checking oil AUDI R8 SPYDER 2012 Owners Manual
[x] Cancel search | Manufacturer: AUDI, Model Year: 2012, Model line: R8 SPYDER, Model: AUDI R8 SPYDER 2012Pages: 236, PDF Size: 59.24 MB
Page 5 of 236
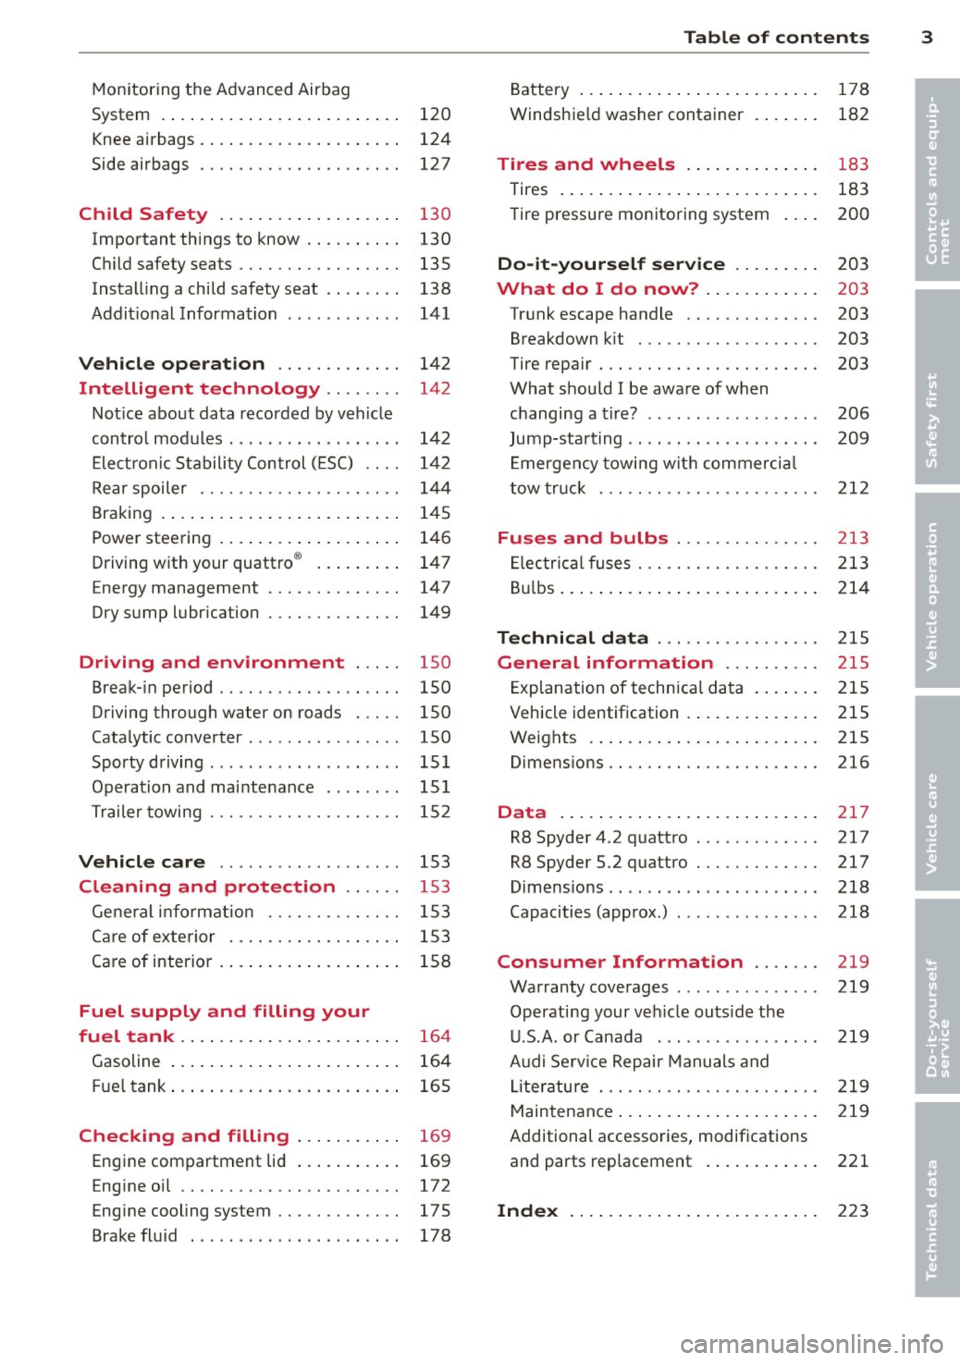
Monitoring the Advanced Airbag
System .... .... .. .... ... .. .. .. . .
Knee airbags . ... ...... ... .. .. .. . .
Side airbags ............. .... .. . .
Child Safety ... ..... ... .. .. .. . .
120
124
127
130
Important things to know . . . . . . . . . . 130
C hi ld safety seats . . . . . . . . . . . . . . . . . 135
Instal ling a child safety seat . . . . . . . . 138
Addit io nal Information . . . . . . . . . . . . 141
Vehicle operation ....... .. .. . .
Intelligent technology .. .. ... .
Not ice about data recorded by veh icle
con trol modules . .... ... .. .. .. .. . .
E lect ron ic Stability Con trol ( ESC) .. . .
Rear spoiler ............. .. .. .. . .
Braking .... .. .. ... . .... ... .. .. . .
Powe r stee ring . .. ..... ... .. .. .. . .
Driving with your quattro ® ... .. .. . .
E nergy management ...... .. .. .. . .
Dry s ump lubr ication ...... .. .. .. . . 142
142
142
1
42
1 4 4
1 4 5
146
147
147
149
Driving and environment . . . . . 150
Break- in period . . . . . . . . . . . . . . . . . . . 150
Driving through water on roads . . . . . 150
Cata lytic converter . . . . . . . . . . . . . . . . 150
Sporty driving ............... .... . 151
Operation and maintenance . . . . . . . . 15 1
T railer towing . . . . . . . . . . . . . . . . . . . . 15 2
Vehicle care . . . . . . . . . . . . . . . . . . . 153
Cleaning and protection . . . . . . 153
Gene ral inf ormatio n . . . . . . . . . . . . . . 1 53
Ca re of exterior . . . . . . . . . . . . . . . . . . 153
Ca re of interior . . . . . . . . . . . . . . . . . . . 158
Fuel supply and filling your
fuel tank . . . . . . . . . . . . . . . . . . . . . . .
164
Gasoline . . . . . . . . . . . . . . . . . . . . . . . . 164
F ue l tank . . . . . . . . . . . . . . . . . . . . . . . . 165
Checking and filling . . . . . . . . . . . 169
Engine compartment lid . . . . . . . . . . . 169
Eng ine oil . . . . . . . . . . . . . . . . . . . . . . . 172
Eng ine cooling system..... .. .. .. .. 175
Brake fluid . ... .. ..... ... .. .. .. .. 178
Table of contents 3
Battery ... .. .... ... .. .. ..... ... .
Windshie ld washer container
Tires and wheels .... .... ... .. .
Tires ... .. .. .... ... .. .. ..... ... .
Tire pressure monitoring system 178
182
183
183
200
Do-it-yourself service . . . . . . . . . 203
What do I do now? . . . . . . . . . . . . 203
Tr unk escape handle . . . . . . . . . . . . . . 203
Breakdown k it . . . . . . . . . . . . . . . . . . . 203
Tire repair . .. .. .. ............... .
What should I be aware of when
h . t· 7 c
anging a rre. . .. .............. .
Jump-starting .. .. ... .. .. ... ..... .
E mergency towing wit h commercia l
tow tr uck . .... .. .. . ............ .
Fu se s and bulbs ... ........... .
Electr ica l fuses . .. ............... .
B ul bs ... .. .. .. .. .. .. .. .. .... ... . 203
206
209
212
213
2
13
214
Technical da ta . . . . . . . . . . . . . . . . . 215
General information . . . . . . . . . . 215
Explanation of techn ica l da ta . . . . . . . 215
Vehicle identification . . . . . . . . . . . . . . 215
Weights . . . . . . . . . . . . . . . . . . . . . . . . 215
Dimens ions.. .. ...... ............ 216
Data . . . . . . . . . . . . . . . . . . . . . . . . . . . 217
R8 Spyder 4.2 quattro . . . . . . . . . . . . . 217
R8Spyder5.2quattro ............. 217
Dimens ions .. .... .... .... ... .... . 218
Capacities (approx .) . . . . . . . . . . . . . . . 218
Consumer Information . . . . . . . 219
Warranty coverages . . . . . . . . . . . . . . . 219
Operating your ve hicle outs ide the
U .S.A. or Canada . . . . . . . . . . . . . . . . . 219
Audi Se rv ice Repair Manuals and
Li te ratu re . . . . . . . . . . . . . . . . . . . . . . . 219
Maintenance ... .. .. . ... ...... ... . 219
Additional accessories, modifications and parts rep lacement . . . . . . . . . . . . 221
Inde x . . . . . . . . . . . . . . . . . . . . . . . . . . 223
•
•
Page 12 of 236
10 Instrum ents a nd warning /indic ato r li ghts
Stop the vehicl e, sw itch the engin e off and
allo w it to coo l.
If the warning light comes on
again after driving a short distance, contact
an authorized Audi dealer.
A WARNING
- Always observe the warning in
¢ page 169, Working in the engine
compartment
before open ing the engine
compartment lid and checking the en
gine coo lant level.
- Never open the engine compartment lid
if you see or hear steam, or if you see en
gine coo lant dr ipping from the eng ine
compar tment. You could bur n yourse lf.
Let the engine coo l
off first so that you
cannot hear or see any steam or engine
coolant.
CD Note
- Mounting additional lights or accesso ries
in front of the air inlets reduces the cool
ing effect of the radiator . At high outside
temperatures or high engine load, the
engine could overheat .
- The front spoi ler has been designed to
properly distribute the cooling air when
the vehicle is moving. If the spoiler is
damaged, this could reduce the cooling
effect and the engine could then over
heat . Ask your authorized Aud i dea ler for
ass istance.
Fuel gauge
The fuel ga uge works only when the ignition is
on. When the needle reaches the red area, the
warning light in the instrument cluster will i l
luminate
c::> page 18 Ii}']. This means you
have approximately 2.6 gallons (10 liters) of
fuel left in the tank.
Time to refuel!
The total tank capacity of your vehicle is listed
in
Te chnic al d ata c::> page 217 .
CD Note
Never run the tank comple tely d ry! An ir
regular supply of fue l can cause engine misfiring and fuel could enter into the ex
haust system. The catalytic converter
could then overheat and be damaged.
Speedometer with odometer
The speedometer shows you the vehicle
speed, and the odometer shows you how
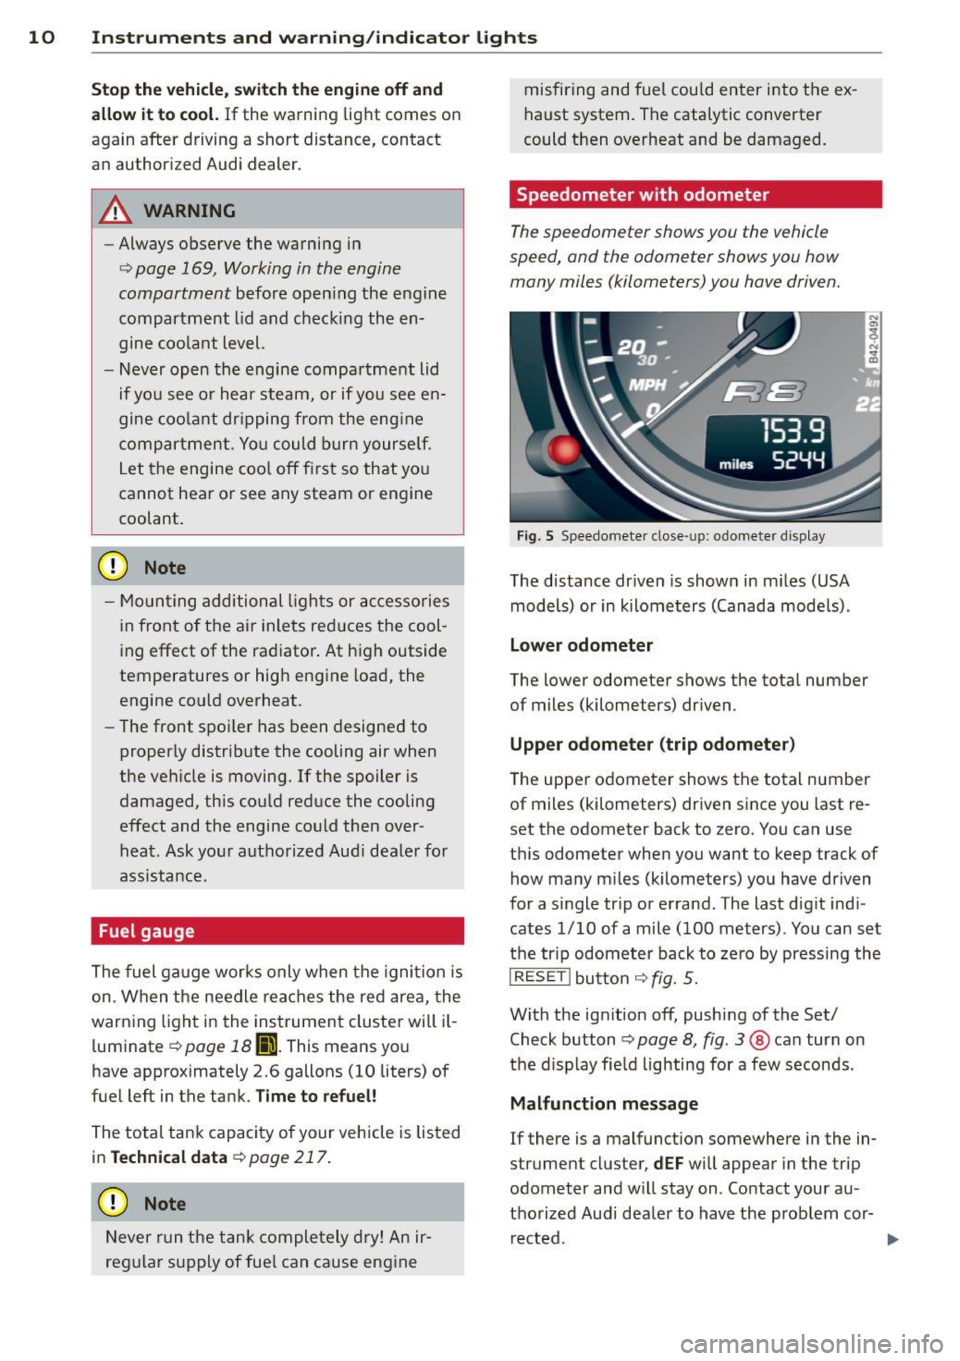
many miles (kilometers) you have driven.
F ig. 5 Speedomete r close-up: odometer display
The distance dr iven is shown in m iles (USA
models) or in kilometers (Canada mode ls) .
Lo wer odometer
The lower odometer shows the total number
of miles (kilometers) dr iven .
Upper odom ete r (trip odometer )
The upper odometer shows the total number
of miles (kilometers) driven since you last re
set the odometer back to zero. You can use
this odometer when you want to keep track of
how many m iles (kilometers) you have driven
for a single tr ip or errand . The last dig it ind i
cates 1/10 of a mile (100 meters) . You can set
the tr ip odometer back to zero by pressing the
I RESE T! button c::> fig. 5.
With the ign ition off, pushing of the Set/
Check button
¢ page 8, fig . 3 @ can turn on
the d isplay fie ld lighting for a few seconds .
Malfunction me ssag e
If there is a malfunct ion somewhere in the in
strument cluster,
d EF w ill appear in the trip
odometer and w ill stay on . Contact your au
thorized Audi dealer to have the problem cor rected.
Page 20 of 236
18 Instruments and warning/indicator lights
(60 °C) and the engine is at operating tem
perature .
~. Checking the engine oil level
II! Please add max. 1 qt of engine oil!
If the 1\1 symbo l comes on, add 1 quart (1 li
ter) of oil at the next opportunity
¢page 174.
'.!:'.::: ... Engine oil sensor defective
If the II symbol illuminates, contact your
author ized Audi dealer and have the oil sensor
inspected.
t:::J Battery voltage low
(•i Low battery charge: battery will be
charged while driving
If the indicator light turns on and the mes
sage appears, there may be limited starting
ab ility.
If th is message turns off after a little while,
the battery charged enough wh ile driving.
If the message does not turn off, have your
author ized Audi dealer or qualif ied workshop
correct the malfunction.
Bu Fuel supply too low
When the II] symbol illuminates, this means
there are about 2.6 gallons (10 liters) of fuel l eft in the fuel tank. Time to refuel!
¢page 165.
If the symbol lights up, even when there is
ample fuel in the tank, and the text
Tank sys
tem malfunction! Please contact workshop
appears in the display, the re is a fault in the
system. Contact a qualified workshop to have
the fau lt rectified .
,;;, Windshield washer fluid level too low
If the I! symbol illuminates, add windshield
washer f luid to the washer system
¢ page 182.
~ Defective light bulb warning
The defective light bulb warning tells you
when a vehicle light bulb has become defec
tive.
If a defective bulb has been detected by the
system or a light bulb burns out, the~ sym
bol w ith a message appears in the display to
te ll you which bulb is burnt out and where it is
lo cated. For example :
Rear left turn signal
After 5 seconds, the message disappears. If
you want to recall the message into the dis play, press the CHECK button¢
page 8, fig. 3
®·
There are three reasons why the defective
bulb message would appear in the display:
- The light bu lb has burnt out
¢page 214.
-The fuse is "blown"¢ page 213, Replacing
fuses .
-The wire connection to the light bulb is de-
fective.
Have the bulb replaced or the connection re
paired by your authorized Aud i Service depart
ment .
A WARNING
-
-Light bulbs are pressurized and could ex
p lod e while they are being changed ca us
ing serious personal injury.
- Work with due care when handling the
high-vo ltage section of gas discharge
(xenon) lamps. Failing to do so could re
sult in death or serious injury!
BRAKE LIGHT!<®> Brake light defective
In case of a malfunction or component fail-
ure, the symbol (USA models)/
$fl (Canada models) can appear. The follow
ing electrical components should be checked,
repaired or replaced, as necessary:
- Brake light bulbs
- All wir ing connections
- Brake light switch
Page 174 of 236
172 Checking and filling
Engine oil
Engine oil specifications
The engine oil used in your Audi needs the
right kind of oil.
The engine in your Audi is a sophisticated
powerplant that was built to exacting specifi
cations. This engine needs the right kind of
engine oil that meets specifications regarding
quality and viscosity so that it can run
smoothly and reliably. Choosing the right oil
and changing oil within the time and mileage intervals printed in your vehicle's Warranty
&
Maintenance booklet matters a lot more to
day than it did years ago. Audi has developed
a special quality standard for engine oil that
will help assure that your vehicle's engine will
get the lubrication it needs for proper opera
tion .
Modern engine lubrication has taken a quan
tum leap in the last few years. Many synthetic
oils available today provide better engine lu brication that can outlast traditional petrole
um-based oils, making them a smart choice
for use throughout the life of your Audi .
Whether you use synthetic or petroleum based engine oil, the oil that you use must
conform to Audi's oil quality standard
VW 502 00 to help keep your vehicle's engine running smoothly and help prevent the for
mation of harmful deposits, sometimes called
"sludge," that over time can lead to expensive
repairs.
At the time of printing, engine oils available in
the U.S. and Canada that meet the exacting
specifications of Audi oil standard VW 502 00
are synthetic engine oils. This does not mean,
however, that every synthetic engine oil will
meet Audi oil standard VW 502 00 . So always
be sure that you use an approved oil.
To help prevent the formation of harmful de posits use only oil with the following specifi
cations printed on the oil container :
Audi oil standard VW 502 00
Oil container labels may carry the specifica
tion singly or in combination with other desig nations and oil quality standards.
Viscosity
Engine oils are graded according to their vis
cosity . The proper viscosity grade oil for your
engine depends on climactic or seasonal con
ditions where you drive. You can use oil with a
viscosity grade of SAE SW40 across all tem
perature ranges for normal driving conditions.
However, if engine oil viscosity grade SAE
SW40 is not available, you can also use viscos
ity grade SAE SW-30 or SAE OW-40 as long as
it meets Audi oil quality standard VW 502 00
specifications.
Because engine oil that meets the Audi oil
standard may not be available everywhere
when you need it, we strongly recommend
that you always carry with you an extra quart (liter) of oil that expressly conforms to the
VW 502 00 specification, in case you have to
top off the oil while on the road.
Only if the level of the oil is at or below the
minimum mark on the oil dipstick - and no oil
that expressly conforms to Audi oil standard
VW 502 00 specifications is available -may
you top off with a high quality engine oil, pref
erably synthetic-based, that meets ACEA A3
or API SM specifications, but even then, only
in viscosity grades SAE SW-40, SAE SW-30, or
SAE OW-40. However, during the entire time
between oil change intervals, never top off
with more than a total of 1 qt/liter engine oil
that does not conform to Audi oil specification
vw 502 00.
For more information about engine oil that
has been approved for your vehicle, please
contact either your authorized Audi dealer or
Audi Customer Relations at 1 (800) 822-2834 or visit our web site at www.audiusa.com or
www .audicanada .ca. Here you will also find a
current list of oils (manufacturers, brand
names etc.) that conform to Audi oil standard
vw 502 00.
Changing the engine oil
Page 176 of 236
17 4 Che cking and filling
@ Tips
If you have the impression your eng ine
consumes excessive amounts of oil, we
recommend that you cons ult your a uthor
ized Audi deale r to have the cause of yo ur
concer n properly d iagnosed . Keep in m ind
that the accurat e measurement of oil con
sumpt ion re quires great care an d may take
s ome time. Your author ized Audi dealer
h as ins truction s about h ow to mea sure o il
consumption a ccurately .
Checking the engine oil level
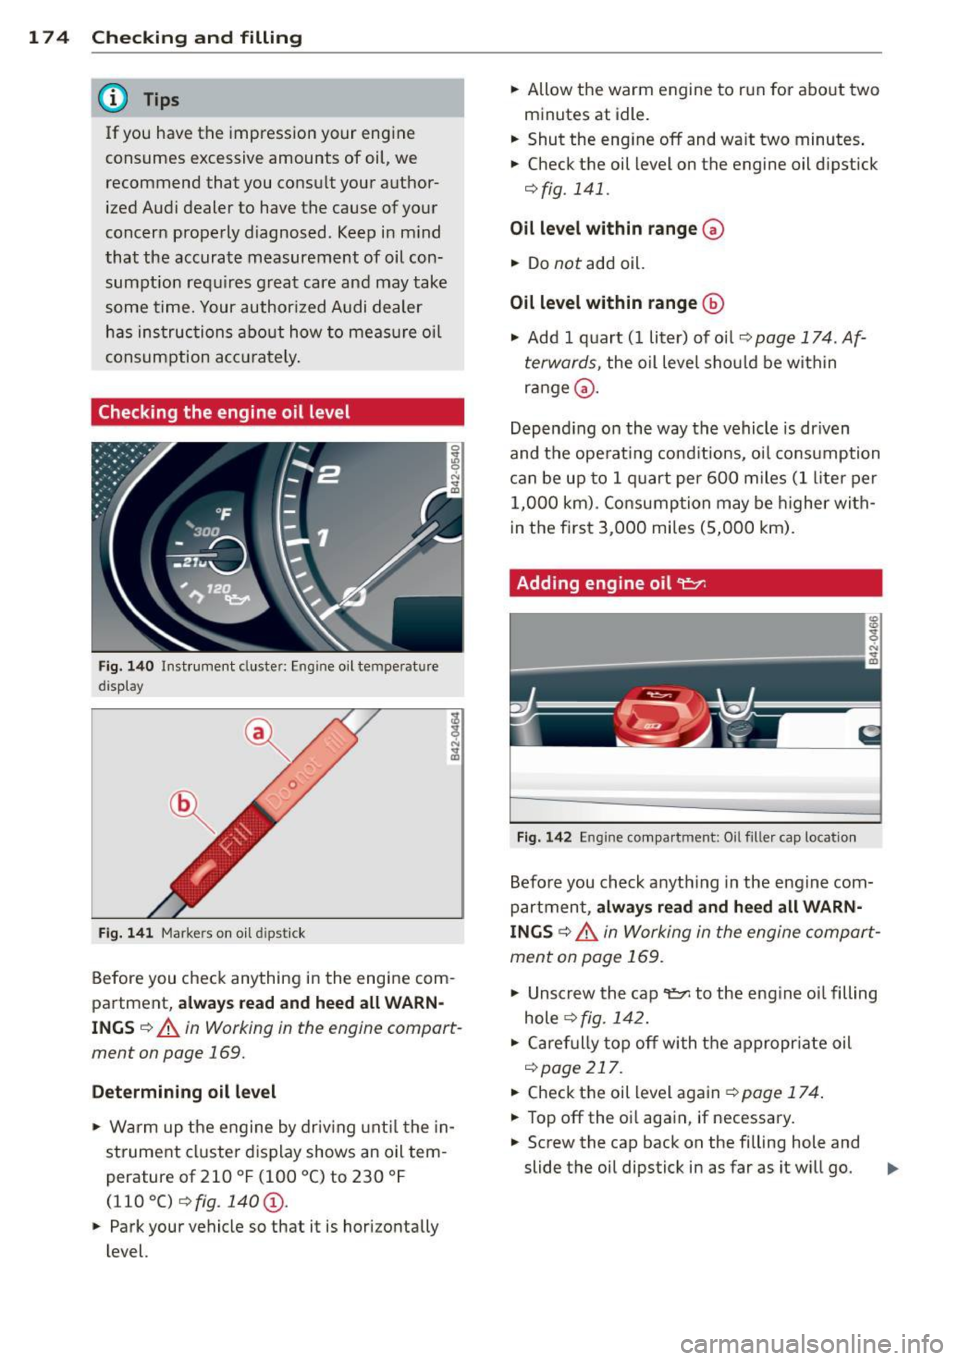
Fig. 140 Ins trume nt clus te r: En gin e o il te mpe rat ure
di sp lay
F ig.
14 1 Marke rs on oil dipstic k
Before you check anything in the eng ine com
pa rtment,
alway s read and heed all WARN
INGS ¢ A in Working in the engin e compart
ment on page 169.
Determining oil lev el
.. Warm up the engine by dr iv ing unt il t he in
strument cl uster d isplay shows an oil tem
perature of 210 °F (100 °C) to 230 °F
(110 °C)
¢ fig . 140 @ .
.. Park your vehicle so that it is hori zo ntally
level. ..
Allow the warm engine to r un for abo ut two
m inutes at idle.
.. Shut the eng ine off and wa it two minutes .
.. Check the oil level on the engine oil d ipstick
¢fig. 141.
Oil level within range (v
.. Do not add oil.
Oil level within range@
"" Add 1 quart (I liter) of oi l i=:> page 174. Af
terwards ,
the oil leve l sho uld be with in
r a nge
G) .
Depend ing on the way the vehicle is dr iven
and the ope ra tin g cond itions, o il consu mption
ca n be up to 1 q uart per 600 miles (1 liter per
1,0 00 km) . Co nsump tion may be higher with
i n the f irst 3,000 mi les (5,00 0 km) .
Adding engine oil~
Fig. 14 2 En g in e co mpa rt m ent: O il fil ler cap loca tio n
Befo re you check a nyth ing in the eng in e com
partment,
always read and heed all WARN
INGS ¢.&. in Working in the engine compar t
men t on page 169.
.,. Unsc rew th e cap 't=;,1 to the eng ine o il filling
hole
¢ fig . 14 2.
.,. Care fully top o ff wi th t he a ppropr iate oil
¢ page 217.
.. Check the oil level again ¢ page 174 .
.. Top off the oi l aga in, if necessary .
.,. Sc rew the cap back on the filling hole and
slide the oil dipstick in as far as it w ill go. ..,.
Page 178 of 236
1 7 6 Che cking and filling
your cooling system and could result in
damage not covered by your New Vehicle Limited Warranty .
Checking the engine coolant level
Proceed carefully when checking the coolant.
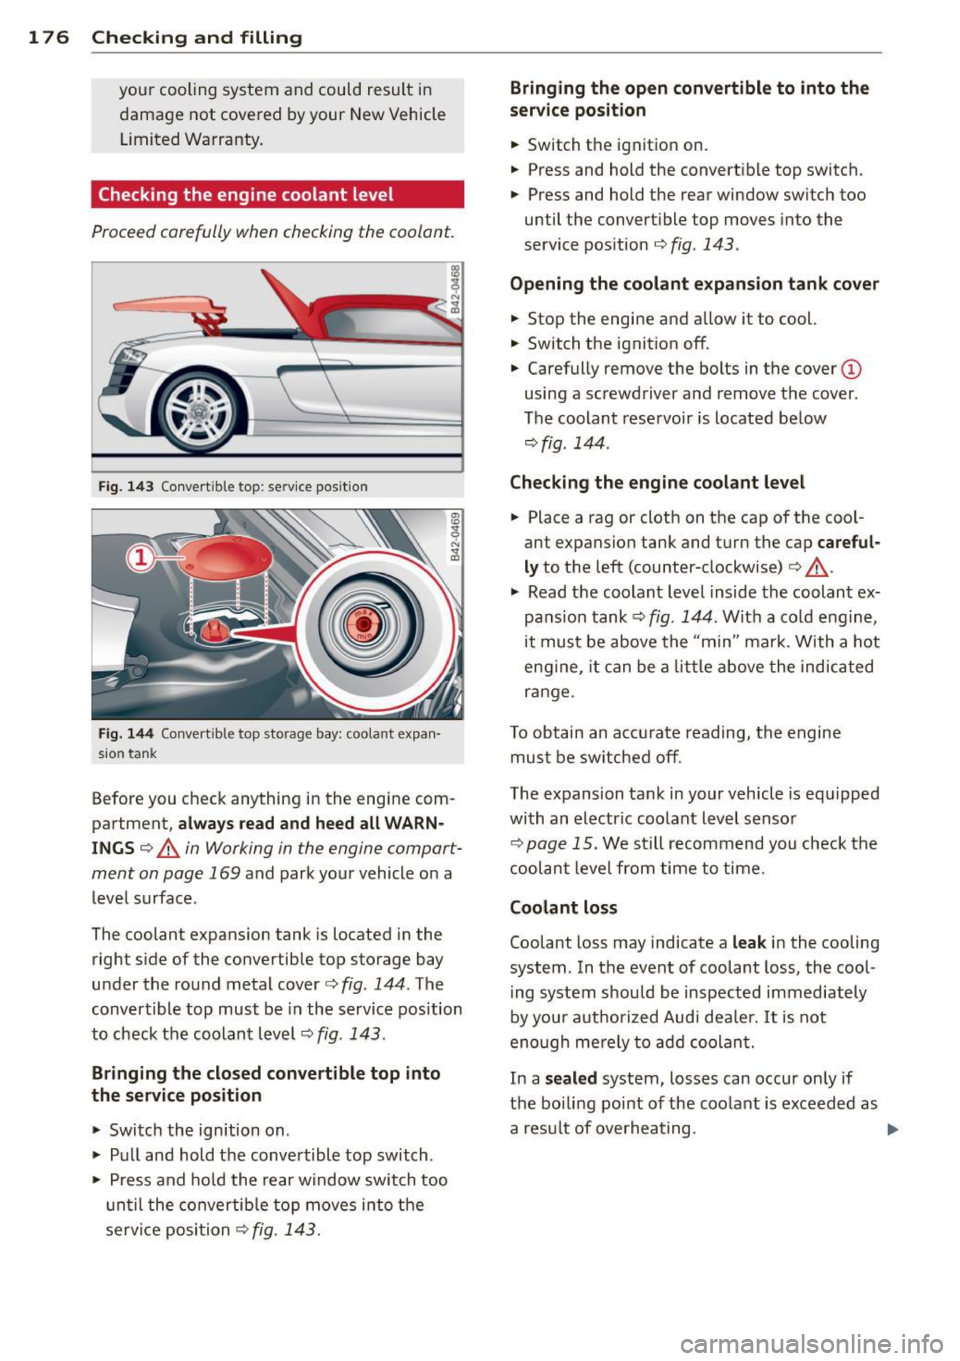
Fig . 1 43 Co nvert ible top: se rv ice pos it ion
F ig . 14 4 Convert ib le top storage bay: coolant expan·
sio n tank
Before you check anything in the engine com
partment,
a lwa ys r ead and heed all WARN
INGS ¢.&.. in Working in the engine compart
ment on page
169 and park your vehicle on a
level surface .
The coolant expansion tank is located in the right s ide of the convertible top storage bay
under the round metal cover¢
fig. 144 . The
convertible top must be in the service position
to check the coolant leve l
¢fig . 143 .
Bringing the closed con ve rtible top into
th e s ervic e position
~ Switch the ignition on .
~ Pull and hold the convert ible top switch .
~ Press and hold the rear window switch too
u nti l the convertib le top moves into the
service position¢
fig. 143.
Bringing the op en conv ertible to into the
service position
~ Switch the ignition on.
~ Press and hold the convertible top switch.
~ Press and hold the rear window switch too
until the convertible top moves into the
service position¢
fig . 143 .
Opening the coolant e xpan sion tank cover
~ Stop the engine and allow it to cool.
~ Switch the ignition off.
~ Carefully remove the bolts in the cover (D
using a screwdriver and remove the cover.
The coolant reservoir is located below
¢fig. 144.
Chec king the engine cool ant level
~ Place a rag or cloth on the cap of the cool
ant expansion tank and turn the cap
careful
ly
to the left (counter-clockwise) ¢ .&_.
~ Read the coolant level inside the coolant ex
pans ion tank ¢
fig. 144 . With a co ld engine,
it must be above the "min" mark. With a hot
eng ine, it can be a little above the indicated
range.
T o obtain an accu rate reading, the engine
must be switched off.
The expansion ta nk in your vehicle is equ ipped
with an electric coo lant level sensor
¢page 15. We still recommend you check the
c oolant level from time to time.
Coolant loss
Coolant loss may indicate a leak in the cooling
system . In the event of coolant loss, the cool
i ng system shou ld be inspected immediately
by your aut horized Audi dea ler. It is not
eno ugh me rely to add coolant.
In a
s ea le d system, losses can occur on ly if
the boiling point of the coo lant is exceeded as
a resu lt of overheating.