turn signal AUDI R8 SPYDER 2012 Owners Manual
[x] Cancel search | Manufacturer: AUDI, Model Year: 2012, Model line: R8 SPYDER, Model: AUDI R8 SPYDER 2012Pages: 236, PDF Size: 59.24 MB
Page 9 of 236
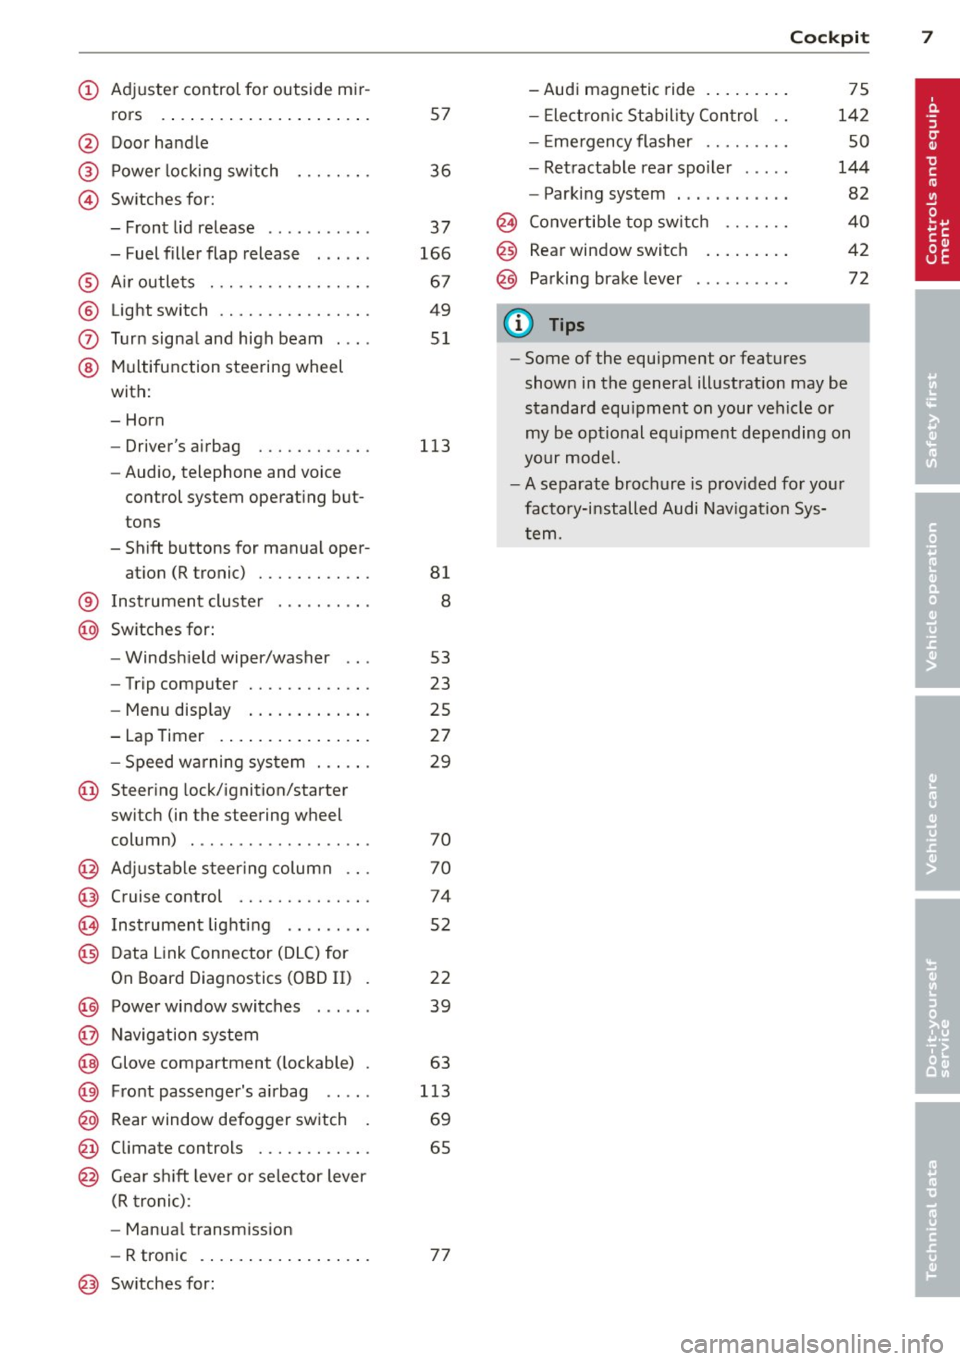
(!) Adjuster control for outside mir-rors .... ..... .......... .. .
@ Door handle
@ Power locking switch
© Switches for:
- Front lid release .......... .
- Fuel filler flap release . .. .. .
® Air outlets ............ .... .
® Light switch ............... .
(J) Turn signal and high beam ... .
@ Multifunction steering wheel
with:
- Horn
- Driver's airbag ........... .
- Audio, telephone and voice
control system operating but
tons
- Shift buttons for manual oper-
at ion (R tronic) ........... .
® Instrument cluster
@ Switches for: 57
36
37
166
67
49
51
113
81
8
- Windshield wiper/washer 53
- Trip computer . . . . . . . . . . . . . 23
- Menu display . . . . . . . . . . . . . 25
- Lap Timer . . . . . . . . . . . . . . . . 27
- Speed warning system . . . . . . 29
@ Steering lock/ignition/starte r
switch (in the steering wheel
column) . . . . . . . . . . . . . . . . . . . 70
@ Adjustable steering column . . . 70
@ Cruise control . . . . . . . . . . . . . . 74
@ Instrument lighting . . . . . . . . . 52
@) Data Link Connector (DLC) for
On Board Diagnostics (OBD II) . 22
@) Power window switches . . . . . . 39
@ Navigation system
@ Glove compartment (lockable) . 63
@ Front passenger's airbag . . . . . 113
@ Rear window defogger switch . 69
@ Climate controls . . . . . . . . . . . . 65
@ Gear shift lever or selector lever
(R tronic) :
- Manual transmission
- R tronic . . . . . . . . . . . . . . . . . . 77
@ Switches for: -Audi magnetic ride ........
.
- Electronic Stability Control ..
- Em ergency flasher ........ .
- Retractable rear spoiler .... .
- Parking system ...... ..... .
Cockpit 7
75
142
so
144
82
@ Convertible top switch . . . . . . . 40
@ Rear window switch . . . . . . . . . 42
@ Parking brake lever . . . . . . . . . . 72
(D Tips
-Some of the equipment or features
shown in the general illustration may be
standard equipment on your vehicle or
my be optional equipment depending on
your model.
-A separate brochure is provided for your
factory-installed Audi Navigation Sys
tem.
Page 15 of 236
Instruments and warning/indicator lights 13
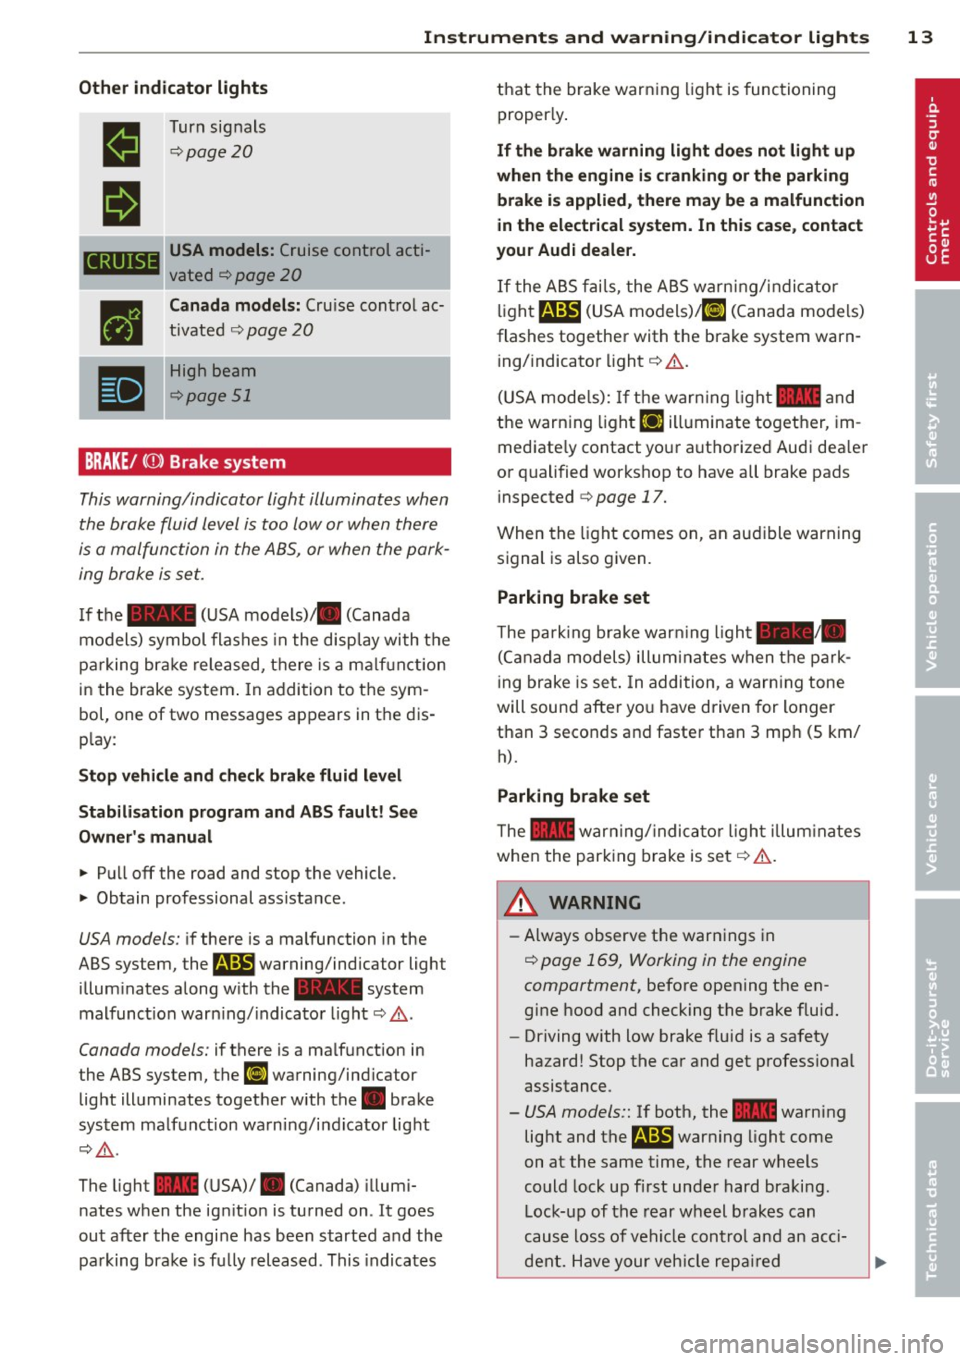
Other indicator lights
•
II
CRUISE
•
•
Turn signals
¢page20
USA models: Cruise control acti
vated
¢ page 20
Canada models: Cru ise cont rol ac
tivated
q page 20
High beam
¢page 51
BRAKE/
the brake fluid level is too low or when there
is a malfunction in the ABS, or when the park
ing brake is set.
If the - (USA models)/ . (Canada
models) symbol flashes in the disp lay with the
parking brake released, there is a ma lfuncti on
in the brake system . In addition to the sym
bol, one of two messages appears in the dis
play:
Stop vehicle and check brake fluid level
Stabilisation program and ABS fault! See
Owner's manual
.. Pull off the road and stop the vehicle.
.. Obtain professional ass istance.
USA models: if there is a malfunction in the
ABS system, the
r.1il warning/indicator light
illuminates along with the - system
malfunct ion warn ing/ indicator light
q ,&..
Canada models: if there is a malf unction in
the ABS system, the
ll] warning/ind icator
light illuminates together with the. brake
system malfunction warning/indicator light
c::>,&. .
The light - (USA)/ . (Canada) illumi
nates when the ign ition is turned on . It goes
out after the engine has been started and the
parking brake is fu lly released . This indicates that the brake
warning light is functioning
properly.
If the brake warning light does not light up
when the engine is cranking or the parking
brake is applied, there may be a malfunction
in the electrical system. In this case, contact
your Audi deale r.
If the ABS fails, the ABS warn ing/ indicator
light
r.1il (USA models) /ll] (Canada models)
flashes together with the brake system warn ing/ indicator light
i:::> .&..
(USA mode ls): If the warn ing light - and
the warning light
EiJ illuminate together, im
mediate ly contact your authorized Audi dea ler
or qualified workshop to have all brake pads
inspected
i:::> page 17.
When the light comes on, an audible warning
signal is also given.
Parking brake set
The pa rk ing brake war ning ligh t-·
(Canada models) illuminates when the park
ing brake is set. In addition, a warning tone
will sound after you have driven for longer
than 3 seconds and faster than 3 mp h (S km/
h).
Parking brake set
The - warning/ indicator light illuminates
when the parking brake is set
i:::> .&. .
A WARNING
-Always observe the warnings in
¢ page 169, Working in the engine
compartment,
before opening the en
gine hood and checking the brake fluid.
- Driving with low brake fluid is a safety
hazard! Stop the car and get profess ional
assistance.
- USA models:: If both, the 1111 warning
light and
the m warning light come
on at the same time, the rear wheels
could lock up first under hard braking.
Lock-up of the rear wheel brakes can
cause loss of vehicle cont rol and an acci
dent. Have your vehicle repaired
Page 20 of 236
18 Instruments and warning/indicator lights
(60 °C) and the engine is at operating tem
perature .
~. Checking the engine oil level
II! Please add max. 1 qt of engine oil!
If the 1\1 symbo l comes on, add 1 quart (1 li
ter) of oil at the next opportunity
¢page 174.
'.!:'.::: ... Engine oil sensor defective
If the II symbol illuminates, contact your
author ized Audi dealer and have the oil sensor
inspected.
t:::J Battery voltage low
(•i Low battery charge: battery will be
charged while driving
If the indicator light turns on and the mes
sage appears, there may be limited starting
ab ility.
If th is message turns off after a little while,
the battery charged enough wh ile driving.
If the message does not turn off, have your
author ized Audi dealer or qualif ied workshop
correct the malfunction.
Bu Fuel supply too low
When the II] symbol illuminates, this means
there are about 2.6 gallons (10 liters) of fuel l eft in the fuel tank. Time to refuel!
¢page 165.
If the symbol lights up, even when there is
ample fuel in the tank, and the text
Tank sys
tem malfunction! Please contact workshop
appears in the display, the re is a fault in the
system. Contact a qualified workshop to have
the fau lt rectified .
,;;, Windshield washer fluid level too low
If the I! symbol illuminates, add windshield
washer f luid to the washer system
¢ page 182.
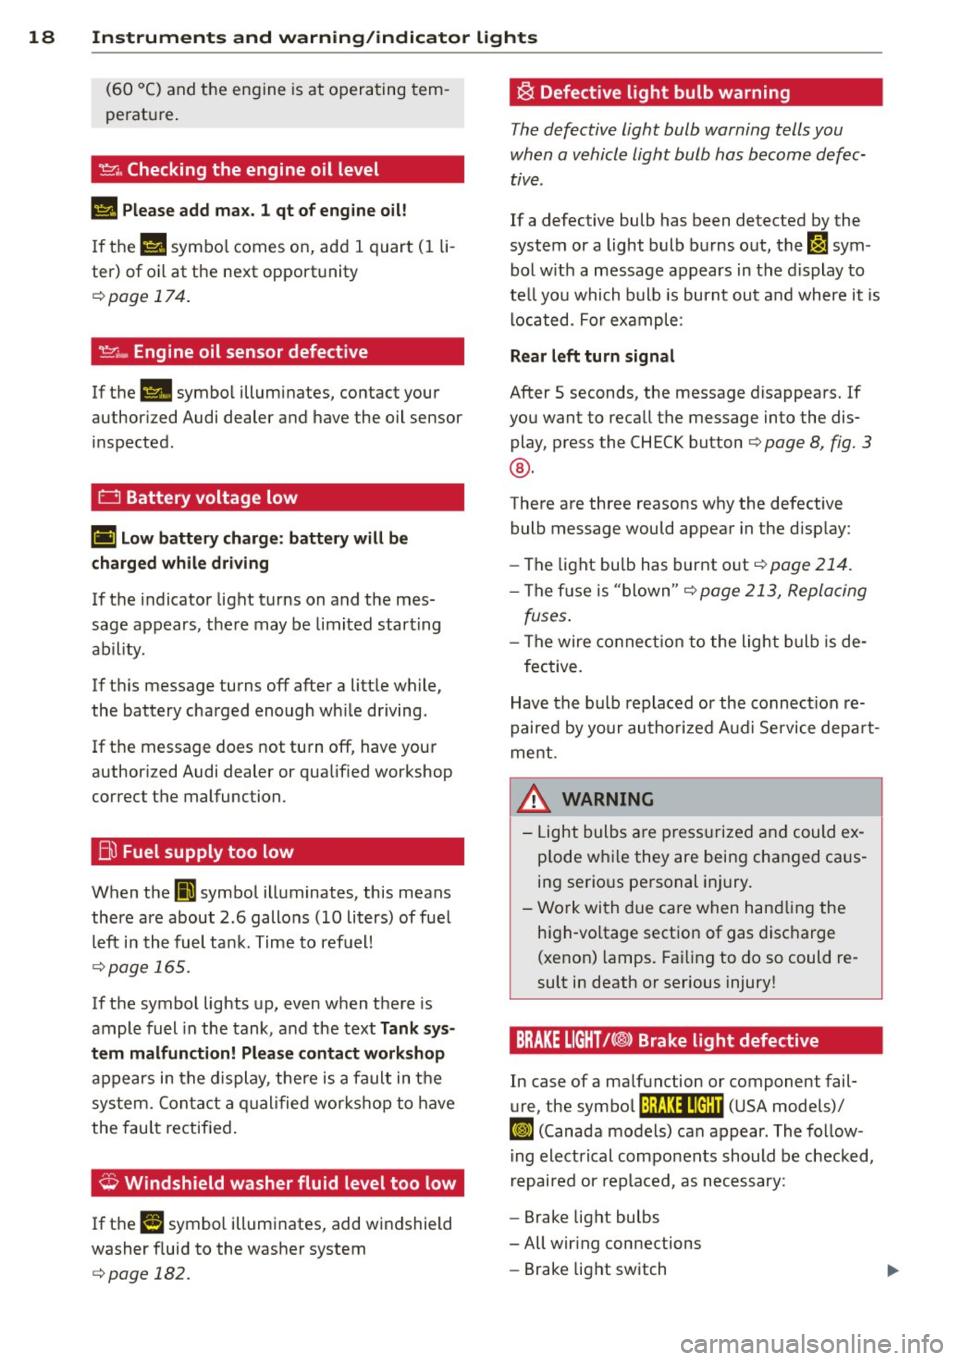
~ Defective light bulb warning
The defective light bulb warning tells you
when a vehicle light bulb has become defec
tive.
If a defective bulb has been detected by the
system or a light bulb burns out, the~ sym
bol w ith a message appears in the display to
te ll you which bulb is burnt out and where it is
lo cated. For example :
Rear left turn signal
After 5 seconds, the message disappears. If
you want to recall the message into the dis play, press the CHECK button¢
page 8, fig. 3
®·
There are three reasons why the defective
bulb message would appear in the display:
- The light bu lb has burnt out
¢page 214.
-The fuse is "blown"¢ page 213, Replacing
fuses .
-The wire connection to the light bulb is de-
fective.
Have the bulb replaced or the connection re
paired by your authorized Aud i Service depart
ment .
A WARNING
-
-Light bulbs are pressurized and could ex
p lod e while they are being changed ca us
ing serious personal injury.
- Work with due care when handling the
high-vo ltage section of gas discharge
(xenon) lamps. Failing to do so could re
sult in death or serious injury!
BRAKE LIGHT!<®> Brake light defective
In case of a malfunction or component fail-
ure, the symbol (USA models)/
$fl (Canada models) can appear. The follow
ing electrical components should be checked,
repaired or replaced, as necessary:
- Brake light bulbs
- All wir ing connections
- Brake light switch
Page 22 of 236
![AUDI R8 SPYDER 2012 Owners Manual 20 Instruments and warning/indicator lights
[O] Gearbo x malfunct ion! You can continue
dri ving but functions are rest ricted
There is a serio us sys tem ma lf u nction:
- The prog ram s AUDI R8 SPYDER 2012 Owners Manual 20 Instruments and warning/indicator lights
[O] Gearbo x malfunct ion! You can continue
dri ving but functions are rest ricted
There is a serio us sys tem ma lf u nction:
- The prog ram s](/img/6/57642/w960_57642-21.png)
20 Instruments and warning/indicator lights
[O] Gearbo x malfunct ion! You can continue
dri ving but functions are rest ricted
There is a serio us sys tem ma lf u nction:
- The prog ram shifts only i nto ce rtain gears.
- The eng ine may sta ll.
- It is not possib le to restart the eng ine if it
has been switched off.
- Contin uing to dr ive could result in s ubse
quent damage.
0 Note
If R tronic has switc hed to emergency op
erat ion mode, you s hou ld have the mal
function corrected as soon as possible .
(J.) Tire pressure monitoring system
Applies to vehicles: with tire pressure monitoring system
Tire pressure that is too low must be correct
ed as soon as possible .
The warning/ind icator light
[I] i ll uminates fo r
a few seconds afte r the ignit ion is t urned on
as a funct io n check. If t he (I] warning light
co mes on, pressu re in at least one tire is too
low .
.,. Stop driv ing as soon as possible without e n
dange ring yourse lf and other drivers on the
r oad.
• Inspect all tires.
• Correc t the t ire pressur e¢ page 189 .
Addit ional information about the
t ire pres
sure monitoring system
can be found
¢ page 201.
¢¢ Turn signals
The indicator light blinks when you use either
turn signal .
Whenever you use the left
R or the r ight II
turn signal , the ind icator light blinks. When
you use the emergency flasher, both indicator
lig hts flash .
If one of the tu rn s ignal light bu lbs burn out,
the t urn signa l wi ll blink tw ice as fast as n or
mal. Additional
in formation on the turn s ignals
¢ page 51.
CRUISE/ (,)" Cruise control
The (lj;(i)~i~ (USA mode ls)/ . (Canada models)
warning/indicator light illuminates whe n the
cruise control is activated .
Page 36 of 236
34 Openin g and clo sing
electronic immobilizer is automatica lly acti
vated once again.
I f an unauthorized key was used , SA FE is d is
p layed con tinuously in the odometer disp lay
field.
A WARNING
-
Always take the key with you when you
leave the vehicle. The key can disarm the
electronic engine immobilizer and permit
an unauthor ized person to start the engine
and enable operation of the vehicle sys
tems such as power window leading to se r ious personal in jury .
(D Tips
-The vehicle cannot be started if an unau
thorized key is used . The vehicle may not
start if another radio device such as a key
for another vehicle or a transponder is l ocated on the key ring.
- For Declarat ion of Compliance to United
States FCC and Industry Canada regu la
tions
~page 222.
Power locking system
General description
The power locking system locks or unlocks all
doors simultaneously.
When opening and closing the doors, the power locking system locks or unlocks
both
doors together.
The remote mas ter key locks and un locks the
doors using a radio signal
~ page 35.
Locking and unl ocking w ith the key
You can also lock and unlock your vehicle us
ing the key in the lock o n the dr iver's door.
The unlocking and lock ing mode can be
changed in the Driver Informat ion System
~ page 25.
Both doors are locked automatically when the
vehi cle is locked and the ant i-theft alarm sys
tem is act ivated.
Auto Loc k
The Auto Lock function locks a ll doors once
speed has exceeded approximately 9 mph (15
km/h).
T he car is unlocked automat ica lly once the ig
nition key is removed . In add ition, the vehicle
can be un locked if the power locking system
opening function
(l;;i) is activated or one of the
door levers is used .
Turn signals
All the tu rn s ignals flash to indicate when the
vehicle is locked and unloc ked. The t urn sig
nals flash twice when the vehicle is unlocked.
T he turn signa ls flash once when all the doors
and the front lid are locked. The interior lights
are also switched on or off automatica lly ac
cord ing to the position of the door contact
switch .
A WARNING "---
-When you lock your vehicle from outside,
nobody -espec ially children -shou ld re
main inside the vehicle. Remember,
when yo u lock the vehicle from the out
side the windows cannot be opened from
the inside .
- When you leave the veh icle, always re
move the ignition key and take it with
you. This will prevent passengers (chil dren, for example) from accidentally being locked in the vehicle should they acci
dentally press the power locking switch
in one of the doors.
- Do not leave ch ildren inside the vehicle
unsuperv ised. In an emergency it would
be imposs ible to open the doors from
the outside without the key.
(D Tips
- The driver's door can be locked and un
locked with the key if the power locking
system fails . The passenger's door can
be locked manually~
page 36 .
Page 37 of 236
-In the event of a c rash with airbag de
ployment all locked doors will be auto
matically unlocked to g ive access to the
vehicle occupants from the outside .
- You are we ll advised not to keep valua
bles inside an unattended vehicle, visib le
or not . Even a properly locked vehicle
cannot p rovide the securi ty of a safe!
Unlocking/locking the vehicle with the
remote control
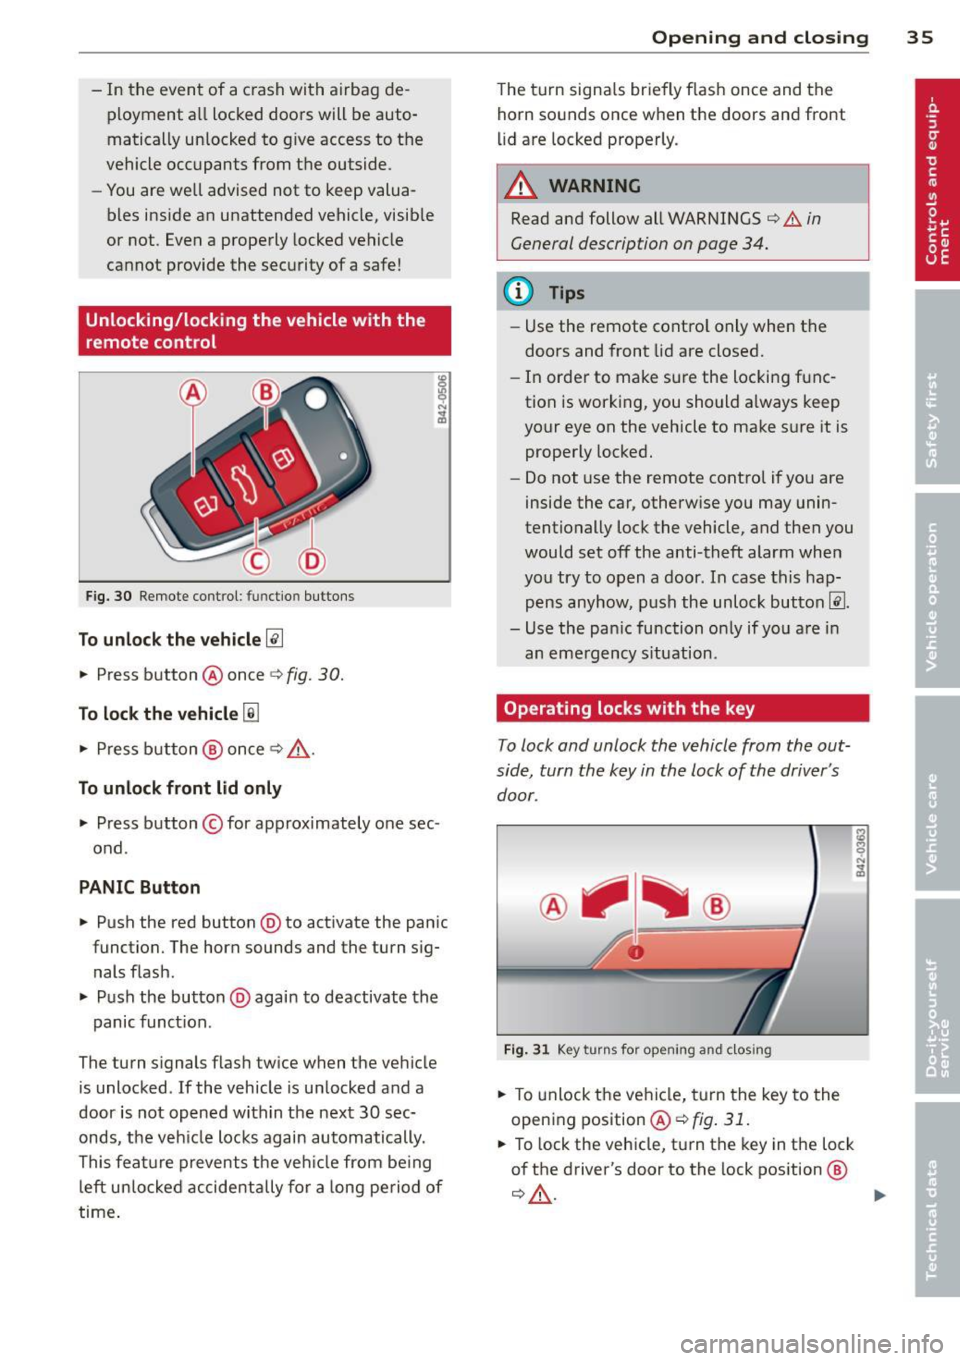
Fig. 30 Remote co n trol: functio n buttons
To unlock the vehicle~
.. Press button @ once ¢ fig. 30.
To lock the vehicle [ru
.. Press button @ once ¢ /A.
To unlock front lid only
.. Press button © for approximately one sec
ond .
PANIC Button
.,. Pu sh the red button @to activate the pan ic
function. The horn sounds and the turn sig
nal s flash .
.. Push the button @again to deactivate the
panic funct ion .
The turn s ignals flash twice when the vehicle
is unlocked . If the vehicle is un locked and a
door is not opened within the next 30 sec
onds, the veh icle locks again automatically.
This feat ure prevents the vehicle from be ing
left unlocked accidentally for a long period of
time .
Opening and closing 35
The turn signals briefly flash once and the
horn sounds once wh en the doo rs and front
li d are locked properly.
_& WARNING
Read and follow all WARNINGS ¢.&. in
General description on page 34.
(D Tips
- Use the remote contro l only when the
doors and front lid are closed.
- In order to make sure the locking func
tion is working, you should a lways keep
your eye on the vehicle to make sure it is
properly locked.
-
- Do not use the remote control if you are
inside the car, otherwise you may unin
tentionally lock the vehicle, and then you
would set off the anti-theft alarm when
you try to open a door . In case this hap
pens anyhow, push the unlock button@ .
- Use the pan ic function on ly if you are in
an eme rgency s ituation .
Operating locks with the key
To lock and unlock the vehicle from the out
side, turn the key in the lock of the driver 's
door .
Fig. 31 Key turn s fo r op eni ng an d clos ing
.. To unlock the vehicle, turn the key to the
opening position
@¢fig. 31.
.. To lock the vehicl e, turn the key in the lock
of the driver's door to the lo ck position @
¢&, . ....
Page 38 of 236
36 Opening and clo sing
The turn signals brief ly flash once and the
horn sounds once when the doors and the
front lid are locked proper ly.
.&_ WARNING
Always read and heed WARNING <=> .& in
General description on page 34.
@ Tips
- However, note that which door is un
locked
mechanically when the vehicle is
opened depends on the settings in the menu display
c>page 25.
-Both doors are locked automatically
when the vehicle is locked.
Locking/unlocking the vehicle from
inside
The vehicle can be locked or unlocked from
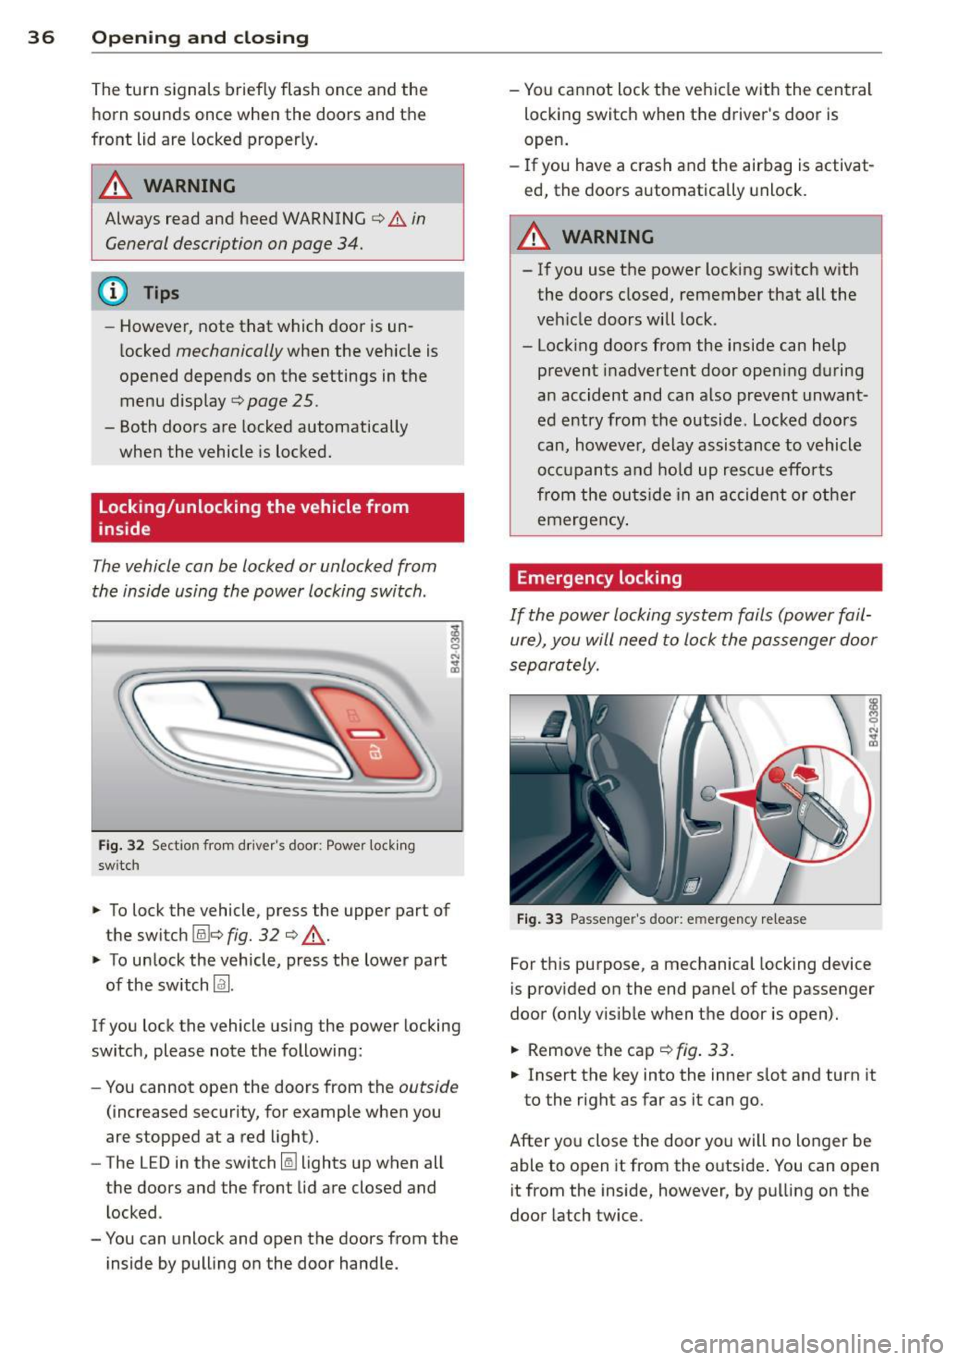
the inside using the power locking switch .
Fig. 32 Section from driver's door: Power locking
sw itch
-
;! M 0
"' .., m
~ To lock the vehicle, press the upper part of
the switch (illc>
fig. 32 c> ..&., .
~ To unlock the vehicle, press the lower part
of the switch
Im.
If you lock the vehicle using the power locking
switch, please note the following:
- You cannot open the doors from the
outside
(increased security, for example when you
are stopped at a red light).
- The LED in the switch
Iii lights up when all
the doors and the front lid are closed and
locked .
- You can unlock and open the doors from the inside by pulling on the door handle. -
You cannot lock the vehicle with the central
locking switch when the driver's door is
open.
- If you have a crash and the airbag is activat
ed, the doors automatically unlock.
A WARNING
-
-If you use the power locking switch with
the doors closed, remember that all the
vehicle doors will lock.
- Locking doors from the inside can help prevent inadvertent door opening during
an accident and can also prevent unwant
ed entry from the outside. Locked doors
can, however, delay assistance to vehicle
occupants and hold up rescue efforts
from the outside in an accident or other
emergency .
Emergency locking
If the power locking system fails (power fail
ure), you will need to lock the passenger door
separately .
Fig. 33 Passenger's door: emergency re lease
For this purpose, a mechanical locking device
is provided on the end panel of the passenger
door (only visib le when the door is open).
~ Removethecap c>fig.33.
~ Insert the key into the inner slot and turn it
to the right as far as it can go.
After you close the door you will no longer be able to open it from the outside . You can open
it from the inside, however, by pulling on the
door latch twice.
Page 53 of 236
When the emergency flasher is on, all four
turn signal blink at the same time . The turn
signal ind icator lights
R II in the instrument
cluster, as well as the light in the emergency
flasher switch~ blink likewise . The emergen
cy flasher also works when the ignition is
switched off.
The emergency flasher wi ll automatically
sw itch on if you are in an acc ident where the
a irbag has deployed .
(D Tips
You should switch on the emergency flash
er when:
-you are the last vehicle standing in a traf
fic jam so that any other vehicles coming
can see you, or when
-your vehicle has broken down or yo u are
in an emergency situation , or when
- your vehicle is being towed by a tow
truck or if yo u are towing another vehicle
behind you.
Turn signals and high beam lever
The lever is used to operate the turn signals
and the high beam as well as the headlight
flasher .
t
t
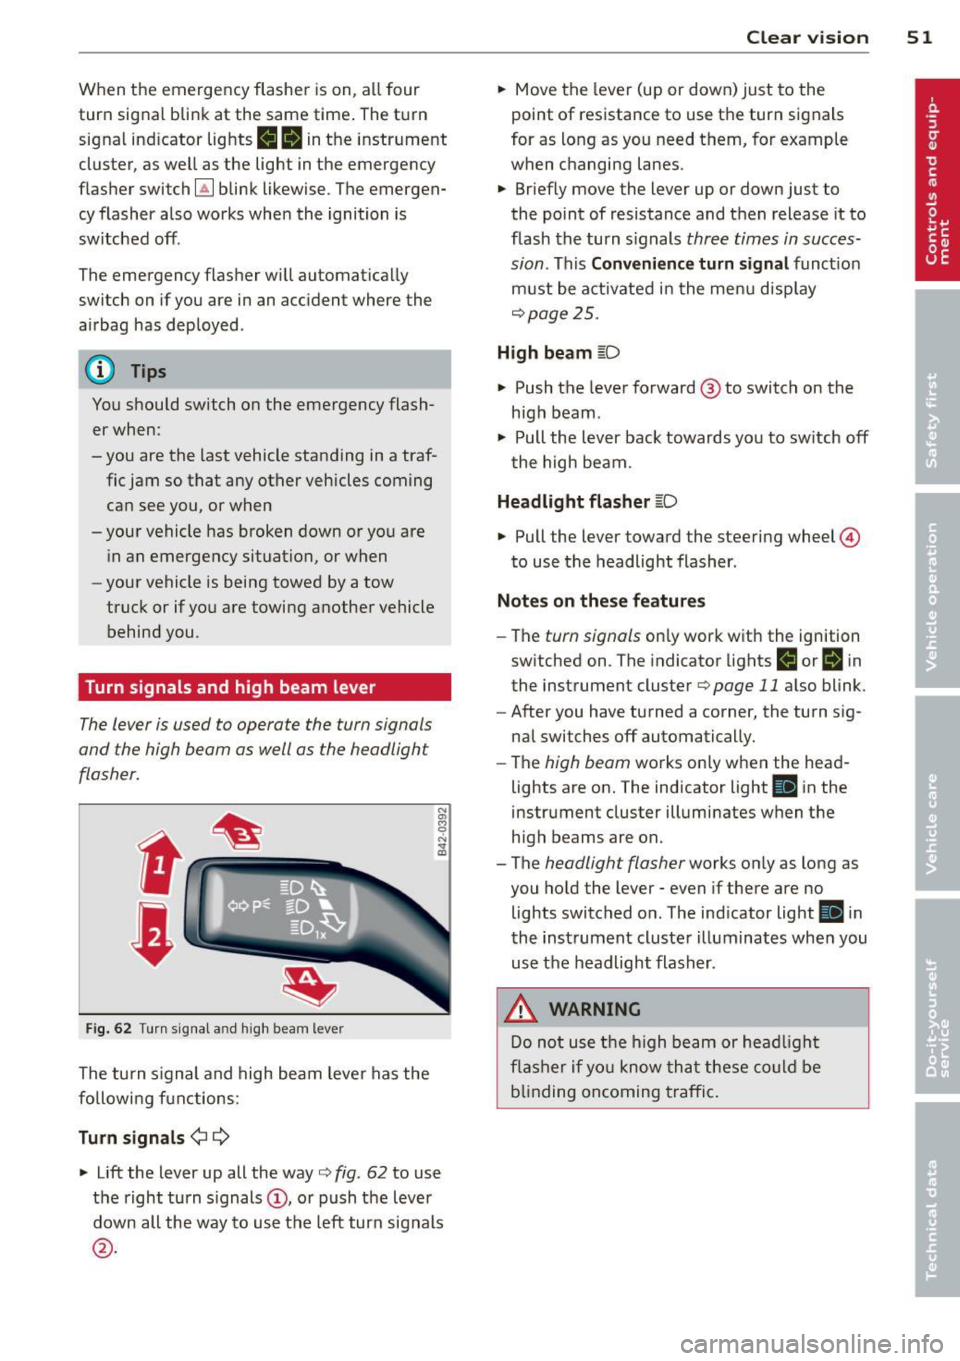
F ig . 6 2 Turn signa l an d h igh beam lever
The turn s ignal and high beam leve r has the
followi ng functions:
Turn sign als ¢ 9
N
"' 8
"' ... a,
~ Lift the lever up all the way c:> fig . 62 to use
the right turn s ignals
(D , or push the lever
down all the way to use the left turn signals
@ .
Clear vi sion 51
~ Move the lever (up or down) just to the
point of resistance to use the turn signals
for as long as you need them, for example
when changing lanes .
~ Briefly move the lever up or down just to
the point of resistance and t hen release it to
flash the turn s ignals three times in succes
sion . This
C o nveni ence turn signal funct ion
must be activated in the menu disp lay
c:> page25 .
High beam ~D
~ Push the lever forward @to switch on the
high beam .
~ Pull the lever back towards you to sw itch off
the high beam.
Headlight flasher ~D
~ Pull the lever toward the steering wheel ©
to use the headlight flasher .
Notes on the se feature s
-The turn signals only work with the ignition
switched on . T he indicator lights
IJ or Bi n
the instrument cluster c:> page 11 also blink.
- After you have turned a corner, the turn s ig-
nal switches off automatically.
- The high beam works only when the head
lights are on. The indicator light
II i n the
instrument cluster illuminates when the
high beams are on .
- The headlight flasher works only as long as
you ho ld the lever - even if there are no
lights switched o n. The ind icator light
II i n
the instrument cluste r illuminates whe n you
use the headlight flasher .
.&, WARNING
Do not use t he h igh beam or hea dligh t
fl ashe r if yo u know th at these could be
b lin ding oncoming t raffic .
Page 88 of 236
86 Parking system
The following steps app ly only when there is
no obstacle such as a wall near the parking
spot. Otherwise, please read the informat ion
prov ided in the "Parking Next to Obstacles"
section.
.. Activate the turn signal.
.. Position your vehicle parallel to the edge of
the street, approximately 3 ft. (1 m) from a parked vehicle .
.. Switch the navigation system and the nav i
gat ion system d isplay on.
.. Se lect rev erse gear . T he parking aid turns
on and pa rking mode 1 appea rs on the dis
play.
.. Press the cont ro l button 1 on the nav iga
tion system ¢
fig. 98. Parking mode 2 ap
pears .
.. Back up and align your vehicle so the b lue
area @ borders on the rear end of the vehi
cle or on the parking spot line. The blue area
represents an extension of the ve hicle's out
line by approximately 16 ft (5 meters) to the
r ear. The long side of the blue area shou ld
be o n the curb. The entire blue area must fit
i n to the par king spot .
.. Wi th the veh icle stopped, turn the steer ing
wheel to the right as far as it wi ll go .
.. Back into the parking spot unti l the blue
curve to uches the curb¢
fig. 99. Stop the
vehicle .
.. With the veh icle stopped, turn the steer ing
whee l to the left as fa r as it wi ll go .
.. Co nti nu e to back into the pa rk ing spot until
the vehicle is par ked para llel to the curb. @
ma rks the rear bumper. Stop the vehicle
when the red orientation line@ borders an
obje ct ¢ .&,. . Keep an eye on the fron t of
yo ur vehicle while doing this
c> (D.
Parking next to obstacles
When the re is an obsta cle (suc h as a wall)
next to the pa rking spot, choose a spot w ith
mo re space on the sides. Pos ition the long
side of the blue area so t hat there is sufficient
space from the c urb. The area must not be on
the c urb. Yo u wi ll also need to start turning
the steering wheel much ear lier. There should
be a suffic ient amount of space between the c
ur b and the blue curve, and the b lue curve
c> fig. 99 must not touch the curb.
A WARNING
--The rearview came ra does not show the
entire area behind the vehicle¢
page 82,
fig. 93. Watch out especially for small
children and anima ls . The rear view cam
era can not always detect them, posing
ris k of an accident!
- Please note that objects not touching the ground can appear to be farther away
than they really a re (fo r example, the
bumper of a vehicle or the rear of a
t ruck). In th is case, you should not use
the orientation lines to help wi th par k
ing, which poses dan ger of an accident!
(D Note
In the navigation system disp lay, the direc
tion o f tra ve l o f th e veh icle re ar is rep re
sented depend ing on the steering wheel
angle. The vehicle front swings out mo re
than the vehicle rear . Ma inta in p lenty of
distance so that your o utside mirror or a
corner of you r vehicle does not coll ide with
any obstacles . This can damage to your ve
hicle .
@ Tips
The left o r right orientation lines and su r
faces will be disp layed, depending on t he
turn s ignal being used .
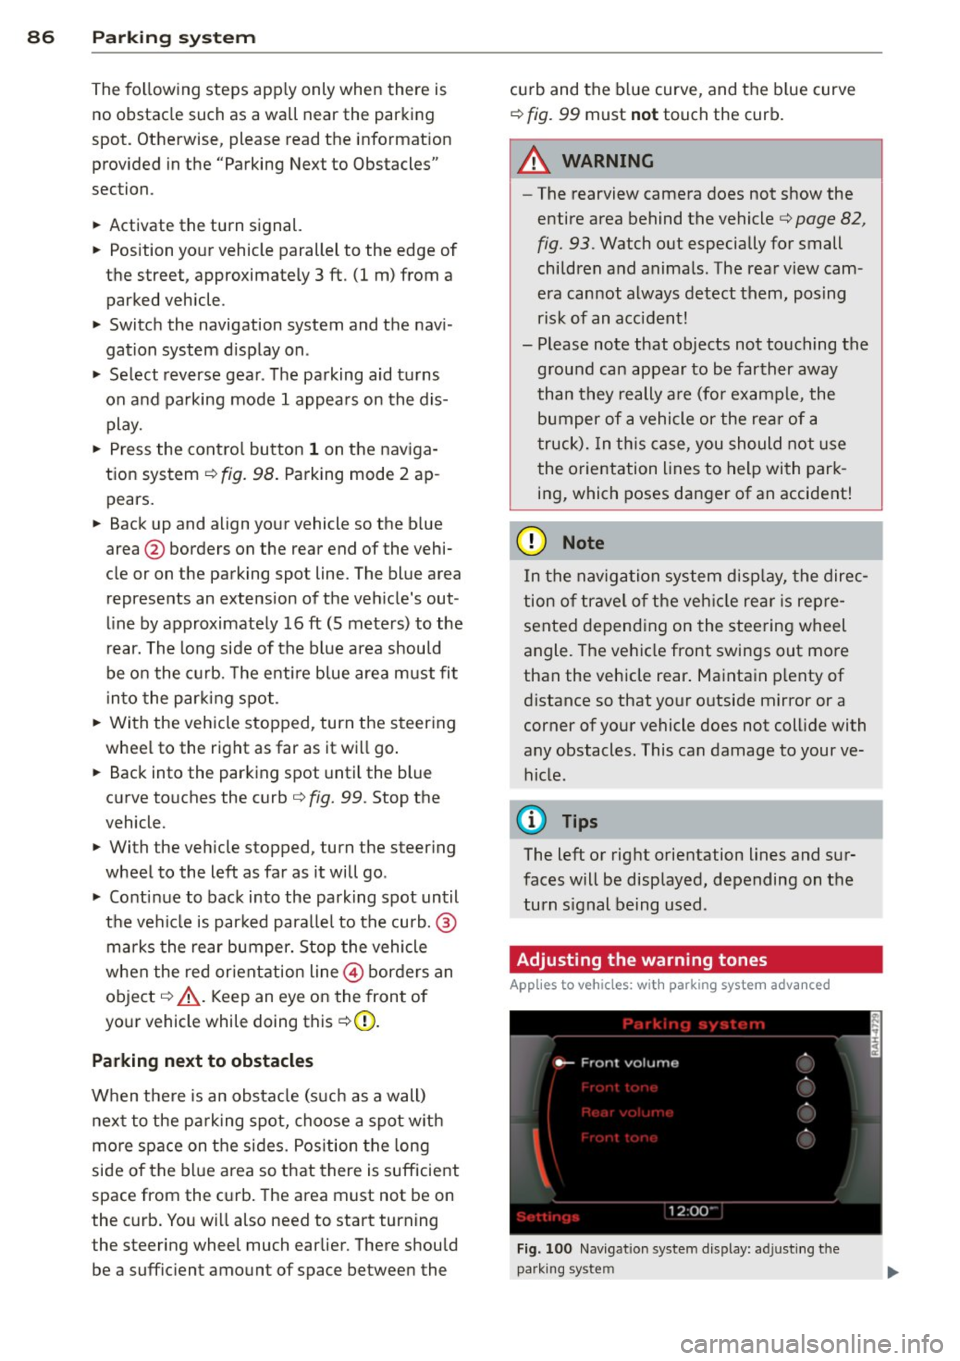
Adjusting the warning tones
Applies to vehicles: with parking system advanced
Fi g. 100 N av igation syste m dis pl ay: a djustin g t he
park ing syst em
Page 134 of 236
132 Child Saf ety
typical 1 year -old chi ld, the Advanced Airbag
System compares the weight meas ured by the
weight sensing mat with the in format ion stor
ed in the electron ic contro l unit.
The electron ic contro l unit a lso registers the
tension on the front passenge r safety belt.
The tens ion on the safety be lt fo r the front
passenger seat will be d ifferent for an adult
who is properly using the safety belt as com
pared to the tension on t he be lt whe n it is
used to attach a child restraint to the seat.
The senso r below the latch fo r the safety be lt
fo r the front seat passenger measu res the
tension on the be lt. T he inp ut from this sen
sor is then used with the we igh t to "decide",
whether there is a chi ld restraint with a typica l
1 year-o ld child o n the front passenger seat
and whether or not the airbag must be turned
off.
Child restraints and Advanced Airbags
Regardless of the ch ild restraint that you use,
make sure tha t it has been ce rtified to meet
Un ited States Fede ral Motor Vehicle Safety
S tanda rds a nd has been cer tified by its manu
facture r fo r u se wit h an air bag. If i n excep
tional circumstances yo u m ust use it on the
front passenge r seat, caref ully read all of the
info rmation on c hild safety an d Advanced Air
bags and heed a ll of the app licable WARN
INGS. Make certai n that t he child restraint is
correctly recognized by the weig ht-sensing
mat i nside the front passenger seat, that the
fro nt passenge r airbag is tur ned off and that
the airbag status is a lways correctly signaled
by the
PASSENGER AIR BAG OFF light .
Many types and models of child restra ints
have been ava ilable over the years, new mod
e ls ar e introduced regularly incorporat ing new
a nd improved designs a nd older models are
taken out of p ro du ction. Child res traints are
not stan dardized . Ch ild restra ints o f the same
type typically have different weights and s izes
a nd d ifferent 'footprints,' the s ize and s hape
of the bottom o f the child restraint that sits
on the seat, when they are installed on a veh i
cle seat. These differences make it virtually impossible to certify compliance wi
th t he re
quirements for a dvanced airbags with eac h
and every ch ild restra int that has ever been
sold in the past or wi ll be sold over the course
of the useful life of your veh icle.
For t his reason, the United States National
Hig hway T raffic Safety Adm inistrat ion has
published a list of spec ific type, ma kes and
m odels of child restraints that must be used
to certify comp liance of the Advanced Airbag
System i n your veh icle w ith the su ppr ession
r equirem ents of Federal Motor Vehicle Safety
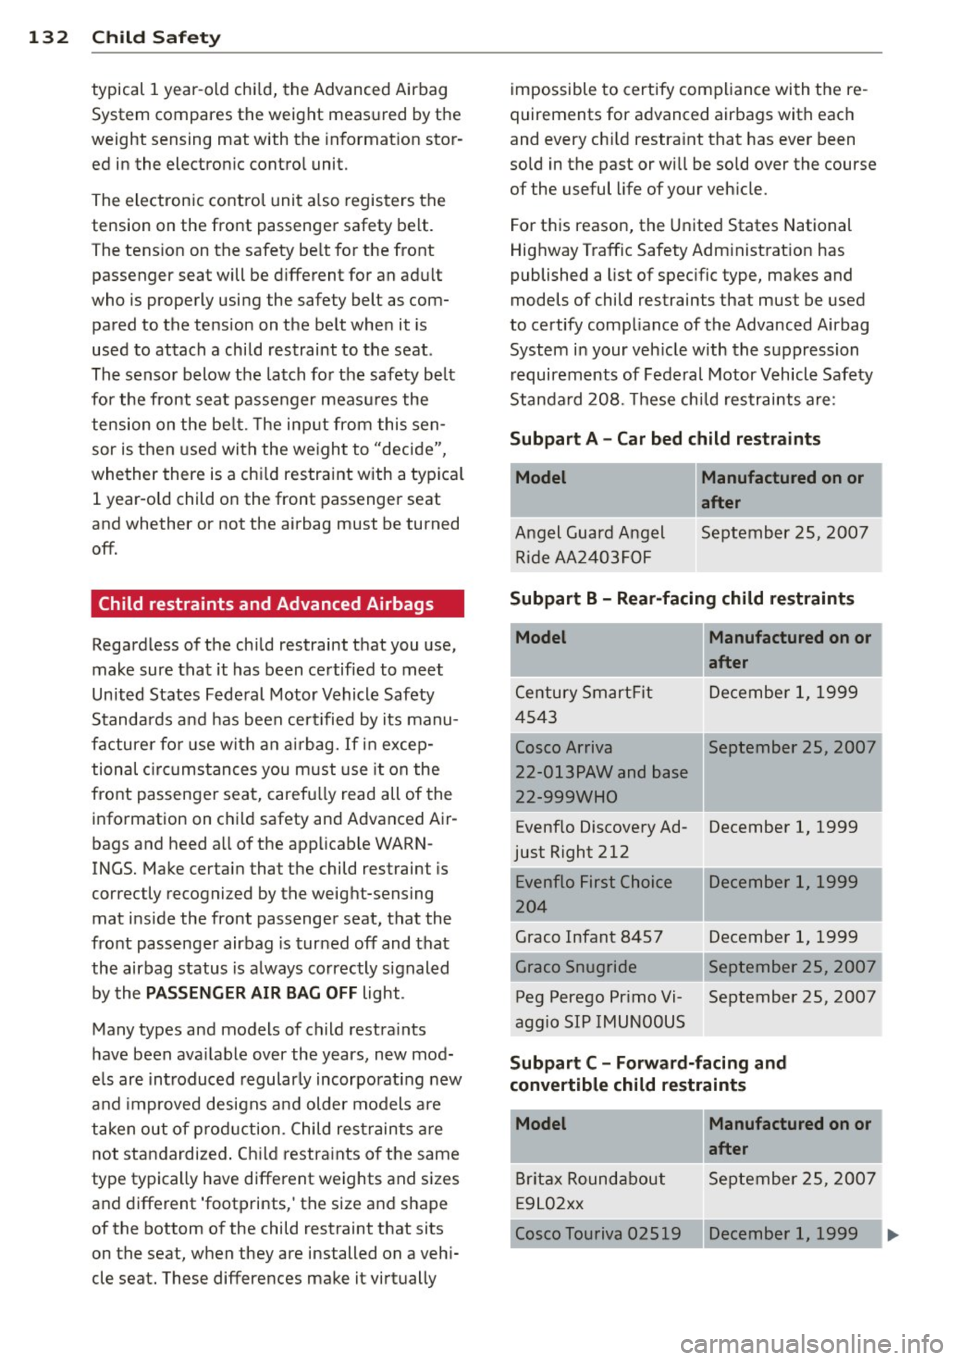
Standa rd 208. These chi ld restraints a re :
Subpart A -Car bed child restraints
Model
Angel Guard Angel
R ide AA 2403F OF Manufactured on or
after
September 25, 2007
Subpart B - Rear-facing child restraints
Model
Century Sm art Fi t
4 543
Cosco Arriva
22 -013PAW and base
22-999 WHO
Evenflo Discove ry Ad
just Right 212
E venflo First Choice
2 04
Graco Infant 8457
G raco Snug ride
Peg Perego Pr im o Vi
aggio SIP IMU NOOUS Manufactured on or
after
D ecembe r 1, 1999
Septemb er 25, 20 07
Decembe r 1, 1999
D ecember 1, 1 999
Decembe r 1, 1999
September 25, 2007
September 25, 2007
Subpart C -Forward-facing and
convertible child restraints '
.
'
.
Model Manufactured on or
·
B rita x Round about
E 9 L0 2xx after
Sep
tember 25, 2007
Cosco Touriva 02519 Decemb er
1, 1999
'