stop start AUDI R8 SPYDER 2014 Owners Manual
[x] Cancel search | Manufacturer: AUDI, Model Year: 2014, Model line: R8 SPYDER, Model: AUDI R8 SPYDER 2014Pages: 244, PDF Size: 61.06 MB
Page 4 of 244
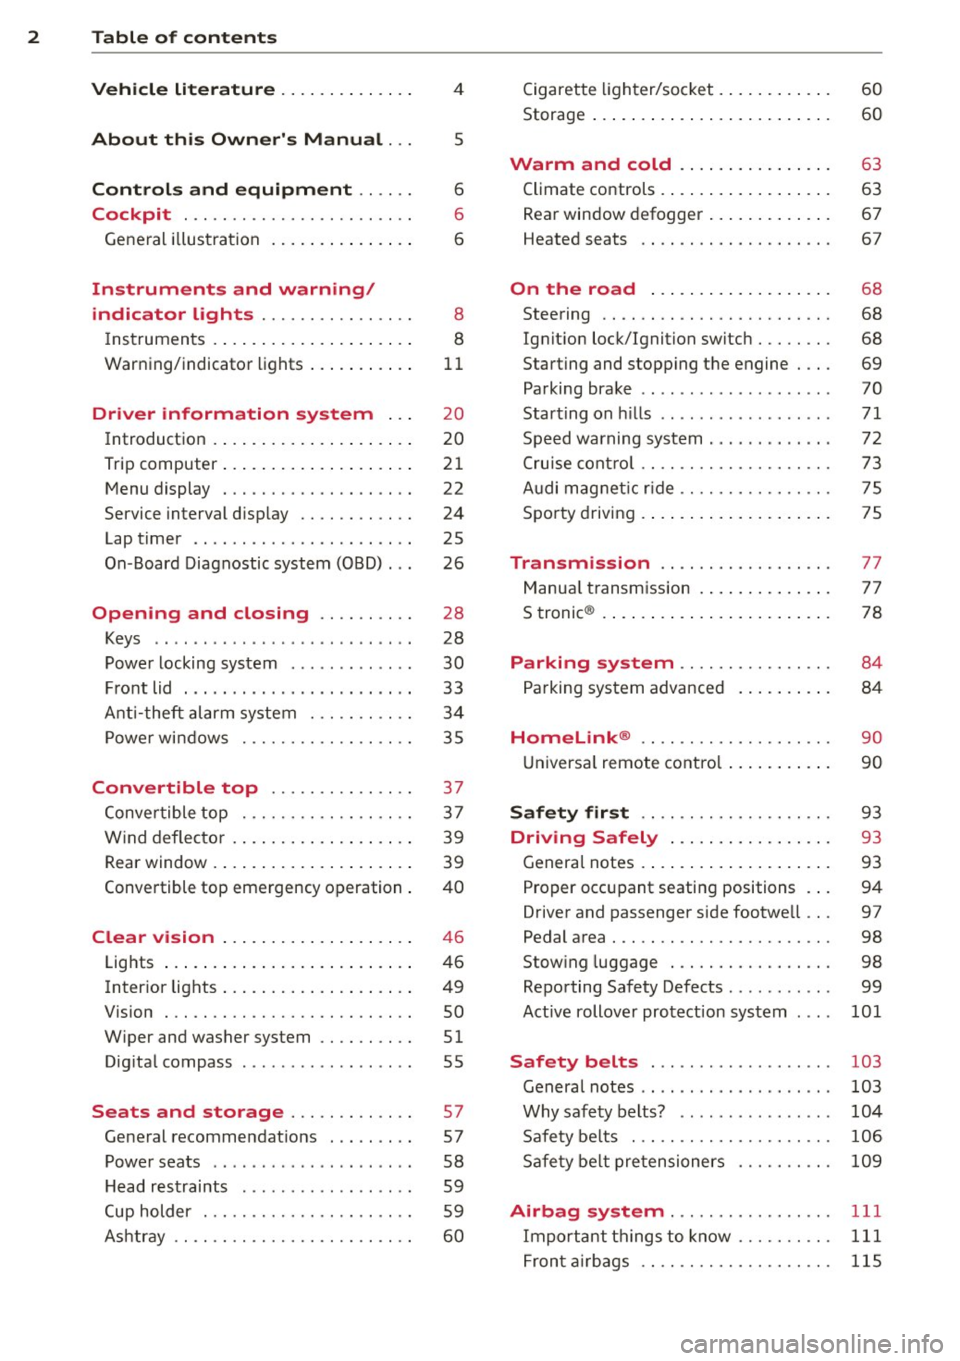
2 Table of contents Vehicle literature .. .. .. .. .. ... .
4
About this Owner's Manual . . . 5
Controls and equipment .. ... .
Cockpit ................ .... .. . .
General illus tration .... ... .. .. ... .
Instruments and warning/
indicator lights ........ .. .. .. . .
Ins truments . .. .. ..... ... .. .. ... .
War ning/ indi cator lights ... .. ... .. .
Driver information system .. .
Introduct ion . .. .. ..... ... .. .. ... .
Trip computer .. .. ..... ... .. .. ... .
M enu display . ........... .... ... .
Service interval d isp lay .... .. .. .. . .
Lap timer .. ........ ..... .. ..... .
On -Board Diagnostic system (OBD) .. .
Opening and closing .... .. .. . .
Keys .. .. .. ... .... .... .. .. .. .. . .
P owe r locking system ......... .. . .
Fr ont lid . .. ... ....... ... .... ... . 6
6
6
8
8
11
20
20
2
1
22
24
25
26
28
28
30
33
Anti-theft alarm system . . . . . . . . . . . 34
P owe r wi ndows .......... .. .. .. . .
Convertible top ......... .. ... .
Conve rtible top ........ .. .. .. .. . .
W ind deflecto r .. ...... ... .. .. ... .
Rear window . .. .. ..... ... .. .. ... .
Conve rtible top emergency operation .
Clear vision .. .. ..... ... .. .. ... .
Lights ...... .. .. ..... ... .. .. ... .
Inter ior lights .. . ...... ... .. .. ... .
V1s1on . .. ................. .. ... .
W iper and washer system .. .. .. ... .
D ig ita l compass . .......... ... .. . .
Seats and storage ....... .. .. . .
General recommendat ions . .... .. . .
P owe r seats .............. ... .. . .
H ead restraints .... .... .. .. .. .. . .
Cup holder . ............. .. .. .. . .
Ashtray ...... ........... ....... .
35
37
3 7
39
39
4 0
4 6
46
49
so
51
55
57 57
58
59
5 9
60
C igarette lighter/soc ket . ..... .... . .
Storage ... .... .. .. ... ..... ... .. . 60
60
Warm and cold . . . . . . . . . . . . . . . . 63
Climate controls . .... .. ..... .... . .
Rea r window defogger ... .... ... .. .
Heated seats .. .. ... .......... .. .
On the road ... ... .. ..... .... . .
Steering .. .. .. .. .. ........... .. .
Ig nit ion lock/Ignition switch ....... .
Starting and stopping t he engine . .. .
Parking brake .. .. ..... ......... . .
Start ing on hills .. ............... .
Speed warning system ... .... ... .. .
C ru ise cont ro l ................. .. .
Audi mag net ic r ide ............. .. .
S po rty driving .... .. ... ..... ... .. .
Transmission ............... .. .
Manua l transm ission . ... .... ... .. .
S tronic ® .. .... .. .. ... ..... ... .. .
Parking system ............... .
Pa rking sys tem advanced
63
67
67
68
68
68
69
70
71
72
73
7S
75
77
7 7
78
8 4
84
Homelink ® . . . . . . . . . . . . . . . . . . . . 9 0
U niversa l remote control . . . . . . . . . . . 90
Safety first . . . . . . . . . . . . . . . . . . . . 93
Driving Safely . . . . . . . . . . . . . . . . . 93
Genera l notes . . . . . . . . . . . . . . . . . . . . 93
Pro per occ upant seating positions . . . 94
Driver and passenger side footwe ll . . . 97
Pedal area . . . . . . . . . . . . . . . . . . . . . . . 98
Stow ing luggage . . . . . . . . . . . . . . . . . 98
Repo rting Safety Defects . . . . . . . . . . . 99
Active rollove r pro tect ion system
101
Safety belts . . . . . . . . . . . . . . . . . . . 103
Genera l notes . . . . . . . . . . . . . . . . . . . . 103
Why safety belts? . . . . . . . . . . . . . . . . 10 4
Safe ty be lts . . . . . . . . . . . . . . . . . . . . . 106
Sa fe ty be lt pretensioners . . . . . . . . . . 109
Airbag system.............. .. . 111
Impo rtant th ings to know . . . . . . . . . . 111
F ron t air bags . . . . . . . . . . . . . . . . . . . . llS
Page 11 of 244
Instrument s and warning /indicator lights 9
Tachometer (engine rev counter)
The tachometer indicates the engine RPM
(revolutions per minutes).
If engine RPM drops below 1,500, you should
downshift to the next lower gear. The red area
at the end of the scale ind icates maximum
perm iss ible engine RPM after the break-in pe
riod . Before reaching th is area, move these
lector lever to posit ion "A (Automat ic opera
tion) " or ease your foot off the accelerator
pedal.
(D Note
The tachomete r needle should only briefly
be in the red zone : you could damage your
engine! The beginning of the red zone var
ies depending on the engine.
@ For the sake of the environment
Upshifting early saves fuel and reduces en
gine noise.
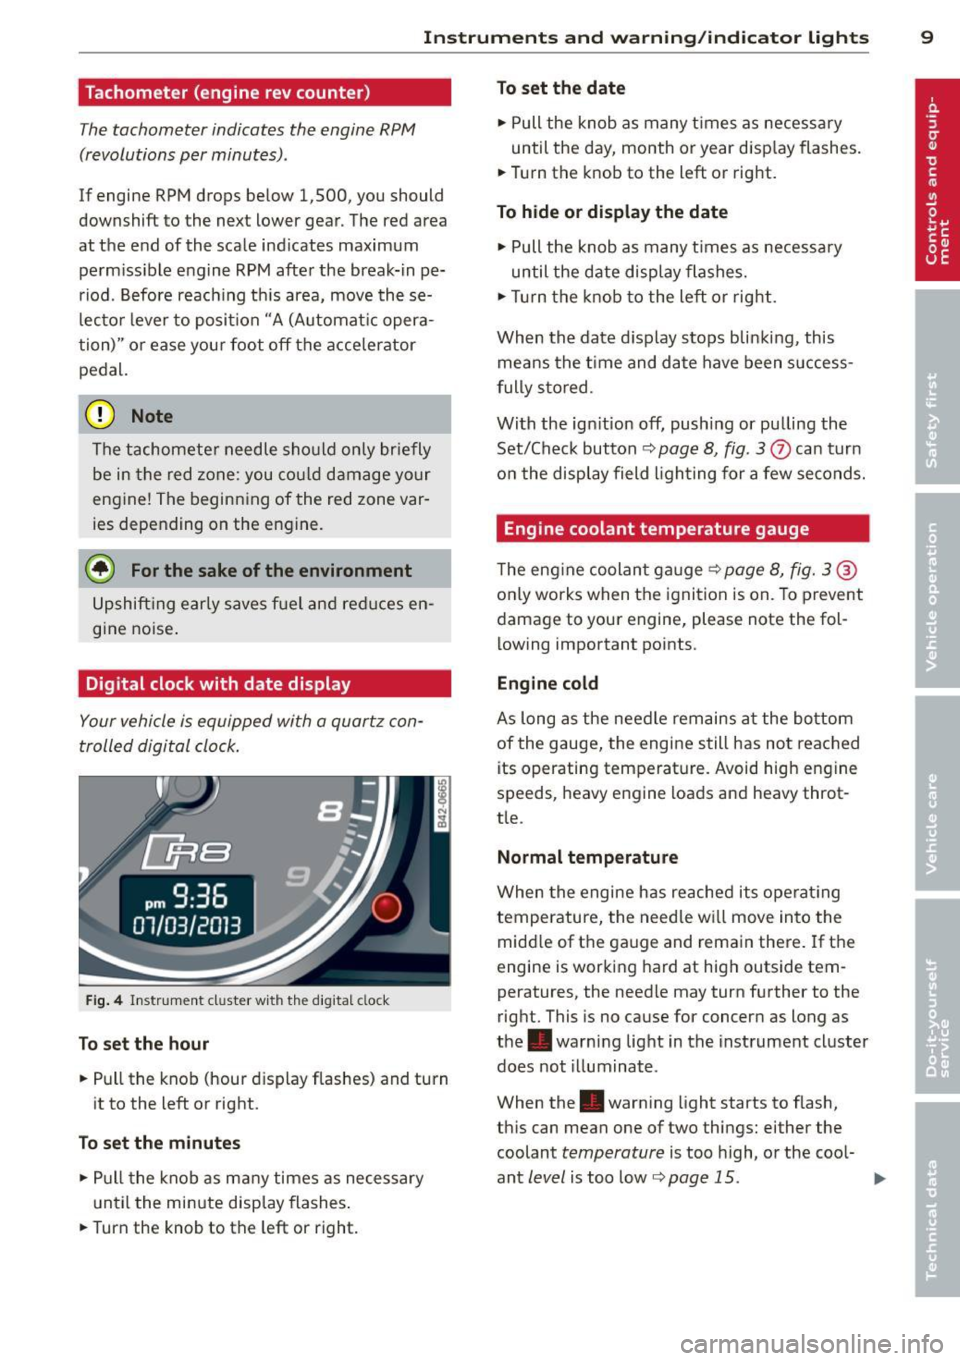
Digital clock with date display
Your vehicle is equipped with a quartz con
trolled digital clock.
Fig. 4 Instr um ent cluster w ith t he digital clock
To set the hour
• Pull the knob (hour display flashes) and turn
it to the left or right.
To set the minutes
• Pull the knob as many times as necessary
until the minute display flashes.
• Turn the knob to the left or right.
To set the date
• Pull the knob as many times as necessary
until the day, month or year disp lay flashes.
• Tur n the knob to the left or right.
To hide or display the date
• Pull the knob as many times as necessary
until the date disp lay flashes.
• Turn the knob to the left or right.
When the date display stops blinking, this means the time and date have been success
fully stored.
With the ign it ion off, pushing or pu lling the
Set/Check button
c::> page 8, fig. 3
Engine coolant temperature gauge
The eng ine coolant gauge c::> page 8, fig. 3 ®
only works when the ignition is on. To prevent
damage to your engine, please note the fol
lowing important points.
Engine cold
As long as the needle remains at the bottom
of the gauge, the engine still has not reached its operating temperature. Avoid high engine
speeds, heavy engine loads and heavy throt
tle.
Normal temperature
When the engine has reached its operating
temperature, the needle will move into the
midd le of the gauge and remain there. If the
engine is working hard at high outside tem
peratures, the needle may turn further to the
right. This is no cause for concern as long as
the . warning light in the instrument cluster
does not illuminate.
When the. warning light starts to flash,
this can mean one of two things: either the
coolant
temperature is too high, or the cool-
ant
level is too low c::> page 15. IJJJ,
Page 13 of 244
Instrument s and warnin g/indic ator ligh ts 11
If an unau thorized key was used , SAFE is dis
p layed continuously in the odometer display
field. The vehicle cannot be operated
<=:> page 29.
Voltmeter display
The voltmeter shows the voltage in the vehi
cle electrical system .
If the reading drops be
low 12 volts with the engine running, you
should have the power supply (batte ry and
generator) inspected by an a uthorized Audi
dealer .
(D Tips
Voltage can drop be low 8 vo lts when you
start the engine.
Warning/indicator lights
Description
The indicato r lights in the inst rument cluster
b link or t urn on. They indicate functions o r
mal funct ions
c:> &. .
Messages may appear with some indicator
lights. The messages turn
off after a short
time. To d isp lay a message aga in, p ress the
Se t/Check button
c:> page 8, fig. 3 (J). If there
is more than one malfunction , the indicator
lights will turn on one after the other for ap
proximately two seconds each.
Some ind icators lights in the disp lay can turn
on in several colors.
,8. WARNING
- Failure to heed warning lights and other
important vehicle information may result
in serious personal injury or vehicle dam
age .
- Whenever sta lled or stopped for repair,
move the vehicle a safe distance
off the
road, stop the engine, and turn on the
emergency flasher
c:> page 48 .
-The engine compartment of any motor
vehicle is a potentially hazardous area . Before you check anything in the engine
compartment, stop the engine and let it
coo l down. Always exercise extreme cau
tion when working under the hood
c:> page 172, Working in the engine
compartment
(D Tips
Malfunctions or faults will be ident ified ei
ther with a red symbol (priority 1 -Dan
ger!) or with a yellow symbol (priority 2 -
Warning) .
Overview
Some indicator lights turn on briefly to check
the function o f that system whe n you swi tch
the ignition on. These systems are marked
with a./ in the follow ing tab les. If one of
these indicator lights does not turn on, ther e
is a ma lf u nction in that system.
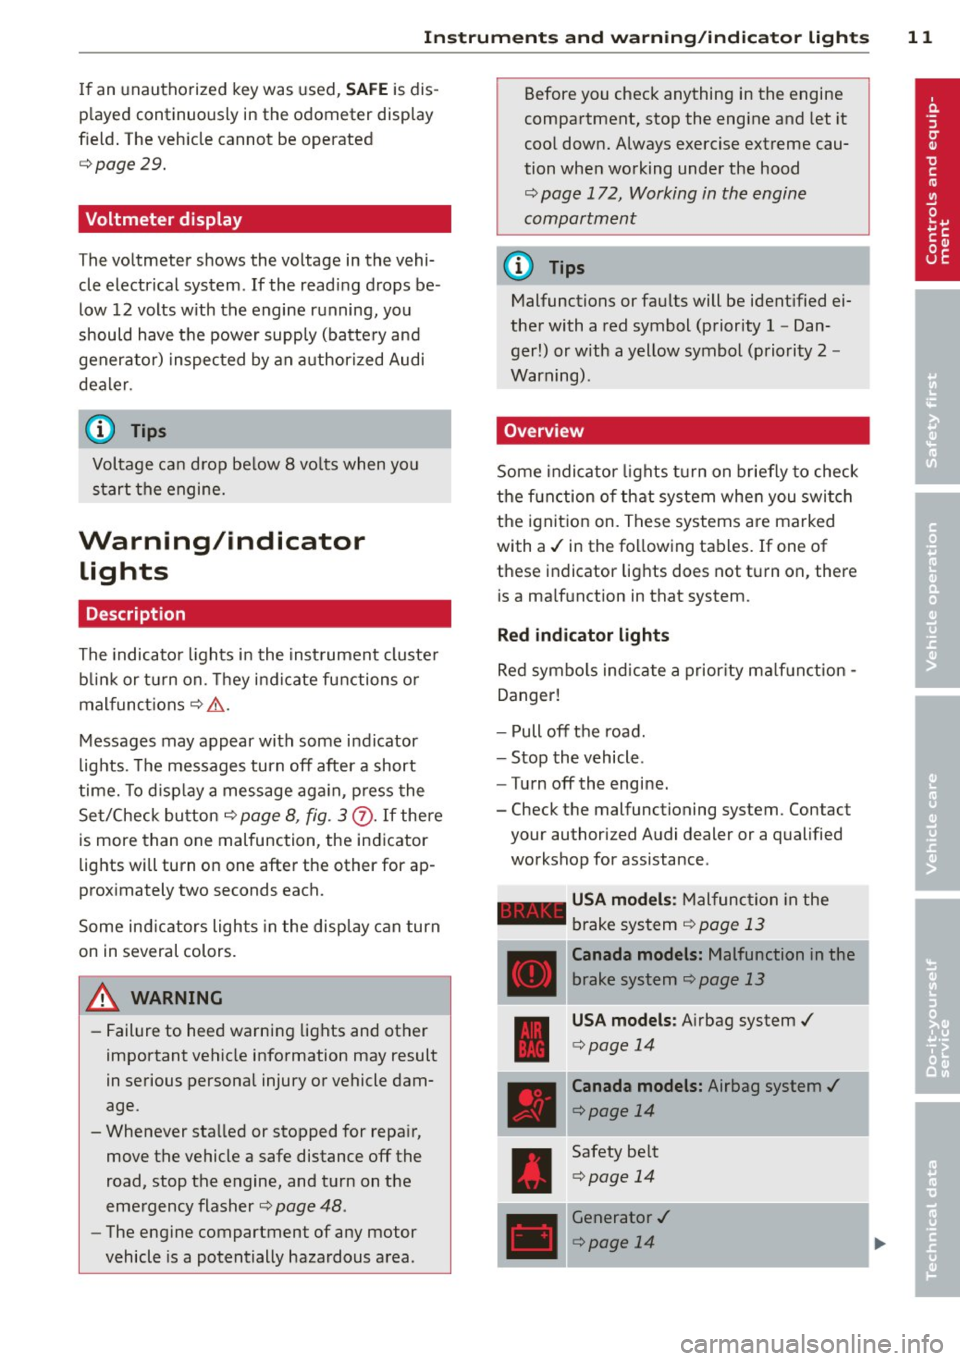
Red indicator lights
Red symbo ls indicate a prior ity ma lf u nction -
Danger!
- Pull
off th e road.
- Stop the vehicle .
-T urn
off the engine.
- Check the malfunctioning system. Contact
your au thorized Audi dealer or a qualified
workshop for assistance .
-USA mod els: Mal function in the
brake system
c:> page 13
Canada models: Malfunction in the
b rake sys tem
c:> page 13
USA models: A irbag system./
<=:> page 14
Canada models: Airbag system ./
<=:>page 14
Safety be lt
<=:> page 14
Generator ./
<=:>page 14
Page 15 of 244
Instrument s and warnin g/indic ator ligh ts 13
•
•
C anada mod els: Cru ise contro l ac
tivated ¢
page 19
High beam
¢page47
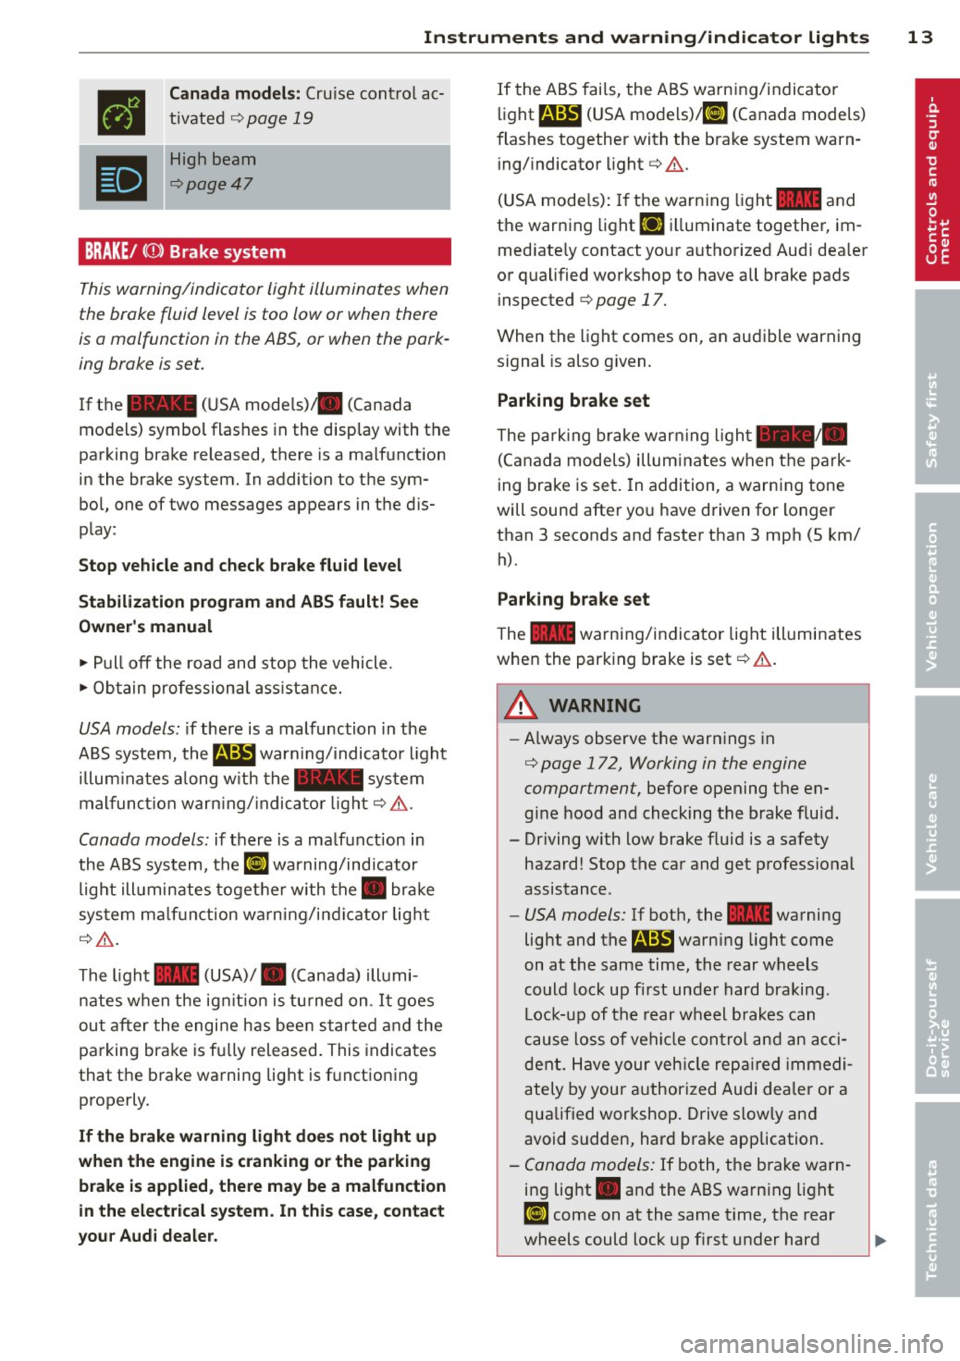
BRAKE/ (CD) Brake system
This warning/indicator light illuminates when
the brake fluid level is too low or when there
is o malfunction in the ABS, or when the park
ing brake is set.
I f the - (USA mode ls)/ . (Canada
models) symbol flashes in the display with the
parking brake released, there is a ma lfunction
in the brake system. In addition to the sym
bol, one of two messages appears in the d is
play:
Stop vehicl e and ch ec k brak e fluid le vel
Stabili zati on p ro g ram and AB S fault! Se e
Owne r's manual
"' Pull off the road and stop the vehicle .
"' Ob tain professiona l ass istance.
USA models: if there is a malfunction in the
ABS system, the
B warn ing/indicato r light
i llum inates a long w ith the - system
mal funct ion warning/ indica to r light ¢&. .
Canada models : if there is a malfunction in
the ABS system, the
[iJ warning/indicator
light ill uminates togethe r with the. brake
system ma lf u nction warning/indicator light
¢ &_ .
The light 1111 (USA)/ . (Canada) illumi
n ates when the ig nitio n is tu rned on . It goes
ou t after the engine has bee n started and the
pa rking brake is fu lly released. This indicates
that the brake warning lig ht is functioning
properly.
If the br ake warning li ght do es not light up
w hen the engine i s cranking or the pa rking
bra ke i s a pplied, the re m ay be a malfun ction
in the electric al sy stem. In thi s cas e, cont act
y ou r Au di dealer .
If the ABS fai ls, the ABS warning/indicator
light
B (USA models)/ [iJ (Canada models)
flashes together with the brake system warn
ing/ indicator light ¢&. .
(USA mode ls): If the warning light
1111 and
the warning light
£1 ill uminate together, im
med iate ly contact your authorized Aud i dea ler
or qualified workshop to have all brake pads inspected ¢
page 17.
When the light comes on , an audible warning
s ignal is also g iven.
Parking brake set
T he pa rk ing brake warning ligh t-·
(Canada models) illuminates when the park
ing brake is set . In addition, a warning tone
will sound after yo u have driven for longer
than 3 seconds and faster than 3 mph (5 km/
h).
Parking b ra ke s et
The llll warning/indicator light illuminates
when the parking brake is set¢&. .
_& WARNING
-Always observe the warn ings in
¢ page 172, Working in the engine
compartment,
before opening the en
gine hood and checking the brake f luid.
- Driving with low brake fluid is a safety hazard! Stop the car and get profess ional
assistance .
-USA models: If both, the 1111 warning
light and the
E warn ing light come
on at the same time, the rear wheels
could lock up first unde r hard braking.
Lock-up of the rear wheel b rakes can
cause loss of vehi cle con tro l and an acci
dent. Have your veh icle repa ired immedi
ately by your authorized Audi dealer or a
qualified workshop . Drive s lowly and
avoid sudden, hard brake application.
- Canada models: If both, the b rake warn
ing light . and the ABS warning light
[iJ come on at the same time, the rear
wheels could lock up f irst under hard
~
Page 16 of 244
14 Instrum ent s and w arn ing /indic ato r light s
braking. Lock-up of the rear wheel brakes
can cause loss of vehicle control and an
accident. Have your vehicle repaired im
med iately by your authorized Audi dealer
or a qualified workshop. Drive slowly and
avo id sudden, hard brake applicat ion .
- If the brake warning/indicator light does
not go out after a few seconds and the
parking brake is released, or lights up
wh ile you are driving, the fluid level in
the brake fluid rese rvoir is too low. If you
believe that it is safe to do so, proceed
immediately at low speed to the nearest
authorized Audi dealer or qualified work
shop and have the brake system inspect
ed.
- Always keep in m ind that afte r several
brake applicat ions, yo u will need greater
pressure on the brake peda l to stop your
vehicle. Do not re ly on stra ined brakes to
respond w ith maximum stopp ing power
in c ritical situations. You must a llow for
increased bra king distances. The extra
dis tance used up by fad ing br akes could
lead to an acc ident .
~/ !lr Safety systems
The I (USA models)/ . (Canada models) in
dicator light monitors the safety systems e.g .
airbags, pretensioners and i llum inates for a
few seconds each time you switch the ignition
on.
I f t he
I (USA models) • (Canada models)
indicator light does not go out, or if it illumi
nates wh ile you are dr iv ing, or if it starts to
bli nk, then there is a ma lfunction somewhere
in the system . If the light does not illuminate
when you sw itch on the ignit ion, this also
means there is a ma lfunction .
A WARNING
If you have a malfunction in the safety sys
t ems, cont act your author ized Audi dealer
immediate ly. Otherw ise the sa fety sys
tems may not wo rk p roperly in an acci
dent.
4 Safety belt warning light
Applies to vehicles: with safety belt warning light
The warning light is a reminder to fasten
safety belts .
The warning light . comes on for a few sec
onds after the ignition is sw itched on as a re
minder to fasten your safety belt .
Additional informat ion on safety belts
¢ page 103.
' 0 Generator '
This warning/indicator light detects a mal
function in the generator or in the vehicle 's
electrical system.
The . warning/indicator light illuminates
when you switch on the ignition and must go
out after the eng ine has started.
If the . warning/indicator light illuminates
whi le you a re d riving, you shou ld contact yo ur
authorized Aud i dea ler. Since the vehicle bat
tery is discharging, you shou ld sw itch off any
unnecessary electr ica l consumers (for exam
ple, the air conditioner).
"l!:r. Engine oil pressure
The red engine oil pressure warning symbol
requires immediate service or repair .
If the . symbo l appears in the disp lay and
flashes, the o il pressure is too low . In add ition
to the symbol, the following message also ap
pears in the display:
Switch off engine! Oil pres sure is too low
.,. Pull off the road and stop the veh icle.
.. Shut the engine down.
.. Check the engine oil level¢
page 178 .
.. Contact your authorized A udi dealer for as-
sistance if necessary.
Engine oil level too low
If the engine oil leve l is too low, top off oil to
t h e proper level~
page 180 . 1J11>
Page 17 of 244
Instruments and warning/indicator lights 15
Engine oil level OK
If
the . symbol st arts flash ing again even
though the engine oil leve l checks O K on the
d ipst ick,
do not start driving again and do
not let the engine run at idle .
Instead, con
tact your author ized Audi dealer for assis
tance.
(D Tips
- The engine oil pressure symbol. is
not an indicator for a low engine oil lev
el. Do not rely on it. Instead, check the
oil level in your engine at regular inter
vals, preferably each time you refuel,
and always before going on a long trip.
- The yellow oil level warning indication
1\1 requires oil refill or workshop serv
ice without delay . Do not wait until the
red oil pre ssure warning symbol.
starts to flash before you respond to
the low oil level warning
11-By then,
your engine may already have suffered
serious damage.
- L Engine cooling system
A malfunction in the engine cooling system must be repaired as soon as possible .
When the. symbol in the disp lay fla shes,
then either the eng ine coo lan t
temperature is
too h igh, or the coo lant
level is too low. In ad
d ition to the symbol, t he fo llowi ng message
a ls o appears in the display:
Switch off engine and check coolant level
~ Pull off the road and stop th e vehicl e.
~T urnoff th e e ngine.
~ C heck coolan t leve l c:>page 182.
~ Add coolant if ne cessary c:> page 18 3.
~ Co ntinu e dr iving only after the eng ine coo l
ant war ning/ indicato r light goes o ut.
~ Contact your a uthorized Audi dea ler for as-
s istance if necessary .
If the engine coolant level is co rrect, then the
radiato r fan may be t he cause of the malf unc
tion . I
f the generator warn ing/ indicato r light
sho uld also illum inate
c:> page 14, then the
fan belt may be damaged .
_& WARNING
- If you r vehicle should brea k down for
mechanical or other reasons, park at a
safe distance fro m moving traff ic , tu rn
off th e eng ine and tu rn on the haza rd
warn ing ligh ts
c:> page 48, Em ergen cy
fla sher.
-
- N ever op en the eng ine c omp artmen t lid
i f you see or he ar stea m or co olan t es
c a p ing from t he eng ine compar tment -
you risk being s ca lde d. Wa it unt il you can
no lo nger see o r hear s team or coolan t
escapin g.
- Th e engine compa rtment o f any vehi cle
is a dangerous area. Befo re you perform
a ny wo rk i n the engine com partment,
turn off the en gine and allow it to cool.
Follow t he war ning stickers
c:> page 172,
Working in th e engine compartment.
(D Note
Do not continue dr iv in g if the . symbo l
ill umina tes . There is a mal function in the
engine cooli ng system -you c ould damage
your engin e.
~ Convertible top operation
T he ind icator light tu rns o n II
- W hen the convert ib le top opens or closes or
- If the convert ible top did not open or close
comp letely .
T he ind ic a tor light blinks if the converti ble top
cannot open or close
c:> page 38.
;;,/ {); Electronic Stabilization Control
(ESC)
If the G1 i ndicator lamp blinks while dr iv ing,
t h e ESC or ASR (Anti-Slip Reg ulat ion) is ac tive
ly reg ulati ng .
If the
DJ indicato r lamp ill uminates, the sys
tem has sw itched the ESC off. In th is case, you .,.
Page 27 of 244
the appropriate service on yo ur vehicle. You
also have the possibility to reset the oi l
change sched ule after having performed an
oil change according to Audi specifications.
- Swi tch the ign ition on.
- Pull the knob ~fig.
15. The message. Serv-
ice due! appears.
- Pull the knob until the d isplay
Oil change in
---- -mi (km)---
d ays appears . If the I RESET !
button is not pulled within 5 seconds, the
display reset mode closes.
(D Note
If you disconnec t the bat tery termin als, no
calc ulations can be made for the service
interval display during this t ime and no
service reminder w ill appear. Remember
that observing the proper serv ice intervals
is vitally impo rtant to extending the life of
your veh icle, part icu larly the eng ine, and
ma intaining its va lue . Even if t he mileage
driven is low, the maximum per iod of one
yea r from one se rvice to the next must not
be excee ded .
0) Tips
- Do not reset the display between o il
c hanges, o therw ise the display will be in
cor rect.
- The information in the Service Reminder
r ema ins s to red even when the veh icle
batte ry is dis con ne cte d.
Lap timer
Introduction
You can record and eva luate lap times with
the lap t imer in the display~
page 25,
fig . 17 . The time is measu red in minutes, sec
onds and 1/10 seconds . Th e hours a re a lso
shown when the lap time exceeds 60 mi nutes.
The maximum individual measu rement is 99
hours.
_& WARNING
Please devote your fu ll attention to driv
ing. As the driver, you have comp lete re -
Driver in formation system 25
sponsibi lity for safety in traff ic. On ly use
the functions in such a way that you a lways
maintain complete control over your vehi
cle in all traffic situations.
(D Tips
When the lap timer stopwatch is running,
you can ca ll up the tr ip comp uter informa
tion with the
I RESET ! button.
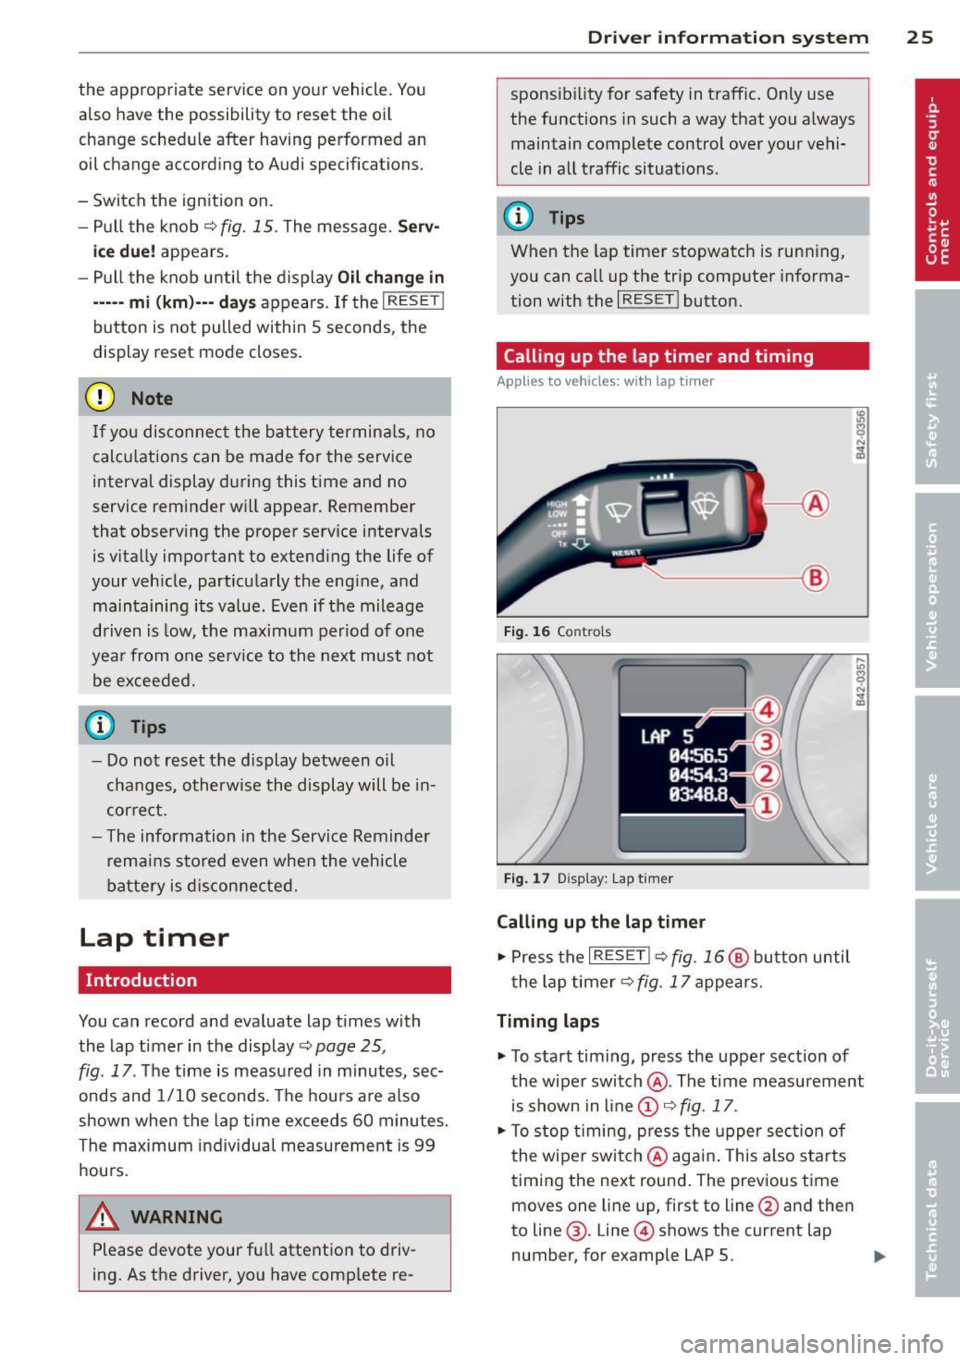
Calling up the lap timer and timing
Applies to vehicles: with lap tim er
~-- @
Fig. 16 Co ntro ls
F ig . 1 7 Display : Lap t imer
Calling up the lap timer
.. Press the I RESET !~ fig. 16@ butto n until
t he lap timer~ fig.
17 appears.
Timing laps
.. To start timing, press the upper section of
the wiper swi tch @ . The tim e measurement
is shown in line @ ~ fig.
17 .
.. To stop t iming, press the upper sec tion of
t he wipe r switch @aga in. This also s tarts
t iming the ne xt round . The previous time
moves one line up, first to line @and the n
to line @. Line @ shows the current lap
number, for example LAP 5. .,.
Page 37 of 244
The indicator li ght q fig . 30 starts flashing
rapidly fo r 2 seconds and then blinks slowly.
How is the anti-theft alarm system
switched off?
The anti -the ft alarm system is switched off
on ly when you unlock your vehicle. If yo u do
not open a door with in 30 seconds after yo u
have unlocked with the remote control, the
ve hicle w ill lock itse lf again a utomat ically.
When will the anti theft alarm system be
triggered?
When the veh icle is locked, the alarm system
monitors and protects the following parts of
the vehicle:
- engine compartment
- luggage compartment
- doo rs
- ignition
When the system is activated , the alarm wi ll
be tr iggered if one of the doors, the eng ine
compa rtment lid or the front lid are opened .
The anti-theft a larm system will also go off
when the battery is disconnected .
You can a lso trigger the alarm by pressing t he
PANIC button on your remote-control key .
This will a lert other peop le in case of emer
gency . Press the
PANIC button again to tu rn
off the alarm .
How is the ant i-theft alarm switched off
when triggered?
The alarm system is switched off w hen you
u nl ock the vehicle us ing the remote-control
key or when the ignition is sw itche d on . T he
a larm w ill also switch itse lf off when it comes
t o the en d of its cycle.
Emergency flasher
The emergency f lasher w ill blink b riefly w hen
the doors, e ngine compartment l id and fron t
lid are properly clos ed .
If the emergency flashers do not blink, check
the doors, e ngine compartment l id and front
l id to make sure t hey a re p roperly closed . If
Opening and clo sin g 35
you close a doo r, the eng ine compartment lid
o r the fro nt lid with the anti -theft alarm
switched on, the eme rgency flashers w ill blink
o nl y after yo u have closed the door or lid.
@ Tips
For the a nti-theft alarm system to f unc
tion properly, make sure all ve hicle do ors
and windows are closed bef ore leaving t he
vehicle.
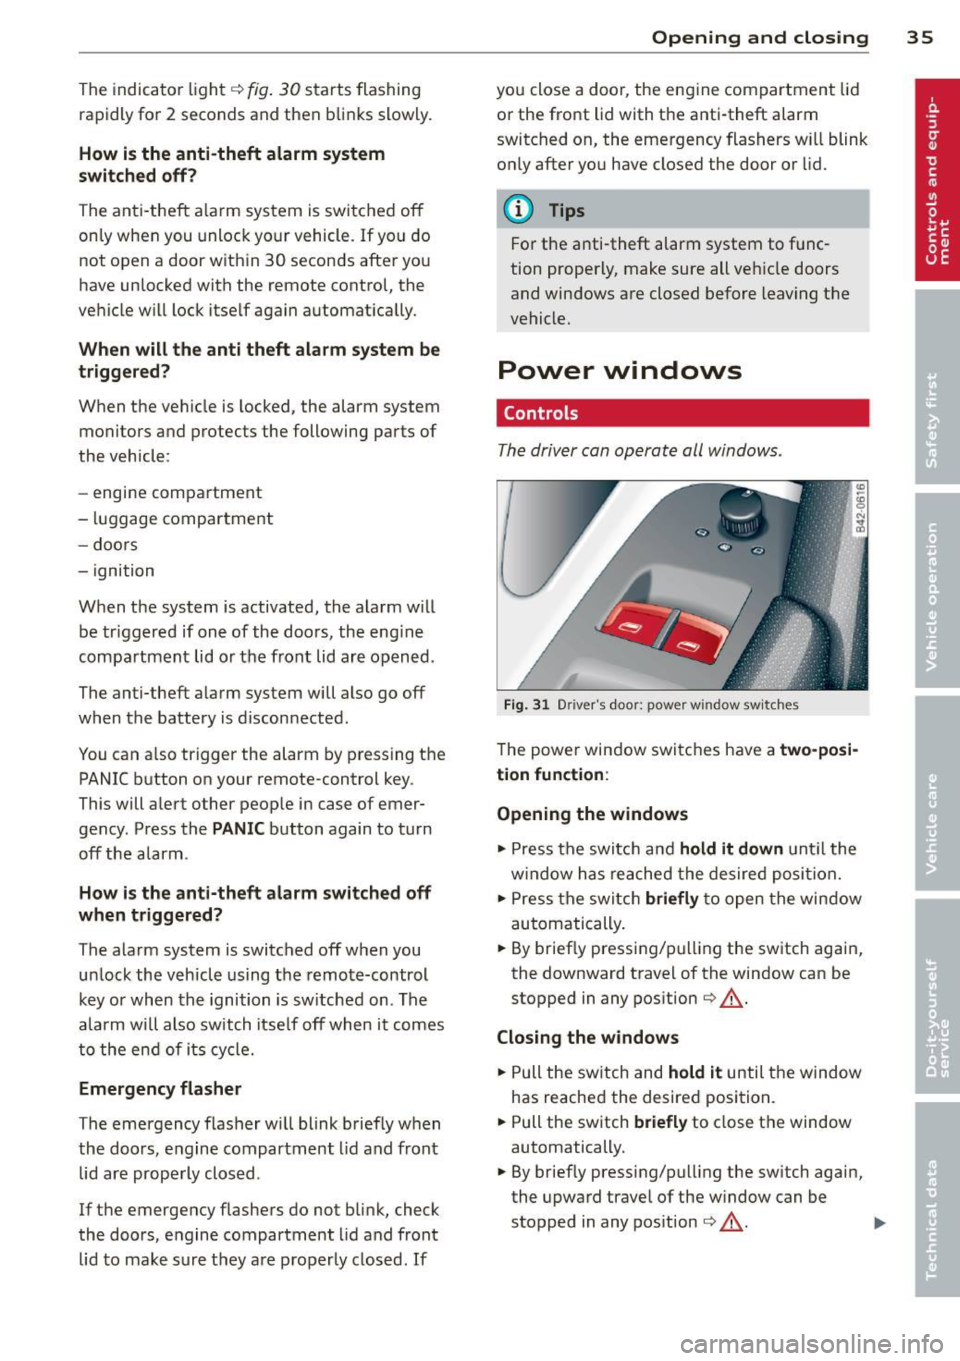
Power windows
Controls
Th e driver can opera te all windo ws.
F ig. 31 Driver 's doo r: power w indow sw it ches
T he powe r window swi tc hes have a two-posi
tion function :
Opening the windows
.,. Press the swit ch and hold it down u nt il the
w indow h as reached the desired posi tio n.
.,. Press t he swi tch
briefly to open the win dow
automatically .
... By briefly press ing/p ulling the sw itch again,
the downward t ravel of the window can be
stopped in any pos ition
¢ ,& .
Closing the windows
.,. Pull the sw itch and hold it until the w indow
has reached the desire d posi tion .
... Pull the sw itch
briefly to close t he window
automatically.
... By briefly pressing/pull ing the sw itch again,
the upwa rd trave l of the w indow can be
stopped in any pos it ion
¢ ,& . .,.
Page 54 of 244

52 Clear vis ion
• Move the interva l set switch @, to change
the interva ls.
Low wiper sp eed
• Move the leve r up to position @.
High wiper speed
• Move the lever up to position @.
One-touch wiping
• Move the lever to position@, when you
want to wipe the windshield briefly.
Automatic wiper /washer
• Pull the lever to position ® (toward the
steering wheel) and ho ld.
• Re lease the lever. The washer stops and the
wipers keep going for about four seconds .
Turning off the wipers
• Move the leve r back to position @.
The windshield wipers and washer only work when the ignition is turned on. If you switch
off the ignit ion w ith the windshield wiper lev
e r still in the interval wipe position and then
come back a while later and drive off, the rain
sensor will reactivate itse lf after the vehicle
speed has exceeded 4 mph (6 km/h).
The rain sensor* is only activated with the
wiper leve r set to posit ion
(D . When it starts
to rain, the rain sensor will automatically acti
vate the intermittent wiping mode.
To reduce the sens it iv ity of the se nsor, move
switch @down. To increase the sens itiv ity,
move the switch up. The highe r you adjust the
sens itivity, the faster the sensor wi ll react
when it se nses moisture on the windshield.
The pauses between w iper turns depend not
only on the sensitivity setting, but on the ve
h icle speed as well.
During brief stops, e .g. at a red light, wiper
motion wi ll automatica lly be reduced to the
next lower speed. Wipers already turning at
low speed change to interm ittent wip ing .
When the ignition is turned on, t he washer
jets are heated.
A WARNING
- W iper blades are crucial for safe driving!
O nly when they are i n good condit io n are
they able to clear the windows properly
to p rov ide uncomprom ising v is ibility.
Wo rn o r damaged wipe r blades are a
safety haz ard
~ page 54, Replacing
windshield wiper blades!
- The light/ rain sensor* is only des igned to
assis t and support the d river. It remains
entire ly the driver's responsibility to
monitor outside weather condit ions and
to manually activate the wipers as soon as rain or dr izzle reduces v is ibility
through the windshield.
- The windsh ield must not be treated w ith
water-repellent materials. They can in
crease glare under poor v is ibility condi
tions such as wetness, darkness, or when
the sun is low on the hor izon. In addi
tion, they can cause the w indshield w ip
ers to chatter.
(D Note
In freezing o r near freezing conditions:
- Always check that the w iper blades are
not frozen to the g lass before you turn
the wipers on. Loosen a wiper blade
w hich is frozen in place before operating
the wipe rs to prevent damage to the
w iper blade or the wiper motor.
- Do not use the w ipers to clear a frosted
w indow. Using the wipers as a conve n
ient ice scr ape r will dest roy the wipe r
blades.
- Before yo u take your ve hicle to a n auto
ma tic ca r w ash, ma ke s ure you have the
w indshield wiper system switched off
(lever in position 0), otherwise the wind
shield wiper system could get damaged
in the car wash i f it should suddenly
come on.
(D Tips
- The windshie ld wipers are switched off
when the ignit ion is turned off. Act ivate
the winds hield wipers after the ignition
Page 70 of 244
68 On th e road
On the road
Steering
Adjusting the steering wheel column
The steering wheel position can be continu
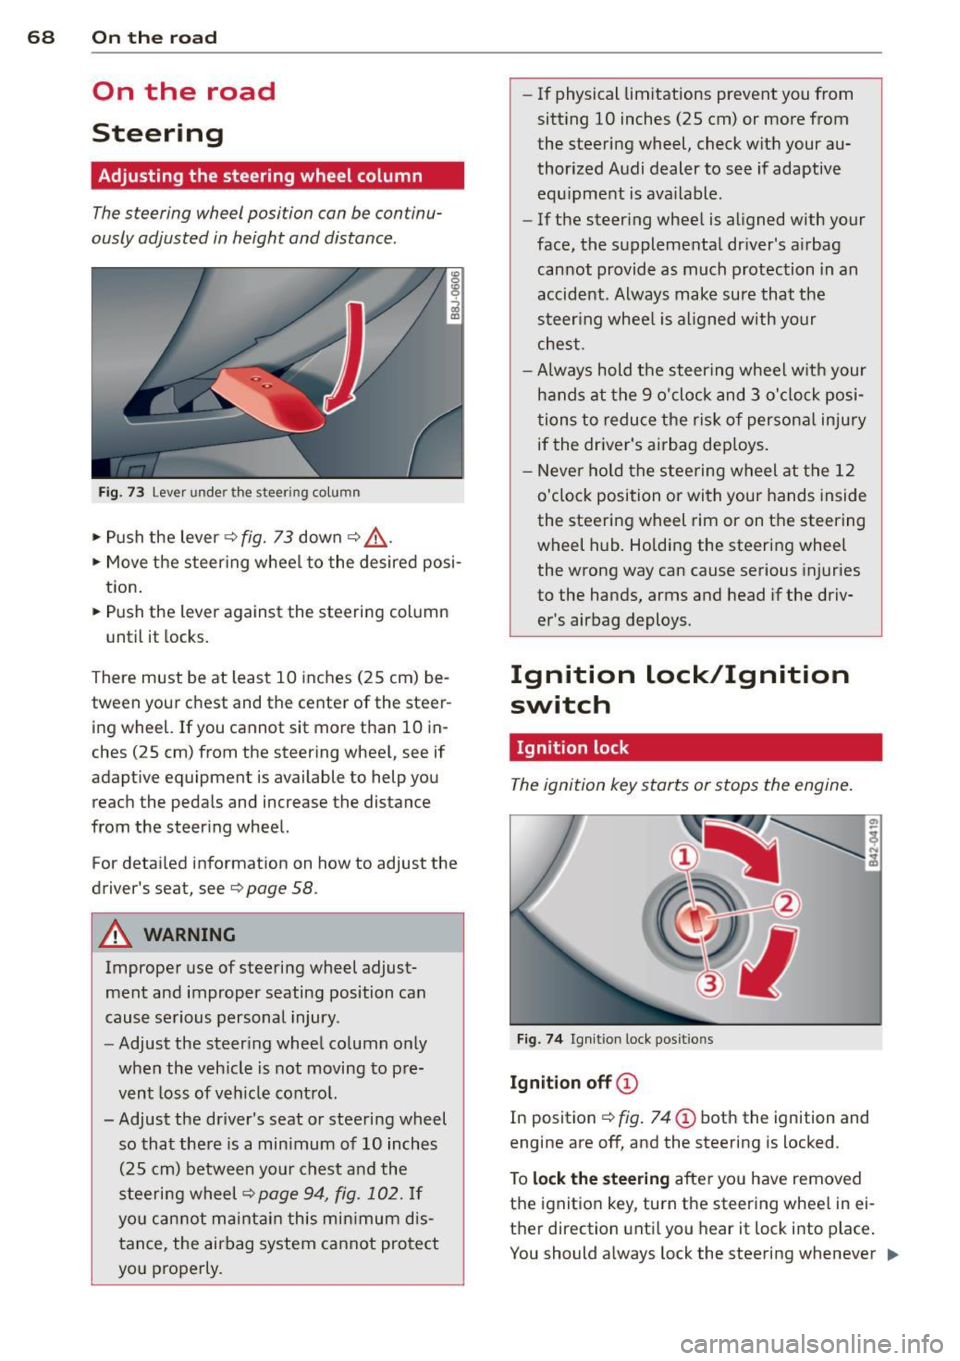
ously adjusted in height and distance .
Fig. 73 Lever under the steering column
~ Push the lever Q fig. 73 down Q ,&..
~ Move the steer ing whee l to the desired posi
tion.
~ Push the lever against the steering column
until it locks.
There must be at least 10 inches (25 cm) be
tween your chest and the center of the steer ing wheel. If you cannot sit more than 10 in
ches (25 cm) from the steering wheel, see if
adaptive equipment is available to help you
reach the pedals and increase the distance
from the steer ing wheel.
For detai led informat ion on how to adjust the
driver's seat, see
Q page 58.
A WARNING
Improper use of steering wheel adjust
ment and improper seating position can
cause serious personal injury .
- Adjust the steer ing wheel column only
when the veh icle is not moving to pre
vent loss of veh icle cont rol.
-
- Adjust the driver's seat or steering wheel
so that there is a min imum of 10 inches
(25 cm) between your chest and the
steering wheel
Q page 94, fig . 102. If
yo u can not maintain this min imum dis
tance, the airbag system cannot protect
you properly.
- If physical limitations prevent you from
sitt ing 10 inches (25 cm) or more from
the steering wheel, check with your au
thorized Audi dealer to see if adaptive equ ipment is ava ilable .
- If the steering wheel is aligned with your
face, the supplemental driver's airbag cannot provide as much protection in an
accident. Always make sure that the
steer ing whee l is aligned with your
chest.
- Always hold the steering wheel w ith your
hands at the 9 o'clock and 3 o'clock posi
tions to reduce the risk of persona l injury
if the driver's airbag dep loys .
- Never ho ld the steering wheel at the 12
o'clock position or with your hands inside
the steering wheel rim or on the steering
wheel hub . Holding the steering wheel
the wrong way can cause serious injuries
to the hands, arms and head if the driv
er's airbag deploys.
Ignition lock/Ignition
switch
Ignition lock
The ignition key starts or stops the engine.
Fig . 7 4 Ign ition lock positions
Igniti on off @
In position Q fig. 74 @ both the ignition and
engine are off, and the steering is locked .
T o
lo ck th e steering after yo u have removed
the ignition key, turn the steer ing whee l in ei
ther direction unti l you hear it lock into place .
You should always lock the steering whenever
II>