center AUDI RS5 CABRIOLET 2013 Owners Manual
[x] Cancel search | Manufacturer: AUDI, Model Year: 2013, Model line: RS5 CABRIOLET, Model: AUDI RS5 CABRIOLET 2013Pages: 286, PDF Size: 71 MB
Page 26 of 286

24 Drive r in form ation d ispl ay
Driver information
display
Introduction
The Driver information disp lay inside the in
strument cluster provides you, the driver ,
with important information.
Fig . 7 In strum en t cl ust er: center dis pl ay
Fi g. 8 W iper leve r: co ntr ols fo r the menu displa y
Cent er d ispla y
With the ignition on, the display in the Dr iver
I nformation System shows the fol low ing in
format ion :
- CD* inserted or Radio* station set
- Outside temperature* : At temperatures be-
low 41 °F ( +S °C), a snowflake symbol ap
pears in front of the temperature display
c::> .&_ .
- Warning if one of the doors , front lid or en-
gine compartment lid is not closed .
Additional fun cti ons
You can open the following function s in the
Driver Information System display by pressing
the
! R ESE T I button c::> fig. 8 one or more times:
Digital speedometer*
Tire pressure monitoring *
~page240
Trip computer
Service interval display
Speed warning
Gearshift selector positions
Automatic transmission
Adapt ive cruise control*
Lap timer
c::> page25
c::> page 27
c::> page 81
c:> page 92
Eng ine oil temperature indica-c:> page 28
tor
Auto Check Control
Some functions and veh icle components are
scanned for their operating status when you
switch the ignition on and whi le you are driv
i ng . Malfunctions or required service proce
dures are s ignaled audib ly and ind icated by
red and yellow illuminated symbols and re
minders in the disp lay.
A WARNING
- Never rely exclusively on the outside
temperature display to determine if a road surface is icy or not. Keep in m ind
that road surfaces, especially br idges
and overpasses, could be ice covered and
slippery even at an outside temperature
above 4 1 °F (+ S
0
() .
-Always remember , even if the "snow
f lake" symbo l (ice warning) does not ap
pear in the d isp lay, black ice co uld be on
the road .
- Always reduce your speed a nd d rive with
specia l care in cold weathe r cond itions
when the chance of encountering icy
road surfaces increases.
© Tips
If the vehicle is stationa ry, or if you are
driving at a very low speed, the tempera
tu re shown in the display mig ht be s light ly
higher than the actua l outside tempera
ture . This is caused by the heat being radi
ated from the engine.
Page 41 of 286

@ Tips
The emergency release lever should never
be used as a handle for closing the lug
gage compartment lid.
Power windows
Controls
The driver can control all power windows .
Fig. 29 Sectio n of the drive r's d oor: Control s
l
I I
I
Fig. 30 Center con sole: cen tral power window sw it c h
All power window switches Q fig. 29 are pro
vided with a
two-position function:
Opening the windows
.,. Press the switch to the first stop and hold it
until the window reaches the desired posi
tion .
.. Press the switch briefly to the
second stop
to automatically open the window.
Closing the windows
.,. Pull the switch to the first stop and hold it
until the window reaches the desired posi
tion .
.,. Pull the switch briefly to the
second stop to
automatically close the window.
Opening and closing 39
Power window switches
@ Driver's door
® Passenger's door
© Left rear window
@ Right rear window
You can open or close all the windows with
the switch
Q fig. 30.
_&. WARNING ..-
- When you leave your vehicle - even if on-
ly briefly - always remove the ignition
key. This applies particularly when chil
dren remain in the vehicle. Otherwise the
children could start the engine or oper
ate electrical equipment (e.g . power win
dows). The power windows are function
al until the driver's door or passenger's
door has been opened.
- Pay close attention when closing the win dows to prevent pinching of hands or
limbs.
- When locking the vehicle from outside,
the vehicle must be unoccupied since the
windows can no longer be opened in an
emergency.
{D Tips
- When you open the doors, the windows
automatically lower about 10 mm .
- After the ignition has been switched off, the windows can still be opened or
closed for about 10 minutes. The win
dow regulators are not switched until
the driver's or passenger's door is
opened.
Page 48 of 286
46 Power top
Wind deflector
Applies to vehicles: with wind deflector
The wind deflector decreases air movement
inside the vehicle and increases driving com
fort.
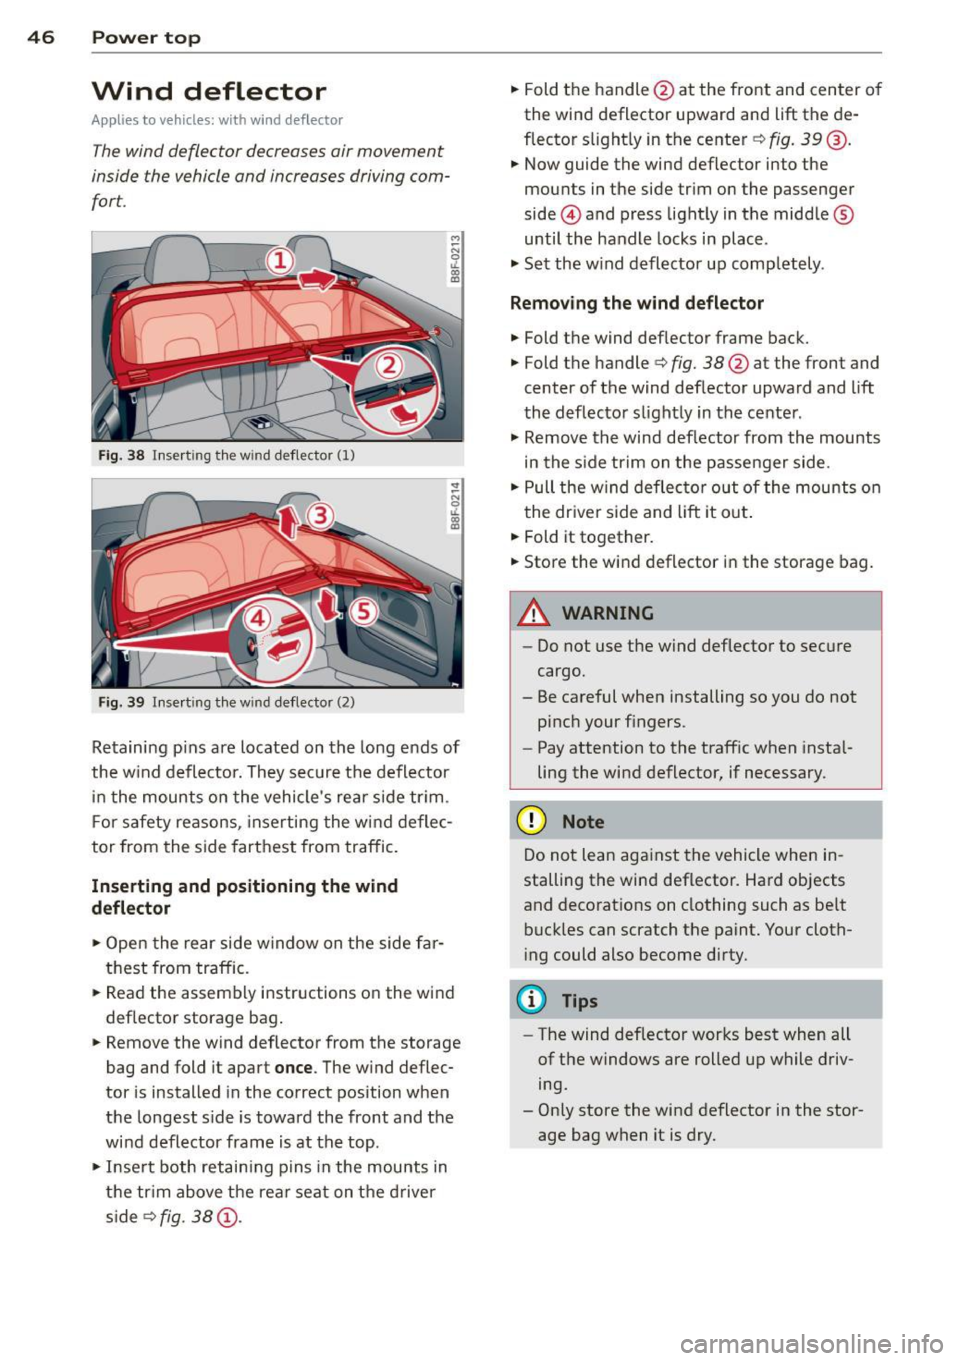
Fi g. 38 Insert ing the win d deflector (1)
Fig. 39 Inse rt in g the wind deflector (2)
Retaining pins are located on the long ends of
the w ind deflector. They sec ure the deflector
i n the mounts o n the vehicle's rear side tr im .
F or safety reasons, inserting the w ind deflec
tor from the side farthest from traffic.
Inserting and positioning the wind
d eflector
,.. Open the rear side w indow on the side far
thest from traffic.
,.. Read the assembly instructions on the wind
deflector storage bag .
,.. Remove the wind deflector from the storage
bag and fold it apart
once . The w ind deflec
tor is installed in the correct position when
the longest s ide is toward the front and the
wind deflector frame is at the top.
,.. Inse rt both retain ing pins in the mounts in
the tr im above the rear seat on the drive r
s ide s>
fig. 38 (D.
,.. Fold the handle @at the front and center o f
the wind deflector upward and lift the de
flector s light ly in the center s>
fig. 39@.
,.. Now guide the wind def lector into the
mounts in the side trim on the passenger
side @and press light ly in the middle ®
until the handle locks in place .
,.. Set the w ind deflector up comp letely .
Remo ving the wind deflector
,.. Fold the wind deflector frame back.
,.. Fold the handle
s> fig. 38@ at the front and
center of the wind deflector upward and lift
the deflector slightly in the center .
,.. Remove the wind deflector from the mounts
in the s ide trim on the passenger side .
,.. Pull the w ind deflector out of the mounts on
the driver side and lift it ou t.
,.. Fold it together.
,.. Store the wind deflector in the storage bag.
_8 WARNING
=
-Do not use the wind deflector to secure
cargo.
- Be careful when installing so you do not
pinch your f ingers.
- Pay attention to the traff ic when insta l
ling the wind deflector, if necessary.
(D Note
Do not lean aga inst the vehicle when in
stalling the wind deflector. Hard objects
and decorat ions on clothing such as be lt
buckles can scratch the paint. Your cloth
i ng could also become dirty.
{!) Tips
- The wind deflector works best when all
of the windows are rolled up while driv
ing.
- Only store the wind deflector in the stor
age bag when it is dry.
Page 56 of 286

54 Clear vis ion
The lea ving home function i lluminates the
area around the vehicle when unlocking it.
This funct ion can be switched on and
off.
The c o ming ho me and leav ing h ome func
tions on ly operate when it is dark and the
light switch is in the AUTO position
r::!) page 52, fig. 55 .
Auto headlight s*
When the light switch is in the AUTO
r::!) page 52 position, the sw itch-on po int of the
lights can be changed in the automatic driving
light function.
Daytime running lights
USA m odels: You can switch the dayt ime run
ni ng lights
on and o ff .
Canada mod els: The function cannot be
turned off .
It is activated automat ica lly each
time the ign ition is switched on.
Travel mod e*
The headlight beam is asymmetrical. This pro
vides stronger illum ination on the s ide of the
road on wh ich you are driving . If you a re driv
ing i n a count ry that d rives on the opposite
side of the road from you r own country, th is
will cause glare for oncoming dr ivers. To pre
vent glare :
- Trave l mode must be selected in vehicles
with Xenon headlights*.
- In vehicles with halogen head lights, certain
areas of the head light lenses must be cov
ered w ith wate rproof adhesive covers tha t
p revent light from passing through. For
more information, p lease see your author
i zed Audi dea ler or author ized repair fac ility .
@ Tips
When trave l mode is activated, a display in
the driver information system indicates
this each time you switch the ignitio n on.
Emergency flashers
Fi g. 5 7 Center co nsole : em ergency flashe r sw itch
The emergency flashers makes other moto
rists aware that you or your vehicle are in an
emergency situation .
... Press the switch~
r::!) fig. 57 to turn the
emergency flashers on or
off.
When the emergency flashers are on, all four
turn s ignals b link at the same time. The turn
s ignal indicator lights
H II in the instrument
cluster, as well as the l ight in the emergency
flasher switch ~ blink likewise.
You can indicate a lane change or a t urn when
the emergency flashers are switched on by us
ing t he turn signal lever. The emergency flash
ers stop temporarily .
T he emergency flashers also work when the
ignition is turned off .
T he emergency flashers wi ll tu rn on automat i
ca lly if yo u are in an accident where the airbag
has deployed.
(D Tips
You sho uld turn on the emergency flas hers
when:
- yo u are the last veh icle standing in a t ra f
fic jam so that any other vehicles corning can see you, o r whe n
- yo ur vehicle has bro ken down or you are
in an emergency s ituation, or when
- yo ur vehicle is be ing towed by a tow
t ruck or if you are towing ano ther vehicle
beh ind you .
Page 57 of 286

Interior lights
Front/rear interior lights
Fig. 58 Front headliner: inter ior lighti ng controls
Fig.
59 Rear headlin er: rear reading lights
@ Interior lights
Press the button @. The LED in the button il
l uminates .
If the LED illuminates, the interior lights turn
on automatically when you unlock the vehicle,
open a door or remove the ignition key. The in
terior lights turn off several seconds after
your close the doors, when you lock the vehi
cle or when you turn the ignition on. When a
door is open, the light turns off after a few
minutes.
@ Front/rear reading lights
To turn a reading light on/off, press the but
ton ~¢
fig. 58 or¢ fig. 59.
Clear vision 55
Instrument illumination
The basic brightness of the illumination for
the instruments, the center console and the
display can be adjusted.
Fig. 60 Instrument illumination
.,. Press the knob to release it .
.. Turn the knob toward"-" or"+" to reduce or
increase the brightness .
.,. Press the knob again to return it to its origi
nal position.
(D Tips
The instrument illumination (for dials and
needles) lights on when the ignition is
switched on and the vehicle lights are
turned off. As the daylight fades, the illu
mination of the dials likewise dims auto
matically and will go out completely when
the outside light is
very low. This feature is
meant to remind you to switch on the
headlights when outside light conditions
become poor.
Vision
Adjusting the exterior mirrors
Fig. 61 Forward sect ion of dr iver 's armrest: power mir
r or cont rols
Page 66 of 286

64 Seats and storage
Center armrest
The center armrest can be adjusted to several
levels.
Fig. 71 Armrest between the driver's/front passenger's
seats .
Adjusting the center armrest
.. To adjust the angle, raise the armrest from
the starting position ¢
fig. 71 detent by de
tent.
"To bring the armrest back into the starting
position, raise it out of the top detent and
fold it back down .
The armrest can slide forward and back .
Head restraints
Front head restraints
Applies to vehicles: with a djustable head restrain ts
Head restraints that are adjusted according
to body size, along with the seat belt , offer
effective protection.
Fig. 72 Fro nt seat: adjusting the power head rest ra in t
Adjust the head restraint so the upper edge is
as even as possible with the top of your head.
If that is not possible, try to adjust the head
restraint so that it is as close to this position
as possible ¢
page 64.
"To adjust the height of the power head re
straint*, press the button up/down
¢fig. 72.
Refer to¢ page 121, Proper adjustment of
head restraints
for guidelines on how to ad
just the height of the front head restraints to
suit the occupant's body size.
A WARNING
-
- Driving without head restraints or with
head restraints that are not properly ad
justed increases the risk of serious or fa
tal neck injury dramatically.
- Read and heed all WARNINGS
¢page 121.
(D Tips
Correctly adjusted head restraints and
safety belts are an extremely effective
combination of safety features .
Seat memory
Description
Applies to vehicles: wi th memory f unctio n
-
The memory funct ion allows you to quickly
and easily store and recall personal seating
profiles for the driver. The memory function is
operated through the master key and the
memory buttons in the driver's door .
The driver's seating profile is stored and as
signed to the master key each time the vehicle is locked. The seating profile is recalled auto
matically when the vehicle is unlocked . If two
people use one vehicle, it is recommended
that each person always uses "their own" master key.
Up to 2 seat profiles can be stored in the
memory buttons in the driver's door . Once
they are stored, these seat profiles can be se lected at any time.
In addition to the driver's seat settings, you
can also store and access the exterior mirror
adjustment settings* using the remote con
tro l key or memory button.
Page 68 of 286
66 Seat s and st o rage
A WARNING
Never put waste paper in the ashtray. Hot
ashes or other hot objects in the asht ray
could set waste paper on fire.
Cigarette Lighter
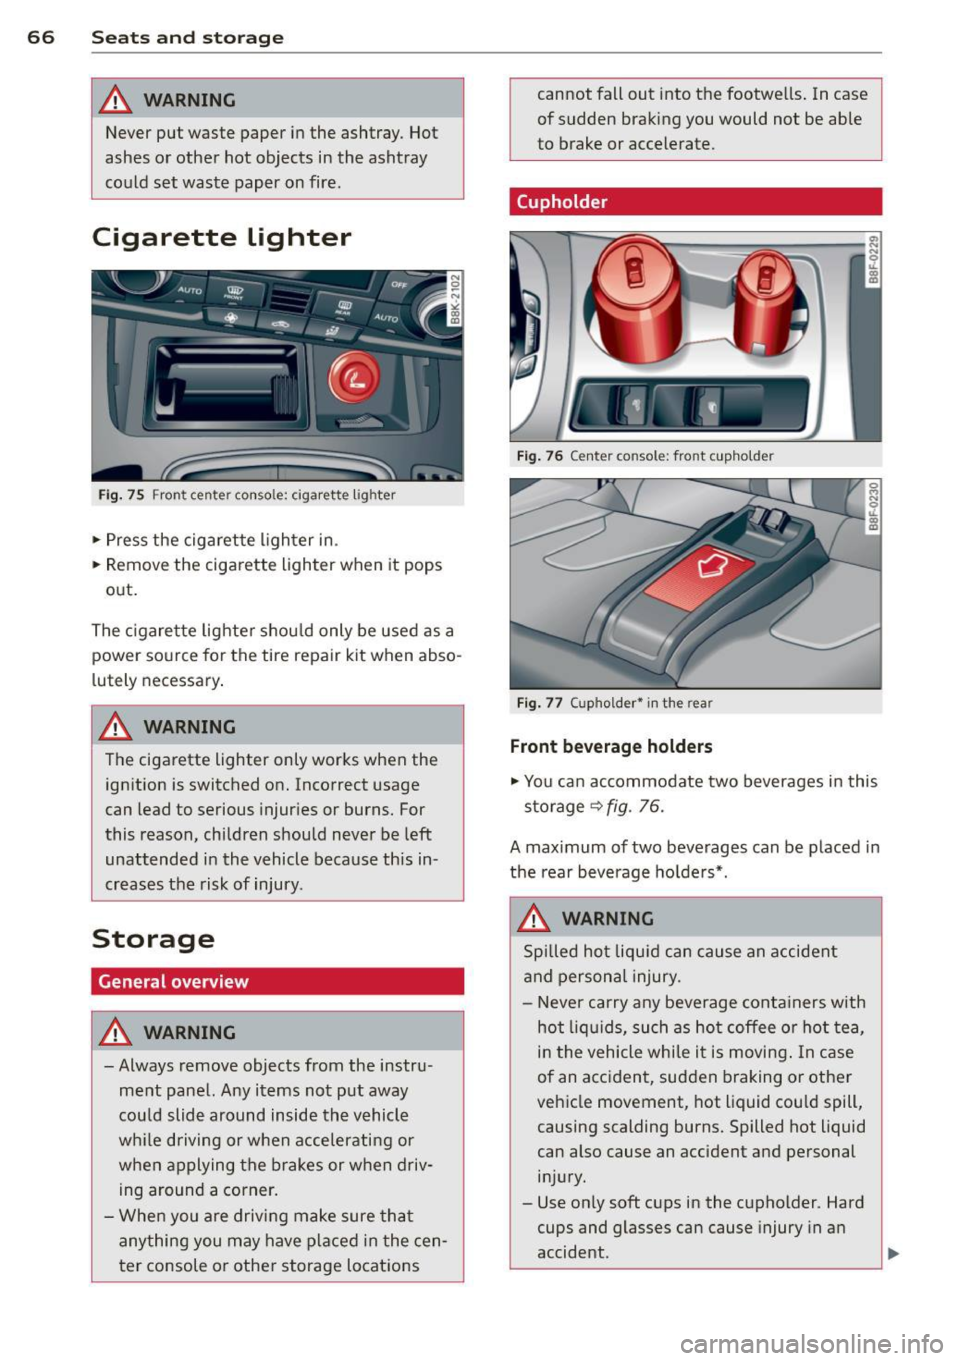
Fig . 75 Fron t center console: cigarette lig hter
.. Press the cigarette l ighter in .
.. Remove the cigarette lighter when it pops
out.
The c igarette lighte r shou ld only be used as a
power source for the tire repair
kit when abso
lutely necessary .
A WARNING
The cigarette lighter only works when the
ign ition is switched on. Incorrect usage
can lead to serious injur ies or burns. For
this reason, children should never be left
unattended in the vehicle because this in
creases the risk of injury.
Storage
General overview
A WARNING I A
- Always remove objects from the instru
ment pane l. Any items not put away
cou ld slide around inside the vehicle
wh ile driving or when accelerating or
when applying the brakes or when driv ing around a corner.
- Whe n you are drivi ng make sure that
anything you may have placed in the cen
ter console or othe r storage locat ions
-
cannot fall out into the footwe lls . In case
of sudden braking you would not be able
to brake or accelerate.
(upholder
Fig . 76 Center console : fro nt cupho lder
Fig . 77 (upholder• in the rear
Front bev erag e holder s
.. You can accommodate two beverages in this
storage
9 fig. 76.
A maximum of two beverages can be placed in
the rear beverage ho lde rs*.
A WARNING
Spi lled hot liqu id can cause an accident
and persona l injury.
-
- Never carry any beverage conta iners with
hot liq uids, such as ho t coffee or hot tea
I
in the vehicle while i t is moving . In case
of an accident, sudden braking or other
vehicle movement, hot liquid cou ld spill,
causing scalding burns. Spilled hot liquid
can also cause an accident and personal
i n jury.
- Use on ly soft cups in the cupholder. Hard
cups and glasses can cause injury in an
accident.
'--------------_J ~
Page 73 of 286
switching recirculation mode on when driving
through a tunnel or when sitting in traffic
c::>_& .
The IAU TOI button or I@ F RONT I button
switches recircu lation mode off .
IAUTO I Switching automatic mode on
Automatic mode mainta ins a constant tem
peratu re in side the vehi cle. Air temperature,
airflow and air distribution are controlled au
tomatically.
Adjusting the temperature
Temperatures between 60 °F (+16 °C) and
84
°F (+ 28 °C) can be set . Outside of this
range,
LO or HI will appear in the climate con
trol system display. At both of these settings,
the climate control system runs continuously
at maximum cooling or heating power. There
is no temperature regu lation.
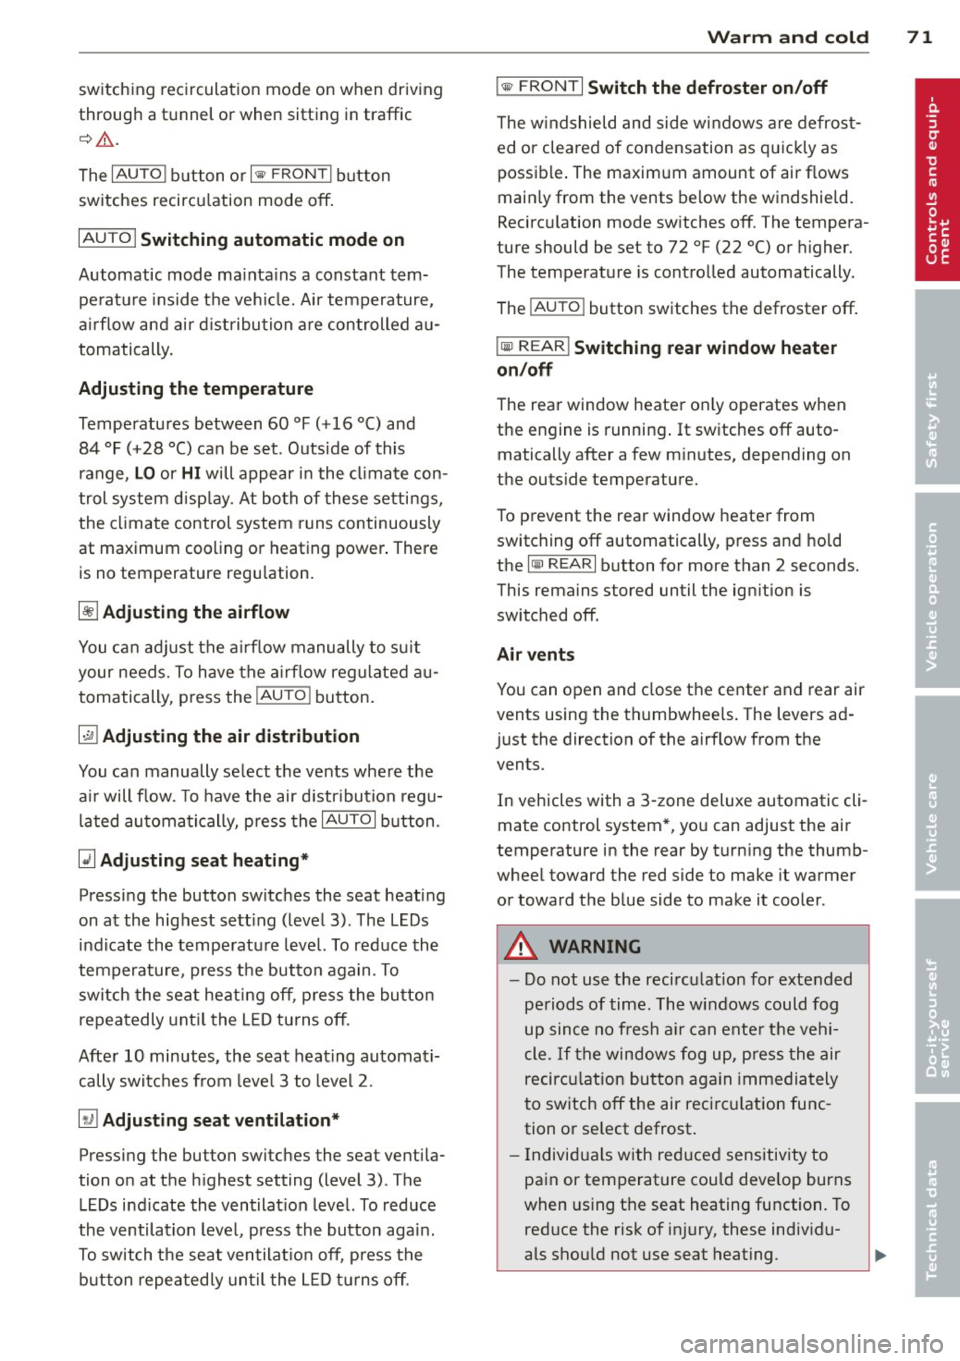
~ Adjusting the airflow
You can adjust the airflow manually to suit
your needs . To have the airflow regulated au
tomatically, press the IAUTO ! button.
~Adjusting the air distribution
You can manually select the vents where the
a ir will flow. To have the air d istr ibution regu
lat ed automatically, press the
IAUTOI button.
~ Adjusting seat heating*
Pressing the button switches the seat heating
on at the highest sett ing (level 3). The LEDs
indicate the temperature leve l. To reduce the
temperature, press the button again. To
switch the seat heating off , press the button
repeatedly until the LE D turns off.
After 10 minutes, the seat heating automati
cally switches from level 3 to level 2.
[ill Adjusting seat ventilation*
Pressing the button switches the seat ventila
tion on at the highest setting (level 3) . The
LE Ds ind icate the ventilat ion level. To reduce
the ventilation leve l, press the button aga in.
To switch the seat ventilat ion off, press the
button repeatedly until the LED turns off.
Warm and cold 71
l F RON T I Switch the defroster on/off
The w indshield and side windows are defrost
ed or cleared of condensation as quickly as
possible . The maximum amount of air flows
main ly from the vents below the windshield.
Recirc ulation mode switches off. The tempera
ture should be set to 72
°F (22 °() or higher.
The temperature is controlled automatically.
The
! AUTO I button switches the defroster off.
lliil R EAR ! Switching rear window heater
on/off
The rear window heater on ly operates when
the engine is running .
It switches off auto
matically after a few minutes, depending on
the outside temperature.
To prevent the rear window heater from
switching off automatically, press and hold
the
l oo REARI button for more than 2 seconds.
This remains stored until the ign ition is
switched off .
Air vents
You can open and close the center and rear air
vents using the thumbwheels . The levers ad
just the direction of the airflow from the
vents.
In vehicles with a 3-zone deluxe automatic cli
mate control system*, you can adjust the air
temperature in the rear by turn ing the thumb
whee l toward the red side to make it warmer
or toward the b lue side to make it cooler .
A WARNING
-Do not use the recirculation for extended
periods of time. The windows could fog
up since no fresh air can enter the vehi
cle. If the windows fog up, press the air
recircu lation button again immediately
to switch off the air recirc ulation func
tion or se lect defrost.
- Individuals with reduced sensitivity to
pain or temperature could develop burns
when using the seat heating function. To
reduce the risk of injury, these indiv idu
als should not use seat heating.
Page 76 of 286

7 4 On the road
On the road
Steering
Manually adjustable steering wheel
The steering wheel position is fully adjustable
up and down and forward and bock .
Fig. 87 Lever under the steering column
F irst, adjust the driver's seat correctly .
• Pull the lever
r:> fig . 87 <=> &_ .
• Move the steer ing whee l to the desired posi
t ion.
• Push the lever against the steering column
until it locks.
There must be at least 10 inches (25 cm) be
tween you r chest and the center of the steer
i ng wheel. If you cannot sit more than 10 in
ches (25 cm) from the steering whee l, see if
adaptive equipment is available to help you
reach the pedals and increase the distance
from the steering wheel.
F or detai led information on how to adjust the
driver's seat, see
r:> page 62.
A WARNING
Improper use of steeri ng wheel adjust
ment and improper seating position can
cause serious personal injury.
- Adjust the steering whee l co lumn on ly
when the veh icle is not moving to pre
vent loss of veh icle control.
- Adjust the driver's seat or steering wheel
so that there is a minimum of 10 inches
(25 cm) between your chest and the
steering wheel
¢ page 119, fig . 134 . If
yo u cannot mainta in this min imum dis- tance, the airbag system cannot protect
you proper ly.
- If physical limitations prevent you from
sitting 10 inches (25 cm) or more from
the steering wheel, check with your au
thorized Audi dealer to see if adaptive
equ ipment is ava ilable .
- If the steer ing wheel is aligned with your
face, the supplementa l driver's a irbag
cannot provide as much protection in an
accident . Always make sure that the
steer ing wheel is aligned with your
chest.
- Always hold the steering wheel w ith your
hands at the 9 o'clock and 3 o'clock posi
tions to reduce the risk of persona l injury
if the driver's airbag dep loys .
- Never hold the stee ring wheel at the 12
o'clock position or with your hands inside
the steeri ng wheel rim or on the steering
wheel hub . Holding the steering wheel
the wrong way can cause se rious injuries
to the hands, arms and head if the driv
er's airbag deploys.
Ignition lock
Starting engine with the key
Applies to vehicles : w ith ign ition lock
The ignition is switched on and the engine
started with the ignition key .
Fig. 88 Ignit ion key
Sta rting th e engine
• Insert the key into the ignition lock .
• Step on the brake pedal and move the selec-
tor lever to the P or N pos ition. ..,..
Page 93 of 286
![AUDI RS5 CABRIOLET 2013 Owners Manual gear. Drive to your authorized Audi dealer or
qualified repair facility immediate ly to have
the ma lfunction corrected.
[O] Transmi ssion m alfu nction: Sto p ve hicle
a nd shift t o](/img/6/57645/w960_57645-92.png "AUDI RS5 CABRIOLET 2013 Owners Manual gear. Drive to your authorized Audi dealer or
qualified repair facility immediate ly to have
the ma lfunction corrected.
[O] Transmi ssion m alfu nction: Sto p ve hicle
a nd shift t o")
gear. Drive to your authorized Audi dealer or
qualified repair facility immediate ly to have
the ma lfunction corrected.
[O] Transmi ssion m alfu nction: Sto p ve hicle
a nd shift t o park .
Do not continue driving. Select the P selector
lever position and see your authorized Audi
dealer or qualified repair facility for assis
tance.
(D Note
If the transmiss ion sw itches to emergency
mode, you shou ld take the vehicle to an
authorized Audi dealership as soon as pos
sible to have the condition corrected.
Selector lever emergency release
If the vehicle's power supply fails, the s elec
tor lever can be released in an emergency.
Fig. 101 Front center console: Removing the ash tray
i nser t
Fig. 102 Selector lever emergency release
.. To access the emergency release mecha
nism, remove the ashtray insert @ using the
release switch @r:!>
fig. 101 .
.. Loosen and remove the cap in the ashtray
mount.
T ra n sm iss io n 9 1
.. You now have access to a pin. Using a screw
driver or simi lar object, press the pin down
and hold it in that position
<=>fig. 102.
.. Now press the release button and move the
selector lever to the N position.
The selector lever can only be moved from the
P position if the key is in the lock and the igni
tion is switched on. If the power supply fails
(for example , the battery is discharged) and
the vehicle must be pushed or towed, move
the selector lever to the
N position first using
the emergency release.