engine AUDI RS5 COUPE 2015 User Guide
[x] Cancel search | Manufacturer: AUDI, Model Year: 2015, Model line: RS5 COUPE, Model: AUDI RS5 COUPE 2015Pages: 254, PDF Size: 64.12 MB
Page 20 of 254
Instruments and indicator lights
A WARNING
Your vehicle must not be towed in the event
of a malfunct ion in the electron ic steer ing col
umn lock because it cannot be stee red due to
the locked steering .
If it is towed w ith the
steering locked, there is the risk of an a cci
dent .
©-Ignition lock
• Ignition lock defective. Conta ct dealer!
If the indicator lig ht t urns on and the message
appears, do
not sw itc h the ignition off because
you may not be able to switch it on again.
Dr ive to your authorized Aud i dea ler immediately
to have the ma lfunction co rrected .
O n ve hicles w ith convenience key*, the engine
should not be sw itched off using the
I STAR T ENGIN E ST OP I button because the engine
cannot be sta rted again afte r the ig nit ion has
been swi tc h ed off .
@ Tips
The symbol's appearance might be different
in some mode ls .
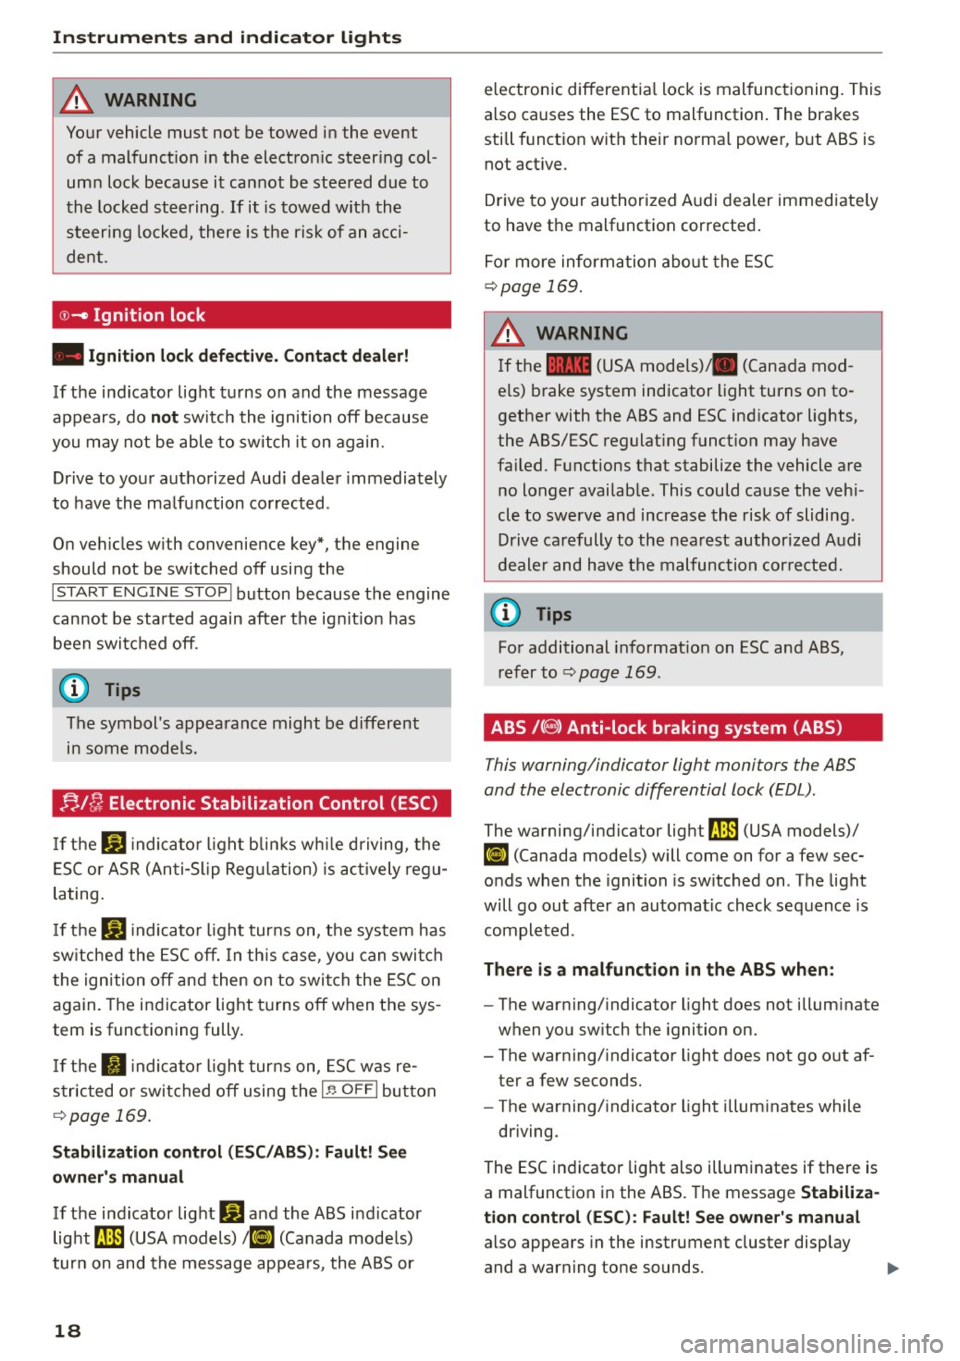
!;. !~ Electronic Stabilization Control (ESC)
If the Ji) indica to r li ght blink s while driving, the
E SC or ASR (An ti- Slip Reg ulation) is ac tively regu
lating.
If t h e DJ indicato r light tur ns on, the system has
sw itche d the ESC off. In th is ca se , you can swi tch
t he ign ition off and then on to swi tch the ESC on
again. The indicator light t urns off when the sys
tem is function ing fully.
If the II indica to r li ght tur ns on, ESC was re
s tric ted or swi tched off using the
I~ O FFI bu tton
c::> page 169.
Stabilization control (ESC /ABS ): Fau lt! S ee
owner 's manual
If the ind icator lig ht Q] and the ABS i ndicator
light ~ (USA models)
111] (Canada mode ls)
tur n on and the message ap pea rs, the ABS or
18
electronic differentia l lock is mal functioning. This
a lso causes the ESC to malfunction . The brakes
still f unct ion wit h their norma l powe r, b ut ABS is
not act ive.
Drive to your authori zed A udi dealer immediate ly
to have the malfunction corrected .
Fo r more information abo ut the ESC
c::> page 169.
A WARNING
If the 11111 (USA models) . (Canada mod
e ls) b rake system indicator light turns on to
gether with the ABS and ESC ind icator lights,
the ABS/ESC regulat ing funct ion may have
failed. F unctions that stabilize the vehicle are
no longer availab le. This could cause the vehi
cle to swerve and increase the risk of slidi ng.
D riv e ca refully to the nea rest authorized A udi
d eale r and have the m alfunc tion corre cte d.
@ Tips
Fo r additional informat ion on ESC and ABS,
ref er to c::> page l 69 .
ABS /(8 ) Anti-lock braking system (ABS)
This warning/indicator light monitors the ABS
and the electronic differential lock (EDL).
The warning/indicator light ~ (USA models)/
Ii] (Canada mode ls) will come on for a few sec
onds when the ignition is sw itched on . T he light
will go out after an automatic check sequence is
completed .
There is a malfunction in the ABS when:
-The war ning/ indicator light does not illum inate
when you sw itch the ignition on.
- The warning/ indicato r light does not go o ut af
ter a few seconds.
- The warning/ indicato r light illum inates while
driving.
The ESC in dicator lig ht also illuminates if there is
a malfunction in the ABS. The message
Stabiliza
tion control (ESC ): Fault! See owner's manual
also appears in the instrument cluster display
and a warn ing tone sounds.
Page 22 of 254
Instruments and indicator lights
co mes on in the i nstrument cl uster display,
immediately contac t your author ized Audi
dealer or qualified workshop to have all
brake pads checked o r replaced if necessary.
EPC Electronic power control
This warning/indicator light monitors the elec
tronic power control .
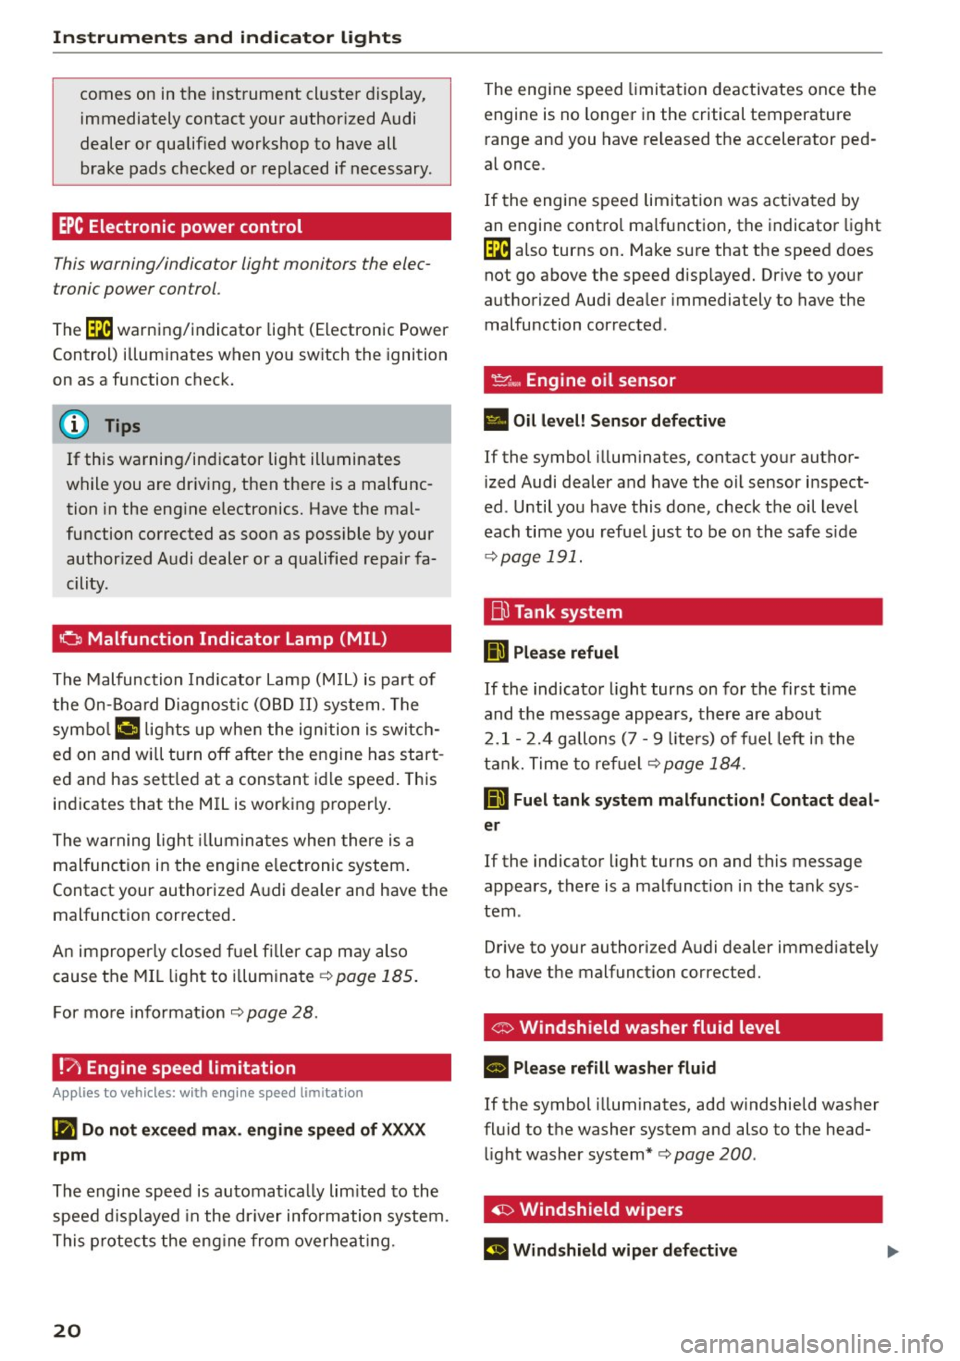
The (m warning/indicator light (Electronic Power
Control) i llum inates when yo u switch the ignition
on as a function check.
(D Tips
If this warning/indicator light ill uminates
while you are dr iv ing, then the re is a malfunc
tion in the eng ine electronics. Have the mal
fu nction corrected as soon as possible by your
author ized A udi dealer or a qualified repair fa
cility.
o Malfunction Indicator Lamp (MIL)
The Malfu nction Indicator Lamp (M IL) is part of
the On-Board Diagno stic (OB D II) system . The
symbo l
('4 lights up whe n the ign ition is switch
ed on and will turn off afte r th e engine has star t
ed an d has sett le d at a constant idle speed . This
indicates that the MIL is working proper ly.
The warning ligh t illumina tes when there is a
malfunct ion in the engine e lectronic system .
Contact your authorized A udi dealer and have the
malfunctio n corrected .
An improperly close d fu e l fi ller cap may also
cause the MIL li ght to il lum inate ¢
page 185 .
For mo re info rmat io n ¢page 28.
!?) Engine speed limitation
Applies to vehicles: with engine speed limitation
(Iii Do not ex ceed max. engine speed of XXXX
rpm
The engine speed is automatically lim ited to the
speed d isp layed in the dr iver information system.
T his protect s the eng ine from overheat ing.
20
The eng ine speed limita tion deactivates once the
engine is no longe r in the critical temperature
r ange and you have re leased t he accelerator ped
a l once .
I f the engine speed limitation was activated by
an engine contro l ma lf u nction, the indicato r light
(m also turns on. Make sure that the speed does
not g o above the speed disp layed. Dr ive to your
authorized Aud i dea ler immediately to have the
malfunction cor rected .
~~, Engine oil sensor
• Oil level! S ensor defective
If the symbol illuminates, contact yo ur author
i zed Audi dealer and have the oil sensor inspect
ed . Until you have this done, check the oil level
each time you refue l just to be on the safe s ide
¢ page 191.
ffi Tank system
IIJ Please refuel
If the indicato r light turns on for the first t ime
and t he m essage appea rs, there are about
2 .1- 2. 4 gallons (7 -9 liters) of fuel left i n the
t ank . T ime to re fuel
¢page 184.
D Fuel tank syst em malfunction! Contact deal
er
If the indicator light turns on and this message
appears , there is a malfunct io n in the tank sys
tem .
Drive to your authorized A udi dealer immediate ly
to have the malfunct ion corrected.
' G> Windshield washer fluid level
II Please refill washer fluid
If the symbol illuminates, add w indshield washer
fl uid to t he washer system and also to the head
li ght washer system*¢
page 200 .
~ Windshield wipers
El Windshield wiper defective
Page 25 of 254
"' N
0:: loo
rl I.O
"' N
"' rl
Driver information
system
Introduction
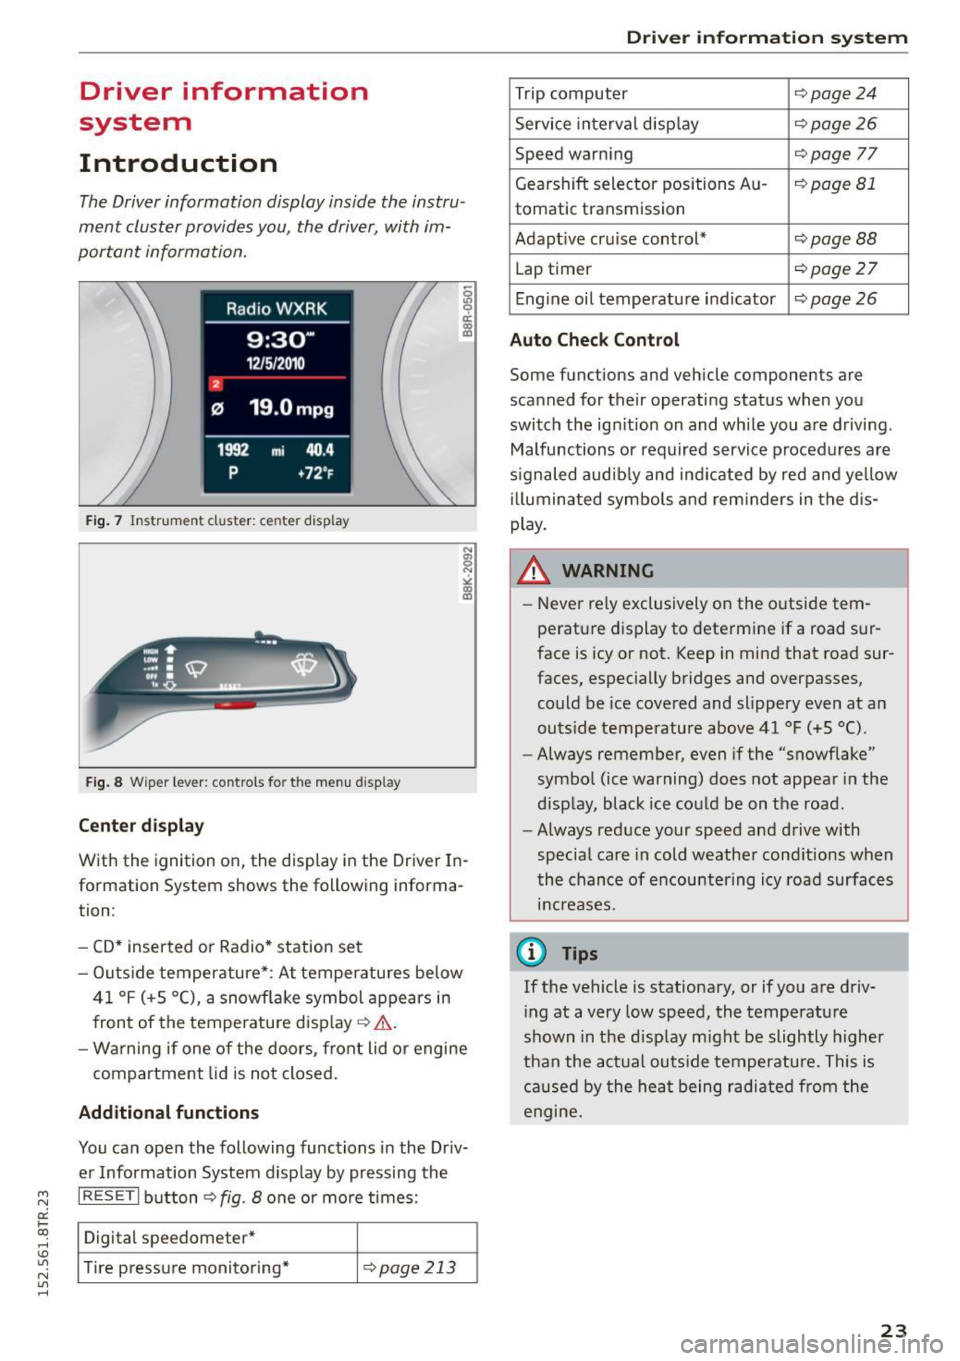
The Driver information display inside the instru
ment cluster provides you, the driver, with im
portant information.
Fig. 7 Instrument cluster: ce nter display
Fig . 8 Wipe r lever: controls fo r the men u display
Cent er dis play
With the ignition on, the display in the Driver In
formation System shows the following informa
tion :
- CD* inserted or Radio * station set
- Outs ide temperature* : At temperatures below
41 °F (+S °C), a snowflake symbol appears in
front of the temperature display¢&. .
- Wa rning if one of the doors, front lid o r engine
compartment lid is not closed.
Additional function s
You can open the following functions in the Driv
er Information System display by pressing the
I RESET I button ¢ fig. 8 one or more times:
Digital speedometer*
T ire pressure monitoring*
¢page213
Dr iver inform atio n sy stem
Trip computer Q page24
Service interval disp lay ¢page26
Speed warning Qpage 77
Gearshift selector positions Au-¢page 81
tomatic transmission
Adapt ive cruise control*
¢ page BB
Lap timer ¢page 27
Eng ine oil temperature indicator ¢ page 26
Auto Che ck Control
Some functions and vehicle components are
scanned for their operati ng status when you
switch the ign ition on and whi le you a re driving.
Malfunctions or required service procedures are
s ignaled audib ly and ind icated by red and yellow
illuminated symbols and rem inders in the dis
play.
A WARNING
-
- Never rely exclusively on the o utside tem
perature display to determine if a road sur
face is icy or not. Keep in mind that road sur
faces, especially bridges and overpasses, could be ice covered and slippery even at an
outs ide temperature above 41 °F (+5 °C).
- Always remember, even i f the "snowflake"
symbo l (ice warning) does not appea r in the
display, black ice could be on the road.
- Always reduce your speed and drive with
specia l care in cold weather cond itions when
the chance of encountering icy road surfaces
increases.
(D Tips
If the vehicle is stationary, or if you are driv
i ng at a very low speed, the temperature
shown in the disp lay m ight be slightly higher
than the act ual outs ide temperatu re. This is
caused by the heat being radiated from the
engine.
23
Page 28 of 254
Driver information system
Service interval display
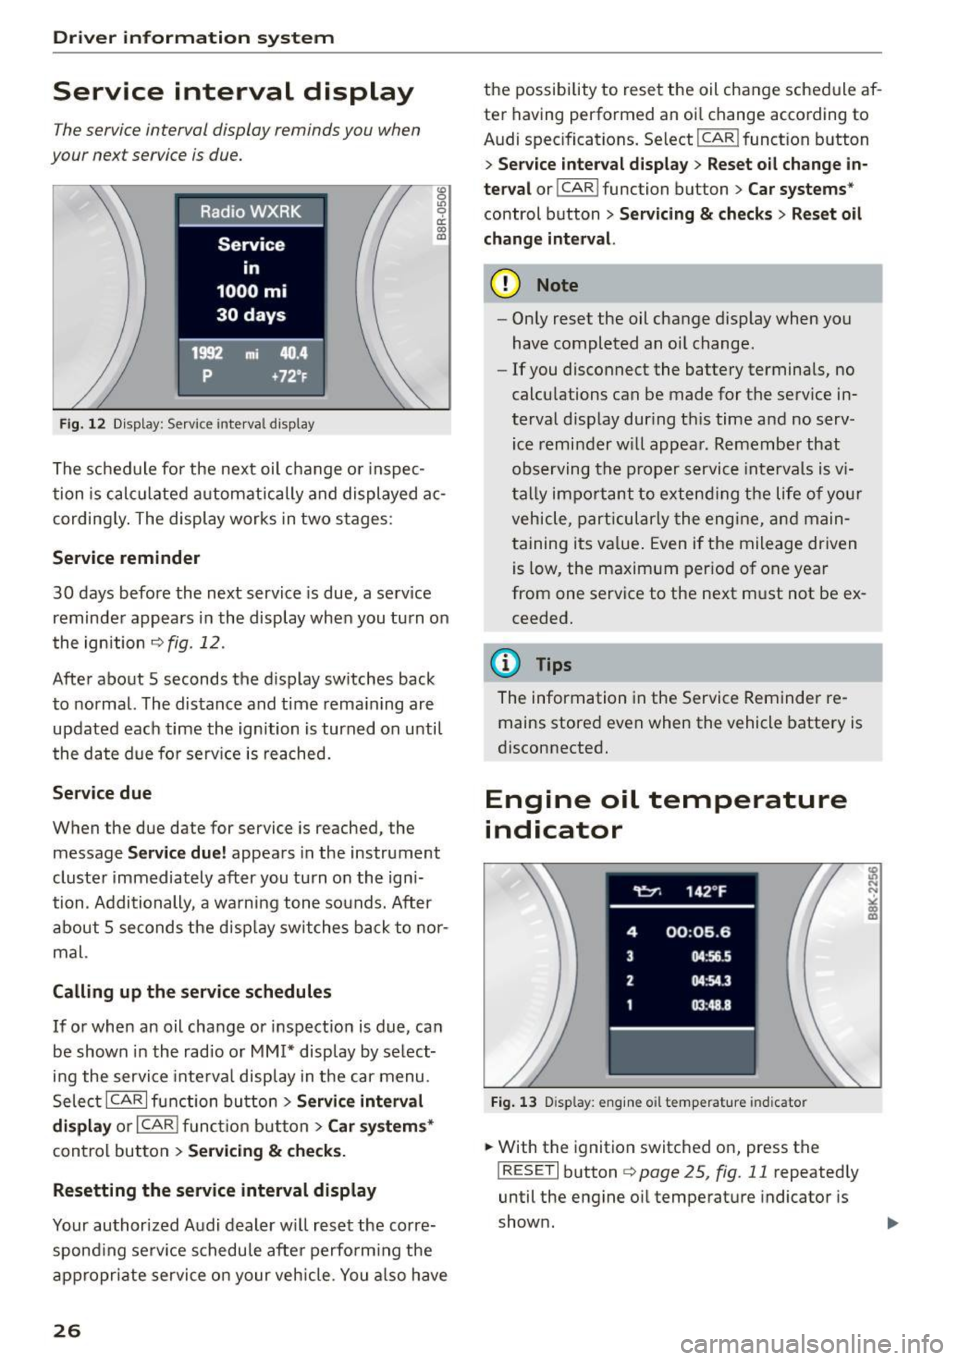
The service interval display reminds you when
your next service is due.
Fig. 12 Display: Service interva l display
"' 0 Ill 0 a: CX) (D
The schedule for the next oil change or inspec
tion is calculated automatically and displayed ac
cording ly. The display works in two stages :
Service reminder
30 days before the next service is due, a serv ice
reminder appears in the display when you turn on
the ignition
c> fig . 12.
After about 5 seconds the display switches back
to normal. The distance and time remaining are
updated each time the ignition is turned on unti l
the date due for serv ice is reached.
Service due
When the due date for service is reached, the
message
Service due! appears in the instrument
cluster immediately after you turn on the igni
tion . Additionally , a warning tone sounds. After
about 5 seconds the disp lay switches back to nor
mal.
Calling up the service schedules
If or when an oil change or inspection is due, can
be shown in the radio or
MM!* display by select
ing the service inte rval display in the car menu.
Select ICARI function button>
Service interval
display
or I CAR ! function button > Car systems*
control button > Servicing & checks.
Resetting the service interval display
Your authorized Audi dealer will reset the corre
spond ing serv ice schedule after perform ing the
appropriate service on your vehicle. You also have
26
the possibility to reset the oil change schedule af
ter having performed an oi l change according to
Audi specifications. Select
I CAR ! function button
> Service interval display> Reset oil change in
terval
o r! CAR i function button > Car systems *
control button > Servicing & checks > Reset oil
change interval.
(D Note
-Only reset the oil change display when you
have completed an oil change .
- If you disconnect the battery terminals, no
calculations can be made for the serv ice in
terval display during th is time and no serv
ice reminder will appear. Remember that
observing the proper service intervals is v i
tally impo rtant to extending the life of you r
vehicle, particularly the engine, and main
taining its value. Even if the mileage driven
is low, the maximum period of one year
from one service to the next must not be ex
ceeded.
(D Tips
The information in the Service Reminder re
mains stored
even when the vehicle battery is
disconnected.
Engine oil temperature
indicator
Fig. 13 Disp lay: eng ine o il temperature indicato r
.. With the ignition switched on, press the
! RESET! button
c> page 25, fig. 11 repeatedly
until the engine oil temperature indicator is
shown.
Page 29 of 254
"' N
0:: loo
rl I.O
"' N
"' rl
If the engine oil temperature is be low 140 ° F
(60 °C) , th <>
Ii symbol followed by three hy
phens"- --" and the °C un it is shown.
At an engine oil temperature above 140 °F
(60 °C) the engine has reached its operating tem
perature. The engine oil temperature may be
higher if there is heavy engine load and high tem
peratures outside. This is not a cause for concern
as long as the.
¢page 16 or the 1\1 ¢page 17
warn ing light in the display does not flash.
Lap timer
Introduction
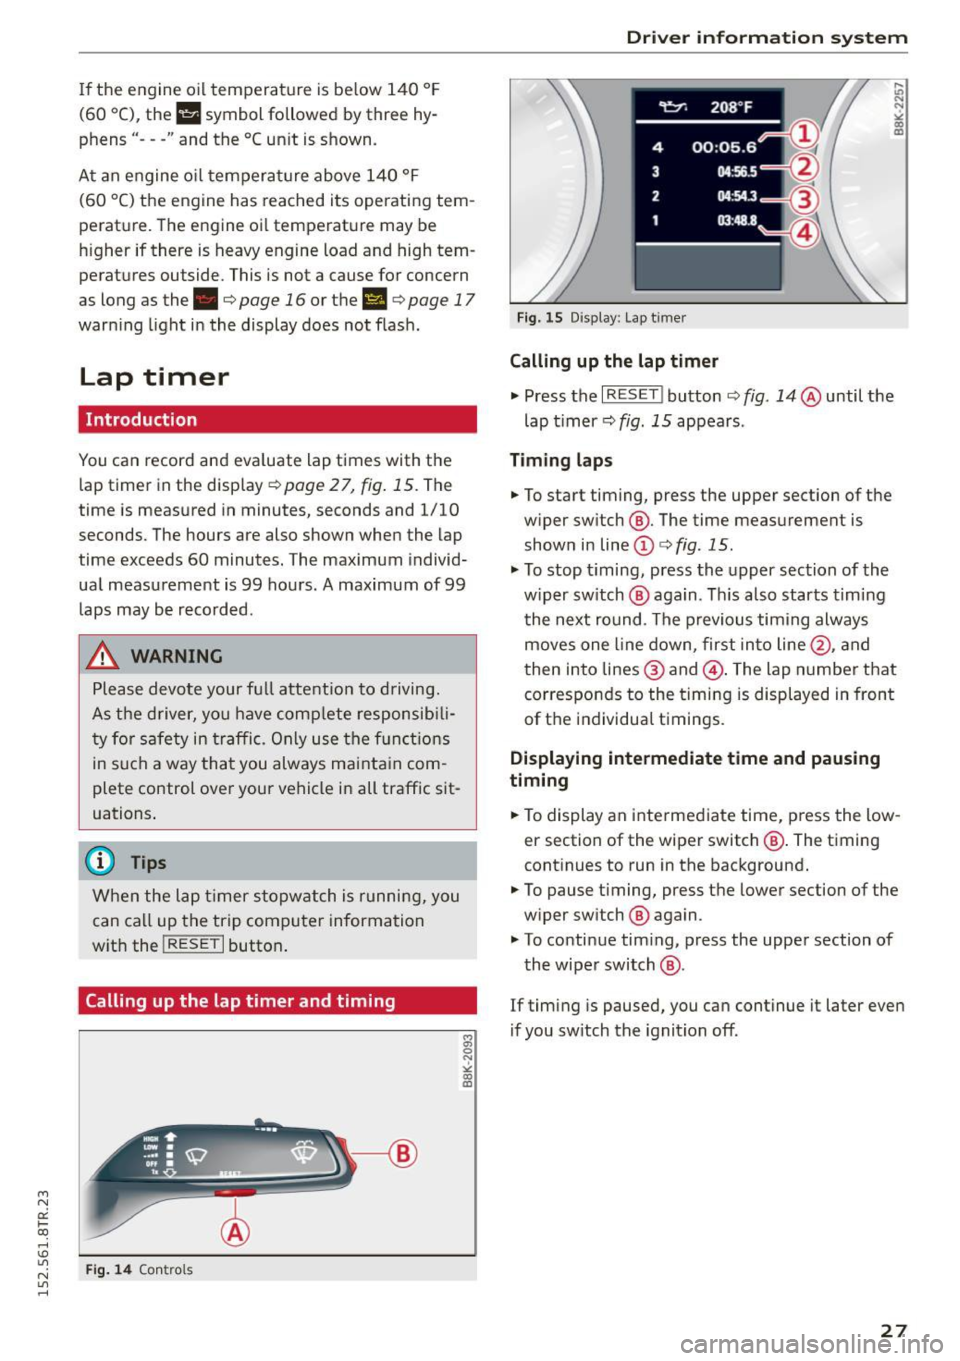
You can record and evaluate lap times with the
lap timer in the display
¢page 27, fig. 15. The
time is measured in minutes, seconds and 1/10
seconds. The hou rs are also shown when the lap
time exceeds 60 minutes. The maximum individ
ual measurement is 99 hours. A maximum of 99 laps may be recorded.
A WARNING
Please devote your full a ttention to driving.
As the driver, you have comp lete responsib ili
ty for safety in traffic. Only use the functions
in such a way that you always ma inta in com
plete control over your vehicle in all traffic sit
uations .
(D Tips
When the lap timer stopwatch is running, you
can ca ll up the trip computer information
w ith the
! RESE T I button .
Calling up the lap timer and timing
Fig. 14 Contro ls
Dri ver information system
Fig. 15 Disp lay : Lap t imer
Calling up the lap timer
.,. Press the I RESET ! button ¢ fig. 14 @until the
lap timer ¢
fig. 15 appears .
Timing laps
.,. To start timing, press the upper section of the
w iper sw itch @. The time measurement is
shown in line
(D ¢ fig . 15.
.,. To stop timing, press the upper section of the
w iper sw itch @ aga in. This also starts timing
the next round. The previous timing always
moves one line down, first into line@, and
then into lines @ and @. The lap number that
corresponds to the timing is displayed in front
of the individual t imings.
Displaying intermediate time and pausing
timing
.,. To display an intermediate time, press the low
er section of the wiper switch @. The timing
continues to run in the background .
.,. To pause timing, press the lower section of the
w iper sw itch @ again .
.,. To continue tim ing, press the upper section of
the wiper switch @.
If timing is paused, you can continue it later even
if you sw itch the ignition off .
27
Page 30 of 254
Driver information system
Evaluating times and continuing or
resetting timing
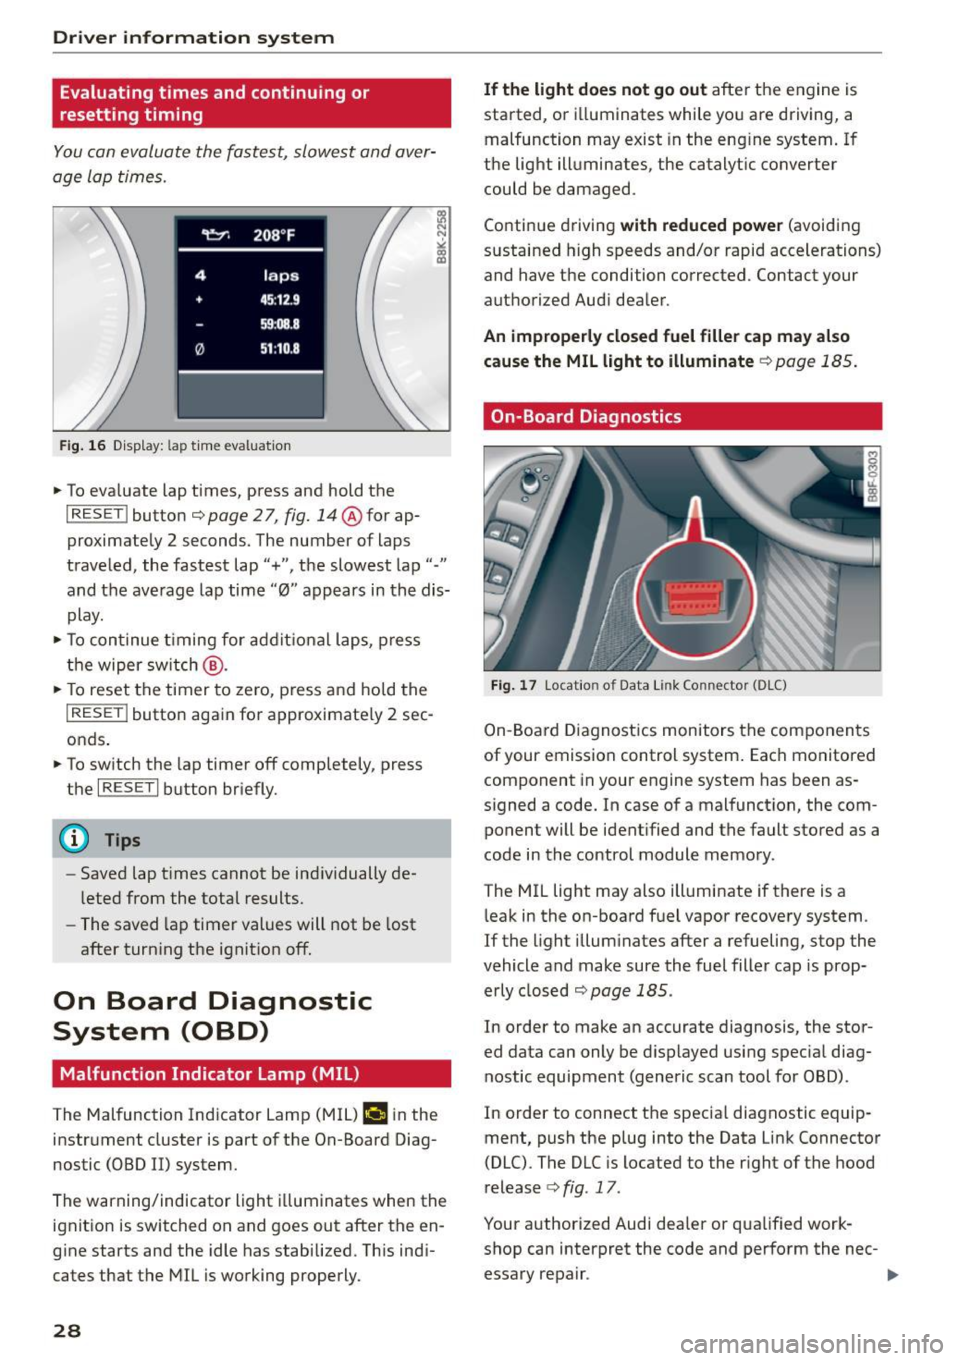
You can evaluate the fastest, slowest and aver
age Lap times.
Fig . 16 D isplay: lap t ime evaluat ion
... To eva luate lap times, press and hold the
I RESET ! button c::;, page 2 7, fig. 14@for ap
proximately 2 seconds. The number of laps
traveled, the fastest lap"+", the slowest lap"-"
and the average lap time "0" appears in the dis
play .
... To continue timing for addit ional laps, press
the wiper sw itch @.
... To reset the timer to zero, press and hold the
I RESE T! button again for approximate ly 2 sec
onds .
... To switch the lap timer off completely, press
the
I RESE T I button briefly.
(D Tips
-Saved lap t imes cannot be ind ividually de
l eted from the total results.
- The saved lap timer values will not be lost
after turn ing the ignit ion off.
On Board Diagnostic
System (OBD)
Malfunction Indicator Lamp (MIL)
The Malfunction Indicator Lamp (MIL) ¢.ij in the
instrument cluster is part of the On-Board Diag
nostic (OBD II) system.
The warning/indicator light illuminates when the
ignit ion is switched on and goes out after the en
g ine starts and the idle has stabilized. Th is ind i
cates that the MIL is working properly.
28
If the light does not go out after the engine is
started, or i lluminates while you are driving, a
malfunction may exist in the eng ine system. If
the light illuminates, the catalytic converter
could be damaged .
Continue driving
with reduced power (avoiding
sustained high speeds and/or rapid accelerations)
and have the condition corrected. Contact your
authorized Audi dealer.
An improperly closed fuel filler cap may also
cause the MIL light to illuminate
c::;, page 185.
On-Board Diagnostics
Fig. 17 Locatio n of Data Link Co nnector (O LC)
On-Board Diagnostics monitors the components
of your emission control system. Each monitored component in your engine system has been as
signed a code. In case of a malfunction, the com ponent will be identified and the fault stored as a
code in the control module memory.
The MIL light may also illuminate if there is a
leak in the on-board fuel vapor recovery system.
If the l ight illuminates after a refueling, stop the
vehicle and make sure the fuel filler cap is prop
erly closed
c::;, page 185.
In order to make an accurate diagnosis, the stor
ed data can only be displayed using special diag
nostic equipment (generic scan tool for OBD).
In order to connect the specia l diagnostic equip
ment, push the plug into the Data Link Connector
(DLC). The DLC is located to the right of the hood
release
c::;, fig . 17 .
Your authorized Audi dealer or qua lified work
shop can interpret the code and perform the nec- essary repair . .,,_
Page 33 of 254
"' N
0:: loo
rl I.O
"' N
"' rl
-If the power lock ing system should fail, you
can still open the fuel tank flap in an emer
gency
c::> page 186 .
-You are well advised not to keep valuables
inside an unattended vehicle, v isible or not.
Even a properly locked vehicle cannot pro
vide the secur ity of a safe.
- If the LED in the upper edge of the driver's
door panel comes on for about 30 seconds
after the vehicle is locked, there is a mal
funct io n in the power locking or the anti
theft warning system. Have the malfunction
corrected by an authorized Audi dealersh ip
or qualified repa ir fa cility.
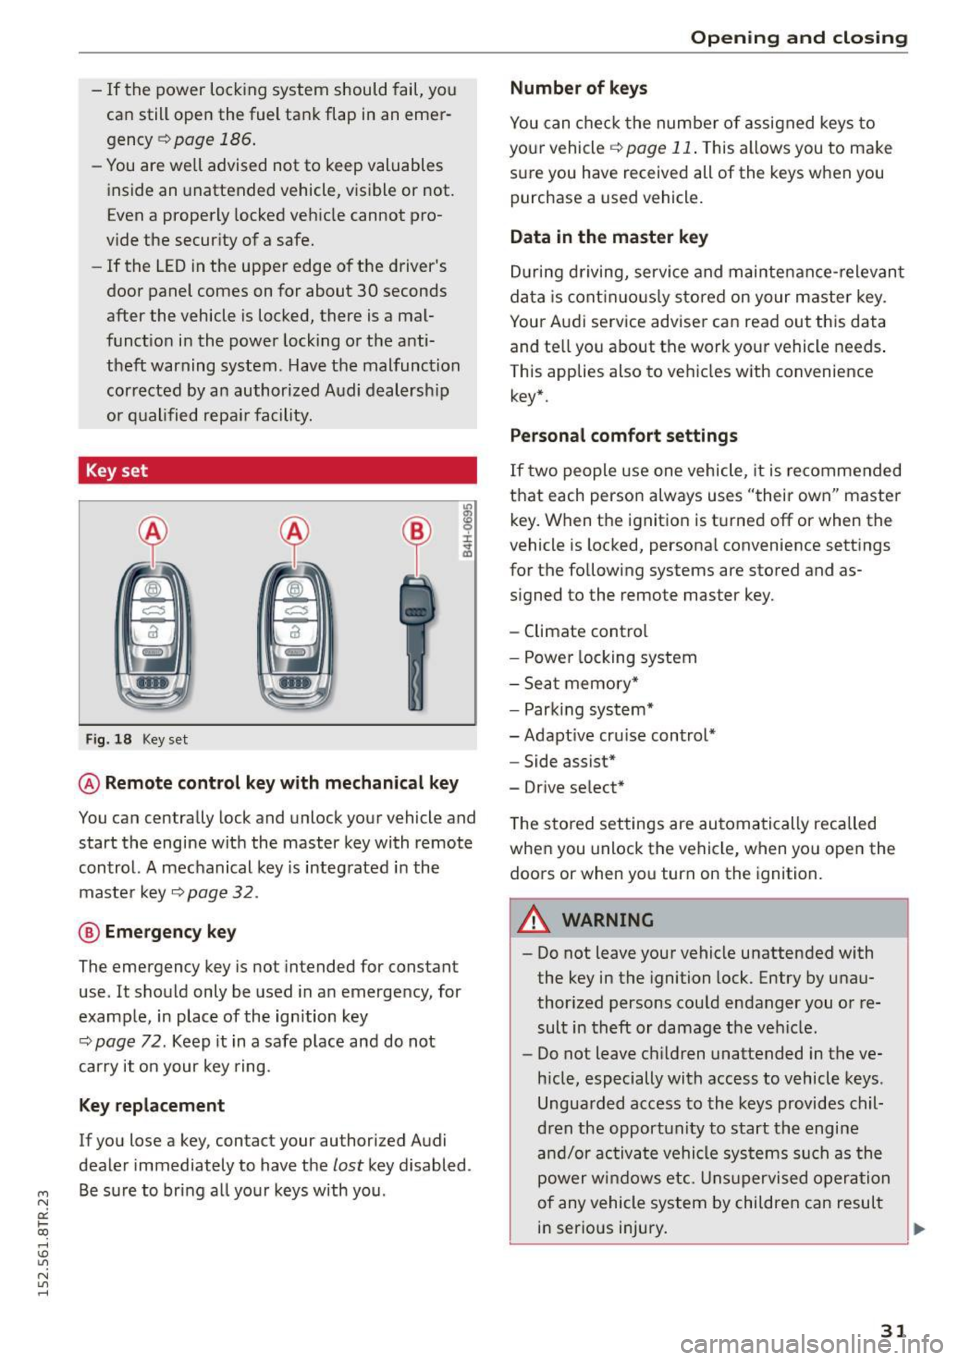
Key set
Fig. 18 Key set
@ Remote cont rol key w ith mechanical key
You can centrally lock and unlock your vehicle and
start the engine wit h the master key with remote
control. A mec hanical key is integ rated in the
master key
c::>page 32 .
@ Emergency key
The emergency key is not intended for constant
use. It should only be used in an emergency, for
example, in place of the ign ition key
c::> page 72. Keep it in a safe place and do not
carry it o n your key ring.
Key replacement
If you lose a key, contact your authorized Audi
dealer immediately to have the
lost key disabled .
Be sure to bring a ll yo ur keys with you .
Opening and clo sing
Number of keys
You can che ck the number of assigned keys to
yo ur vehicle
c::> page 11 . This allows you to make
s ur e you have received all of the keys when you
purchase a used vehicle.
Data in the mast er key
D uring d riving, service and maintenance- relevan t
da ta is cont in uo usly stored on your master key .
Your Aud i service advise r can read out this data
and te ll you about the work your vehicle needs .
This applies also to vehicles w ith convenience
key*.
Personal comfort settings
If t wo people use one vehicle, it is recommended
that each person always uses "their own" master key. When the ignition is t urned
off or when the
vehicle is locked , persona l convenience settings
for the fo llowing systems are stored and as
s igned to the remote master key.
- Climate contro l
- Powe r locking system
- Sea t memory*
- Park ing syst em*
-Adapt ive cru ise control*
- Side assist*
- Dr ive se lect*
T he sto red settings are automa tically recalled
when you unlock the vehicle, when yo u open the
doors or when you turn on the ignition.
A WARNING
- Do not leave your vehicle unattended with
the key in the ignition lock. Entry by unau
thor ized persons could endanger you or re
sult in theft or damage the veh icle.
- Do not leave ch ildren unattended in the ve
h icle, especially with access to vehicle keys .
Ungua rded access to the keys provides chil
d ren the opportunity to start the engine
a nd /or ac tivate vehicle sys tems su ch as the
power wi ndows etc. Uns upervised oper ation
of any vehicle system by chil dren can result
in serious injury.
-
31
Page 35 of 254
"' N
0:: loo
rl I.O
"' N
"' rl
Emergency unlocking of the ignition key
In the event of malfunctions in the electrical sys
tem, it may happen that you cannot remove the
ignition key.
.,. Remove the mechanical key ,=;,page 32.
.,. Lock the veh icle using the mechan ical key
,=;, page 35 .
.,. Have the electrical system inspected by an au
t h o rized Aud i dea lership.
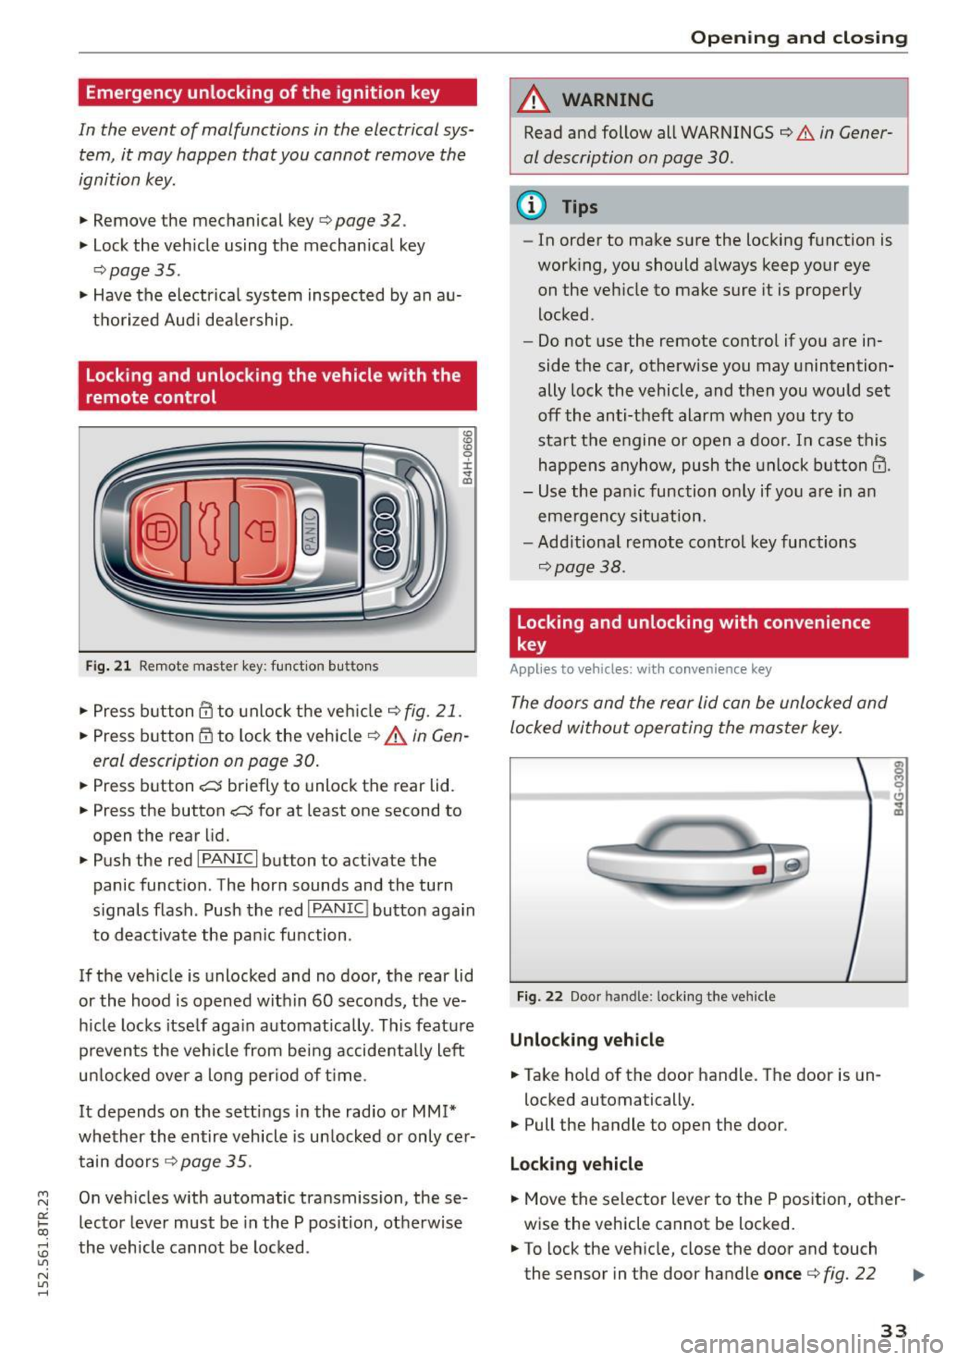
Locking and unlocking the vehicle with the
remote control
Fig . 2 1 Remote master key: funct ion butto ns
:g ID 0 :i: .,. a,
.,. Press button@ to unlock the veh icle c;, fig. 21 .
.,. Press button @to lock the veh icle c;, A in Gen
eral description on page 30 .
.,. Press button e:5 briefly to unlock the rear lid .
.,. Press the button
e:5 for at least one second to
open the rear lid .
.,. Push the red
I PANIC I button to activate the
panic funct ion . The horn sounds and the turn
s ignals flash . Push the red
I PANIC ! button aga in
to deactivate the pan ic function .
If the vehicle is unlocked and no door, the rear lid
or the hood is opened w ithin 60 seconds, the ve
h icle locks itself aga in automatically . This feature
p reven ts the vehicle from be ing accidenta lly left
un locked over a long per iod of time.
It depends on the setti ngs in the radio o r
MM!*
whether the entire vehicle is un locked or only ce r
tain doors
c;, page 35 .
On ve hicles w ith automatic transmission, these
lecto r lever must be in the P pos it ion, otherwise
the vehicl e cannot be locked .
Opening and clo sing
A WARNING
-Read and follow all WARNINGS c;, .&. in Gener-
al description on page 30 .
@ Tips
-In orde r to make sure the locking f unction is
work ing, you should a lways keep your eye
on the vehicle to make sure it is properly
locked.
- Do not use the remote control if you are in
side the car, otherwise you may unintention
ally lock the vehicle, and then you would set
off the anti-theft alarm when you try to
sta rt t he engine o r open a door. In case this
happens anyhow, pu sh th e unlock button@ .
- Use the pan ic function o nly if yo u are in a n
e m erge ncy si tuat ion.
- Add itiona l remote co ntrol key functions
c;, page 38.
Locking and unlocking with convenience
key
Applies to v ehicles: w ith c onve nienc e key
The doors and the rear lid can be unlocked and
locked without operating the master key .
Fig. 22 Door handle : lock ing the vehicle
Unlocking vehicle
.,. Take hold of the door handle . The door is un-
locked automatically.
.,. Pull the handle to open the door .
Locking vehicle
.,. Move the selector lever to the P position, ot her
wise the vehicle cannot be locked.
.,. To lock the veh icle, close the door and touch
the sensor in the door handle
once c> fig. 22
33
Page 38 of 254
Opening and closing
Once the front passenger's door has been closed,
you cannot open it again from the outside. The
door can be opened from the inside by pulling
the door handle.
A WARNING
Read and follow all WARNINGS¢.& in Gener
al description on page 30.
(D Tips
After the ignition is switched on, the power
locking system switch and the unlocking but
ton for the rear lid~ in the door are ena
bled.
Electronic immobilizer
The immobili zer prevents your vehicle from being
started by unauthorized persons .
Inside the key there is a computer chip . This chip
automatically activates/deactivates the electron ic immobilizer .
Applies to vehicles with ignition lock:
The electronic immobilizer deactivates automati
cally when you insert the remote control key into
the ignition lock.
It activates again automatically
when you remove the remote control key from
the ignition lock.
Applies to vehicles with convenience key:
If the remote control key is located inside the ve
hicle and you press the
! S TAR T ENGINE ST OPI
button, the electronic immobilizer deactivates
automatically . If you swi tch the ignition off and
remove the remote control key from the vehicle,
the electronic immobilizer activates again auto
mat ically.
A WARNING
Always take the key with you when you leave
the vehicle. The key can disarm the electronic
eng ine immobilizer and permit an unauthor
ized person to start the engine and enable op
eration of the vehicle systems such as power
window or power sunroof leading to serious personal injury.
36
@ Tips
- Th e vehicle cannot be started if an unau
thorized key is used. The vehicle may not
start if another radio device such as a key
for another vehicle or a transponder is locat ed on the key ring.
- For Declaration of Compliance to United
States FCC and Industry Canada regulations
¢ page 239 .
Luggage compartment
lid
Opening/closing rear lid
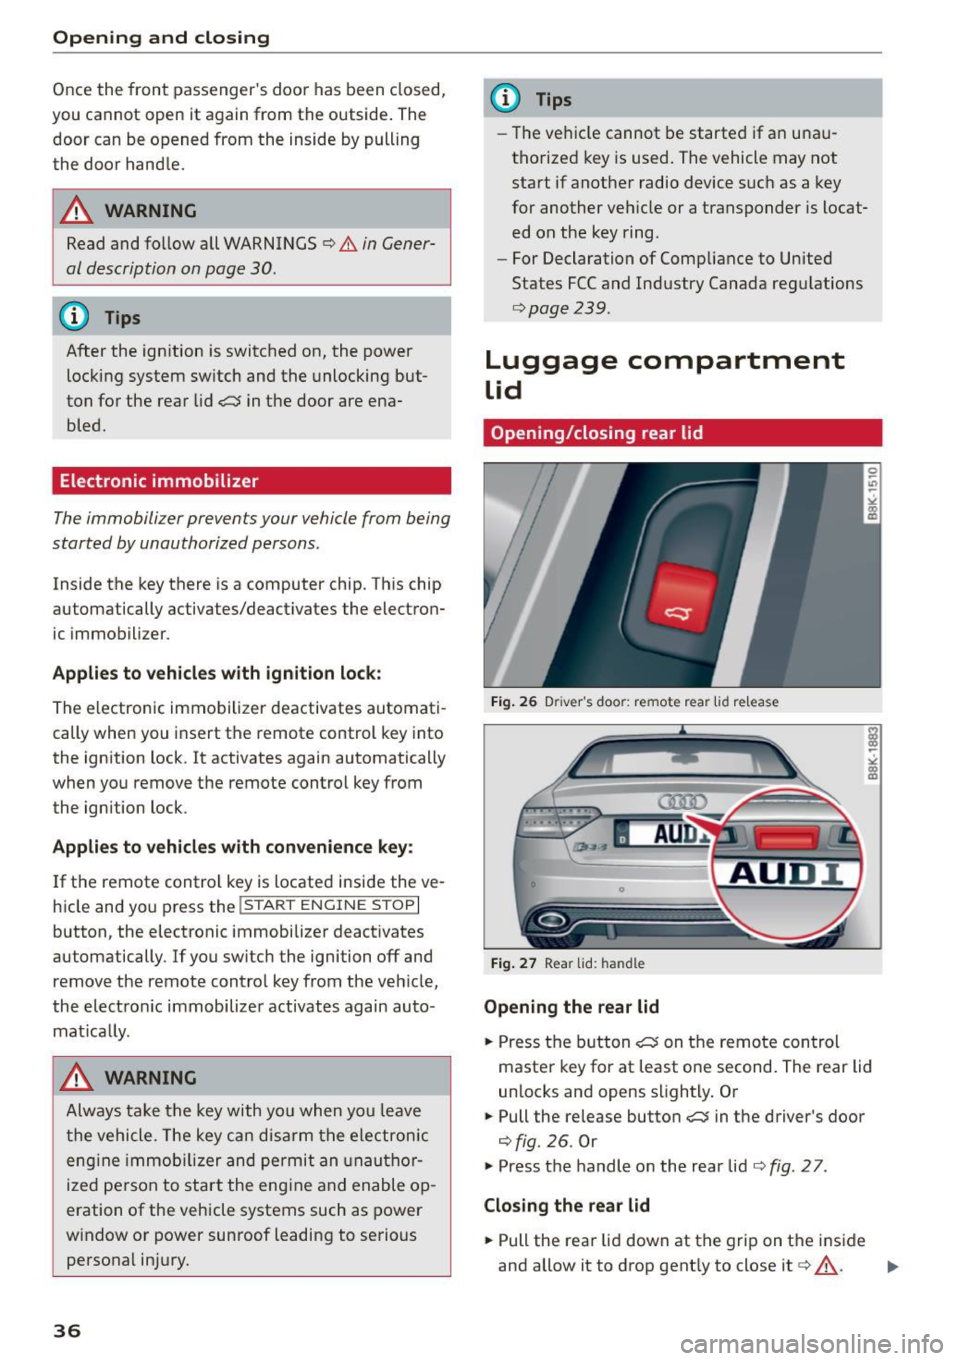
Fig. 26 Driver 's doo r: remote rear lid r elease
Fig. 27 Rear lid: handle
Opening the rear lid
.. Press the button ~ on the remote control
master key for at least one second. The rear lid
unlocks and opens slightly. Or
.. Pull the release button~ in the driver's door
¢fig. 26. Or
.,. Press the handle on the rear lid¢
fig. 27 .
Closing the rear lid
.. Pull the rear lid down at the grip on the inside
and allow it to drop gently to close it¢ .&_ . .,.
Page 40 of 254
Open in g and cl osin g
"' Pull the switch briefly to the se con d sto p to au
tomatically close the window.
A WARNING
- When you leave your vehicle -even if only
briefly -always remove the ignition key. This
applies part icularly when children remain in
the vehicle. Otherwise the children could start the engine or operate electr ical equip
ment (e.g. power w indows). The power win
dows are functional until the driver's door o r
passenger's door has been opened.
- Pay close atten tion when closing the w in
dows to prevent pinch ing of hands or limbs.
- When locking the vehicle from outs ide, the
vehicle must be unoccupied since the win dows can no longer be opened in an emer
gency.
(I) Tips
- When you open the doo rs, the windows au
tomatically lower about 10 mm.
- After the ignition has been switched off, the
windows can st ill be opened or closed for
about 10 m inutes. The window regulators
are not switched until the dr iver's or pas
senger's door is opened .
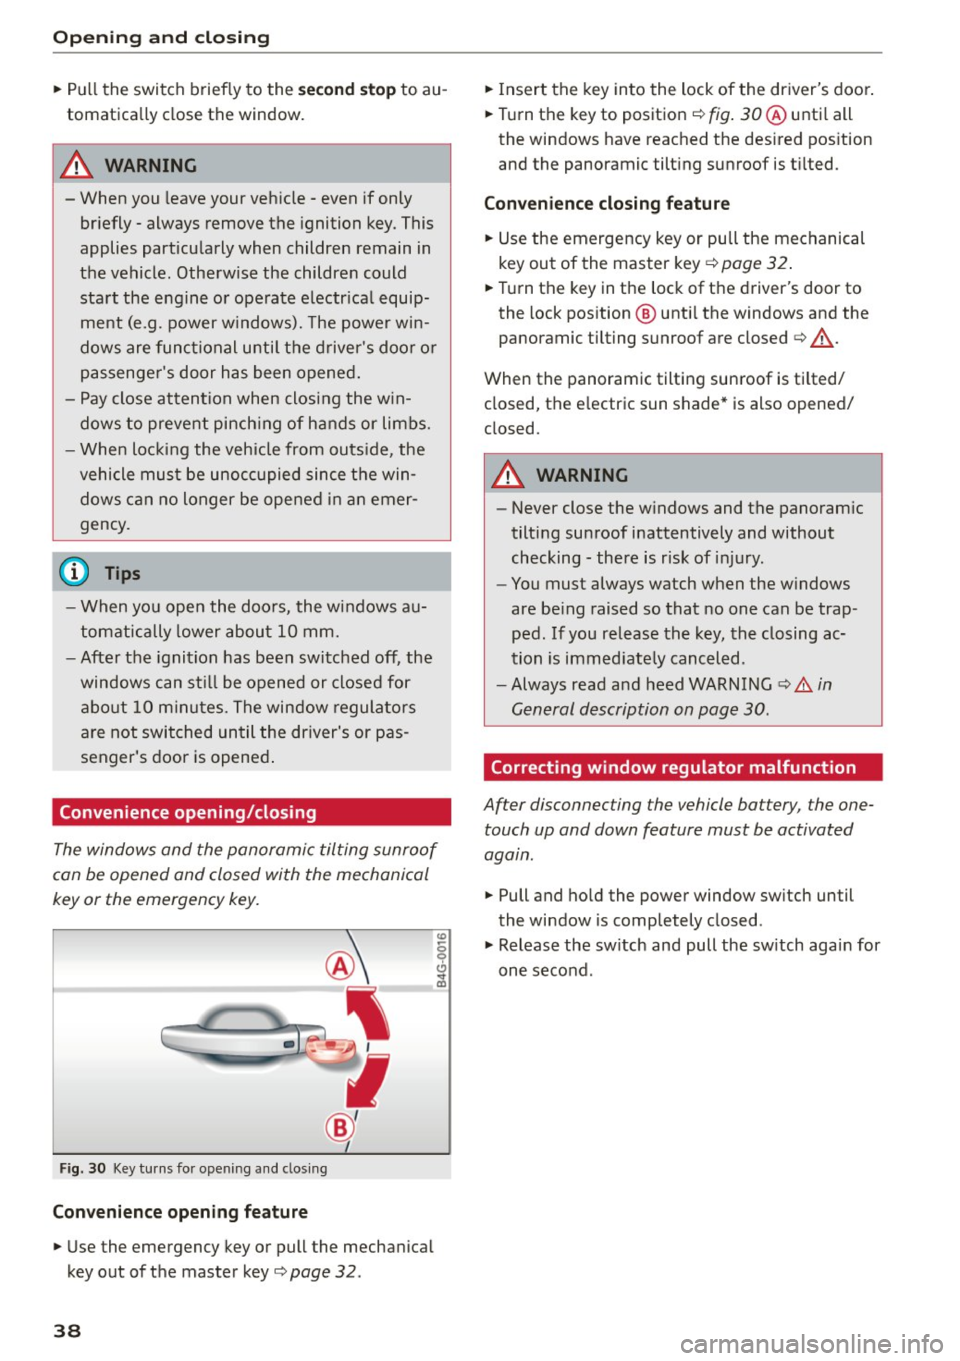
Convenience opening/closing
The windows and the panoramic tilting sunroof
can be opened and closed with the mechanical
key or the emergency key.
F ig. 30 Key turns fo r opening a nd clos ing
Conveni ence opening fe ature
"' Use the emergency key or pull the mechanical
key out of the master key
c> page 32 .
38
"'Insert the key into the lock of the driver's door .
"' Turn the key to position ¢
fig. 30 ® unti l all
the windows have reached the des ired pos ition
and the panoramic tilting sunroof is t ilted.
Con veni ence clo sing f eatur e
"'Use the emergency key or pull the mechanical
key out of the master key ¢
page 32.
"'Turn the key in the lock of the driver's door to
the lock position @ unti l the windows and the
panoramic tilting sunroof are closed
c> ,& .
When the panoramic tilting sunroof is tilted/
closed, the electric sun shade* is also opened/
closed.
A WARNING
- Never close the windows and the panoram ic
tilting sunroof inattentively and without
checking -there is risk of injury .
- You must always watch when the w indows
are be ing raised so that no one can be trap
ped. If you release the key, the closing ac
tion is immed iate ly canceled .
- Always read and heed WARN ING
c> A in
General description on page 30.
Correcting window regulator malfunction
After disconnecting the vehicle battery , the one
touch up and down feature must be activated
agatn.
"' Pull and ho ld the power window sw itch until
the window is completely closed .
"' Release the sw itch and pull the sw itch again for
one second .