clock AUDI RS7 SPORTBACK 2014 Owners Manual
[x] Cancel search | Manufacturer: AUDI, Model Year: 2014, Model line: RS7 SPORTBACK, Model: AUDI RS7 SPORTBACK 2014Pages: 292, PDF Size: 73.56 MB
Page 28 of 292
26 Instruments and warning /indicator lights
• To turn an economy message off immediate
l y after it appears, press any b utton on the
mult ifunction steer ing whee l.
(D Tips
-Once you have t urne d a fue l eco nomy
message off , it will only appear again af
ter you t urn the ignition on aga in.
- The fuel eco nomy messages are not dis
played in every instance, but rathe r in in
terva ls over a per iod of time.
Cylinder on demand System
App lies to vehicles: with 4.0 TFSI engine
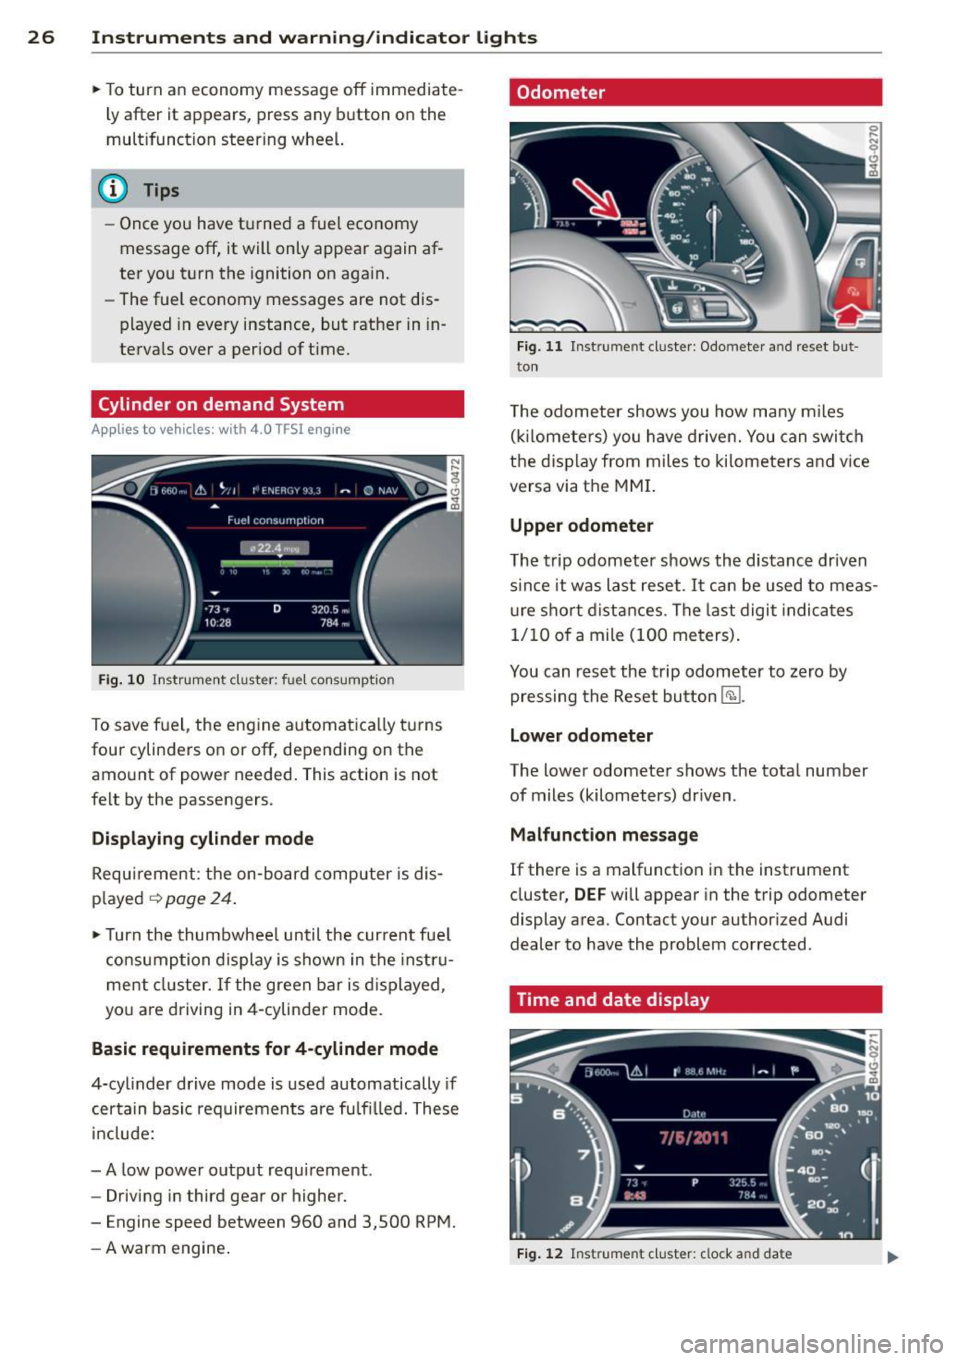
Fig. 10 In strument cluster : fu el con sumpt io n
To save f uel, the eng ine automat ica lly t urns
four cylinders on or off, depending on the
amo unt of power needed . This action is not
fe lt by the passengers.
Displaying cylinder mode
Requ irement : th e on-bo ard computer is dis
p layed
q page 24 .
• Turn the thumbwhee l until the current fue l
co nsu mp tion d isplay is shown in the in st ru
ment cluster. I f the green bar i s di splayed ,
yo u are driving in 4-cylinder mo de.
Basic requirements for 4 -cylinder mode
4-cy linder d rive mode is used automatically if
certain basi c req uiremen ts are fu lfi lled . T hese
i n cl ude:
-A low powe r outp ut requi rement .
- Driving i n third gear or higher.
- Engine speed between 960 and 3,500 RP M.
- A warm engine .
Odometer
Fig. 11 Inst ru m ent clus ter : Odo meter an d reset b ut
t o n
T he odometer shows you how ma ny m iles
( kil ome te rs ) you have drive n. You can swi tch
t h e d is pl ay from miles to ki lomete rs and v ice
versa via t he MMI.
Upper odometer
The trip odometer shows the distanc e driven
s in ce it was last reset .
It can be u sed to meas
u re s ho rt dist ances . T he last digit indica tes
1/10 o f a mile (10 0 me ters) .
You can res et the trip odometer to zero by
pressing the Reset bu tton
@J .
Lower odometer
The lower odomete r shows the tota l number
of miles (kilometers) dr iven .
Malfunct ion message
If there is a malfunct ion in the instrument
cluster ,
DEF will appear in the trip odometer
display area . Contact your author ized Audi
dealer to have the problem corrected .
Time and date display
Fig. 12 Instrume nt cluster: clock a nd da te
Page 63 of 292
Front cupholder
• To open the cupholder, tap the cover
¢fig. 61.
Rear cupholder*
• To open the rear cupholder, press on the
symbol
'i @ ¢ fig. 62.
• To adjust the arm@, swing it in the direc
t ion of the arrow.
• Place the beverage in the holder and release
the arm. The arm swings back by itself and
automatically secures the beverage.
• To close the rear cup holder, press on the
center section between the two arms and
push the cupholder in the slot as far as it
will go .
& WARNING
Spilled hot liquid can cause an accident
and personal injury.
- Never carry any beverage containers with
hot liquids, such as hot coffee or hot tea,
in the vehi cle while it is moving . In case
of an accident, sudden braking or other
vehicle movement, hot liquid could spill,
causing sca lding burns. Spilled hot liquid
can a lso cause an accident and personal
injury.
- Use only soft cups in the cupholder . Hard
cups and g lasses can cause injury in an
accident.
- Never use the cupholder or adapter as an
ashtray -risk of fire.
(D Note
On ly drink containers with lids should be
carried in the cupho lder. Liquid could spill
out and damage your vehicle's e lectronic
equipment or stain the upholstery, etc.
Seats and storage 61
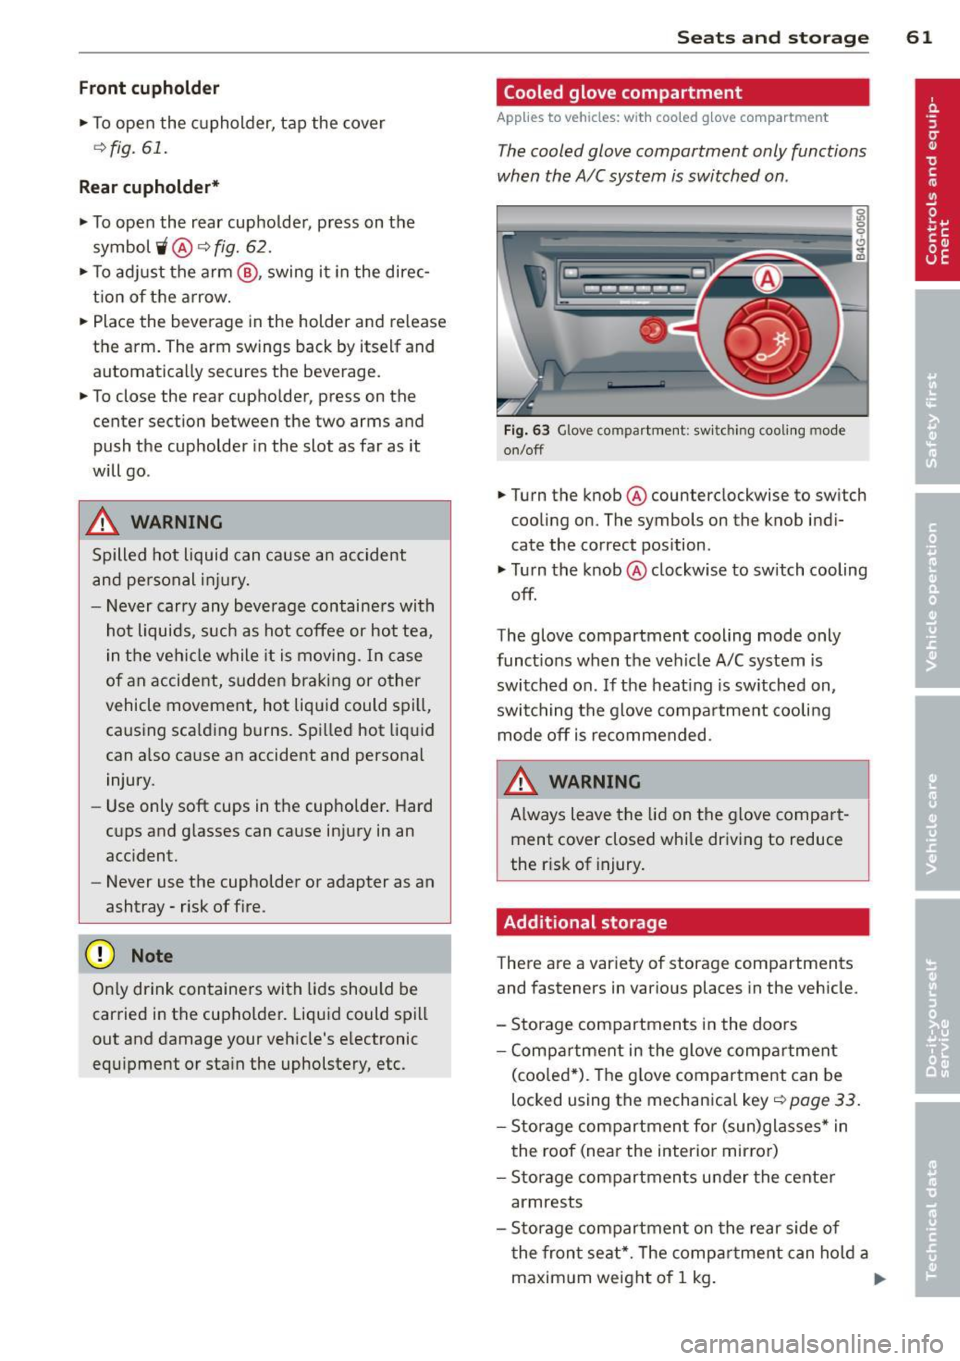
Cooled glove compartment
Applies to vehicles: w ith cooled g love compart men t
The cooled glove compartment only functions
when the AIC system is switched on .
Fig. 63 Glove compartment: sw it c h in g cooling mode
on/off
• Turn the knob@counterclockwise to switch
cooling on. The symbols on the knob indi
cate the correct position .
• Turn the knob @clockwise to switch cooling
off.
The glove compartment cooling mode only
functions when the vehicle A/C system is
switched on . If the heating is switched on,
switching the glove compa rtment cooling
mode off is recommended.
& WARNING ~ -
Always leave the lid on the glove compart
ment cover closed while driving to reduce
the r isk of injury.
Additional storage
There are a variety of storage compartments
and fasteners in various places in the vehicle .
- Storage compartments in the doors
- Compartment in the glove compartment
(coo led*) . Th e g love compartment can be
locked using the mechanica l key ¢
page 33.
-Storage compartment for (sun)glasses* in
the roof (near the interio r mirror)
- Storage compartments under the center
armrests
- Storage compartment on the rear side of
the front seat*. The compartment can hold a
maximum weight of 1 kg. ..,..
Page 75 of 292
On the road
Steering
Manually adjustable steering wheel
Applies to vehicles: with manu ally adjustable steering
w hee l
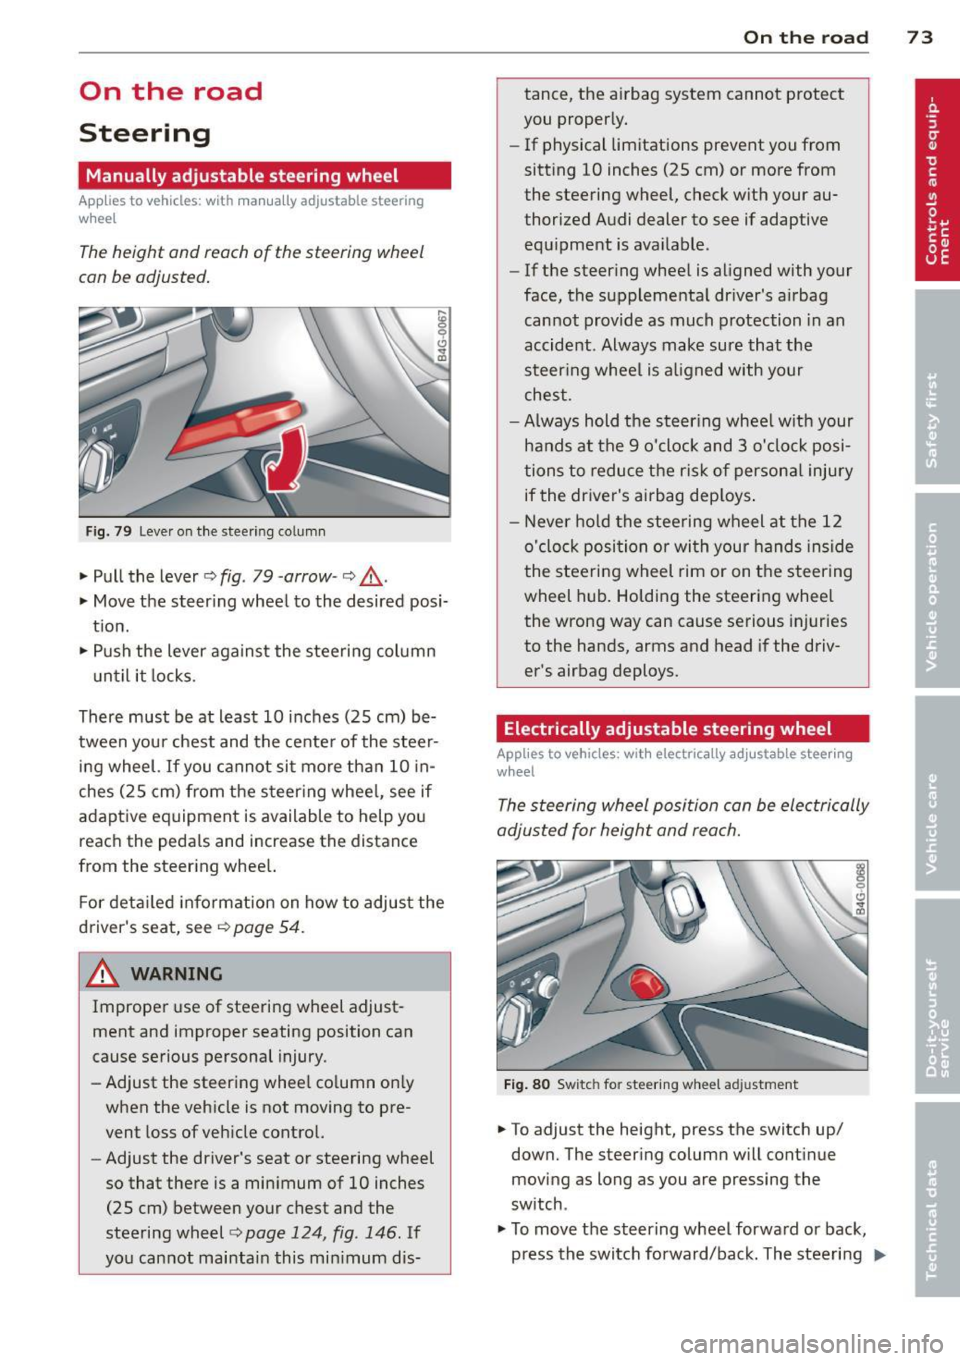
The height and reach of the steering wheel
can be adjusted .
Fig. 79 Leve r on t he steer ing co lumn
" Pull the lever¢ fig. 79 -arrow -¢_&..
"Move the steer ing whee l to the desired posi
t ion.
" Push the lever aga inst the steeri ng column
u ntil it locks.
There must be at least 10 inc hes (25 cm) be
tween your chest and the cente r of the steer
in g wheel.
If you cannot sit more than 10 in
ches (25 cm) from the s teer ing whee l, see if
adaptive eq uipment is available to help you
reach the peda ls and increase the distance
from the steer ing whee l.
F or deta iled informa tion on how to adjus t the
d river's seat, see
Q page 54.
_& WARNING
Improper use of steering wheel adjust
ment and improper seating position can
cause se rious personal injury .
- Adjust the steer ing whee l co lumn on ly
when the veh icle is not moving to pre
vent loss of veh icle cont rol.
-
- Adjust the driver's seat or steering wheel
so that there is a min imum of 10 inches
(25 cm) between your chest and the
steering wheel¢
page 124 , fig . 146. If
yo u cannot mai ntai n this min imum dis-
On the road 73
tance, the a irbag system cannot protect
you proper ly.
- If physical limitations prevent you from
sitting 10 inches (25 cm) or more from
the steering wheel, check with your au
thorized A udi dealer to see if adaptive
equ ipment is ava ilable .
- If the steer ing wheel is aligned with your
face , the suppleme nta l dr iver's a irbag
cannot provide as much protection in an
accident . Always make sure that the
steer ing whee l is a ligned with your
ches t.
- Always hold the ste ering whee l w ith your
hands at the 9 o'clock and 3 o'clock posi
tions to reduce the ris k of persona l injury
if the driver's airbag dep loys .
-Never hold the stee ring wheel at the 12
o' clock posi tion or wi th your hands ins ide
the stee rin g wheel rim or on t he steering
wheel hub . Holding the steering whee l
the wrong way can cause se rious injuries
to the hands, arms and head if the driv
er's airbag deploys.
Electrically adjustable steering wheel
App lies to vehicles: wi th electrica lly ad justable stee ring
w heel
The steering wheel position can be electrically
adjusted for height and reach.
F ig . 8 0 Switc h fo r steeri ng w hee l adju stment
"To adjust the height, p ress the switch up/
down. The steer ing column w ill cont inue
moving as long as you are press ing the
switch .
" To
move th e steering wheel forwa rd or back,
press the switch forward/back. The steering
I),-
Page 76 of 292
7 4 On the road
column will continue moving as long as you
are pressing the switch.
There must be at least 10 inc hes (25 cm) be
tween you r chest and the center of the steer
ing whee l.
If you cannot sit more than 10 in
ches (25 cm) from the steering whee l, see if
adaptive equipment is available to help you reach the pedals and increase the distance
from the steer ing wheel.
F or detai led information on how to adjust the
driver's seat, see
<::> page 54 .
In vehicles with the memory f unction* , the
steering column settings are stored together
with the seat position.
A WARNING
Improper use of steering wheel adjust
ment and improper seating position can
cause se rious personal injury.
- Adjust the steer ing whee l column on ly
when the vehicle is not moving to pre
vent loss of veh icle control.
-
- Adjust the driver's seat or steering wheel
so that the re is a min imum of 10 inches
(25 cm) between your chest and the
steering wheel ¢
page 124, fig. 146. If
you can not maintain this min imum dis
tan ce, the airbag system cannot protect
yo u properly.
- If phys ica l limi tations prevent you from
sitting 10 in ches (25 cm) o r more from
the steering wheel, check with yo ur au
tho rized Aud i dealer to see if adaptive
equipment is availab le .
- If the steering wheel is aligned with you r
face, the supp lemental drive r's airbag
cannot provide as much protect ion in an
acc ident. A lways make sure that the
steering wheel is aligned with your
chest.
- Always hold the steering wheel with your
hands at the 9 o'clock and 3 o'clock posi
t ions to reduce the risk of pe rsonal injury
if the d river 's airbag deploys.
- Never hold the steering whee l at the 12
o'clock posit ion or w ith your hands i nside the steering wheel rim or on the steering
wheel hub. Hold
ing the steer ing wheel
the wrong way can cause serious injuries
to the hands, arms and head if the driv
er 's airbag deploys.
Easy entry feature
Applies to vehicles: with electrically adjustable steering
wheel
The easy entry feature makes it easier to en
ter and exit the vehicle by automatically ad
justing the steering wheel.
.. Select in the MM I: ICARI function button>
(Car )* sys tem s control b utton > V ehicle set
ting s
> Seats > D rive r's seat > Easy entry >
On .
When the easy ent ry feature is turned on, the
steering wheel moves up to the park position
when you switch
off the ignition. After you en
ter the veh icle, the steering wheel moves to
the stored position as soon as you sw itch on
the ignit ion.
Starting and stopping
the engine
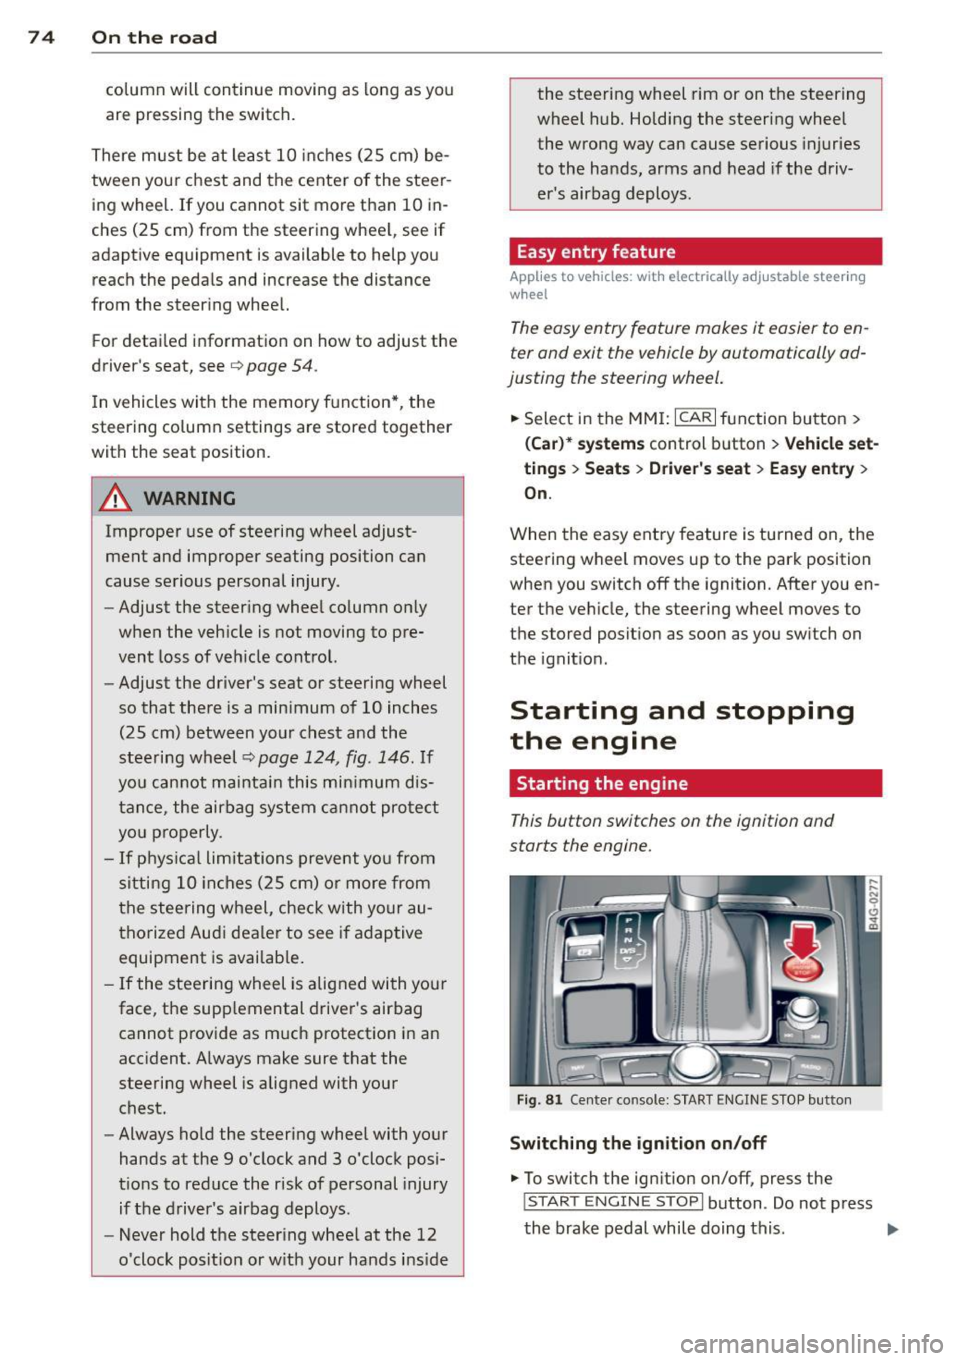
Starting the engine
This button switches on the ignition and
starts the engine.
Fig . 81 Center console: S TART ENGINE S TOP butto n
Switching the ign ition on /off
.. To switch the ign ition on/off, press the
I STAR T ENGINE ST OPI button . Do not press
the brake pedal while doing this . .,.
Page 127 of 292
~ Fasten and wear safety belts correctly
¢page 136.
~ Always keep both feet in the footwell so
that you are in control of the vehicle at all
times.
For detailed information on how to adjust the
driver's seat, see
¢ page 54 .
A WARNING
Drivers who are unbelted, out of position
or too close to the airbag can be seriously
injured by an airbag as it unfolds. To help
reduce the risk of serious personal injury:
- Always adjust the driver's seat and the
steering wheel so that there are at least
10 inches (25 cm) between your breast
bone and the steering wheel.
- Always adjust the driver's seat and the
steering wheel so that there are at least
4 inches (10 cm) between the knees and
the lower part of the instrument panel.
- Always hold the steering wheel on the
outside of the steering wheel rim with
your hands at the 9 o'clock and 3 o'clock
positions to help reduce the risk of per
sonal injury if the driver's airbag inflates.
- Never hold the steering wheel at the
12 o'clock position or with your hands at
other positions inside the steering wheel
rim or on the steering wheel hub . Hold
ing the steering wheel the wrong way
can cause serious injuries to the hands, arms and head if the driver's airbag in
flates.
- Pointing the steering wheel toward your
face decreases the ability of the supple
mental driver's airbag to protect you in a
collision .
- Always sit in an upright position and nev
er lean against or place any part of your
body too close to the area where the air
bags are located.
- Before driving, always adjust the front
seats properly and make sure that all
passengers are properly restrained.
Driving Safely 125
-For adjustable head restraints: before
driving, always also adjust the head re
straints properly.
- Never adjust the seats while the vehicle
is moving. Your seat may move unexpect
edly and you could lose control of the ve hicle .
- Never drive with the backrest reclined or
tilted far back! The farther the backrests are tilted back, the greater the risk of in
jury due to incorrect positioning of the safety belt and improper seating posi
tion .
- Children must always ride in child seats
¢ page 168. Special precautions apply
when installing a child seat on the front
passenger seat ¢
page 142.
Proper seating position for the front
passenger
The proper front passenger seating position
is important for safe, relaxed driving.
For your own safety and to reduce the risk of
injury in the event of an accident, we recom
mend that you adjust the seat for the front
passenger to the following position :
~ Adjust the angle of the seatback so that it is
in an upright position and your back comes
in full contact with it whenever the vehicle is
moving.
~ For adjustable head restraints: adjust the
head restraint so the upper edge is as even
as possible with the top of your head. If that
is not possible, try to adjust the head re
straint so that it is as close to this position
as possible
¢ page 127. Move the head re
straint so that it is as close to the back of
the head as possible.
~ Keep both feet flat on the floor in front of
the front passenger seat.
~ Fasten and wear safety belts correctly
¢ page 136.
For detailed information on how to adjust the
front passenger's seat, see
¢ page 53. .,..
•
•
Page 149 of 292
q fig. 160. The general location of the airbags
is marked "AIRBAG".
There is a lot you need to know about the air bags in your vehicle. We urge you to read the
detailed information about airbags, safety
belts and child safety in this and the other
chapters that make up the owner's literature.
Please be sure to heed the WARNINGS -they
are extremely important for your safety and
the safety of your passengers, especially in
fants and small children .
A WARNING
Never rely on airbags alone for protection.
- Even when they deploy, airbags provide only supplemental protection .
- Airbag work most effectively when used
with properly worn safety belts .
- Therefore, always wear your safety belts
and make sure that everybody in your ve
hicle is properly restrained .
- Always hold the steering wheel with both
hands on the outside of the steering
wheel rim at the 9:00 o'clock and 3:00 o'clock positions to help reduce the risk
of personal injury if the driver's airbag in
flates.
- Never hold the steering wheel at the 12
o'clock position or with your hands any
where inside the steering wheel or on the
steering wheel hub. Holding the steering
wheel the wrong way increases the risk
of severe injury to the arms, hands, and
head if the driver airbag deploys .
A WARNING
Objects between you and the airbag will
increase the risk of injury in a crash by in
terfering with the way the airbag unfolds
and/or by being pushed into you as the air
bag inflates.
- Always make sure nothing is in the front
airbag deployment zone that could be
struck by the airbag when it inflates.
- Objects in the zone of a deploying airbag
can become projectiles when the airbag
Airbag system 147
deploys and cause serious personal in
Jury.
- Never hold things in your hands or on
your lap when the vehicle is in use.
- Never place accessories or other objects
(such as cup holders, telephone brackets,
note pads, navigation systems, or things
that are large, heavy, or bulky) on the
doors; never attach then to the doors or
the windshield; never place them over or
near or attach them to the area marked
,,AIRBAG" on the steering wheel, instru
ment panel or the seat backrests; never
place them between these areas and you
or any other person in the vehicle.
- Never attach objects to the windshield
above the passenger front airbag, such
as accessory GPS navigation units or mu
sic players. Such objects could cause seri
ous injury in a collision, especially when
the airbags inflate.
- Never recline the front passenger seat to
transport objects. Items can also move
into the deployment area of the side air
bags or the front airbag during breaking
or in a sudden maneuver. Objects near
the airbags can fly dangerously through
the passenger compartment and cause injury, particularly when the seat is re
clined and the airbags inflate.
WARNING
A person on the front passenger seat, es
pecially infants and small children, will re
ceive serious injuries and can even be kil
led by being too close to the airbag when
it inflates.
- Although the Advanced Airbag System in
your vehicle is designed to turn off the
front passenger airbag if an infant or a
small child is on the front passenger
seat, nobody can absolutely guarantee
that deployment under these special conditions is impossible in all conceiva
ble situations that may happen during
the useful life of your vehicle . .,.
•
•
Page 212 of 292
210 Fuel supply and filling your fuel tank
transport fuel to use for your lawn mower,
snow blower, etc., be very careful and al
ways observe local and state laws regard
ing the use, transportat ion and storage of
such fuel containers. Make certain the con
tainer meets industry standards (ANSI/
AS TM F852 -86) .
(D Note
Never drive your vehicle until the fuel tank
is completely empty. The irregular supply
of fuel can cause misfiring. Gasoline could
enter the exhaust system and damage the
catalyt ic converter.
Refuelling
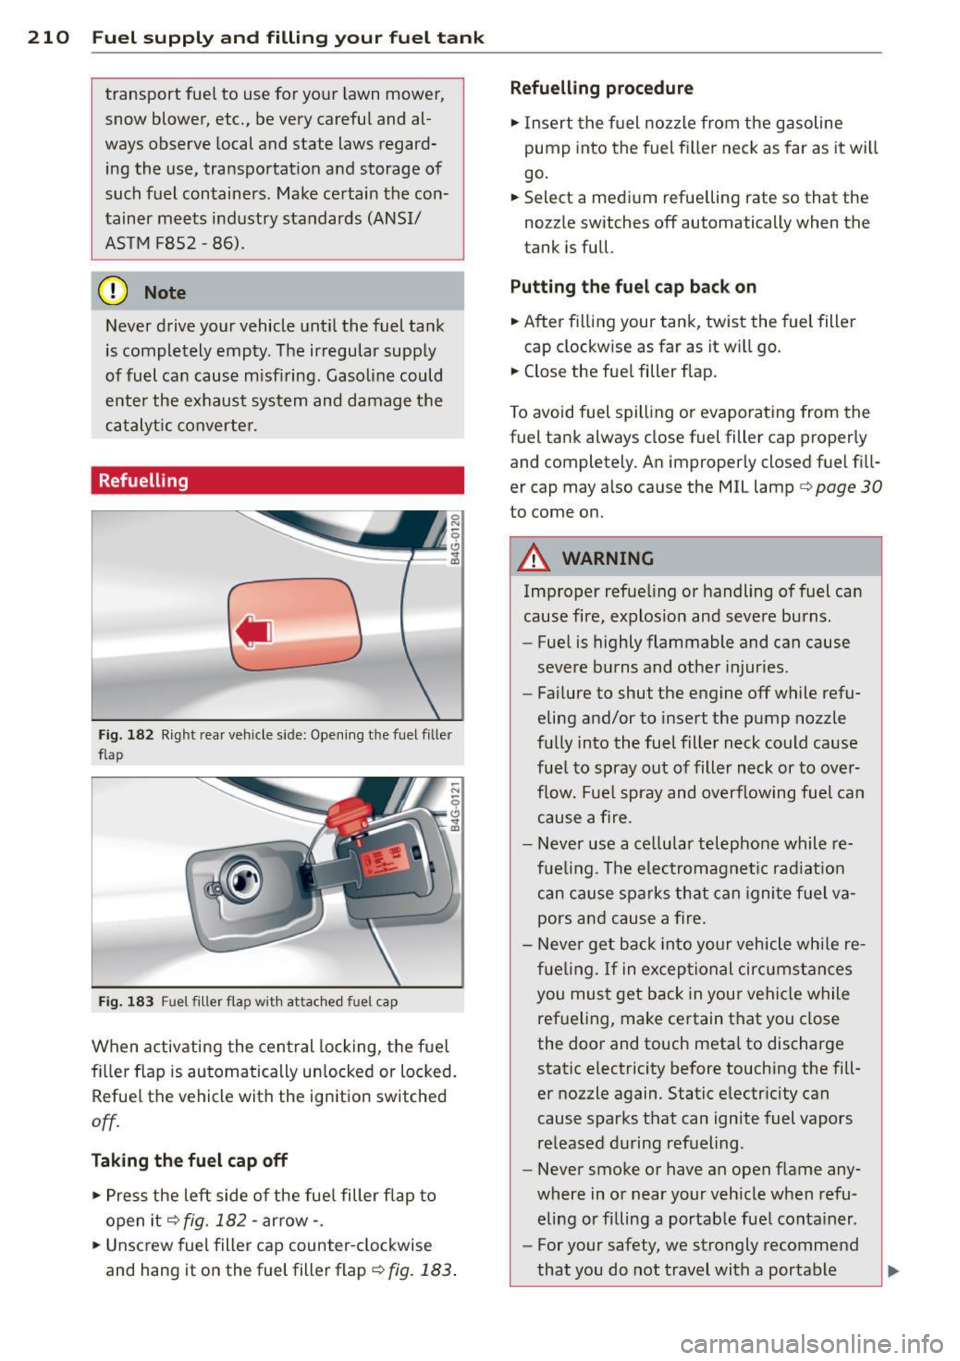
Fig. 182 Right rear vehicle side: Opening the fuel filler
flap
Fig . 183 Fuel filler flap with attached fuel cap
When activating the central locking, the fuel
fi ller flap is automatically un locked or locked.
Refuel the vehicle with the ignition switched
off.
Taking the fuel cap off
• Press the left side of the fuel filler flap to
open it
q fig. 182 -arrow-.
• Unscrew fuel filler cap counter-clockwise
and hang it on the fuel filler flap
¢ fig. 183.
Refuelling procedure
• Insert the fuel nozzle from the gasoline
pump into the fuel filler neck as far as it will
go .
• Select a med ium refuelling rate so that the
nozzle switches off automatically when the
tank is full.
Putting the fuel cap back on
• After filling your tank, twist the fuel filter
cap clockwise as far as it w ill go.
• Close the fue l filler flap.
T o avoid fuel spilling or evaporating from the
fuel tank always close fuel filter cap properly
and completely. An improperly closed fuel fill
er cap may also cause the MIL lamp¢
page 30
to come on.
A WARNING
Improper refue ling or handling of fuel can
cause fire, explosion and severe burns.
- Fuel is highly flammable and can cause
severe burns and other injuries.
- Fai lure to shut the engine off while refu
eling and/or to insert the pump nozzle
fully into the fuel filter neck could cause
fuel to spray out of filler neck or to over
flow. Fuel spray and overflowing fuel can
cause a fire.
- Never use a ce llular telephone while re
fue ling. Th e electromagnet ic rad iat ion
can cause sparks that can ignite fuel va
pors and cause a fire.
- Never get back into your vehicle whi le re
fueling.
If in exceptional circumstan ces
you must get back in your vehicle while
refueling, make certain that you close
the door and touch metal to discharge
static electricity before touching the fill
er nozzle again. Static electricity can
cause sparks that can ignite fuel vapors
released during refueling.
- Never smoke or have an open flame any
where in or near your veh icle when refu
eling or filling a portable fuel conta iner.
- For your safety, we strongly recommend
that you do not travel with a portable
Page 223 of 292
fig. 188. With a cold engine, the coolant
lev el should be between the "min" and
"max" markings. When the engine is warm,
the level may be slightly above the "max"
marking .
The location of the coolant expansion tank
can be seen in the engine compartment illus
t ration
<=> page 215.
To obtain an accurate reading , the engine
must be switched
off.
The expansion tank in your vehicle is equipped
with an electric coolant level sensor.
When the coolant level is too low, the warning
light in the Auto-Check System<=>
page 15 will
illuminate until you add coolant and the level
has been restored to normal. Even though
there is an electric coolant level sensor, we
still recommend you check the coolant level
from time to time .
Coolant loss
Coolant loss may indicate a leak in the cooling
system. In the event of coolant loss, the cool
ing system should be inspected immediately
by your authorized Audi dealer. It is not
enough merely to add coolant .
In a
sealed system, losses can occur only if
the boiling point of the coolant is exceeded as
a result of overheating.
&_ WARNING
-
The cooling system is under pressure and
can get very hot. Reduce the risk of scald
ing from hot coolant by following these
steps.
- Turn
off the engine and allow it to cool
down.
- Protect your face, hands and arms from
escaping fluid and steam by covering the
cap with a large, thick rag.
- Turn the cap slowly and very carefully in
a counter-clockwise direction while ap
plying light, downward pressure on the
top of the cap.
Checking and filling 221
-To avoid being burned, do not spill anti
freeze or coolant on the exhaust system
or hot engine parts. Under certain condi
tions, the ethylene glycol in engine cool
ant can catch fire .
(D Note
Do not add any type of radiator leak seal
ant to your vehicle 's engine coolant. Add-
ing radiator repair fluid may adversely af
fect the function and performance of your
cooling system and could result in damage
not covered by your New Vehicle Limited
Warranty.
Adding coolant
Be very careful when adding engine coolant.
Before you check anything in the engine com
partment,
always read and heed all WARN
INGS <=>.&. in Working in the engine compart
ment on page 213.
"'Turn off the engine.
"'Let the engine cool down .
"' Place a thick rag over the coolant expansion
tank
<=> page 220, fig. 191 and carefully
twist the cap counter-clockwise <=>_& .
"'Add coolant mixed in the correct ratio
<=> page 220, Coolant.
"'Twist the cap on again tightly.
Replacement engine coolant must conform to
exact specifications <=>
page 220, Coolant.
We recommend using only coolant addi-
tive G12++, G13 or in an emergency G12+. Do
not use a different additive. In an emergency
use plain water until you can get the correct
additive and can restore the correct ratio. This
should be done as soon as possible.
If you have lost a considerable amount of
coolant , then you should add cold antifreeze
and cold water only when the engine is cold.
Always use
new engine coolant when refilling.
Do not fill coolant above the "MAX" mark. Ex -
cess coolant will be forced out through the ..,.
•
•
Page 224 of 292
222 Checking and filling
pressure relief valve in the cap when the en
gine becomes hot.
.&_ WARNING
- The cooling system is under pressure and
can get
very hot. Reduce the risk of
sca lding from hot coolant by following
these steps .
- Turn off the eng ine and a llow it to cool
down.
- Protect your face, hands and arms from
escap ing flu id and steam by cover ing
the cap with a large , thick rag .
- Tu rn the cap slowly and
very carefully
in a counter -clockwise direction while
applying light, downward pressure on
the top of the cap .
- To avo id being burned, do not sp ill an
tifreeze or coolant on the exhaust sys
tem or hot engine parts. Under certain
conditions, the ethylene glycol in en
g ine coolant can catch fire.
- Antifreeze is poisonous. Always store an
t ifreeze in its original container and well
out of the reach of children.
- If you drain the coolant, it must be
caught and safely stored in a proper con
ta iner clearly marked "poison".
(D Note
- Coolant po llutes the environment and
could cause an engine fire. Excess coo l
ant will be forced out through the pres
sure relief valve i n the cap when the en
gine becomes hot .
- If, in an emergency, only water can be
added, the correct ratio between wate r
and antifreeze ~
page 220 must be re
stored as soon as possib le.
@) For the sake of the environment
Dra ined coolant should not be reused . Al
ways dispose of used coolant while
observ
ing all environmental regulations .
Radiator fan
The radiator fan switches on automatically by
itself .
An auxilia ry electric r adiator fan switches on
and off depending on coolan t tempera ture
and other vehicle operat ing condit ions .
After you switch the engine off, the aux iliary
fan can continue running for up to 10 minutes
- even w ith the ignition off . It can even swi tch
on aga in later by itself
c> .&. , if
- the temperature of the engine coo lant rises
due to the heat build-up from the engine in
the engine compartmen t, or
- the engine compartment heats up because
the vehicle is parked in intense sunlight.
.&_ WARNING ,_
- To reduce the risk of personal injury nev
er touch the radiator fan .
- The auxiliary electric fan is temperature
controlled and can sw itch on suddenly
even when the engine is not running .
- The auxiliary radiator fan sw itches on au
tomatically when the engine coo lant
reac hes a certain t emperature and wi ll
continue to run until the coolant temper
a ture drops.
Brake fluid
Checking brake fluid level
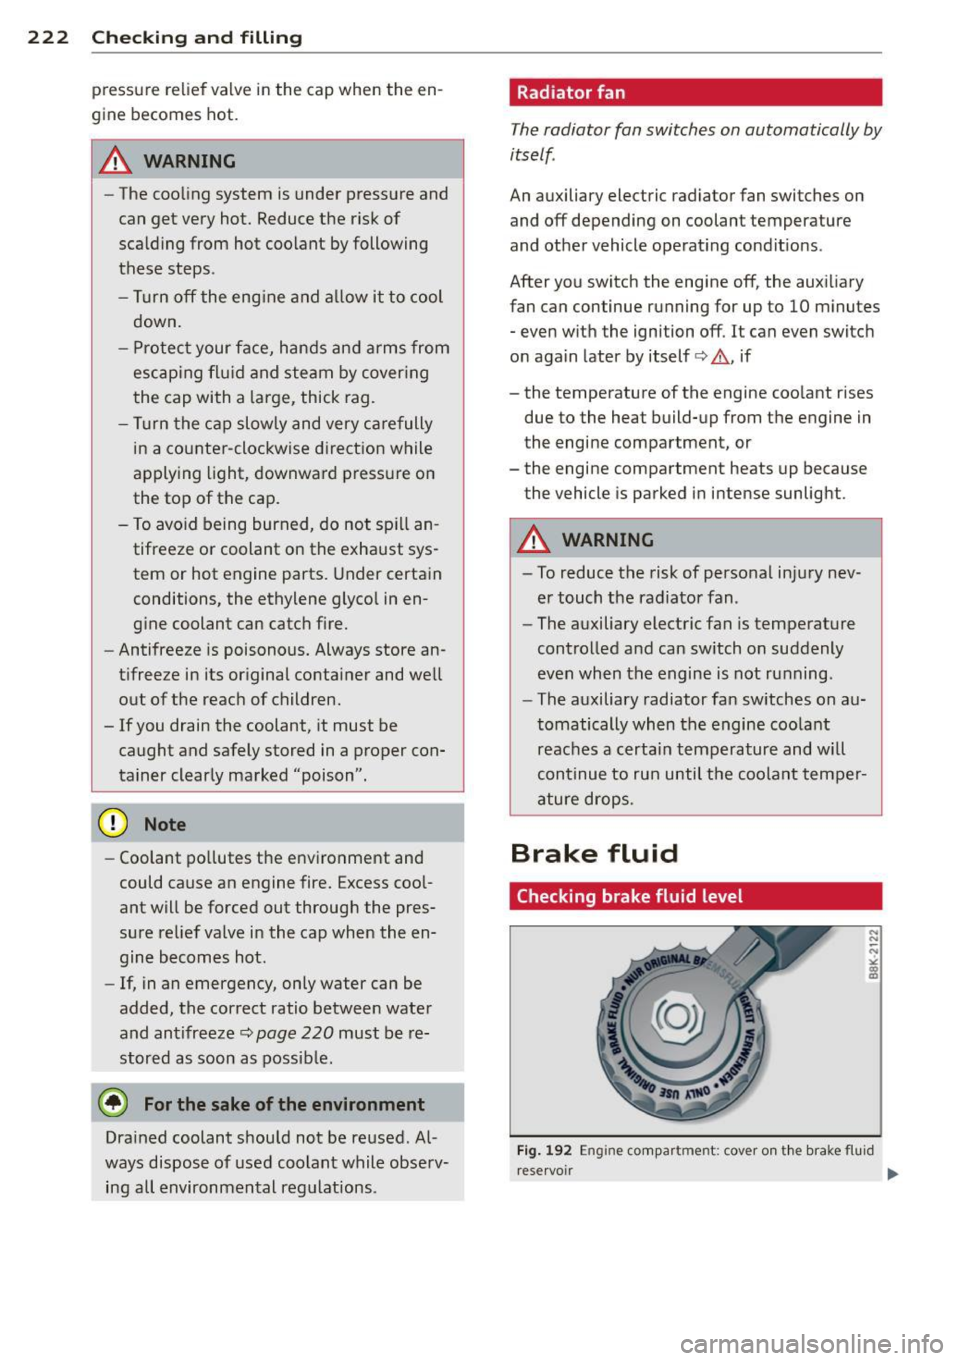
Fi g. 19 2 Engin e compart ment: cover on t he bra ke fluid
re servoir
Ill>
Page 237 of 292
-Turn the valv e stem cap counter-clockwise
to remove it from the tire valve.
- Place the air pressure gauge on the valve.
- The tire pressures should only be checked
and adjus ted when the tires are cold . The
s li ght ly raised p ressures of warm tires must
not be reduced .
- Adjust the tire pressure to the load you are
carrying .
- Re insta ll the va lve stem cap on the valve.
When should I che ck the tire pres sur e?
The correct tire pressure is espec ially impor
tant at high speeds. The pressure should
therefo re be checked at least once a month
and a lways before start ing a journey.
When should I adjust the tire p re ssure s?
Adjust the tire pressure to the load you are
carry ing . After changing a wheel
o r replacing
wheels you have to adjust the tire pressures
on all wheels. In addition , you must then
store the new ti re pressu res in the t ire pres
sure monitoring system
r::!.> page 246 .
A WARNING
Incorrect tire pressures and/or underinf la
tion can lead sudden tire failure, loss of contro l, collision, serious persona l injury
or even death.
- When the warning symbo l
[ti] appears in
the instrument cl uster, stop and inspect
the tires.
- Incorrect tire pressure and/or underinfla
t ion can cause increased tire wear and
can affect the handling of the veh icle and
stopp ing ability .
- Incorrect tire pressures and/or underin
flation can also lead to sudden tire fa il
ure, including a blowout and sudden de
flation, causing loss of vehicle control.
- The driver is responsible for the correct
tir e pressures fo r all t ires on the vehicle .
T he applicable pressu re va lues are locat
ed on a stic ker on the drive r's side B-pil
lar .
- Only when a ll t ires on the vehicle are fi l
led to t he cor rect pressure, the ti re p res-
Tire s an d wheel s 235
sure monitor ing system can work cor
rectly.
- The use of incorrect tire pressure va lues
can lead to acc idents or other damage.
Therefore it is essential that the driver
observe the spec ified t ire pressure values
for the tires and the correct pressures for
the function of the t i re p ress ure monito r
ing system .
- Always inf late t ires to the recommended
a nd correct t ire p ress ure before dr iv ing
off.
- Driving with unde rinflated tires bend
mo re, lett ing t hem get too hot resulti ng
in tread separation, s udden tire failure
and loss of cont ro l.
- Excess ive speed and/overloadi ng can
cause heat b uild- up, sudden tire failure
a nd loss of cont rol.
- If the tire pressure is too low or too high,
the t ires will wear prema turely and the
veh icle w ill not handle well.
- If the tire is not fla t and you do not have
to ch ange a wheel immedia tely, drive a t
red uced speed to the nearest service sta
tion to check the t ire p ress ure and add
air as requi red.
(D Note
Dr iving w it h out valve stem c aps can c ause
damage to the tire valves . To prevent this,
a lways make sure that factory insta lled
va lve stem caps on all whee ls are sec urely
mounted on the valve .
@ For the sake of the env ironment
Un derinflated tires wi ll also increase the
fuel consumption .
Tires and vehicle load limits
There are limits to the amount of load or
weight that any vehicle and any tire can carry.
A vehicle that is overloaded will not handle
well and is mo re d iff icult to stop. Overloading
can not o nly lead to loss of vehicle control,
but can also damage important parts of the
vehicle and c an le ad to sudden tire fa ilu re, .,..
•
•