ESP AUDI RS7 SPORTBACK 2015 Owners Manual
[x] Cancel search | Manufacturer: AUDI, Model Year: 2015, Model line: RS7 SPORTBACK, Model: AUDI RS7 SPORTBACK 2015Pages: 302, PDF Size: 74.76 MB
Page 8 of 302
6 About this Owner's Manual
This owner's manua l contains important infor
mation, tips, suggestions, and warnings for
the use of your veh icle.
Make sure that this owner's manua l is always
located in the vehicle. This is especia lly impor
tant if you allow other people to drive the ve
h icle, or if you sell it.
This owner's manua l descr ibes the
equipment
range
specified for this mode l at the editoria l
deadline date. Some of the equipment descri
bed here will on ly be available at a later date,
or only in specific markets.
Some sections in this owner's manua l do not
apply to a ll vehicles . In that case, the
range of
applicability
is g iven at the beginn ing of the
section, e.g. "Applies to vehicles: w ith Ad
vanced Parking System" . In add it ion, optional
or vehicle -specific equipment is indicated by
a n aster isk
" *" .
Illustrations may be different from those in
your vehicle, and are intended to be viewed as
a basic guide .
You will find a
table of contents at the begin
n ing of this book, which disp lays all topics de
scr ibed in this manual in order of appearance.
You will find an alphabetical
index at the end
of this book .
All
directions , such as "left", "right", "front",
''back", are relative to the direct ion of travel.
* Optional or vehicle-specific equipment
.,.. This section continues on the next page.
~ .&. Cross-reference to a "WARNING!" with
in a sect ion. For ind ication w ith a page num
ber, the corresponding "WARNING!" can be
found outside of the section .
A WARNING
Text with this symbol contains important
information on safety and how to reduce
the risk of personal injury or death.
(D Note
Text with this symbo l draws your attention
to potentia l sources of damage to your ve
hicle.
@) For the sake of the environment
Text with this symbo l contains information
abo ut the environment and how you can
help protect it.
{!) Tips
Text with this symbo l contains specia l tips
and other information about gett ing the
most out of your vehicle and its features.
Page 17 of 302
M N
0:: <.J 'SI: ,...., \!) ..,.,
,...., ..,., ,....,
Instrument s and warnin g/indic ator ligh ts 15
immediately at low speed to the nearest
authorized Audi dealer or qualified repair
facility and have the brake system in
spected .
- Always keep in m ind that after several
brake applicat ions, you will need greater
pressure on the brake pedal to stop your
vehicle . Do not rely on stra ined brakes to
respond w ith maximum stopp ing power
in critical situations. You must allow for
increased bra king distances . The extra
distance used up by fading brakes could
lead to an accident .
PARK!<®> Electromechanical parking brake
The warning/indicator light monitors the
electromechanical parking brake.
If the indicator light . (USA models)/ .
(Canada models) tu rns on, the par king b rake
was set .
• (USA mod els ) ~ (C anada mode ls) Cau
tion: V ehicle pa rk e d too stee p
If the indicator lig ht blinks and the message
appears, there is not enough braking power to
keep the vehicle from rolling. The brakes have
overheated . The vehicle could ro ll away even
on a small in cl ine.
Pr ess brake pedal to rel eas e parking brake
To release the parking brake, press the brake
pedal and press the button ~ or start driving
with s tart ing ass ist at the same t ime
c::> page 78.
Please release parking brake
To release the parking brake man ually, press
the brake pedal and press the button~ at the
same time. The parking brake on ly re leases
automatically if the driver's safety be lt is fas
tened.
Ill Parkin g brake!
If the Ill indica tor l igh t turns on and this
message appea rs, there is a p arking brake
mal function . Drive to your authorized Audi dealer or qualified workshop immediately to
have the malfunction corrected
.
_L Engine cooling system malfunction
A malfunction in the engine cooling system
must be repaired as soon as possible .
• Swit ch off en gin e and check coolant l evel
If the indicato r light turns on and the mes
sage appea rs, the coolant temperature is too
high or the coolant leve l is too low.
.,. Pull off the road .
.,. Stop the vehicle .
.,. Turn off the engine .
.,. Check coolant level
c::> page 217 .
.,. Add coo lant if necessary c::> page 218.
.,. Con tinue dr iv ing on ly afte r the engine cool
ant warning/indicator ligh t goes out .
.,. Contact yo ur authorized Audi dealer for as-
sistance if necessary.
If the engine coo lant level is correct, t hen the
radiator fan may be the ca use of the malfunc
tion .
• Coola nt temperature t oo high! Plea se let
engine run with vehicle stationary
If the indicator light turns on and the mes
sage appea rs, let the engi ne run at idle for a
f ew m in utes to cool down.
A WARNING
- If you r vehicle should brea k down for
mechanical or other reasons, park at a
safe distance from moving traffic, turn
off the eng ine and turn on the hazard
warn ing lights
c::> page 45, Emergency
flasher.
-
- Never open the hood if you see or hear
steam or coolant escaping from the en
gine compartment -you risk being scald
ed . Wait unt il you can no longer see o r
hea r steam o r coolant escap ing .
- The engine compartment of any vehicle is a dangerous area . Before you perform
any wo rk in the engine compartment,
~
Page 18 of 302
16 Instruments and warning/indicator lights
turn of the engine and allow it to cool. Follow the warning stickers
c::> page 211.
@ Note
Do not continue driving if the. symbol
illuminates. There is a malfunction in the
engine cooling system -you could damage
your eng ine.
0 Battery
This warning/indicator light detects a mal
function in the generator or in the vehicle's
electrical system.
The . warning/indicator light illuminates
when yo u switch on the ignition and must go
out after the engine has started.
• Alternator fault: Battery is not being
charged
If the indicator light turns on and the mes
sage appears, there is a ma lfunction in the
generator or vehicle e lectrica l system.
Drive to you r authorized Aud i deale r or quali
fied workshop immediately. Because the vehi
cle battery is discharging, turn off all unnec
essa ry electrical equipment such as the radio .
Seek professional assistance if the battery
charge leve l is too low.
(•) Low battery: battery will be charged
while driving
If the indicator light turns on and the mes
sage appears, there may be limited starting
ability.
I f th is message turns off afte r a litt le while,
the battery cha rged enough wh ile driving.
If the message does not turn off, have your
author ized Audi dealer or qualified workshop
correct the malfunction .
4'-Safety belts
This warning/indicator light reminds you to
put on your safety belt.
The . warn ing/ indicator light illuminates
when the ignition is switched on to remind
the driver and any front passenger to put on
the safety belt. Addit ionally, an acoustic warn
ing (gong) w ill also sound .
For more Information¢
page 130, ~ Safety
belt warning light.
"l!::7": Engine oil pressure malfunction
The red engine oil pressure warning symbol
requires immediate service or repair . Driving
with a low-oil-pressure indication is likely to
inflict severe damage to the engine .
• Switch off engine and check oil level
If the indicator light turns on and the mes
sage appears, the oi l pressu re is too low.
.,. Pull off the road .
.,. Stop the vehicle.
.,. Turn off the engine .
.,. Check the engine oil level c::> page 21 S.
.,. If the engine o il level is too low, add eng ine
oil
¢ page 215. Make sure that the oil pres
sure warning symbol. appears no longer
in the display before you start dr iv ing again .
.,. If the engine o il level is correct and the indi
cator light still turns on, turn the engine off
and do not continue driving. Seek professio
na l assistance .
@ Tips
- The engine oil pressure symbol. is
not an indicator for a low engine oil lev
el. Do not rely on it. Instead, check the
oil level in your engine at regular inter
vals, preferably each time you refuel,
and always before going on a long trip.
- The yellow oil level warning indication
II requires oil refill or workshop serv
ice without delay. Do not wait until the
red oil pressure warning. starts to
flash before you respond to the low oil ..,.
Page 25 of 302
"' N
a:: I.J "". rl I.O
"' rl
"' rl
Instrument s and warning /indicator lights 23
® ®
Tab Content
2 Indicator lights and messages
Warning when a door, the hood or
the rear lid is not closed
Service interval display<=>
page 26
Speed warning system <=> page 78
3 Night vision assistant* <=> page 99
4 Audio/video
5 Telephone*
6 Navigation*
The second and third tabs are only visib le if at
l east one indicator light or message is shown
or if that system is switched on .
The status line © is located in the bottom
part of the display¢
fig. 4. It displays the ex
terior temperature, time, selector lever posi
tion, trip odometer and odometer .
F or some veh icle functions, you can access the
trip information from the temporary memory
<=> page 24 in the line(!)<=> fig. 5.
A WARNING 1= -
- Never rely exclusively on the outside
temperature display to determine if a
road surface is icy or not. Keep in mind
that road surfaces, especially bridges
and overpasses, could be ice covered and
slippery even at an outside temperature above
41 °F (+5 °().
- Always reduce your speed and dr ive with
special care in cold weather conditions
when the chance of encountering icy
road surfaces increases.
@ Tips
-If the vehicle is stationary, or if you are
driving at a very low speed, the tempera
ture shown in the display might be
s light ly higher than the actual outside
temperature. This is caused by the heat
being radiated from the eng ine.
- You can select the units used for temper
ature, speed and other measurements in
the MMI. -
For information on the audio/video and
navigation* functions, refer to the sepa
rate MMI owner's manua l.
Operation
The driver information system is operated us
ing the buttons on the multifunction steering
wheel.
Fig. 6 Multifunction steering wheel: operating the driv
er in formation system
Fig. 7 Driver informat ion system: opening the vehicle
func tions menu
Operating concept
.,. Switch the ignition on.
.,. To switch between the tabs, press the rocker
switch
(D to the left or rig ht <=> fig. 6.
.,. To access additional information below or
above, rotate the t humbwheel @down or
up.
.,. To confirm a selection, press the thumb
wheel @.
.,. Press the~ button @ to open a submenu
for an active tab.
.,. Press the button@) to access a function for
the prog rammab le steering whee l button* .
Accessing Vehicle functions
.,. Select the first tab with the rocker switch
(D.
Page 28 of 302
26 Instruments and warning/indicator lights
Lower odometer
The lower odometer shows the total number
of miles (kilometers) driven.
Malfunction message
If there is a malfunction in the instrument
cluster,
DEF will appear in the trip odometer
display area. Contact your authorized Audi
dealer to have the problem corrected.
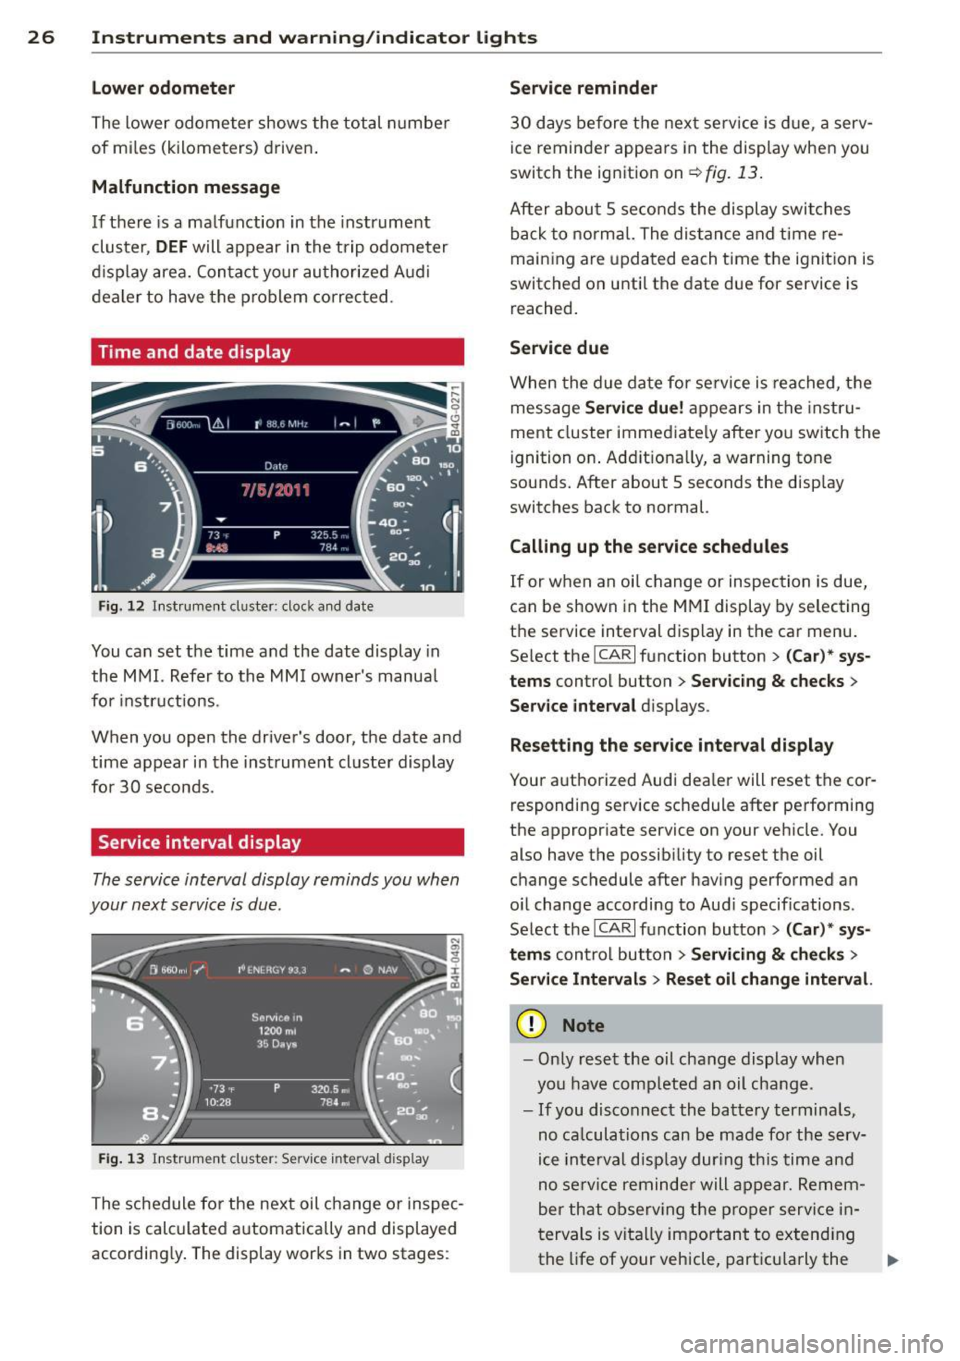
Time and date display
Fig. 12 Instrument cluster : cloc k and date
You can set the time and the date display in
the MMI. Refer to the MMI owner's manual
for instructions .
When you open the driver's door, the date and
time appear in the instrument cluster display
for 30 seconds.
Service interval display
The service interval display reminds you when
your next service is due.
Fig. 13 In strum ent cluste r: Serv ic e inte rval d isp lay
The schedule for the next oil change or inspec
tion is calculated automatically and displayed
accordingly. The display works in two stages :
Service reminder
30 days before the next service is due, a serv
ice reminder appears in the display when you
switch the ignition on
¢ fig. 13.
After about 5 seconds the display switches
back to normal. The distance and time re
maining are updated each time the ignition is
switched on until the date due for service is
reached.
Service due
When the due date for service is reached, the
message
Service due! appears in the instru
ment cluster immediately after you switch the
ignition on. Additionally, a warning tone
sounds. After about 5 seconds the display
switches back to normal.
Calling up the service schedules
If or when an oil change or inspection is due,
can be shown in the MMI display by selecting
the service interval display in the car menu.
Select the
ICARI function button > (Car)* sys
tems control button > Servicing & checks >
Service interval displays .
Resetting the service interval display
Your authorized Audi dealer w ill reset the cor
responding service schedule after performing
the appropriate service on your vehicle. You
also have the possibility to reset the oil
change schedule after having performed an
oil change according to Audi specifications .
Select the
ICARI function button > (Car)* sys
tems control button > Servicing & checks >
Service Intervals> Reset oil change interval.
Q) Note
-Only reset the oil change display when
you have completed an oil change.
- If you disconnect the battery terminals,
no calculations can be made for the serv
ice interval display during this time and
no service reminder will appear. Remem
ber that observing the proper service in
tervals is vitally important to extending
the life of your vehicle, particularly the
ll>-
Page 31 of 302
"' N
a:: I.J "". rl I.O
"' rl
"' rl
Instrument s and warning /indicator lights 29
corresponds to the timing is displayed in
front of the ind ividual timings .
Displaying intermediate time and pausing
timing
.. To disp lay an intermediate time, press the
t h umbwheel. The timing cont in ues to run in
t h e background .
.. To pa use tim ing, press the thumbwhee l.
.. To continue t iming, press the thumbwheel
again.
If t iming is paused, you can continue it later
even if you switch the ignit ion
off.
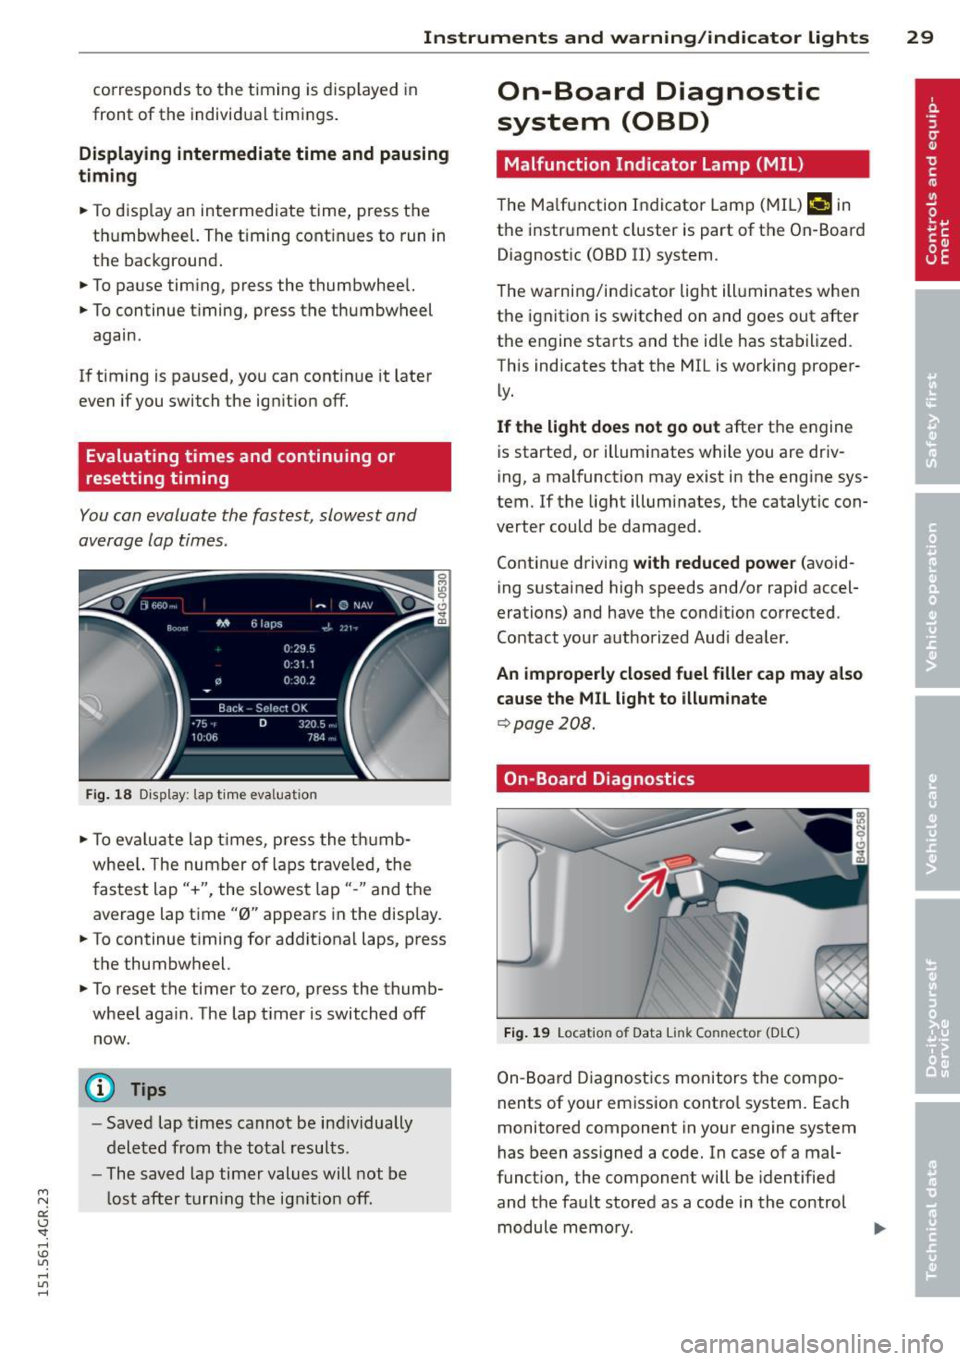
Evaluating times and continuing or
resetting timing
You can evaluate the fastest, slowest and
average lap times.
F ig. 1 8 Dis pl ay: lap t ime eva luat ion
.. To ev aluate lap t imes, press the t humb
whee l. The number of laps traveled, the
f astest lap"+", the slowes t lap" -" and the
average lap time "0" appears in the disp lay .
.. To continue t iming for addit iona l laps, press
t h e thumbwheel.
.,. To reset the timer to ze ro , press the thumb
whee l aga in . The lap t imer is switched
off
now.
(D Tips
- Saved lap t imes cannot be ind iv idually
dele ted from t he tota l resu lts .
- The saved lap timer values will not be
l ost after turn ing the ig nitio n
off.
On-Board Diagnostic
system (OBD)
Malfunction Indicator Lamp (MIL )
The Ma lfunction Indicator Lamp ( MIL) ¢'4 in
the instr ument cluster is part of the On-Board
Diagnostic (OBD II) system .
T he wa rni ng/indicator light ill uminates when
the ignit io n is switched on and goes out after
the engine sta rts and the id le has stab ilized.
This indicates that the M IL is working proper
ly .
If the light does not go out afte r th e engine
is started, or illuminates while you are dr iv
ing, a mal function may exist in the engine sys
tem .
If the light illum inates, the catalyt ic con
verter could be damaged .
Contin ue driving
with reduced power (avoid
ing s ustained high speeds and/or rapid accel
erations) and have the cond ition corrected.
Contact your aut horized Audi dea ler.
An improperly closed fuel filler cap may also
cause the MIL light to illuminate
¢ page 208.
On-Board Diagnostics
Fig. 19 Locat io n of Data Li nk Co nnector (D LC)
On-Board Diagnostics monitors the compo
nents of your emission contro l system. Each
monitored component in your engine system
has been ass igned a code. In case of a mal
funct ion , the component will be identified
and the fault stored as a code in the control module memo ry.
Page 33 of 302
"' N
a:: I.J "". rl I.O
"' rl
"' rl
Opening and closing Keys
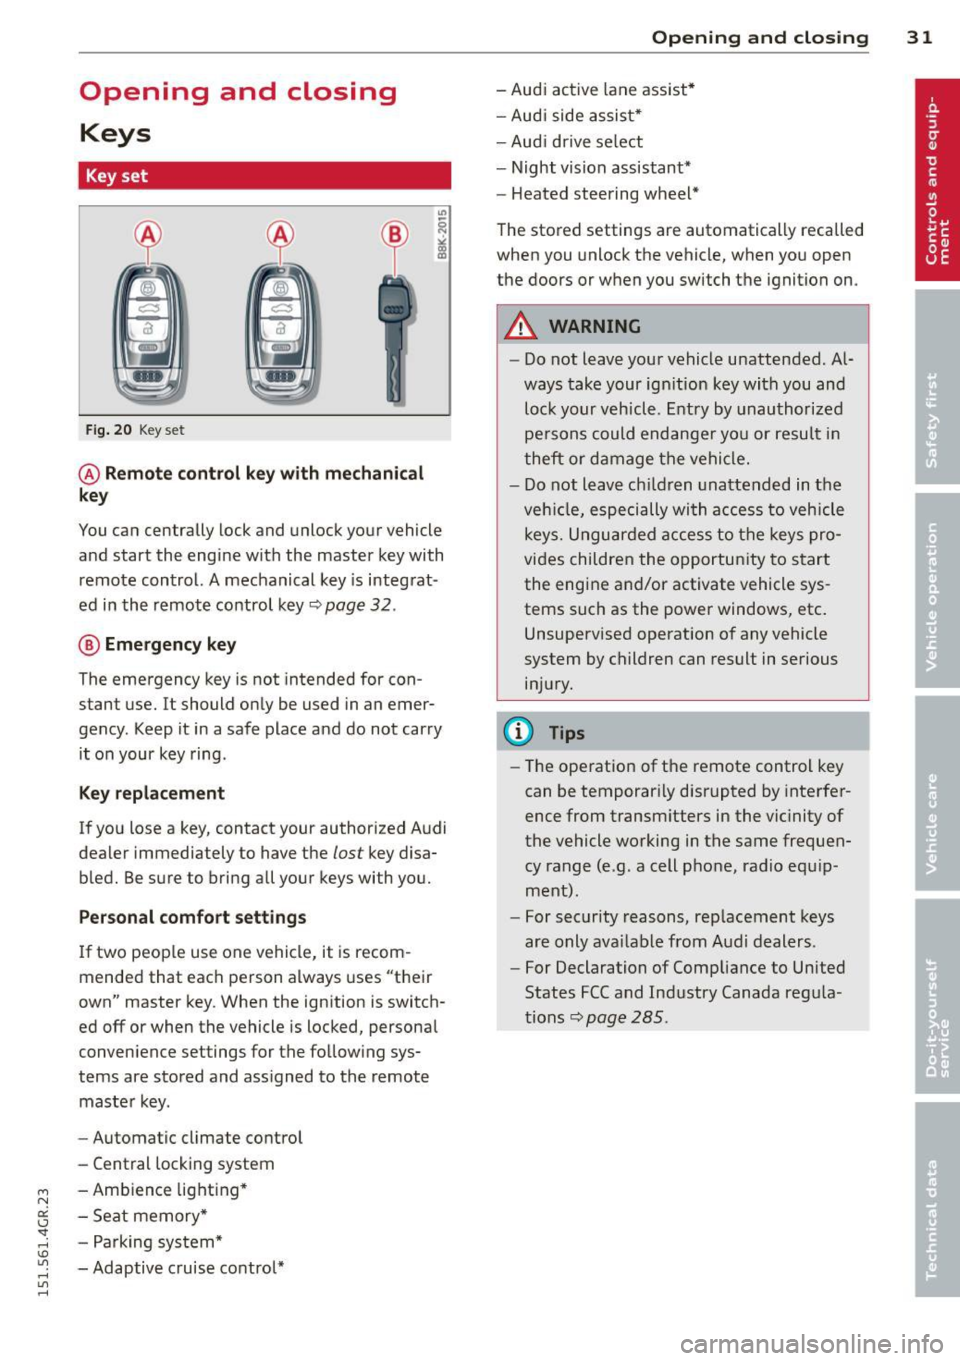
Key set
Fig. 20 Key set
@ Remote control key with mechanical
key
You can centrally lock and unlock your vehicle
and start the engine with the master key with
remote control. A mechanical key is integrat
ed in the remote control key~ page
32 .
® Emergency key
The emergency key is not intended for con
stant use.
It should only be used in an emer
gency. Keep it in a safe place and do not carry
it on your key ring .
Key replacement
If you lose a key, contact your authorized Audi
dealer immed iately to have the
lost key disa
bled. Be sure to bring all your keys with you.
Personal comfort settings
If two people use one vehicle, it is recom
mended that each person always uses "their
own" master key. When the ignition is switch
ed off or when the vehicle is locked, personal
convenience settings for the following sys
tems are stored and assigned to the remote
master key.
- Automatic climate control
- Central locking system
- Ambience lighting*
- Seat memory*
- Parking system*
- Adaptive cruise control*
Opening and closing 31
- Audi active lane assist*
- Audi side assist*
-Audi drive select
- Night vision assistant*
- Heated steering wheel*
The stored settings are automatically recalled
when you unlock the vehicle, when you open
the doors or when you switch the ignition on.
A WARNING
-Do not leave your vehicle unattended. Al
ways take your ignition key with you and
lock your vehicle. Entry by unauthorized
persons could endanger you or result in
theft or damage the vehicle.
- Do not leave children unattended in the
vehicle, especially with access to vehicle
keys. Unguarded access to the keys pro
vides children the opportunity to start
the engine and/or activate vehicle sys
tems such as the power windows, etc.
Unsupervised operation of any vehicle
system by children can result in serious
injury.
(D Tips
- The operation of the remote control key
can be temporarily disrupted by interfer
ence from transmitters in the vicinity of
the vehicle working in the same frequen
cy range (e.g. a cell phone, radio equip
ment).
- For security reasons, replacement keys
are only available from Audi dealers.
- For Declaration of Compliance to United
States FCC and Industry Canada regula
tions~ page
285.
Page 35 of 302
M N
0:: <.J 'SI: ,...., \!) ..,.,
,...., ..,., ,....,
for another vehicle or a transponder is
l ocated on the key ring.
- For Decla ration of Compliance to United
States FCC and Industry Canada regula
tions
¢ page 285.
Power locking system
General description
The power locking system locks or unlocks all
doors and the rear lid simultaneously.
You can lock and un lock the vehicle centrally.
You have the following choices:
- Remote master key¢
page 34,
-Door handles with convenience key*
¢page 35 ,
-Lock cylinder at the driver's door
¢ page 36, or
- Power locking switch inside¢
page 36.
Selective unlocking
When you lock the vehicle, the power locking
system w ill lock the doors and the rear lid.
When unlocking, you can set in the M MI
whether only the driver 's doo r or the entire
vehicle should be unlocked
¢ page 34.
Automatic locking
The automat ic locking feature locks all the ve
hicle doors and the rear lid when you drive
faster than 9 mph ( 1S km/h).
T he car is unlocked again, when the opening
function in the power lock ing system sw itch
or at one of the door levers is actuated . Th e
Auto Lock function can be turned on and off in
the MMI
¢page 34.
Anti-theft alarm warning system
If the anti-theft alarm warning system de
tects a break- in into the vehicle, acoustic and
visua l warning signals are triggered.
The anti-theft warning system is activated au
tomatically when you lock the vehicle . It is de
activated when u nlocking using the remote
key, with the mechanical key, and when you
switch the ignition o n.
Opening and clo sin g 33
The alarm also turns off when the a larm cycle
has expired.
Turn signals
When you unlock the veh icle, the turn s ignals
flash twice. When you lock the veh icle the
tu rn s ignals flash once. If they do not flash,
one of the doors, the rear lid or the hood is
not locked.
Unintentionally locking yourself out
In the follow ing cases there safeguards to
prevent yo u lock ing your remote master key in
the vehicle:
- The vehicle does not lock w ith the central
locking switch¢
page 36 if the driver's
door is open.
- On veh icles with convenience key*, if the
most recently used maste r key is in the lug
gage compartment, the rear lid is a utomat i
cally un locked again after it is closed.
Do not lock your veh icle w ith the
remote mas
ter key or convenience key*
unti l all doors
and the rear lid are closed . In this way you
avoid locking yoursel f out accidentally .
Power side door closer*
The vehicle doors are equipped w ith a power
s ide door closer . When closing a door, you on
ly have to let it fall light ly into the latch. The
door will then automatically close by itself
¢_&. .
A WARNING
-When you lock your vehicle from outside,
nobody -especia lly children -shou ld re
main inside the vehicle. Remember,
when you lock the vehicle from the out side the windows cannot be opened from
the inside.
- When you leave the veh icle, always take
the ignition key w ith you . Th is w ill pre
vent passengers (children, for example)
from accidentally being locked in the ve
hicle should they accidentally press the
power locking sw itch in the doors. .,.
Page 39 of 302
"' N
a:: I.J "". rl I.O
"' rl
"' rl
-On a vehicle locked from the outside the
power locking system switch is inopera
t ive.
- Locked doors make it more difficult for
emergency workers to get into the vehi
cle, which puts lives at risk. Do not leave
anyone behind in the vehicle, especially
children.
(D Tips
Your vehicle is locked automatically at a speed of 9 mph (15 km/h) ¢ page 33. You
can unlock the vehicle again using the
open ing funct ion in the power lock ing sys
tem switch .
Emergency locking
Each door must be locked separately if the
power locking system fails.
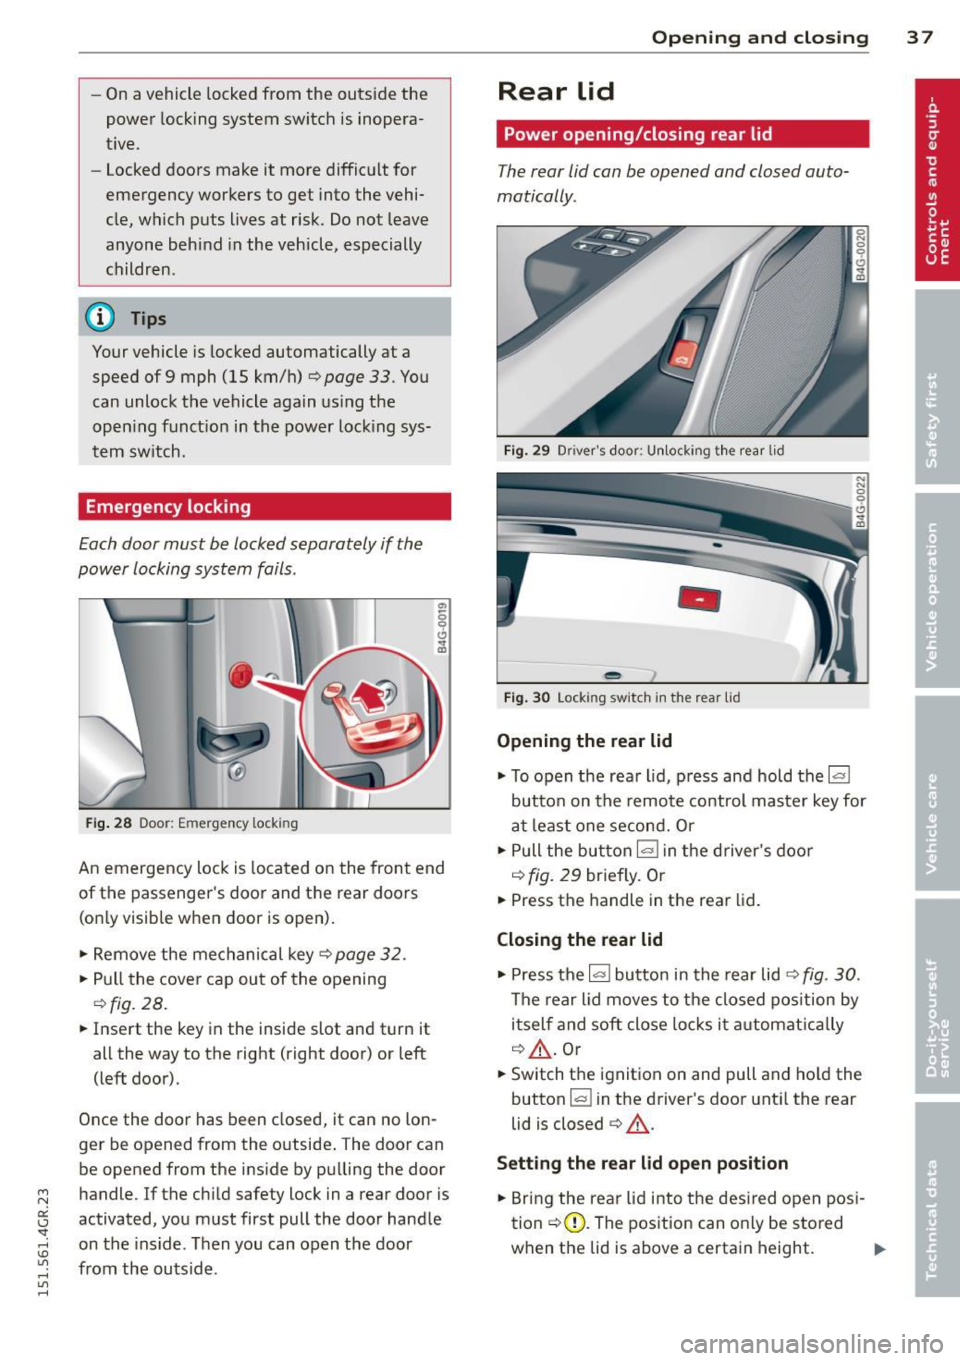
Fig . 28 Door: Emergency locking
An emergency lock is located on the front end
of the passenger' s door and the rear doors
(only visible when door is open).
.,. Remove the mechanical key¢ page 32.
.,. Pull the cover cap out of the opening
¢fig. 28.
.,. Insert the key in the inside slot and turn it
all the way to the right (right door) or left
(left door).
Once the door has been closed, it can no lon
ger be opened from the outside . The door can
be opened from the inside by pulling the door
handle. If the child safety lock in a rear door is
activated, you must first pull the door handle
on the inside. Then you can open the door
from the outs ide.
Opening and closing 3 7
Rear lid
Power opening/closing rear lid
The rear lid can be opened and closed auto
matically .
Fig. 29 Driver's door: Un locking th e rear lid
-
Fig . 30 Locking switc h in the rear lid
Opening the rear lid
.,. To open the rear l id, pre ss and hold the la!
button on the remote control master key for
at least one second. Or
.,. Pull the button
lo<::>l in the driver's door
¢ fig. 29 briefly. O r
.,. Press the handle in the rear l id.
Closing the rear lid
.,. Press the lasl button in the rear lid ¢ fig. 30 .
The rear lid moves to the closed position by
itself and soft close locks it aut omatica lly
¢ .&, . Or
.,. Switch the ignition on and pull and ho ld the
button
l a l in the driver's door until the rear
lid is closed
a:> .&, .
Setting the rear lid open position
.,. Bring the rear lid into the desired open posi
tion¢(!). The position can only be stored
when the lid is above a certa in height .
IJJ,,-
Page 46 of 302
44 Clear vis ion
Clear vision
Lights
Switching the headlights on and off
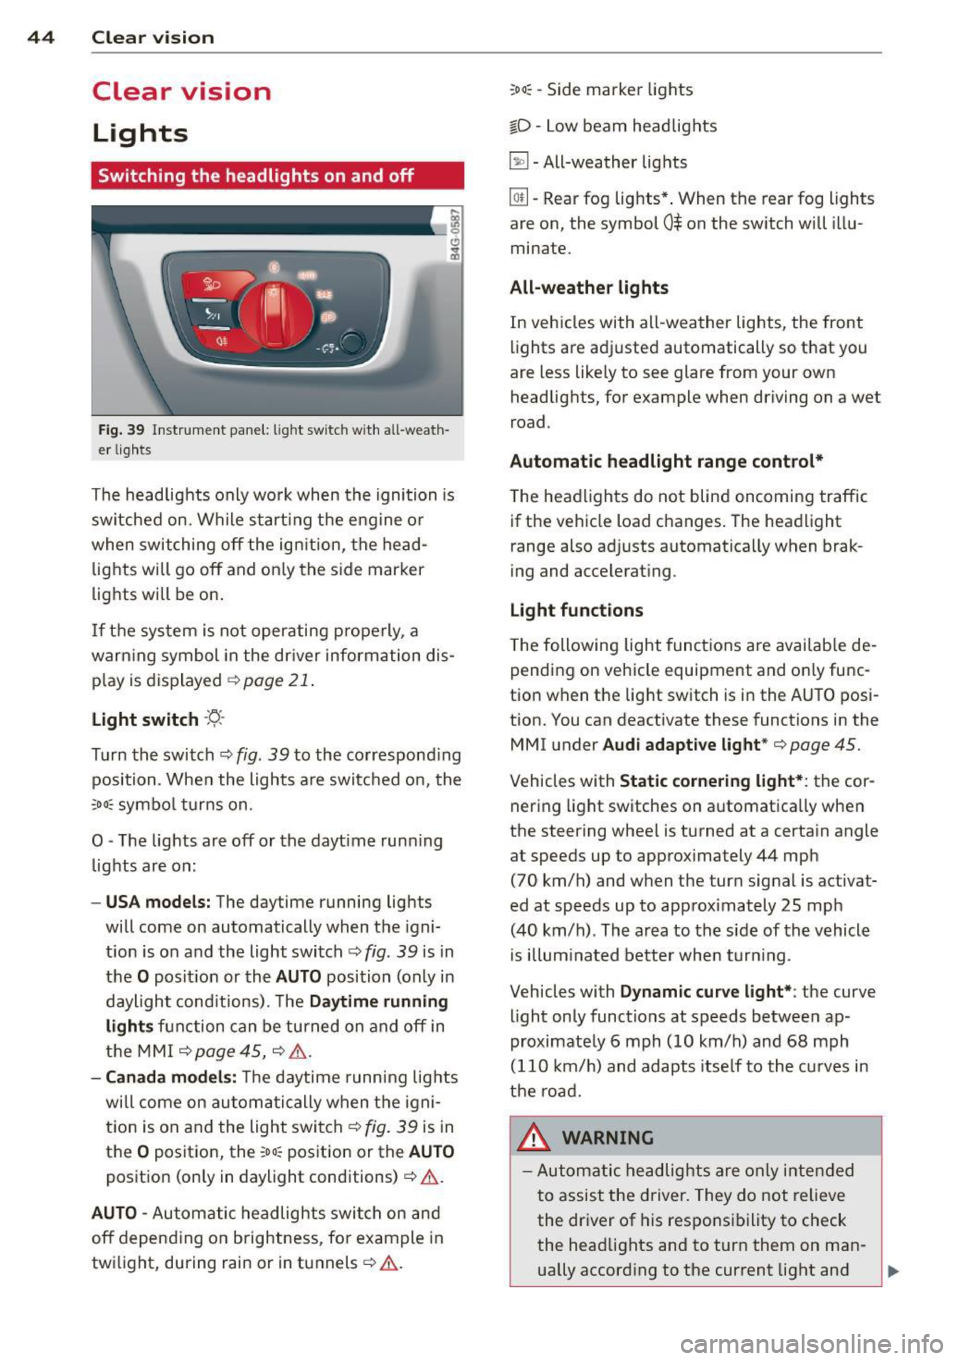
Fig . 39 Instr ument pane l: light sw itch w it h all -weath
er lig hts
The headlights only wo rk when the ignition is
sw itched on. Wh ile start ing the eng ine or
when switching off the ig nition, the head
lights will go off and on ly the s ide marker
lights w ill be on .
I f the sys tem is not operating properly, a
warn ing symbol in the dr iver inform ation dis
p lay is dis played ¢
page 21.
Light switch -~ -
Turn the switch ¢ fig. 39 to the co rrespond ing
position . When the lights a re switched o n, the
:oo: symbo l turns on.
0 -The lights are off or the dayt ime run ning
lights are on:
- USA models: The daytime running lig hts
will come on automatically when the igni
t ion is on and the light switch¢
fig. 39 is in
the
O pos it ion or the AUTO position (only in
daylight cond itions). The
Daytime running
lights function can be tu rned on and off in
the MMI ¢
page 45, ¢ .& .
-Canada model s: T he daytime running lig hts
will come on au tom atically when t he igni
t ion is on and the light switch¢
fig. 39 is in
the
O posit io n, the :oo~ position or the AUTO
posit ion (on ly in daylight conditions)¢ .&.
AUTO -Automatic headlights swi tch on an d
off depend ing o n brightness, fo r example in
tw ilight, during rain or in tunnels¢.&.
:oo~ -Side marker lights
io -Low beam head lights
~ -All-weather lig hts
@!l -Rear fog lights *. When the rear fog lights
are on, the symbol
0$ on the sw itch will i llu
minate.
All-weather light s
In vehicles with all -weather lights, the front
lights are ad justed automatically so that you
are less like ly to see glare from your own
headlig hts, for example when driving on a wet
road .
Automatic headlight range cont rol*
T he headlights do not blind oncoming traffic
if the veh icle load changes . The head light
range also ad justs automatica lly when brak
ing and accelerating .
Light functions
The following light funct ions are availab le de
pending on vehicle equipment and o nly func
tion when the lig ht switch is i n the AUTO posi
t ion. You can deactivate these functions in the
MMI u nder
Audi adapt ive light *¢ page 45.
Vehicles with Static corneri ng light*: the cor
nering light switches on a utomatica lly when
the steering whee l is turned at a certa in angle
at speeds up to app rox imately 44 mph
(70 km/h) and when the turn signal is activat
ed at speeds up to app rox imately 25 mph
(40 km/h) . Th e ar ea to the side of th e vehicle
is illum inated better when turn ing .
Vehicles with
Dynamic curve light*: the curve
light only functions at speeds betwee n ap
proximate ly 6 mph (10 km/h) and 68 mph
(110 km/ h) and adapts itse lf to the cu rves in
the road.
A WARNING
- Automatic headlights are o nly inte nded
t o assist the driver. They do not relieve
the dr iver of his respons ibility to check
the head lights and to turn them on ma n-
ually accord ing to the current light and ,..