service indicator AUDI RS7 SPORTBACK 2015 Owners Manual
[x] Cancel search | Manufacturer: AUDI, Model Year: 2015, Model line: RS7 SPORTBACK, Model: AUDI RS7 SPORTBACK 2015Pages: 302, PDF Size: 74.76 MB
Page 18 of 302
16 Instruments and warning/indicator lights
turn of the engine and allow it to cool. Follow the warning stickers
c::> page 211.
@ Note
Do not continue driving if the. symbol
illuminates. There is a malfunction in the
engine cooling system -you could damage
your eng ine.
0 Battery
This warning/indicator light detects a mal
function in the generator or in the vehicle's
electrical system.
The . warning/indicator light illuminates
when yo u switch on the ignition and must go
out after the engine has started.
• Alternator fault: Battery is not being
charged
If the indicator light turns on and the mes
sage appears, there is a ma lfunction in the
generator or vehicle e lectrica l system.
Drive to you r authorized Aud i deale r or quali
fied workshop immediately. Because the vehi
cle battery is discharging, turn off all unnec
essa ry electrical equipment such as the radio .
Seek professional assistance if the battery
charge leve l is too low.
(•) Low battery: battery will be charged
while driving
If the indicator light turns on and the mes
sage appears, there may be limited starting
ability.
I f th is message turns off afte r a litt le while,
the battery cha rged enough wh ile driving.
If the message does not turn off, have your
author ized Audi dealer or qualified workshop
correct the malfunction .
4'-Safety belts
This warning/indicator light reminds you to
put on your safety belt.
The . warn ing/ indicator light illuminates
when the ignition is switched on to remind
the driver and any front passenger to put on
the safety belt. Addit ionally, an acoustic warn
ing (gong) w ill also sound .
For more Information¢
page 130, ~ Safety
belt warning light.
"l!::7": Engine oil pressure malfunction
The red engine oil pressure warning symbol
requires immediate service or repair . Driving
with a low-oil-pressure indication is likely to
inflict severe damage to the engine .
• Switch off engine and check oil level
If the indicator light turns on and the mes
sage appears, the oi l pressu re is too low.
.,. Pull off the road .
.,. Stop the vehicle.
.,. Turn off the engine .
.,. Check the engine oil level c::> page 21 S.
.,. If the engine o il level is too low, add eng ine
oil
¢ page 215. Make sure that the oil pres
sure warning symbol. appears no longer
in the display before you start dr iv ing again .
.,. If the engine o il level is correct and the indi
cator light still turns on, turn the engine off
and do not continue driving. Seek professio
na l assistance .
@ Tips
- The engine oil pressure symbol. is
not an indicator for a low engine oil lev
el. Do not rely on it. Instead, check the
oil level in your engine at regular inter
vals, preferably each time you refuel,
and always before going on a long trip.
- The yellow oil level warning indication
II requires oil refill or workshop serv
ice without delay. Do not wait until the
red oil pressure warning. starts to
flash before you respond to the low oil ..,.
Page 19 of 302
M N
0:: <.J 'SI: ,...., \!) 1.1"1 ,...., 1.1"1 ,....,
Instruments and warning/indicator lights 17
level warning a. By then, your engine
may already have suffered serious dam
age.
!::. , Engine oil level
• WARNING: Please add oil immediately
If the indicator lig ht and the driver message
ap pear , add eng ine oi l immediately
¢page 213.
Ill Add oil , max. x qt (l). You may continue
driving
Wh en the sy mbol and t he dr ive r m essage ap
pea r, a dd t he am oun t of oil a pp ear ing in t he
d is pl ay at the ne xt opport uni ty
¢ page 213.
~ - Steering column lock
• Do not drive vehicle: Steering defective
If the ind ic a to r lig ht tur ns on and t he mes
sage ap pears, the re is an ele ct ro nic steer ing
col umn loc k ma lf u nction. You ca nnot switch
the ign ition on.
D o
not to w y our ve hicle bec ause it c annot be
steere d. Seek pro fes sional assistance.
Ill Steering lock: system fault. P lease con
tact dealer
If the i ndicator lig ht tu rns on and the mes
sage ap pears, the re is a n elect ro nic s teer ing
col umn loc k ma lfunction .
Drive to yo ur authorized Audi dea ler immedi
ately to have the malfunction cor rected.
A WARNING
Y our veh icle mus t not be towed in the
eve nt of a malfun ct ion in th e ele ctron ic
s teeri ng colu mn lock becau se i t ca nno t be
steered due t o the l ocked s tee ring. If it is
t owed w ith the stee ring loc ked, there is
the risk of an accident .
©-. Engine start system
• Engine sta rt system fault. Please contact
dealer
I f the indica tor ligh t turns on and the mes
sage a ppears , do
not switch the ign ition off
because you may not be ab le to sw itch it on
again.
Drive to your authori zed A udi dealer immedi
ate ly to have the ma lfunction corrected .
Ill Engine start system fault . Please contact
dealer
If t h e i ndica to r ligh t turns on and the m es
sage appea rs, t here is a malf unctio n in the en
gine start system.
D rive to your author ized A udi dealer immed i
ate ly to have th e ma lfunction corr ected .
0 Air suspension
Applies to vehicles : wit h air suspensio n
• Air suspension: system fault. Can contin
ue slowly with max . 35 mph .
There is a malfunction that can result in re
stricte d driving stability.
Carefully drive at a maximum speed of 35
mph (60 km/h) to your authorized Audi dealer
o r q ualified wor ks h op to have the ma lf u nc tion
correc ted.
• Air suspens ion: service mode. Vehicle can
only be moved with restrictions
Carefu lly drive to your author ized Audi dealer
o r qualified works hop immed iate ly to have
the service mode deactivated.
II Ai r suspension fault
The re is a system mal func tion th at ca n res ult
i n rest ric te d d rivi ng stability or redu ced
g ro und clea rance.
D rive to your au th oriz ed A udi dealer immed i
ate ly to h ave the mal func tion correc ted.
II Air suspension: vehicle too low. Ground
clearance reduced
The ground clearance is very low due to a sys
tem malfunction . Wa it until the air suspe n
s io n system has resto red no rma l groun d clear
an ce . Ot he rwis e, cond it ions su ch as an uneven
r oad su rfa ce can lead to vehicle damage .
Page 23 of 302
M N
0:: <.J 'SI: ,...., \!) 1.1'1 ,...., 1.1'1 ,....,
Instruments and warning/indicator lights 21
If the symbol illuminates, add windshield
washer fluid to the washer system/headlight
washer system* ~
page 224.
O Windshield wipers
m Windshield wiper defective
There is a malfunction with the windshield
wipers.
Drive to your authorized Aud i dea le r im medi
ately to have the mal function cor rected .
~/0$ Defective light bulb warning
J:i -If the ind icator light turns on, a bulb has
failed. The message indicates the location of
the bulb.
IJ-if a rear fog lamp has failed, the indicator
light t urns on to indicate the location on the
vehicle.
Vehicle lights: malfunction
If the message appears, there is a malfunc
tion in the headlights or lig ht switch.
Drive to you r authorized Aud i dealer immedi
ately to have the malfunction corrected.
A WARNING
- Light bulbs are pressurized and could ex
plode whi le they are being changed caus
ing serious personal injury.
- Work with due care when handling the
high-voltage section of gas discharge
(xenon) lights. Failure to do so could re
sult in death or serious injury.
(D Tips
Have the bulb replaced or the connection
repaired by you r aut horized Aud i Service
department.
~ID Headlight range control
II Headlight range control: defective!
If the symbol illuminates, the headlight range
control is no longer working properly . Have the system checked and
repaired at your A udi
dealer.
· go Adaptive Light
Applies to vehicles : with Adaptive Light
m;J Audi adaptive light: system fault
If the indicator light turns on and this mes
sage appears, there is a malfunction in the
adaptive light system . The headlights sti ll
function.
Go to an authorized dealership to have the
headlights or the control unit for the Adaptive
Light repaired.
/i.O Light/rain sensor
El Automatic headlights/automatic wipers:
system fault
If the indicator light turns on and this mes
sage appears, the light/rain sensor is not
funct ioning correct ly.
For safety reasons the low beams are tur ned
on permanently with the switch in
AUTO.
However, you can continue to turn the lights
on and off using the light switch. You can st ill
control all functions that are independent of
the ra in sensor through the w indshield wiper
lever .
Contact your authorized Audi dealer as soon
as possible to have the problem corrected .
; Adaptive dampers
Applies to vehicles: with adaptive dampers
II Suspension: System fault! You can con
tinue driving
If the II symbol in the d isplay comes on,
there is a malfunction in the adaptive damp
ers. Please go to an authorized Aud i dealer or
other qualified workshop to have the malfunc
tion repa ired .
1--! Sport differential
Applies to vehicles: with sport different ial
I'll Sport differential: system fault
Page 25 of 302
"' N
a:: I.J "". rl I.O
"' rl
"' rl
Instrument s and warning /indicator lights 23
® ®
Tab Content
2 Indicator lights and messages
Warning when a door, the hood or
the rear lid is not closed
Service interval display<=>
page 26
Speed warning system <=> page 78
3 Night vision assistant* <=> page 99
4 Audio/video
5 Telephone*
6 Navigation*
The second and third tabs are only visib le if at
l east one indicator light or message is shown
or if that system is switched on .
The status line © is located in the bottom
part of the display¢
fig. 4. It displays the ex
terior temperature, time, selector lever posi
tion, trip odometer and odometer .
F or some veh icle functions, you can access the
trip information from the temporary memory
<=> page 24 in the line(!)<=> fig. 5.
A WARNING 1= -
- Never rely exclusively on the outside
temperature display to determine if a
road surface is icy or not. Keep in mind
that road surfaces, especially bridges
and overpasses, could be ice covered and
slippery even at an outside temperature above
41 °F (+5 °().
- Always reduce your speed and dr ive with
special care in cold weather conditions
when the chance of encountering icy
road surfaces increases.
@ Tips
-If the vehicle is stationary, or if you are
driving at a very low speed, the tempera
ture shown in the display might be
s light ly higher than the actual outside
temperature. This is caused by the heat
being radiated from the eng ine.
- You can select the units used for temper
ature, speed and other measurements in
the MMI. -
For information on the audio/video and
navigation* functions, refer to the sepa
rate MMI owner's manua l.
Operation
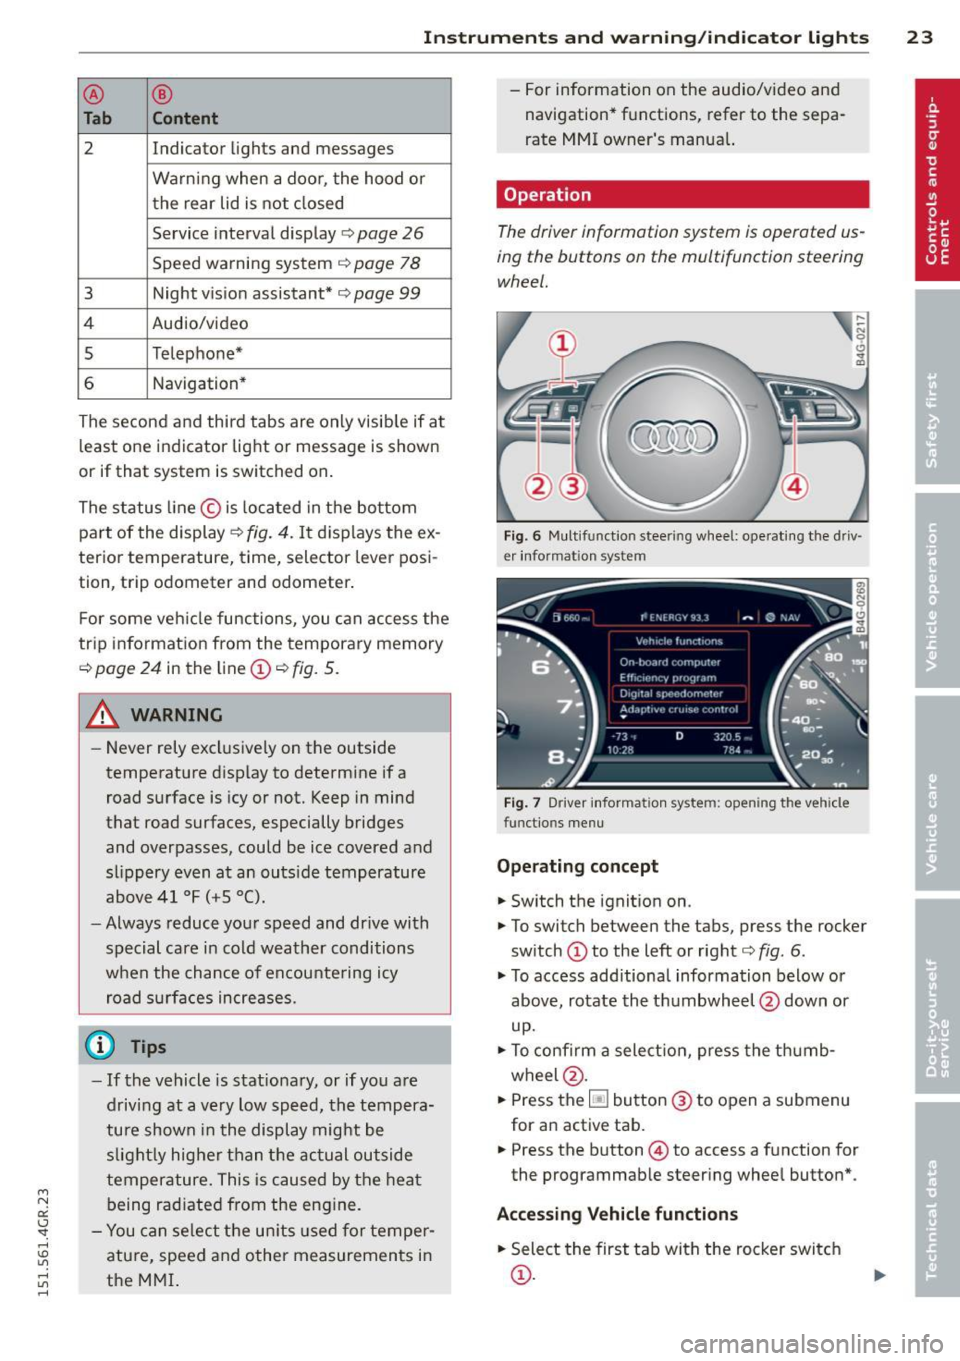
The driver information system is operated us
ing the buttons on the multifunction steering
wheel.
Fig. 6 Multifunction steering wheel: operating the driv
er in formation system
Fig. 7 Driver informat ion system: opening the vehicle
func tions menu
Operating concept
.,. Switch the ignition on.
.,. To switch between the tabs, press the rocker
switch
(D to the left or rig ht <=> fig. 6.
.,. To access additional information below or
above, rotate the t humbwheel @down or
up.
.,. To confirm a selection, press the thumb
wheel @.
.,. Press the~ button @ to open a submenu
for an active tab.
.,. Press the button@) to access a function for
the prog rammab le steering whee l button* .
Accessing Vehicle functions
.,. Select the first tab with the rocker switch
(D.
Page 28 of 302
26 Instruments and warning/indicator lights
Lower odometer
The lower odometer shows the total number
of miles (kilometers) driven.
Malfunction message
If there is a malfunction in the instrument
cluster,
DEF will appear in the trip odometer
display area. Contact your authorized Audi
dealer to have the problem corrected.
Time and date display
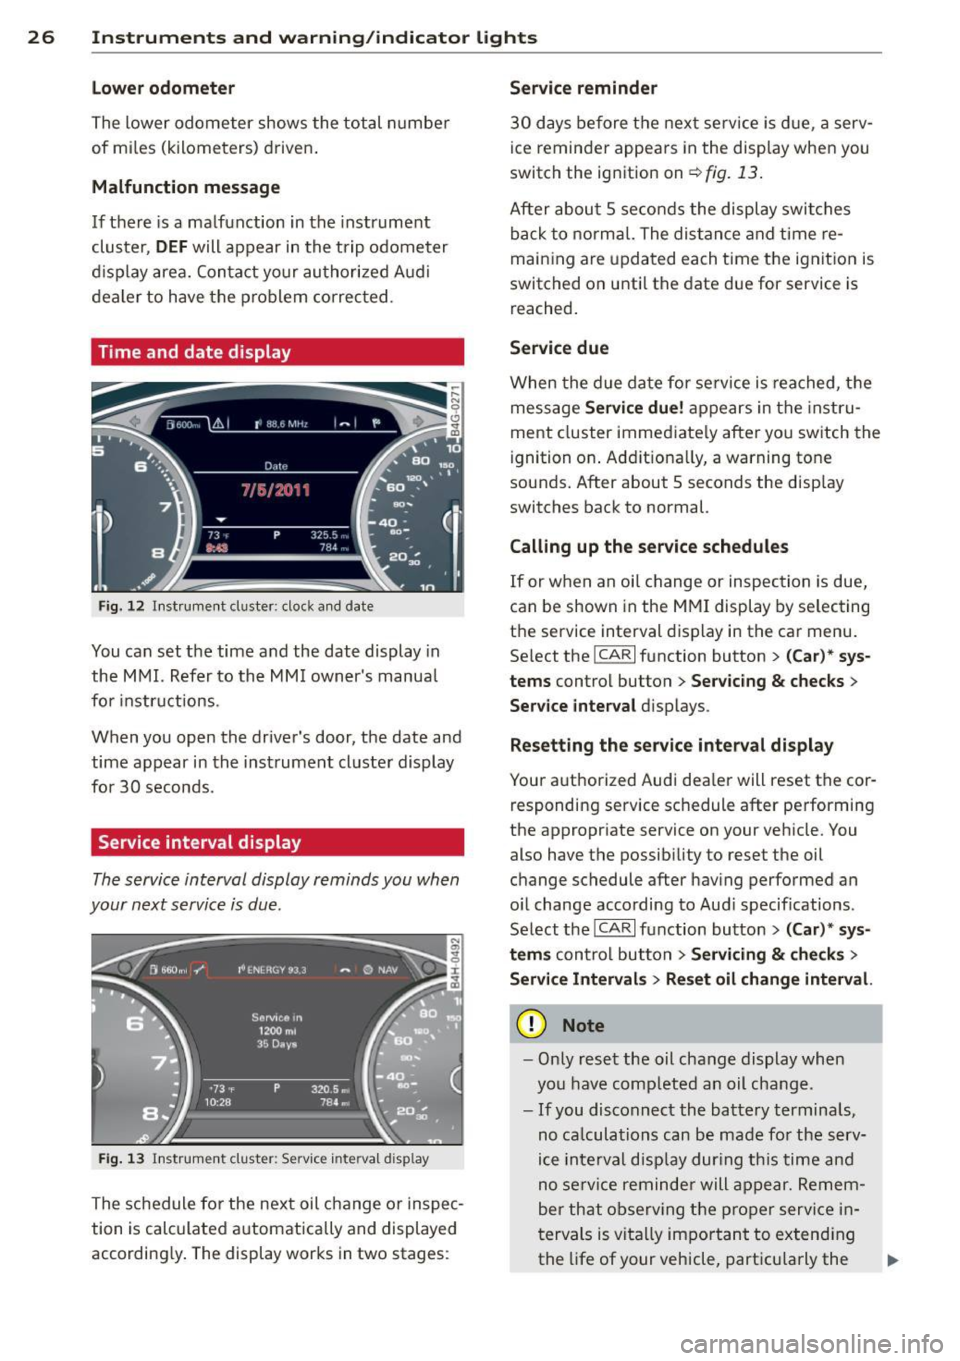
Fig. 12 Instrument cluster : cloc k and date
You can set the time and the date display in
the MMI. Refer to the MMI owner's manual
for instructions .
When you open the driver's door, the date and
time appear in the instrument cluster display
for 30 seconds.
Service interval display
The service interval display reminds you when
your next service is due.
Fig. 13 In strum ent cluste r: Serv ic e inte rval d isp lay
The schedule for the next oil change or inspec
tion is calculated automatically and displayed
accordingly. The display works in two stages :
Service reminder
30 days before the next service is due, a serv
ice reminder appears in the display when you
switch the ignition on
¢ fig. 13.
After about 5 seconds the display switches
back to normal. The distance and time re
maining are updated each time the ignition is
switched on until the date due for service is
reached.
Service due
When the due date for service is reached, the
message
Service due! appears in the instru
ment cluster immediately after you switch the
ignition on. Additionally, a warning tone
sounds. After about 5 seconds the display
switches back to normal.
Calling up the service schedules
If or when an oil change or inspection is due,
can be shown in the MMI display by selecting
the service interval display in the car menu.
Select the
ICARI function button > (Car)* sys
tems control button > Servicing & checks >
Service interval displays .
Resetting the service interval display
Your authorized Audi dealer w ill reset the cor
responding service schedule after performing
the appropriate service on your vehicle. You
also have the possibility to reset the oil
change schedule after having performed an
oil change according to Audi specifications .
Select the
ICARI function button > (Car)* sys
tems control button > Servicing & checks >
Service Intervals> Reset oil change interval.
Q) Note
-Only reset the oil change display when
you have completed an oil change.
- If you disconnect the battery terminals,
no calculations can be made for the serv
ice interval display during this time and
no service reminder will appear. Remem
ber that observing the proper service in
tervals is vitally important to extending
the life of your vehicle, particularly the
ll>-
Page 29 of 302
Instruments and warning/indicator lights 2 7
engine, and maintaining its value. Even if
the mileage driven is low, the maximum
period of one year from one service to
the next must not be exceeded.
(D Tips
The information in the Service Remi nder
remains stored even when the vehicle bat
tery is disconnected.
Head-up Display
Applies to vehicles: with Head-up Display
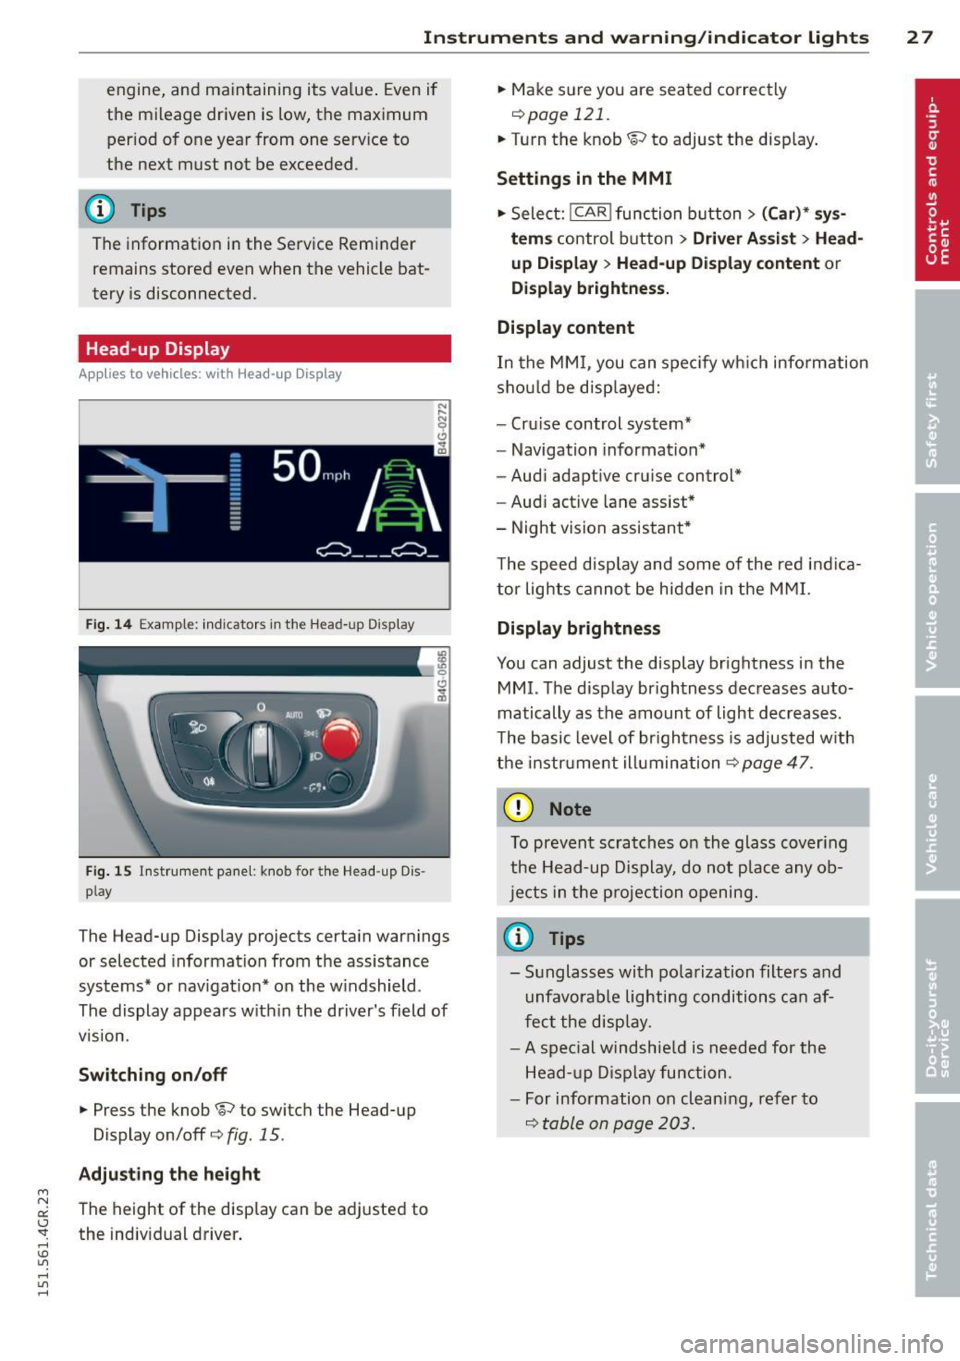
Fig. 14 Example: indicators in the Head-up Display
Fig. 15 Instrument panel: knob for the Head-up Dis ·
play
The Head-up Display projects certain warnings
or selected information from the assistance
systems* or navigation* on the windshield.
The display appears within the driver's field of
v1s1on.
Switching on/off
.,. Press the knob~ to switch the Head-up
Display on/off¢
fig. 15.
Adjusting the height
"' N a:: The height of the display can be adjusted to I.J "". the individual driver. rl I.O
"' rl
"' rl
.,. Make sure you are seated correctly
¢page 121 .
.,. Turn the knob ~ to adjust the display.
Settings in the MMI
.,. Select: !CAR ! function button> (Car)* sys
tems
control button > Driver Assist > Head
up Display
> Head-up Display content or
Display brightness.
Display content
In the MMI, you can specify which information
should be displayed:
- Cruise control system*
- Navigation information*
- Audi adaptive cruise control*
- Audi active lane assist*
- Night vision assistant*
The speed display and some of the red indica
tor lights cannot be hidden in the MMI.
Display brightness
You can adjust the display brightness in the
MMI. The display brightness decreases auto
matically as the amount of light decreases.
The basic level of brightness is adjusted with
the instrument illumination¢
page 47.
(D Note
To prevent scratches on the glass covering
the Head-up Display, do not place any ob
jects in the projection opening.
(D Tips
-Sunglasses with polarization filters and
unfavorable lighting conditions can af
fect the display.
- A special windshield is needed for the
Head-up Display function.
- For information on cleaning, refer to
¢ table on page 203.
Page 32 of 302
30 Instruments and warning /indicator lights
The MIL light may a lso illuminate if there is a
leak in the on-board fue l vapor recovery sys
tem .
If the light illuminates after a refuell ing,
stop the vehicle and make sure the fuel filler
cap is properly closed¢
page 208.
In order to make an accurate diagnosis, the
stored data can only be displayed using spe
cial diagnostic equipment (generic scan tool
for OBD) .
In order to connect the special diagnostic
equipment, push the p lug into the Data L ink
Connector (DLC). The DLC is located to the
rig ht of the hood release ¢
fig. 19.
Your authorized Audi dealer or a qualified
service station can interpret the code and per
form the necessary repair .
A WARNING
Do not use the diagnostic connector for
personal use . Incorrect usage can cause
malfunctions, which can increase the risk
of a coll ision!
-
Page 43 of 302
"' N
a:: I.J "". rl I.O
"' rl
"' rl
door is opened . The window will Lower
again when you close the door .
- After the ignition has been switched off,
the windows can still be opened or
closed for about 10 minutes . The power
windows are not switched off until the
driver's door or passenger's door has
been opened.
What to do after a malfunction
The one -touch open and close function must
be reactivated if the battery has been discon
nected .
.. Pull and hold the power window switch until
the window is fully closed.
.. Release the switch and then pull it again for
at least one second .
Valet parking
The valet parking feature protects the lug
gage compartment from unauthorized access from the outside.
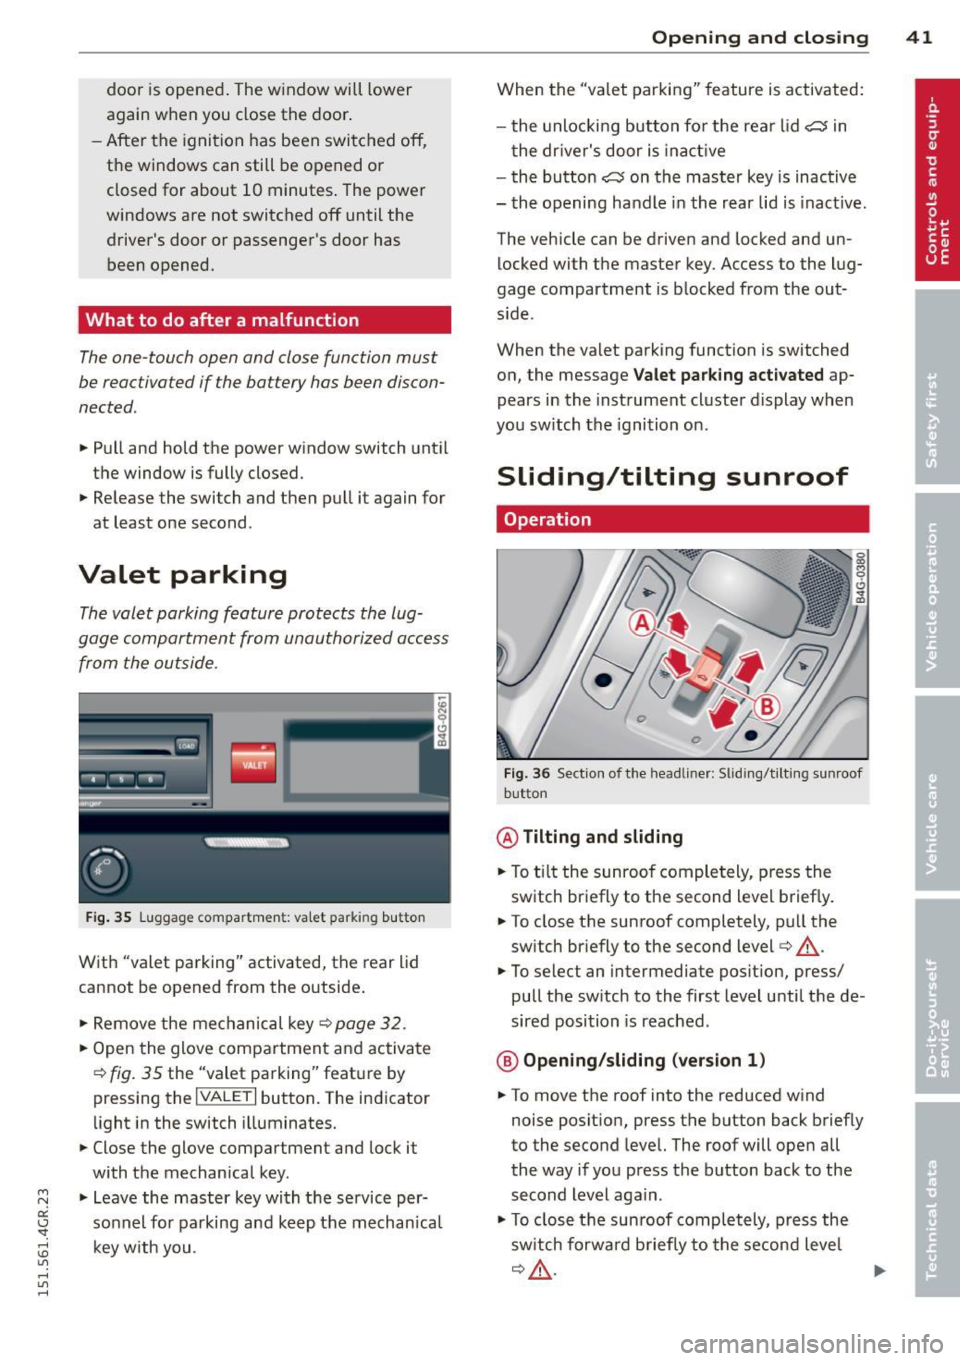
Fig. 35 Luggage compartment: valet parking button
With "valet parking" activated, the rear lid
cannot be opened from the outside .
.. Remove the mechanical key ¢
page 32 .
.. Open the glove compartment and activate
¢
fig. 35 the "valet parking" feature by
pressing the
I VALET I button. The indicator
light in the switch illuminates.
.. Close the glove compartment and lock it
with the mechanical key.
.. Leave the master key with the service per
sonnel for parking and keep the mechanica l
key with you .
Opening and closing 41
When the "valet parking" feature is activated:
- the unlocking button for the rear lid
c:s in
the driver's door is inact ive
- the button
c:s on the master key is inactive
- the opening handle in the rear lid is inact ive.
The vehicle can be driven and locked and un
locked with the master key. Access to the lug
gage compartment is blocked from the out
s ide .
When the valet parking function is switched
on, the message
Valet parking activated ap
pears in the instrument cluster display when
you switch the ignition on .
Sliding/tilting sunroof
Operation
Fig. 36 Sect ion of the headliner: Sliding/t ilting sunroof
button
@ Tilting and sliding
.. To ti lt the sunroof completely, press the
switch briefly to the second level briefly.
.. To close the sunroof completely, pull the
sw itch briefly to the second level¢_&..
.. To select an intermediate position, press/
pull the switch to the first level until the de
sired position is reached .
@ Opening/sliding (version 1)
.. To move the roof into the reduced wind
noise position, press the button back briefly
to the second level. The roof will open all
the way if you press the button back to the
second Level again.
.. To close the sunroof completely, press the
sw itch forwa rd b riefly to the second level
~A -~
Page 47 of 302
"' N
a:: I.J "". rl I.O
"' rl
"' rl
visibility conditions. For example, fog cannot be detected by the light sensors.
So always switch on the headlights 1§.D under these weather conditions and
when driving in the dark.
- Crashes can happen when you cannot see
the road ahead and when you cannot be
seen by other motorists . Always turn on
the headlights so that you can see ahead
and so that others can see your car from
the back.
- Please observe legal regulations when
using the light ing systems descr ibed .
(D Note
The rear fog lights should only be turned
on in accordance with traffic regulation, as
the lights are bright for following traffic.
@ Tips
- The light sensor* for automatic head light range control* is located in the rear
view mirror mount. You should therefore not apply any stickers to the windshield
in this area in order to prevent malfunc
tions or failures.
- In the event of a light sensor malfunc
tion, the driver is notified in the instru
ment cluster display ¢
page 21.
-You will hear a warning tone if you open
the driver door when the exterior lights
are switched on .
- In cool or damp weather, the inside of
the headlights, turn signals and tail
lights can fog over due to the tempera
ture difference between the inside and
outside. They will clear shortly after
switching them on. This does not affect
the service life of the lighting .
Clear vision 45
Emergency flasher
The emergency flasher makes other motorists
aware that you or your vehicle are in an emer
gency situation .
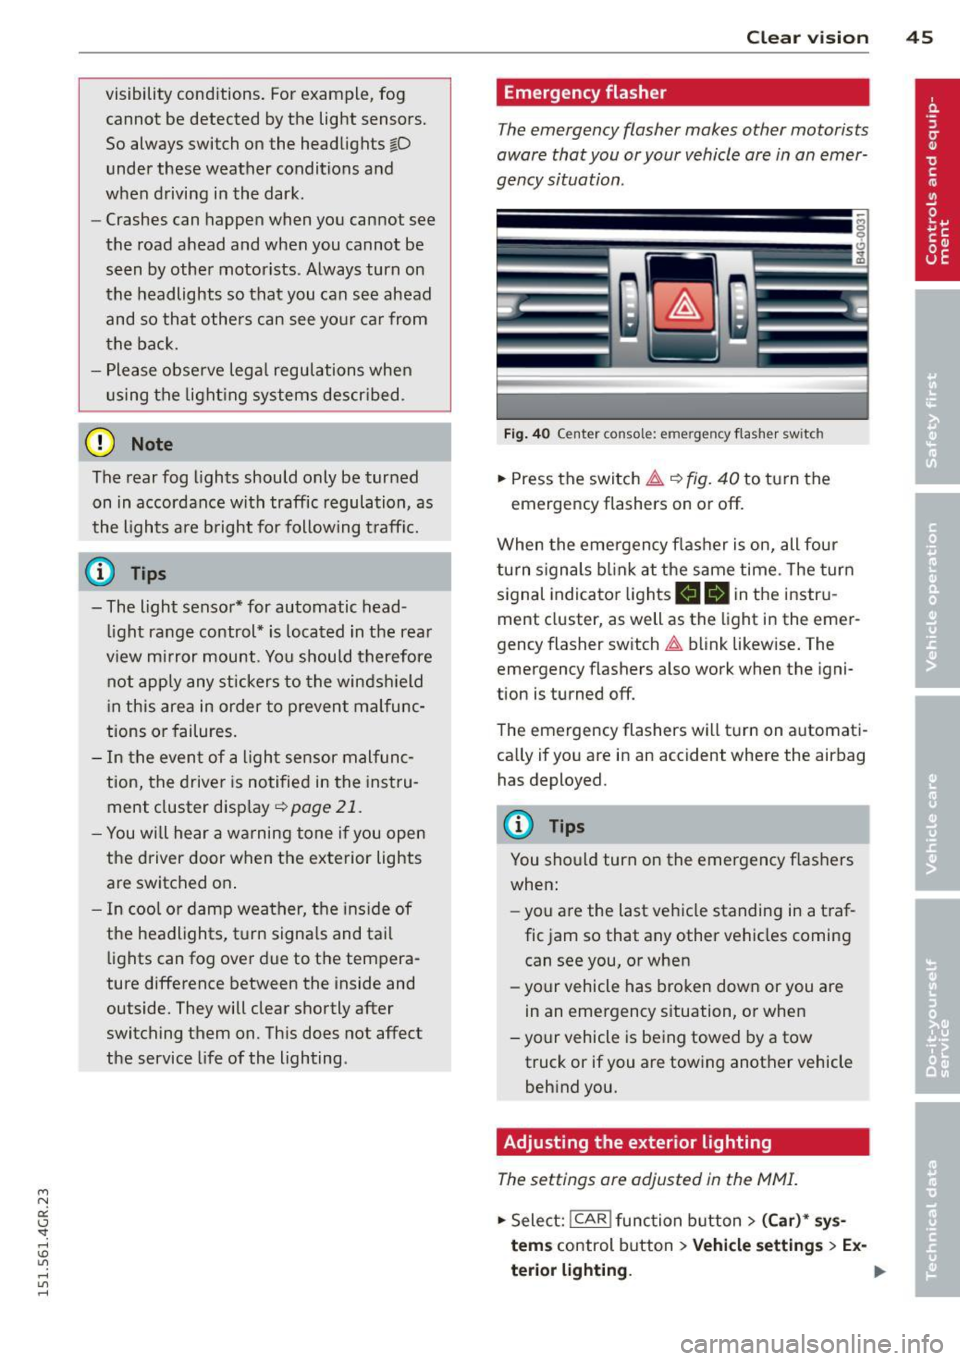
Fig. 40 Ce nt er co nsol e: em erge ncy flash er sw itc h
.,. Press the switch &..¢ fig. 40 to turn the
emergency flashers on or off.
When the emergency flasher is on, all four
turn signals blink at the same time . The turn
signal indicator lights
B DI in the instru
ment cluster, as well as the light in the emer
gency flasher switch &.. blink likewise. The
emergency flashers also work when the igni
tion is turned off.
The emergency flashers will turn on automati
cally if you are in an accident where the airbag has deployed.
@ Tips
You should turn on the emergency flashers
when:
- you a re the last vehicle standing in a traf
fic jam so that any other vehicles coming
can see you, or when
- your vehicle has broken down or you are
in an emergency situation, or when
- your vehicle is being towed by a tow
truck or if you are towing another vehicle
behind you.
Adjusting the exterior lighting
The settings are adjusted in the MMI.
.,. Select: !CAR ! function button> (Car)* sys
tem s
control button > Vehicle settings > Ex-
terior lighting. ..,.
Page 216 of 302
214 Check ing and filling
Using the proper engine o il is important for
the functionality and service life of the en
g ine . Your engine was factory-filled with a
hi gh-quality oil which can usua lly be used
throughout the enti re year.
0 Note
Y our Limited New Vehicle Warranty does
not cover damage or ma lf u nctions due to
fa ilure to follow recommended mainte
nance and use requ irements as set forth in
the Audi Owner's Manual and Warranty
&
Ma intenance boo klet.
- Use only a high quality eng ine oi l that ex
pressly complies w ith the Audi o il quality
sta ndard spec ified for your veh icle's en
gine . U sing any other oil can cause seri
ous eng ine damage.
- Do not mix any l ubr ica nts o r othe r addi
tives into the eng ine o il. Doing so c an
ca use eng ine dam age.
I f you need to add oi l and there is no ne
availab le tha t mee ts the Audi o il qua lity
s tandar d your engine requires, yo u may
ad d a tota l of no more than 0 .5 quart/liter
of a high-quality "synthetic"oil that meets
the following specifications.
- ACEA A3 or API S M with a viscosity grade
of SAE 0W-30, SAE SW-30 or
SAE SW -40.
- Fo r more information abo ut engine oi l
that has been app roved for your vehicle,
please contact either your a uthori zed
Audi dealer or Audi Customer Relations
at 1 (800) 822 -2834 or visit our web site
at www.audiusa .com or
www .aud icanada .ca .
Engine oil consumption
The engine in your vehicle depends on an ade
quate amount of oil to lubricate and cool all
of its moving parts.
In order to provide effective lubrication and
cooling of i nternal engine components, a ll in
ternal comb ustion eng ines consume a certa in amount of oil. Oil consumpt
ion varies from
engine to engine and may change significant ly
over the life of the engine . Typically, engines
with a spec ified break-in period (see
<=> page 196) consume more oil during the
break -in pe riod than they consume after o il
co nsump tion has stabilized.
Under normal cond itions, the rate of oil con
sumption depends on the q ua lity and viscos ity
of the oil, the RPM (revolut ions per minute) at
wh ich the engine is operated, t he ambie nt
temperature and road conditions . Fur ther fac
tors a re the amount of oil dilut ion from wa ter
condensation or f ue l resid ue and the oxid a
t ion level of the o il. As any engine is subjec t to
wear as m ileage builds up, t he oil consump
tion may increase over time until replacement of wo rn components may become necessary.
W it h a ll these variab les coming into play, no
standard rate of oil consumption can be es
tablished or specified. There is no alte rnative
to regu lar and frequent check ing of the o il lev
el, see
Note .
If
the yellow engine oil level warning symbo l
in the instrument cluster
I!!! lights up, you
shou ld check the oil leve l as soon as possib le
<=> page 215. Top off the oil at your earliest
convenience
<=> page 215.
A WARNING
-Before you chec k anythi ng in the engine
com partment, always read a nd heed all
WAR NIN GS¢
& in Working in th e engine
compar tment on page 211.
{(D Note
Driving w it h an insufficient o il level is like
ly to cause severe damage to the engine .
(D Tips
- The oil pressure warn ing display. is
not an indicator of the oil level. Do not
rely on it . Instead, check the oil lev el in
your engine at regular intervals , pref
erably each time you refuel, and alway s
before going on a long trip. .,.