center console AUDI RS7 SPORTBACK 2016 Owners Manual
[x] Cancel search | Manufacturer: AUDI, Model Year: 2016, Model line: RS7 SPORTBACK, Model: AUDI RS7 SPORTBACK 2016Pages: 282, PDF Size: 70.78 MB
Page 60 of 282
Sea ts and stor age
.. Press and hold the control knob until the ad
justing process is complete.
@ Tips
The lumbar support and upper th igh support
settings a re not transferred when aligning
the front passenger's seat with the driver's
seat.
Ashtray
Applies to: vehicles with ashtray
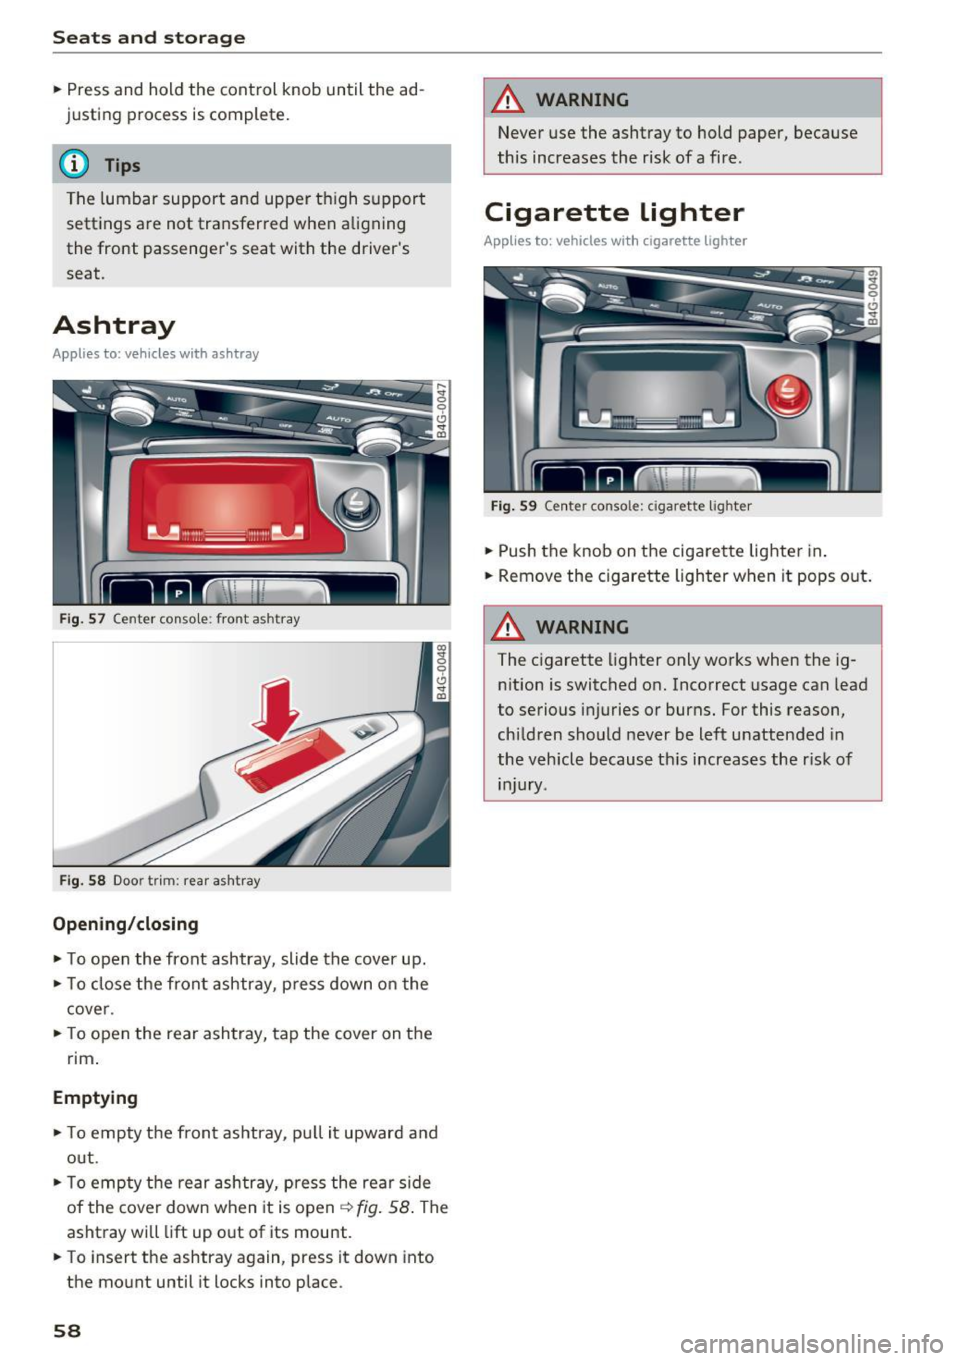
F ig . 57 Center console : front ashtray
F ig. 58 Door tr im: rea r asht ray
Opening /closing
.. To open the front ashtray, slide the cover up .
.. To close the front ashtray, press down o n the
cove r .
.. To open the rear ashtray, tap the cover on the
rim .
Emptying
.. To empty t he front ashtray, pu ll it upward and
out .
.. To empty the rear ash tray, press the rea r side
of the cover down when it is open ¢ fig . 58 . The
ashtray will lift up out of its mount .
.. To insert the ashtray again, press it down into
the mount until it locks into place.
58
A WARNING
Never use the ashtray to hold paper, because
this increases the risk of a fire .
Cigarette lighter
Applies to: vehicles with cigarette lighter
F ig . 59 Center console: cigarette lighter
.. Push the knob on the cigarette lighte r in .
.. Remove the cigarette lighter when it pops out.
A WARNING
The c igarette lighter only works when the ig
n ition is switched on. Incorrect usage can lead
to serious injuries or burns. For this reason,
chi ldren should never be left unattended in
the vehicle because th is increases the risk of
injury .
Page 61 of 282
12 Volt sockets
Applies to: veh icles wit h 12 V sockets
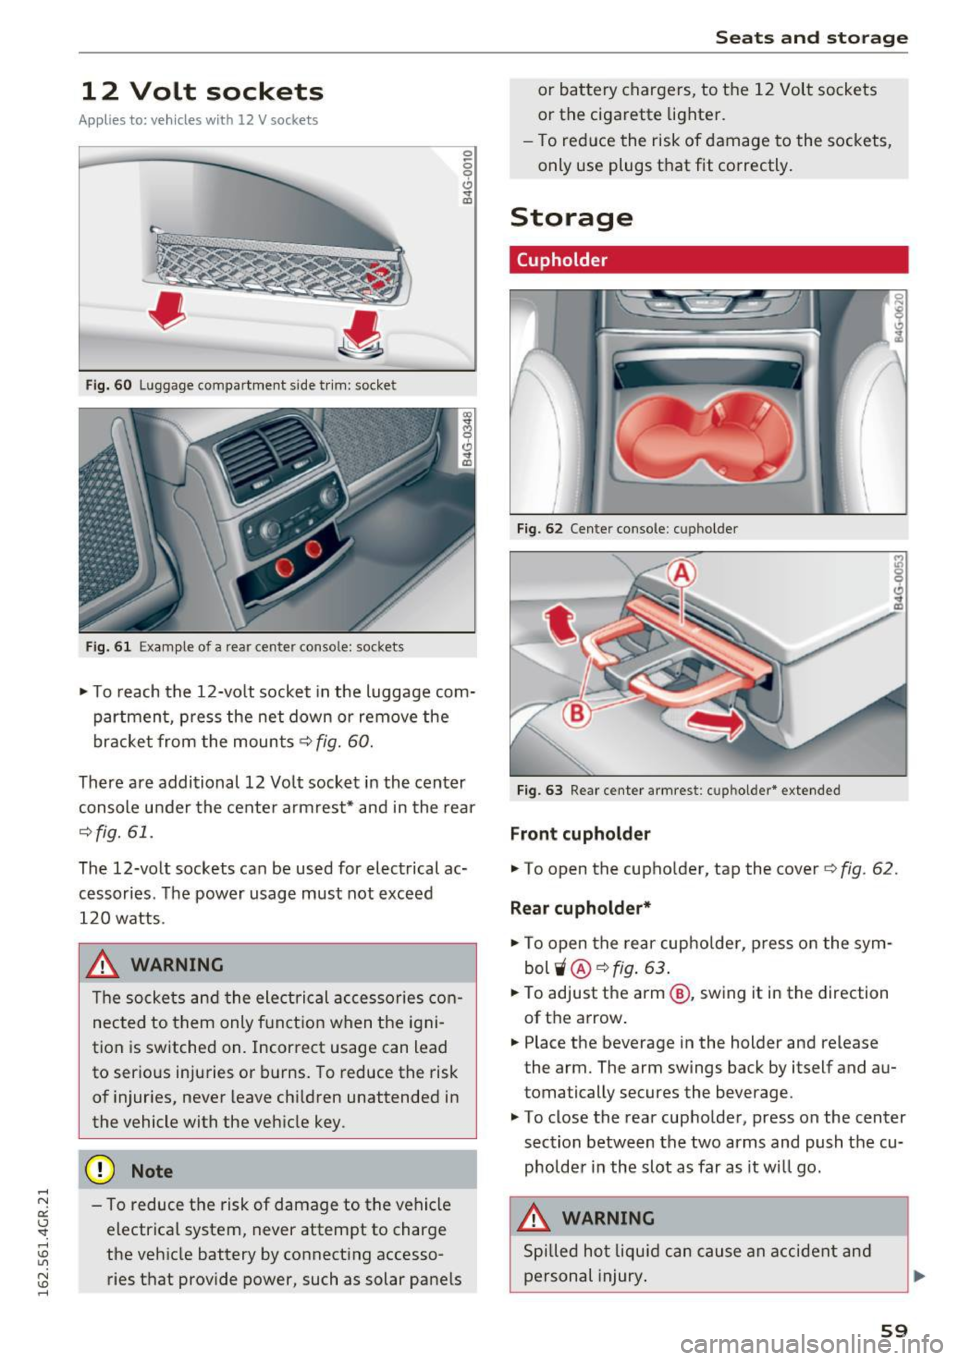
Fi g. 60 Luggage compartment side tr im: socket
Fi g. 61 Exa mple of a rear center console: sockets
0 0 9 (!) ., ID
~ To reach the 12-volt socket in the luggage com
partmen t, press the net down or remove the
bracket from the mounts~
fig. 60.
There are addi tional 12 Vo lt socket in the center
console under the cente r arm rest* and in the rear
¢fig. 61.
The 12-volt sockets can be used for electrical ac
cessories. The power usage must not exceed
120 watts.
_& WARNING
The socke ts and the ele ctrical accessories con
nected to them only f unct ion when the igni
tion is switched on. Incor rect usage can lead
to ser ious injuries or b urns. To reduce the risk
of injur ies, never leave chi ldren unattended in
the vehicle with the veh icle key.
(D Note
- To reduce the risk of damage to the vehicle
electrical system, never attempt to charge
the vehicle battery by connecting accesso
ries that prov ide power, such as solar panels
Seats and storag e
or battery chargers, to the 12 Volt sockets
or the cigarette lighter.
- To red uce the risk of damage to the sockets,
only use plugs that fit correctly.
Storage
(upholder
I
I
F ig . 62 Center console: cupho lder
F ig. 63 Rear center armrest: cupholder * ex tended
Front cupholder
~ To open the cupho lder, tap the cover Q fig. 62.
Rear cupholde r*
~ To open the rear cupholder, p ress o n the sym
bol
'i @ ¢fig . 63.
~ To adjust the arm @, sw ing it in the direction
of t he arrow .
~ Place the beverage in the holder and release
the arm. The arm swings back by itself and au
tomatically secures the beverage.
~ To close the rear cupholde r, press on the center
section between the two arms and push the cu
pholder in the slot as far as it w ill go.
_& WARNING
Spilled ho t liqu id can cause an accident and
personal injury .
59
Page 110 of 282
Parking systems
Parking system plus
Description
Applies to: ve hicles w ith park ing system p lus
Audi parking system plus provides audio and vis
ual signals when parking.
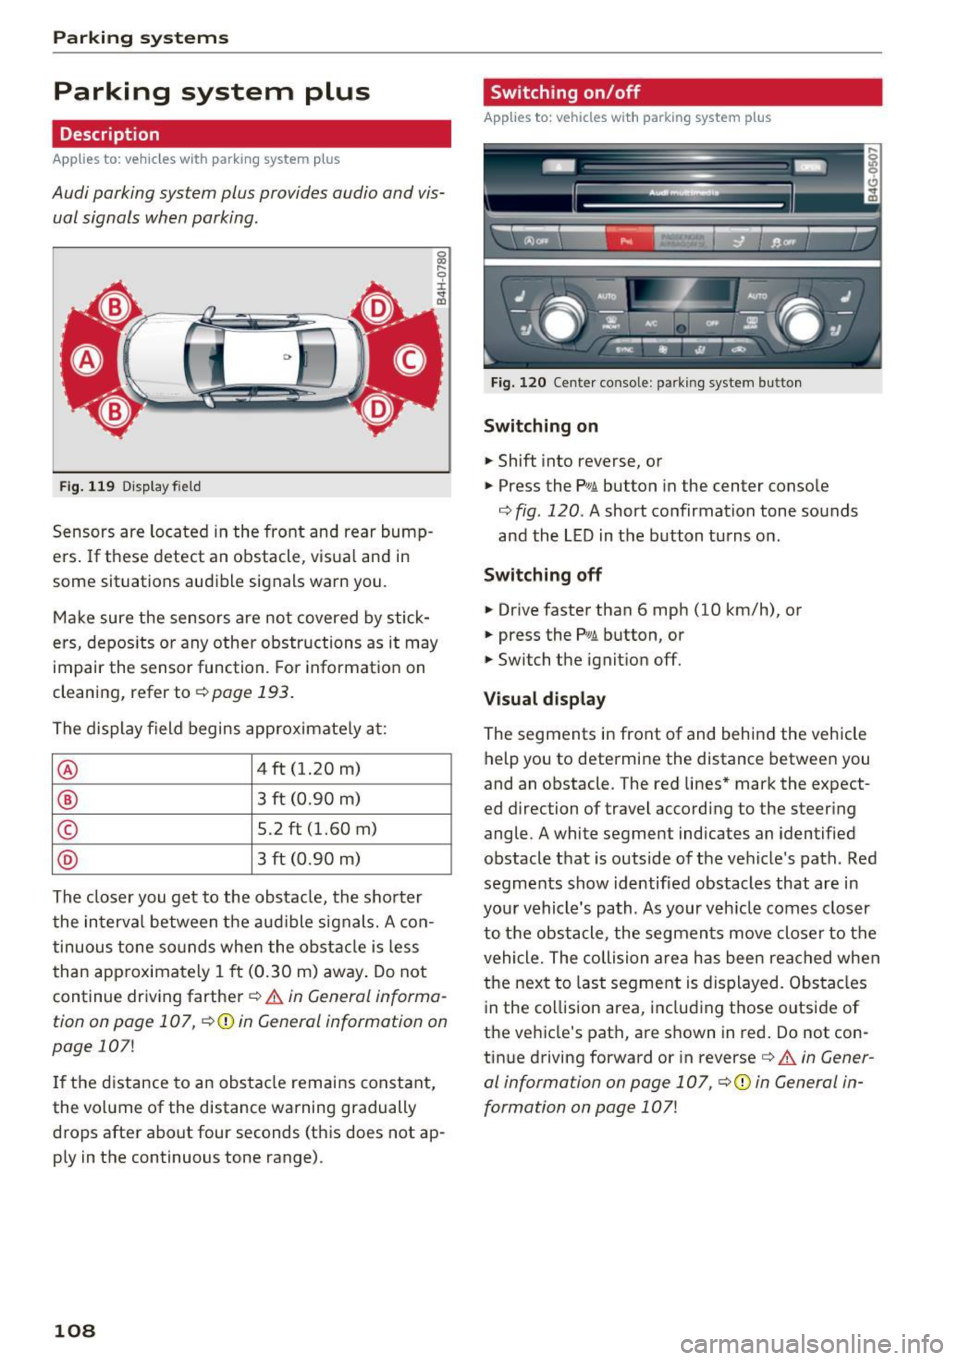
F ig . 119 D isp lay fiel d
Sensors are located in the front and rear bump
ers. If these detect an obstacle, visua l and in
some situations audible signals warn you.
Make sure the sensors are not covered by stick
ers, depos its or any other obstructions as it may
impair the sensor function. For information on
cleaning, refer to
¢ page 193.
The display field begins approximately at :
® 4 ft (1.20 m)
® 3 ft (0.90 m)
© 5.2 ft (1.60 m)
@ 3 ft (0.90 m)
The closer you get to the obstacle, the shorter
the interva l between the audible signals. A con
tinuous tone sounds when the obstacle is less
than approximately 1 ft (0.30 m) away . Do not
continue driving farther¢
& in General informa
tion on poge 107,
¢ @) in General information on
page
107!
If the distance to an obstacle remains constant,
the volume of the distance warning gradually
drops after about four seconds (this does not ap
p ly in the continuous tone range).
108
Switching on/off
App lies to : vehicles with parking system plus
Fig. 120 Center console : parkin g system button
Switching on
.. Shift into reverse, or
.. Press the
PwA button in the center console
¢
fig. 120 . A short confirmation tone sounds
and the LED in the button turns on .
Switching off
.. Drive faster than 6 mph (10 km/h), or
.. press the
p,qi button, or
.. Switch the ignition off.
Visual display
The segments in front of and behind the veh icle
help you to determine the distance between you
and an obstacle. The red lines* mark the expect
ed d irection of travel according to the steer ing
angle. A white segment indicates an identified
obstacle that is outside of the vehicle's path . Red
segments show identified obstacles that are in
your vehicle's path. As your veh icle comes closer
to the obstacle, the segments move closer to the
vehicle. The collision area has been reached when
the next to last segment is displayed. Obstacles
in the collision area, including those o utside of
the vehicle's path, are shown in red. Do not con
tinue driving forward or in reverse¢
A in Gener
al information on page 107, ¢(Din General in
formation on page
107!
Page 112 of 282
Parking systems
-The camera lens enlarges and distorts the
field of vision. The object appears both al
tered and inaccurate on the screen.
- In certain situations, people or objects in
the display appear closer or farther away:
- For objects that do not touch the ground,
such as the bumper of a parked vehicle, a
trailer hitch or the rear of a truck. Do not
use the help lines in this case.
- If driven from a level surface onto an in
cline, or a downward slope.
- If driven toward protruding objects.
- If the vehicle is carrying too much load in
the rear.
(D Note
- Always read and follow the applicable warn
ings r::!>(D
in General information on
page 107 .
-The orange colored orientation lines in the
Infotainment display show the vehicle path
depending on the steering wheel angle. The
front of the vehicle swings out more than
the rear of the vehicle. Maintain plenty of
distance so that your outside mirror or a
corner of your vehicle does not collide with
any obstacles.
Switching on/off
Applies to: vehicles with rearview camera
Switching on
.,. Shift into reverse, or
.,. Press the
P,,, A button in the center console
r:=> page 108, fig. 120. A short confirmation
tone sounds and the LED in the button turns
on.
Switching between the rearview camera and
optical display
.,. Press the Graphic control button ®
r:=> page 110, fig. 125 to see the optical display .
.,. Press the
Rear view control button to see the
. . rearv1ew camera image.
Switching off
.,. Drive forward faster than 10 km/h, or
.,. press the
P,1
1.A button, or
110
.,. Switch the ignition off.
@ Tips
- The visual display in the left part of the dis
play should help you detect the critical vehi
cle areas.
- You can change the volume and pitch of the
signals as well as the display
r:=> page 116.
Cross parking
Applies to: vehicles with rearview camera
This view may be used when parking in a garage
or in a parking space.
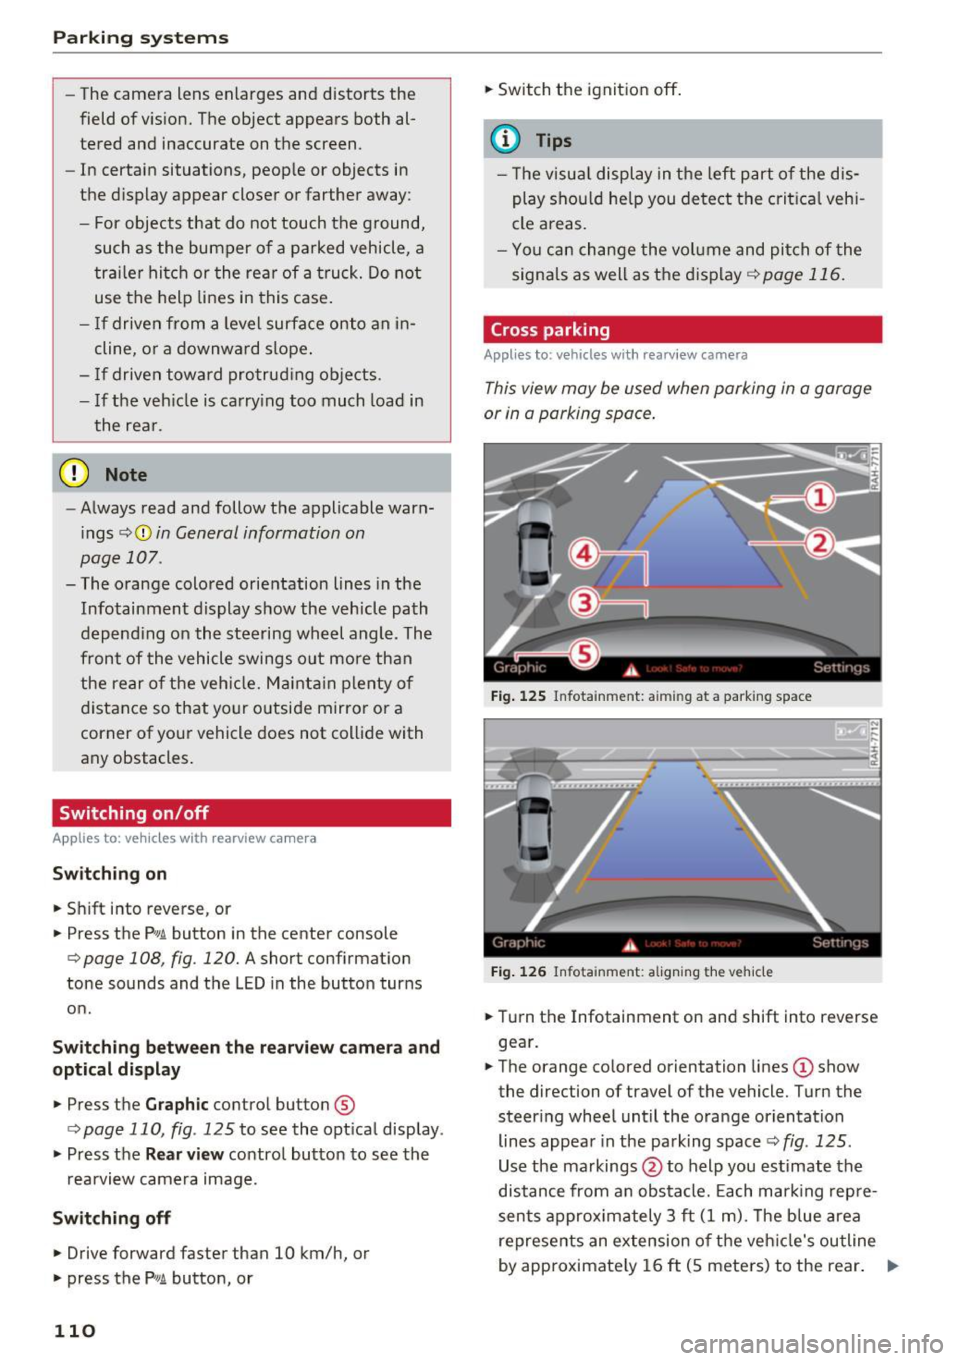
Fig. 125 Infotainment: aiming at a parking space
Fig. 126 Infota inment: aligning the vehicle
.,. Turn the Infotainment on and shift into reverse
gear.
.,. The orange colored orientation lines
(D show
the direction of travel of the vehicle. Turn the
steer ing wheel until the orange orientation
lines appear in the parking space r::!>
fig. 125 .
Use the markings @to help you estimate the
distance from an obstacle. Each marking repre
sents approximately 3 ft
(1 m). The blue area
represents an extension of the vehicle's outline
by approximately
16 ft (5 meters) to the rear. ..,.
Page 183 of 282
In extreme cases, EDL automatically switches off
to keep the brake on the braked wheel from over
heating. The vehicle is still working correctly. EDL
will switch on again automatically when condi
tions have returned to normal.
Steering recommendation
The ESC helps to stabilize the vehicle by changing
the steering torque .
I n vehicles with dynamic steering*, ESC also
helps to stabilize the steering in critical situa
tions.
Selective wheel torque control
Selective wheel torque control is used when driv
ing on curves. The front wheel on the inside of
the curve or both wheels on the inside of the
curve are braked selectively as needed. This al
lows more precise driving in curves.
Automatic post-collision braking system
The "Automatic post-collision brak ing system"
can help to reduce the risk of sliding and of other
coll isions after an accident.
If the airbag control
module detects a collision above a certain vehicle
speed, the vehicle is braked by the ESC.
The vehicle does not brake automatically if:
- the driver presses the accelerator pedal, or
- the braking force generated by the pressed
brake pedal is greater than the brak ing force
that would be initiated by the system, or
- the ESC, the brake system or the vehicle electri
cal system are not function ing .
Switching on /off
Intelligent Technology
A WARNING
-- The ESC and its integrated systems cannot
overcome the limits posed by natural physi
cal laws. This is especia lly important on slip
pery or wet roads. If the systems begin act
ing to stabilize your vehicle, you should im
mediately alter your speed to match the
road and traffic conditions. Do not let the
increased safety provided tempt you into
taking r isks. This cou ld increase your risk of
a collision .
- Please note the risk of a collision increases
when driving fast, especially through curves
and on slippery or wet roads, and when dr iv
ing too close to objects ahead. The ESC and
its integrated systems cannot always pre
vent collisions -there is still a risk of acci
dents!
- Press the accelerator pedal carefully when
accelerating on even, slippery surfaces such
as ice and snow. The dr ive wheels can spin
even when these control systems are instal
led and this can affect driving stability and
i n crease the risk of a collision .
(j) Tips
-ABS and ASR only function correctly when
all four wheels are equipped with identical
tires. Different tire sizes can lead to a reduc
tion in engine power.
- You may hear noises when the systems de
scribed are working.
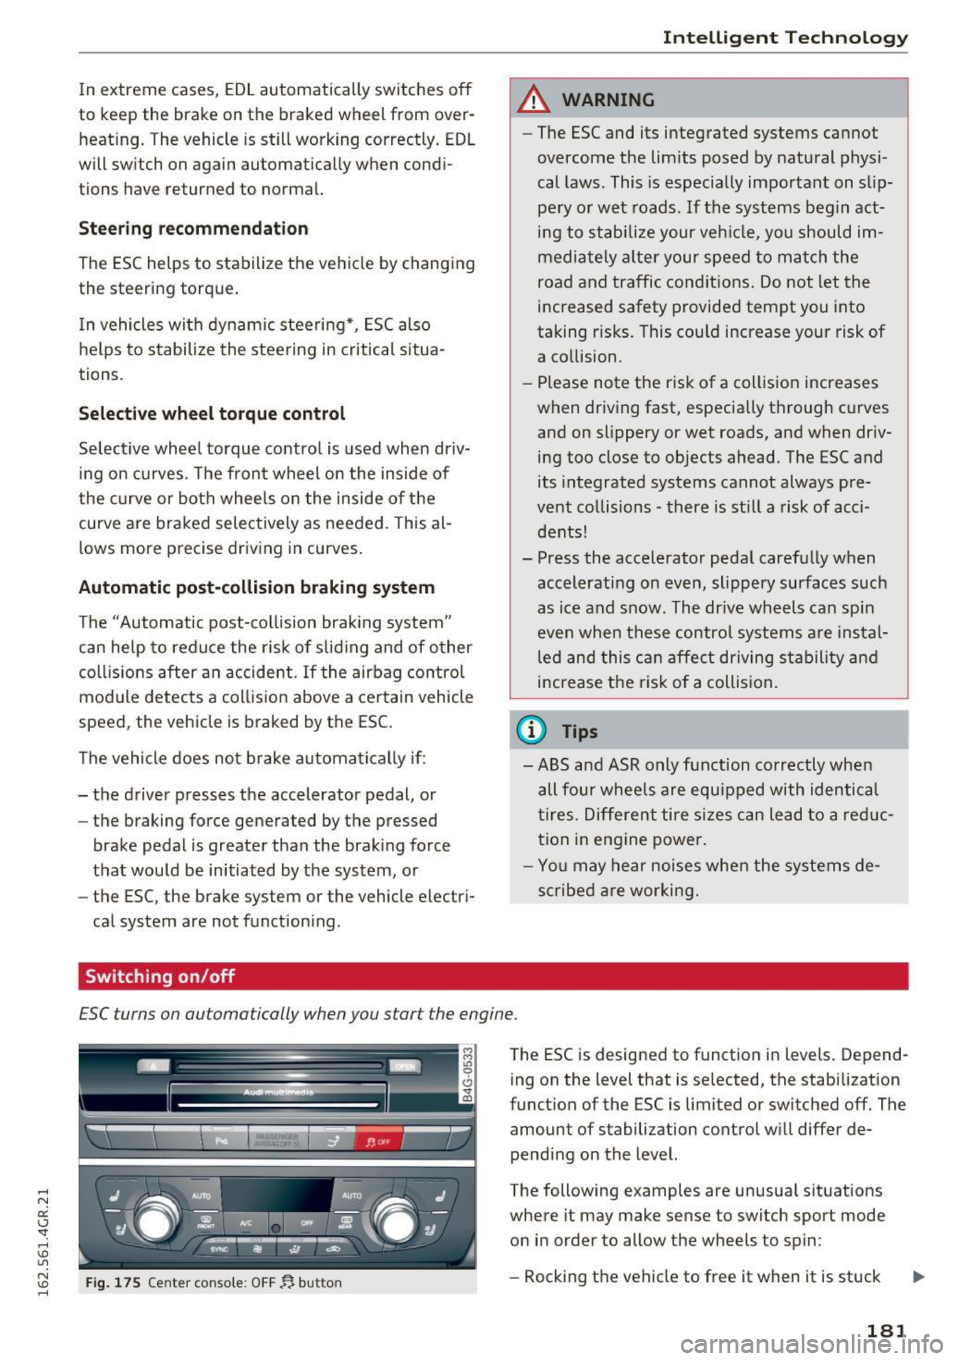
£SC turns on automatically when you start the engine.
Fig. 175 Center console: OFF~ button
The ESC is designed to function in levels. Depend
ing on the level that is se lected, the stabilization
function of the ESC is limited or switched off. The amount of stabilization control will differ de
pending on the level.
The following examples are unusual situations
where it may make sense to switch sport mode on in order to allow the wheels to spin:
- Rocking the vehicle to free it when it is stuck ..,.
181
Page 187 of 282
The all wheel drive concept is designed for high
engine power. Your vehicle is exceptionally pow
erful and has excellent driving characterist ics
both under normal driving conditions and on
snow and ice. Always read and follow safety pre
cautions
¢ ,&. .
Winter tires
By using all wheel drive, your vehicle has good
forward motion with standard tires in winter con ditions . However, in winter we recommend using
winter or all season tires on all four wheels, be
cause this will improve the braking effect.
Snow chains
If there are snow chain laws, snow chains must
also be used on vehicles with all wheel drive
¢ page 233, Snow chains .
Replacing tires
For vehicles with all wheel drive, only wheels with
the same rolling circumference should be used .
Avoid wheels with different tread depths
¢ page 225, New tires or wheels.
Offroad vehicle?
Your Audi is not an offroad vehicle -there is not
enough ground clearance. For this reason, avoid
difficult terrain.
A WARNING
-Also, in vehicles with all wheel drive, adapt
your driving style to the current road and
traffic conditions. Do not let the increased
safety provided tempt you into taking risks,
because th is increases the r isk of an acci
dent.
- The braking ability of your veh icle is limited
to the tract ion of the wheels . In this way, it
is not diffe rent from a two wheel drive vehi
cle. Do not be tempted to accelerate to a
high speed when the road is slippery this in
creases the risk of an accident.
- Note that on wet streets, the front wheels
can "hydroplane" if driving at speeds that
are too high . Unlike front wheel drive
vehicles, the engine does not rev higher sud
denly when the vehicle begins hydroplaning.
Intelligent Technology
For this reason, pay attention to the road
conditions reg a rd less of your speed to re
duce the risk of an accident .
Rear spoiler
The extendable rear spoiler increases driving sta
bility .
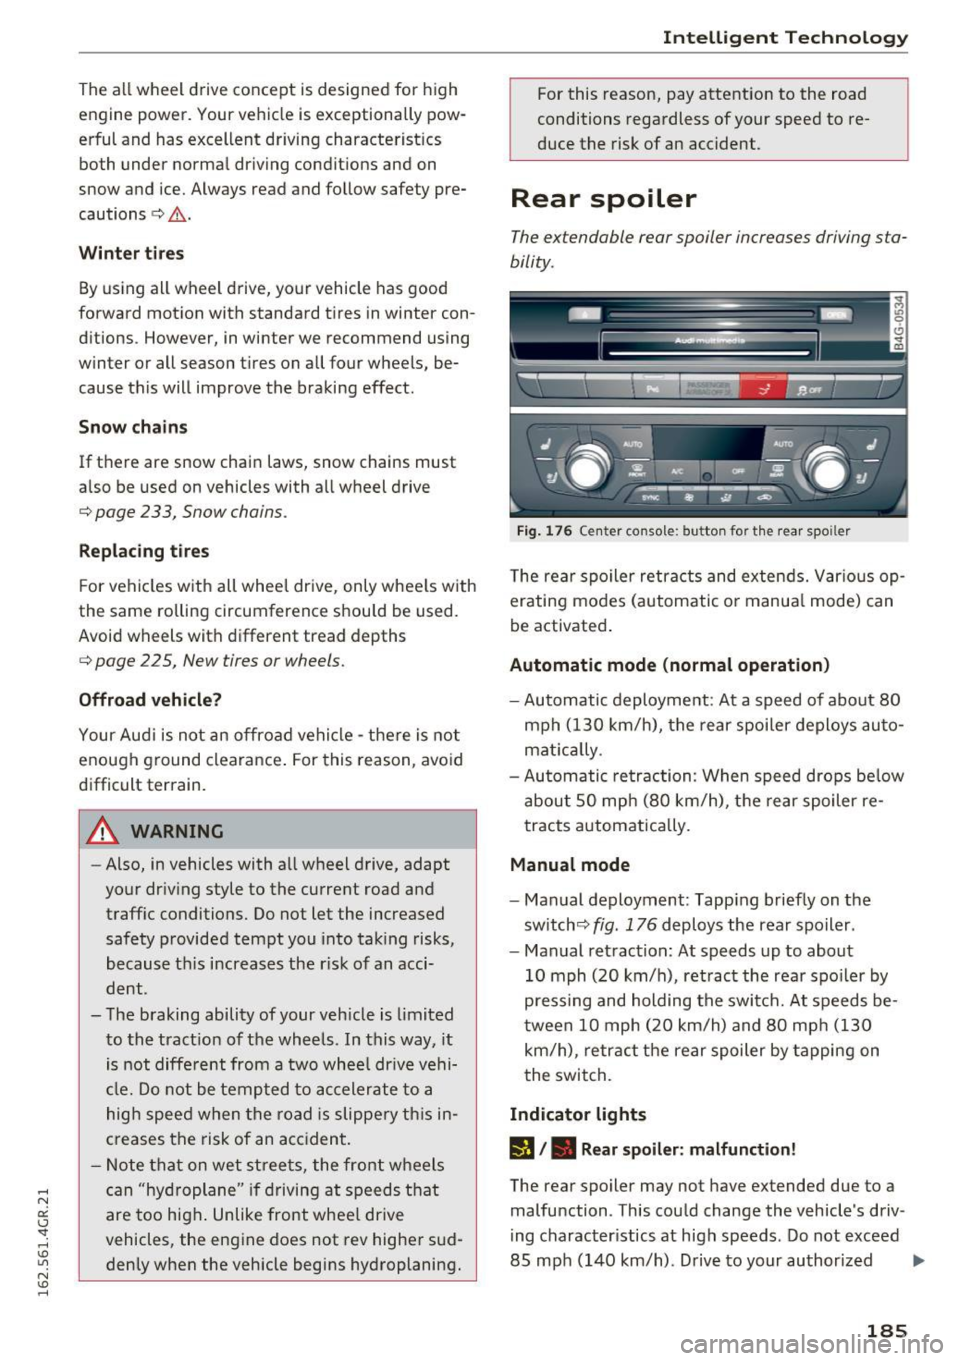
Fig. 176 Center console: button for t he rear spoiler
The rear spoiler retracts and extends. Var ious op
erating modes (automatic or manua l mode) can
be activated .
Automatic mode (normal operation)
-Automatic deployment : At a speed of about 80
mph (130 km/h), the rear spoiler deploys auto
mat ically .
- Automatic retraction: When speed drops be low
about SO mph (80 km/h), the rear spoiler re
tracts automatically.
Manual mode
-Manual deployment: Tapping briefly on the
switch<=:>
fig. 176 deploys the rear spoiler.
- Manual retraction: At speeds up to about
10 mph (20 km/h), retract the rear spoiler by
pressing and holding the switch. At speeds be
tween 10 mph (20 km/h) and 80 mph (130
km/h), retract the rear spoiler by tapping on
the switch.
Indicator lights
l'J /. Rear spoiler: malfunction!
The rear spoiler may not have extended due to a
malfunction . This could change the vehicle's driv
ing character istics at high speeds . Do not exceed
85 mph (140 km/h). Drive to your authorized ..,.
185