AUDI S3 2010 Manual PDF
Manufacturer: AUDI, Model Year: 2010, Model line: S3, Model: AUDI S3 2010Pages: 320, PDF Size: 75.34 MB
Page 71 of 320

Outside mirrors
The outside mirrors a re electrically adjuste d (power
mirrors)
Adjusting the outside mirrors
l8 ::: ci. ., m
Fig . 67 Forwa rd
s e ctio n of dri ver 's
a rm re st : po wer m irr or
c ontrol s
Turn the adjust ing knob to=> fig. 67 © (driver 's side
outside m irror) to @ (front passenger's outside mirror) .
- Press the knob in the appropr iate direction to move the
mirror surface so that you have a good view to the rear.
Heat ed mirrors*
- T urn t he ro tary kno b to @ .
Folding both exterior mirrors*
- Rotate the knob to position @.
Depending on outside tempera ture and v ehic le speed, the mirror
surfaces are heated until the ignition is swi tched off -even if the
ro tary knob is no longer in position @.
Yo u are well -advised to fold * the outside mi rrors in when maneu
vering in tight spaces or when leaving the car parked c lose to other
vehic les .
Con tro ls and eq uip
ment
Clear vision
0 Note
• Curved mirro r surfaces (convex or spherica l* ) increase your fie ld
of view. Remember that vehicles or other objects will appear smaller
and far ther away than when seen in a flat mirror. If you use th is
mirror to estimate distances of fo llowing vehic les when changing
lanes, you cou ld estimate incorrectly and cause an accident .
[ i ] Tips
If the re shoul d be a malfunctio n in the electrical system, yo u ca n
still adjust the outside mirrors by pressing the edge of the mirror .•
Ap plies to vehi cles: with automa tic dim m in g for ou tsi de m irro rs
Automatic dimming for outside mirrors
The outside mirr ors are dimmed t ogether wi th the automatic
dimming of the inside mirror. When the ignition is switched on , the
mir ro rs darken automat ically depending on the light s triking the m
(e.g . headlights from the rear) .
When the interior lighting is switched on and when reverse gear is engaged, the mir rors are switched back to their o riginal b rightness
(not dimmed).
& WARNING
Broken glass of automati c dimming mirror can cause electrolyte
fluid leakage . Electrolyte fluid c an irritate skin , eyes , and respi ra
tory system .
• Repeated or prolonged e xpo sure to elect ro lyte can c au se irrita
tion to the respiratory system , e spe cially among people with
asthma or o ther re spiratory condition s. Get fresh air immediately
b y le aving the vehi cle or , if that i s not possibl e, open windows and
doors all the way . .,
Vehicle care I I Technical data
Page 72 of 320

Clear vision
& WARNING (continued)
• If electrolyte gets into the eyes, flush them thoroughly with
large amounts of clean water for at least 15 minutes ; medical
attention is recommended .
• If electrolyte contacts skin, flush affected area with clean water
for at least 15 minutes and then wash affected area with soap and
water; medical attention is recommended. Thoroughly wash
affected clothing and shoes before reuse .
• If swallowed and person is conscious, rinse mouth with water
for at least 15 minutes. Do not induce vomiting unless instructed
to do so by medical professional . Get medical attention immedi
ately.
0 Note
Electrolyte leaking from a broken mirror glass attacks the vehicle
paint and plastic surfaces. Clean up spilled electrolyte immediately
with clear water and a sponge .
[ i] Tips
• If automatic dimming for the inside mirror is switched off, the
outside mirrors are also not dimmed automatically.
• Automatic dimming for the mirror only operates properly if the
sunshade* for the rear window is retracted, or the light striking the inside mirror is not hindered by other objects. •
Digital compass
Applies to vehicles: with digital compass
Activating or deactivating the compass
The direction is displayed on the interior rear view mirror.
Fig. 68 Inside rear
view mirror : digital
compass activated
-To activate or deactivate, hold the@ button down until
the red display appears or disappears.
The digital compass only works with the ignition turned on. The
directions are displayed as initials:
N (North), NE (Northeast), E
(East), SE (Southeast), S (South), SW (Southwest), W (West), NW
(Northwest).
[ i] Tips
To avoid inaccurate directions, do not allow any remote controls,
electrical systems, or metal parts close to the mirror. •
Page 73 of 320

Applies to vehi cles: wit h dig it al compass
Setting the magnetic deflection zone
The correct magnetic deflection zone must be set in order
to display the directions correctly .
/
@
®
Fig. 69 North America: magnetic deflection zone boundaries
-Hold the@=> page 70, fig. 68 button down until the
number of the set magnetic deflection zone appears on
the interior rear v iew mirror .
- Adjust the magnetic deflection zone by repeatedly
pressing on the @ button. The set mode automatically
deactivates after a few seconds. •
Contro ls and eq uip
ment
Ap plies to vehi cles: with digital compass
Calibrating the compass Clear vision
The
compass has to be recalibrated if the display is wrong
or inaccurate.
Hold the@ button down until the letter C is displayed on
the interior rear view mirror.
Drive in a circle at a speed of about 5 mph (10 km/h) until
a direction is shown on the interior rear view mirror.
& WARNING
The digital compass is to be used as a directional aid only. Even
though you may want to look at it while you are driving, you must
still pay attention to traffic, road and weather conditions as well
as other possible hazards. •
Vehicle care
I I irechnical data
Page 74 of 320
Seats and storage
Seats and storage
General recommendations
Why is your seat adjustment so important?
The safety belts and the airbag system can only provide
maximum protection if the front seats are correctly
adjusted.
There are several different ways you can adjust the driver's seat and
the front passenger's seat so that it conforms to your body size. It is
especially important that the seat be adjusted properly so that:
• you can easily and quickly reach all the switches and controls in
the instrument panel
• your body is properly supported thus reducing physical stress
and fatigue
• the safety belts and airbag system can offer maximum protec
tion=>
page 145
In the following chapters, you will see exactly how you can best
adjust your seats.
There are special regulations and instructions for installing a child safety seat on the front passenger's seat. Always heed the informa
tion regarding child safety provided in=>
page 167, "Child Safety".
L1}. WARNING
Incorrect seating position of the driver and all other passengers
can result in serious personal injury.
• Always keep your feet on the floor when the vehicle is in motion
- never put your feet on top of the instrument panel, out of the
window or on top of the seat cushion! This applies especially to
the passengers. If your seating position is incorrect you increase
the risk of injury in the case of sudden braking or an accident. If
& WARNING (continued)
the airbag inflates and the seating position is incorrect this could
result in personal injury or even death.
• It is important for both the driver and front passenger to keep
a distance of at least 10 inches (25 cm) between themselves and
the steering wheel and/or instrument panel. If you're sitting any closer than this, the airbag system cannot protect you properly. In
addition to this, the front seats and head restraints must be
adjusted to your body height so that they can give you maximum
protection.
• Always try to keep as much distance as possible between your
self and the steering wheel or instrument panel.
• Do not adjust the driver's or front passenger's seat while the
vehicle is moving . Your seat may move unexpectedly, causing
sudden loss of vehicle control and personal injury. If you adjust
your seat while the vehicle is moving, you are out of position. •
Driver's seat
The correct seat position is important for safe and relaxed
driving.
We recommend that you adjust the driver's seat in the
following manner:
- Adjust the seat in fore and aft direction so that you can easily push the pedals to the floor while keeping your
knees slightly bent=>
& in "Why is your seat adjustment
so important?".
- Adjust the seatback so that when you sit with your back
against the seatback, you can still grasp the top of the
steering wheel.
~
Page 75 of 320
- Position the head restraint according to the occupant's height=>
page 77. For maximum protection, the top of
the head restraint should be at least at eye level, prefer
ably higher and ideally level with the top of the head
=>
page 129 , fig. 126.
& WARNING
Never place any objects in the driver's footwell. An object could
get into the pedal area and interfere with pedal function. In case
of sudden braking or an accident, you would not be able to brake
or accelerate! •
Front passenger's seat
Always move the front passenger seat into the rearmost
position.
To avoid contact with the airbag while it is deploying, do not
sit any closer to the instrument panel than necessary and
always wear the three-point safety belt provided adjusted
correctly. We recommend that you adjust the passenger's
seat in the following manner :
- Move the front passenger seat into the rearmost position
of the fore and aft adjustment range=>
& in "Why is
your seat adjustment so important?" on
page 72.
- Bring the backrest up to an (almost) upright position.
Do
not ride with the seat reclined.
- The ideal position for the head restraint is with the upper
edge of the restraint level with the top of your head
=>
page 77. You should not lower the top of the restraint
below the level of your eyes.
Con tro ls and eq uip
ment
Seats and storage
- Place your feet on the floor in front of the passenger's
seat. •
Adjusting front seats manually
Applies to vehicle s: wi th manua l seat ad justme nt
Adjustment controls
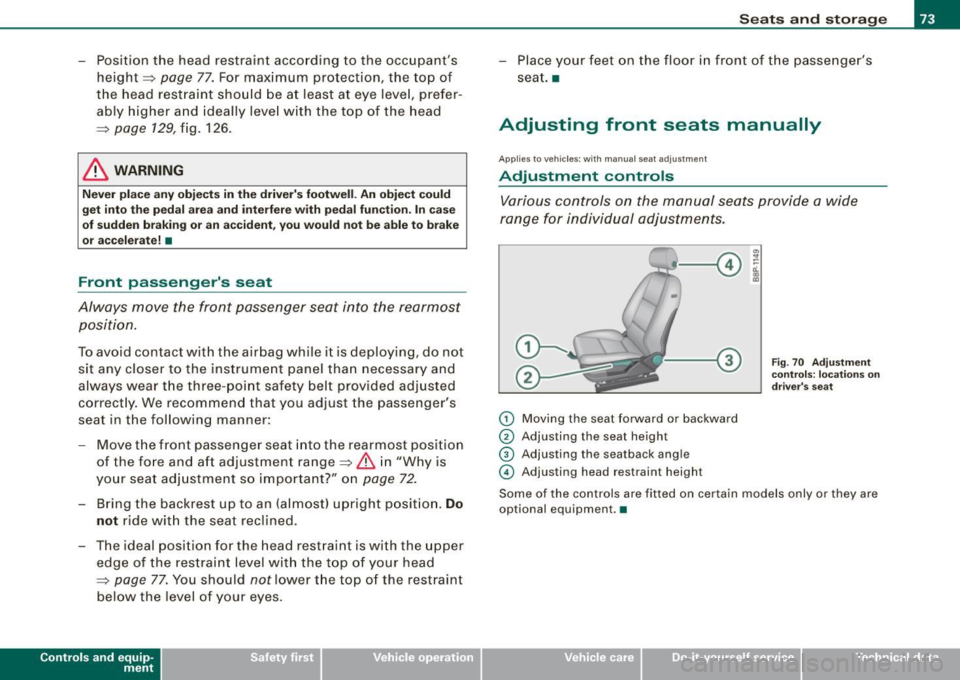
Various controls on the manual seats provide a wide
range for individual adjustments.
G) Moving the seat forward or backward
© Adjusting the seat height
© Adjusting the seatback angle
© Adjusting head restraint heigh t
Fig. 70 Adjustment
controls: locations on
driver's seat
Some of the controls are fitted on certain models only or they are
optional equipment. •
Vehicle care
I I irechnical data
Page 76 of 320
Seats and storage
Applies to vehicles : with m anual seat a djustm en t
Adjusting the manual seats
Position, angle and shape of the manual seats can be
adjusted to provide safe and comfortable seating.
Read and heed all WARNINGS =:> & before you adjust your
seat.
Moving the front seats forward or backward
- Lift the lever=:>
page 73, fig. 70 (D and slide the seat to
the desired position.
- Release the lever and then move the seat further until
you feel and hear it engage.
Adjusting the seat height
- Pull the lever @ up and pump it to raise the seat.
-Push the lever down and pump it to lower the seat.
Adjusting the seatback angle
- Lean forward to take your weight off the seatback.
- Turn the hand wheel© in the direction you want the
seatback to tilt.
& WARNING
• Never adjust the driver's or front passenger's seat while the
vehicle is moving. If you do this while the vehicle is moving, you
will be out of position. Always adjust the driver's or front
passenger's seat when the vehicle is not moving.
• Be careful when adjusting the seat height. Check to see that no
one is in the way, or serious injury could result!
& WARNING (continued)
• To reduce the risk of injury in the case of sudden braking or
accident, front passengers must never ride in a moving vehicle
with the seatback reclined. Safety belts and the airbag system
only offer maximum protection when the seatback is upright and
the safety belts are properly positioned on the body . The more the
seatback is reclined, the greater the risk of personal injury from an
incorrect seating position and improperly positioned safety
belts! •
Adjusting the power seat
Applies to vehi cles : wi th p ow er dr iver s eat
Adjustment switches
For an intuitive operation, the switches @ and @ are
distinctly shaped and positioned to reflect their adjust
ment functions.
Fig. 71 Adjustment
switches: locations on
driver's seat
Push or pull either switch in exactly the same direction you like the
corresponding part of the seat to move. .,,
Page 77 of 320
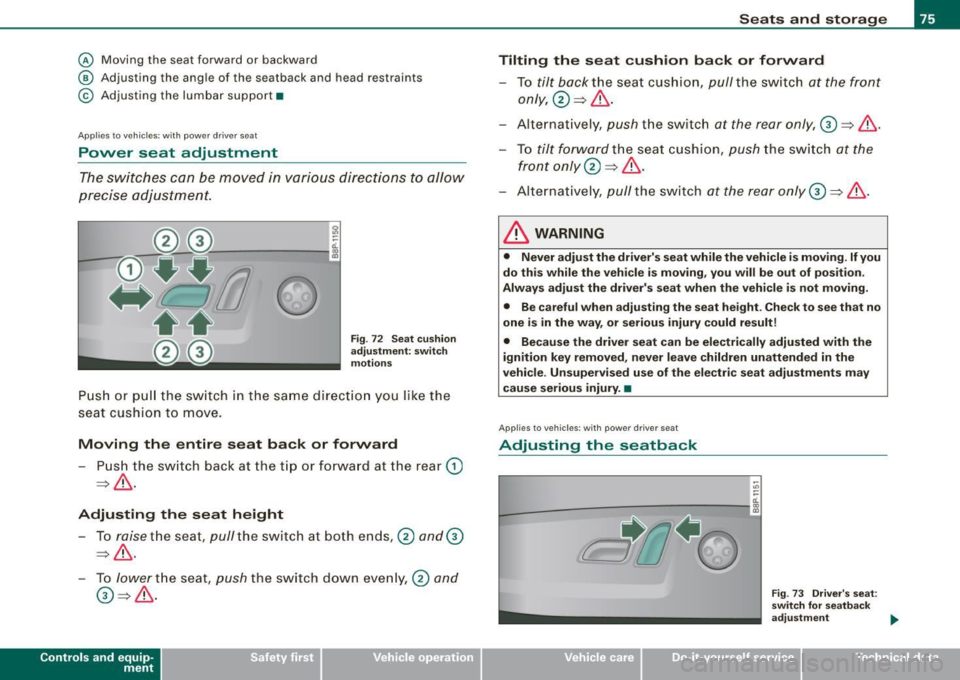
@ Moving the seat forward or backward
@ Adjusting the angle of the seatback and head restraints
© Adjusting the lumbar support•
Applies to ve hicl es : with power driver s eat
Power seat adjustment
The switches can be moved in various directions to allow
precise adjustment.
~
L----"'/ :,._..--,'~-~ ------- --i
Fig . 72 Seat cushion
adjustment: switch
motions
Push or pull the switch in the same direction you like the
seat cushion to move.
Moving the entire seat back or forward
- Push the switch back at the tip or forward at the rear G)
~& -
Adjusting the seat height
- To raise the seat, pull the switch at both ends,@ and (i)
=>& .
- To lower the seat, push the switch down evenly, @ and
0~& .
Con tro ls and eq uip
ment
Seats and storage
Tilting the seat cushion back or forward
-To tilt back the seat cushion, pull the switch at the front
only, @~& -
- Alternatively, push the switch at the rear only,
(i) => &.
- To tilt forward the seat cushion, push the switch at the
front only@=>& .
- Alternatively, pull the switch at the rear only
(i) ~ &.
& WARNING
• Never adjust the driver's seat while the vehicle is moving. If you
do this while the vehicle is moving, you will be out of position.
Always adjust the driver's seat when the vehicle is not moving.
• Be careful when adjusting the seat height. Check to see that no
one is in the way, or serious injury could result!
• Because the driver seat can be electrically adjusted with the
ignition key removed, never leave children unattended in the
vehicle . Unsupervised use of the electric seat adjustments may
cause serious injury. •
Applies to vehicles : with powe r driv e r seat
Adjusting the seatback
a'..
L------- --;:----- ~--- -,lll
CJ'1·~
Vehicle care I I
Fig. 73 Driver's seat:
switch for seatback
adjustment
~
irechnical data
Page 78 of 320
Seats and storage
-Push or pull the top of the switch in the same direction
you like the seatback to tilt~ fig . 73.
& WARNING
• Never adjust the seatback while the vehicle is moving . If you
adjust your seatback while the vehicle is moving, you will be out
of position. Always adjust the seatback when the vehicle is not
moving.
• To reduce the risk of injury in the case of sudden braking or
accident, front passengers must never ride in a moving vehicle
with the seatback reclined. Safety belts and the airbag system
only offer maximum protection when the seatback is upright and
the safety belts are properly positioned on the body. The more the
seatback is reclined , the greater the risk of personal injury from an
incorrect seating position and improperly positioned safety
belts! •
Applies to v ehicles : with lum bar support
Adjusting the lumbar support
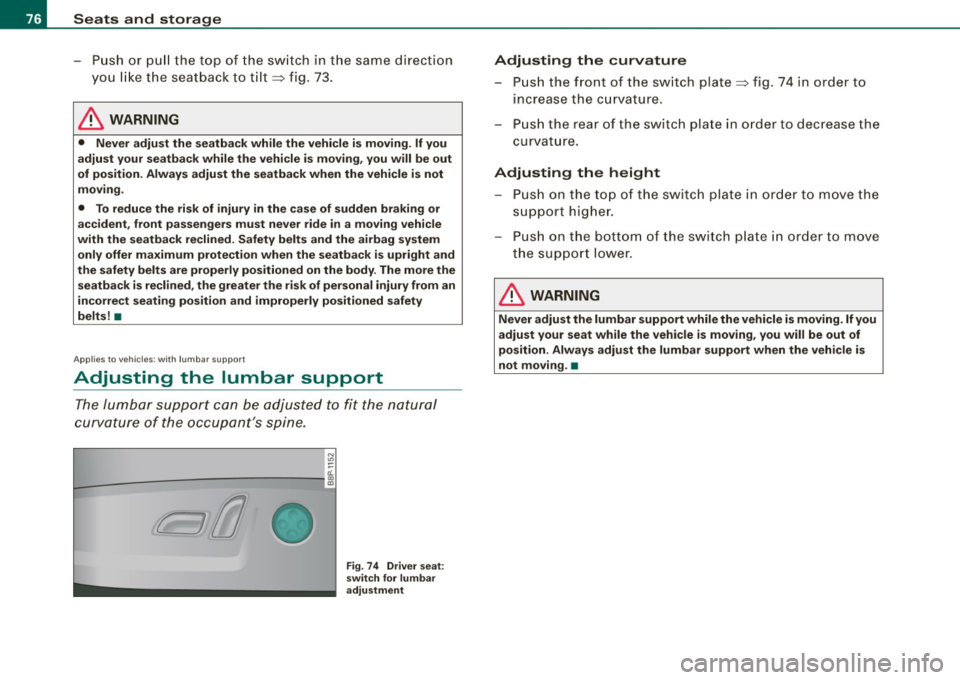
The lumbar support can be adjusted to fit the natural
curvature of the occupant's spine.
N
"' ~
~
a:.
L-------- -,:g
Fig. 74 Driver seat:
switch for lumbar
adjustment
Adjusting the curvature
- Push the front of the switch plate~ fig. 74 in order to
increase the curvature.
- Push the rear of the switch plate in order to decrease the
curvature.
Adjusting the height - Push on the to p of the switch plate in order to move the
support higher.
- Push on the bottom of the switch plate in order to move
the support lower.
& WARNING
Never adjust the lumbar support while the vehicle is moving. If you
adjust your seat while the vehicle is moving, you will be out of
position. Always adjust the lumbar support when the vehicle is
not moving .•
Page 79 of 320
Head restraints
Adjusting head restraints, front seats
The head restraints must be properly adjusted to the
occupants's height to provide optimal restraint in combi
nation with the seat restraints.
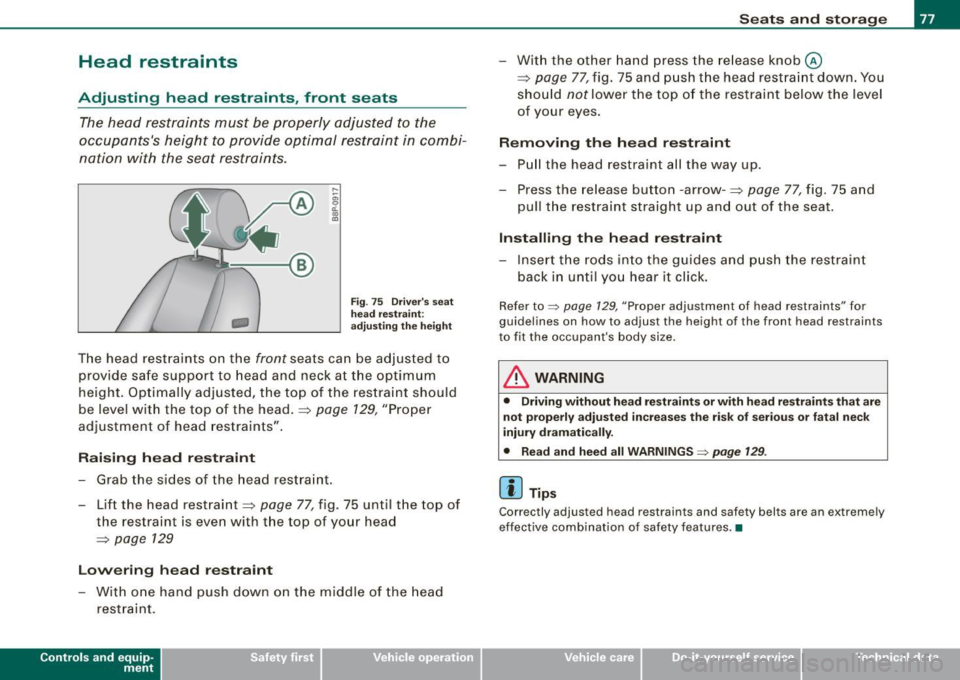
Fig . 75 Driver's seat
head restraint:
adjusting the height
The head restraints on the front seats can be adjusted to
provide safe support to head and neck at the optimum
height. Optimally adjusted , the top of the restraint should
be level with the top of the head.==>
page 129, "Proper
adjustment of head restraints" .
Raising head restraint
-Grab the sides of the head restraint.
- Lift the head restraint ==>
page 77, fig . 75 until the top of
the restraint is even with the top of your head
==>
page 129
Lowering head restraint
- With one hand push down on the middle of the head
restraint.
Con tro ls and eq uip
ment
Seats and storage
- With the other hand press the release knob@
==> page 77, fig. 75 and push the head restraint down. You
should
not lower the top of the restraint below the level
of your eyes.
Removing the head restraint
-Pull the head restraint all the way up.
- Press the release button -arrow- ==>
page 77, fig. 75 and
pull the restraint straight up and out of the seat.
Installing the head restraint
- Insert the rods into the guides and push the restraint
back in until you hear it click.
Refer to~ page 129, "Proper adjustment of head restraints" for
guidelines on how to adjust the height of the front head restraints
to fit the occupant's body size.
& WARNING
• Driving without head restraints or with head restraints that are
not properly adjusted increases the risk of serious or fatal neck
injury dramatically.
• Read and heed all WARNINGS ~
page 129.
[ i] Tips
Correctly adjusted head restraints and safety belts are an extremely
effective combination of safety features. •
Vehicle care
I I irechnical data
Page 80 of 320

Seats and stor ag e
Rear head restraints (outer seating positions)
Fi g. 7 6 Oute r r ear
h ea d re stra ints:
a dju sting th e heigh t
When t he rear seats a re no t occu pied, you can l ower the
head restrain ts (park p osition) and obtain better rearward
v1s 1on.
Moving the head restraints to the "in-us e
position "
Grasp the s ides of the head restraint with both hands .
- Move the head restraint to the uppermost pos ition
=> fig. 76 G) until it latches (in -use posit ion).
Moving the head restraints to the "park
position "
-Press the re lease butto n => page 78, fig. 76 @ .
- Grasp the s ides of the head restraint with both hands.
- Press the head restraint down until it lies against the seat
back @ (park position) .
Removing the head restraints
- Move the h ead restraint upward as far as it can go . - Press the button
@ => page 78, fig. 76 and p
ull the head
restraint out a t the same t im e.
Installing head restraints
- Pus h the rods for the head restraint into the guides until
they latch with an audible click .
Refer to~ page 129, "Proper adjustment of head restraints" for
guide lines on how to adjust the height of the outer head restrai nts
to fit the occupant's body size .
& WARNING
• Pas senger s m ay only o ccupy the rear se ats wh en the he ad
restraint s are in th e top po siti on.
• Drivi ng w ithout he ad restr aints or with h ead restr aint s that are
no t prop erly adju sted in crea se s the ri sk of seriou s or fatal ne ck
i njury d ra m atic ally.
• Read and h eed all WARNIN GS ~
page 1 29
[ i ] Tips
Correctly adjusted head restra ints and safety belts are an extremely
effective combination of safety features .•