roof rack AUDI S3 2012 Owners Manual
[x] Cancel search | Manufacturer: AUDI, Model Year: 2012, Model line: S3, Model: AUDI S3 2012Pages: 280, PDF Size: 70.11 MB
Page 73 of 280
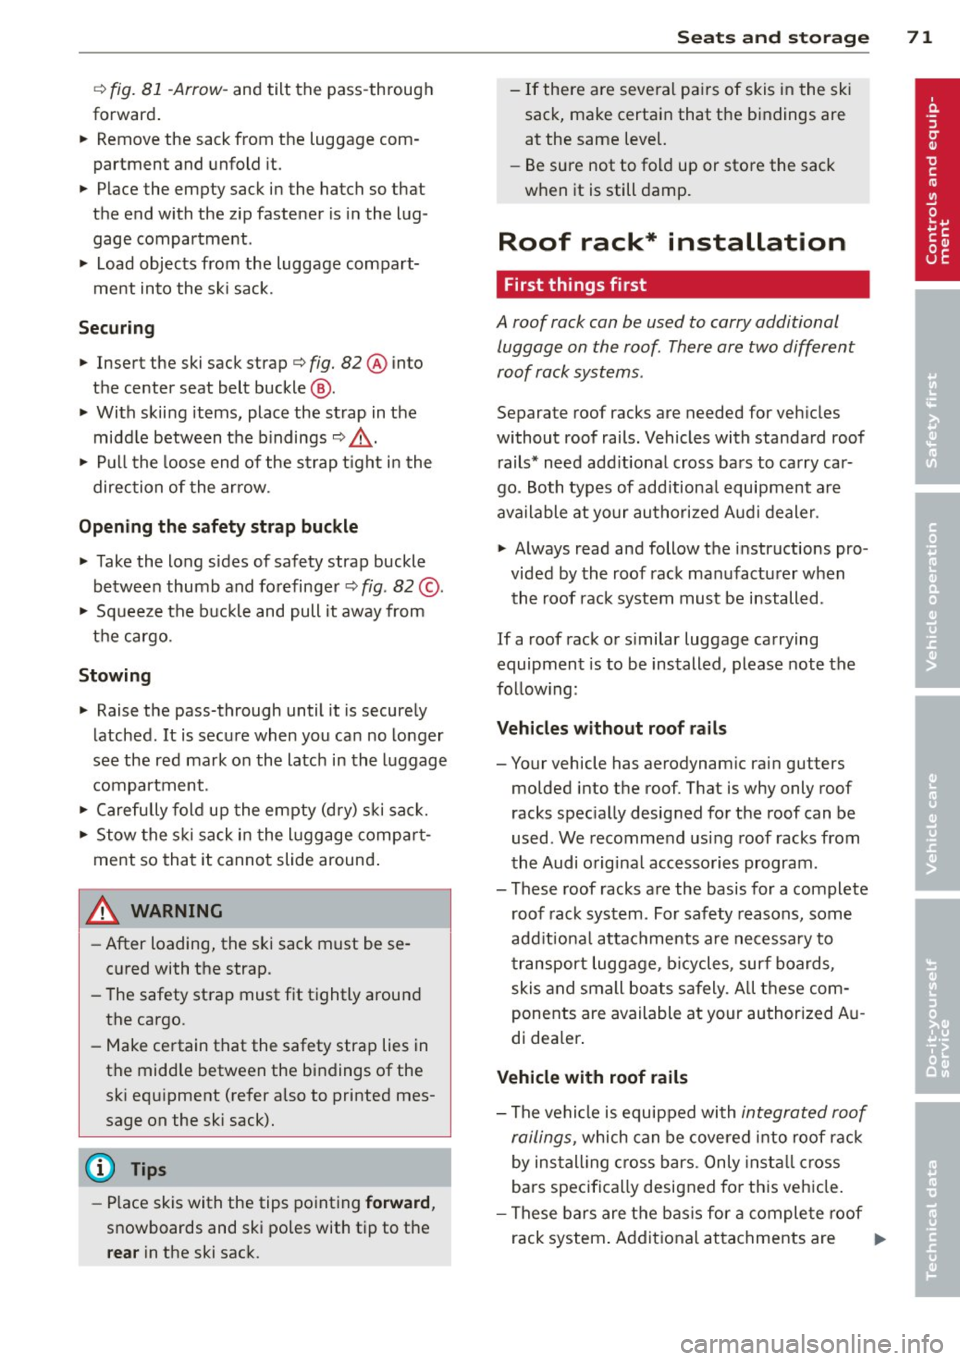
¢ fig. 81 -Arrow-and tilt the pass-through
forward.
~ Remove the sack from the luggage com
partment and unfold it.
~ Place the empty sack in the hatch so that
the end with the zip fastener is in the lug
gage compartment .
~ Load objects from the luggage compart
ment into the ski sack.
Securing
~ Insert the ski sack strap¢ fig. 82@ into
the center seat belt buckle @.
~ With skiing items, place the strap in the
middle between the bindings ¢,&. .
~ Pull the loose end of the strap tight in the
direction of the arrow.
Opening the safety strap buckle
~ Take the long sides of safety strap buckle
between thumb and forefinger¢
fig. 82 @ .
~ Squeeze the buckle and pull it away from
the cargo.
Stowing
~ Raise the pass-through until it is securely
latched. It is secu re when you can no longer
see the red mark on the latch in the luggage
compartment .
~ Carefully fold up the empty (dry) ski sack.
~ Stow the ski sack in the lu ggage compart
ment so that it cannot slide around .
A WARNING
-After loading, the ski sack must be se
cured with the strap.
- The safety strap must fit tightly around
the cargo.
- Make certain that the safety strap lies in
the middle between the bindings of the
ski equipment (refer also to printed mes
sage on the ski sack).
(D Tips
- Place skis with the tips pointing forward,
snowboards and ski poles with tip to the
rear in the ski sack.
Seats and storage 71
-If there are several pai rs of skis in the sk i
sack, make certain that the bindings are
at the same level.
- Be sure not to fold up or sto re the sack
when it is still damp.
Roof rack* installation
First things first
A roof rack can be used to carry additional
luggage on the roof There are two different
roof rack systems .
Separate roof racks are needed for vehicles
without roof rails . Vehicles with standard roof
rails* need add itional cross bars to carry car
go . Both types of add itiona l equipment are
available at your authorized Audi dealer.
~ Always read and follow the instructions pro
vided by the roof rack manufacturer when
the roof rack system must be installed.
If a roof rack or s imilar luggage carrying
equipment is to be installed, please note the
fo llow ing :
Vehicles without roof rails
- Your vehicle has aerodynam ic rain gutters
molded into the roof. That is why only roof
racks specially designed for the roof can be
used . We recommend using roof racks from
the Audi original accessories program .
- These roof racks are the basis for a complete
roof rack system . For safety reasons, some
additional attachments are necessary to
transport luggage, bicycles , surf boards,
skis and small boats safely. A ll these com
ponents are available at your authorized Au
di dea ler .
Vehicle with roof rails
-The vehicle is equipped with integrated roof
railings,
which can be covered into roof rack
by ins tal ling c ross bars . Only install cross
bars specifica lly designed for this vehicle.
- These bars are the basis for a complete roof
rack system . Additional attachments are ..,.
Page 74 of 280
7 2 Seats and storage
necessary to safely trans port luggage,
bicycles, surf boards, skis or small boats.
- All necessary hardware for these systems is
available from yo ur authorized Audi dealer.
When should the roof rack b e removed ?
-Before go ing through an automatic car wash
(it is bes t to ask the car wash opera to r)
- When not in use ( reduce fuel consumpt ion,
reduce wind noise and gua rd against theft)
_& WARNING
- Use of an unapproved roof rack or in cor
rect mo unt ing of an app roved roof rack
can cause the roof rack o r the items car
ried on it to fall
off the roof onto the
road.
- Objects falling from the roof of a ve hicle
can cause a c rash and persona l injury.
- Only mount the system between the markings shown in
r=> page 72, fig . 83
or r=>page 73, fig. 84.
-The roof rack system must be insta lled
exactly according to the instr uctions pro
vided.
(D Note
- Any damage to the veh icle ca used by us
ing roof racks or other types of cross bars
that have not been approved by Audi for
your vehicle, or incorrect roof rack instal
l ation, is not covered by the Warranty.
- Always check the roof rack mount ings
and hardware before each trip and dur i ng a tr ip to make sure eve rything is se
curely tightened . If necessary, retighten
the mount ings and check the ent ire sys
tem from t im e to t im e.
- After mounting a roof rack system, or when you transport objects on the roof
of your veh icle, the height of the v ehicl e
i s n atur ally in creased. Be care ful when
driving u nder low br idges or in pa rk ga
rages for example. This could cause
damage to the veh icle and even the loa d.
Attachment points without roof rails
App lies to vehic les : with out roof rails
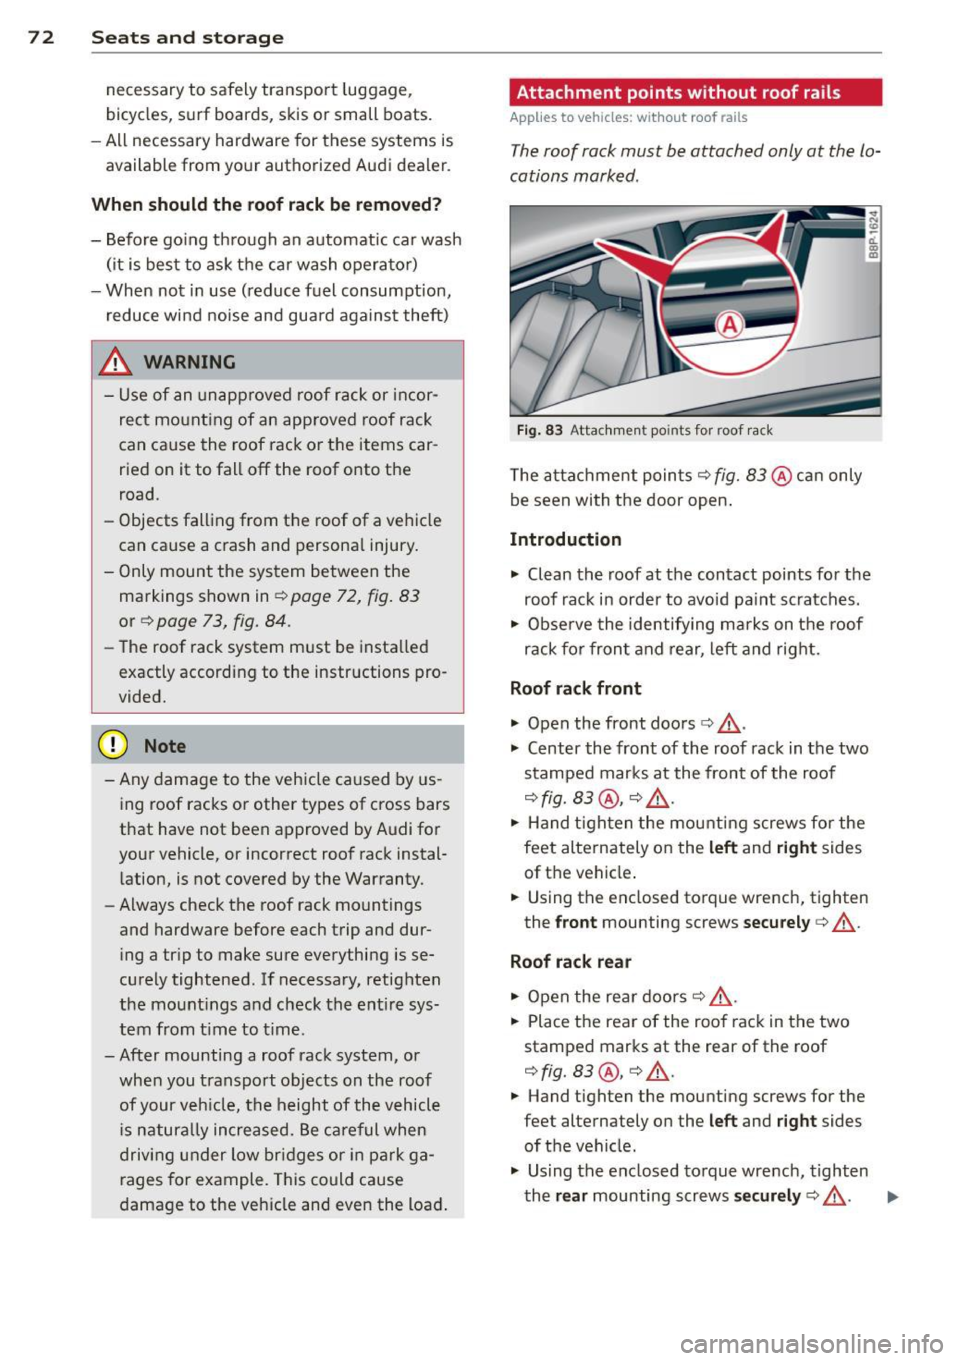
The roof rack must be attached only at the lo
cations marked .
Fig . 83 Attac hmen t po ints fo r roof rac k
The attachme nt poin ts r=> fig. 83 @ can only
be seen with the door open .
Introduction
.,. Clean the roof at the contact points for the
roof rack in order to avoid pa int scratches.
.,. Obse rve the identify ing marks on t he roof
rack for front and rear, left and right.
Roof rack front
.,. Open the front doo rs c:> &_ .
.,. Center the front of the roof rack in t he two
stamped marks at the front of the roof
r=> fig. 83 @ , r::!> & .
.,. Hand tighten the mount ing screws for the
feet alternately on the
left and right sides
of the vehicle .
.,. Using the enclosed torque wrench, tighten
the
front mounting screws securely c:> &_ .
Roof rack rear
.,. Open the rea r doors r=> £ .
.,. Place the rear of the roo f rack in the two
stamped marks at the rear of the roof
r=> fig. 83 @, r=> £.
.,. Hand tighten the mounting screws for the
feet alternately on the
left and r ight sides
of the vehicle.
.,. Us ing the enclosed to rque wre nch, t ighten
the
rear mounting screws s ecurely c:> &_ . ..,.
Page 75 of 280
_& WARNING
-Always follow the instructions prov ided
by the roof rack manufacturer.
- When installing the roof rack with the
vehicle doors open, watch out for other
traffic - there is the risk of an accident .
- Make certain that the feet of the roof
rack are sitting exactly in the four stamp
ed marks - otherw ise you risk an acci
dent!
- After you have driven a few miles, and part icularly during long trips, inspect the
attach ing screws to make certain they
are tight.
- Do not make any modification to the roof
rack - you increase the risk of an acci
dent.
Roof rack mounting locations
App lies to vehicles: with roof rails
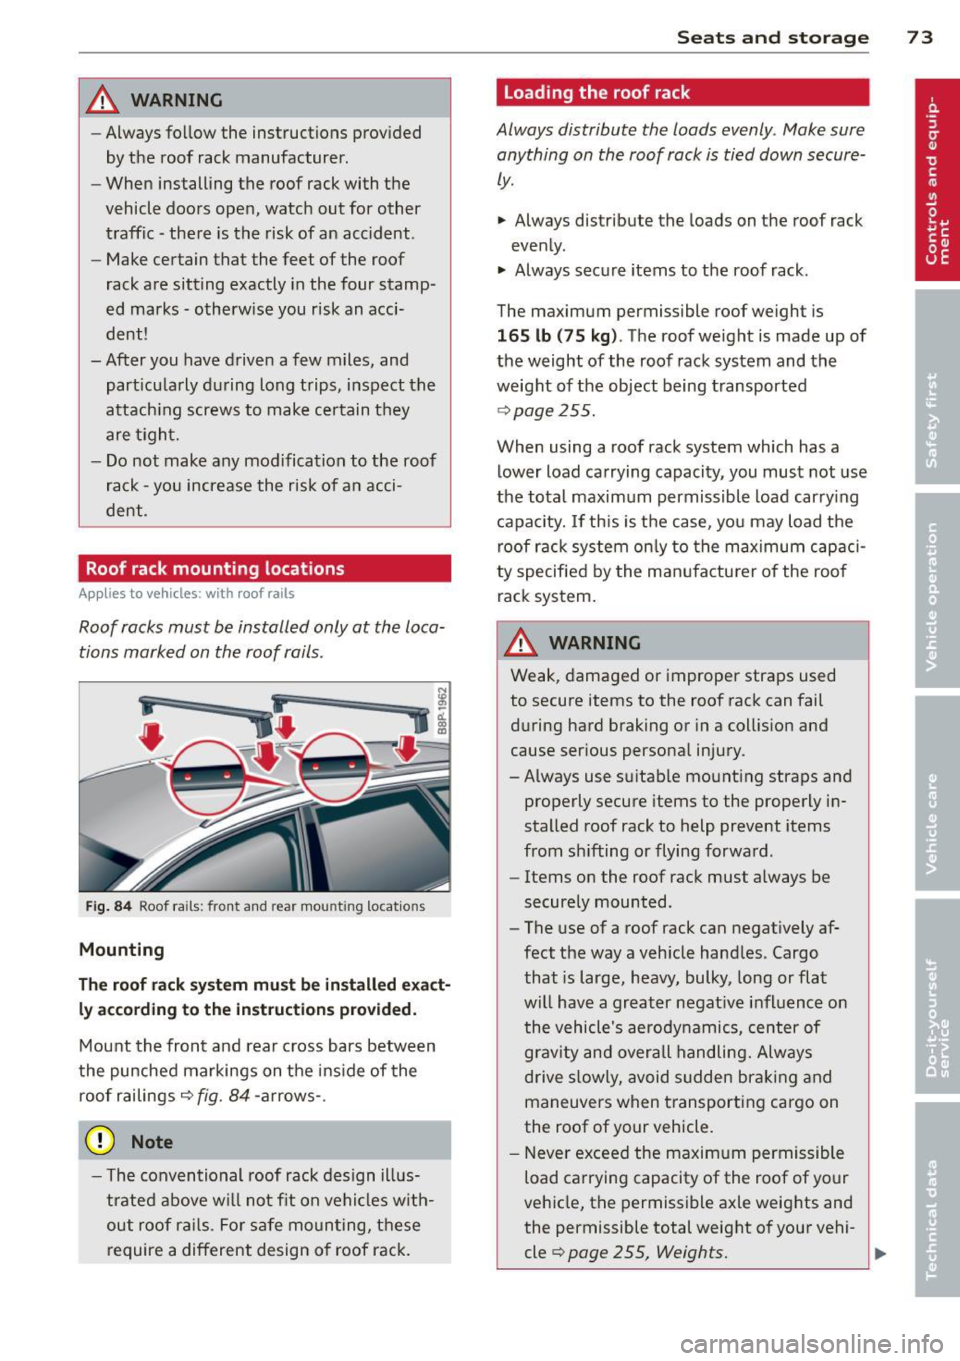
Roof racks must be installed only at the Loca
tions marked on the roof rails .
Fig . 8 4 Roof ra ils: front and rear mou nting locations
Mounting
The roo f rack syste m mu st be in sta ll ed exact
l y accord ing to th e instru cti ons prov ided.
Mount the front and rear cross bars between
the punched markings on the ins ide of the
roof railings
r::;,fig. 84-arrows- .
(D Note
- The conventional roof rack des ign illus
trated above w il l not f it on vehicles w ith
out roof ra ils. For s afe mounting, these
require a different design of roof rack.
S ea ts a nd s to rage 73
Loading the roof rack
Always distribute the Loads evenly . Make sure
anything on the roof rack is tied down secure
ly.
.. Always distribute the loads on the roof rack
evenly.
.. Always secure items to the roof rack.
The maximum permissible roof weight is
16 5 lb (75 k g). The roof weight is made up of
the weight of the roof rack system and the
weight of the object being transported
.;, page 255.
When using a roof rack system which has a
lower load carrying capacity, you must not use
the total maximum permissible load carry ing
capacity. If th is is the case, you may load the
roof rack system on ly to the maximum capaci
ty specified by the manufacturer of the roof
rack system.
A WARNING
Weak, damaged or improper straps used
to secure items to the roof rack can fail
during hard braking or in a coll is ion and
cause ser ious persona l injury.
-Always use suitable mounting straps and
properly secure items to the properly in
stalled roof rack to help prevent items
from sh ifting or flying forward .
- Items on the roof rack must always be
securely mounted.
- The use of a roof rack can negat ively af
fect the way a veh icle hand les . Cargo
that is large, heavy, bulky, long or flat
will have a greater negat ive influence on
the vehicle's aerodynamics, center of
grav ity and overa ll handling. Always
drive s lowly, avoid sudden braki ng and
maneuvers when transporting cargo on
the roof of your vehicle.
- Never exceed the maxim um permissible
load carrying capacity of the roof of your
vehicle, the permissible axle weights and
the permissible total weight of your vehi- cle
r::;, page 255, Weights. ~
Page 76 of 280
7 4 Seats and storage
- Always drive slowly, avo id sudden brak
ing and maneuvers when transporting
cargo on the roof of your vehicle .
@) For the sake of the environment
Sometimes it may be easier to leave a roof
rack installed even though you are not us
ing it . Due to the increased a ir resistance
your veh icle will unnecessar ily use more
fuel. Remove the roof rack if you are not
going to use it.
Cup holders
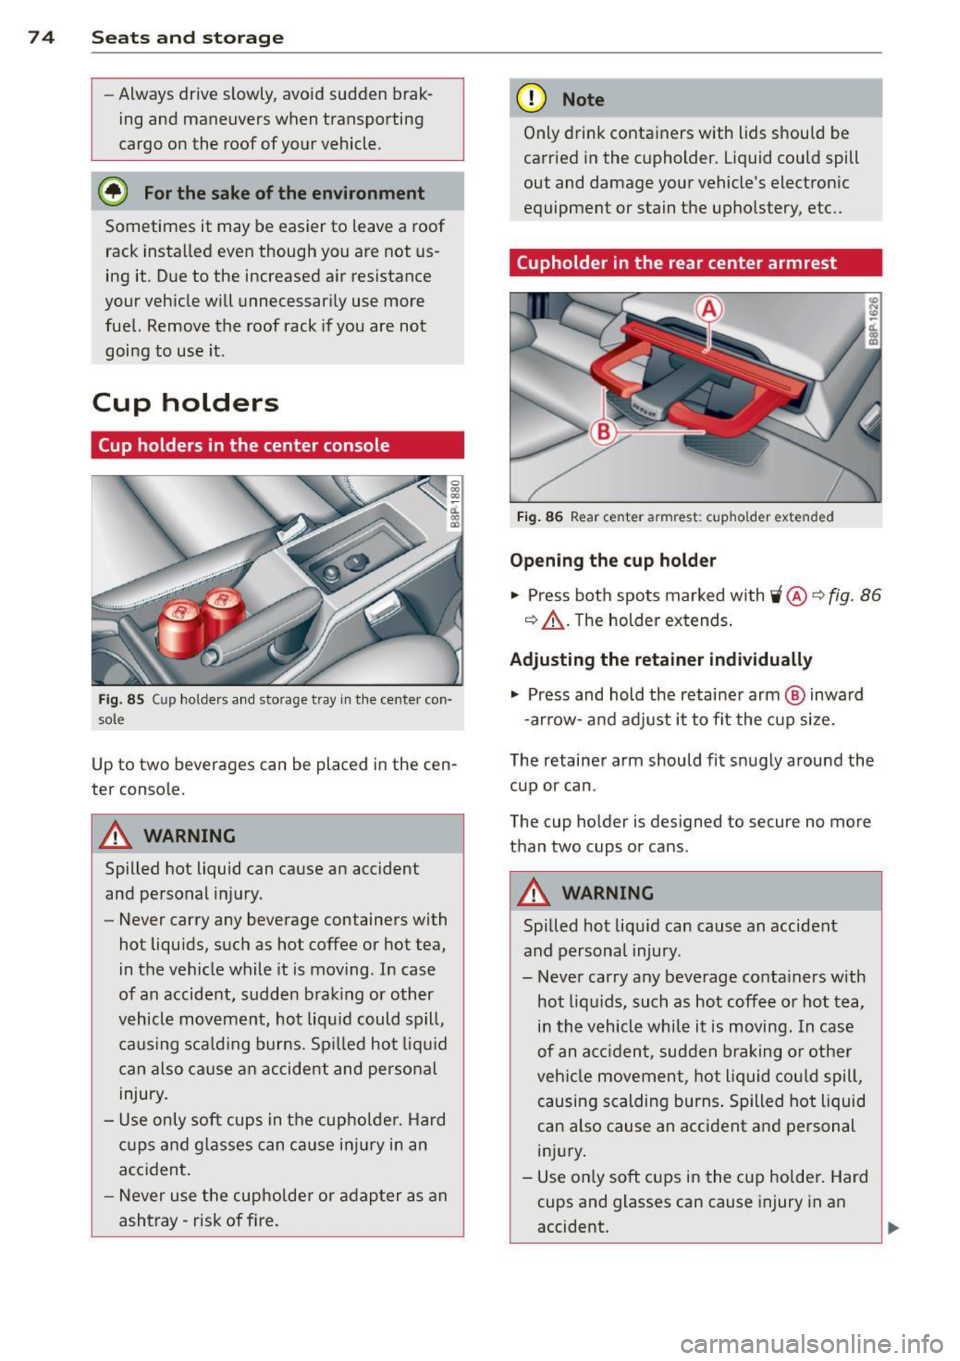
Cup holders in the center console
Fi g. 85 Cup ho lders a nd sto rage t ray in th e ce nte r con ·
s o le
Up to two b everages can be placed in the cen
te r console.
A WARNING
Spilled hot liquid can cause an accident
and pe rsonal injury.
-
- Never carry any beverage containers with
hot liquids, such as hot coffee or hot tea,
in the vehicle while it is moving . In case
of an accident, s udde n bra king or other
v ehicl e mov ement, hot liq uid could s pill,
causing s ca ld ing burns . Sp illed hot liq uid
c an also ca use a n accide nt and perso nal
injury.
- Use only soft cu ps in t he cup holder. H ard
c u ps and gla sses can c ause i njur y in an
acc ident.
- N ever use the cup holder or adap ter as an
ashtray- r isk o f fire.
(D Note
Only drink conta iners with lids should be
carr ied in the cupholder. Liquid could spill
out and damage your vehicle's electron ic
equipment or stain the upho lstery, etc ..
(upholder in the rear center armrest
Fig. 86 Rea r ce nter armr est: c upho ld er extend ed
Opening the cup holder
.,. Press bot h spo ts marked with 'i @ ~ fig. 86
q &_ . The holder ex tends .
Adjusting the retain er individually
.,. Press and hold the retai ne r arm @ inwa rd
- ar row -and adj ust i t to fit the cup si ze.
The retainer arm should fit snugly around the cup or can .
The cup ho lder is de signed to secure no mo re
than two cups or can s.
A WARNING
Spi lled ho t liquid can cause an accident
and persona l injury .
-
- Never carry any beverage conta iners w ith
hot liq uids, such as hot coffee o r hot tea,
in th e vehicle while it is moving. In case
of an a cciden t, sudden braking or othe r
ve hicl e movement, hot liquid cou ld spill,
causing scalding burns . Spilled hot liquid
can also cause an acc ident a nd personal
in ju ry.
- Use on ly soft cups in the cu p holde r. Hard
cups and glasses can cause injury in a n
accident.
Page 134 of 280
132 Airbag system
of their body too close to the area where
the airbags are located.
- Occupants who are unbelted, out of posi
tion or too close to the airbag can be se riously injured by an airbag as it unfolds
with great force in the blink of an eye
r=> page 123 .
A WARNING
A child in a rearward-facing child safety
seat installed on the front passenger seat
will be seriously injured and can be killed if
the front airbag inflates -even with an Ad
vanced Airbag System.
- The inflating airbag will hit the child
safety seat or infant carrier with great
force and will smash the child safety seat
and child against the backrest, center armrest, door or roof.
- Always install rear-facing child safety
seats on the rear seat.
- If you must install a rearward facing
child safety seat on the front passenger
seat because of exceptional circumstan ·
ces and the
PASSENGER AIR BAG OFF
light does not come on and stay on, im
mediately install the rear-facing child
safety seat in a rear seating position and
have the airbag system inspected by your
authorized Audi dealer .
A WARNING
Objects between you and the airbag will
increase the risk of injury in a crash by in
terfering with the way the airbag unfolds
or by being pushed into you as the airbag
inflates.
- Never hold things in your hands or on
your lap when the vehicle is in use .
- Never transport items on or in the area
of the front passenger seat. Objects
could move into the area of the front air
bags during braking or other sudden ma
neuvers and become dangerous projec
tiles that can cause serious personal in
jury if the airbags inflate.
-
- Never place or attach accessories or oth
er objects (such as cup holders, tele
phone brackets, large, heavy or bulky ob
jects) on the doors, over or near the area
marked "AIRBAG" on the steering wheel,
instrument panel, seat backrests or be
tween those areas and yourself . These
objects could cause injury in a crash, es
pecially when the airbags inflate.
- Never recline the front passenger's seat
to transport objects. Items can also
move into the area of the side airbag or
the front airbag during brak ing or in a
sudden maneuver. Objects near the air
bags can become projectiles and cause
injury, particularly when the seat is re
clined.
A WARNING
-T he fine dust created when airbags deploy
can cause breathing problems for people
with a history of asthma or other breath
ing conditions.
= To reduce the risk of breathing problems ,
those with asthma or other respiratory
conditions should get fresh air right
away by getting out of the vehicle or
opening windows or doors.
- If you are in a collision in which airbags
deploy, wash your hands and face with
mild soap and water before eating.
- Be careful not to get the dust into your
eyes, or into any cuts or scratches.
- If the residue should get into your eyes ,
flush them with water.
Page 142 of 280
140 Airbag system
-Objects between you and the airbag can
increase the risk of injury in an accident
by interfering with the way the airbag
unfolds or by being pushed into you as
the airbag inflates .
- Never place or attach accessories or
other objects (such as cup holders, tel
ephone brackets, or even large, bulky
objects) on the doors, over or near the
area marked "AIRBAG" on the seat backrests.
- Such objects and accessories can be
come dangerous projectiles and cause
injury when the supplemental side air
bag deploys.
- Never carry any objects or pets in the
deployment space between them and
the airbags or allow children or other
passengers to travel in this position .
- Always use the built-in coat hooks only
for lightweight clothing . Never leave any
heavy or sharp-edged objects in the
pockets that may interfere with side air
bag dep loyment and can cause personal
injury in an accident .
- Always prevent the side airbags from be
ing damaged by heavy objects knocking
against or hitting the sides of the seat
backs.
- The airbag system can only be triggered
once. If the airbag has been triggered,
the system must be replaced by an au
thorized Audi dealership.
- Damage (cracks, deep scratches etc .) to
the original seat covers or to the seam in
the area of the side airbag module must always be repaired immediately by an au
thorized Audi dealer .
- If children are seated improperly, their
risk of injury increases in the case of an
accident
q page 143, Child Safety .
- Never attempt to modify any compo
nents of the airbag system in any way .
- In a side collision, side airbags will not
function properly if sensors cannot cor
rectly measure increasing air pressure in
side the doors when air escapes through larger, unclosed openings in the door
panel.
- Never drive with interior door trim pan
els removed.
- Never drive when parts have been re
moved from the inside door panel and
the openings they leave have not been
properly closed.
- Never drive when loudspeakers in the
doors have been removed unless the
speaker holes have been properly
closed.
- Always make certain that openings are
covered or filled if additiona l speakers
or other equipment is installed in the inside door panels.
- Always have work on the doors done by
an authorized Audi dea ler or qualified
workshop.
Side curtain airbags
Description of curtain airbags
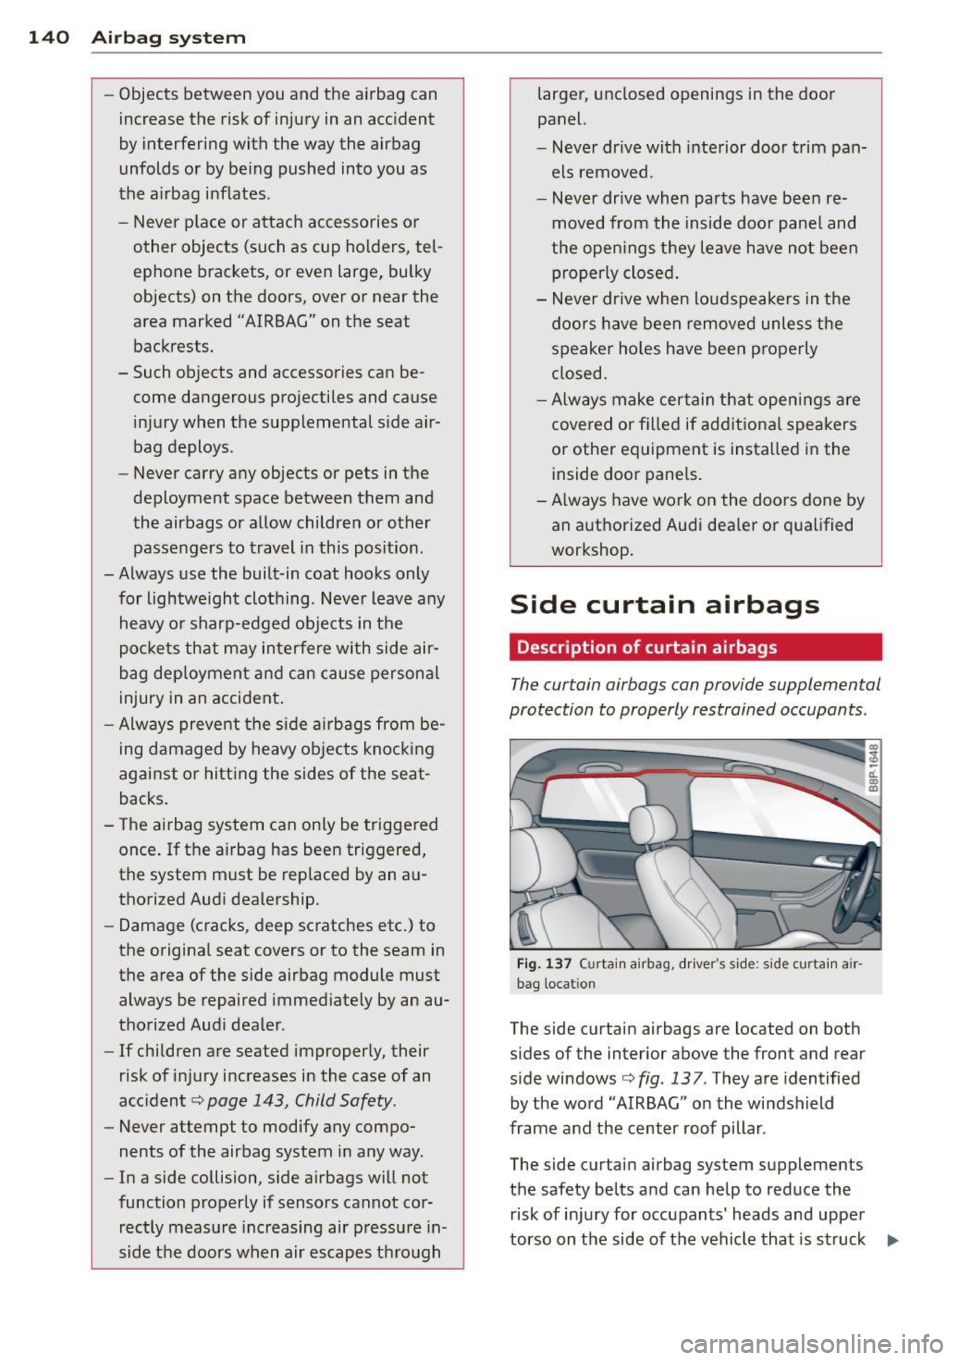
The curtain airbags can provide supplemental
protection to properly restrained occupants .
Fig. 137 Cur tain airbag , drive r's sid e: s ide cu rtain a ir
bag locat ion
The side curtain airbags are located on both
sides of the interior above the front and rear
side windows
c;, fig. 137 . T hey are identified
by the word "AIRBAG " on the windshield
frame and the center roof pillar .
The side curtain airbag system supplements
the safety belts and can help to reduce the risk of injury for occupants' heads and upper
torso on the side of the vehicle that is struck
liJI,
Page 181 of 280
CD Note
You should remove debris (such as insects)
from the headlight lenses on a regular basis, for example when refueling your vehi
cle. Never clean the headlights with a dry
cloth or sponge . Use a wet cloth or
sponge.
It is best to use soapy water .
Automatic car wash
The vehicle can be washed in almos t any
modern automatic car wash .
The vehicle paint is so durable that the vehicle
can normally be washed without problems in
an automatic car wash . However, the effect on
the paint depends to a large extent on the de
sign of the facility, the filtering of the wash
water , the type of wash and care material , etc .
If the paint has a dull appearance after going
through the car wash or is scratched, bring
this to the attention of the operator immedi
ately. If necessary, use a different car wash.
Before going through a car wash, be sure to
take the usual precautions such as closing the
windows and panoramic sliding sunroof*. Re move antenna if applicable.
If you have installed additional accessories on
the vehicle -such as spoilers, roof rack, etc. -
it is best to ask the car wash operator if these
should be removed.
A WARNING
Always read and heed all WARNINGS and other information
¢ page 178.
Washing the vehicle by hand
A lot of water is needed when washing a vehi
cle by hand.
11-Before you start washing, make sure you
have read and understood the WARNINGS
¢ A in General information on page 178.
11-First soak all dried dirt until it is soft, then
rinse it off .
11-As you clean your vehicle, s tart with the
roof and work your way down to the bottom,
Cleaning and protection 179
using a sponge, a sponge glove or a clean
brush.
"" Rinse the sponge or the sponge glove often,
flushing it clean each time.
11-Use special car shampoo only for very per
sistent dirt .
11-Rinse the car thoroughly with water .
11-Use a chamois leather to gently wipe the ex-
terior dry.
Use a separate sponge for cleaning the
wheels, door sills and other regions exposed
to road dirt. In this way, you will not scratch
the paint with coarse particles imbedded in
the sponge the next time you wash the car.
A WARNING
= -
-Do not clean the underside of the chas-
sis, fenders, wheel covers , or other hard
to reach parts without protecting your hands and arms . You may cut yourself on
sharp-edged metal parts.
- Always read and heed all WARNINGS and
other information
¢ page 178.
CD Note
- Never try to remove dirt, mud or dust if
the surface of the vehicle is dry. Never
use a dry cloth or sponge, since this
could scratch your vehicle's paint or win
dows.
- Never wash your car in bright sunlight.
Drops of water act as magnifying lenses
and may damage your paint .
- When you wash your car in the winter: if
you rinse your vehicle with a hose, be
careful not to aim the stream of water
directly at locks, or at door or hatch
openings -they can freeze shut.
- Never use sponges designed to remove
insects, or any kitchen scouring sponges
or similar products. They can damage
your paint finish.
- Never use a dry cloth or sponge to clean
the headlights. Only use wet cloths or
sponges to prevent scratches. It is best
to use soapy water. •
•
Page 216 of 280
214 Tires and wheels
Maximum loaded vehicle weight
means the sum of:
(a) Curb weight
(b) Accessory weight
(c) Vehicle capacity weight, and
(d) Production options weight
Maximum (permissible) inflation pressure
means the maximum cold inflation pressu re
to which a tire may be inflated. Also called
"maximum inflation p ressure."
Normal occupant weight
means 150 lbs. (68 kilograms) times the
number of occupants seated in the vehicle up
to the total seating capacity of your vehicle.
Occupant distribution means distribution of occupants in a vehicle .
Outer diameter means the overa ll diameter of an inf lated new
tire.
Overall width
means the linear distance between the exteri
ors of the sidewalls of an inflated tire, includ
ing e levations due to labeling, decorations, or
protective bands or ribs.
Ply
means a layer of rubber-coated parallel cords.
Production options weight
means the comb ined weight of those installed
regular production options weighing over 5
lbs . (2 .3 kg) in excess of those standard items
which they replace, not previously considered
in curb weight or accessory weight, including
heavy duty brakes, r ide leve lers, roof rack,
heavy duty battery, and specia l trim .
Radial ply tire
means a pneumatic tir e in which the p ly cords
that extend to the beads are laid at substan
tially 90 degrees to the centerline of the
tread . Recommended inflation pressure
see
~
page 213, Cold tire inflation pressure.
Reinforced tire
means a t ire designed to operate at higher
loads and at higher inflation pressures than
the corresponding standard tire . Re inforced
t ir es my be identified as "XL", "xl", "EX TRA
LOAD", or "RF" on the sidewall.
Rim
means a metal support for a tire or a t ire and
tube assembly upon which the tire beads are seated.
Rim diameter
means nom inal d iameter of the bead seat. If
you change your wheel s ize, you w ill have to
purchase new tires to match the new r im di
ameter .
Rim size designation
means rim diameter and width.
Rim width
means nominal distance between rim flanges .
Sidewall
means that portion of a tire between the
t read and bead.
Speed rating (letter code)
means the speed at which a tire is designed to
be driven for extended periods of time. The
ratings range from 93 mph (150 km/h) to
186 mph (298 km/h)
~ page 224 . You may
not find this information on all tires because
it is not requ ired by law.
The speed rating letter code, where applica
ble, is molded on the tire sidewall and indi
cates the max imum pe rmissibl e road speeds
~ A in Winter tires on page 228.
Tire pressure monitoring system*
means a system that detects when one or
more of a veh icle's tires are underinflated and
illuminates a low tire pressure warning tell
tale.
Page 258 of 280
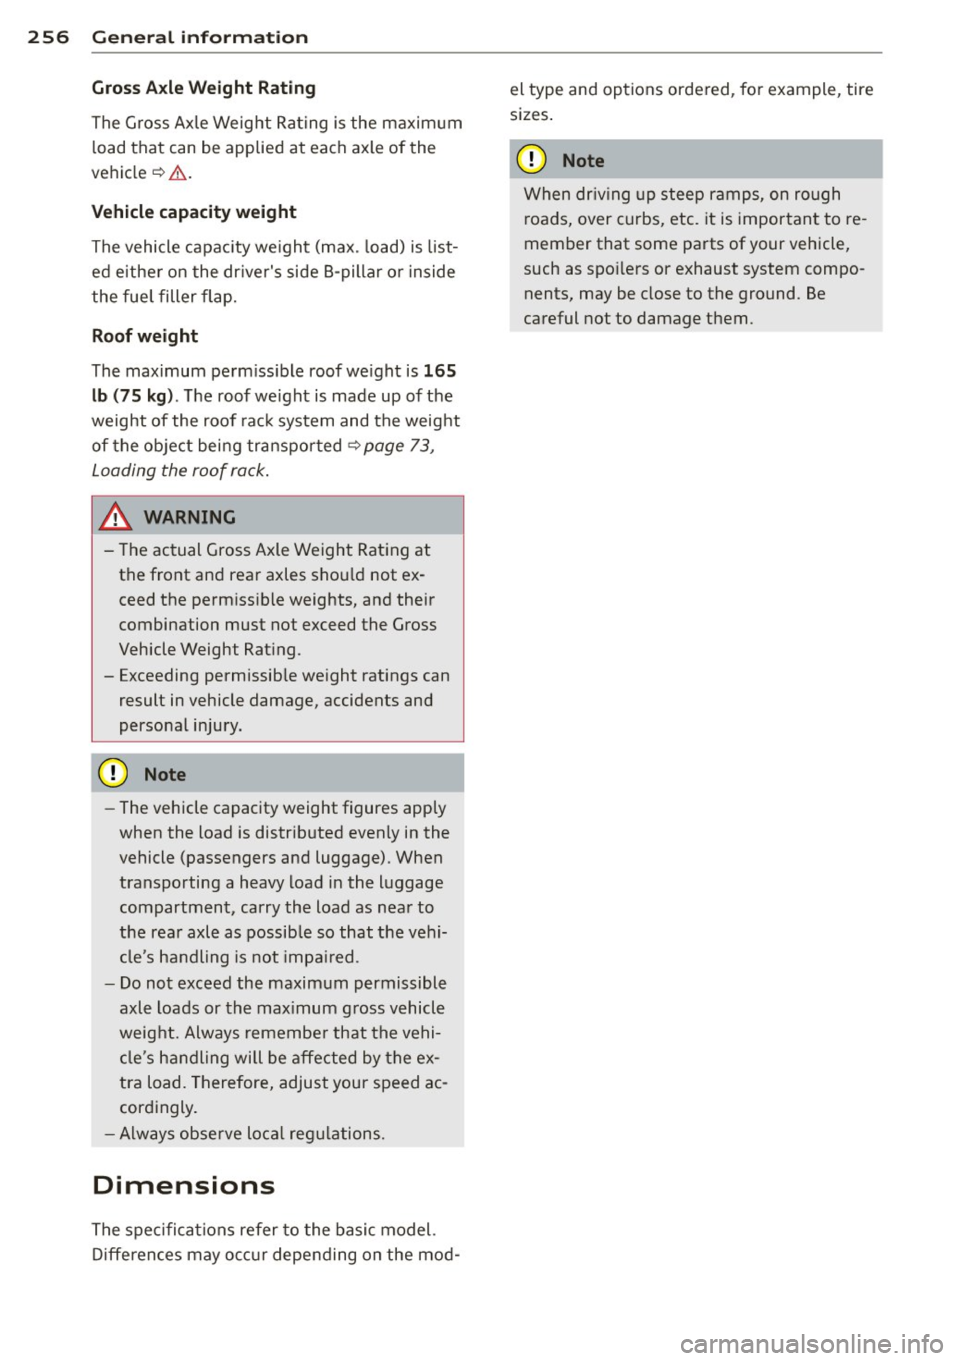
256 Genera l inform ation
Gro ss Axl e Weight Rating
The Gross Axle Weight Rating is the maxim um
l oad that can be applied at each axle of the
vehicle ~&. .
Vehicle capacity weight
The vehicle capac ity we ight (max . load) is list
ed eithe r on the dr iver's side B-pillar o r inside
the fuel filler flap.
Roof weight
The maximum perm iss ible roof we ight is 165
lb (75 kg ). The roof we ight is made up of the
weight of the roof ra ck system and the weight
of the object bei ng transpo rted
~ page 73 ,
Loading the roof rack .
A WARNING
- The actual Gross Axle Weight Rating at
the front and rear axles sho uld not ex
ceed the perm iss ib le weights, and their
combination must not exceed the Gross
Vehicle Weight Rat ing .
- Exceeding permissib le we ight ratings can
result in vehicle damage, accidents and
personal in jury.
(D Note
- The vehicle capacity weight figures app ly
when the load is distrib uted evenly in the
vehicle (passengers and luggage) . When
transporting a heavy load in the luggage
compartment , carry the load as nea r to
the rea r axle as possib le so that the vehi
cle's handling is not impa ired .
- Do not exceed the maximum permissible
axl e loads or the max imum g ross vehicl e
weig ht. Always remembe r that the vehi
cl e's handling will be affected by the ex
tra load . Therefore, adjust your speed ac
cordingly.
- Alw ays obse rve lo cal regulations.
Dimensions
-
The spe cifica tions refer to the basi c model.
D ifferen ces may oc cur depe nding on the mod- el type and options orde
red , fo r example , tire
siz es.
(D Note
When dr iv ing up steep ramps, on rough
r oads, over curbs, etc. it is important to re
member that some pa rts of your vehicle,
such as spo ile rs or exhaust system compo
nents, may be close to the ground . Be
careful not to damage them .
Page 260 of 280
258 Data
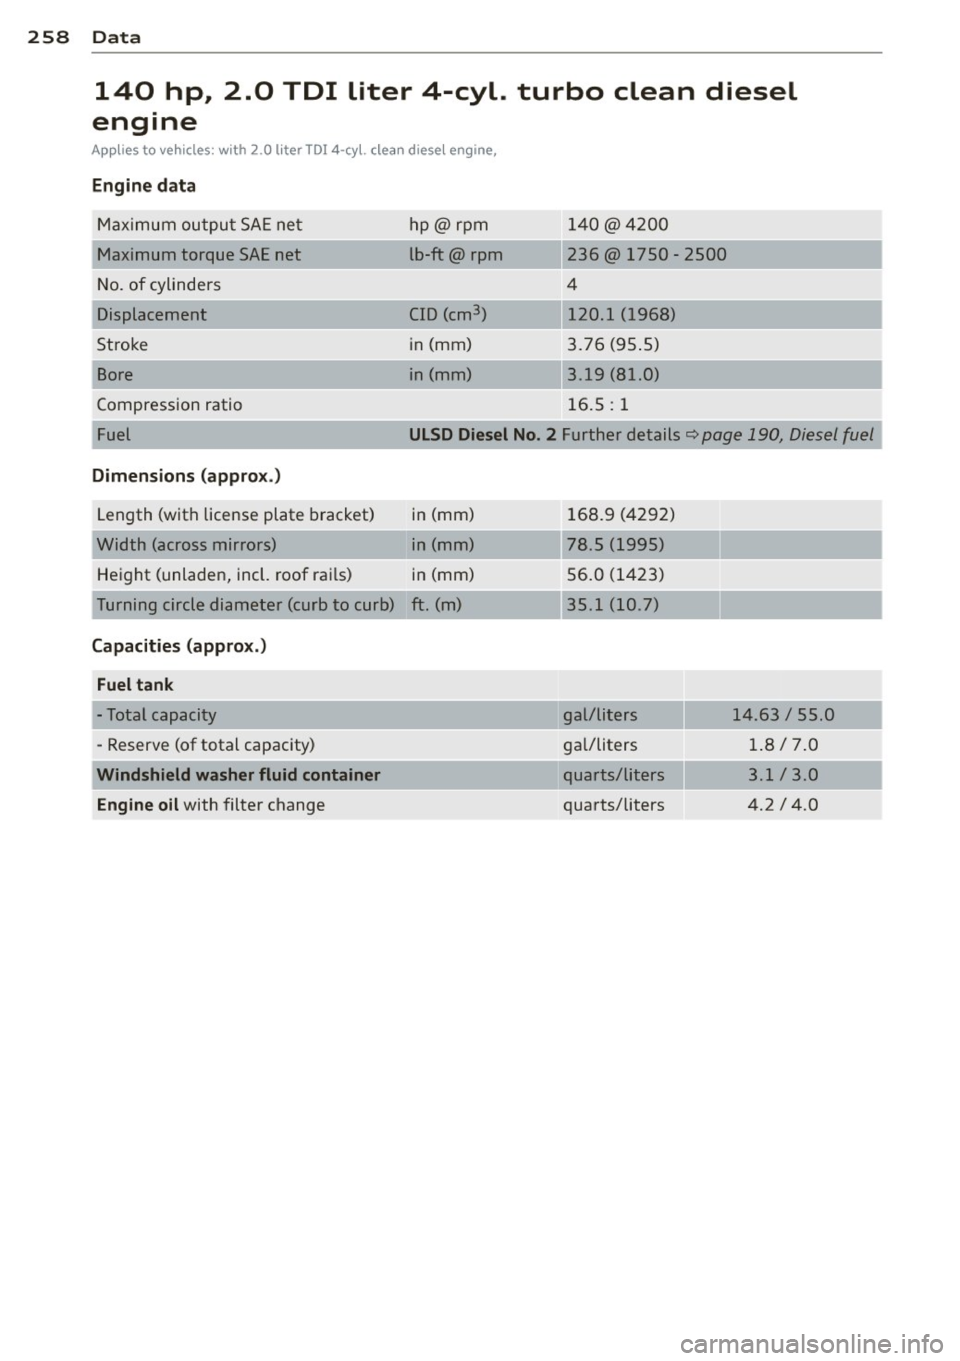
140 hp, 2.0 TOI liter 4-cyl. turbo clean diesel
engine
App lies to vehicles: with 2.0 liter TD! 4-cyl. clea n diesel engine,
Engine dat a
Maximum ou tpu t SA E ne t hp@rpm 140 @42 00
Maximum torque SAE net lb-ft@ rpm 236@ 1750 -2500
N o. of cylinders 4
Displacement CID (cm3
) 120.1 ( 1968)
Stroke i
n (mm) 3.7 6 (9 5.5)
Bore i
n (mm) 3.19 (8 1.0)
Compression ratio 16.5: 1
Fuel ULSD Diesel No . 2 Further details c::> page 190, Diesel fuel
Dimensions (approx .)
Length (with license plate bracket) in (mm)
Width (across mirrors) in (mm)
Height (unladen, incl. roof ra ils) in (mm)
T urning circl e diameter (curb to curb) ft. (m)
Capacities (approx.)
Fuel tank
- Total capacity
- Reserve (of total capacity)
Windshield washer fluid container
Engine oil
with filter change
168.9 (4 292)
78.5 (1995)
56 .0 (1423)
35.1 (1 0.7)
gal/li te rs 1 4 .63 / 55.0
ga I/liters 1.8/7 .0
quarts/liters 3.1 / 3.0
quarts/liters 4 .2 I 4.0