catalytic converter AUDI S3 2016 Owners Manual
[x] Cancel search | Manufacturer: AUDI, Model Year: 2016, Model line: S3, Model: AUDI S3 2016Pages: 328, PDF Size: 81.78 MB
Page 5 of 328
,....,
N
0 > co ,....,
Audi active lane assist . . . . . . . . . . . . . . . . 142
Audi side assist . . . . . . . . . . . . . . . . . . . . . 145
Audi drive select (drive settings) . . . . . . . . 148
Parking systems
General information ............ .... .
Rear parking system .......... .. .... .
Parking system plus ...... ... .. .. .. .. . 151
151
152
152
Rearview camera . . . . . . . . . . . . . . . . . . . . 153
Adjusting the display and the warning
tones. . . . . . . . . . . . . . . . . . . . . . . . . . . . . . 157
Error messages . . . . . . . . . . . . . . . . . . . . . 157
Intelligent Technology . . . . . . . . . . 158
Notice about data recorded by the Event
Data Recorder and vehicle control
modules . . . . . . . . . . . . . . . . . . . . . . . . . . . 158
Electronic stabilization control (E5C) . . . . 159
Brakes . . . . . . . . . . . . . . . . . . . . . . . . . . . . . 161
Electromechanical steering . . . . . . . . . . . . 162
All wheel drive (quattro) . . . . . . . . . . . . . . 163
Energy management 164
Safety ... . .. .. ............. .. .. .. . 166
Driving safety . . . . . . . . . . . . . . . . . . . . 166
Basics . . . . . . . . . . . . . . . . . . . . . . . . . . . . . 166
Correct passenger seating positions . . . . . 167
Driver's and front passenger's footwell . . 171
Pedal area . . . . . . . . . . . . . . . . . . . . . . . . . . 171
Storing cargo correctly . . . . . . . . . . . . . . . 172
Reporting Safety Defects . . . . . . . . . . . . . . 17 4
Safety belts . . . . . . . . . . . . . . . . . . . . . . 176
General notes . . . . . . . . . . . . . . . . . . . . . . . 176
Why use safety belts? . . . . . . . . . . . . . . . . 177
Safety belts . . . . . . . . . . . . . . . . . . . . . . . . 179
Belt tensioners . . . . . . . . . . . . . . . . . . . . . . 182
Airbag system . . . . . . . . . . . . . . . . . . . . 184
Important information . . . . . . . . . . . . . . . 184
Front airbags . . . . . . . . . . . . . . . . . . . . . . . 188
Monitoring the Advanced Airbag System . 196
Knee airbags . . . . . . . . . . . . . . . . . . . . . . . . 200
Table of contents
Side airbags . . . . . . . . . . . . . . . . . . . . . . . . 202
Side curtain airbags . . . . . . . . . . . . . . . . . . 205
Child safety . . . . . . . . . . . . . . . . . . . . . . 209
Important information . . . . . . . . . . . . . . . 209
Child seats . . . . . . . . . . . . . . . . . . . . . . . . . 215
Securing child seats. ............... .. 219
LATCH system (Lower anchorages and
tethers for children) . . . . . . . . . . . . . . . . . 222
Additional information . . . . . . . . . . . . . . . 227
Maintenance and Care . . . . . . . . . . . 228
Checking and Filling . . . . . . . . . . . . . 228
Gasoline fuel . . . . . . . . . . . . . . . . . . . . . . . 228
Diesel fuel . . . . . . . . . . . . . . . . . . . . . . . . . 229
Refueling . . . . . . . . . . . . . . . . . . . . . . . . . . 230
Catalytic converter . . . . . . . . . . . . . . . . . . . 232
Diesel particulate filter . . . . . . . . . . . . . . . 233
Selective catalytic reduction (AdBlue) . . . 234
Engine compartment . . . . . . . . . . . . . . . . . 236
Engine oil . . . . . . . . . . . . . . . . . . . . . . . . . . 240
Cooling system . . . . . . . . . . . . . . . . . . . . . . 244
Brake fluid . . . . . . . . . . . . . . . . . . . . . . . . . 246
Battery . . . . . . . . . . . . . . . . . . . . . . . . . . . . 247
Windshield washer system . . . . . . . . . . . . 251
Service interval display 252
Tires and wheels . . . . . . . . . . . . . . . . . 253
Wheels ... .. .. .. .. ... ... .... ..... .. 253
T ire pressure monitoring system 271
Care and cleaning ......... ... .. .. 274
General information . . . . . . . . . . . . . . . . . 274
Car washes . . . . . . . . . . . . . . . . . . . . . . . . . 2 7 4
Cleaning and care information . . . . . . . . . 275
Placing your vehicle out of service . . . . . . 279
Do It Yourself . . . . . . . . . . . . . . . . . . . . 280
Emergency a ssistance . . . . . . . . . . . 280
Trunk escape latch . . . . . . . . . . . . . . . . . . . 280
Genera l information . . . . . . . . . . . . . . . . . 280
Equipment . . . . . . . . . . . . . . . . . . . . . . . . . 280
Tire mobility kit . . . . . . . . . . . . . . . . . . . . . 281
Replacing wheels . . . . . . . . . . . . . . . . . . . . 283
Spare tire . . . . . . . . . . . . . . . . . . . . . . . . . . 289
3
Page 14 of 328
Instruments and indicator lights
(+S °C), a snowflake symbol appears in front of
the temperature display.
If your vehicle is stationary or if you are driving at
very low speeds, the temperature displayed may
be slightly higher than the actual temperature
outside due to the heat radiating from the en
gine.
A WARNING
Do not assume the roads are free of ice based
on the outside temperature display . Be aware
that there may be ice on roads even when the
outside temperature is around 41 °F (+S
0
()
and that ice can increase the risk of accidents .
@ Tips
You can change the measurement units, for
example for temperature or speed, in the
MMI.
Fuel level
The display @ q page 10, fig. 3 only works when
the ignition is switched on. When the display has reached the reserve mark, the bottom LED will
turn red and the
tj] indicator light turns on
q page 24. Th e bottom LED blinks red when
the fuel level is very low.
The on-board computer shows the range based
on the fuel level~
page 29, On-board comput
er display.
For the tank capacity in your vehicle , refer to the
Technical Data
qpoge 303.
(D Note
Never drive until the tank is completely emp
ty . The irregular supply of fuel that results
from that can cause engine misfires . Uncom
busted fuel will then enter the exhaust sys
tem. This can cause overheating and damage
to the catalytic converter.
Coolant temperature indicator
In vehicles without a coolant temperature indica
t or, an indicator light . will turn on when the
12
coolant temperature is too high q page 20. Re
fer to
q 0 .
The coolant temperature indicator @ q page 10,
fig. 3
only works when the ignition is switched
on. To prevent engine damage, please observe
the following notes about the temperature rang
es .
Cold range
If only the LEDs at the bottom of the gauge turn
on, the engine has not reached operating tem
perature yet. Avoid high engine speeds, full ac
ce lerating and heavy engine loads.
Normal range
The engine has reached its operating tempera
ture once the LEDs up to the center of the gauge
turn on under normal driving conditions. The
LEDs higher up may turn on if the engine is under
heavy load or the outside temperature is high.
T his is no cause for concern as long as the. in
dicator light in the instrument cluster does not
turn on.
Hot range
If the LEDs in the upper area of the display and
the . indicator light in the instrument cluster
display turn on, the coolant temperature is too
high
q page 20 .
A WARNING
-Never open the hood if you can see or hear
steam or coolant escaping from the engine
compartment . This increases the risk of
burns . Wait until you no longer see or hear
steam or coolant escaping.
- The engine compartment in any vehicle can
be a dangerous area. Stop the engine and
allow it to cool before working in the engine
compartment. Always follow the informa
tion found in¢
page 236, Working in the
engine comportment.
([) Note
-In vehicles with a boost pressure indicator*,
this indicator replaces the temperature dis
play. To promote a long engine service life,
avoiding high engine speeds, full
Page 81 of 328
.... N
0 > CX)
rl I.Cl U"I
rl I.Cl ....
You must drive your vehicle about 3,000 miles
(5 ,000 kilomet ers) before you can prop erly as
sess o il consumption .
This a lso applies to fuel consump tion and engine
output .
(D Note
-Have your vehicle mainta ined properly and
i n accor dance wi th the service re commenda
tions in yo ur War ranty
& Maintenance book
l et. Lack of proper maintenance as well as
i mproper use of the vehicle will impair the
function of the emission control system and
could lead to damage .
- Do not alter or remove any component of
the Em ission Control System unless ap
proved by the manufacturer.
- Do not alter or remove any device, such as
heat shie lds, sw itches, ignition wires,
valves, which a re designed to protect yo ur
vehicle's Em ission Control System and other
i mportant vehicle components.
Fewer short trips
Fuel consumption will always be relatively high
on short trips.
• Try to avoid driving short dist ances with a cold
engi ne .
T he eng ine and catalytic converter have to reach
their optimal
operating tempe rature to reduce
fuel consump tion and noxious emissions effec
tively .
Just after starting, a cold engine in a mid-si ze car
only achieves a fuel economy of 6-8 miles per
ga llon (30-40 l/100 km). A fter about a half a
m ile , fuel economy cl imbs to 12 mpg (20 l/
100 km) . After about
2.5 miles (4 km), the en
g ine is a t its prope r operating temperature and
fuel economy has reache d a normal level. So you
c a n see t hat you s hou ld avoid sho rt t rips whenev
er possib le .
The
outside temperature is also cr itical in th is re
g ar d. Yo ur car c onsumes mo re fuel in the w in ter
than in the s umme r.
D rivi ng
Steering
Adjusting the steering wheel position
The steering wheel position is fully adjustable up
and down and forward and back.
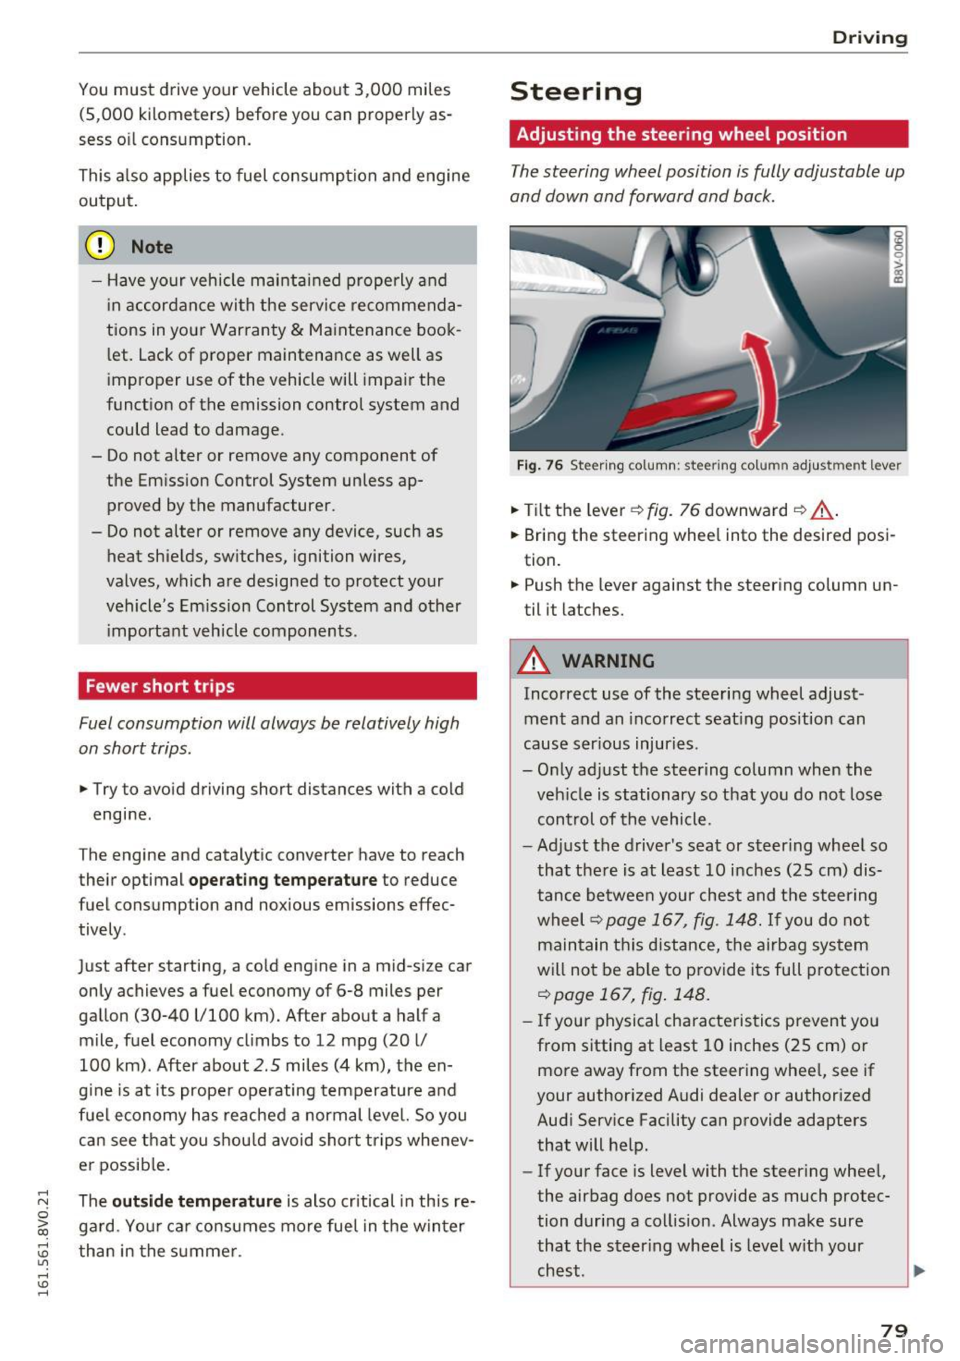
F ig . 7 6 Stee rin g c olu m n: steering co lumn adjustm en t leve r
• Tilt the leve r¢ fig. 76 downward ¢&_ .
• Bring the steer ing whee l into the desired pos i
tion.
• Push the lever against the steer ing column un
til it latches.
A WARNING
-
Incorrect use of the stee ring wheel adjust
ment and an incorrect seat ing position can
cause ser ious injuries .
- On ly ad just the steering column when the
veh icle is stationary so that yo u do not lose
con trol of the vehicle.
-
-Ad just the driver 's sea t or s teer ing whee l so
that the re is at least 10 inc hes (25 cm) dis
tance be tween your ches t and t he steer ing
wheel
r:!> p age 16 7, fig. 1 48 . If y ou d o not
main tain t his d istance, t he ai rb ag sys tem
will not be ab le to provide its fu ll pro tection
r:!> page 167, fig . 148.
- If your phy sical ch aracteris tic s prevent you
from sitting at least 10 inches ( 25 cm) o r
mo re away from the steer ing whee l, see if
your author ized Audi dealer or authorized
Aud i Serv ice Facility can provide adapters
that will help.
- If your face is level with the steer ing whee l,
the airbag does not provide as much protec
tion dur ing a col lision . Always make sure
that the steer ing whee l is level w ith your
chest.
~
79
Page 92 of 328

Automat ic t ra nsm iss io n
-Never select R or P while driving, because
this increases the risk of an accident.
- Power is still transmitted to the wheels
when the engine is running at idle. To pre
vent the vehicle from "creeping" , you must
keep your foot on the brake in all selector
lever positions (except P) when the engine is
running. Otherwise, this increases the r isk
of an accident.
- Do not inadvertently press the accelerator
pedal when the veh icle is stopped if a gear is
engaged. Otherwise the vehicle will start to
move immediately, even if the parking brake
is set. This cou ld result in a crash.
- Do not press the accelerator pedal when
changing the selector lever position wh ile
the vehicle is stationary and the engine is running .
- Never leave yo ur vehicle with the engine
running whi le in gear. If you must leave
your vehicle when the engine is running, set
the parking brake and move the selector lev
er to the P position.
- To decrease the risk of an accident, these
lector lever must be in the P position and
the parking brake must be set before open ing the hood and working on a running en
gine . Always read and follow the applicable
warnings
q page 236, Working in the en
gine compartment.
(D Note
Never let the veh icle roll downhill with engine
off and the selector lever in the
N position,
because this could damage the automatic
transmission and catalytic converter .
(D Tips
-Audi drive select: Sporty shifting character
i stics can be selected us ing the
D ynami c
driving mode.Swill appear in the instru
ment cluster disp lay instead of D.
- Plug-in hybrid drive*: the transm iss ion
switc hes automatically to the normal D
mode if the
l a ' I butto n ¢ page 104 is p ress
ed while in spo rt mode 5 .
90
-If you accidentally select N whi le dr iving,
take your foot off the accelerator peda l im
mediately and wait for the eng ine to slow
down to idle before selecting Dor
5.
- If there is a power failure, the selector lever
will not move out of the P position. The
emergency release can be used if this hap
pens ¢
page 96.
Selector lever lock
Applies to vehicles: with S tronic transmiss ion
The sele ctor lever lock prevents you from select
ing a gear accidentally, causing the vehicle to
roll .
Fig. 82 Selecto r lever lock
To release the se lector lever lock :
.,. Sw itch on the ignition .
12 0
0
> Q) a)
.,. Press the brake pedal while pressing the in ter-
lock button.
Automat ic shift lock (ASL )
The selector lever is locked in the P and N posi
tions when the ign it ion is switched on. You must
press the brake peda l to select another position .
You must also press the in terlock button if you
are moving from the P posi tion . The follow ing
message appears in the d isp lay when the se lector
lever is in the P or N posit ion to rem ind the driv
er:
When stati onar y ap pl y fo otbrake while select
ing ge ar
The automatic sh ift lock only functions when the
vehicle is stationa ry or at speeds be low 1 mph
(2 km/h) . At highe r speeds, the lo ck is automati-
ca lly deactiva ted in the N pos ition . ..,.
Page 230 of 328
Check ing and F illing
Checking and Filling
Gasoline fuel
Gasoline grade
A pp lies to veh icles: w ith gaso li ne engine
The correct gasoline grade is stated on the inside
of the fuel filler door .
The vehicle is equipped with a catalytic converter
and must only be driven w ith
unleaded ga soli ne.
Aud i recommends using TOP TIER Detergent Gas
oline. Additional information on TOP TIER Deter
gent Gaso line can be found on the offic ial web
site (www .toptiergas.com) .
The individua l gasoline grades are differentiated
by
octane ratings . This value is given with (R +M)/
2 equating to AK I or in RON.
The fo llow ing headings match the co rrespon ding
sticker in the fue l fi ller door .
UNLEADED FUEL ONLY MIN . (R+M) /2 87
Regular/ MIN. RON
91 Regular
Use regu lar gaso line with minim um 87 AKI/
9 1 RON ~@ .
The max imum engine power is only reached if
p rem ium gasol ine 91 A KI/ 95 R ON is used.
UNLEADED FUEL ONLY PREMIUM MIN. (R
+M) /2
91 / SUPER MIN. RON 95
Using premium gasoli ne with m inim um 91 AKI/
9 5 RON is recommended.
If premium gasoline is not available, yo u can also
use reg ula r gasoline 87 AKI/ 91 RON . However
this does reduce t he engine powe r slight ly.
CD Note
- Fil li ng the tank just one ti me with leaded
f u el or other meta llic additives will caus e
p ermanent dete riorat io n to the cata lyt ic
conve rter func tion.
- When gasoline with an octane rati ng that is
too low is used , h igh speeds o r heavy engi ne
l o ad can lead to engi ne d am age.
228
(D Tips
The vehicle can be fi lled wit h fue l that has a
h igher octane rating than what is requi red by
the eng ine.
Blended gasoline
App lies to vehicles : wit h gasol ine engi ne
U se of g asoline conta ining alcohol or MTBE
(methyl tertiary butyl ether)
You may use unleaded gasoline blended with al
cohol o r MTBE (commonly referred to as oxygen
ates) if the blended m ixt ure meets the fo llow ing
c rit er ia:
Blend of gasoline methanol (wood alcohol or
methyl alcohol)
- Anti-knock index must be 87 AKI or h igher.
- Blend must contain no more than 3% metha-
nol.
- Blend must contain more than 2% co-solvents.
Blend of ga soline and ethanol (grain alcoh ol or
ethyl alcohol)
- Anti-knoc k index must be 87 A KI or h igher.
- Blend must not conta in more t han 15% etha-
nol.
Blend of gasoline and MTBE
- Anti -knock index must be 87 AKI or higher.
- Blend mus t contain no t more t han 15% M TBE.
Seasonally adjusted gasoline
Many gasoline grades are blended to perform es
pecially well for winter or s ummer dr iv ing . Du r
i ng seasonal change-ove r, we s ugges t that you
fill up a t busy gas stat io ns where the seaso nal
adjustment is mo re l ikely to be made in t ime .
CD Note
-Methanol fuels which do not meet these re
quireme nts may cause cor rosion and dam
age to plas tic and rubber componen ts i n t he
fue l system.
- Do not use f ue ls that fa il to meet t he speci
fie d cr iteria in th is ch ap ter.
...
Page 232 of 328
Checking and Filling
Refueling
Fuel filler neck
The fuel filler neck is located on the right rear
side panel behind the fuel fi ller flap.
If the power locking system should fail, you can
still open the flap manually· for deta iled instruc
tions see~
page 232 .
You can find the fuel tank capacity of your vehicle
in
c::;, page 303 .
The label on the inside of the fuel filler flap tells
you the correct fuel for your vehicle . For more in
formation about fuel specifications, see
c::;, page 228 .
Your vehicle fuel tank has an onboard refuelling
vapor recovery system . This feature helps to pre·
vent fuel vapors from escap ing from the tank and
polluting the environment while you refuel your
veh icle. In order to fill the tank properly while
protecting the environment, please fo llow this
refueling procedure carefully .
.&, WARNING
Under normal operating conditions, never car
ry additional fuel containers in your car. Gas
canisters and other containers used to trans
port fuel can be dangerous . Such containers,
full or empty, may leak and could cause a fire
in a collision. If you must transport fuel to
use for your lawn mower, snow blower, etc.,
be very careful a nd always observe local and
state laws regard ing the use, t ransportation
and storage of such fue l containers. Make cer·
tain the container meets industry standards (ANSI/ASTM F852 · 86).
(D Note
Never drive yo ur vehicle unt il the fuel tank is
completely empty. The ir regula r supply of
fue l can cause misfiring. Gasoline could enter
the exhaust system and damage the catalytic
converter.
230
Fueling procedure
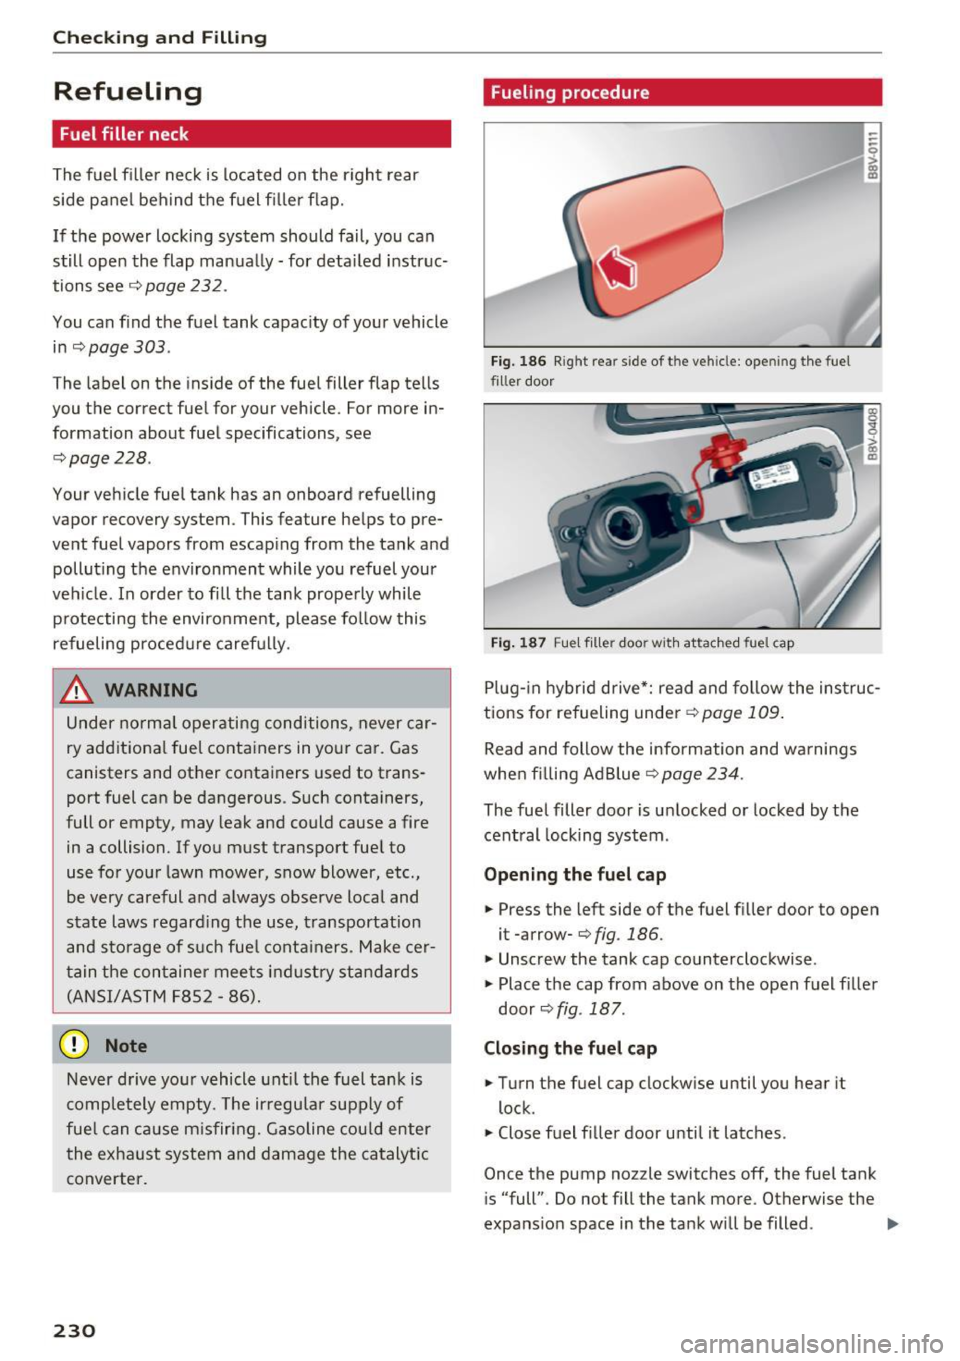
Fig. 186 R ig ht rea r side of t he ve hicle: ope ning the fuel
fil ler door
Fig. 187 Fuel fill er doo r wit h attached fue l cap
--0 > g:
Plug -in hybrid drive*: read and follow the instruc
tions for refueling unde r
c::;,page 109.
Read and follow the information and warnings
when filling AdBlue
c::;,page 234.
The fuel filler door is unlocked or locked by the
central locking system .
Opening the fuel cap
.. Press the left side of the fuel filler door to open
it -arrow-¢
fig. 186.
.,. Unscrew the tank cap counterclockwise .
.. Place the cap from above on the open fuel filler
door ¢
fig. 187.
Closing the fuel cap
.. Turn the fuel cap clockwise until you hear it
lock.
.. Close fuel f iller door until it latches .
Once the pump nozzle switches off, the fuel tank
is "full". Do not fill the tank more. Otherwise the
expans ion space in the tank will be filled .
IJ.
Page 234 of 328
Checking and Filling
@ Tips
Fue l can age and may lead to prob lems when
starting. Audi recommends replacing the fuel
in your vehicle within six months.
@ Tips
- If the engi ne is running while fueling, va
pors can escape or the fuel can spill over.
Because of th is, the fuel no zzle switches off
before the tank is full.
- Do not fuel the vehicle when the ignition is
switched on. Otherwise, the fuel gauge may
not show t he correct level after fueling the
vehicle .
- Diesel veh icles are equ ipped with a diesel
misfueling guard
1>. It allows the vehicle to
be f ueled on ly w ith a diesel fuel pump noz
zle .
- A wo rn o r damaged nozzle or a nozzle that
i s too smal l may not be ab le to open the
diesel misfueling protector . If this is the
case, try t urning the nozzle before inserting
i t in the f uel fille r neck, u se a d ifferent fue l
pump or see an aut horized Audi dea ler or
a uthorized Audi Service Facility fo r assis
tance .
- The misf ueling guard does not open when
adding fue l from a fue l conta iner . You can
bypass it by adding the diesel fuel slow ly.
- The fuel filler door on your ve hicle does not
l ock when you lock the vehicle from the in
side.
l ) Ma rket -specifi c
232
Fuel filler door emergency release
If the cen tral locking system is faulty, the fuel
filler door can be unlocked manually .
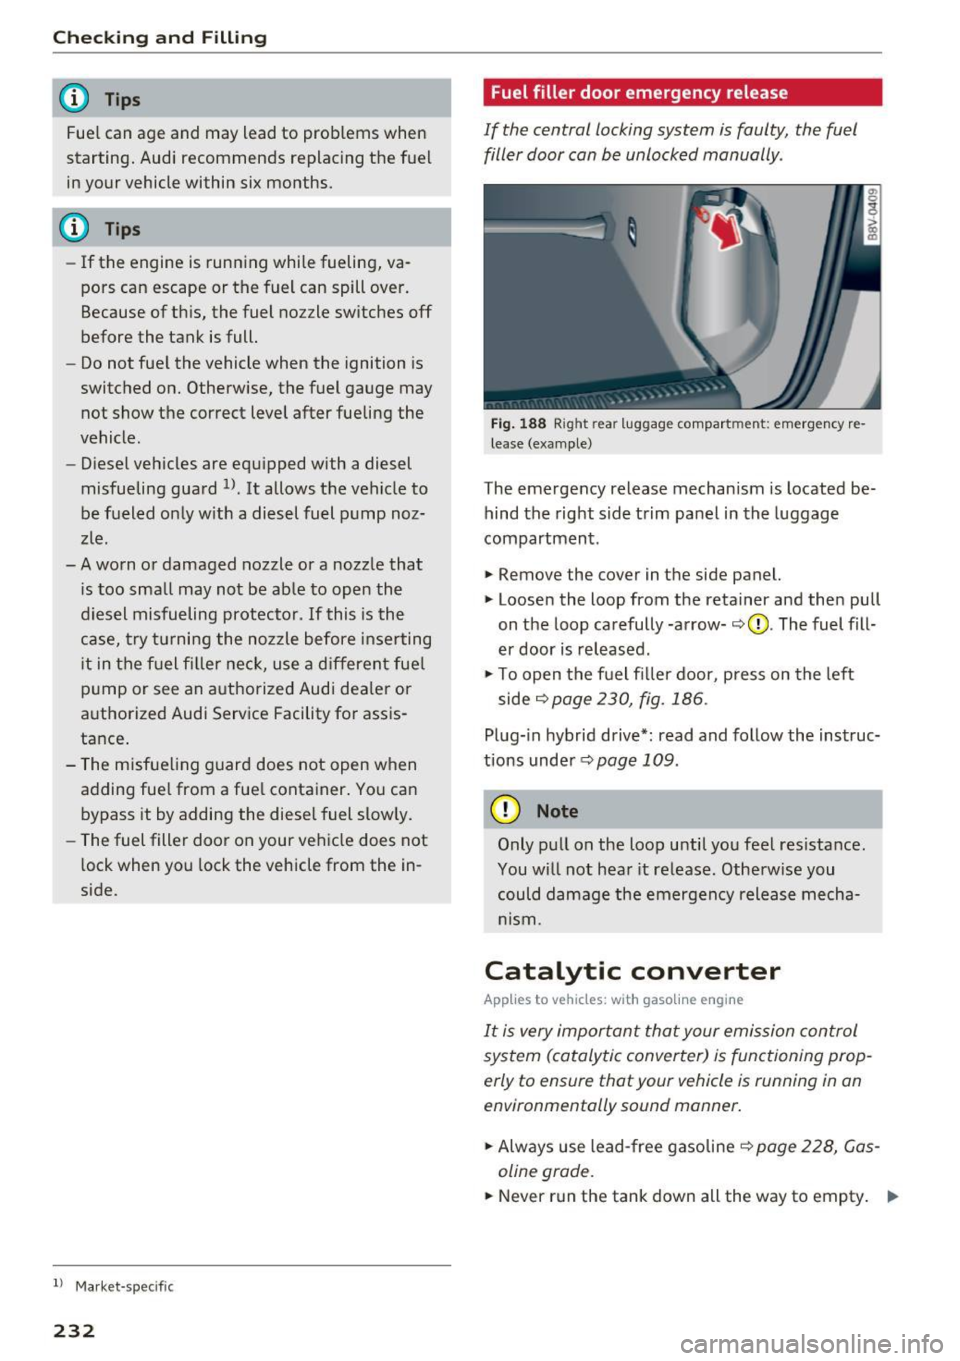
Fig. 188 Right re ar l ug gag e compa rtm en t: em erg enc y re
lease (example)
T he emergency release mechan ism is located be
hind the right s ide trim panel in the luggage
compartment.
.,. Remove the cover in the side panel.
.,. Loosen the loop from the retainer and then pull
on the loop carefully-arrow-
~ CD. The fuel fill
er door is released .
.,. To open the f uel filler door, press on the left
side
~ page 230, fig. 186 .
Plug-in hybrid drive*: read and follow the instruc
tions unde r
Qpage 109.
(D Note
Only pu ll on the loop until you feel res ista nce .
You wil l not hear it re lease. Otherw ise you
could damage the emergency release mecha
n ism .
Catalytic converter
Applies to vehicles: with gasol ine engine
It is very important tha t your emi ssion control
sys tem (ca talytic conv erter) is functioning prop
erly to ensure that your vehicle is running in an
env ironmentally sound manner .
.,. Always use lead-free gasoline ~ page 228, Gas
oline grade .
.,. Never run the tank down all the way to empty . ..,.
Page 235 of 328
,....,
N
0 > co ,....,
¢ page 242, Adding engine oil
The cata lytic converter is an efficient "clean -up"
device bui lt into the exhaust system of the vehi
cle. The catalytic converter burns many of the
pollutants in the exhaust gas before they are re
leased into the atmosphere.
The exclusive use of unleaded fue l is critica lly im
portant for the life of the catalytic converter and
proper functioning of the engine.
A WARNING
The temperature of the exhaust system is
high, both when driving and after stopping
the engine.
- Never touch the exhaust tail pipes once they
have become hot. This could result i n burns .
- Do not park or operate the vehicle in areas
where the hot exhaust system may come in
contact with dry grass, brush, fuel spill or
other material which can cause a fire .
-Do not apply additional undercoating or
rustproofing o n or near the exhaust mani
fold, exhaust pipes, catalytic converte r o r
heat s hields. During dr iving, t he substance
used for under coati ng could ove rheat and
c ause a fire.
(D Note
- Be aware that just one tank filling with
leaded fue l wi ll al ready ser iously degrade
the pe rformance of the ca talytic converter.
- Do not ex ceed the correct eng ine o il level
~page 242.
- Do not d rive until the fuel tank becomes
complete ly empty. The engine co uld m is
fire. Unburned fuel could also get in to the
exhaust system and this co uld cause t he
cata lytic converter to overheat .
- Do no t sw itch off t he igni tion while t he vehi
cle is moving.
- Do no t continue to operate your vehicle un
der these cond it ions, as othe rwise fue l can
reach the catalytic converter. This cou ld re
su lt in overheating of the converter, req uir
i ng its replacement.
Ch eck ing and Filling
-To ass ure eff icient operat ion of the Emis
sion Contro l System:
- Have yo ur vehicle maintained p roperly and
i n accordance with the serv ice recommen
dat ions in yo ur War ranty
& Ma intenance
booklet.
- L ack of proper ma intenance as well as im
p roper use of the ve hicle will impa ir the
f u nction of t he emission control system
a nd could lead to damage.
~ For the sake of the environment
Eve n when the Em iss ion Control System is op
era ting properly, t he exhaus t gas can have a
su lf ur -li ke exhaus t gas sme ll under some op
erating s tates . This depends on the sul fur
content of the fuel being used. Using a differ
ent brand of fuel may help, or fi lling the tank
with lead-free super grade gasoline.
Diesel particulate filter
Appl ies to vehicles: wit h diesel eng ine
The diese l particu late filter filte rs nearly all of
the soot part icles out of the exhaust. The filter
cleans itself automatically under norma l driving
condit ions. If the filter cannot clean itself (for ex
amp le, because yo u are o nly dr iving short distan
ces), the filte r becomes clogged with soot and
the
II symbol fo r the diese l par ticu late filter il
l u minates
¢page 23.
A WARNING
-Do not park your veh icle over flammab le
materia ls such as grass or leaves because
the high temperature of the diesel particu
late filte r cou ld start a fi re.
-
- Do not app ly an underbody protectant in the
exhaust system area or a fire could start .
233
Page 236 of 328
Check ing and F illing
Selective catalytic
reduction (AdBlue)
General information
Applies to vehicles: with diesel engine
In vehicles with selective cata lytic reduction, a
urea solution (AdB lue) is injected into the ex
haust system before a nitrogen oxide catalytic
converter to reduce nitrogen emissions.
Ad B lue is the marketing name for Diesel Exha ust
Fl uid (DEF).
The AdBl ue is carried in a separate ta nk in the ve
hicle. The Ad Blue usage accounts for approxi
mate ly 0.5% to 1.2% of the diesel f uel that is
used .
W hen a message about refilling the Ad B lue ap
pears in the instrument cluster disp lay, you must
refill the Ad Blue you rself or have it refilled by an
author ized Audi dealer or authorized Audi Service
Facility ¢
page 235.
A WARNING
-
Failure to heed AdBlue refill informat ion in
the instrument cluster can prevent the vehicle
from being started and dr iven . If the vehicle
cannot be driven and an emergency arises,
perso na l in jur y can occur.
- Always have the AdBlue tank refilled well
before the tank runs dry .
(D Tips
-The instrument cluster display indicates the
distance rema ining t hat can be driven
¢ page 234. If the AdBlue tank is com
plete ly empty, the engine wi ll not start
again after the ignition is sw itched off.
- Ad B lue is req uired by law to operate this ve
hicle.
234
· Messages in the instrument cluster display
Applies to vehicles: with diesel engine
T he display indicates if the Ad Blue level is low or
if there is a system malfunction .
AdBlue level low
Yo u w ill be informed if the AdB lue in the tank
drops below a certain level.
AdBlue /;) Refill xxx l -xxx l Ad Blue . Range
1500 mi (2400 km)
This message appears w hen the re is on ly enough
Ad Blue left to dr ive the dis tance indicated in the
driver information system . Refi ll the recom
mended amount of Ad Blue . The sma ller va lue
given in the message rep resents the minim um
amount and the larger value is the maxim um
amount.
AdBlue /9 Refill xxx l -x xx l Ad Blue ! No restart
in
600 miles ( 1000 km). See owner 's manual
This message appears w hen the re is on ly enough
Ad B lue left to drive the distance indicated in the
driver information system . Refi ll the recom
mended amount of Ad Blue. Otherwise the engine
will not sta rt again if you stop it once the dis
tance indicated h as been driven. The smaller val
ue g iven in the message represents the m inimum
amount and t he larger value is the maxim um
amount . As long as the indicator
li gh t is on , you can chec k the rema ining range in
t h e tr ip comp ute r*.
Refill xxx l -xxx l Ad Blu e! Engine
start not po ssible! See owner 's manu al
This message appears when the Ad Blue tank is
empty . Fill the Ad Blue . Otherwise you w ill not be
able to sta rt the engi ne aga in once you stop it .
The Ad Blue must be refilled when the amount in
the tank has reached the min imum level
¢ page 235 , Filling AdBlue .
¢'4 Incorrect filling /system malfunction
A message appea rs if the Ad Blue tank was fi lled
with a f lu id other than Ad Blue and the system
has detected that the tank was filled incorrectly,
or if there is a system malfunction.
Page 245 of 328
,....,
N
0 > co ,....,
ing anything in the engine compartment
c::> page 236, Working in the engine compart
ment.
.. Turn the engine off.
.. Unscrew the engine oil filler opening cap~
c::>fig.197, c::>page239, fig.193 .
.. Carefully add 0.5 quart (0.5 liter) of the appro
priate oil
c::> page 240.
.. Check the oil level again after two minutes
c::> page 242, Checking the engine oil level .
.,. Add o il, if necessary.
.. Close the engine oil filler cap and push the dip
stick all the way in .
A WARNING ,--
- When adding oil, do not let oil drip onto hot
engine components . There could be risk of a
fire.
- You must secure the cap on the oi l filler
opening correctly so that oil does not leak
out onto the hot engine and exhaust system
when the eng ine is running, because this is
a fire hazard.
- Always clean skin thoroughly if it comes into contact with engine oil.
(D Note
-Applies to vehicles with a gasoline engine:
the oil level cannot be above the
0 range
c> page 242, fig. 195 or else yo u risk dam
aging the catalytic converter and the en
gine . Contact an authorized Audi dealer or
authorized Audi Serv ice Facility to have ex
cess oil extracted if necessary .
-Applies to vehicles with a diesel eng ine: the
oil level must not be in the
G) range
c::>page 242, fig. 196-The oil must not be
extracted or else you risk damaging the en
gine. Drive to an authorized Aud i dealer or
authorized Audi Service Facility immediate
l y.
- Do not mix any additional l ubricants into
the engine o il. Damage cause by such addi
tives is not covered by the warranty.
Checking and Filling
{® For the sake of the environment
-Oil shou ld never enter the sewer system or
come into contact with the ground.
- Pay attention to lega l requirements when
disposing of empty oil containers .
Changing the engine oil
We recommend that have your oil changed by an
authorized Audi dealer or a qualified service sta
tion .
Before you check anything in the engine compart
ment,
always read and heed all WARNINGS
c::> page 236.
The engine o il must be changed according to the
intervals specified in your Warranty
& Mainte
nance book let. This is very important because the
lubricating properties of oil diminish gradua lly
during norma l vehicle use.
Under some circumstances the engine oil shou ld
be changed more frequent ly. Change oil more of
ten if you drive mostly short distances, operate
the vehicle in dusty areas or under predominantly
stop-and-go traff ic conditions, or have your vehi
cle where temperatures remain below freezing
for extended periods.
Detergent additives in the oi l will make fresh oil
look dark after the engine has been running for a
short time. This is normal and is not a reason to
change the oil more often than recommended.
Because of the problem of proper disposal, along
with the special tools and necessary expertise re
quired, we strongly recommend that you have
your o il changed by an authorized
Audi dealer or
a qualified service stat ion.
If you choose to change your oil yourself, please
note the following important information:
A WARNING ,-~
To reduce the risk of personal injury if you
must change the engine oil in your vehicle
yourself:
- Wear eye protection.
243