cooling AUDI S3 SEDAN 2015 Owners Manual
[x] Cancel search | Manufacturer: AUDI, Model Year: 2015, Model line: S3 SEDAN, Model: AUDI S3 SEDAN 2015Pages: 282, PDF Size: 71.14 MB
Page 5 of 282
M N
0 > co ,...., \!) ..,.,
..,.,
..,., ,....,
Adjusting the disp lay and the warning
tones .... .. .. .. .... .... ... .. .. .... . 121
Error messages . . . . . . . . . . . . . . . . . . . . . 121
Intelligent Technology . . . . . . . . . . 122
Notice about data recorded by the Event
Data Recorder and vehicle cont rol
modules . . . . . . . . . . . . . . . . . . . . . . . . . . . 122
Electronic stabilization control (ESC) . . . . 123
Brakes . . . . . . . . . . . . . . . . . . . . . . . . . . . . . 125
Electromechanical steering . . . . . . . . . . . . 126
All wheel drive (quatt ro) . . . . . . . . . . . . . . 127
En ergy management 128
Safety . . . . . . . . . . . . . . . . . . . . . . . . . . . . 130
Driving safety . . . . . . . . . . . . . . . . . . . . 130
Basics . . . . . . . . . . . . . . . . . . . . . . . . . . . . . 130
Correct passenger seating positions..... 131
Driver's and front passenger's footwe ll . . 13 5
Pedal area . . . . . . . . . . . . . . . . . . . . . . . . . . 135
Storing cargo correct ly . . . . . . . . . . . . . . . 136
Reporting Safety Defects . . . . . . . . . . . . . . 138
Safety belt s . . . . . . . . . . . . . . . . . . . . . . 140
General notes . . . . . . . . . . . . . . . . . . . . . . . 140
Why use safety belts? . . . . . . . . . . . . . . . . 141
Safety belts . . . . . . . . . . . . . . . . . . . . . . . . 143
Belt tensioners . . . . . . . . . . . . . . . . . . . . . . 146
Airb ag sy stem . . . . . . . . . . . . . . . . . . . . 148
Important information . . . . . . . . . . . . . . . 148
Front airbags . . . . . . . . . . . . . . . . . . . . . . . 152
Monito ring the Advanced Airbag System . 160
Knee airbags . . . . . . . . . . . . . . . . . . . . . . . . 164
Side airbags . . . . . . . . . . . . . . . . . . . . . . . . 166
Side curtain airbags . . . . . . . . . . . . . . . . . . 169
Child safety . . . . . . . . . . . . . . . . . . . . . . 172
I mportant information . . . . . . . . . . . . . . . 172
Child seats . . . . . . . . . . . . . . . . . . . . . . . . . 178
Securing child seats . . . . . . . . . . . . . . . . . . 182
LATCH system (Lower anchorages and
tethers for children) . . . . . . . . . . . . . . . . . . 185
Additional information . . . . . . . . . . . . . . . 189
Table of contents
Maintenance and Care . . . . . . . . . . .
190
Checking and Filling . . . . . . . . . . . . . 190
Gasoline . . . . . . . . . . . . . . . . . . . . . . . . . . . 190
Diesel f uel . . . . . . . . . . . . . . . . . . . . . . . . . 191
Refueling . . . . . . . . . . . . . . . . . . . . . . . . . . 192
Catalytic co nverter . . . . . . . . . . . . . . . . . . . 194
D ie sel particulate filter . . . . . . . . . . . . . . . 195
Selective catalytic reduction . . . . . . . . . . . 195
En gine compartm ent . . . . . . . . . . . . . . . . . 198
Eng ine oil . . . . . . . . . . . . . . . . . . . . . . . . . . 20 1
Cooling system . . . . . . . . . . . . . . . . . . . . . . 205
Brake fluid . . . . . . . . . . . . . . . . . . . . . . . . . 207
Battery . . . . . . . . . . . . . . . . . . . . . . . . . . . . 208
Windshield washer system . . . . . . . . . . . . 212
Serv ice interval display
212
Tires and wheels . . . . . . . . . . . . . . . . . 214
Wheels . . . . . . . . . . . . . . . . . . . . . . . . . . . . 214
Tire pressure monitoring system . . . . . . . 232
Care and cleaning . . . . . . . . . . . . . . . . 235
General information . . . . . . . . . . . . . . . . . 23S
Car washes . . . . . . . . . . . . . . . . . . . . . . . . . 23S
Cleaning and care information 236
Troubleshooting . . . . . . . . . . . . . . . . . 240
Emergency assistance . . . . . . . . . . . 240
Luggage compartment lid emergency
re lease . . . . . . . . . . . . . . . . . . . . . . . . . . . . 240
General informat ion . . . . . . . . . . . . . . . . . 240
Equipm ent . . . . . . . . . . . . . . . . . . . . . . . . . 241
Replacing wheels . . . . . . . . . . . . . . . . . . . . 241
Spare tire . . . . . . . . . . . . . . . . . . . . . . . . . . 246
Fu se s and bulbs . . . . . . . . . . . . . . . . . . 248
El ectrica l fuses . . . . . . . . . . . . . . . . . . . . . . 24 8
Bulbs. . . . . . . . . . . . . . . . . . . . . . . . . . . . . . 250
Emergency situation s . . . . . . . . . . . . 252
General . . . . . . . . . . . . . . . . . . . . . . . . . . . . 252
Starting by pushing or towing . . . . . . . . . . 252
Starting with jumper cables . . . . . . . . . . . 252
Using jump start cables . . . . . . . . . . . . . . . 253
Towing with a tow truck . . . . . . . . . . . . . . . 254
Raising the vehicle . . . . . . . . . . . . . . . . . . . 256
3
Page 14 of 282
Instruments and indicator lights
reached the reserve mark, the bottom LED will
turn red and the
ljJ indicator light turns on
¢
page 23. The bottom LED blinks red when
the fuel level is very low.
The on-board computer shows the range based
on the fuel level¢
page 28, On-board comput
er display.
For the tank capacity in your vehicle, refer to the
Technical Data
¢ page 260.
(D Note
Never drive until the tank is completely emp
ty. The irregular supply of fuel that results
from that can cause engine misfires. Uncom
busted fuel will then enter the exhaust sys
tem. This can cause overheating and damage
to the catalytic converter.
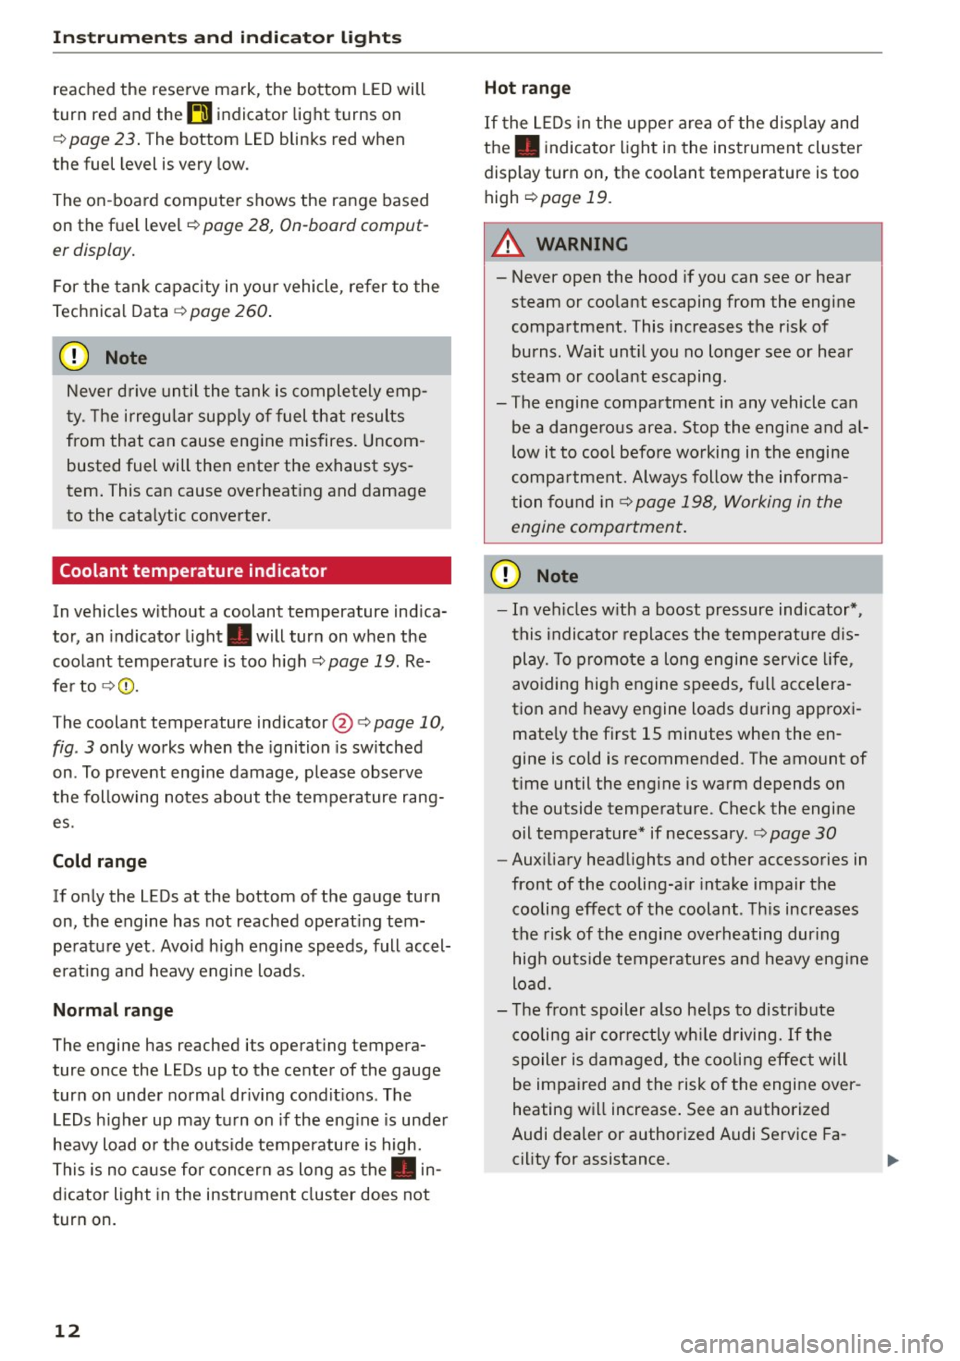
Coolant temperature indicator
In vehicles without a coolant temperature indica
tor, an indicator light. will turn on when the
coolant temperature is too high ¢
page 19. Re
fer to ¢(1) .
The coolant temperature indicator @c:>
page 10,
fig . 3 only works when the ignition is switched
on . To prevent engine damage, please observe
the following notes about the temperature rang
es.
Cold range
If only the LEDs at the bottom of the gauge turn
on, the engine has not reached operating tem perature yet. Avoid high engine speeds, full accel
erating and heavy engine loads.
Normal range
The engine has reached its operating tempera
ture once the LEDs up to the center of the gauge
turn on under normal driving conditions . The
LEDs higher up may turn on if the engine is under
heavy load or the outside temperature is high.
This is no cause for concern as long as the. in
dicator light in the instrument cluster does not
turn on.
12
Hot range
If the LEDs in the upper area of the display and
the . indicator light in the instrument cluster
display turn on, the coolant temperature is too
high
c:> page 19 .
A WARNING
-Never open the hood if you can see or hear
steam or coolant escaping from the engine
compartment. This increases the risk of
burns. Wait until you no longer see or hear
steam or coolant escaping.
- The engine compartment in any vehicle can
be a dangerous area . Stop the engine and al
low it to cool before working in the engine
compartment. Always follow the informa
tion found in ¢
page 198, Working in the
engine compartment.
(D Note
- In vehicles with a boost pressure indicator* ,
this indicator replaces the temperature dis
play. To promote a long engine service life,
avoiding high engine speeds, full accelera
tion and heavy engine loads during approxi
mately the first 15 minutes when the en
gine is cold is recommended . The amount of
time until the engine is warm depends on
the outside temperature . Check the engine
oil temperature* if necessary .
c:> page 30
-Auxiliary headlights and other accessories in
front of the cooling-air intake impair the
cooling effect of the coolant. This increases
the risk of the engine overheating during
high outside temperatures and heavy engine
load.
- The front spoiler also helps to distribute
cooling air correctly while driving. If the
spoiler is damaged, the cooling effect will
be impaired and the risk of the engine over
heating will increase. See an authorized
Audi dealer or authorized Audi Service Fa
cility for assistance.
Page 16 of 282
Instruments and indicator lights
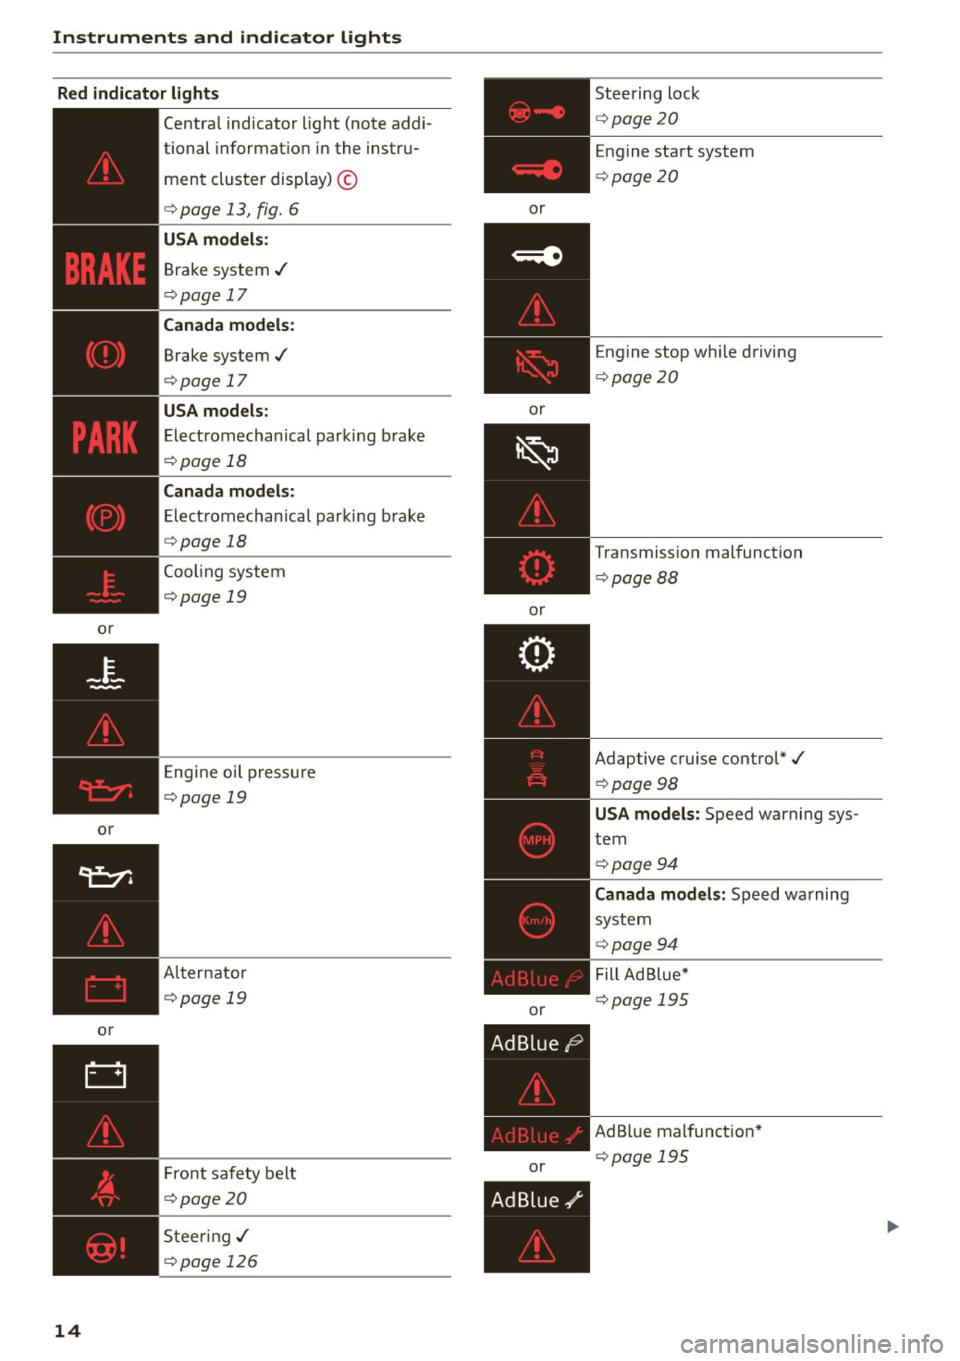
Red indicator light s
or
or
or
14
Central indicator light (note addi-
tional informat ion in the instru-
ment cluster display) ©
<=>page 13, fig. 6
USA m odel s:
Brake system ../
<=>page 17
Cana da models :
Brake system ../
<=>page 17
USA models :
Electromechan ical parking brake
<=> page 18
Canada mod els :
Electromechanica l parking b rake
<=> page 18
Cooling system
<=>page 19
Eng ine oil pressure
<=>page 19
Al ternator
<=>page 19
Fr ont safety belt
<=>page20
S teer ing../
<=>page 126
or
or
or
or
or Steering lock
<=>
page20
Engine start system
<=> page20
Engine stop whi le driving
<=> page 20
Transmission malfunction
<=>page 88
Adaptive cruise control*./
<=>page 98
USA mod els: Speed warning sys
tem
<=> page 94
Canada mo del s: Speed warning
system
<=> page 94
Fill Ad Blue*
<=> page 195
AdB lue malfunct ion*
<=> page 195
Page 21 of 282
![AUDI S3 SEDAN 2015 Owners Manual M N
0 > co ,...., \!) 1.11
1.11
1.11
,....,
If th is message appea rs, press t he b rake pe da l
f ir st and the n re lease the par king brake .
IZ,;11:);MJ~ (USA models) / [i] (Canada AUDI S3 SEDAN 2015 Owners Manual M N
0 > co ,...., \!) 1.11
1.11
1.11
,....,
If th is message appea rs, press t he b rake pe da l
f ir st and the n re lease the par king brake .
IZ,;11:);MJ~ (USA models) / [i] (Canada](/img/6/57653/w960_57653-20.png)
M N
0 > co ,...., \!) 1.1'1
1.1'1
1.1'1
,....,
If th is message appea rs, press t he b rake pe da l
f ir st and the n re lease the par king brake .
IZ,;11:);MJ~ (USA models) / [i] (Canada models)
Caution: Vehicle parked too steep
I f the indicator lig ht blinks and t he messag e ap
pea rs, there is no t enoug h bra kin g power to se
cure the vehicle. The b rakes have ove rhe ate d. T he
ve hicl e c ould r oll aw ay even on a sm all incli ne.
l:(;1;1:t:);MJ~ (USA models ) / [i] (Canada models)
Parking brake is applied
I f th is message appears , press t he brake pedal
f ir st and the n re lease the par king b rake if neces
sa ry .
(D Tips
For addit io nal information o n the park ing
b ra ke, re fe r to ¢
page 78.
_L Cooling system
• Switch off engine and check coolant level!
The coolant leve l is too low or the coolant tem
pe ra tu re is too hig h.
Do not cont inue driving and switc h the engine
off. C hec k the coolant leve l¢
page 205.
- If the coolant leve l is too low, add coolant
¢ page 206 . Only cont inue driv ing once t he in
dicator light turns off.
- If the coolant is at the correct level , the prob
l em may be ca used by a ma lf u nction in the radi
ator fan. Do not cont inue driv ing. See an au
t h orized Aud i dea le r or authorized Audi Service
Fac ility for assistance .
• Coolant temperature too high! Let engine
run with vehicle stationary
L e t th e en gine cool by r unnin g it in idle for a few
minutes .
A WARNING
-Never open t he hoo d if you ca n see o r hear
steam o r co olant escap ing from the engine
compartment. T his i ncreases the ris k of
bur ns. Wai t until yo u no lo nger see o r hear
steam o r co olan t escap ing .
Instruments and indicator lights
-The engine compa rtment in any vehicle ca n
be a dange ro us area . Sto p the engine and a l
low it t o cool befo re working in the engine
compa rtment. Always follow the informa
tion fo u nd in ¢
page 198, Working in the
e ngine compartment .
(D Note
Do not cont inue dr iv ing if the . indicato r
li g ht tur ns on -this inc reases the r isk o f en
g in e damage.
"1::::7: Engine oil pressure
• Switch off engine! Oil pres sure too low
St op t he engine and do not cont inue drivi ng .
Ch eck the eng ine oi l level
¢ page 203.
- If the engine o il level is too low, add eng ine oi l
¢ page 201 . Only continue dr iving once the in
dicator light turns off.
- If the engine o il level is co rrect and the indica
to r li ght still turns on, turn t he e ngine off and
do not cont inue drivi ng. See an authorized Aud i
dea le r or a uth o rized Aud i Serv ice Facility fo r as
sis tance .
(D Tips
The oil pressu re war ning is not an oi l level i n
dicator . Always chec k the o il l ev el re gular ly .
0 Alternator/battery
• Alternator fault : battery is not being charg
ed
T he re is a malfunction in the al ternator or the ve
hicle e lectr ica l system .
Drive to an authorized A udi dealer or autho rized
Audi Serv ice Facility immed iately. Because t he ve
hicle battery is d ra ining, turn off all unnecessary
elect rical e quipment suc h as th e MMI. Seek pro
fe ssional ass istance if t he battery charge lev el is
too low.
(•) Low battery charge: Battery will be charged
while driving
The starting ab ility may be impaired.
19
Page 66 of 282
Warm and cold
Warm and cold Climate control system
Description
Different systems could be installed.
- manual climate control system* or
- automatic climate control system*
The
climate control system* cools and removes
humidity from the air in the vehic le interior. It is
the most effective when the windows and panor
ama sunroof* are closed.
If there is a build-up of
heat inside the vehicle, ventilation can help to
speed up the cooling process . For this reason, the
windows and panorama sunroof can be opened
from the outside .~
page 41, Convenience open
ing/closing
Pollutant filter
The pollutan t filter removes pollutants such as
dust and pollen from the air.
Key recognition
You can store various settings for the manua l and
automatic
climate control system* and assign
them to the key being used .
A WARNING
Poor visibility can lead to acc idents.
- For safer driving, keep all w indows free of
ice, snow and fog.
- Become familiar as quickly as possible with
the correct use and function of the climate
control system, espec ially with the defrost
ing and defogging function .
- When the temperature is below freezing,
only use the windsh ield washer system after
the windsh ield has been warmed by the cli -
64
mate control system. The washer f luid could
freeze on the w indshield and impair visibili
ty.
(D Note
- If you suspect that the climate control sys
tem is damaged, switch the system off to
prevent further damage and have it checked
by an authorized Audi dealer or authorized
Audi Service Facility .
- Repairs to the Audi climate control system
require special technical knowledge and
special tools. See an author ized Audi dealer
or authorized Audi Service Facility .
@ For the sake of the environment
Reducing the amount of fuel used also re
duces the amount of pollutants that enter the
a ir .
@ Tips
- To prevent interference with the heating
and cooling output and to prevent the win
dows from fogg ing over, the air intake in
front of the w indshield must be free of ice,
snow or leaves.
- Condensation from the cooling system* can
dr ip and form a pudd le of water under the
vehicle . This is normal and does not mean
there is a leak .
- Th e energy management system may switch
the seat heating* or rear window defroster
off temporarily. These systems are available
again as soon as the energy balance has
been restored.
- The f lows through the vents under the rear
window. Make sure the openings are not
covered when p lacing clothing on the lug
gage compartment cover.
Page 67 of 282
....,
N
0 > co
rl I.O
"'
"'
"'
rl
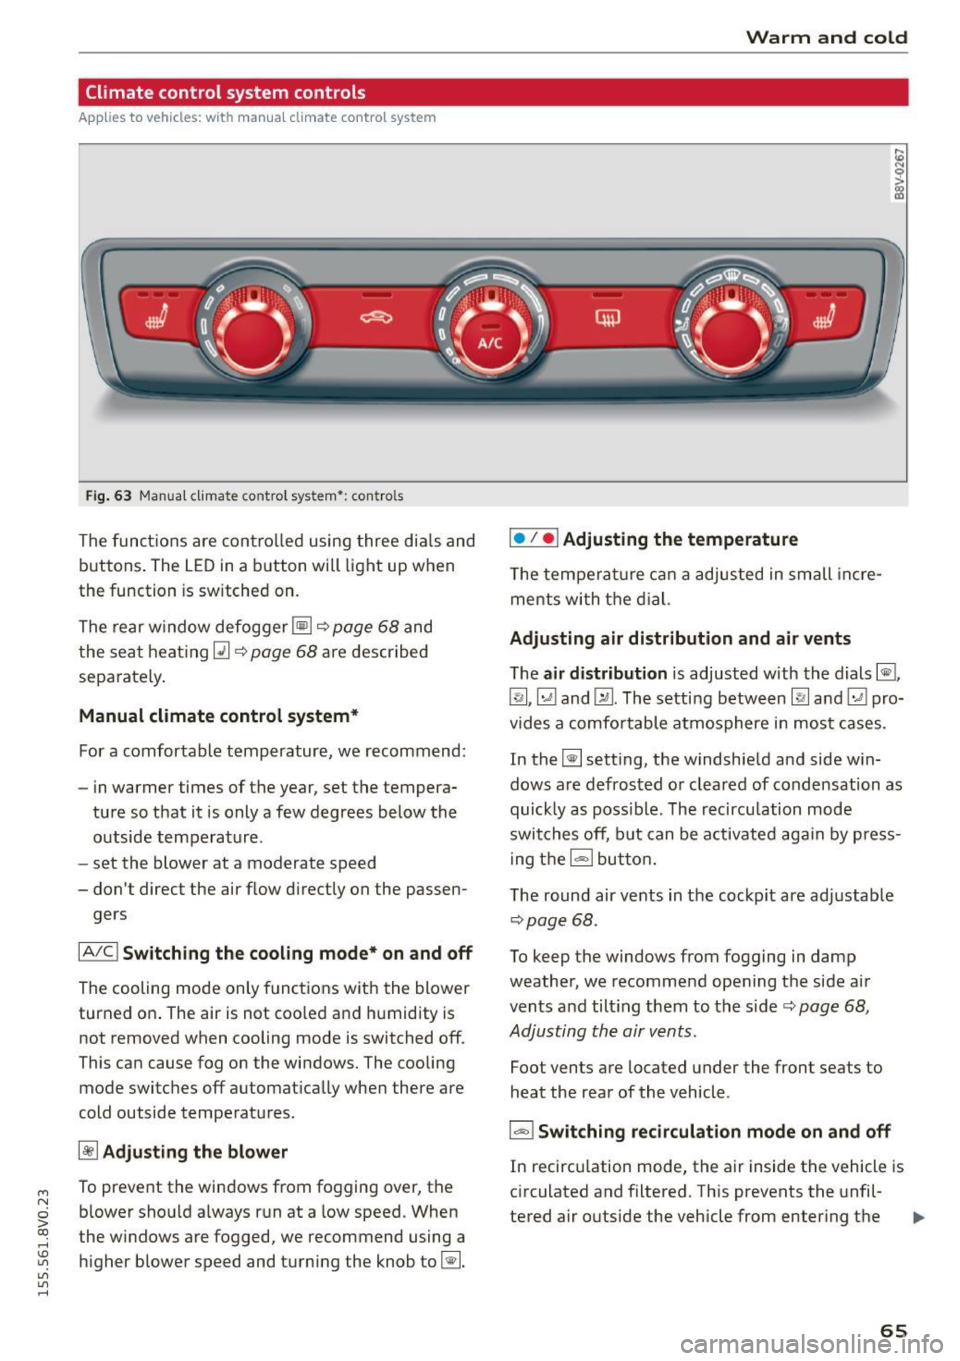
Climate control system controls
Applies to vehicles: with manual climate control system
F ig. 63 Manua l clima te co ntro l system *: contro ls
The functions are controlled using three dia ls and
buttons . The LED
in a button will light up when
the function is sw itched on.
The rear window defogger ~~
page 68 and
the seat heating~~
page 68 are described
sepa rately .
Manual climate control system*
For a comfortable temperature, we recommend:
- in warmer time s of the year, set the tempera-
ture so that it is only a few degrees below the outside temperature .
- set the blower at a moderate speed
- don't direct the air flow d irectly on the passen-
gers
IA/C l Switching the cooling mode* on and off
The cooling mode only functions with the blower
turned on . The air is not coo led and humidity is
not removed when cooling mode is switched off .
This can cause fog on the windows. The cooling
mode switches off automat ically when there are
cold outside temperatures.
~ Adjusting the blower
To prevent the windows from fogging over, the b lower should a lways run at a low speed. When
t he w indows are fogged, we recommend using a
higher blower speed and turning the knob to~-
Warm and cold
I• I • I Adjusting the temperature
T he temperature can a adjusted in small incre
me nts with the dial.
Adjusting air distribution and air vents
The air distribution is adjusted with the dials ~.
~.~ and~-The setting between
IR! and ~ pro
vides a comfo rtable atmosphere in most cases.
In the~ setting, the windshield and side win
dows are defrosted or cleared of condensation as
quickly as poss ible. The recircu lation mode
switches off, but can be activated again by press
ing the
l = I button.
The round air vents in the cockpit are adjustab le
¢ page 68 .
To keep the windows from fogging in damp
weather, we recommend opening the side air
vents and tilt ing them to the side ¢
page 68,
Adjusting the air vents .
Foot vents are located under the front seats to
heat the rear of the vehicle .
I-I Switching recirculation mode on and off
In recirculation mode, the air inside the vehicle is
circulated and filtered. This prevents the unfil-
tered air outside the vehicle from enter ing the .,..
65
Page 68 of 282
Warm and col d
vehicle interior . We recommend switching recir
culation mode on when driving through a tunne l
or when s itting in traffic¢.&. .
Recircula tion mode is sw itched off in the defrost
setting ~.
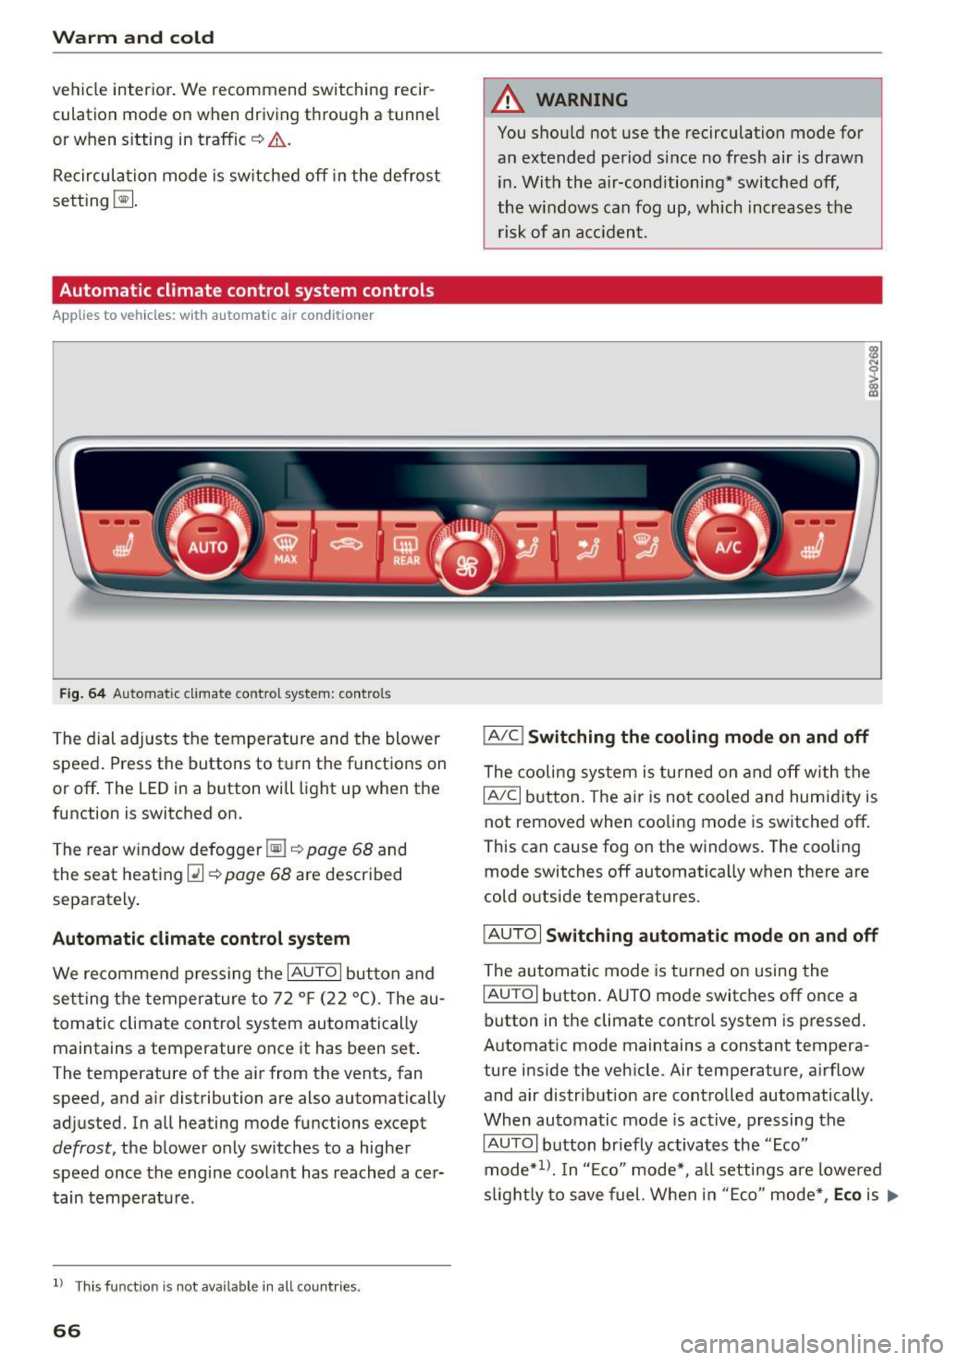
Automatic climate control system controls
Applies to vehicles: with automatic air conditioner
Fig. 6 4 Automa tic climat e co ntro l system : contro ls
The dial ad justs the temperature and the blower
speed . Press the buttons to turn the functions on
or off . The LED in a button will light up when the
function is switched on.
T he rear w indow defogger ~¢
page 68 and
the seat heat ing
Q] ¢ page 68 are described
separately .
Automatic climate cont rol system
We recommend p ress ing t he IAU TOI button and
se tting the temperature to 72
°F (22 °(). T he au
tomatic climate control system au tomatically
maintains a temperature once it has been set .
The temperature of the ai r from the vents, fan
speed, and a ir distribution are also automatically
adjusted. In all heating mode functions except
defrost, the b lower only sw itches to a higher
speed once the engine coo lant has reached ace r
tain tempe rat ure.
ll Thi s fun ctio n is not ava ilable in a ll countries.
66
A WARNING
You shou ld not use the recirculation mode for
an extended period s ince no fresh air is drawn
i n . With the air-conditioning* switched off,
the w indows can fog up, which increases the
risk of an a cciden t.
IA/C l Switching the cooling mode on and off
The cooli ng sys tem is turned on a nd off with the
IAJC I button. The ai r is no t cooled and humid ity is
not removed when cooling mode is switched off .
This can cause fog on the windows. The coo ling
mode switches off automatically when there are
cold o utside temperatures.
IAU TO I Switching automatic mode on and off
The au tomatic mode is turned on using the
IAU TO I button. A UTO mode switches off once a
button in the climate contro l system is pressed.
Automat ic mode maintains a constant tempera
ture i nside the vehicle. Air temperature, a irflow
and air distribut ion are contro lled automatically.
When automatic mode is active, pressing the
IAUTOI b utton briefly activates the "Eco"
mode*
1> . I n "E co" mode*, a ll setti ngs are lowered
s ligh tly to save fuel. Whe n in "E co" mode *,
Eco is .,..
Page 69 of 282
shown in the disp lay. To exit "Eco" mode*, press
the
! AUTO ! button again .
I• I • I Setting the temperature
The temperature can be adjusted individually for
the dr iver and front passenger using the dials.
Tempe ratures between 60 °F ( +16 °C) and 84 ° F
(+28 °C) can be set. If outside of this range, LO or
HI will appear in the climate control system dis
p lay. In both settings, the climate contro l runs
with constantly at the maximum cooling or heat ing level. The temperature is not regulated.
Synchronization: by pressing the IAUTO I button
for two seconds, the temperature setting for the
driver is transferred to the front passenger's side.
This applies a temperature change to the front
passenger's side.
~ Adjusting the blower
To prevent the windows from fogging over, the b lower sho uld a lways ru n at a low speed. You can
ad just the volume of air generated by the b lower
to your preference. To have the blower regu lated
automatically, press the !AU TO I button .
Adjusting the air distribution
The air distribution is adjusted with the~, U!i
and ~ buttons. To have the air d istr ibut ion regu
lated automatically, press the
IAUTOI button.
The round air vents in the cockpit are adjustable
¢page 68.
To keep the windows from fogging in damp
weather, we recommend opening the side air
vents and ti lting them to the side
~ page 68,
Adjusting the air vents .
Foot vents are located under the front seats and
adjustable vents on the end o f the center console
to heat the rear of the vehicle .
~ Switching the defroster on and off
The windshield and side windows are defrosted
or cleared of condensation as quickly as possible .
The maximum amount of air flows main ly from
M
N the vents below the windshie ld. Recirculation 0
iii mode switches off . The temperat ure is contro lled
~ automatically. In the Ii] sett ing, the IA/C i cooling
Vl
Vl
......
Warm and cold
mode switches on automatically, depending on
the outside air temperat ure.
T he
IAUTO ! button switches the defroster off.
l"""I Switching recirculation mode on and off
The recircu lation mode can be turned on manual
ly or automatically* .
- Switching manual recirculation mode on and
off : press
1.,,.,1 The LED light up when switched
on .
- Automatic* recirculation mode: the auto recir
culat ion must be act ivated in the MMI. Select:
the
I MENU I button > Car > Systems* control
button
> AC > Auto recirculation . The air quali
ty sensor that is designed for diesel and gaso
line exhaust automatically switches the recircu
lation mode on or off depending on the level of
pollutants in the outside air .
In recircu lation mode, the air inside the vehicle is
c ir cula ted and filtered. This prevents the unfil
tered air outside the vehicle from entering the
vehicle interior. We recommend switching recir
cu lation mode on when driving through a tunnel
or when sitting in traffic~ &.
T he
1-1 button, !AUTO ! or the [ii bu tton switches
recirculation mode off.
T he system switches to recirculation mode when
driv ing in reverse when the engine is cold.
_&. WARNING
You should not use the recirculation mode for
an extended period sin ce no fresh air is drawn
in. With the air-conditioning switched off, the
windows can fog up, which increases the risk
of an acc ident.
67
Page 93 of 282
M N
0 > co ,...., \!) ..,.,
..,.,
..,., ,....,
Trailer mode Driving with a trailer
General information
Your Audi was designed primarily for passenger
transportation .
If you plan to tow a tra iler, p lease remember that
the additiona l load will affect d urability, econo
my and performance .
T railer towing not on ly places more stress on the
vehicle, it a lso calls for more concentrat ion from
the dr iver .
F or this reason, a lways fo llow the operating and
d riving instructions provided and use common
sense.
Technical requirements
Traile r hitch
Use a weight-carrying hitch conforming to the
gross trailer we ight. The hitch must be suitable
for your vehicle and trai ler and must be mounted
securely on the veh icle 's chassis at a technically
sound
location . Use on ly a tra iler hitc h with a re
movable ba ll mou nt. Always chec k w ith the t ra il
e r hitch m anu fac tur er to make sure that you a re
using the co rrec t hitch.
Do not use a bumper hitch .
The hitch must be installed in such a way that it
does not i nterfere wit h the impact -absorbi ng
bumper system. No mod ificat ions should b e
mad e to the vehicle exhaust and brake systems .
Fr om time to t ime, c hec k t hat a ll h itch mou nti ng
bo lts remain sec urely fastened .
When you are no t tow ing a trailer,
remove the
trai ler hitch ball mount . Th is prevents the hitc h
fr om caus ing damage should you r vehicle be
s truck from behind~,&. .
Trailer brakes
If yo ur tra iler is equipped w it h a braking system,
check to be s ure that it conforms to all regu la
tions.
Trailer mode
T he trailer hyd raulic brake system must not be di
rect ly connected to the ve hicle's hydraulic b rake
system .
Safety chains
Always use s afe ty chains be tween your ve hicle
and the tra ile r.
Trailer lights
Tra ile r li ghts must meet all regulations. Be sure
to check w it h your Aud i dea le r fo r corr ect w irin g,
swi tches and relays.
Mirrors
If you a re unable to see the traffic behind you us
i ng the regular o uts ide mirrors, then you
must in
sta ll extended mirrors .
It is importa nt that you
always have clea r vision to the rea r.
_&. WARNING
Afte r removing the trailer hit ch, d o no t store
i t in yo ur vehicle. In ca se of sudden br akin g,
the hitch could fly fo rward and inju re you or
your passengers.
Operating instructions
Maximum traile r weight
A trai le r fo r you r vehicle is limited to a typi cal
class 1 or class 2 trai le r.
Trailer load distribution
B e sure the load in the t raile r is held secure ly in
pla ce to p revent it from shift ing forward, back
ward or sideways .
Never allow a pas senger to ride in a trailer~.&.
in Driving instructions on page 92.
Engine cooling system
Towing a trailer makes the engine work harder . It
is important tha t the cooling system 's pe rform
ance is up to the additional load. Make s ure that
the coo ling system has enoug h flu id.
Tire pressure
When towing a trailer, inflate the tires of your ve-
hicle to the cold tire pressure listed under "Full
lilJJ..
91
Page 207 of 282
M N
0 > co ,...., \!) ..,.,
..,.,
..,., ,....,
-Drain th e oi l into a container desi gned for
this purpose, one large enough to ho ld at
least the total amount of oil in your engine .
- Engine oil is poisonous . Keep it well out of
the reach of children.
- Continuo us contact with used engine oil is
harmful to your sk in. A lways protect your
sk in by washing oil off thoroughly w ith soap
and water.
(D Note
Never mix oi l addit ives with your engine oi l.
These additives can damage your eng ine and
adversely affect your Audi Limited New Veh i
cle Warranty .
@) For the sake of the environment
-Before changing your oi l, f irst make sure
you know where you can properly dispose of
the used oil.
- Always d ispose of used engine oil proper ly.
Do not dump it on garden soil, wooded
areas, into open streams or down sewage
d rains .
- Recycle used e ngine oi l by taking it to a used
engine oil collection facility in your area, or
contact a service station .
Cooling system
Coolant
The engine coolant performs two functions: it
keeps the engine from overheating and it pro
tects the engine from freezing in the winter.
The cooling system is sea led and generally re
q ui res lit tle atten tion.
The cooling system has been filled at the factory
w ith a pe rma nen t coolan t which does no t need to
be ch anged . T he coolant consists o f a mixture o f
specia lly condit ioned wa ter and the man ufactu r
er's glycol -based coolant additive Gl3 antifreeze
with anticor rosion add itives (SO% for USA mod
e ls · 60% for Canadian models) . Th is m ixture bot h
'
assures the nece ssary fros t protection and p ro-
tects meta l components in the engine 's cooling
Checking and Fillin g
system from corrosion and scaling . It also raises
t h e boiling point of the coo lant .
D o no t redu ce the con cen tra tion of the coolan t in
the summer by ad ding plain water.
The prop or
tion of coolant additive mu st be at least 50%
but not more than 60%
to maintai n antifr eeze
protection and cooling efficiency . If the coo lant
frost pro tec tion is too low, the coo lant co uld
freeze and damage the vehicle heating and en
gine cooling system .
For year- ro und driving, antifreeze is added at the
factory for temperatures down to :
-- 31°F(-3S° C)USA
- -40 °F ( - 40 ° C) C anada.
If you must add coolant, use a mixture of water
and coolant additiv e. Mix ing the coo lant add it ive
with dis tilled wa te r is recommended .
A WARNING
Befo re you c hec k anythi ng i n the engi ne com
partment, always re ad and heed a ll WA RN
IN GS
~page 198.
(D Note
- Befor e wi nter sets in , have the coo la nt
c hecke d to see if the cool an t additive in you r
vehicle is sufficient to meet the climate con
ditions . This is espec ia lly impo rtant if you
live in a region where the winter is extreme
ly cold . If necessary, increase the proportion
of coolant additive to 60%.
- When adding coolant additive to yo ur cool
ing system, remember:
- We recommend us ing o nly coo la nt addi
tive G12 ++ o r G13 ( che ck the label) fo r
your ve hicl e. This coolant addi tive is av ail
a ble at autho rized Aud i dea le rs . Othe r
types of ant ifreeze can significant ly re
d uce corrosion protection. The resulting
corrosion can ca use a loss o f coolant and
serious engine damage.
- Do not add any type of rad iator leak sealant
to y our vehicle's engine coolant. Adding ra
diator repa ir fluid may adversely affect the
function and perfo rmance of your cooling .,,.
205