interior lights AUDI S4 2008 Owners Manual
[x] Cancel search | Manufacturer: AUDI, Model Year: 2008, Model line: S4, Model: AUDI S4 2008Pages: 342, PDF Size: 15.01 MB
Page 4 of 342
Contents
2ContentsNotes on this Owner's
Manual
. . . . . . . . . . . . . . . . . . . . . .
Controls
. . . . . . . . . . . . . . . . . . . . .
Controls and displays
. . . . . . . . . .
Overview . . . . . . . . . . . . . . . . . . . . . .
Instruments and
warning/indicator lamps
. . . . . . .
Instruments . . . . . . . . . . . . . . . . . . . .
Fuel gauge . . . . . . . . . . . . . . . . . . . . .
Warning and indicator lamps . . . . .
Driver information system
. . . . . .
Introduction . . . . . . . . . . . . . . . . . . . .
On-board computer . . . . . . . . . . . . .
Speed warning function . . . . . . . . .
Auto-check control . . . . . . . . . . . . . .
Tyre pressure monitoring system .
Doors and windows
. . . . . . . . . . . .
Central locking system . . . . . . . . . .
Boot lid . . . . . . . . . . . . . . . . . . . . . . . .
Child-proof catches . . . . . . . . . . . . .
Electric windows . . . . . . . . . . . . . . .
Sun roof . . . . . . . . . . . . . . . . . . . . . . .
Lights and vision
. . . . . . . . . . . . . . .
Lights . . . . . . . . . . . . . . . . . . . . . . . . .
Interior lights . . . . . . . . . . . . . . . . . . . Clear vision . . . . . . . . . . . . . . . . . . . .
Windscreen wipers . . . . . . . . . . . . .
Rear-view mirrors . . . . . . . . . . . . . .
Digital compass . . . . . . . . . . . . . . . .
Seats and storage
. . . . . . . . . . . . .
Manual adjustment of front seats
Electric adjustment of front seats
Seat memory . . . . . . . . . . . . . . . . . .
Head restraints . . . . . . . . . . . . . . . .
Front armrest . . . . . . . . . . . . . . . . . .
Luggage compartment . . . . . . . . .
Roof carrier . . . . . . . . . . . . . . . . . . . .
Roof load . . . . . . . . . . . . . . . . . . . . .
Cup holders . . . . . . . . . . . . . . . . . . .
Ashtrays . . . . . . . . . . . . . . . . . . . . . .
Cigarette lighter and electrical
sockets . . . . . . . . . . . . . . . . . . . . . . .
On-board 230 Volt Euro socket . . .
Storage compartments . . . . . . . . .
Heating and cooling
. . . . . . . . . . .
Deluxe automatic air conditioner .
Deluxe automatic air conditioner -
basic settings . . . . . . . . . . . . . . . . . .
Deluxe automatic air conditioner
plus . . . . . . . . . . . . . . . . . . . . . . . . . .
Deluxe automatic air conditioner
plus - basic settings . . . . . . . . . . . .
Auxiliary heating and auxiliary
ventilation . . . . . . . . . . . . . . . . . . . . .
Seat heating . . . . . . . . . . . . . . . . . . .
Driving
. . . . . . . . . . . . . . . . . . . . . . . . .
Steering . . . . . . . . . . . . . . . . . . . . . . .
Ignition lock . . . . . . . . . . . . . . . . . . .
Starting and stopping the engine
with the advanced key . . . . . . . . . . Electro-mechanical parking brake
Cruise control system . . . . . . . . . . .
adaptive cruise control (ACC)
. .
Speed and distance control system
Driver messages . . . . . . . . . . . . . . .
System limitations . . . . . . . . . . . . . .
Audi braking guard . . . . . . . . . . . . .
Audi lane assist
. . . . . . . . . . . . . . . .
Audi lane assist . . . . . . . . . . . . . . . .
Audi side assist
. . . . . . . . . . . . . . . .
Lane change assist feature . . . . . .
Notes . . . . . . . . . . . . . . . . . . . . . . . . .
Audi drive select
. . . . . . . . . . . . . . .
Adjusting the vehicle set-up . . . . .
Automatic gearbox
. . . . . . . . . . . . .
multitronic®, tiptronic (6-speed
gearbox) . . . . . . . . . . . . . . . . . . . . . . .
Parking aid
. . . . . . . . . . . . . . . . . . . . .
General notes . . . . . . . . . . . . . . . . . .
Audi parking system . . . . . . . . . . . .
Audi parking system plus . . . . . . . .
Audi parking system advanced . . .
Switching display and acoustic
signals on and off . . . . . . . . . . . . . .
Towing bracket . . . . . . . . . . . . . . . . .
Error messages . . . . . . . . . . . . . . . . .
HomeLink
. . . . . . . . . . . . . . . . . . . . . .
Universal transmitter . . . . . . . . . . . .
5
7
9
9
11
11
14
15
21
21
25
28
30
39
42
42
51
53
53
55
57
57
63 64
65
68
71
73
73
74
75
77
78
79
83
84
85
86
87
89
90
93
93
100
101
109
110
114
116
116
116
118 121
125
128
128
134
140
142
145
145
149
149
156
159
159
162
162
169
169
169
170
171
177
177
178
179
179
document_0900452a81b1b9de.book Seite 2
Donnerstag, 26. Juli 2007 9:16 09
--4 -
-T
-+ +-
Page 45 of 342
Doors and windows43
Controls
Safety
Driving tips
General maintenance
Self-help
Technical data
To prevent yourself from being locked out, do not lock the vehicle
with the remote control key
before closing the doors or boot lid. If
you accidentally press the locking button on your remote control
key when any of the doors (except for the driver's door) are open,
then put the key down inside the ca r and forget to take it with you
when you close the doors, you can still open the doors for about one
minute before the vehicle is locked.
WARNING
Do not leave anyone (especially chil dren) in the car if it is locked
from the outside and the deadlock mechanism is activated: the
doors and windows cannot then be opened from the inside.
Locked doors could delay assistance in an emergency, potentially
putting lives at risk.
Note
•
Never leave any valuable items in the vehicle unattended. Even a
locked vehicle is not a safe.
•
If the diode on the driver's wi ndow sill lights up for about
30 seconds when the vehicle is locked, the central locking system or
anti-theft alarm* is not working properly. Please have the malfunc-
tion repaired by an Audi dealer or qualified workshop.
•
The interior monitor of the anti-theft alarm* system will only
function as intended if the windows and the tilting panorama roof*
are closed.
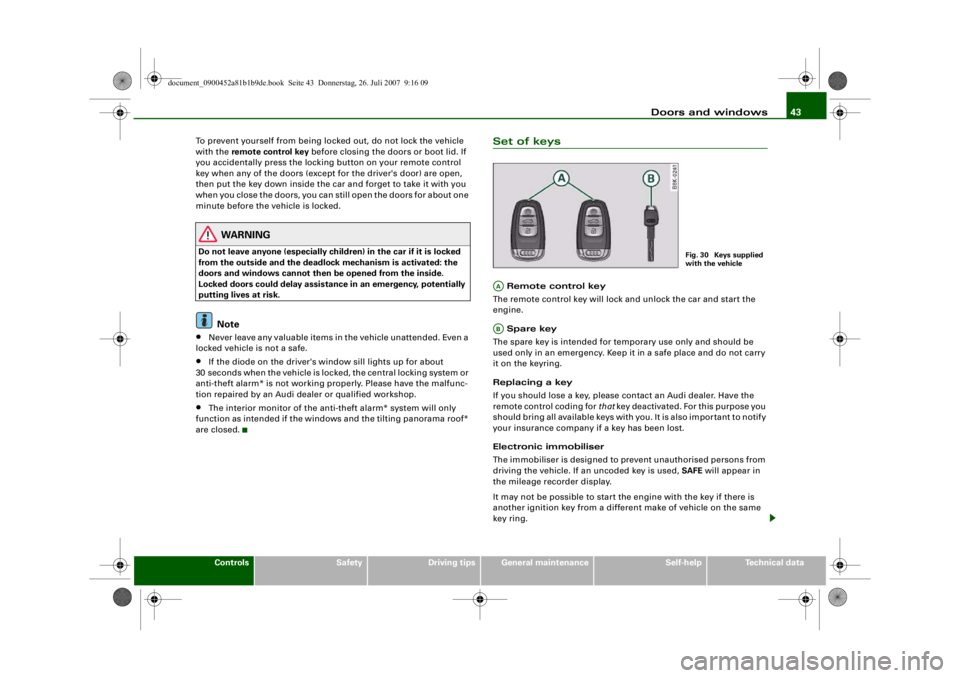
Set of keys Remote control key
The remote control key will lock and unlock the car and start the
engine.
Spare key
The spare key is intended for temporary use only and should be
used only in an emergency. Keep it in a safe place and do not carry
it on the keyring.
Replacing a key
If you should lose a key, please contact an Audi dealer. Have the
remote control coding for that key deactivated. For this purpose you
should bring all available keys with you. It is also important to notify
your insurance company if a key has been lost.
Electronic immobiliser
The immobiliser is designed to prevent unauthorised persons from
driving the vehicle. If an uncoded key is used, SAFE will appear in
the mileage recorder display.
It may not be possible to start the engine with the key if there is
another ignition key from a different make of vehicle on the same
key ring.
Fig. 30 Keys supplied
with the vehicle
AAAB
document_0900452a81b1b9de.book Seite 43 Donnerstag, 26. Juli 2007 9:16 09
--4 -
-T
-+
II]
+-
•
Page 60 of 342
Lights and vision
58
WARNING
The automatic headlights are only intended to assist the driver.
The driver must always ensure th at the headlights are used when
required, and may have to switch th e m o n m a n u a l l y when the light
conditions or visibility are poor. For example, the light sensors are
not able to detect fog. Therefore, you should always switch on the
headlights
in these conditions and when driving after dark.
Note
•
The light sensor for automatic headlight control is located in the
mounting for the interior mirror. Do not affix any stickers on this
section of the windscreen to avoid malfunctioning of the sensor.
•
Some of the settings for the exterior lighting can be adjusted
⇒ page 59 .
•
If the lights are left on after the key has been taken out of the
ignition lock, a buzzer sounds when the driver's door is opened.
•
The use of the lighting described here is subject to the relevant
statutory requirements.
•
The coming home/leaving home function is active only when the
light switch is set to AUTO.
Fog lights
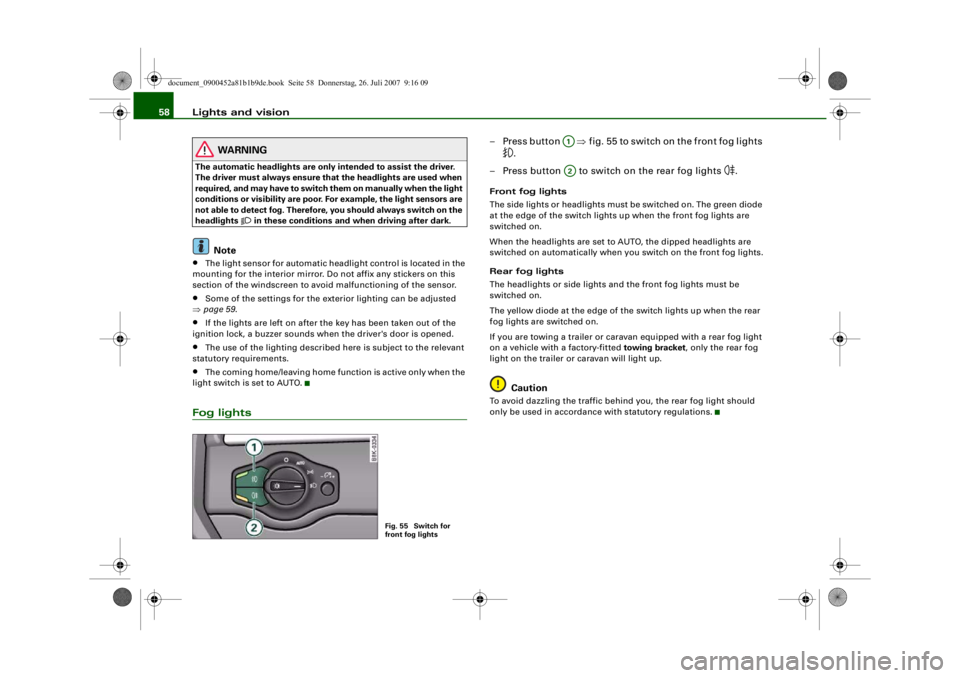
– Press button ⇒fig. 55 to switch on the front fog lights
.
– Press button to switch on the rear fog lights
.
Front fog lights
The side lights or headlights must be switched on. The green diode
at the edge of the switch lights up when the front fog lights are
switched on.
When the headlights are set to AUTO, the dipped headlights are
switched on automatically when you switch on the front fog lights.
Rear fog lights
The headlights or side lights and the front fog lights must be
switched on.
The yellow diode at the edge of the switch lights up when the rear
fog lights are switched on.
If you are towing a trailer or cara van equipped with a rear fog light
on a vehicle with a factory-fitted towing bracket , only the rear fog
light on the trailer or caravan will light up.
Caution
To avoid dazzling the traffic behind you, the rear fog light should
only be used in accordance with statutory regulations.
Fig. 55 Switch for
front fog lights
A1A2
document_0900452a81b1b9de.book Seite 58 Donnerstag, 26. Juli 2007 9:16 09
--4 -
-T
[I]
-+ +-
•
CD
•
Page 65 of 342
Lights and vision63
Controls
Safety
Driving tips
General maintenance
Self-help
Technical data
Caution
Do not use the main beam headlights or the headlight flasher if this
would dazzle oncoming traffic.Interior lightsFront interior lights
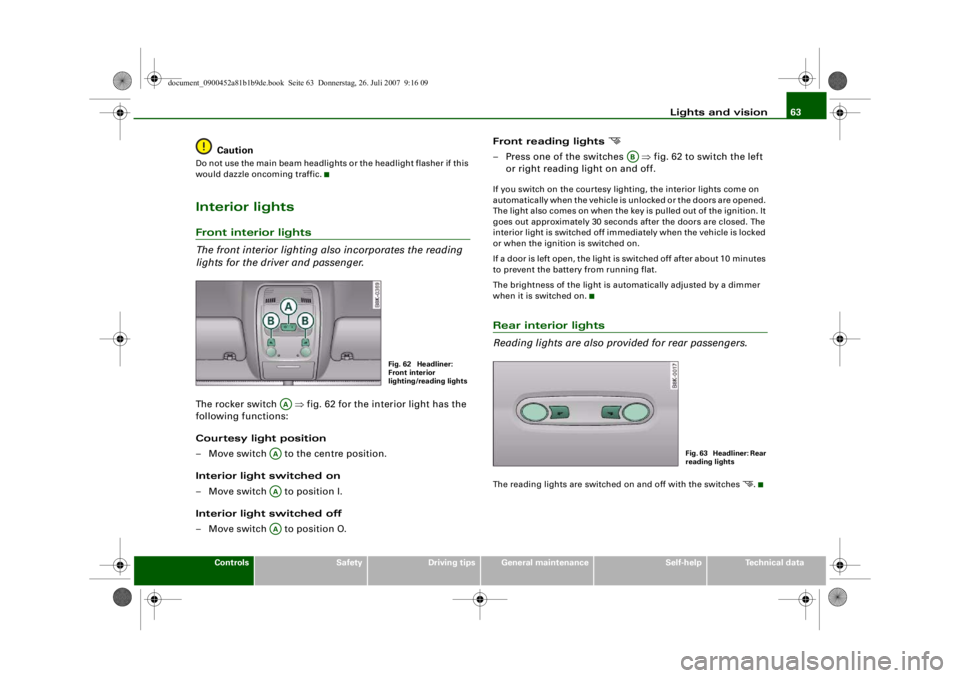
The front interior lighting also incorporates the reading
lights for the driver and passenger.The rocker switch ⇒ fig. 62 for the interior light has the
following functions:
Courtesy light position
– Move switch to the centre position.
Interior light switched on
– Move switch to position I.
Interior light switched off
– Move switch to position O. Front reading lights
– Press one of the switches
⇒fig. 62 to switch the left
or right reading light on and off.If you switch on the courtesy ligh ting, the interior lights come on
automatically when the vehicle is unlocked or the doors are opened.
The light also comes on when the key is pulled out of the ignition. It
goes out approximately 30 seconds after the doors are closed. The
interior light is switched off immediately when the vehicle is locked
or when the ignition is switched on.
If a door is left open, the light is switched off after about 10 minutes
to prevent the battery from running flat.
The brightness of the light is au tomatically adjusted by a dimmer
when it is switched on.Rear interior lights
Reading lights are also provided for rear passengers.The reading lights are switched on and off with the switches
.
Fig. 62 Headliner:
Front interior
lighting/reading lights
AA
AAAAAA
AB
Fig. 63 Headliner: Rear
reading lights
document_0900452a81b1b9de.book Seite 63 Donnerstag, 26. Juli 2007 9:16 09
--4 -
-
0
T
•
•
-+ +-
•
Page 71 of 342
Lights and vision69
Controls
Safety
Driving tips
General maintenance
Self-help
Technical data
Anti-dazzle setting
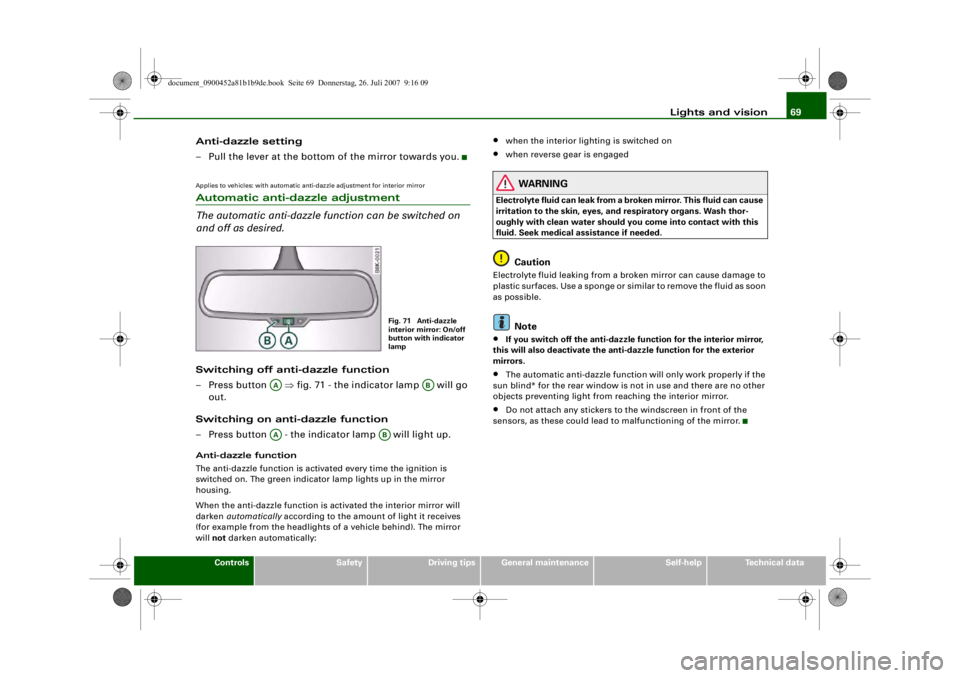
– Pull the lever at the bottom of the mirror towards you.Applies to vehicles: with automatic anti-dazzle adjustment for interior mirrorAutomatic anti-dazzle adjustment
The automatic anti-dazzle function can be switched on
and off as desired.Switching off anti-dazzle function
– Press button ⇒fig. 71 - the indicator lamp will go
out.
Switching on anti-dazzle function
– Press button - the indicator lamp will light up.Anti-dazzle function
The anti-dazzle function is activa ted every time the ignition is
switched on. The green indicator lamp lights up in the mirror
housing.
When the anti-dazzle function is ac tivated the interior mirror will
darken automatically according to the amount of light it receives
(for example from the headlights of a vehicle behind). The mirror
will not darken automatically:
•
when the interior lighting is switched on
•
when reverse gear is engaged
WARNING
Electrolyte fluid can leak from a br oken mirror. This fluid can cause
irritation to the skin, eyes, and respiratory organs. Wash thor-
oughly with clean water should you come into contact with this
fluid. Seek medical assistance if needed.
Caution
Electrolyte fluid leaking from a broken mirror can cause damage to
plastic surfaces. Use a sponge or similar to remove the fluid as soon
as possible.
Note
•
If you switch off the anti-dazzle function for the interior mirror,
this will also deactivate the anti -dazzle function for the exterior
mirrors.
•
The automatic anti-dazzle function will only work properly if the
sun blind* for the rear window is not in use and there are no other
objects preventing light from reaching the interior mirror.
•
Do not attach any stickers to the windscreen in front of the
sensors, as these could lead to malfunctioning of the mirror.
Fig. 71 Anti-dazzle
interior mirror: On/off
button with indicator
lamp
AA
AB
AA
AB
document_0900452a81b1b9de.book Seite 69 Donnerstag, 26. Juli 2007 9:16 09
--4 -
-T
•
-+
[I]
+-
•
Page 73 of 342
Lights and vision71
Controls
Safety
Driving tips
General maintenance
Self-help
Technical data
Applies to vehicles: with automatic anti-dazzle adjustment for exterior mirrorsAutomatic anti-dazzle adjustment for exterior mirrorsThe exterior mirrors darken t ogether with the automatically
adjusting interior mirror. When the ignition is on, the mirrors will
darken automatically according to th e amount of light received (for
example from the headlights of a vehicle behind).
When the interior lights are switched on, or when reverse gear is
engaged, the mirrors revert to thei r original (i.e. not darkened)
condition.
WARNING
Electrolyte fluid can leak from a broken mirror. This fluid can cause
irritation to the skin, eyes, and respiratory organs. Wash thor-
oughly with clean water should yo u come into contact with this
fluid. Seek medical assistance if needed.
Caution
Electrolyte fluid leaking from a broken mirror can cause damage to
the paintwork or plastic surfaces. Use a sponge or similar to remove
the fluid as soon as possible.
Note
•
If you switch off the anti-dazzle function for the interior mirror,
this will also deactivate the an ti-dazzle function for the exterior
mirrors.
•
The automatic anti-dazzle function will only work properly if the
sun blind* for the rear window is not in use and there are no other
objects preventing light from reaching the interior mirror.
Digital compassApplies to vehicles: with digital compassActivating and deactivating the compass
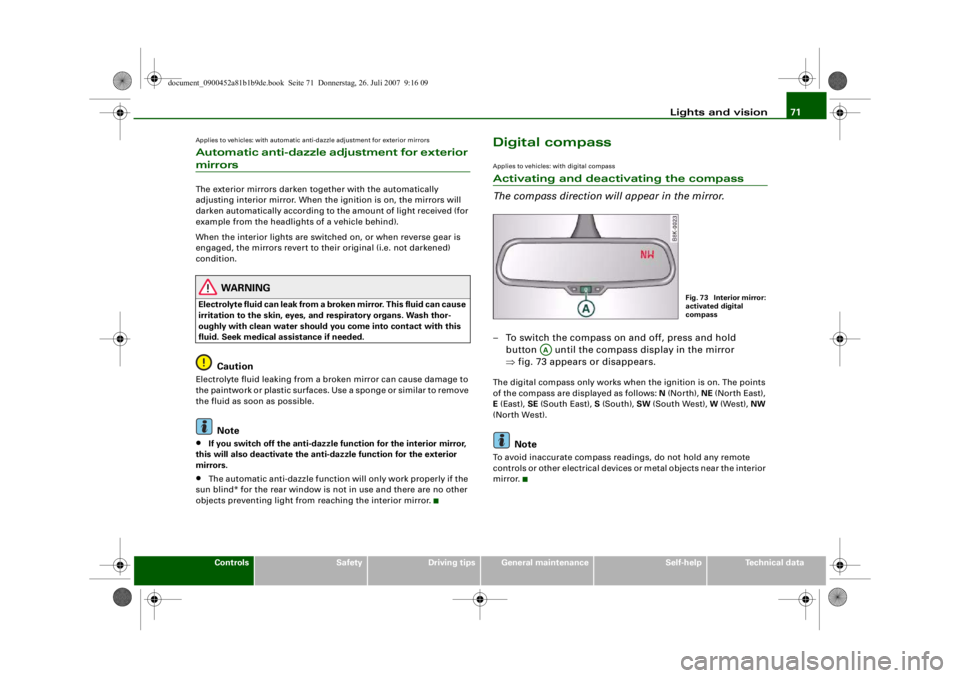
The compass direction will appear in the mirror.– To switch the compass on and off, press and hold button until the compass display in the mirror
⇒fig. 73 appears or disappears.The digital compass only works when the ignition is on. The points
of the compass are dis played as follows: N (North), NE (North East),
E (East), SE (South East), S (South), SW (South West), W (West), NW
(North West).
Note
To avoid inaccurate compass readings, do not hold any remote
controls or other electrical devices or metal objects near the interior
mirror.
Fig. 73 Interior mirror:
activated digital
compass
AA
document_0900452a81b1b9de.book Seite 71 Donnerstag, 26. Juli 2007 9:16 09
--4 -
-T
-+
CD
+-
[I]
[I]
•
•
Page 74 of 342
Lights and vision
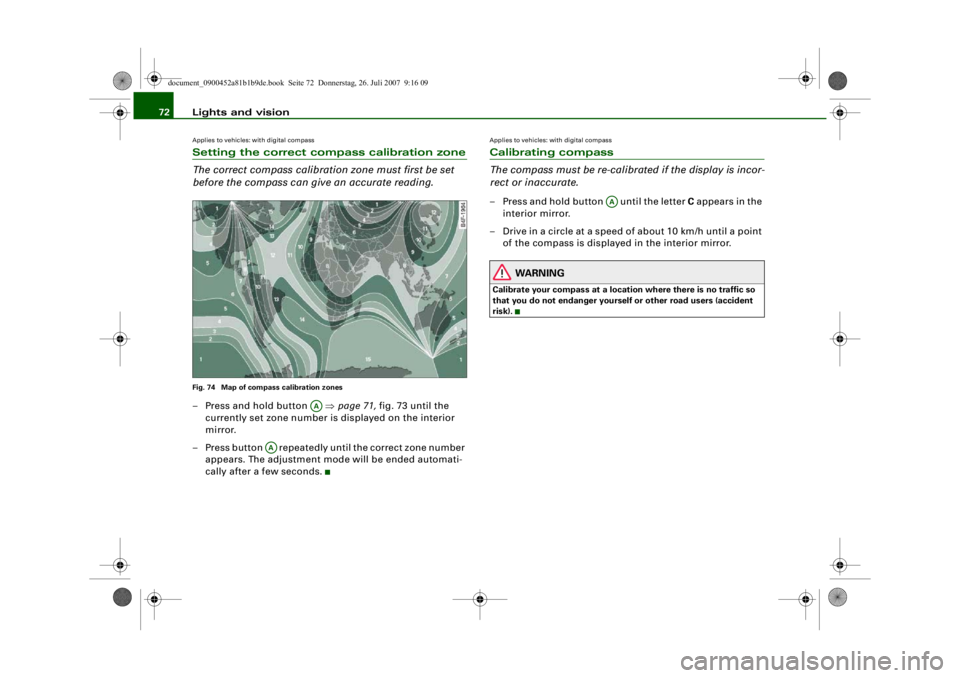
72Applies to vehicles: with digital compassSetting the correct compass calibration zone
The correct compass calibration zone must first be set
before the compass can give an accurate reading.Fig. 74 Map of compass calibration zones– Press and hold button ⇒page 71, fig. 73 until the
currently set zone number is displayed on the interior
mirror.
– Press button repeatedly until the correct zone number appears. The adjustment mode will be ended automati-
cally after a few seconds.
Applies to vehicles: with digital compassCalibrating compass
The compass must be re-calibra ted if the display is incor-
rect or inaccurate.– Press and hold button until the letter C appears in the
interior mirror.
– Drive in a circle at a speed of about 10 km/h until a point of the compass is displayed in the interior mirror.
WARNING
Calibrate your compass at a location where there is no traffic so
that you do not endanger yourself or other road users (accident
risk).
AA
AA
AA
document_0900452a81b1b9de.book Seite 72 Donnerstag, 26. Juli 2007 9:16 09
--4 -
-T
-+
•
Page 189 of 342
Safe driving187
Controls
Safety
Driving tips
General maintenance
Self-help
Technical data
Before every trip
The driver is responsible for the safety of the passengers
and the safe operation of the vehicle at all times.For your own safety and the safety of your passengers,
always note the following points before every trip:
– Make sure that all lights and turn signals are working
properly.
– Check the tyre pressures.
– Make sure that all windows are clean and give good visi- bility to the outside.
– Secure all luggage and other items carefully ⇒page 79 .
– Make sure that no objects can interfere with the pedals.
– Adjust the front seat, head restraint and mirrors correctly.
– Make sure that the head restraints for all passengers are adjusted to the correct position.
– Make sure that children are protected with suitable safety seats and properly worn seat belts ⇒ page 210.
– Sit in the correct position in your seat and make sure that
your passengers do the same. ⇒page 73 .
– Fasten your seat belt correctly. Make sure that your passengers do the same ⇒page 194.
What affects driving safety?
Safety on the road is directly related to how you drive, and
can also be affected by the passengers in the vehicle.The driver is responsible for the safety of the vehicle and all
its occupants. If your ability to drive is impaired in any way,
you endanger yourself and other road users ⇒. There-
fore:
– Do not let yourself be distracted by passengers or by using a mobile phone, etc.
– Never drive when your driving ability is impaired (by medication, alcohol, drugs, etc.).
– Obey all traffic regulations and speed limits and always maintain a safe distance to the vehicle in front.
– Always adjust your speed to suit the road, traffic and weather conditions.
– Take frequent breaks on long trips. Do not drive for more than two hours without a stop.
– If possible, avoid driving when you are tired or stressed.
WARNING
•
Distractions while driving or any kind of impairment to your
driving ability increase the risk of accident and injury.
•
Do not store loose objects on the dashboard. These objects
could fly around the interior when the vehicle is moving (under
acceleration or whilst cornering) and distract the driver – this
could lead to an accident.
document_0900452a81b1b9de.book Seite 187 Donnerstag, 26. Juli 2007 9:16 09
--4 -
-T
-+ +-
•
•
Page 317 of 342
Fuses and bulbs315
Controls
Safety
Driving tips
General maintenance
Self-help
Technical data
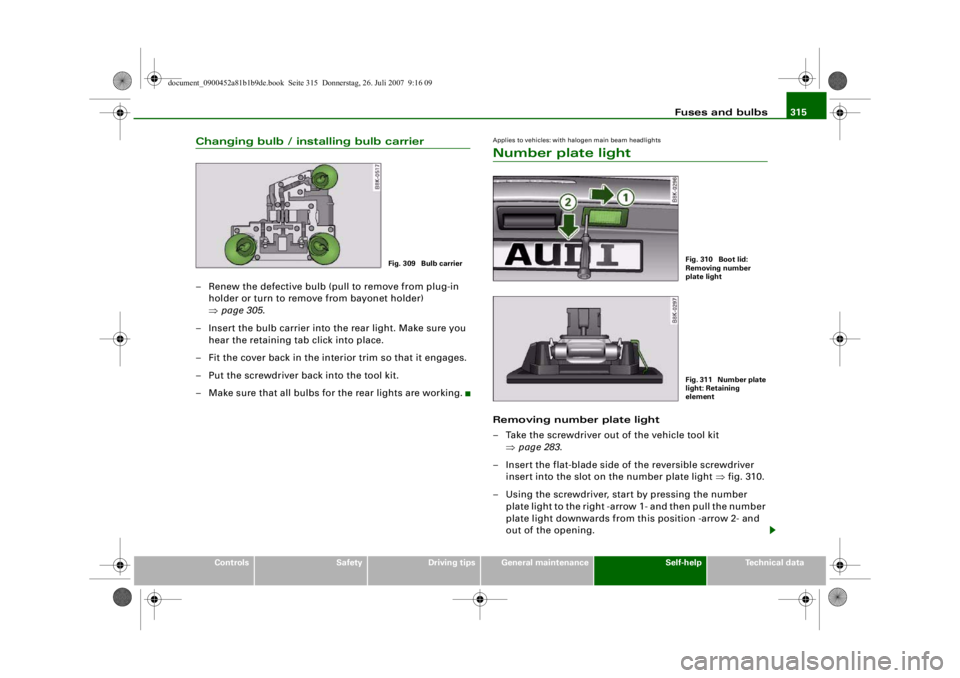
Changing bulb / installing bulb carrier– Renew the defective bulb (pull to remove from plug-in
holder or turn to remove from bayonet holder)
⇒page 305 .
– Insert the bulb carrier into the rear light. Make sure you hear the retaining tab click into place.
– Fit the cover back in the interior trim so that it engages.
– Put the screwdriver back into the tool kit.
– Make sure that all bulbs for the rear lights are working.
Applies to vehicles: with halogen main beam headlightsNumber plate lightRemoving number plate light
– Take the screwdriver out of the vehicle tool kit ⇒page 283.
– Insert the flat-blade side of the reversible screwdriver insert into the slot on the number plate light ⇒fig. 310.
– Using the screwdriver, start by pressing the number plate light to the right -arrow 1- and then pull the number
plate light downwards from th is position -arrow 2- and
out of the opening.
Fig. 309 Bulb carrier
Fig. 310 Boot lid:
Removing number
plate lightFig. 311 Number plate
light: Retaining
element
document_0900452a81b1b9de.book Seite 315 Donnerstag, 26. Juli 2007 9:16 09
--4 -
-T
-+ +-
•
Page 337 of 342
Index335
Controls
Safety
Driving tips
General maintenance
Self-help
Technical data
Hazard warning lights . . . . . . . . . . . . . . . . 61
Indicator lamp . . . . . . . . . . . . . . . . . . . . 18
Head restraints Front seats . . . . . . . . . . . . . . . . . . . . . . . 77
Rear seats . . . . . . . . . . . . . . . . . . . . . . . . 78
Headlamp converter . . . . . . . . . . . . . . . . . . 59
Headlight flasher . . . . . . . . . . . . . . . . . . . . . 62
Headlight range control . . . . . . . . . . . . . . . 60 Malfunction . . . . . . . . . . . . . . . . . . . . . . 39
Headlights . . . . . . . . . . . . . . . . . . . . . . . . . . 57 adaptive light . . . . . . . . . . . . . . . . . . . . . 61
Changing dip settings . . . . . . . . . . . . . . 59
Driving abroad . . . . . . . . . . . . . . . . . . . . 59
Headlight range control . . . . . . . . . . . . 60
Washer system . . . . . . . . . . . . . . . . . . . . 67
Heated Exterior mirrors . . . . . . . . . . . . . . . . . . . 70
Front seats (deluxe automatic air conditioner) . . . . . . . . . . . . . . . . . . . . 114
Rear seats . . . . . . . . . . . . . . . . . . . . . . . 115
Rear window . . . . . . . . . . . . . . . . . 98, 106
Washer jets . . . . . . . . . . . . . . . . . . . . . . . 65
Heated rear window . . . . . . . . . . . . . . 98, 106
Heating Deluxe automatic air conditioner . . . . 93
Deluxe automatic air conditioner plus . . 101
HomeLink . . . . . . . . . . . . . . . . . . . . . . . . . . 179
Horn . . . . . . . . . . . . . . . . . . . . . . . . . . . . . . . . 9
IIgnition key Emergency release . . . . . . . . . . . . . . . . 46
Safety interlock . . . . . . . . . . . . . . . . . . 116
Ignition lock . . . . . . . . . . . . . . . . . . . . . . . . 116 Malfunction . . . . . . . . . . . . . . . . . . . 34, 39
Immobiliser . . . . . . . . . . . . . . . . . . . . . . 14, 43
Indicator lamps . . . . . . . . . . . . . . . . . . . . . . 15 adaptive cruise control . . . . . . . . . . . . 134
Cruise control system . . . . . . . . . . . . . . 19
Glow plug system . . . . . . . . . . . . . . . . . 16
Main beam headlights . . . . . . . . . . . . . 18
Overview . . . . . . . . . . . . . . . . . . . . . . . . . 15
Trailer turn signals . . . . . . . . . . . . . . . . 18
Turn signals . . . . . . . . . . . . . . . . . . . . . . 18
Inflation pressures (tyres) . . . . . . . . . 39, 268
Inspection intervals . . . . . . . . . . . . . . . . . . . 24
Instrument cluster . . . . . . . . . . . . . . . . . . . . 11
Instrument lighting . . . . . . . . . . . . . . . . . . . 59
Interior lights Dimming . . . . . . . . . . . . . . . . . . . . . . . . . 63
Front . . . . . . . . . . . . . . . . . . . . . . . . . . . . 63
Rear . . . . . . . . . . . . . . . . . . . . . . . . . . . . . 63
Interior mirrors See Mirrors . . . . . . . . . . . . . . . . . . . . 68, 69
Interior monitor . . . . . . . . . . . . . . . . . . . . . . 50
Intermittent wipe . . . . . . . . . . . . . . . . . . . . . 65 Rain sensor . . . . . . . . . . . . . . . . . . . . . . . 65
ISOFIX . . . . . . . . . . . . . . . . . . . . . . . . . . . . . 218
JJack . . . . . . . . . . . . . . . . . . . . . . . . . . . 283, 290
Jacking points . . . . . . . . . . . . . . . . . . . . . . 290
Jump-starting . . . . . . . . . . . . . . . . . . . . . . 293KKey-operated switch for front passenger's airbag . . . . . . . . . . . . . . . . . . . . . . . . . 208
Keys . . . . . . . . . . . . . . . . . . . . . . . . . . . . . . . . 43 Emergency key . . . . . . . . . . . . . . . . . . . . 45
Replacement keys . . . . . . . . . . . . . . . . . 43
Replacing the battery . . . . . . . . . . . . . . 45
Kick-down feature . . . . . . . . . . . . . . . . . . . 165Llane assist Changing settings on the MMI . . . . . . 147
Description . . . . . . . . . . . . . . . . . . . . . . 145
Indicator lamp in instrument cluster . 145
Instrument cluster display . . . . . . . . . 146
Switching on and off . . . . . . . . . . . . . . 145
Leather care Alcantara . . . . . . . . . . . . . . . . . . . . . . . . 250
Natural leather . . . . . . . . . . . . . . . . . . . 249
leaving home . . . . . . . . . . . . . . . . . . . . . . . . 59
Light sensor . . . . . . . . . . . . . . . . . . . . . . . . . 57
Light sensor defective . . . . . . . . . . . . . . . . . 37
Lights . . . . . . . . . . . . . . . . . . . . . . . . . . . . . . 57 coming home . . . . . . . . . . . . . . . . . . . . . 59
Daytime running lights . . . . . . . . . . . . . 59
document_0900452a81b1b9de.book Seite 335 Donnerstag, 26. Juli 2007 9:16 09
--4 -
-T
-+ +-