display AUDI S4 2014 User Guide
[x] Cancel search | Manufacturer: AUDI, Model Year: 2014, Model line: S4, Model: AUDI S4 2014Pages: 296, PDF Size: 73.56 MB
Page 27 of 296
Trip computer
Introduction
Applies to vehicles: with trip computer
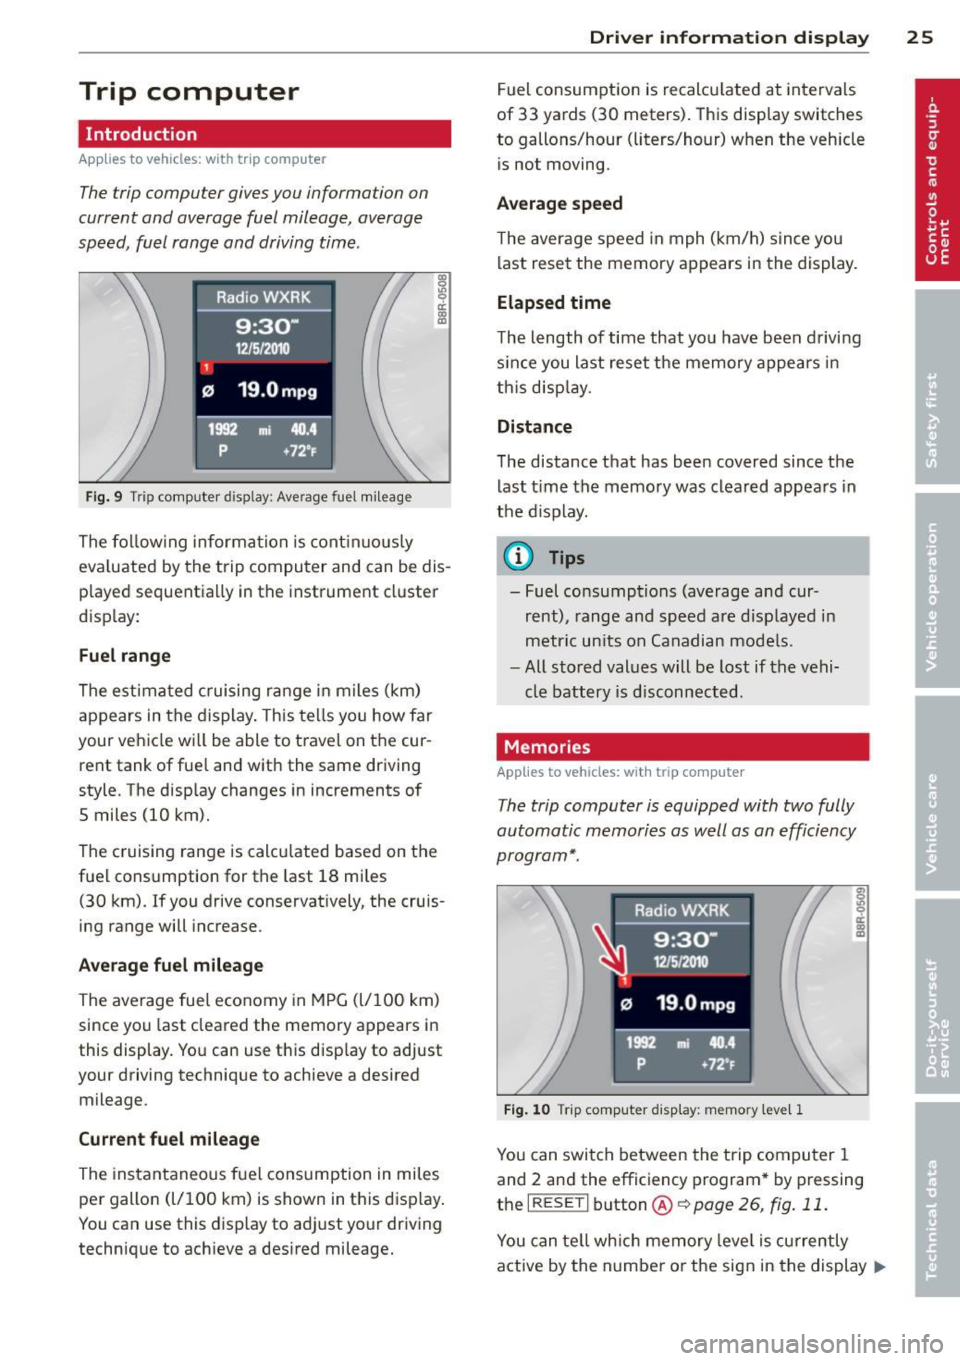
The trip computer gives you information on
current and average fuel mileage, average
speed, fuel range and driving time .
Fig. 9 Trip comp uter d isp lay : Ave rage fuel mileage
The following information is continuously
eva luated by the trip computer and can be dis
played sequentia lly in the instrument cluster
disp lay:
Fuel range
The estimated cruising range in miles (km)
appears in the display. This tells you how far
your vehicle wi ll be able to travel on the cur
rent tank of fuel and with the same driving
style. The display changes in increments of
5 miles (10 km).
The cruising range is calcu lated based on the
fuel consumption for the last 18 miles
(30 km). If you drive conservatively, the cruis
ing range will increase.
Average fuel mileage
The average fuel economy in MPG (l/100 km)
since you last cleared the memory appears in
this display. You can use this disp lay to adjust
your driving technique to achieve a desired mileage.
Current fuel mileage
The instantaneous fuel consumption in miles
per gallon (l/100 km) is shown in this disp lay.
You can use this display to adjust your driving
technique to achieve a desired mileage.
Driver information display 25
Fuel consumption is recalculated at intervals
of 33 yards (30 meters). This display switches
to gallons/hour (liters/hour) when the veh icle
is not moving .
Average speed
The average speed in mph (km/h) s ince you
last reset the memory appears in the display.
Elapsed time
The length of time that yo u have been driving
s inc e you last reset the memory appears in
this display.
Distance
The distance that has been covered since the
last time the memory was cleared appears in
the display.
(0 Tips
- Fuel consumptions (average and cur
rent), range and speed are displayed in
metric units on Canadian models.
- All stored values will be lost if the vehi
cle battery is disconnected.
Memories
App lies to vehicles: wi th trip computer
The trip computer is equipped with two fully
automatic memories as well as an efficiency
program*.
Fig. 10 T rip comput er dis play: memory lev el 1
You can switch between the trip computer 1
and 2 and the efficiency program* by pressing
the
I RESET I button @c::> page 26, fig. 11 .
You can tell which memory leve l is currently
active by the number or the sign in the display .,..
Page 28 of 296
26 Driver in formation d isplay
¢fig . 10 . The data from the single -trip mem
ory (memory leve l 1) is being displayed if a
D
appears in the display . If a II is shown, then
the data from the total -trip memory is being
d isplayed (memory leve l 2). The fuel pump
nozzle
iii indicates the efficiency program*
¢ page 27.
Single-tr ip m emory (Trip computer 1 )
The single-trip memory stores the trip infor
mat ion from the time the ignition is turned o n
until it is turned off. If the trip is continued
w ithin 2 hours from the t ime the ignition was
turned off, the new data will be included in
the calcu lation of the current trip i nfo rma
tion .
If the t rip is inte rrupted fo r more than 2
hours the memory is reset automati ca lly.
Total -trip memory (Trip computer 2)
Unlike the sing le-trip memory, the tota l- tr ip
memory is not reset automatically . Th is per
mits you to evaluate your d riving data for the
enti re pe riod be tween manual rese ts.
Efficiency program*
The effic iency program can help you to use
less fuel ¢
page 2 7.
Operation
App lies to vehicles: with trip computer
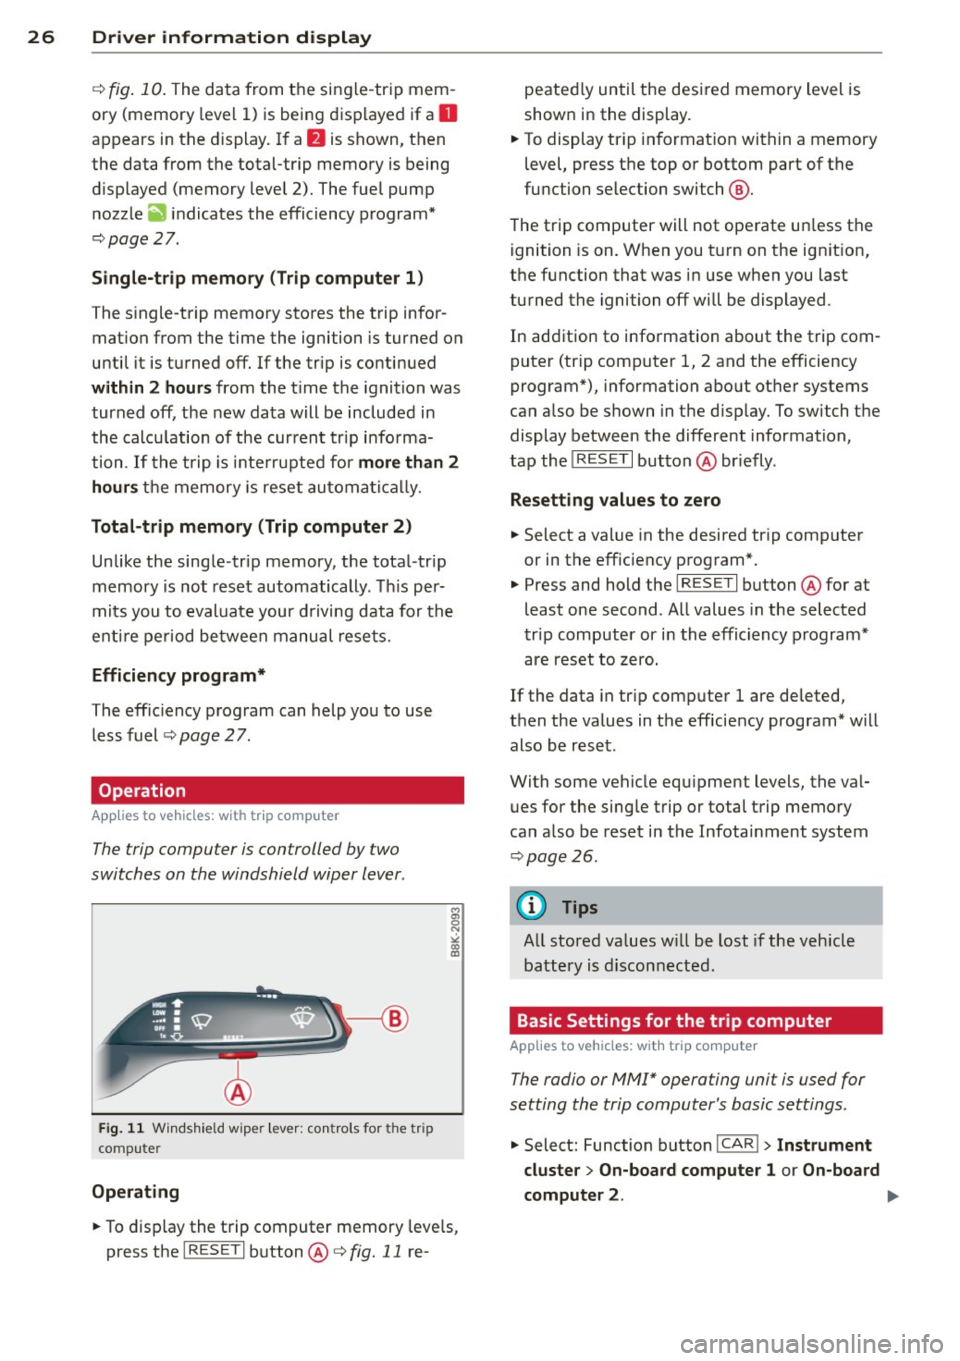
The trip computer is controlled by two
switches on the windshield wiper lever .
Fig. 1 1 Windsh ie ld wipe r leve r: co ntrols for the tri p
co mpute r
Operating
M
"' 0 N
"' co a:,
.. To d isp lay the trip computer memory leve ls,
press the
I R ESE T I button @¢ fig. 11 re- peated
ly until the desi red memory level is
show n in the display.
.. To display tr ip in format ion within a memory
level, press the top or bottom part of the
function selection switch @.
The trip computer will not operate un less the
ignition is on . When you t urn on the ign it ion,
the function that was in use when you last
turned the ignition off will be displayed .
In addition to information about the trip com
puter (trip comp uter 1, 2 and the efficiency
program*), information abo ut other systems
can a lso be shown in the disp lay. To switch the
display between the different information,
tap the
! RESE T I button @briefly .
Resett ing values to zero
.. Select a value in the desired tr ip computer
or in the eff iciency program*.
.. Press and hold the
I RES ET I button @for at
least one second . All values in the selected
trip computer or i n the efficiency p rogram*
are reset to zero.
If the data in tr ip computer 1 are deleted,
then the values in the eff iciency program* w ill
also be reset .
With some vehicle eq uipment levels, the val
ues for the sing le trip or total trip memory
can a lso be reset in the Infotai nment system
¢ page 26.
@ Tips
All stored va lues w ill be lost if the veh icle
battery is disconnected.
Basic Settings for the trip computer
Applies to veh icles: w it h trip computer
The radio or MM!* operating unit is used for
setting the trip computer 's basic settings .
.. Select: Function button ICAR ! > Instrument
cluster > On -board computer 1 or On-board
computer 2 . .,,.
Page 29 of 296
The values in the single-t rip or the total-trip
memory can a ll be reset to zero at the same
time under
Reset in the menu .
I n addition, you can determine what informa
tion from the trip computer should be shown
in the instrument cluster display. If one of the
p ieces of driver information is turned
Off , that
driver information w ill not be shown in the
display. The information will continue to be
calculated by the trip computer and can be
turned back
On at any t ime.
(D Tips
- This function is not avai lab le on all
vehicles.
- The driving information in the efficiency
program is also reset to zero with the
s ingle-trip memory.
Gearshift Indicator
A ppl ies to vehicles: with manu al transmis sion a nd gea r·
shi ft indica tor
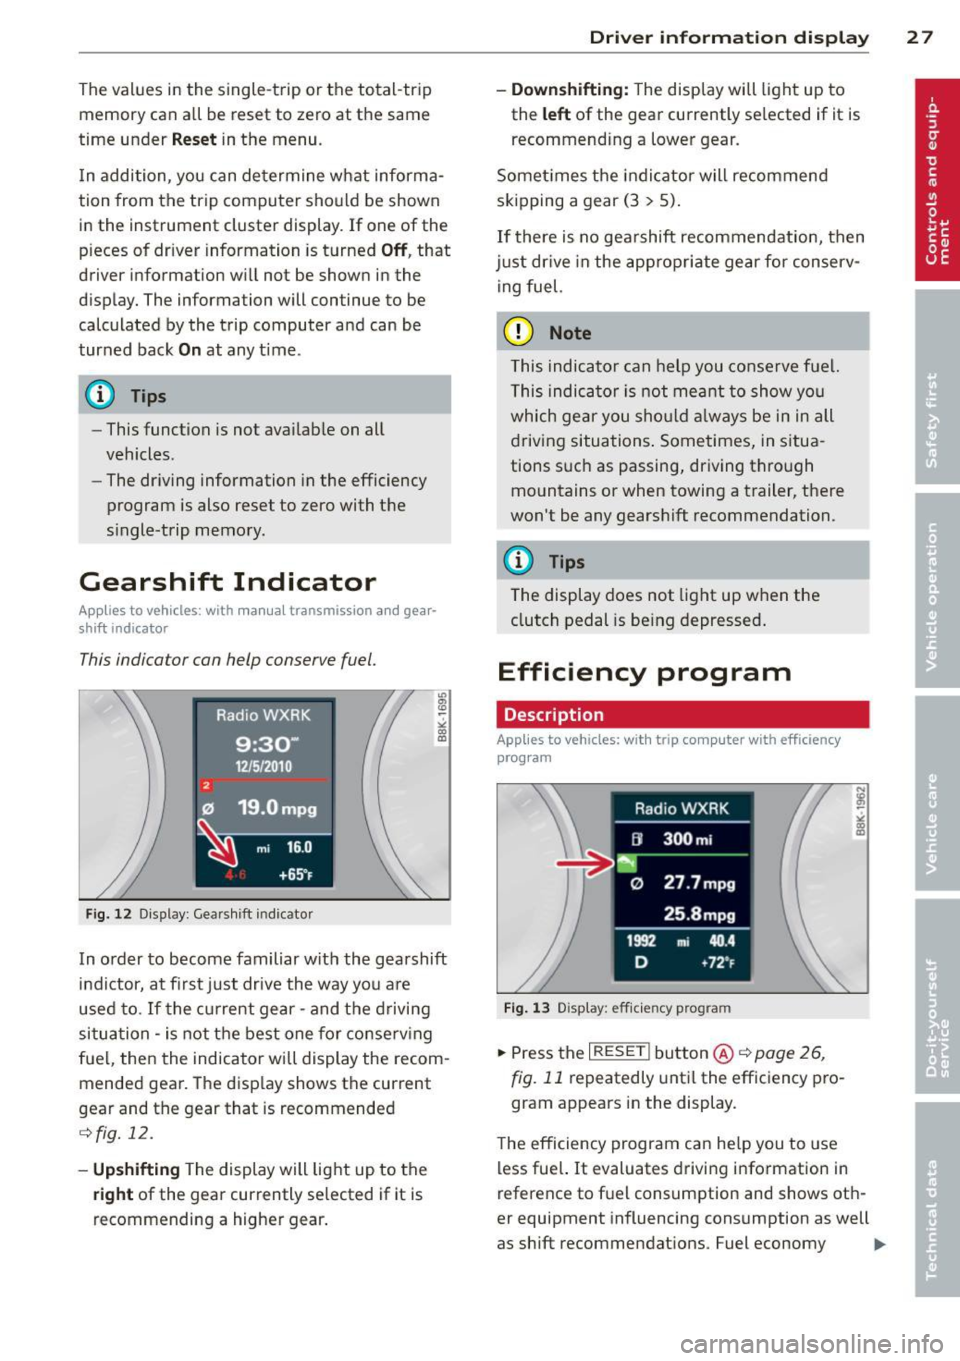
This indicator con help conserve fuel.
~~~------------~~ ~.;;-
Fig. 12 Display: Gea rs hi ft indicator
m ~ ~ a, a,
In order to become familiar with the gearshift
indictor, at first just drive the way you are
used to.
If the current gear -and the driving
situa tion -is not the best one for conserving
fuel, then the indicator will display the recom
mended gear. The display shows the current
gear and the gear that is recommended
¢fig. 12.
-Upshifting The display will light up to the
right of the gear currently selected if it is
recommending a higher gear.
Driver information display 2 7
- Downshifting:
The display will light up to
the
left of the gear currently se lected if it is
recommending a lower gear.
Sometimes the indicator will recommend
skipping a gear (3
> 5).
If there is no gearshift recommendation, then
just drive in the appropriate gear for conserv
ing fuel.
(D Note
This indicator can help you conserve fuel.
This indicator is not meant to show you
which gear you should always be in in all
driving situations . Sometimes, in situa
tions such as passing, driving thro ugh
mountains or when towing a trailer, there
won't be any gearshift recommendation.
(D Tips
The display does not light up when the
clutch pedal is be ing depressed.
Efficiency program
Description
App lies to vehic les: wi th trip co mp uter with efficiency
prog ram
Fig. 13 Display: efficiency program
.. Press the I RESET I button@¢ page 26,
fig. 11 repeatedly until the efficiency pro
gram appears in the display.
The efficiency program can help you to use
less fuel. It evaluates driving information in
reference to fuel consumption and shows oth
er equipment influencing consumption as well
as shift recommendations. Fuel economy ...,
Page 30 of 296
28 Driver information d isplay
messages ¢ page 29 provide tips for effi
cient driving .
The effic iency program uses distance and con
sumption data from trip computer
1. If the
data are deleted in the efficiency program,
those values are also reset in trip computer
1.
Enhanced shift indicator
Applies to vehicles: with manual transmission and trip
computer with efficiency program
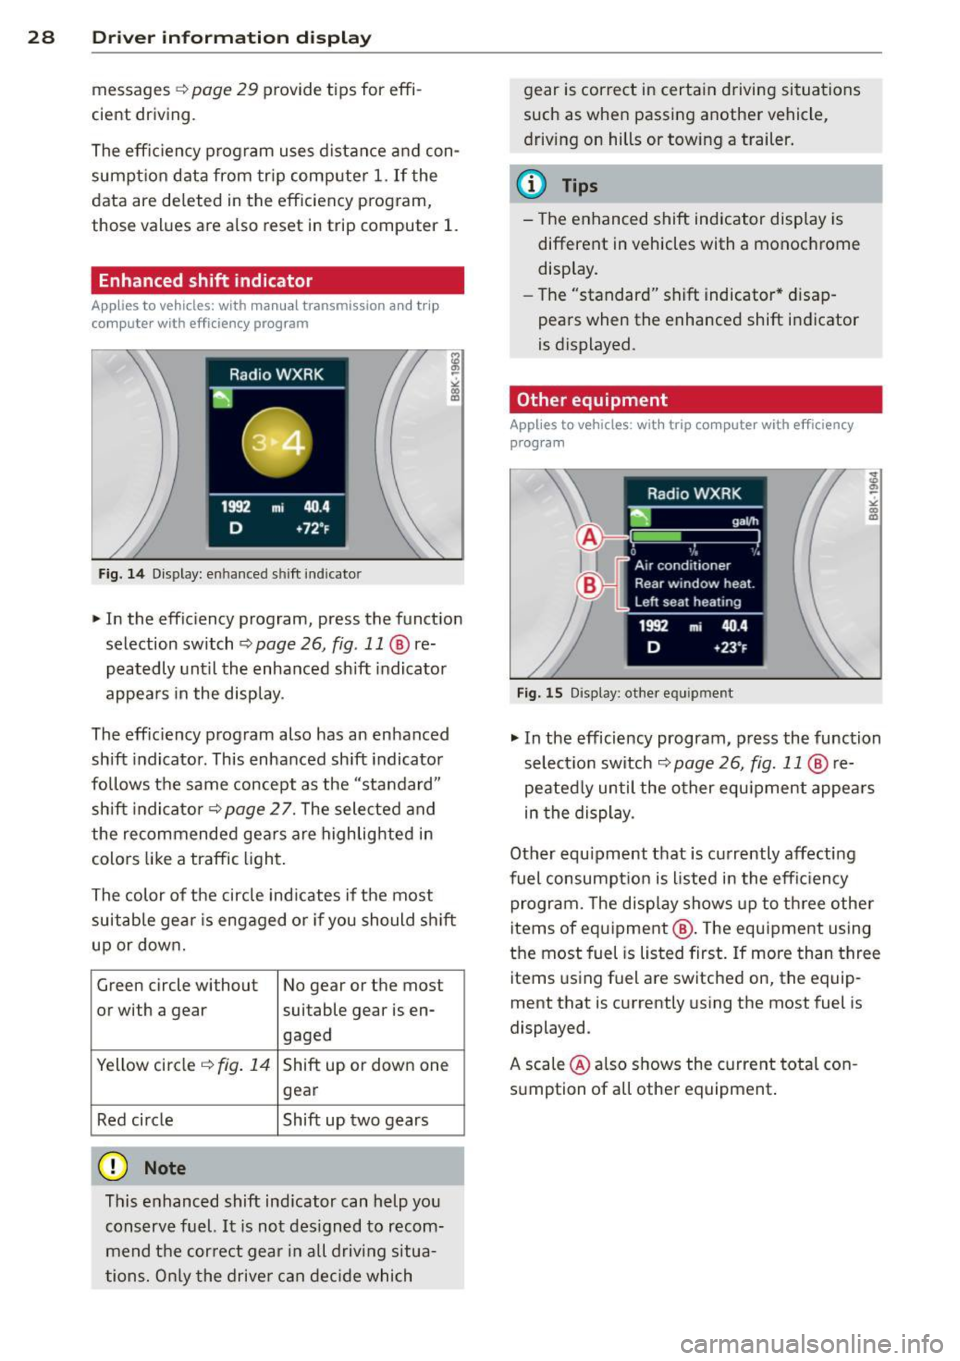
Fig. 14 Display: enhanced shift indicator
"In the efficiency program, press the function
selection switch ¢
page 26, fig. 11 @ re
peatedly until the enhanced sh ift indicator
appea rs in the display.
The eff ic iency program also has an enhanced
shift indicator . This enhanced shift indicator
follows the same concept as the "standard"
shift indicator¢
page 27. The selected and
the recommended gears are highlighted in
colo rs like a traffic light.
The color of the circle indicates if the most
suitable gear is engaged or if you should sh ift
up or down.
Green circle without No gear or the most
or with a gear suitable gear is en- gaged
Yellow circle ¢
fig. 14 Shift up or down one
gear
Red circle Shift up two gears
(D Note
This enhanced shift indicator can help you
conserve fuel.
It is not designed to recom
mend the correct gear in all driving situa
tions. Only the driver can decide which gear
is correct in certain driving situations
such as when passing another vehicle,
driving on hills or towing a trailer.
(D Tips
- The enhanced shift indicator display is
different in vehicles with a monochrome
display.
- The "standard" sh ift indicator* disap
pears when the enhanced shift indicator
is displayed.
Other equipment
Applies to vehicles: with trip computer with efficiency program
Fig . 15 Display: other equ ipmen t
"In the efficiency program, press the function
selection switch ¢
page 26, fig. 11 @ re
peated ly until the other equ ipment appears
in the display .
Other equipment that is currently affecting
fuel consumpt ion is listed in the efficiency
program. The display shows up to three other
items of equipment @. T he equipment using
the most fuel is listed first. If more than three
items using fuel are switched on, the equip
ment that is currently using the most fuel is
displayed.
A scale @also shows the current total con
sumption of all other equipment.
Page 31 of 296
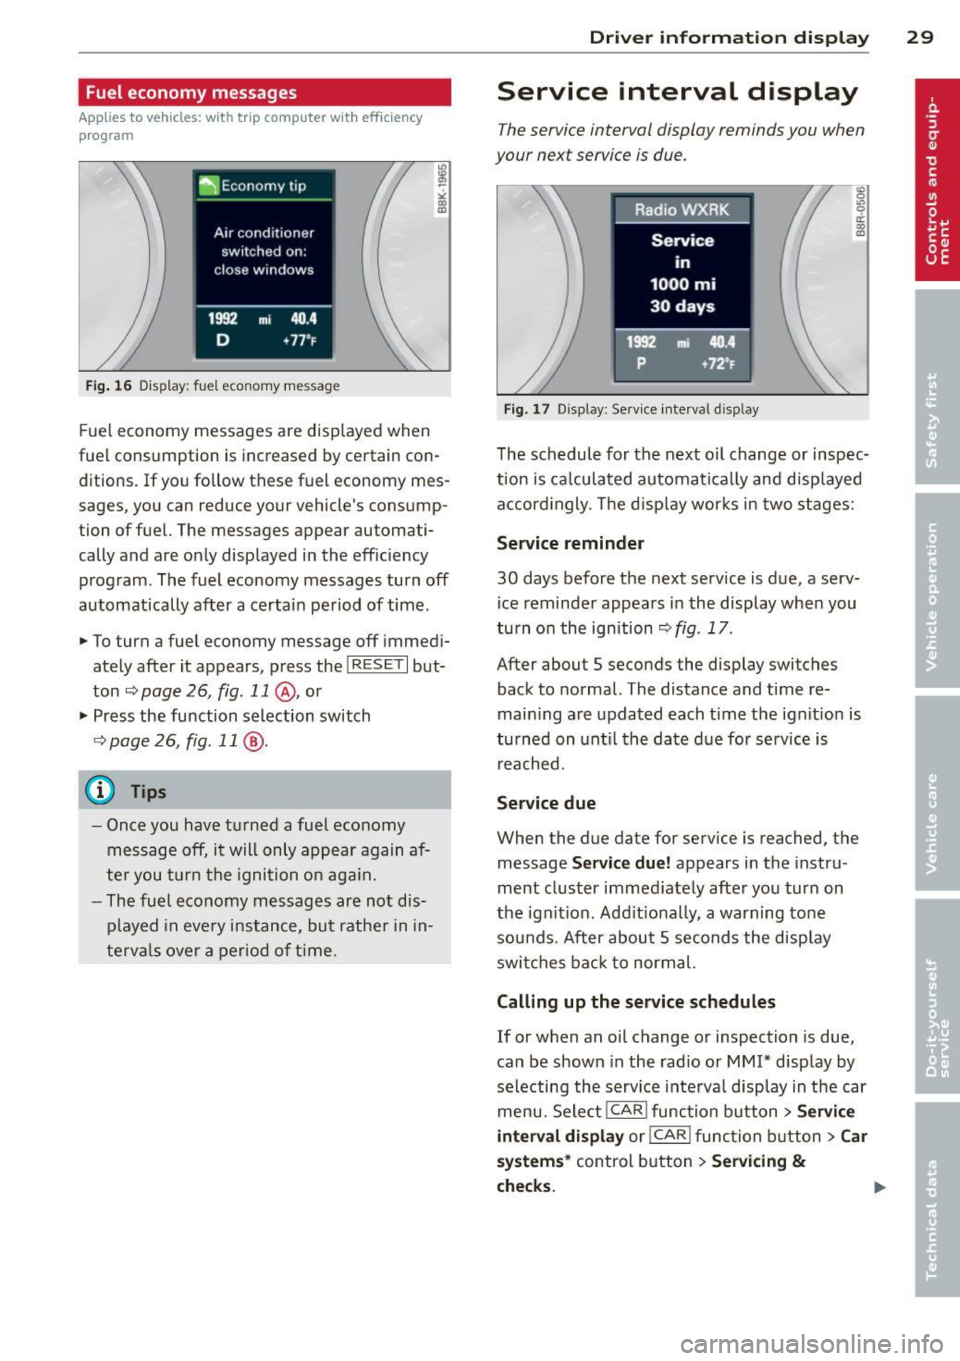
Fuel economy messages
Applies to vehicles: with trip computer w ith efficiency
program
Fig . 16 Display: fuel eco nomy me ssage
F ue l economy messages are disp layed when
fuel consumption is increased by certa in con
ditions. If you follow th ese fu el economy mes
sages, you can reduce your vehicle's consump
tion of fuel. The messages appear automati
cally and are only displayed in the eff ic iency
program . The fuel economy messages turn off
automatically after a certain period of time .
• To turn a fuel economy message off immedi
ately after it appears, pres s the !R ES ETI but
ton
~ page 26, fig . 11 @ , or
• Press the function selection switch
¢ page 26, fig. 11 @ .
(D Tips
- Once you have turned a fuel economy
message off, it will only appear again af
te r you turn the ignition on aga in.
- The fuel economy messages are not dis
played in every instance, but rathe r in in
te rva ls over a period of time .
Driver inform ation di spl ay 29
Service interval display
The service interval display reminds you when
your next service is due .
Fig. 17 Disp lay: Se rvice i nterval d is pl ay
The schedule for the next oi l change or inspec
tion is ca lculated automatica lly and disp layed
accord ingly. The d isp lay works in two stages:
Service reminde r
30 days before the next service is due, a serv
ice reminder appears in the display whe n you
turn on the ignition ¢
fig. 17 .
After about S seconds the display switches
back to normal. The distance and time re
main ing are updated each time the ignit ion is
tu rned on unt il th e date due for service is
reached.
Service due
When the due da te for service is reached , the
message
Ser vice due! appears in the in stru
ment cluster immed iately after you turn on
the ignit ion. Add it iona lly, a warning tone
sou nds . After about S seconds the disp lay
switches bac k to normal.
Calling up the service schedule s
If or when an oil change or inspection is due,
can be shown in the rad io or
MMI* disp lay by
selecting the service interva l display in the car
menu. Select !CAR ! func tion button>
Servic e
interval d ispl ay
o r! CAR ! function button> C ar
sys te m s*
control button > Serv icing &
check s.
Page 32 of 296
30 Driver information display
Resetting the service interval display
Your authorized Audi dealer will reset the cor
responding service schedule after performing
the appropriate service on yo ur vehicle . Yo u
also have the possibility to reset the oil
change schedule after having performed an
oil change according to Audi specifications.
Select
I CAR I function button > Service interval
display > Reset oil change interval
or ICARI
function button> Car systems* control but
ton
> Servicing & checks > Reset oil change
interval.
(D Note
If you disconnect the battery terminals, no
calculations can be made for the serv ice
interval display during this time and no
service rem inder wi ll appear. Remember
that observing the proper service intervals
is vitally important to extend ing the life of
your vehicle, particu larly the eng ine, and
maintaining its value. Even if the mileage
driven is low, the maximum period of one
yea r from one service to the next must not
be exceeded .
@ Tips
-Do not reset the display between oil
changes, otherwise the display will be in
correct.
- The information in the Service Reminder
r ema ins stored even when the vehicle
battery is disconnected.
On-Board Diagnostic
system (OBD)
Malfunction Indicator Lamp (MIL)
The Malfunction Indicator Lamp (MIL) ¢4' i n
the instrument cluster is part of the On-Board
Diagnostic (OBD II) system.
The warning/indicator light illuminates when
the ignition is switched on and goes out after
the engine starts and the idle has stabilized .
This indicates that the MIL is working proper
ly.
If the light does not go out after the engine
is started, or illuminates while you are driv
i ng, a malfunction may exist in the eng ine sys
tem . If the light illuminates, the catalytic con
verter could be damaged .
Continue driving
with reduced power (avoid
ing sustained high speeds and/or rapid accel
erations) and have the cond ition corrected.
Contact your authorized Audi dealer.
If the light il luminates, the electronic speed
limiter may also be malfunct ioning. For more
information
c:> page 31 , Electronic speed
limiter.
An improperly closed fuel filler cap may also
cause the
MIL light to illuminate
c:>page 212.
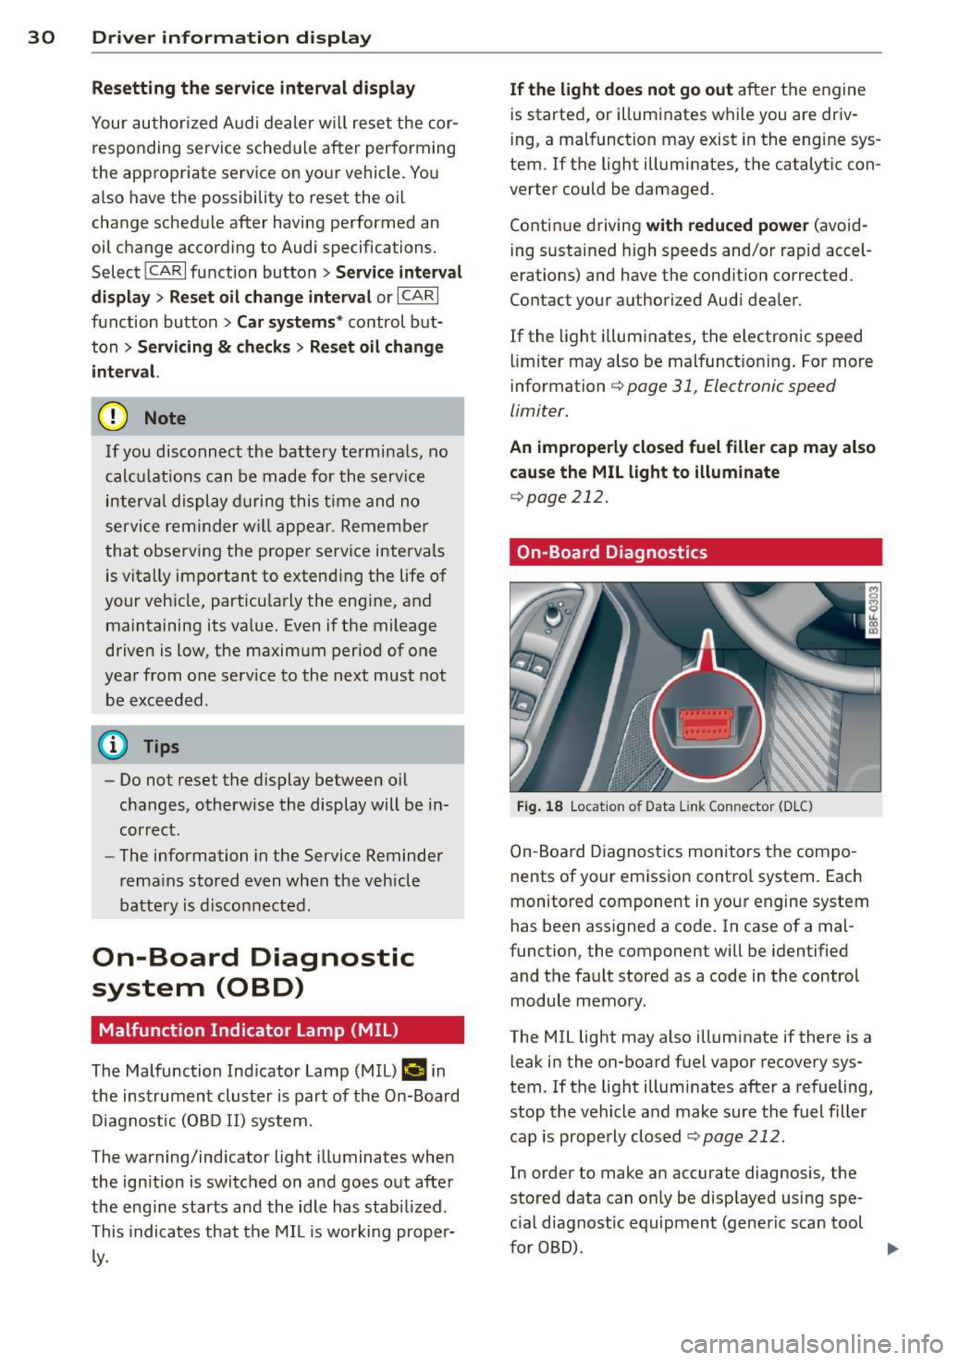
On-Board Diagnostics
Fig . 18 Locat io n of Data Link Con nector (D LC)
On-Board Diagnostics monitors the compo
nents of your emission control system . Each
monitored component in your engine system
has been assigned a code. In case of a mal
function, the component will be identified
and the fault stored as a code in the control
module memory.
The MIL light may also illuminate if there is a leak in the on-board fuel vapor recovery sys
tem. If the light illuminates after a refueling,
stop the vehicle and make sure the fuel filler
cap is properly closed
c:> page 212 .
In order to make an accurate diagnosis, the
stored data can on ly be displayed using spe
c ial diagnostic equipment (generic scan tool
furOBD) .
~
Page 51 of 296
The leavin g home function i lluminates the
area around the vehicle when unlock ing it.
T his function can be switched on and off.
The
c o ming h om e and lea ving home func
tions on ly operate when it is dark and the
light switch is in the AUTO posit ion
¢ page 47 , fig. 40 .
Auto headlight s*
When the light switch is in the A UTO
¢ page 47 posi tion, the switch-on po int of the
lights can be changed in the automatic driving
light function.
Daytime running lights
USA m odel s:
You can switch the dayt ime run
ni ng lights
on and o ff .
Canada mod els:
The function cannot be
turned off .
It is activated a utomat ica lly each
time the ignition is switched on.
Travel mode*
T he headlig ht beam is asymmetrical. This pro
v ides stronger illum ination on the s ide of the
road on wh ich you are driving .
If you are driv
i ng in a count ry that d rives on the opposite
side of the road from your own country, th is
will cau se glare for on coming dr ivers. To pre
vent glare:
- Trave l mode must be selected in vehicles
with Xenon headlights*.
- In veh icles with halogen headlights, ce rtain
areas of the head light lenses must be cov
ered w ith wate rproof adhesive covers that
prevent light from passing thro ugh. Fo r
more informat ion, please see your author
i z ed Audi dea ler or author ized repa ir faci lity .
(D Tips
When trave l mode is activated, a display in
the dr iver information system in dicates
this each time you switch the ignit io n on.
Clear vi sion 49
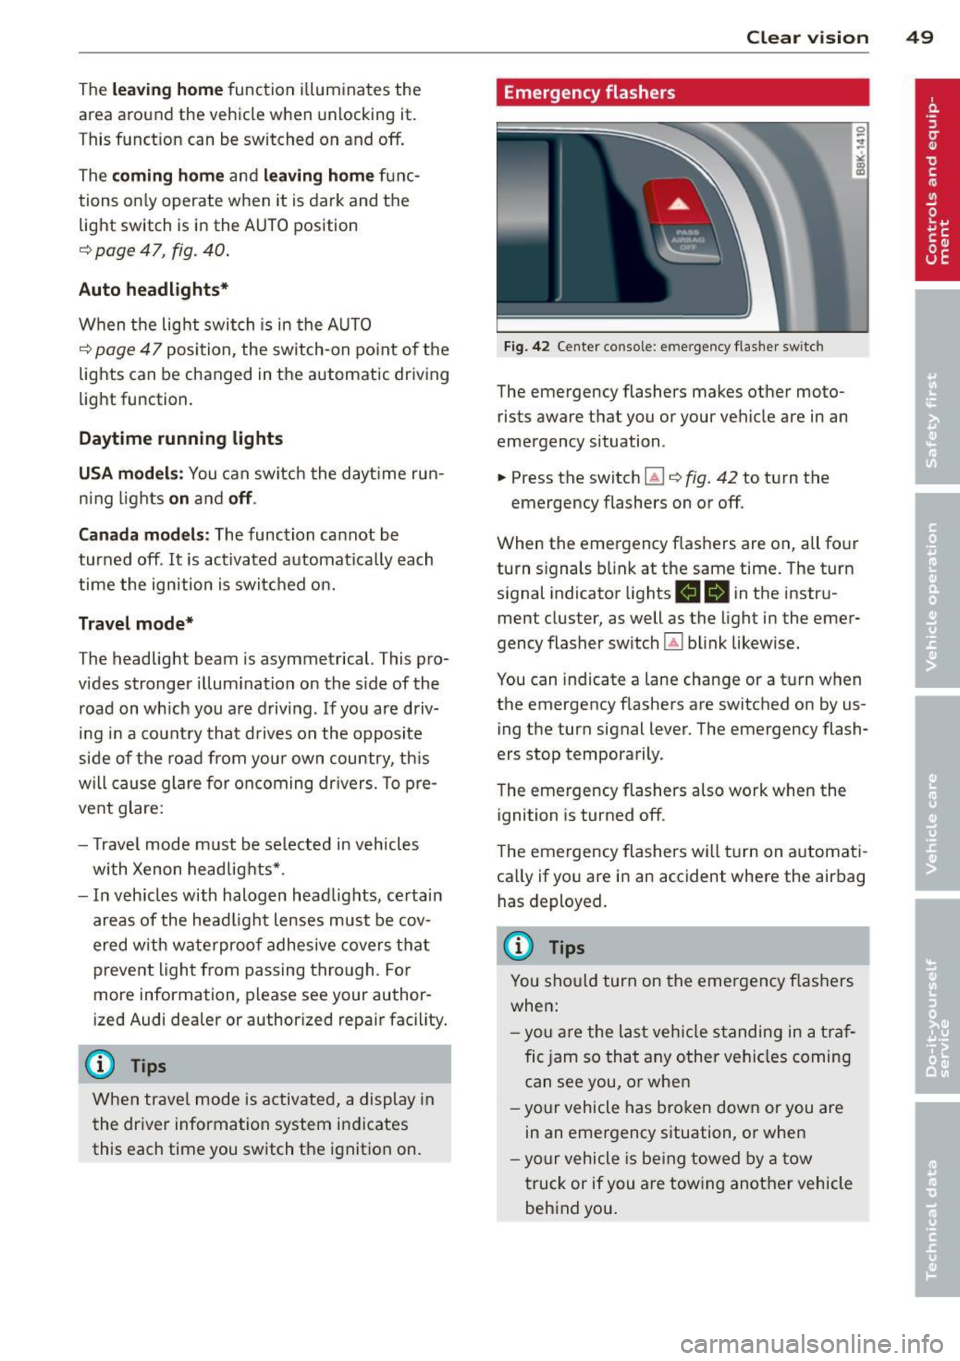
Emergency flashers
Fi g. 42 Center co n sole : em erge ncy flasher sw itc h
The emergency flashers makes other moto
rists aware that you or your vehicle are in an
emergency situation .
.. Press the switch
Gil ¢ fig. 42 to turn the
emergency flashers on or off .
When the emergency f las hers are on, all four
turn s ignals b link at the same time. The turn
s ignal indicator lights .
1B in the instru
ment cluster, as well as the light in the emer
gency flasher switch ~ blink likewise.
You can indicate a lane change or a tu rn w hen
the emergency flashers are switched on by us
ing the turn signal lever. The emergency flash
ers stop temporarily .
T he emergency flashers also work when the
ign ition is turned off .
T he emergency flashers w ill turn on a utomat i
ca lly if yo u are in an accident where the airbag
has deployed.
(D Tips
You sho uld turn on the emergency f las hers
when:
- yo u are the last veh icle standing in a t raf
fic jam so that any other vehi cles coming
can see you, or whe n
- yo ur vehicle has bro ken down or you are
in an eme rgency s ituation, or when
- yo ur vehicle is be ing towed by a tow
truck or if you are tow ing another vehicle
beh ind you.
Page 52 of 296
50 Clear vis ion
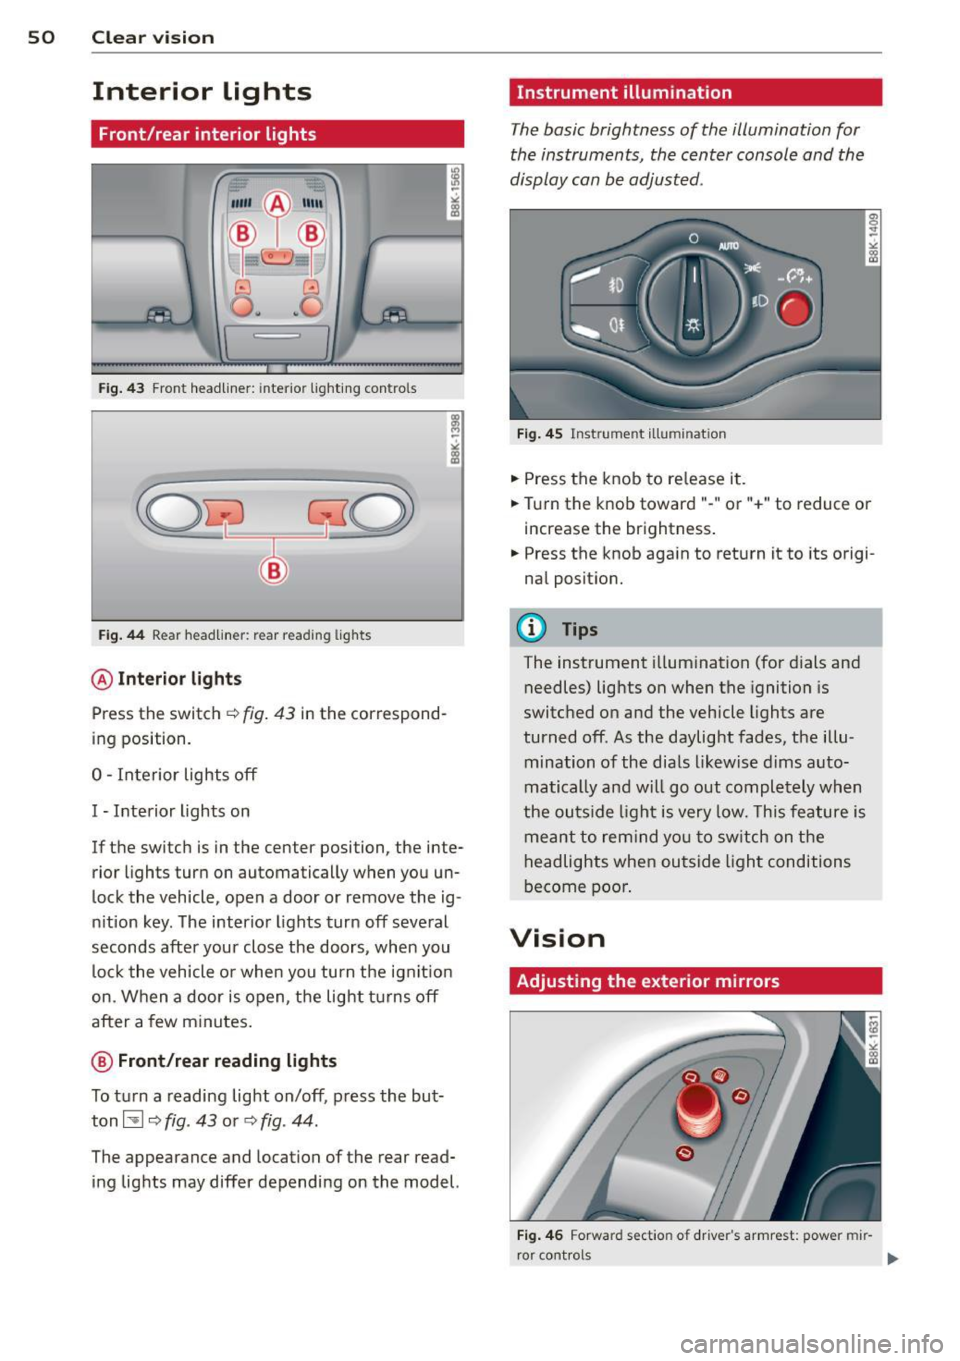
Interior lights
Front /rear interior lights
Fig . 43 Front headliner: inte rior lighting controls
Fig. 44 Rear headliner: rear reading lights
@Interio r ligh ts
Press the switch ~ fig. 43 in the correspond
ing position.
0 -Interior lights off
I -Interior lights on
If the switch is in the center position, the inte
rior l ights turn on automatically when you un
lock the vehicle, open a door or remove the ig
n ition key. The interior lights turn off several
seconds after your close the doors , when you
lock the vehicle or when you turn the ign it ion
on. When a door is open, the light tu rns off
after a few minutes.
@ Fr ont /rear r eading lights
To turn a reading light on/off, press the but
ton~
c::> fig. 43 or c::> fig. 44.
The appearance and location of the rear read
ing lights may differ depending on the model.
Instrument illumination
The basic brightness of the illumination for
the instruments, the center console and the
display can be adjusted .
Fig . 45 Inst rume nt illu mination
.,. Press the knob to release it .
.,. Turn the knob toward"-" or"+" to reduce or
increase the brightness .
.,. Press the knob again to return it to its origi
nal posit ion.
(!') Tips
The instrument i llumination (for dials and
needles) lights on when the ignition is
switched on and the vehicle lights are
turned off . As the daylight fades, the illu
mination of the dia ls likewise dims auto
matically and wi ll go out completely when
the ou tside light is very low. This feature is
meant to rem ind you to sw itch on the
headlights when ou tside light conditions
become poor .
Vision
Adjusting the exterior mirrors
Fig . 4 6 Forward section of driver's a rmrest: power mir
r or controls
Page 59 of 296
Calibrating the compass
Appl ies to vehicles: with digital compass
You must recalibrate the compass if it does
not display the correct direction .
.. Press and ho ld the button @unt il a C ap
pears in the rearview mirror .
.,. Drive in a c ircle at about 6 mph (10 km/h)
until a direction is d isp layed in the rearview
mirror .
A WARNING
- To avoid endanger ing yourself and other
dr ivers, calibrate the compass in an area
where the re is no traffic.
- T he dig ita l compass is to be used as a di
rect ional aid only. Even though you may
want to look at it wh ile you are driving,
yo u must still pay attention to traffic,
road and weather cond itions as well as
other poss ible hazards.
Clear vis ion 5 7
Page 79 of 296
Warm and cold 77
Operation
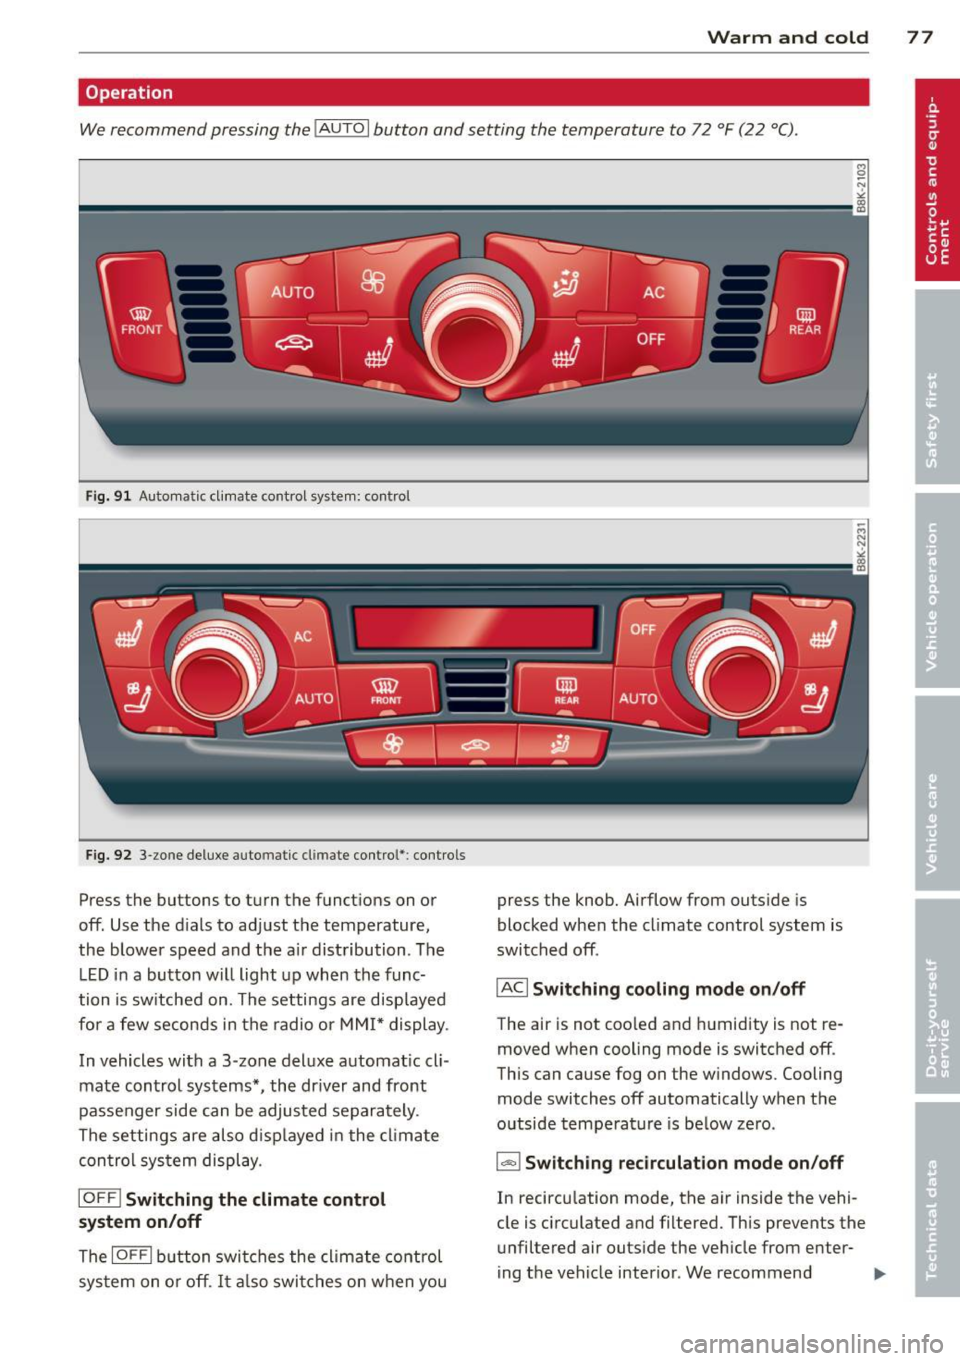
We recommend pressing the IAUTO I button and setting the temperature to 72 °F (22 °C).
Fig. 91 Automatic cl imate control system: control
Fig. 92 3-zone deluxe automatic climate control': controls
Press the buttons to turn the functions on or
off. Use the d ials to adjust the temperature,
the blower speed and the a ir distribution. The
L ED in a button will light up when the func
tion is switched on. The settings are displayed
for a few seconds in the radio or MMI* display.
In vehicles with a 3-zone deluxe automat ic cl i
mate control systems *, the dr iver and front
passenger side can be adjusted separately.
The settings are also d isplayed in the climate
con trol system display.
IOFFI Switching the climate control
system on/off
The IOF FI button switches the climate control
sys tem on or off.
It also switches on when you press the knob. Airflow from outs
ide is
blocked when the climate control system is
switched off.
IACI Switching cooling mode on/off
The air is not coo led and humidity is not re
moved when cooling mode is switched off.
This can cause fog on the w indows. Cooling
mode switches off automatically when the
outside temperature is be low zero.
1- 1 Switching recirculation mode on/off
In recircu lation mode, the air inside the vehi
cle is circulated and filtered. This prevents the
unfiltered air outside the vehicle from enter
ing the vehicle interior. We recommend