display AUDI S4 2014 Owner's Guide
[x] Cancel search | Manufacturer: AUDI, Model Year: 2014, Model line: S4, Model: AUDI S4 2014Pages: 296, PDF Size: 73.56 MB
Page 106 of 296
104 Audi adaptive cruise control and braking guard
Setting the distance
Applies to vehicles: wit h Aud i adapt ive cru ise co ntrol
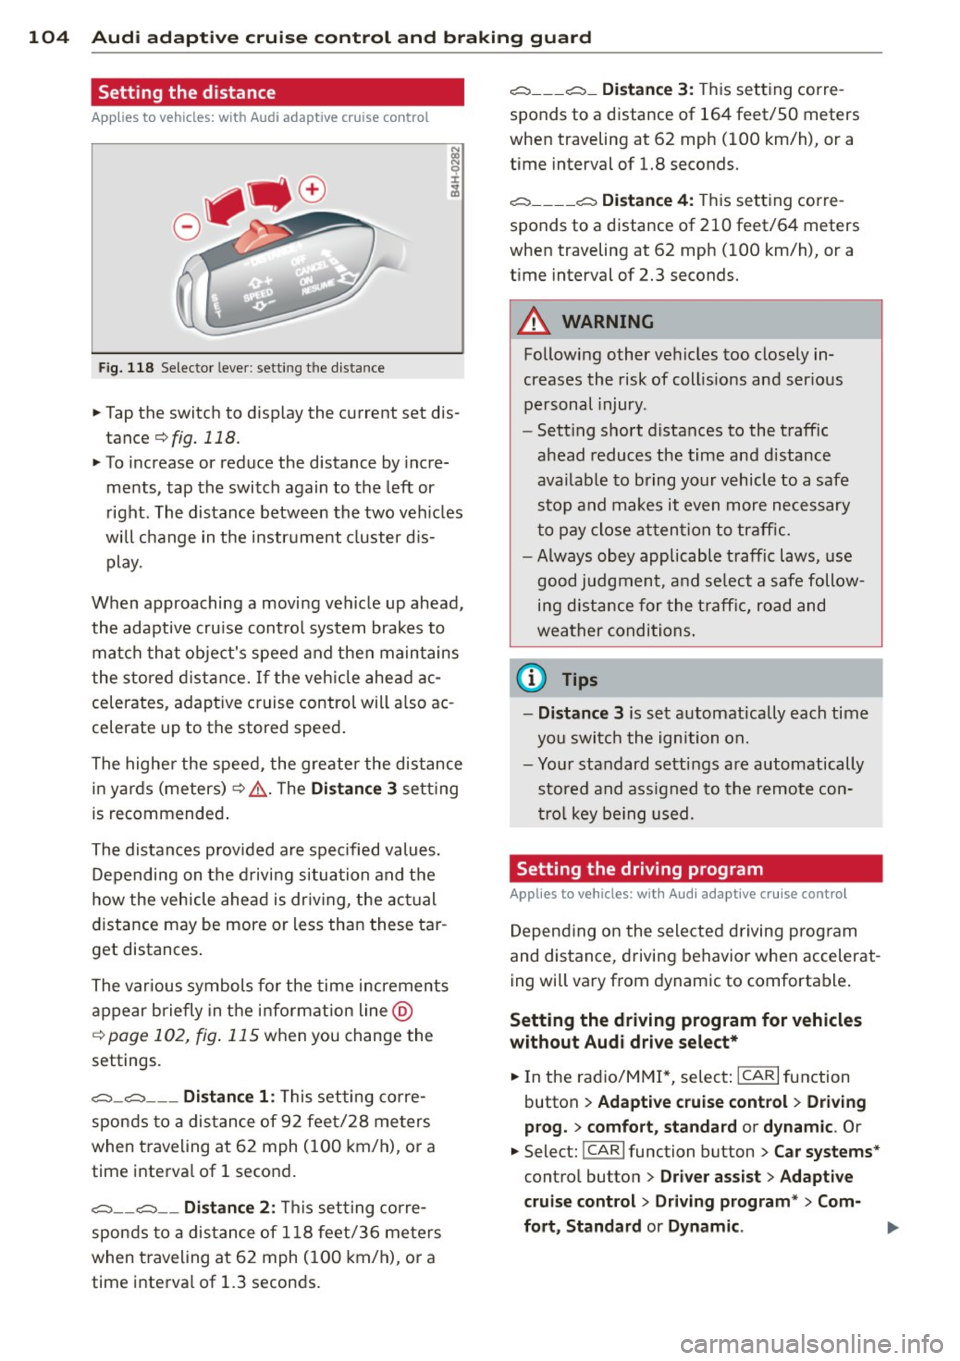
Fig. 118 Selector lever: setting the distance
~ Tap the switch to display the current set dis
tance
¢fig. 118.
~ To increase or reduce the distance by incre
ments, tap the switch again to the left or
right. The distance between the two vehicles
will change in the instrument cluster dis
play.
When approaching a moving vehicle up ahead,
the adaptive cruise control system brakes to match that object's speed and then maintains
the stored distance. If the vehicle ahead ac
celerates, adaptive cruise control will also ac
celerate up to the stored speed.
The higher the speed, the greater the distance
in yards (meters)¢ ,&.. The
Distance 3 setting
is recommended.
The distances provided are specified values.
Depending on the driving situation and the
how the vehicle ahead is driving, the actual
distance may be more or less than these tar
get distances.
The various symbols for the time increments
appear briefly in the information line @
c;, page 102, fig. 115 when you change the
settings.
c::::::,_c::::::, ___ Distance 1: This setting corre-
sponds to a distance of 92 feet/28 meters
when traveling at 62 mph (100 km/h), or a
time interval of 1 second.
c::::::, __ c::::::, __ Distance 2: This setting corre
sponds to a distance of 118 feet/36 meters
when traveling at 62 mph (100 km/h), or a
time interval of 1.3 seconds.
c::::::, ___ c::::::,_ Distance 3: This setting corre-
sponds to a distance of 164 feet/SO meters
when traveling at 62 mph (100 km/h), or a
time interval of 1.8 seconds.
c::::::, ____ c::::::, Distance 4: This setting corre-
sponds to a distance of 210 feet/64 meters
when traveling at 62 mph (100 km/h), or a
time interval of 2.3 seconds.
A WARNING
Following other vehicles too closely in
creases the risk of collisions and serious
personal injury .
- Setting short distances to the traffic
ahead reduces the time and distance
available to bring your vehicle to a safe
stop and makes it even more necessary
to pay close attention to traffic.
-
-Always obey applicable traffic laws, use
good judgment, and select a safe follow
ing distance for the traffic, road and
weather conditions.
0) Tips
- Distance 3 is set automatically each time
you switch the ignition on.
- Your standard settings are automatically
stored and assigned to the remote con
trol key being used.
Setting the driving program
Applies to veh icles: w ith Audi ada ptive c ruise control
Depending on the selected driving program
and distance, driving behavior when accelerat
ing will vary from dynamic to comfortable.
Setting the driving program for vehicles
without Audi drive select*
~ In the radio/MM!*, select: ICARlfunction
button
> Adaptive cruise control > Driving
prog.
> comfort, standard or dynamic. Or
~ Select: !CAR I function button > Car systems*
control button > Driver assist > Adaptive
cruise control> Driving program*
> Com-
fort, Standard
or Dynamic . ll-
Page 107 of 296
Audi adaptive cruise control and braking guard 105
Setting the driving mode for vehicles with
Audi drive select*
Refer to r=;,poge 114 .
(D Tips
Your settings are automatically stored and
assigned to the remote control key being
used.
Request for driver intervention
Applies to vehicles: with Audi adaptive cruise control
Fig. 119 Instrumen t cl us ter: reques t for drive r inte r·
vention
I n ce rtain situat ions, the system will prompt
you to take action . This cou ld happen, for ex
ample, if braking by the adaptive cruise con
trol system is not enough to maintain enough
distance to the vehicle ahead.
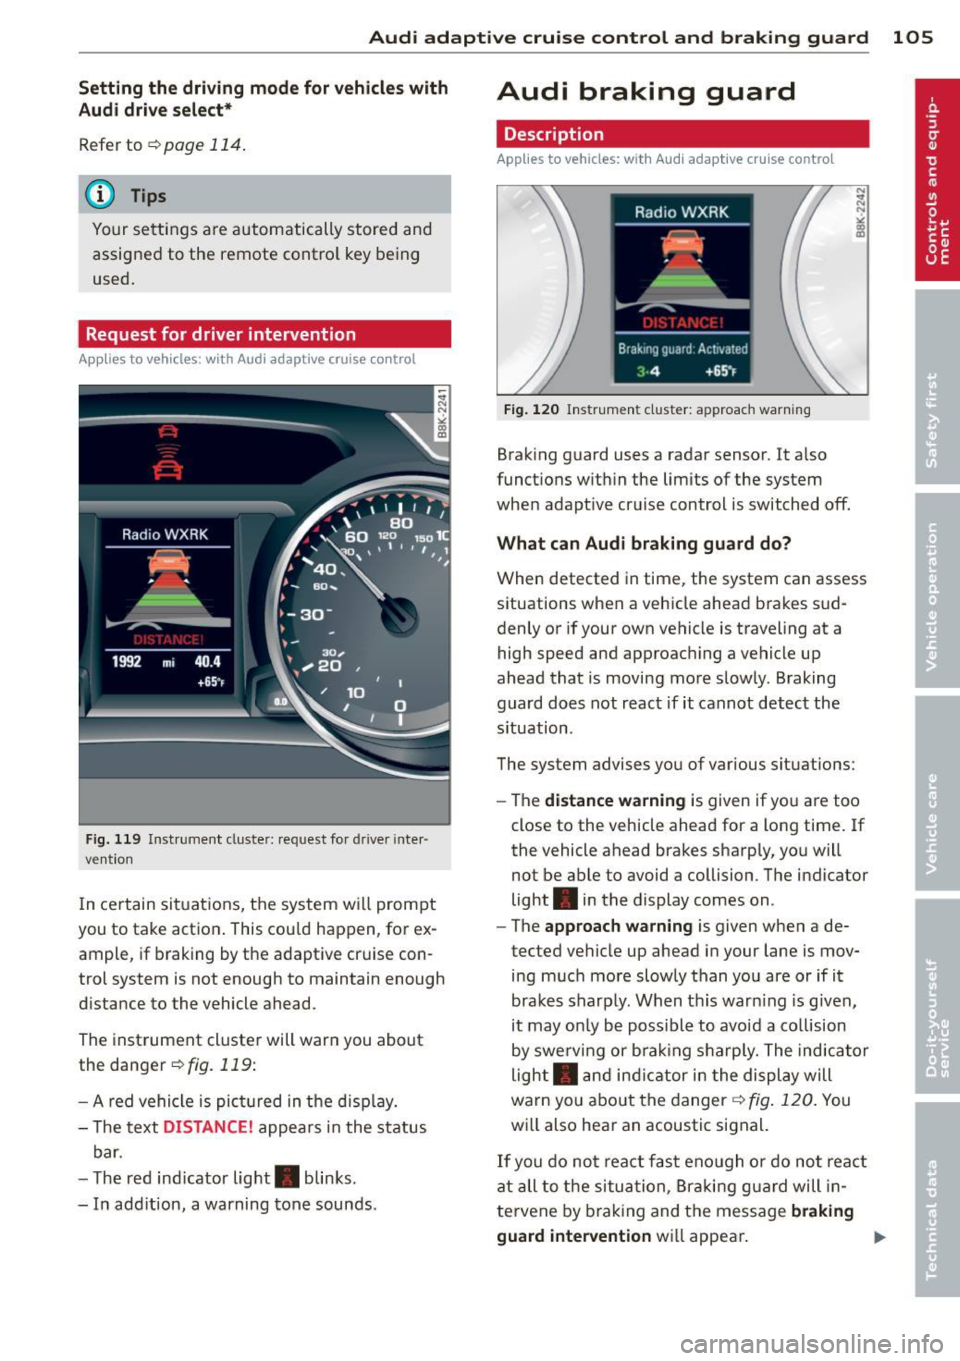
The instrument cluster will warn you about
the danger
r=;,fig. 119:
- A red vehicle is pict ured in the disp lay.
- The text
DISTANCE! appears in the status
bar.
- T he red ind icator light . blinks.
- In add ition, a warning tone sounds.
Audi braking guard
Description
Applies to vehicles: with Audi adaptive cruise control
Fig. 120 Instr ument cluster: approach warning
Braking guard uses a radar sensor. It also
functions within the limits of the system
when adapt ive cruise control is switched off.
What can Audi braking guard do?
When detected in time, the system can assess
situations when a vehicle ahead brakes sud
denly or if your own vehicle is traveling at a
high speed and approaching a vehicle up
ahead that is moving more slowly. Braking
guard does not react if it cannot detect the
s ituation.
The system advises you of various situations:
- The
distance warning is given if you are too
close to the vehicle ahead for a long time. If
the vehicle ahead brakes sharply, you will
not be able to avoid a collision . The indicator
light . in the display comes on .
- The
approach warning is given when a de
tected vehicle up ahead in your lane is mov
ing much more slowly than you are or if it
brakes sharply. When thi s war ning is given,
it may on ly be possible to avoid a co llision
by swerving or brak ing sharp ly. The indicator
light . and indicator in the display will
warn you about the danger¢
fig. 120. You
wi ll also hear an acoustic signal.
If you do not react fast enough or do not react
at all to the situation, Braking guard will in
te rvene by brak ing and the message
braking
guard intervention
wi ll appear.
Page 108 of 296
106 Audi adap tive cruise control and br aking guard
- If a co llision is imminent, the system will
first provide an
acute warning by bri efly and
sharp ly app ly ing the brakes .
- If you do not react to the ac ute warning ,
braking guard can brake within the limits of
the system. This reduces the veh icle speed
in the event of a collision.
- At speeds under 20 mph (30 km/h), the sys
tem can in it iate a complete deceleration
s hortly before a collision
l) .
-If the braking guard senses that you are not
braking hard enough when a collision is im
minent, it can increase the braking force.
Which funct ion s can be contr oll ed ?
You can switch braking guard and the dis
tance/approach warning on or off in the radio
or MM I c> poge 106, Settings in the radio/
MMI.
A WARNING
Lack of attention can cause col lisions, oth
er accidents and serious personal injuries.
The braking guard is an assist system and
cannot prevent a collis ion by itself. The
driver m ust always intervene . T he d river is
always responsib le for bra king at the cor
rect time.
- Always pay close attention to traffic,
even when the brak ing guard is switched
on. Be ready to intervene and be ready to
take complete control whenever necessa
ry. A lways keep the safe and legal dis
tance between your vehicle and vehicles
up ahead.
- Braking guard works w ith in limits and
will not respond outs ide the system lim
its, for example when approaching a
stopped vehicle or stationary obstacle
(end of a traff ic jam or veh icle that has
broken down in traffic).
- Always remember that the radar sensor
for the braking guard works only within
defined detection and range limits that
l ) Th is is not available in some c oun tri es.
may prevent the proper detection of oth
er vehicles.
- The radar sensor's function and range
can be reduced by rain, snow and heavy
spray. Moving veh icles up ahead may not
be prompt ly detected or may not be de
tected at all .
- Reflective surfaces including crash barri
ers or tunne l entrances may impair the
function of the radar sensor .
(D Tips
- You can cancel the braking that is in it iat
ed by the system by braking yourse lf, by
accelerating not iceably or by swerving .
- Braking guard error messages
c>poge 107.
- Keep in mind that braking guard can brake unexpectedly. Always secure any
cargo or objects that you are transport
ing to reduce the risk of damage or in
jury .
Settings in the radio/MMI
App lies to vehicles : wit h Audi ada ptive cr uise contro l
.,. Select: !CARI function button> Car sy ste m s*
contro l but ton > Driv er a ssi st> Audi brak
ing guard .
Or
.,. Select: !CAR I function button> Audi b raking
gua rd.
Sys tem -
Switch A udi braking guard On and
Off . When you switch the ignition on, the
message
Audi b raking gu ard off appears if
the system is switch ed off .
Ea rly warnin g -The distance and approach
warnings in the display can be switched
On/
Off .
(D Tips
-Yo ur settings are automatically s tored
and assigned to the remote contro l key
being used at the times the settings are
made.
Page 111 of 296
Audi side assist Lane change assistant
Description
Applies to vehicles: with Audi side assist
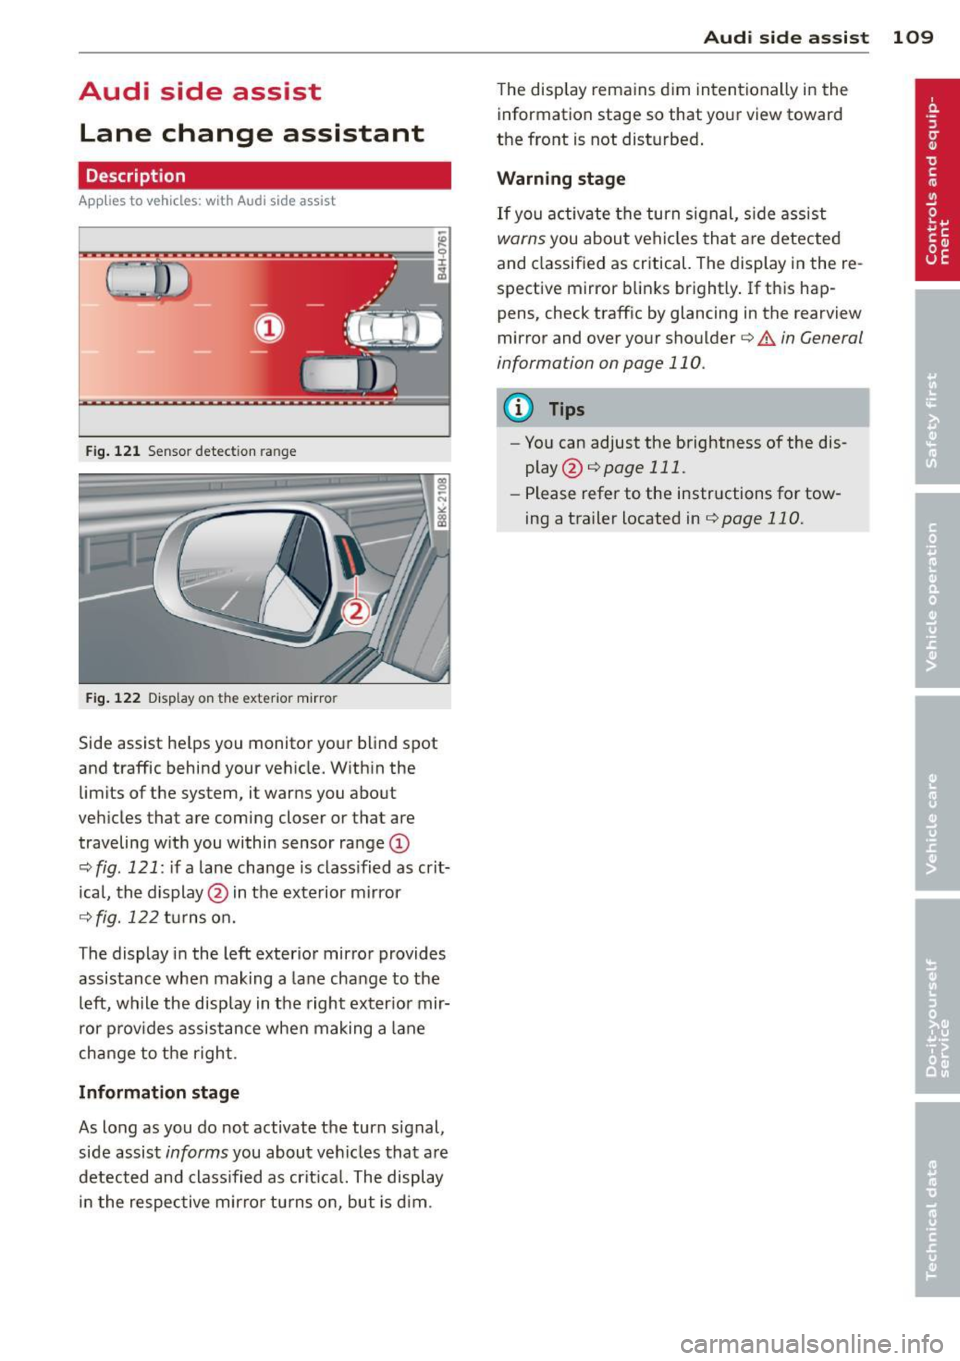
Fig . 12 1 Sensor dete ction ra n ge
Fig . 122 Disp la y on t he e xterio r mirro r
Side assist he lps you mon itor your blind spot
and traffic behind you r veh icle. W ith in the
limits of the system, it warns you about
vehicles that are coming closer or tha t are
traveling w ith you within sensor ra nge
(D
o:;, fig . 121: if a lane change is class ified as crit
ical, the display @ in the exterior mirror
o:;, fig. 122 turns on.
T he display in the left exterior mirror provides
assistance when making a lane change to the l eft, while the display in the right exter ior mir
r or p rov ides assistance when making a lane
change to the right .
Information stage
As long as you do not activate the turn signal,
side assist
informs you about vehicles that are
detected and class ified as crit ical. The display
i n the respective mirror turns o n, but is d im .
Aud i side assist 109
The display remains d im intentionally in the
information stage so that your view toward
the front is not disturbed .
Warning st age
If you activate the turn signal, s ide assist
warns you about veh icles that are detected
and classified as critical. The display in the re
sp ective mirror blinks brightly . If this hap
pens, check traff ic by glanc ing in the rearview
mirror and over your shoulder ¢
A in General
information on page 110 .
@ Tips
-You can adjust the brightness of the dis
play @¢
page 111 .
-Please refer to the instructions for tow
ing a trailer located in
¢page 110.
Page 112 of 296
110 Audi side assist
General information
App lies to vehicles: with Audi side assist
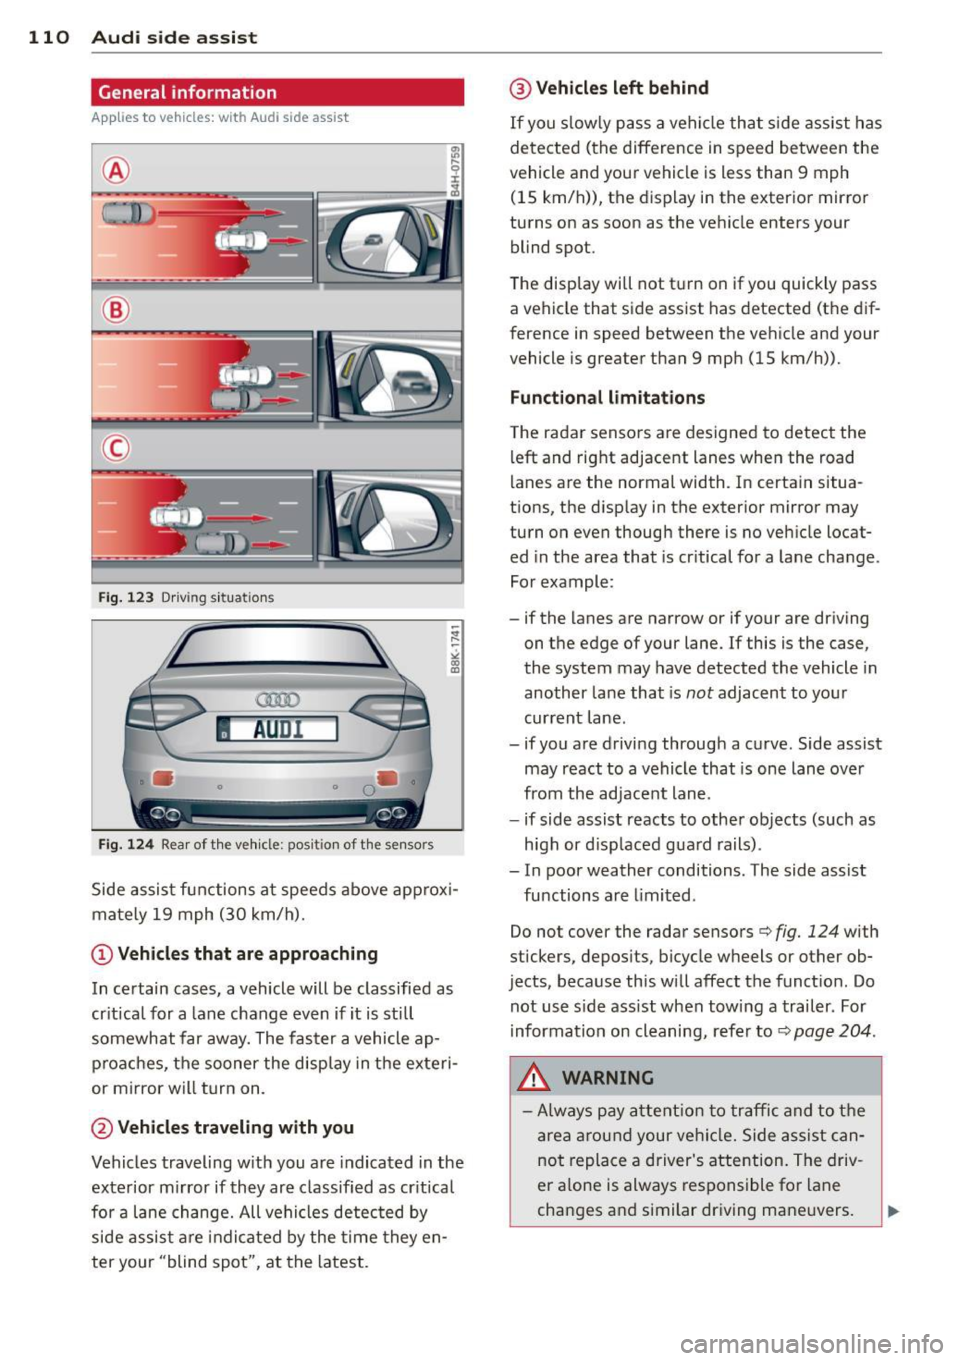
®
©
Fig. 12 3 Driving s it u at ions
AU Dr- l
• •
Fig . 124 Rear of th e ve hicle: pos it io n of t he se nso rs
Side assis t fu nctions at speeds above ap prox i
ma tely 19 mph (30 km/h).
(D V ehicles that are approaching
In certain cases, a vehicle will be classified as
cr itical for a lane change
even if it is still
somewhat far away. The fas ter a vehicle ap
p ro aches, the sooner the disp lay in the exteri
or m irror will t urn on.
@ Vehicles traveling with you
Vehicles traveling w ith you are indicated in the
exterior m irror if they are classified as cr it ical
for a lane change. All vehicles detec ted by
side assis t are in dicated by the time they en
ter your "blind spot", at the latest.
@ Vehicles left behind
If you s low ly pass a ve hicl e tha t sid e ass ist has
dete cted ( the difference in s peed between the
vehicle and you r vehicle is less than 9 mph
(15 km/h)), the display in the exter io r mirro r
turns on as soon as the vehicle enters your blind spot.
The disp lay wi ll not t urn on if you quickly pass
a vehicle that s ide assist has detected (t he d if
f erence in speed between the ve hicle and your
vehicle is greater than 9 mph (15 km/h)).
Functional limitations
T he radar senso rs are des igned to detect the
left and right adjacent lanes whe n the road
l anes a re the normal width. In certain situa
t ions, the d isp lay in the exterior mirror may
turn on even though there is no ve hicle locat
ed in the area that is cr itical fo r a lane cha nge.
For example:
- if the lanes are narrow or if your are driving on the edge of your lane. If this is the case,
the system may have detected the vehicle in
another la ne that is
not adjacent to your
cur rent lane .
- if you a re driving through a c urve . Side assis t
may react to a vehicle that is one lane ove r
from the ad jacent lane .
- if side assist reacts to other objects (such as
high or d isp laced gua rd rails) .
- In poor weather conditions. The side assist fu nctions are limited .
Do not
cover the radar sensors c::> fig. 124 with
stickers, depos its, bicycle wheels or other ob
jects , because this will affect the funct ion. Do
not use s ide ass ist when tow ing a trail er. For
information on cleaning, refe r to
c::> page 204 .
&_ WARNING
-Always pay a tten tion t o traffic and to the
ar ea around your ve hicl e. Side a ssist can
no t repla ce a driver's attention. The driv
er a lone is always respons ible fo r lane
cha nges a nd similar driving mane uvers.
Page 113 of 296
-Improper reliance on the side assist sys
tem can cause collisions and serious
personal injury:
- Never rely only on side assist when
changing lanes.
- Always check rear view mirrors to make
sure that it is safe to change lanes.
- Side assist cannot detect all vehicles un
der all conditions- danger of accident!
- Please note that side assist indicates
there are approaching vehicles, or
vehicles in your blind spot, only after
your vehicle has reached a driving speed
of at least 19 mph (30 km/h).
- In certain situations, the system may not
function or its function may be limited.
For example:
- if vehicles are approaching or being left
behind very quickly. The display may
not turn on in time.
- in poor weather conditions such as
heavy rain, snow or heavy mist .
- on very wide lanes, in tight curves or if
there is a rise in the road surface .
Vehicles in the adjacent lane may not
be detected because they are outside
of the sensor range.
(D Note
The sensors can be displaced by impacts or
damage to the bumper, wheel housing and
underbody. This can affect the system .
Have your authorized Audi dealer or au
thorized Audi Service Facility check their
function.
(D Tips
- If the window glass in the driver's door
or front passenger's door has been tint
ed, the display in the exterior mirror may be misinterpreted.
- For Declaration of Compliance to United
States FCC and Industry Canada regula
tions
~page 278.
Audi side assist 111
Activating and deactivating
App lies to vehicles : wi th Aud i side ass ist
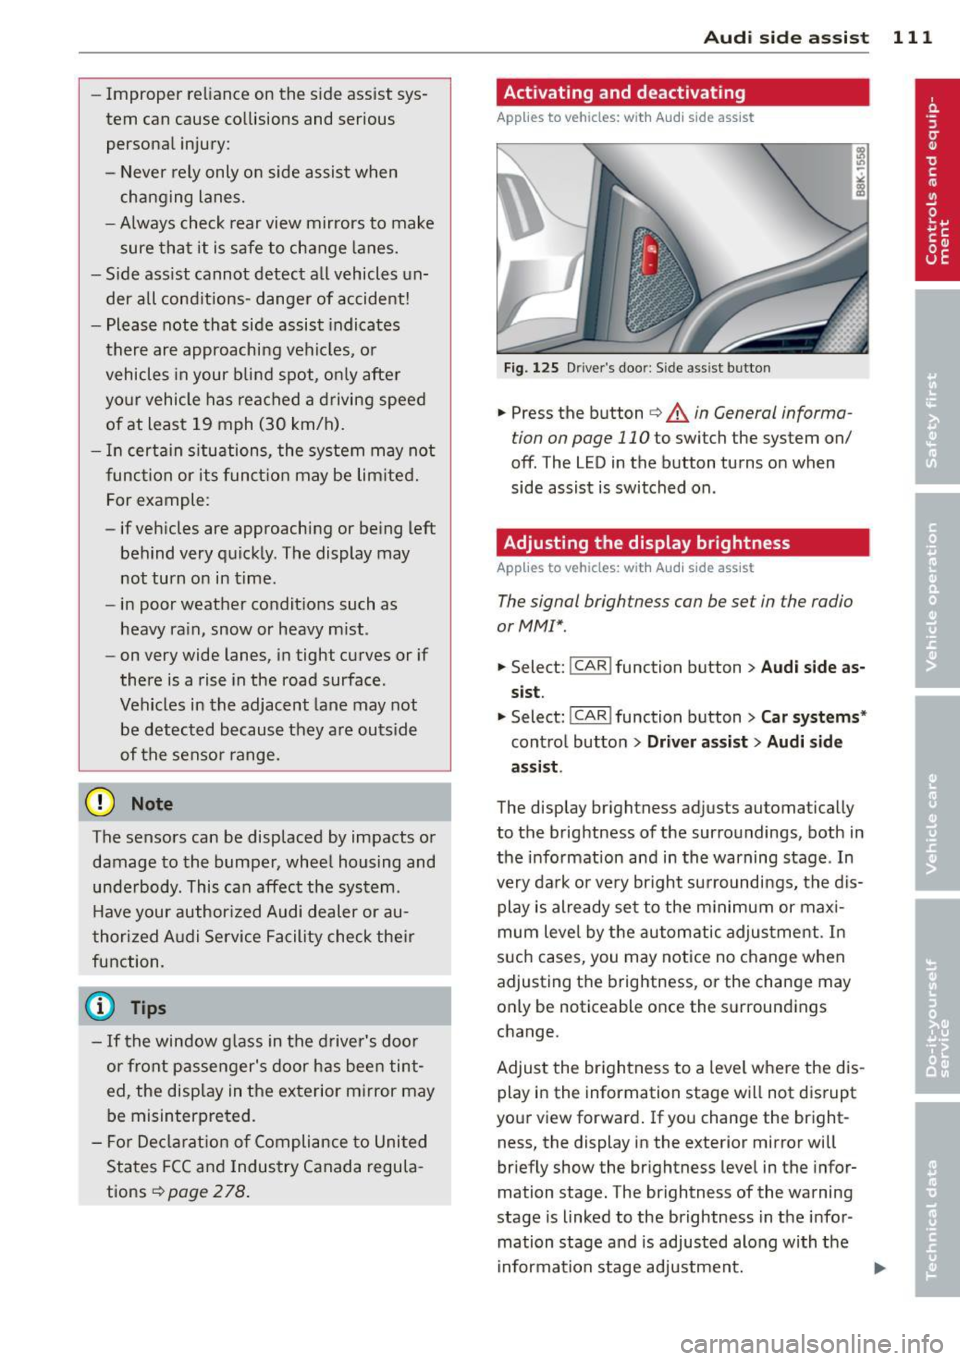
Fig. 125 Driver 's doo r: Side ass ist button
.,. Press the button ~ A in General informa
tion on page 110
to switch the system on/
off . The LED in the button turns on when
side assist is switched on.
Adjusting the display brightness
A pp lies to vehicles: wi th Audi side ass ist
The signal brightness can be set in the radio
orMMI* .
.,. Select: !CAR ! function button > Audi side as
sist.
.,. Select: I CAR I function button > Car systems*
control button > Driver assist > Audi side
assist .
The display brightness adjusts automatically
to the brightness of the surroundings, both in
the information and in the warning stage . In
very dark or very bright surroundings, the dis play is already set to the minimum or maxi
mum level by the automatic adjustment. In
such cases, you may notice no change when
adjusting the brightness, or the change may
only be noticeable once the surroundings
change.
Adjust the brightness to a level where the dis
play in the information stage will not disrupt
your view forward. If you change the bright
ness, the display in the exterior mirror will
briefly show the brightness level in the infor
mation stage. The brightness of the warning
stage is linked to the brightness in the infor
mation stage and is adjusted along with the
information stage adjustment.
Page 116 of 296
114 Audi drive select
-For vehicles with an automatic transmis
sion, selecting the
Dynamic mode re
su lts in sporty shifting characteristics .
The S gear position engages automati
cally.
- In vehicles that have dynamic steering*,
operating noise is heard when starting or
stopping the eng ine . This does not ind i
cate a problem .
Selecting the driving mode
Applies to vehicles: with Audi drive select
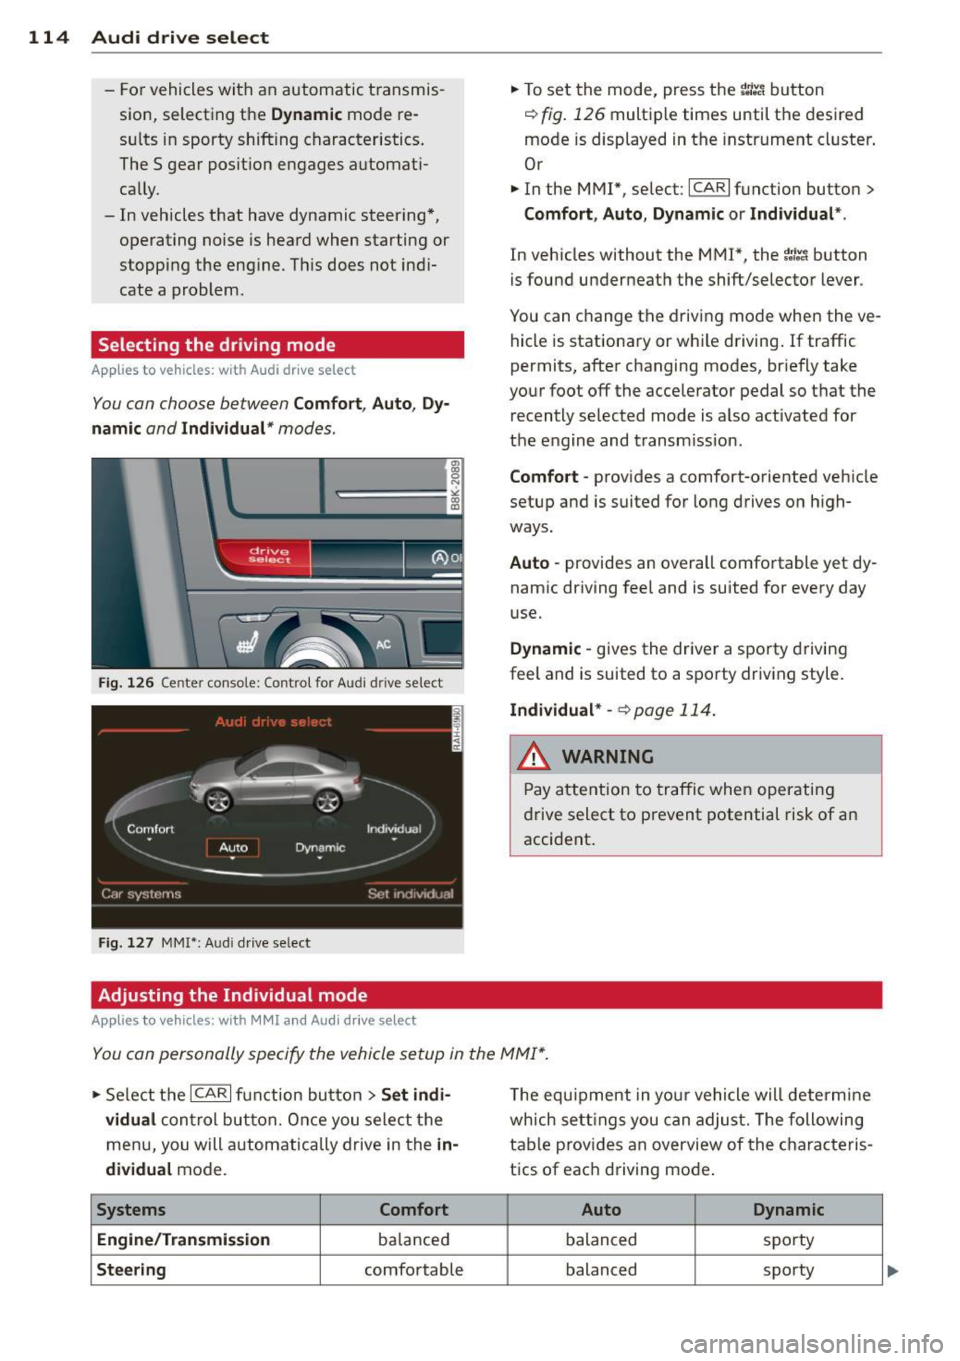
You can choose between Comfort, Auto, Dy
namic
and Individual * modes.
Fig. 126 Cen ter console: Control for Au di dri ve select
Fig. 127 MMI•: Aud i drive select
Adjusting the Individual mode
Applies to vehicles: with MMI and Aud i drive select
.,. To set the mode, press the r.:i:.~ button
~ fig. 126 multiple times until the desired
mode is displayed in the instrument cluster .
Or
.,. In the MMI", select:
ICARI function button>
Comfort, Auto, Dynamic or Individual *.
In vehicles without the MMI*, the~:/;,~ button
is found underneath the shift/selector lever .
You can change the driving mode when the ve hicle is stationary or wh ile driving . If traffic
permits, after changing modes, br iefly take
your foot off the acce lerator pedal so that the
recently selected mode is also activated for
the engine and transm ission .
Comfort -provides a comfort-oriented vehicle
setup and is suited for long drives on h igh
ways.
Auto -provides an overall comfortable yet dy
namic driving feel and is suited for every day
use.
Dynamic -gives the driver a sporty driving
feel and is suited to a sporty driving style.
Individual * -¢ page 114.
& WARNING
Pay atte ntion to traffic when operating
drive select to prevent potential risk of an
accident .
You can personally specify the vehicle setup in the MMI* .
.,. Se lect the ICAR I function button > Set indi·
vidual
control but ton. Once you select the
menu, you will automatically drive in the
in·
dividual
mode.
Systems Comfort
Engine /Transmission
balanced
Steering comfortable T
he equipment in your vehicle will determine
wh ich sett ings you can adjust. The following
table provides an overview of the characteris
tics of each driving mode .
Auto Dynamic
balanced spo
rty
balanced sporty
Page 121 of 296
not affect the continuous signal tone). Ap
proaching another obstacle will cause the dis
tance signa l to sound again at the normal
volume.
R ear view came ra co verage area
The MM I d isplay shows the area covered by
the rear view camera¢
fig . 130 (i) . Objects
that are not in the area covered @are not
shown on the MMI display.
We recommend that you p ractice parking with
the rear view camera in a traffic -free location
or parking lot to become familiar with the sys
tem, the orientation lines, and their function.
When doing th is, there shou ld be good light
and weather conditions.
In t he MMI disp lay, objects or vehicles appear
closer or further away if:
- yo u are driving in reverse gear from a level
surface onto an incline, or a downward
s lope,
- you are driving in reverse gear toward pro
truding objects,
- the vehicle is carrying too much load in the
rear .
The accuracy of the or ientat ion lines and blue
surfaces d imin ishes if:
- the rear view camera does not prov ide a reli
able image, for examp le, in poor visibility
condit ions or if the lens is dirty,
- the image on the screen is not visible due to
sun g lare and reflect ion.
Caring for the rear view came ra lens
The rear view camera is located above the rear
license plate bracket . Fo r the parking assist to
operate, the lens
¢ fig. 131 must be kept
clean:
- Dampen the lens with a household alcoho l
based glass cleaner, and clean the lens with
a dry cloth ¢
CD.
- Remove snow with a hand brush and ice
preferably with a de -icing spray ¢(D .
Park a ssis t 119
A WARNING
- The parking aid cannot replace the driv
er's attent ion. The dr iver alone is respon
sible for park ing and similar driving ma
neuvers .
-Always keep your eyes on the vehicle 's
surroundings, us ing the rea r view m irror
as well.
- Do not allow yourself to be dist racted
from traffic by the rear view camera p ic
tures.
- If the position and the installation angle
of the camera has changed, for examp le,
after a rear end collision, do not conti nue
to use the system for s afety re asons .
H ave it checked by a qualified dea le rship.
CJ) Note
- Low obstacles a lready s ignaled by a
wa rning can disappear from the system's
detect ion range as they are app ro ached
and w ill not continue to be signaled. Ob
jects such as barrier chains, trailer d raw
bars, thin painted vertica l poles or fen
ces may not be detected by the system,
posing risk of damage.
- Never use warm or hot water to remove
snow or ice from the rear view camera
lens -danger of crack format ion on the
lens!
- When cleaning the lens, never use prod
ucts that are abrasive.
Switching on/off
App lies to vehicles: wit h parking system (rear, wit h rear
v iew camera)
The rear view camera switches on automati
cally together with the acoustic pork assist when you put the vehicle in reverse.
Switching on
.,. Put the ve hicle in reverse gear, the acoust ic
parking system wi th rear view camera is ac
tivated a utomatica lly. Activation of the
acoust ic parking system is confirmed by a
brief acknowledgement sound . ..,_
Page 122 of 296
120 Park ass is t
Sw it c hing off
.,. Drive faster than 9 mph (15 km/h), or
.,. take the vehicle out of reverse gear. The
acoustic parking system is immediately de
activated, and the rear view camera picture
is deactivated automatically after a per iod
of about 15 seconds, or
.,. switch off the ignition.
The delay in deactivating the camera provides an uninterrupted view behind the vehicle es
pec ially when maneuvering in tight parking
spaces and prevents the picture from turning
off the every time you sh ift out of reverse .
If the warning message appears in the display but not the rear view camera picture, read and
confirm the warning message. The acoustic
d istance signal is always active .
If you press a function button on the MMI
control console, the rear view camera picture
d isappears. The rear view camera picture reap
pears the next time you park.
Further information on the warn ing message
and the MMI control console can be found in
the MMI instruction booklet .
A WARNING
-Only use the rearview camera to assist
you if it shows a good, clea r picture. For
example, the image may be affected by
the sun sh in ing into the lens, dir t on the
lens or if there is a defect .
- Use the rearview camera only with the
rear lid completely closed. Make sure any
objects you may have mounted on the
rear lid do not block the rearview cam
era .
(D Tips
-The rear v iew camera picture is ava ila b le
as soon as the MM I Display or the MM I is
switched on, or the start-up phase is
completed.
- The sensors must be kept clean and free
of snow and ice for the park assist to op
erate. -
Yo u can change the vo lume and pitch of
the s ignals as we ll as the disp lay
¢ page 122 .
-What appea rs in the disp lay is time-de
layed.
· Reverse Parking
Applies to vehicles: with parking system (rear, with rear
v iew camera}
Parking mode 1 can be used when parking in
a garage or parking space.
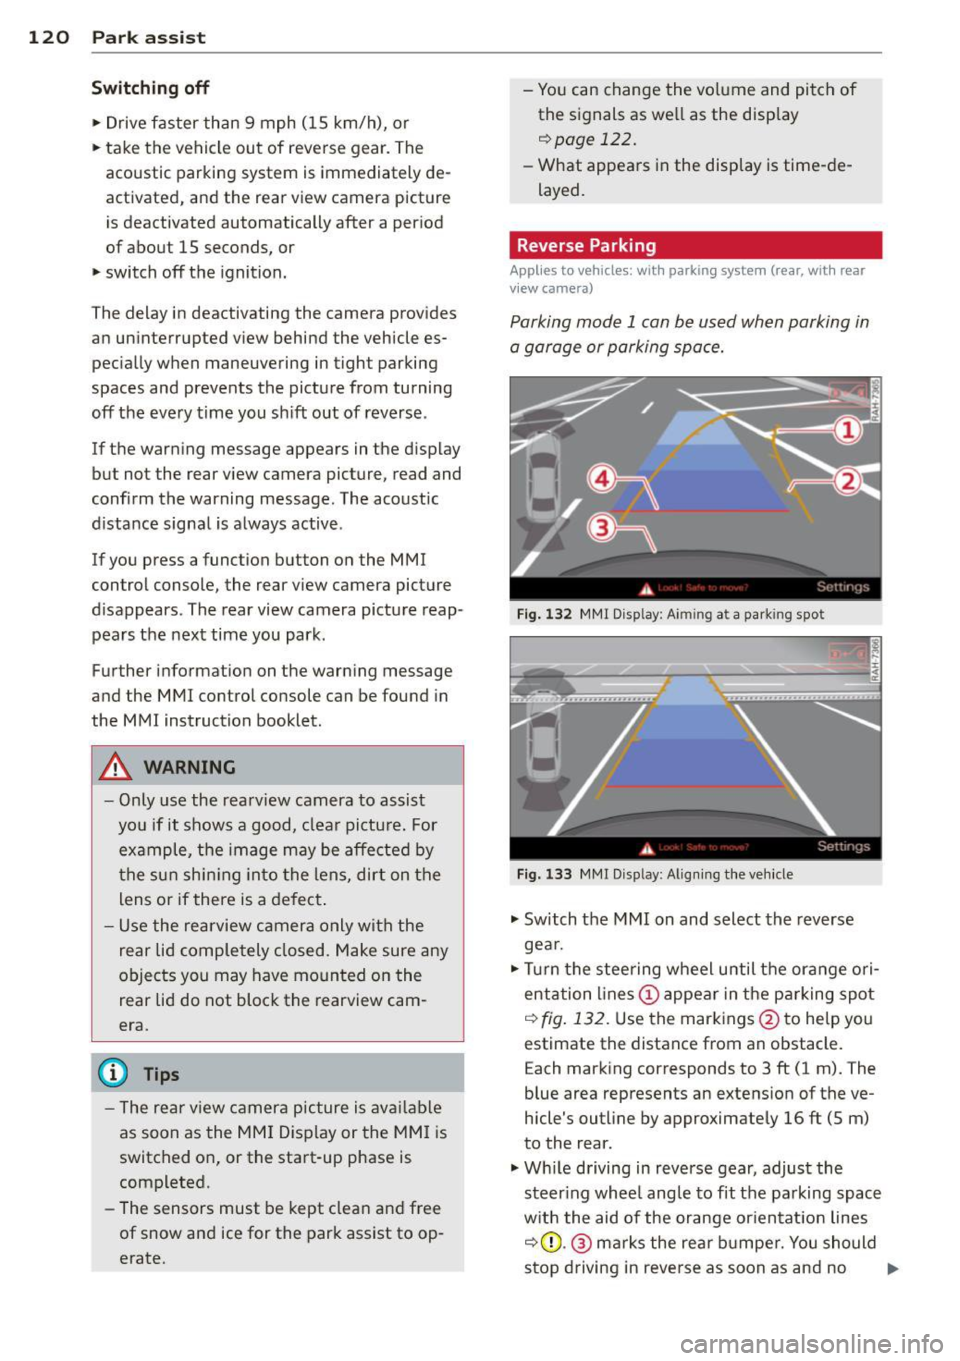
F ig . 1 32 MMI Disp lay : A im ing a t a park ing spo t
Fig. 133 MMr Disp lay : A lig nin g the ve hicle
.,. Switch the MMI on and select the reverse
gea r.
.,. Turn the stee ring wheel u ntil the ora nge ori
entation lines(!) appea r in the pa rking spot
q fig . 13 2. Use the markings @to help you
estimate the distance from an obstacle. E ach marking corresponds to 3 ft (1 m). The
blue area represents an extens ion of the ve
hicle's outline by approximately 16 ft (5 m)
to the rear.
.,. Wh ile driving in reverse gear, adjust the
steer ing whee l angle to fit the parking spac e
w ith the aid of the orange or ien tat ion lines
q (D .@ marks the rear b umpe r. You should
stop driving in reve rse as soon as and no .,.
Page 123 of 296
later than when the red orientation line©
abuts an object¢,&.!
A WARNING
- The rear view camera does not show the
entire area behind the vehicle
¢
page 118, fig. 130. Watch out espe
c ially for small children and animals. The
rear view camera cannot always detect
them, posing risk of an accident!
- Please note that objects not touch ing the
ground can appear to be further away
than they really are (for example, the
bumper of a parked vehicle, a trailer
hitch, or the rear of a truck). In this case,
yo u should not use the help lines to he lp
with parking, which poses danger of an
accident!
{[) Note
-Low obstacles already signaled by a
warning can disappear from the system's
detection range as they are approached
and will not continue to be signaled. Ob
j ects such as barrier chains, trailer draw
bars, thin pa inted vertical poles or fen
ces may not be detected by the system, posing risk of damage.
- In the MMI display, the direction of trav
el of the vehicle rear is represented de
pending on the steering wheel angle.
The vehicle front swings out more than
the vehicle rear. Maintain plenty of dis
tance from an obstacle so that your out
s ide mirror or a corner of your vehicle
does not collide with any obstacles -dan
ger of accident!
Park assist 121
Parallel Parking
Applies to vehicles: with parking system (rear, with rear
v iew camera)
Use parking mode 2 to help you park on the
edge of a street.
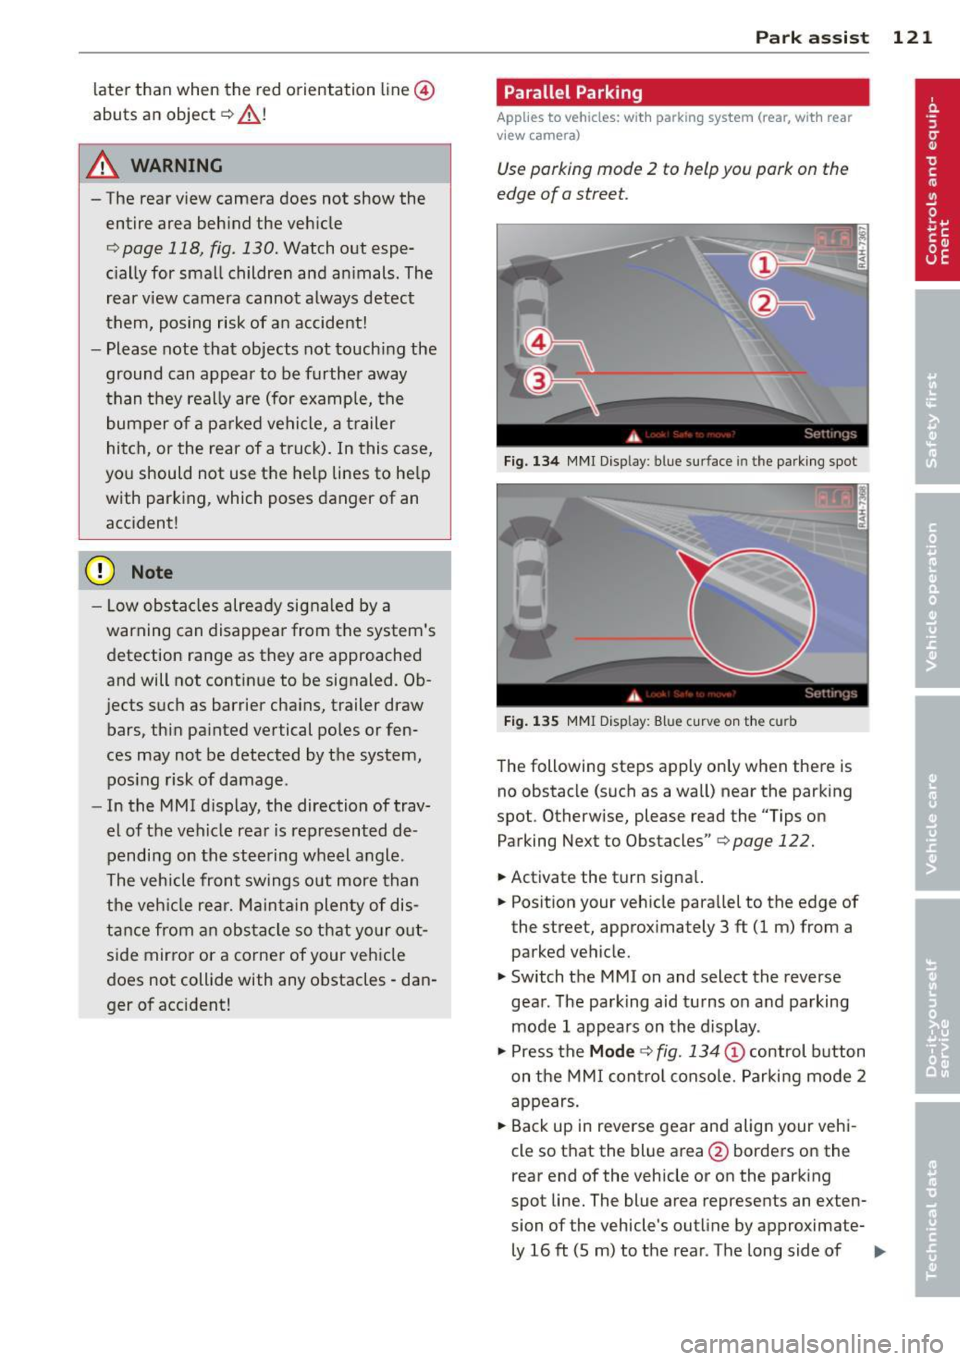
Fig. 134 MMI Display: blue surface in the parking spot
Fig. 135 MMI Display: Blue curve on the curb
The following steps apply only when there is
no obstacle (such as a wall) near the parking
spot. Otherwise, please read the "Tips on Parking Next to Obstacles"¢
page 122.
.,.. Activate the t urn signa l.
.,.. Position your vehicle parallel to the edge of
the street, approximately 3
ft (1 m) from a
parked vehicle.
.,.. Switch the MMI on and select the reverse
gear. The parking aid turns on and parking
mode 1 appears on the display .
.,.. Press the
Mode ¢ fig. 134 (!) control button
on the MMI contro l conso le. Parking mode 2
appears .
.,.. Back up in reverse gear and align your vehi
cle so that the blue area @borders on the
rear end of the vehicle or on the parking
spot line. The blue area represents an exten
sion of the vehicle's outline by approximate-
ly 16
ft (5 m) to the rear. The long side of liJJ,