seat adjust AUDI S4 2018 Owners Manual
[x] Cancel search | Manufacturer: AUDI, Model Year: 2018, Model line: S4, Model: AUDI S4 2018Pages: 403, PDF Size: 66.81 MB
Page 4 of 403
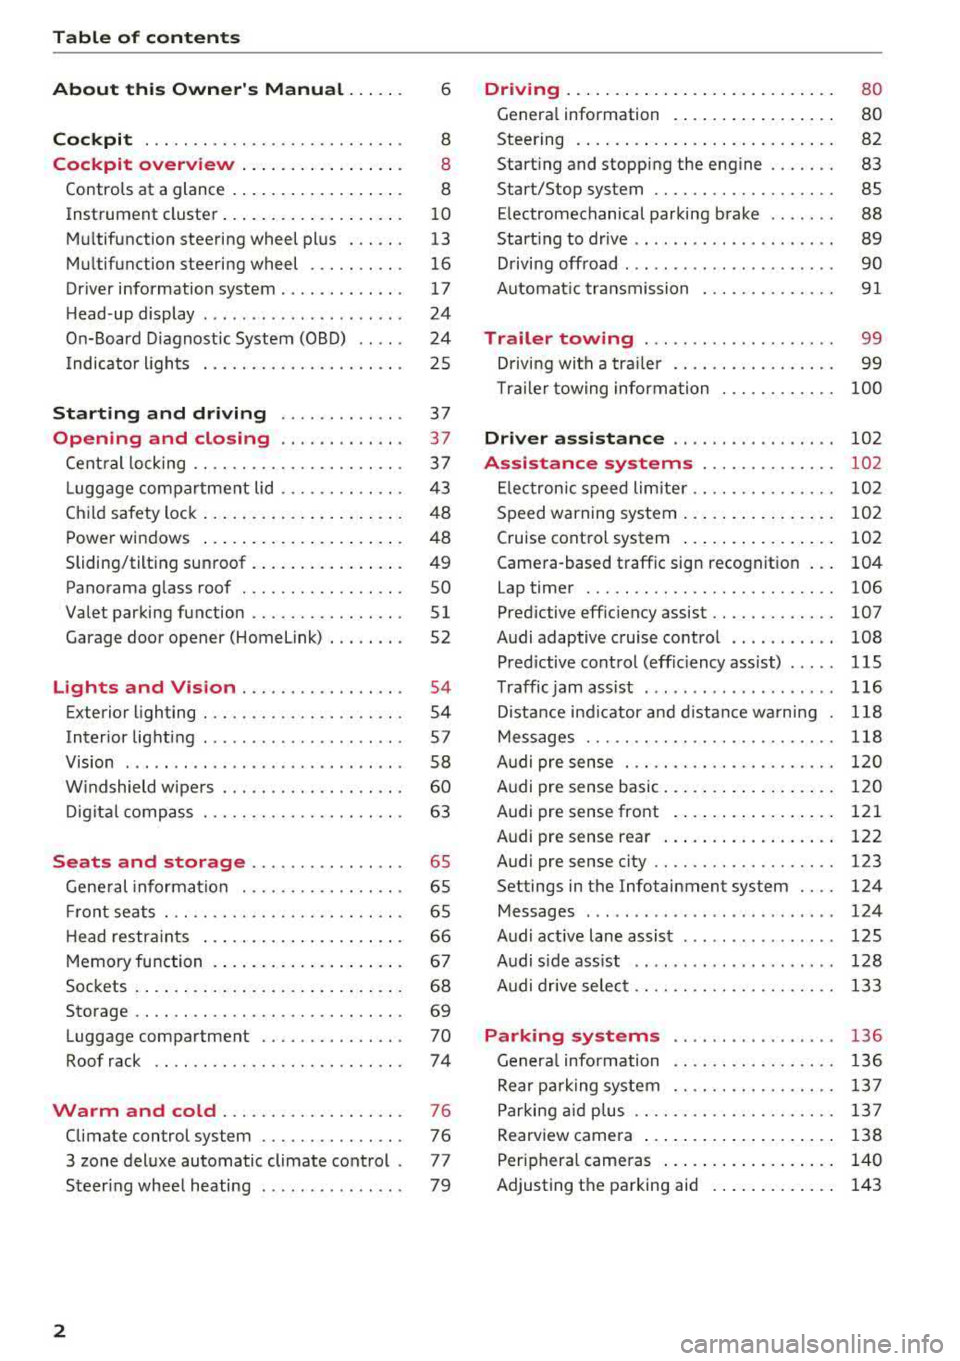
Table of contents
About this Owner's Manual . .. .. .
Cockpit ... .. ............... .... .. .
Cockpit overview ................ .
Controls at a glance ... .......... .. .. .
Instrument cluster .. .......... .. .. .. .
Multifunction steering wheel plus ... .. .
Multifunction steering wheel ......... .
Driver information system ...... .. .. .. .
H ead-up display .... .. .. ..... ... .. .. .
On-Board Diagnostic System (OBD) .. .. .
I ndicator lights .................... . 6
8
8
8
10
13
16
17
24
24
25
Starting and driving . . . . . . . . . . . . . 37
Opening and closing . . . . . . . . . . . . . 3 7
Central locking . . . . . . . . . . . . . . . . . . . . . . 3 7
L uggage compartment lid . . . . . . . . . . . . .
43
Child safety lock . . . . . . . . . . . . . . . . . . . . . 48
Power windows . . . . . . . . . . . . . . . . . . . . . 48
Sliding/tilting sunroof . . . . . . . . . . . . . . . . 49
Panorama glass roof . . . . . . . . . . . . . . . . . SO
Valet parking function . . . . . . . . . . . . . . . .
51
Garage door opener (Homelink) . . . . . . . . 52
L ights and Vision . . . . . . . . . . . . . . . . . 54
Exterior lighting . . . . . . . . . . . . . . . . . . . . . 54
Interior lighting . . . . . . . . . . . . . . . . . . . . . 57
V1s1on . . . . . . . . . . . . . . . . . . . . . . . . . . . . . 58
Windshield wipers . . . . . . . . . . . . . . . . . . .
60
Digital compass . . . . . . . . . . . . . . . . . . . . . 63
Seats and storage . . . . . . . . . . . . . . . . 65
General information . . . . . . . . . . . . . . . . . 65
Front seats . . . . . . . . . . . . . . . . . . . . . . . . . 65
H ead restraints . . . . . . . . . . . . . . . . . . . . . 66
Memory function . . . . . . . . . . . . . . . . . . . .
67
Sockets . . . . . . . . . . . . . . . . . . . . . . . . . . . . 68
Storage . . . . . . . . . . . . . . . . . . . . . . . . . . . . 69
Luggage compartment ........ .... .. .
Roof rack .. .. ... ............ .... .. .
Warm and cold ................ .. .
Climate control system .............. .
3 zone deluxe automatic climate control .
Steer ing wheel heating .. ........ .. .. .
2
70
74
76
76
77
79
Driving ... .. .. .. .. .. ... .......... . .
General information . ... ........... . .
Steering .......... .. .. . .......... . .
Start ing and stopping the eng ine ..... . .
Start/Stop system .. .. ............. . .
E le ctromechanical parking brake ...... .
Start ing to drive .. .. .. ........ ..... . .
D rivi ng offroad . .. ... ...... ....... .. .
Automatic transmission
Trailer towing ..... .............. .
Driving with a trailer .. ............. . .
8 0
80
82
83
85
88
89
90
91
99
99
T raile r towing information . . . . . . . . . . . . 100
Driver assistance . . . . . . . . . . . . . . . . . 102
Assistance systems . . . . . . . . . . . . . . 102
Electronic speed limiter. . . . . . . . . . . . . . . 102
Speed warning system . . . . . . . . . . . . . . . . 102
Cruise control system . . . . . . . . . . . . . . . . 102
Camera-based traffic sign recognition . . . 104
Lap timer . . . . . . . . . . . . . . . . . . . . . . . . . . 106
Pred ictive efficiency assist. . . . . . . . . . . . . 107
Audi adaptive cruise contro l . . . . . . . . . . . 108
Pred ictive control (eff ic ie ncy assist) . . . . . 115
Traffic jam assist . . . . . . . . . . . . . . . . . . . . 116
Distance indicat or and distance warnin g 118
Messages . . . . . . . . . . . . . . . . . . . . . . . . . . 118
Audi pre sense . . . . . . . . . . . . . . . . . . . . . . 120
Audi pre sense basic . . . . . . . . . . . . . . . . . . 120
Audi pre sense front . . . . . . . . . . . . . . . . . 121
Audi pre sense rea r . . . . . . . . . . . . . . . . . . 122
Audi pre sense city . . . . . . . . . . . . . . . . . . . 123
Settings in the Infotainment system . . . . 124
Messages . . . . . . . . . . . . . . . . . . . . . . . . . . 124
Audi active lane assist . . . . . . . . . . . . . . . . 125
Audi s ide assist . . . . . . . . . . . . . . . . . . . . . 128
Audi drive select . . . . . . . . . . . . . . . . . . . . . 133
Parking systems
General information .. ... .......... . .
Rear parking system .. .. ........... . .
Parking aid plus .. .. .. ............. . .
Rearview camera ... .. .. ........... . .
Periphera l cameras ... ... .......... . .
Adjusting th e parking aid . ........... .
136
136
137
137
138
140
143
Page 26 of 403
Cockpit overv iew
Head-up display
Applies to: vehicles with head-up display
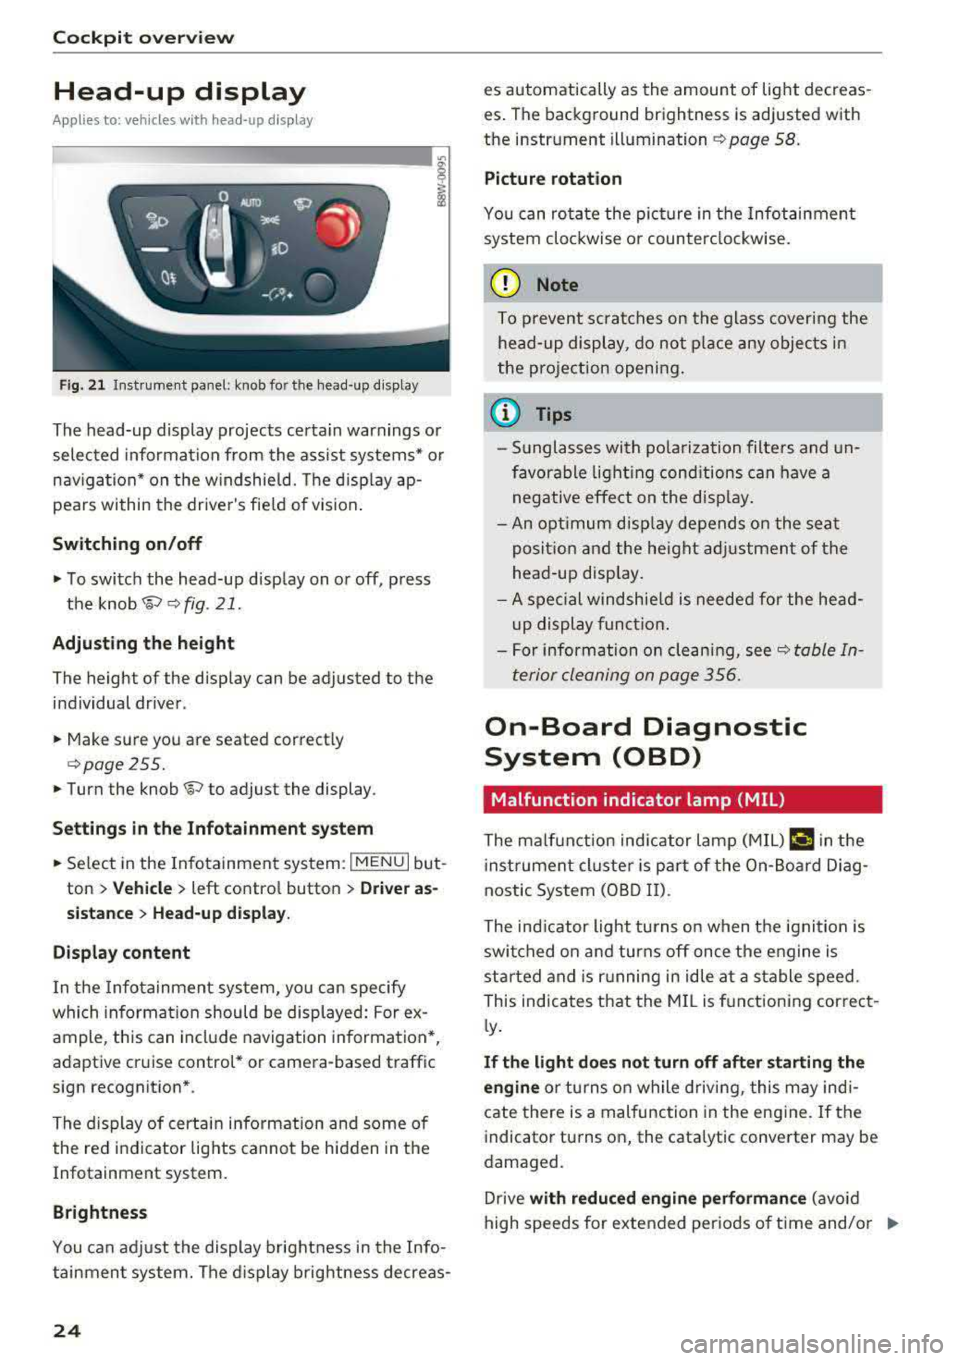
Fig. 21 Instrument panel: knob for the head-up display
The head-up display projects certa in warnings or
selected information from the ass ist systems* or
nav igation* on the w indshield. The d isplay ap
pears within the drive r's fie ld of vision .
Switching on /off
• To switch the head-up display on or off, press
the
knob~ ~ fig. 21.
Adjust ing th e height
The height of the display can be adjusted to the
individual driver.
• Make sure you are seated correctly
qpage255.
• Turn the knob~ to adjust the display .
Setting s in th e Infotainm ent sy ste m
• Se lect in the Infotainment system: I MENU I but
ton
> Vehi cle > left contro l button > Dri ver as
s ist ance
> H ea d-up di spl ay .
D is play content
In the Infotainment system, you can specify
which information should be displayed: For ex
ample, this can include navigation information*,
adaptive cruise control* or camera-based traffic
sign recognition *.
The display of certa in information and some of
the red indicator lights cannot be hidden in the
Infotainment system.
Brightness
You can adjust the display brightness in the Info
tainment system. The d isplay brightness decreas -
24
es automatically as the amount of light decreas
es . The background brightness is adjusted with
the instrument
illumination ~ page 58.
Picture rotation
You can rotate the picture in the Infotainment
system clockwise or counter clockwise.
(D Note
To p revent sc ratches on the glass covering the
head-up display, do no t place any objec ts in
the pro jection opening .
@ Tips
-Sunglasses with po larization filte rs and un
favorable light ing cond itions can have a
negative effect on the disp lay .
- An optimum disp lay depends on the seat
posit ion and the height ad justment of the
head -up disp lay.
- A spec ial windshie ld is needed for the head
up display funct ion .
- For information on clean ing,
see~ table In
terior cleaning on page 356.
On-Board Diagnostic
System (OBD)
Malfunction indicator lamp (MIL)
The ma lf u nction indicator lamp (MIL) ¢;# in the
i nstrumen t cluster is part of the On-Board Diag
nostic System (OBD II).
The indicator light turns on when the ignition is
switched on and turns off once the engine is
star ted and is r unning in idle at a stable speed.
This indicates that the MI L is fu nctioning correct
l y .
If th e light do es n ot turn off aft er start ing the
e ngin e
or turns on while driving, this may indi
cate there is a malfunction in the engine .
If the
i ndicator turns on, the cata lytic converter may be
damaged.
Drive
with reduc ed eng in e perf orman ce (avoid
high speeds for extended periods of time and/o r
IJJ,-
Page 67 of 403
Seats and storage
General information
A WARNING
See¢ page 254, Driving safety for important
information, tips, suggestions and warnings
that you sho uld read and follow for your own
safety and the safety of yo ur passengers.
Front seats
Power seat adjustment
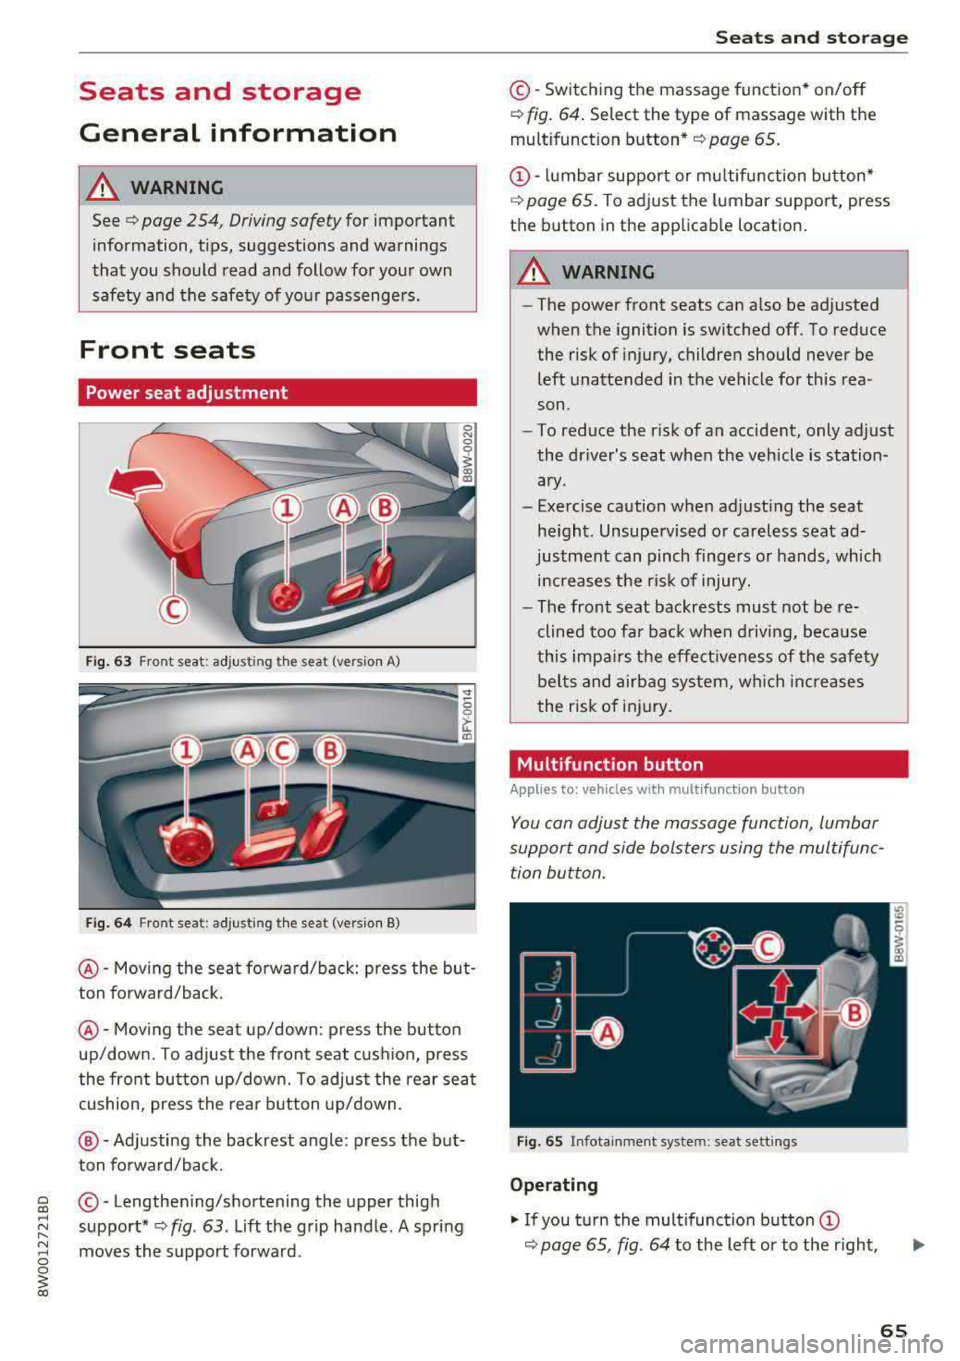
Fig. 63 Front seat: adjusting the seat (ve rsion A)
F ig . 6 4 Front seat: adjusting the seat (ve rs ion B)
@-Moving the seat fo rward/back: press the but
ton forward/back.
@ -Moving the seat up/down: press the button
up/down. To adjust the front seat cus hion, press
the front bu tton up/down. To adjust the rear sea t
cushion, press the rear b utton up/down.
@ -Adjusting the backrest angle: press the but
ton forward/back.
~ © -Lengthen ing/shortening the upper thigh
~ ~ support* ¢ fig. 63. Lift the g rip hand le . A spring
~ moves the support forward. 0 0
~ co
Seats and storag e
©-Switching the massage function* on/off
¢ fig. 64. Select the type of massage with the
multifunction
button*¢ page 65.
@ -lumbar support or mu ltifunction button*
¢
page 65. To adjust the lumbar support, press
the button in the applicab le location.
A WARNING
-
-The power front seats can a lso be adjusted
when the ignition is switched off. To reduce the risk of injury, children should never be
left unattended in the vehicle for this rea
son .
-To reduce the r isk of an accident, only adjust
the dr iver's seat when the vehicle is station
ary.
-Exercise caution when adjust ing the seat
he ight. Unsupervised or careless seat ad
justment can pinch finge rs or hands, which
increases the risk of injury.
-The front seat backrests must not be re
clined too far back when driving, because
this impa irs t he effect iveness of the safety
be lts and airbag system, which increases
the risk of injury.
Multifunction button
Applies to: vehicles wit h mult ifunct ion butto n
You can adjust the massage function, lumbar
support and side bolsters using the multifunc tion button.
F ig. 65 Infotain ment system: seat sett ings
Operating
"' If you turn the multifunction button (D
¢ page 65, fig. 64 to the left or to the r ight,
65
Page 68 of 403

Sea ts and stor age
the possible seat settings @ are shown in the
Infotainment system
r::!;> fig . 65.
• To select a seat setting, turn the multifunction
button
(I) in the corresponding direction until
the desired seat setting is outlined in red.
• The arrows @ represent the possible adjust
ments. Fo r example, to lower the lumbar sup
port, press the multifunction button
(I) down.
The co rresponding ar row © lights up.
The follow ing seat sett ings @ are possible:
Massage function * -select the massage type
Wave, St ret ch , Knead or Off . You can adjust the
intens ity of each massage from 1 to 3. You ca n
sw itch the selected massage on/off using the
button @
r::!;> fig. 65.
Lumbar support -you can adjust the lumbar sup
port up/down and to be stronger/weaker.
Side bolsters* -you can increase/decrease the
side support in the seat using the side bolsters
on the seat backrest.
@ Tips
- The massage function switches off a uto
matically after approx imately 10 minutes.
- The air in the side bo lsters* is released as
soon as the driver's door opens. T his makes
i s possible to enter and exit the vehicle
more comfortably. As soon as you start driv
i ng the veh icle, the side bo lsters fill.
Center armrest
There is a storage comportment under the arm
rest.
F ig . 66 Comfort center armrest between the driver's seat
and front passenger's seat
66
• To adjust the ang le, raise the armrest from the
starting position notch by notch.
• To bring the armrest back into the sta rt ing po
sition, raise it out of the top notch and fold it
back down.
The armrest can slide forward and back .
Head restraints
Front head restraints
Applies to: vehicles with adjustable head restraints
Fig. 67 Fro nt seat: adjust ing the head restraint
Adjust the head restraints so the upper edge is as
even as possible w ith the top of your head . If that
i s not possib le, try to adjust as close to this pos i
tion as possib le .
Adjusting the head restraints
• To move the head restra int upward/forward,
hold it at the sides w ith both hands and sl ide it
upward/forward until yo u feel it click into
place.
• To move the head restra int downward/back
ward, press the s ide button and slide t he head
restraint downward/backward . Release the but
ton and slide the head restraint farther unti l it
clicks into place.
&_ WARNING
Always read and follow the applicable warn i n gs
r::!;> page 257, Proper adjustment of head
restraints.
-
Page 69 of 403
Rear head restraints
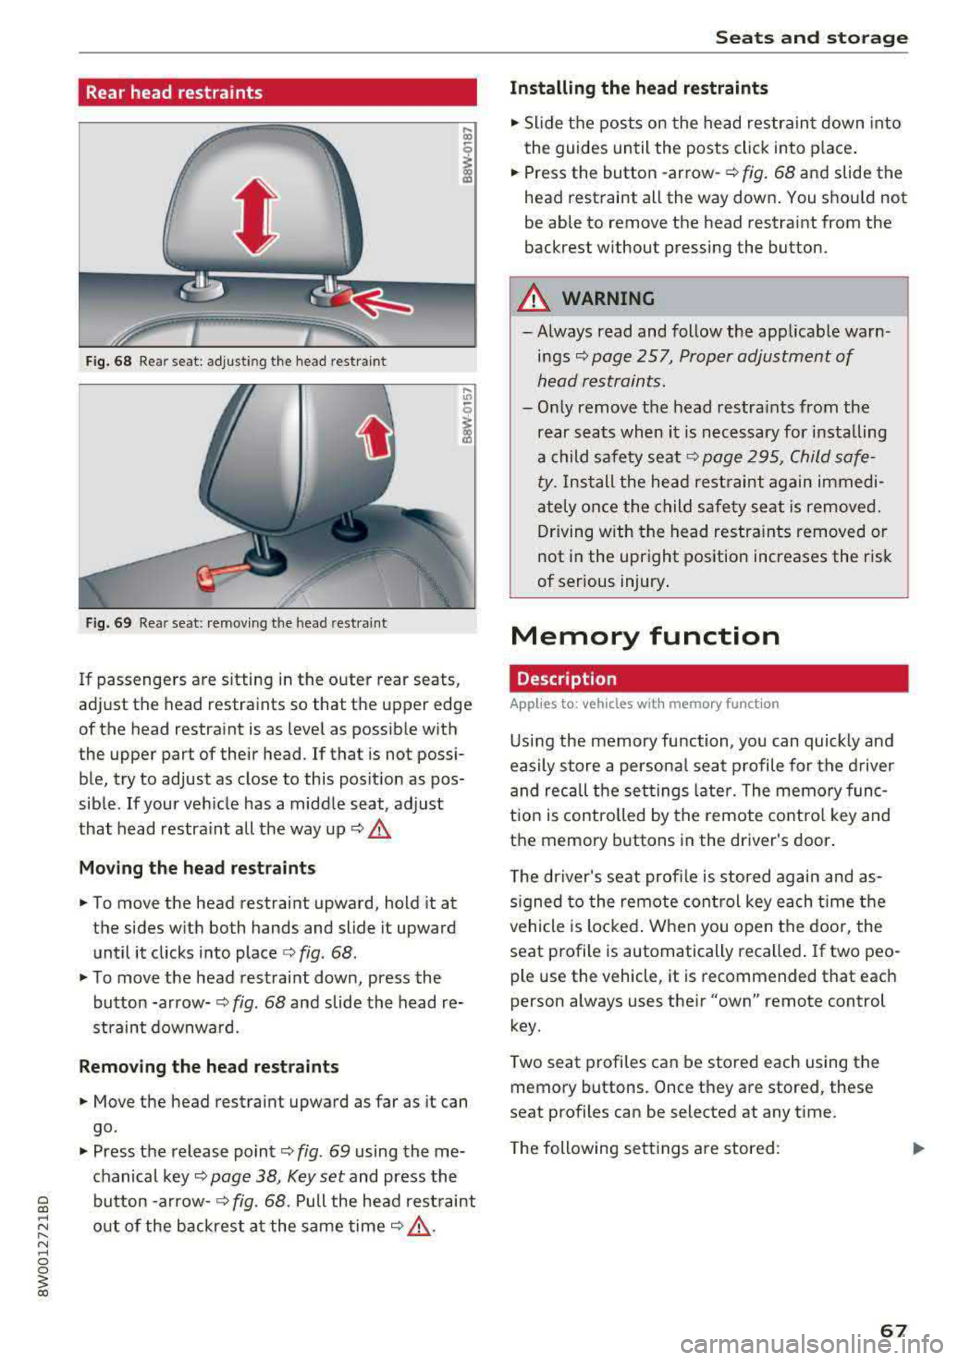
Fig. 68 Re ar seat : adjus ting the head re stra in t
Fig. 69 Re ar seat: remov ing the head rest ra in t
If passenge rs are s itting in the outer rear seats ,
ad just the head restraints so that t he upper edge
of the head restraint is as level as possib le with
the upper part of their head . If that is not possi
ble, try to adjust as close to this posit ion as pos
sible . If your ve hicle has a midd le seat, adjust
that head restraint all the way up
c:> A_
Mo ving the head rest raint s
.. To move the head restraint upward, hold it at
the sides w it h both hands and slide it upward
until it clicks into place
c:> fig . 68 .
.. To move the head restraint down, press the
button -arrow-
c:> fig . 68 and slide the head re
straint downwa rd.
Remo ving the head restraints
.. Move the head restraint upward as far as it can
go .
.. Press the release point c:> fig. 69 using the me
chanical key
c:> page 38, Key set and press the
bu tton -arrow-
c:> fig. 68. Pull the head rest raint
out of the backrest a t the same time
c:> &_ .
Seats and storag e
Installing the head restraints
.. Slide the pos ts on the head restrain t down into
the guides until the posts click into p lace .
.. Press the button -arrow-c:> fig. 68 and slide the
head rest raint all the way down . You shou ld not
be able to remove the head restraint from the
back rest without pressing the button.
_& WARNING ~
-Always read and follow the applicable warn
ings
c:> page 257, Proper adjustment of
h ead restraints .
-Only remove the head restra ints from the
rear seats when it is necessary for installing
a child safety seat
c:> page 295 , Child safe
ty .
Install the head restraint again immedi
ately once the child safety seat is removed. D riving with the head restra ints removed or
not in the upright position increases the risk
of serious injury .
Memory function
Description
Applies to: vehicles with memory function
Using the memory function, you can quickly and
easily store a persona l seat p rofile for the d river
and recall the set tings late r. The memo ry func
t ion is controlled by the remote contro l key and
the memory buttons in the driver 's door .
T he driver's se at profile is stored again and as
s igned to the remote con trol key each t ime the
vehicle is locked . W hen you open the door, the
seat profile is automatically recalled . If two peo
ple use the v ehicle , it is recommended that each
person always uses the ir
"own" remote control
key.
T wo seat p rofiles can be stored each using the
memory buttons . Once they are stored, these
seat p rofiles can be selected at any t ime .
T he following se tt ings a re stored :
67
Page 70 of 403
Seats and storage
Remote con- Memory but-
trol key ton
Driver Driver
Seat X X
Both exterior
X X mirrors*
Remote control key
Applies to: vehicles with memory function
The driver's seat profile can be assigned to the
remote control key when the vehicle is locked .
.,. Select in the Infotainment system : IMENUI but
ton >
Vehicle > left control button > Vehicle
settings > Seats > Driver's seat > Store set
tings on remote control key .
(D Tips
If you do not wish to have the seat profile for
another driver assigned to the remote control
key, switch the memory function off in the In
fotainment system.
Memory buttons
Applies to: vehicles with memory function
Fig. 70 Drive r's doo r: me mory function butto ns
Storing a seat profile
.,. Press the ISETI button. The LED in the button
turns on .
.,. Press memory button II] or [Ii.
A signal tone will sound when it is successfully
stored.
Accessing a seat profile
... If the driver's door is open and the ignition is
switched off, press the memory button.
68
.,. If the driver's door is closed or the ignition is
switched on, press and hold the memory but
ton until the seat adjustment is complete .
A WARNING
-For safety reasons, the seat sett ing can only
be recalled when the vehicle is stationary to reduce the r isk of an accident.
- In an emergency, seat adjustment operat ion
can be stopped by p ressing the
ISETI button
or the buttons @or@
Q page 65, fig . 64 .
Sockets
Fig. 71 Cente r conso le: 12 vo lt socke t
Fig. 72 Rear center co nso le: 12 vo lt socket *
The 12-volt sockets can be used for electrical ac
cessor ies. The power usage must not exceed
120 watts.
There is an additional 12 volt socket* located on
the side trim panel in the luggage compartment.
A WARNING
The sockets and the electrical accessories con
nected to them only function when the igni
tion is switched on. Incorrect usage can lead
to serious i njuries or burns. To reduce the r isk
,..
Page 80 of 403

Warm and cold
system operates most efficiently in eco cooling
mode.
A/C MAX cooling mode*
You can switch the maximum cool ing mode on or
off using the rocker switch@. Th e air is not
coo led and humidity is not removed when cooling
mode is switched off. This can cause fog on the
windows. Cooling mode switches off automati
cally when the outside temperature is below
zero. When the cooling mode is switched on, the
vehicle interior is cooled as quickly as possible
and dehumidified .
c:E) Recirculation mode
In recirculation mode, the air inside the vehicle is
circu lated and filtered. This prevents the unfil
tered air outside the vehicle from entering the
vehicle interior. Switching recirculation mode on
when dr iv ing through a tunnel or when s itting in
traffic is recommended
Q &, .
Using the button, recirculation mode is~ using
the button. You can also switch the recirculation
mode off by pressing the knob (D or the ~ but
ton.
AUTO
Automatic mode
Automatic mode maintains a constant tempera
ture inside the vehicle. Air temperature, airflow
and air distribution are controlled automatically .
You can switch automatic mode on or off by
pressing the
knob@.
Temperature
You can adjust the temperature between 60°F
( + 16°()
and 84°F ( +28°() by turn ing the knob
(D . Outs ide of this range, LO or HI will appear in
the climate control system display . In both set
tings, the climate control runs constantly at the
maximum cooling or heating level. The tempera
ture is not regulated.
The temperature can be adjusted in the rear us
ing the rear contro ls
Q fig. 91.
86'~ Blower
You can adjust the vo lume of air generated by the
blower to your preference using the rocker switch
@ . The blower should always run at a low setting
78
to prevent the windows from fogging and to en
sure a continuous exchange of air inside the vehi
cle. To have the blower regulated automatically,
press one of the knobs
(D .
Air distribution
You can use the rocker sw itches @to adjust the
vents where the air will flow out of. Press the
rocker switches @repeatedly unti l the desired
air distribution setting is displayed in the climate
control system controls. To have the air distribu
tion regulated automatically, press one of the
knobs
(D .
""lll"' OPEN/CLOSE the wide vent
You can open and close the wide vent in the cock
pit using the rocker switch ®·
JI~ Seat heating and ventilation*
If you press the button J ,J, the seat heating/
ventilat ion is switched on at the highest leve l (3) .
The LEDs indicate the temperature level. To re
duce the temperature, press the button again. To
switch the seat heating/ventilation off, press the
button repeatedly until the LED turns
off.
3% Defrosting
The windshield and side windows are defrosted
or cleared of condensation as quick ly as possible .
The maximum amount of air flows mainly from
the vents below the windsh ield. Recirculation
mode switches off. The temperature should be
set at
+72°F (+22°() or higher . The temperature
i s controlled automat ically .
Defrost is switched on and off
3% using the but
ton. You can switch the function off by pressing a knob
(D .
Applies to vehicles with windshield defogger: the
windshield defogger switches on automatically
when outside temperatures are low. If you would like to sw itch the windshield defroster on man
ually, press the
3%. The LED in the button blinks.
ClWREAR Rear window defogger
Press the button [email protected] switch the rear window de
fogger on. It on ly operates when the engine is
running. It switches off automatically after
10 to .,,.
Page 81 of 403

a co .... N ,....
N .... 0 0
3 co
20 minutes, depending on the outside
temperature.
To keep the rear window defogger on contin uous
l y, press and hold the
QWREAR button longer
than
3 seconds. This is stored unti l the ignition is
switched off .
SYNC Synchronization
Use the rocker switc h® to sele ct the funct ion.
When synch ronization is switched on, the set
tings for the driver's side are applied to the front
passenger's side and the rear (except for seat
heating/venti lation*) . When the settings on the
front passenger's side or in the rear are changed,
the synchron iz at ion is automatically sw itched off
and
3 -z one appears in the display .
SET REAR function
Use t he rocker switch ® to select the function .
When the function is switched on, you can adjust
all settings for the rear us ing the climate control
system controls in the cockpit. The rear climate
control system controls cannot be operated at
the same time . This function switches off auto
mat ically after a certain period of time or after
leaving the menu.
Vent s
You can open or close the center and rear vents in
the cockpit and the vents in the rear center con
sole us ing the r idged thumbwheels . The levers
adjust the d irection of the airflow from the vents.
The wide vent is opened and closed using the
r ocker switch
® ·
Residu al heat
You can activate the residual heat funct ion when
the ignition is switched off by pressing the knob
(D . The res idual heat from the coolant is used to
h eat the vehicle inte rior. The residual heat func
tion swi tches off automatically afte r abou t 15
minu tes .
A WARNING
- You should not use the recirculation mode for an exten ded period of time, because no
fresh a ir is drawn in and the w indows can
Warm and c old
fog when cooling mode is switched off. This
increases the r isk of an accident.
- Individuals with reduced sensitivity to pain
or temperature could develop burns when
using the seat heat ing* function. To reduce
the risk of injury, these individua ls should
not use seat heating*.
(D Note
To avoid damaging the seat heat ing* ele
ments, do not knee l on the seats or place
heavy pressure on one area of the seat.
Setup
The climate control system basic settings ore ac
cessed in the Infotainment system .
.,. Select in the Infotainment system : I MENU! but
ton
> Vehicle > l eft control button > Ai r co ndi
tioning
Auto recircu lation
When switched on, a utomat ic rec irculat ion con
trols the recircu lation mode automatically . You
must press the
®MAX button if fog forms on
the windows.
Automatic auxiliary heater*
T he aux iliary hea ter he lps to wa rm the vehicle in
terior more q uickly.
Steering wheel heating
Applies to: vehicles with steering wheel heating
The steering wheel rim con be heated.
.,. Press the bu tton on the m ultif unct ion steeri ng
wheel to switch the steering whee l heating on
and
off~ r=:> poge 15, fig . 11 . The message
Steering wheel heating : on /Steering wheel
heating: off
appears in the instrument cluster
disp lay.
The temperature is maintained at a constant lev el when steering wheel heating is switched on .
T he s teer ing whee l heating se tt ings a re stored
automat ica lly and assigned to the remo te control
key that is in use.
79
Page 84 of 403
Driving
unheeded. Extended idling also produces
heat, which could result in overheating or
other damage to the vehicle or other proper
ty.
(D Note
- Have your vehicle maintained properly and
in accordance with the service recommenda
tions in your Warranty
& Maintenance book
let . Lack of proper maintenance as well as
improper use of the vehicle will impair the
function of the emission control system and
could lead to damage.
- Do not alter or remove any component of the Emission Control System unless approved by the manufacturer .
- Do not alter or remove any device, such as
heat shields, switches, ignition wires,
valves, which are designed to protect your
vehicle's Emission Control System and other
important vehicle components.
(D Tips
The consumption estimates as published by
ENVIRONMENTAL PROTECTION AGENCY (EPA) and Transport Canada may not corre
spond to your actual consumption on the
road, which will vary depending upon vehicle
load and speed, road and weather conditions,
trip length, etc.
Steering
Adjusting the steering wheel position
The steering wheel position is adjustable up and
down and forward and back.
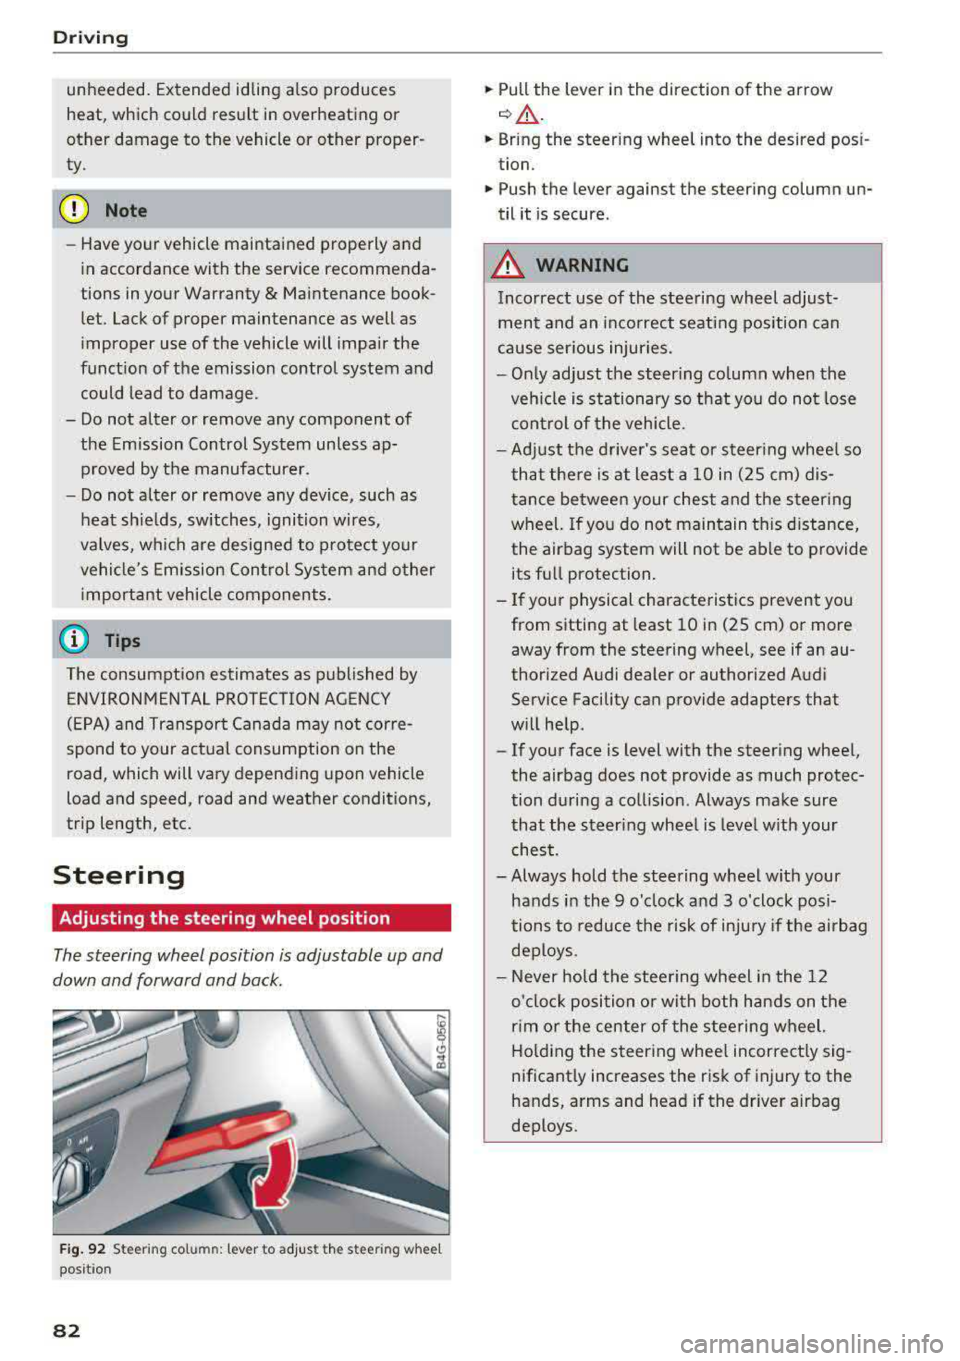
Fig. 92 S tee rin g col umn : le ver to adjus t the stee ring w heel
posit ion
82
.,. Pull the lever in the direction of the arrow
c::, A -
... Bring the steering wheel into the desired posi
tion .
.,. Push the lever against the steering column un
til it is secure .
_&. WARNING
Incorrect use of the steering wheel adjust
ment and an incorrect seating position can
cause serious injuries.
- Only adjust the steering column when the
vehicle is stationary so that you do not lose
control of the vehicle.
-
-Adjust the driver's seat or steering wheel so
that there is at least a 10 in (2S cm) dis
tance between your chest and the steering
wheel. If you do not maintain this distance,
the airbag system will not be able to provide
its full protection.
-If your physical characteristics prevent you
from sitting at least 10 in (2S cm) or more
away from the steering
wheel, see if an au
thorized Audi dealer or authorized Audi
Service Facility can provide adapters that
will help .
- If your face is level with the steering wheel,
the airbag does not provide as much protec
tion during a collision . Always make sure
that the steering wheel is level with your
chest.
- Always hold the steering wheel with your
hands in the 9 o'clock and 3 o'clock posi
tions to reduce the risk of injury if the airbag
deploys.
- Never hold the steering wheel in the 12
o'clock position or with both hands on the
rim or the center of the steering wheel.
Holding the steering wheel incorrectly sig
nificantly increases the risk of injury to the
hands, arms and head if the driver airbag
deploys .
Page 123 of 403

-Activating the emergency flashers l).
The message Audi pre sense . ¢ page 121,
fig. 122 will warn you abo ut the danger.
Aud i drive select*: the trigger t imes are adjusted
depending on the mode selected.
Audi pre sense front
Description
Applies to: veh icles with Audi adaptive cruise control
Within the limits of the system, pre sense front
can warn you of impending collisions and initiate
the corresponding braking maneuvers or the sup porting measures when avoiding a collision .
If detected in time, the system can rank the dan
gerous situation as critical if a vehicle driving
ahead brakes suddenly, if your own vehicle is ap
proaching a significantly slower vehicle at high
speed or when there is an oncoming vehicle dur
in g a turning maneuver .
If detection is not possible, then pre sense front
does not react .
Warnings
Applies to: ve hicles with Audi adaptive cruise control
Fig. 122 In strument cluste r: approac h warning
General information
The system recognizes various dangerous situa
tions . The
early warning occurs if:
-a vehicle driving ahead brakes suddenly,
-your own vehicle approaches a significantly
a s lower vehicle or stationary vehicle in the direc-co
;::; tion of travel. ,....
N .... 0 0
3 1) This is not availa ble in some co untrie s. co
Assistance systems
When this warning occurs, it may only be possi
ble to avoid a collision by swerving or braking
strongly. The message
Audi pre sense.
¢ fig. 122 and a warning tone will warn you
about the danger .
If you do not react enough or not at all to a dan
gerous situation that was detected by the sys
tem, pre sense front provides assistance by ap plying the brakes .
If a collision is imminent, the system will first
provide an
acute warning by braking sharply. You
will also warned by an indicator in the instrument
cluster
display¢ fig. 122. If you do not react to
the acute warning, pre sense front can brake with i ncreasing fo rce within the limits of the
system
1>. This reduces the vehicle speed in the
event of a collision. At low vehicle speeds, pre
sense front can in itiate a complete deceleration
shortly before a collision with a vehicle driving
ahead
l). If pre sense front determines that you
are not braking strongly enough when a collision
is imminent, it can increase the braking force.
T he following functions trigger in conjunction
with pre sense basic/rear at corresponding vehi
cle speeds:
-Reversible tensioning of the front safety belts.
-Closing the windows and sunroof* .
-Inflating the side bolsters* on the seat back-
rest .
Audi drive select*: depending on the mode se lected, the reversible belt tensioner, the closing
of the w indows and sunroof*, and the inflating of
the side bolsters* on the seat backrest may not be active.
Evasive steering support
Evasive steering support helps you to steer the
vehicle around an obstacle in a critical situation .
If you avo id an obstacle after the acute warning,
then the evasive steer ing support ass ists you by
applying slight stee ring adjustment to correct
.,.
121