key AUDI S4 CABRIOLET 2009 Service Manual
[x] Cancel search | Manufacturer: AUDI, Model Year: 2009, Model line: S4 CABRIOLET, Model: AUDI S4 CABRIOLET 2009Pages: 340, PDF Size: 77.32 MB
Page 166 of 340
-Safety belts ___ .:,__ _____________________________________ _
Automatic safety belt retractors
Every safety belt is equipped with an automatic belt retractor on the
shoulder bel t. This featu re locks the bel t when the belt is pulled out
fast, during hard braking and in an accident. The belt may also lock
when you drive up or down a steep hill or through a sharp curve. During normal driving the bel t lets you move freely.
Safety belt pretensioners
The safety belts are equipped with a belt pretension er that helps to
tighten the safety belt and remove slack when the pretensioner is
activated. The function of the pretensioner is monitored by a
warning light:::::, page
20, "Airbag system @;".
Switchable locking feature
Every safe ty belt except the one on the driver seat is equipped with
a switchable locking feature that must be used when the safety belt
is used to attach a child seat . Be sure to read the important informa
tion about this feature:::::, page
200.
& WARNING
Improperly positioned safety belts can cause serious injury in an
accident :::::,
page 164, "Safety belt position" .
• Safety belts offer optimum protection only when the seat back
is upright and belts are properly positioned on the body.
• Never attach the safety belt to the buckle for another seat.
Attaching the belt to the wrong buckle will reduce safety belt
effectiveness and can cause serious personal injury.
• A passenger who is not properly restrained can be seriously
injured by the safety belt itself when it moves from the stronger
parts of the body into critical areas like the abdomen.
• Always lock the convertible locking retractor when you are
securing a child seat in the vehicle :::::,
page 202. •
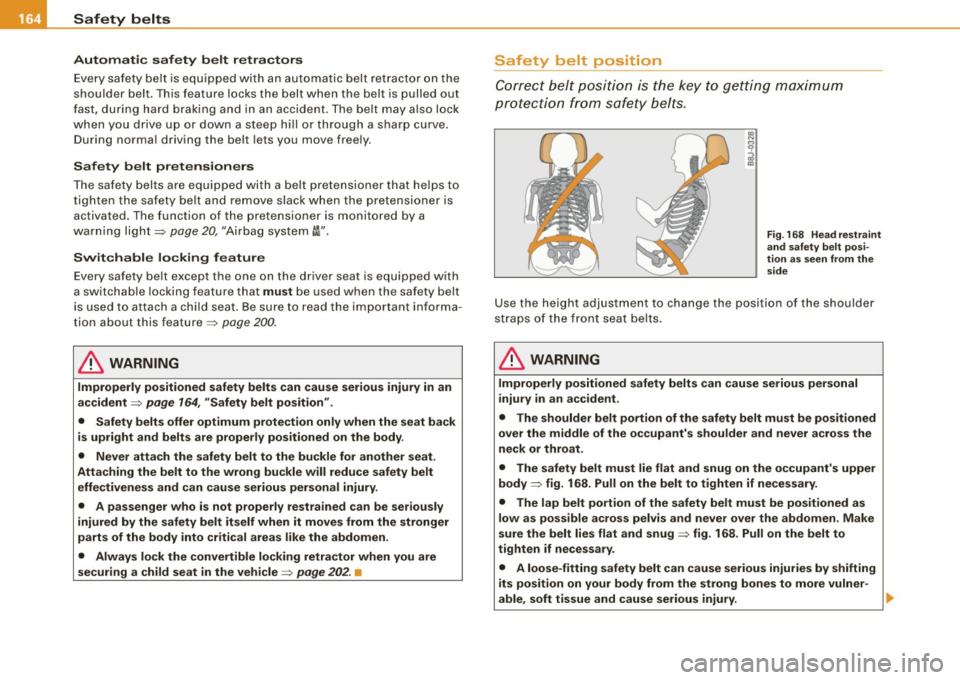
Safety belt position
Correct belt position is the key to getting maximum
protection from safety belts.
Fig . 168 Head restraint
and safety belt posi
tion as seen from the
side
Use the height adjustmen t to change the position of the shoulder
straps of the front seat belts.
in. WARNING
Improperly positioned safety belts can cause serious personal
injury in an accident .
• The shoulder belt portion of the safety belt must be positioned
over the middle of the occupant's shoulder and never across the
neck or throat.
• The safety belt must lie flat and snug on the occupant's upper
body
:::::> fig. 168. Pull on the belt to tighten if necessary.
• The lap belt portion of the safety belt must be positioned as
low as possible across pelvis and never over the abdomen. Make
sure the belt lies flat and snug :::::, fig. 168. Pull on the belt to
tighten if necessary.
• A loose-fitting safety belt can cause serious injuries by shifting
its position on your body from the strong bones to more vulner-
able, soft tissue and cause serious injury. ..,.
Page 245 of 340
_____________________________________________ C_ l_ e _a_ n_ in_ g_a _ n_d_ p_ r_ o_ t _e_ c_t _io _ n __ _
•
& WARNING (continued)
• Before reaching into the front plenum panel, always remove the
ignition key. Otherwise, the windshield wiper system could unin
tentionally be switched on, possibly causing personal injury from
the moving wiper linkage.
• Never reach into the area around or touch the radiator fan. The
auxiliary fan is temperature controlled and can switch on suddenly
- even when the ignition is off .
• Do not wash, wax or dry the engine with the engine running .
Moving or hot parts could injure you.
• Do not clean the underside of the chassis, fenders, wheel
covers , or other hard to reach parts without protecting your hands
and arms. You may cut yourself on sharp-edged metal parts .
• Always read and heed all WARNINGS and other information
=> page 230. •
Vehic le care
Page 252 of 340
-~_C_ h_e _c _ k_ i_ n ...:::g:;..._ a_n_ d_ f_ i_ll _in ....;g:::;.._ ___________________________________________ _
Closing the engine hood
-Pull t he hood down until the pressure from the strut is
reduced.
- Let t he hood
drop down and latch in place. Do not try to
push it shut;
it may fai l to engage ~& .
& WARNING
A hood that is not completely latched could fly up and block your
view while driving.
• When you close the engine hood, check it to make sure the
safety catch has properly engaged. The hood should be flush with
the surrounding vehicle body parts.
• If you notice while driving that the hood is not secured prop
erly, stop at once and close it. •
Working in the engine compartment
Be especially careful whenever you work in the engine
compartment.
Whenever you must perform any work in the engine compartment,
for example checking and filling different fluids, there is a risk of injury, burns and accidents. To prevent personal injury always
observe the following WARNINGS. The engine compartment of any
vehicle is a hazardous area
~ 6 .
& WARNING
To help avoid injury, before you check anything under the hood :
• Turn off the engine.
• Remove the ignition key.
• Apply the parking brake.
& WARNING (continued)
• Move selector lever of automatic transmission to "P" (Park);
put manual transmission in Neutral.
• Always let the engine cool down. Hot components will burn
skin on contact.
• To reduce the risk of being burned, never open the hood if you
see or hear steam or coolant escaping from the engine compart
ment. Wait until no steam or coolant can be seen or heard before
carefully opening the hood .
• Keep children away from the engine compartment.
• Never spill fluids on hot engine components. They can cause a
fire.
• Never touch the radiator fan. The auxiliary electric fan is
temperature controlled and can switch on suddenly.
• Never open the coolant reservoir cap when the engine is still
warm. The coolant system is pressurized and hot coolant could
spray out.
• Protect your face, hands and arm from steam or hot engine
coolant by placing a thick rag over the cap when you open the
coolant reservoir.
• If work on the fuel system or the electrical system is necessary :
- Always disconnect the battery .
- Never smoke or work near heaters or open flames. Fluids in
the engine compartment could start a fire.
- Keep an approved fire extinguisher immediately available.
• To avoid electrical shock and personal injury while the engine
is running or being started, never touch :
- Ignition cables
- Other components of the high voltage electronic ignition
system.
• If you must perform a check or repair with the engine running:
~
Page 302 of 340
111!1...__F_ u_ s _ e_s _ a_n_ d_ b_ u_lb _ s _______________________________________________ _
Fuses and bulbs
Fuses
Replacing a fuse
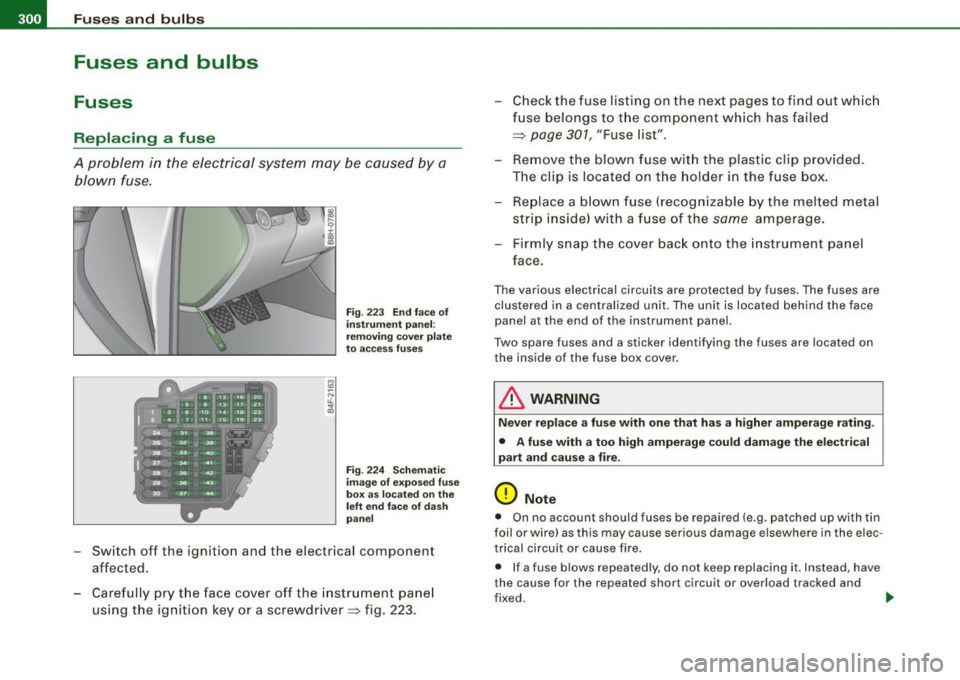
A problem in the electrical system may be caused by a
blown fuse.
Fig. 223 End face of
instrument panel :
removing cover plate
to access fuses
Fig. 224 Schematic
image of exposed fuse
box as located on the
left end face of dash
panel
- Switch off the ignition and the electrical component
affected.
Carefully pry the face cover off the instrument panel
using the ignition key or a screwdriver~ fig . 223 . -
Check the fuse listing on the next pages to find out which
fuse belongs to the component which has failed
~ page 301 , "Fuse list".
- Remove the blown fuse with the plast ic clip provided.
The clip is located on the holder in the fuse box.
- Replace a blown fuse (recognizable by the melted metal
strip inside) w ith a fuse of the
some amperage.
- Firmly snap the cover back onto the instrument panel
face.
The various electrical circuits are protected by fuses . The fuses a re
clustered in a centralized unit. The unit is located behind the face
panel at the end of the instrument panel.
Two spare fuses and a sticker identifying the fus es are located on
the inside of the fuse box cover.
& WARNING
Never replace a fuse with one that has a higher amperage rating.
• A fuse with a too high amperage could damage the electrical
part and cause a fire.
(D Note
• On no account should fuses be repaired (e.g . patched up with tin
foil or wire) as this may caus e se rious damage elsewhere in the elec
trical circuit or cause fire.
• If a fuse blows repeatedly, do not keep replacing it. Instead, have
the cause for the repeated short circuit or overload tracked and
fixed. _,,
Page 314 of 340
-Gen eral inf orm ation PW'f,___ ______________ _
General information
Explanation of technical data
Some of the technical data listed in this manual requires
further explanation .
The technical data for your vehicle is listed in the charts starting on
~ page 314 . This section provides general information, notes and
restrictions which apply to this data. •
Vehicle identification
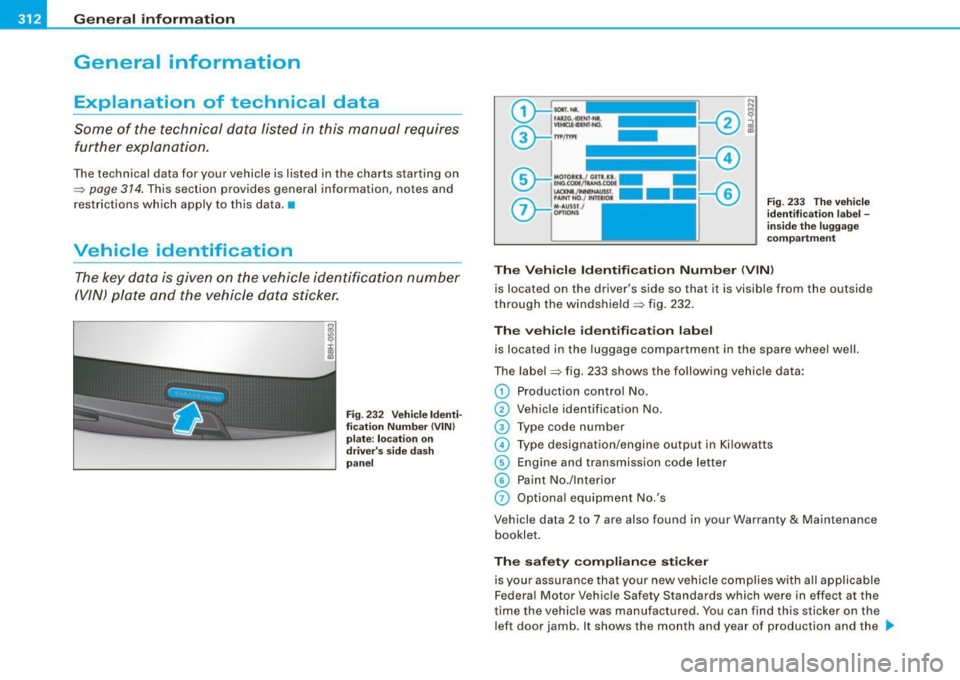
The key data is given on the vehicle identification number
(VIN) plate and the vehicle data sticker.
F ig . 232 Ve hicle Iden ti
fi cati on N umber (VI N)
p late: loca tio n
on
driv er's side das h
pa nel
Fi g. 233 The vehi cle
i d e ntifi cat ion la be l -
insid e th e lu gga ge
co mp art me nt
T he Vehicle Identificati on Number (VIN )
is located on the driver's side so that it is visible from the outside
through the windshield ~ fig . 232 .
The veh icle ide ntification lab el
is located in the luggage compartment in the spare whee l well.
The label
~ fig . 233 shows the following vehicle data :
0 Production control No.
0 Vehicle identification No.
G) Type code number
© Type designation/engine output in Ki lowatts
© Engine and transmission code letter
© Paint No./lnterior
0 Optiona l equipment No.'s
Vehicle data 2 to 7 are also found in your Warranty
& Maintenance
booklet.
The safet y co mpliance sti cke r
is your assurance that your new vehicle complies with a ll app licable
Federa l Motor Vehic le Safety Standards which were in effect at the
time the veh ic le was manu factured. You can find this sticker on the
left door jamb. It shows the month and year of production and the .,,_
Page 320 of 340
___ C_ o_n_ s_ u_m _ e_ r_ ln_ f_o _r_m _ a_ t_ i_o _n ______________________________________________ _
& WARN ING (continued )
• The engine compartment of any motor vehicle is a potentially
hazardous area . Never reach into the area around or touch the
radiator fan . It is temperature controlled and can sw itch on
suddenly -even when the engine is off and the ignition key has
been removed . The radiator fan switches on automatically when
the coolant reaches a certain temperature and will continue to run until the coolant temperature drops .
• Always remove the ignition key before anyone gets under the
vehi cle .
• Always support your vehicle with safety stands if it is neces
sary to work underneath the vehicle . The jack suppl ied with the
vehicle is not adequate for this purpose and could collapse causing serious personal injury .
• If you must work underneath the vehicle with the wheels on
the ground, always make sure the veh icle is on level ground , that
the wheels are always securely blocked and that the engine
cannot be sta rted .
• Always make sure the transmission selector lever (automatic
transmission) is in "P " (Park position ) or Neutral (manual transm is
sion) and the park brake is firmly applied.
W For the sake of the environment
• Cha ng ing t he e ngine sett ings will adverse ly aff ect em iss ion
l eve ls. This is detrimenta l to the environment and increases fuel
co nsu mp tio n .
• Always observe environmental regu lations when disposing of
ol d eng ine oil, u sed br ake fluid , d irty e ngin e coo la nt , spe nt batter ies
or worn out tires.
• Undeployed airba g modu les and prete nsioners might be classi
fied as Perchlorate Material -specia l handling may apply, see
www .dtsc.ca .gov/ hazar douswaste/perc hlorat e. When the vehic le o r
parts of the restraint system including airbag modules safety be lts
w it h pr eten sion ers ar e sc ra p pe d, a ll ap pli cab le la w s and reg ula- tions must be observed. Your authorized Audi dealer is familiar with
t
hese requi re m ents and we re co m mend th at you h ave your dealer
perform this service for you .•
Additional accessories,
modifications and parts replacement
Additional accessories and parts
replacement
Always consult an author ized Audi dealer before
pu rchasin g acc ess ori es.
Your vehicle incorporates the latest safety design features ensuring
a high standa rd o f act ive and passiv e safety .
T his saf ety coul d be compromised by non -approved changes to the
vehic le . F or t his reason, if parts have to be replace d, p lease obse rve
t h e f ollow ing po ints when i nsta lling addi tio na l acc essor ies:
App roved Aud i accessories and genuine Audi pa rts a re avai lab le
fr om autho rize d Aud i dea lers.
T hese dealers also have the necessary fac ilities, tools and trained
spec ia lists t o ins tal l the part s and accessor ie s pr oper ly .
& WARNING
Using the wrong spare parts or using non -approved accessories
can cause serious personal injury.
• Use only accessorie s expressly approved by Audi and genuine
Audi spare parts.
• These parts and accessories have been specially designed to
be used on your vehicle .
• Never install accessories such as telephone cradles or
beverage holders on airbag covers or within the airbag deploy-
Page 322 of 340
___ C_ o_n_ s_ u_m _ e_ r_ ln_ f_ o _r _m _ a_ t_ i_o _n ______________________________________________ _
0 Note
If emergency repairs must be performed elsewhere, have the
vehic le examined by an authorized Audi dealership as soon as
possible .•
Declaration of Compliance,
Telecommunications and Electronic Systems
Rad io Frequency Devices an d Rad ioc ommunic ation
Equipment User Man ual N otic e.
T he manufacturer is not responsib le for any radio or TV interference
cause d by unauthorized mod ifications to this equipment .
Devic es
The fol lowing dev ices eac h comply with FCC Part 1 5.19, FCC Part
15.21 and RSS -Gen Issue 1:
• Cell phone package
• Electronic immobi lizer
• Homelink® unive rsal remote contr ol
• Remote control key
• T ire pressure monitoring system
FCC Part 15 .1 9
This device complies with part 15 of the FCC Rules. Operation is
subject to the fo llowing two cond itions:
(1) This device may not cause harmful interference, and
(2) this device must accept any interference received, inc luding
interference that may cause undesired ope ra tion .
FCC Part 15 .21
CAUT IO N: Changes or modifications not expressly approved by the party
responsible for complia
nce cou ld void the user's au thority to
operate the equipment.
RSS -Gen Is sue 1
Operation is subject to the following two conditions :
(1) th is device may not cause interference, and
(2) this device must accept any interference, including interference
that may cause undesired operation of the device. •
Page 327 of 340
Alph ab eti ca l ind ex -
-------------=----
AUTO
Climate controls .. ...... ..... .... . 112
Switching on .... .... .... .... .... 112
When should I use AUTO? ....... .. 112
Auto Safety Hotl ine .. ..... ... ... .... . 155
Auto-Check Control .. ... ... .... ... .. .. 28
Automat ic air recirculation ........... 114
Automatic belt retractor .... ...... .... 163
Automatic car wash
See Washing .. .... .... ... ...... .. 231
Automatic headlight con trol ....... .... 77
Automatic rollover protection system . . 156
Automatic Shift Lock (ASLl ....... 128, 135
Automatic transm ission
6 -spe ed automatic transmission .... 126
Automatic Shi ft Lock (ASLl .... . 128, 135
Driving ........ ..... ....... ..... 126
Dynamic shif t prog ram ... .... .... . 129
Fail-safe mode ... ...... ........ .. 13 1
Ignition key safety lock ... ... ... .. . 119
Kick-down ... .... .... .... ... .... . 129
Manual sh ift program . ... .... .... . 130
multitronic® ... ... ... .... ... ..... 131
Se lector lever ..... .... ...... . 127, 133
Shift but tons . ... .... .... .... 131, 137
Steering wheel with tiptronic® . 131,137
Average speed ... ... ... ... .. ...... ... 37
Avoid damaging the v ehicle .. ... .... . 22 1
Controls and equip
ment Safety first
B
Battery .
.... .... ...... .... ... .. 261, 264
Charging ...... .. ... ..... .. .. .... 265
Checking battery acid level . .... .... 264
Important warnings when working on the batte ry . .......... .... ... .. ... . 263
Low vol tage symbo l .. ....... .... ... 34
Replacing the battery . ...... .. .... 262
Winter opera tion ... .. ...... ...... 261
Working on the battery .......... .. 263
B efore driving ... ..... .. ...... ...... 146
Blended gasoline ... ... .. .. .. .... .... 244
Body cavity sealing .. .. .. ...... .... .. 237
Boos ter seats .... .... .... .... .... ... 198
How do I properly instal l a booster seat in
my vehicle? . .......... ...... ... 198
Sa fety instructions . .... .... .... ... 198
Brake f luid
Changing the brake fluid .......... 261
Checking the brake fluid leve l .. .... 260
Reservoir . ... .... .... ....... .... . 260
What is the correct brake fluid level? 260
What shou ld I do if the brake fluid warning
light comes on? . ..... ... .... .... 260
Brake system .. ...... .... .... .... ... 260
An ti- lo ck brake system (ABS) ... .... . 20
Brake ass istant . .... .. .... .... ... . 217
Brake booster .... .... .... .... .... 216
Brake flu id .... ... .... .... .... .... 260
Brake f luid specifications for refi ll and
rep lacement . ... ..... ... .... .... 261
Brake pads ...... .... .... .... .... 220
Genera l informa tion ....... .. .... . 215 How does the moisture or road salt affect
the brakes? ....... ... .... .... ... 215
Ma lfunction ... .. .... .... .... .. .. . 30
Warning/indicator lights .. .. .... .... 23
Worn brake pads symbol . ..... .. .. . 33
B reak -in period ...... .... .... .... ... 219
B rake pads ... .... .... .. . .... .... 220
Tires ..... .... .... .... ... .... .. .. 219
Bu lbs ... ... .... ... ... ... .... ...... . 302
C
California Proposition 65 Warning . .... 251
Battery specific ..... ...... .... .... 264
Capacities Eng ine oil .... .... .... ... .... .... 31 4
Fuel tank ..... ...... .. ...... .... . 314
Windshield washer fluid ... .... .... 314
Car care ... .. .... ... .... .... .... .. .. 230
Interior ... .... .... .... ... .... .... 238
Plastic and v inyl .... ... .... .... ... 234
Weatherstr ips . .... .... .... ...... . 236
Care of exterior ..... .... .... .... .. .. 230
Cargo area
See Loading the luggage compartment .
153
Catalytic converter .. ...... ...... .... 220
Centigrade Switching between Centig rade and
Fahrenheit ...... .... .. .. ... .. .. 11 3
Certification . ............ ...... .... . 320
Changing a flat tire ....... ... .... .. .. 293
Chan ging a wheel .... .... ... .... .... 293
Vehicle operation Vehicle care Do-it-yourself service Technical data
Page 328 of 340
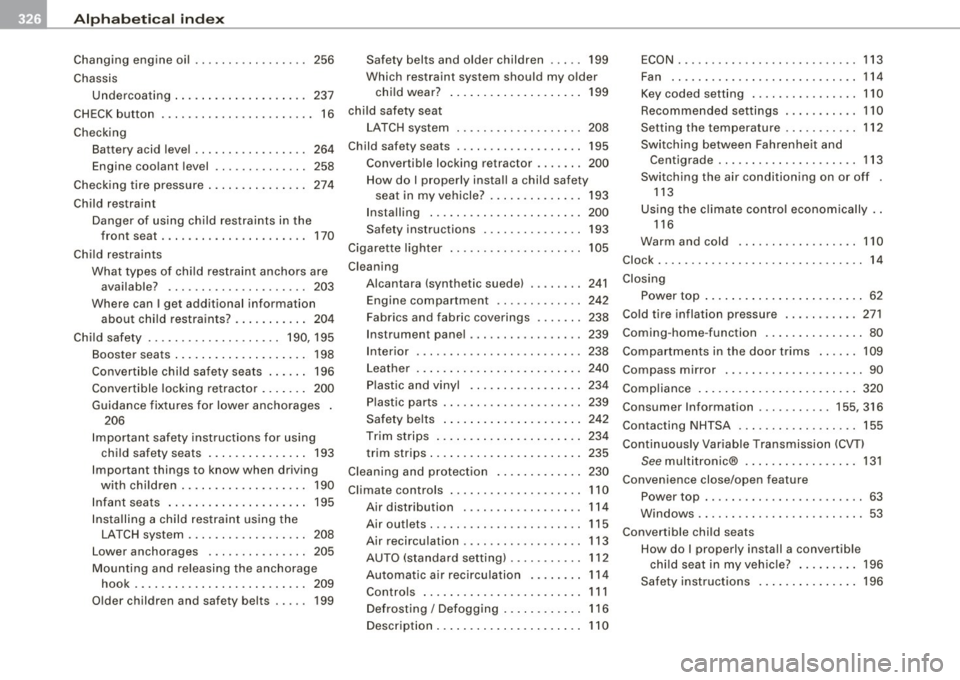
ll'JI Alphabetical index _ __,__ ___ ____;_...::.:...::... ___________________________ _
Changing engine oil ...... ... ... .. ... 256
Chassis Undercoating ........ ...... .... .. 237
CHECK button . . . . . . . . . . . . . . . . . . . . . . . 16
Checking Battery acid level . . . . . . . . . . . . . . . . . 264
Engine coolant level .. ............ 258
Checking tire pressure ............... 274
Child restraint Danger of using child restraints in the
front seat . . . . . . . . . . . . . . . . . . . . . . 170
Child restraints What types of chi ld restraint anchors are
available? ..................... 203
Where can I get additional information
about child restraints? ... .... .... 204
Child safety .. ........ ....... ... 190, 195
Booster seats . . . . . . . . . . . . . . . . . . . . 198
Convertible child safety seats . . . . . . 196
Convertible locking retractor . . . . . . . 200
Guidance fixtures for lower anchorages 206
Important safety instructions for using
child safety seats .. ...... ....... 193
Important things to know when driving
with chi ldren ............. ...... 190
Infant seats . . . . . . . . . . . . . . . . . . . . . 195
Installing a child restraint using the
LATCH system .... ... .... ...... . 208
Lower anchorages .... .... ... ... . 205
Mounting and releasing the anchorage
hook ...... ...... .... .......... 209
O lder children and safety belts ... .. 199 Safety belts and oldler children
... .. 199
Which restraint system should my older chi ld wear? ........ .... ... .. ... 199
child safety seat LATCH system . .... .... .... ...... 208
Childsafetyseats .... ........ .... ... 195
Convertible locking retractor .... ... 200
How do I properly install a child safety seat in my vehicle? .. ...... .... .. 193
Installing .... .... ... .. .... .... .. 200
Safety instructions .............. .
Cigarette lighter .......... .... ..... .
Cleaning Alcantara (synthetic suede) ....... .
E . ngine compartment . .... ... .. .. .
Fabrics and fabric coverings ... ... .
Instrument panel ....... .... ..... . 193
105
241
242
238
239
I . ntenor ......................... 238
Leather .... ...... ... .. .... ...... 240
Plastic and vinyl . .... .... ... .. ... 234
P lastic parts ........... .... ... ... 239
Safety be lts ...... ............ ... 242
Trim strips ............. ... .... .. 234
trim strips ... .. ...... .... ..... ... 235
Cleaning and protection .......... ... 230
Climate controls .. .... ......... ..... 11
O
Air distribution . . . . . . . . . . . . . . . . . . 114
Air outlets . . . . . . . . . . . . . . . . . . . . . . . 115
Air recirculation .... .... .... .... .. 113
AUTO (standard setting) .... .... ... 112
Automatic air recirculation ... .. ... 114
Contro ls . . . . . . . . . . . . . . . . . . . . . . . . 111
Defrosting / Defogging . . . . . . . . . . . . 116
Description . . . . . . . . . . . . . . . . . . . . . . 11
O
ECON ... .. .. .. .... .... ..... .. ... 113
Fan .. ............ .... ... .... ... 114
Key coded setting ................ 11
O
Recommended settings ........... 11 O
Setting the temperature ........... 112
Switching between Fahrenheit and Centigrade ... .... .... ...... .... 113
Switching the air conditioning on or off .
113
Using the climate control economically . .
116
Warm and cold .................. 110
Clock .. ........... ........... .... ... 14
Closing Power top . . . . . . . . . . . . . . . . . . . . . . . . 62
Cold tire inflation pressure .. .... ..... 271
Coming -home -function .. ............. 80
Compartments in the door trims ... ... 109
Compass mirror .. .... ...... ... ..... . 90
Comp liance .......... ....... .... ... 320
Consumer Information ........... 155, 316
Contacting NHTSA .................. 155
Continuously Variable Transmission (CVT)
See multitronic® ........ ... ...... 131
Convenience close/open feature Power top . . . . . . . . . . . . . . . . . . . . . . . . 63
Windows ......................... 53
Convertible child seats How do I properly install a convertib le
chi ld seat in my vehic le? ...... ... 196
Safety instructions .. ...... .... ... 196
Page 329 of 340
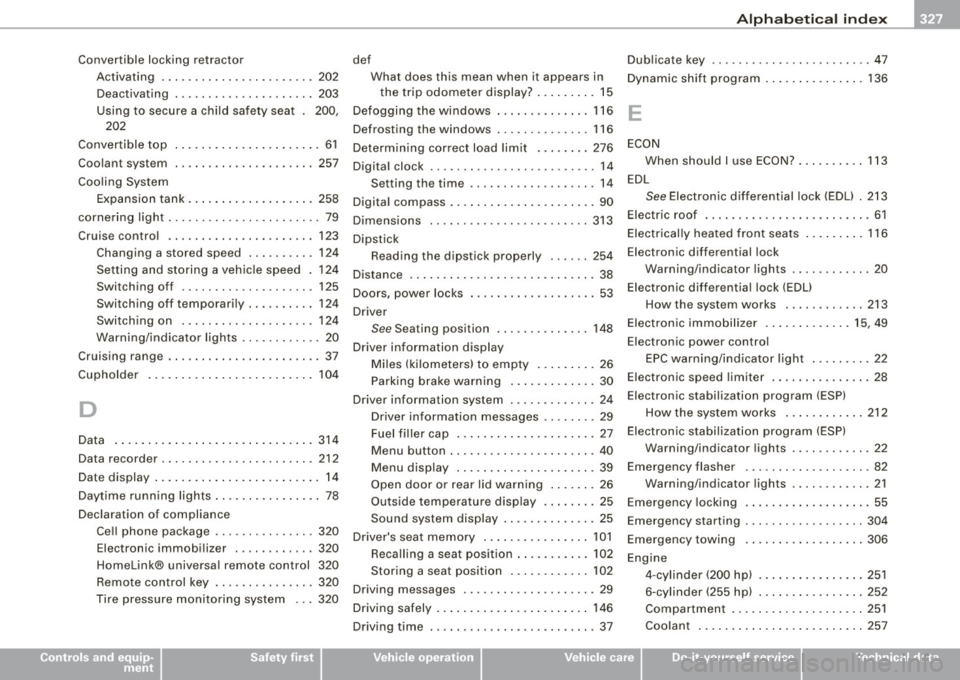
Alph ab eti ca l ind ex --------------=-----
Convertible locking retractor
Activating ...... ... .. .... ...... .. 202
Deactivating .. ... ..... ..... .. ... . 203
Using to secure a child safety seat 200 ,
202
Convertible top ........ .... .... .... .. 61
Coolant system
Cooling System 257
Expansion tank ... .... ...... .... .. 258
cornering light . .......... .. .... .... .. 79
Cruise control .. ... ... ...... ...... .. 123
Changing a stored sp eed . .... .... . 124
Setting and storing a vehicle speed . 124
Switching off .................... 125
Switching off temporari ly .. ........ 124
Switching on .... .... .... ...... .. 124
Warning/indicator lights ... ... .... .. 20
Cruising range .. .... .... .... ...... ... 37
Cupholder . ... .. ...... ..... .. .. .... 104
D
Data . .... ... . ... .. ... ... .... ..... . 314
Data recorder ... .... ...... ..... .... . 212
Date dis play . . . . . . . . . . . . . . . . . . . . . . . . . 14
Daytime running lights ... .. ... .. ... ... 78
Declaration of compliance Cell phone package .. .. .... .... ... 320
Elect ronic immobilizer . ..... .. .... 320
Homelink® universal remote con trol 320
Remote control key .. .... .... .... . 320
Tire pressure monitoring system ... 320
Controls and equip
ment Safety first
def
Dublicate key ... ...... ... .. . ... .... .. 47
What does this mean when it appears in
Dynamic shift program ....... ... ... . . 136
the trip odometer display? .. ...... . 15
Defogging the windows . ....... ..... . 116
E
Defrosting the windows .. ... ..... ... . 116
Determining correct load lim it ... .... . 276 ECON
Digi tal clock ............. .. ... ... .... 14 When should I use ECON?
... .... .. . 113
Setting the time ......... .... .... .. 14 EDL
Digital compass . ... ... . ... ... .. .... .. 90 See Electronic differential lock (EDU . 213
Dimensions ..... .... .... .... .... ... 313 Electric roof .
..... ... ..... .. .... .... . 61
Dipstick Electrically heated front seats .
.. .... .. 116
Reading the dipstick properly ...... 254 Electronic differential lock
Distance ... .... ... ... .. ... .... .... .. 38 Warning/indicator
lights ..... ... .... 20
Doors, power locks ........ ....... .... 53
Driver Electronic differ
ential lock (EDU
How the system works ...... .. .... 213
See S eating position .. ... ... ... ... 148 Electronic immobilizer ..
.. .. . .. .. .. 15, 49
Driver information dis play
Miles (kilometers) to empty .. .. ... .. 26 Electronic power control
EPC warning/indicator light ......... 22
Parking brake warning ... ... ..... .. 30 Electronic sp
eed limiter ..... .. .... .... 28
D river information sys.tern . .... ...... .. 24 Electronic stabilization program (ESP)
Driver information messages .. .... .. 29 How the system works ...
..... .. .. 212
Fuel filler cap . .. . ........ ....... .. 27 Elec
tronic stabiliza tion program (ESP)
Menu button .... . .. .. .... .... .... . 40 Warning/indicator lights
.... ...... .. 22
Menu display .... ... .... .... . ... .. 39 Emerg
ency flasher ... .... ... .. ....... 82
Open door or rear lid warning ...... . 26 Warning/indicator
lights .... ...... .. 21
Outside temperatu re disp lay ... ..... 25
Emergency locking . .... .... ... .. .. . .. 55
Sound system display .... .... .... .. 25
Emergency starting ..... ....... .. .... 304
Driver's seat memory ... .... .... ..... 101
Emergency towing . .. ... .. .. .... .... 306
Recalling a seat position .... .... ... 102
Engine
Storing a seat position ... ... .... .. 102
4-cylinder (200 hp) . ... .. .. .... .. .. 251
Driving messages ...... ........ ..... . 29
6-cylinder (255 hp) . ... .. .. .... .. .. 252
Driving safely . ... .. . ... .. .... .... ... 146
Compartment .... ... .. ...... .... . 251
Driving time . .... ...... .... ... .. .... . 37 Coolant ...
.. ... .... .... .... ..... 257
Vehicle operation Vehicle care Do-it-yourself service Technical data