automatic transmission AUDI S4 CABRIOLET 2009 Owners Manual
[x] Cancel search | Manufacturer: AUDI, Model Year: 2009, Model line: S4 CABRIOLET, Model: AUDI S4 CABRIOLET 2009Pages: 340, PDF Size: 77.32 MB
Page 4 of 340
Table of contents
Table of contents
Vehicle literature ... ..... . 5 Doors, power locks ..... ... ... . . 53 Parking brake . . . . . . . . . . . . . . . . . . 121
Rear lid .. .. ... ... ......... ... . 55 Acoustic park assist . . . . . . . . . . . . 122
Anti-theft alarm system ........ .
57 Cruise contro l . . . . . . . . . . . . . . . . . . 123
About this Owner's Power windows ... ... ... .... . . 59
Transmission . . . . . . . . . . . . . . . . . . . 126
Manual .... ............... .. . 6 Power top .................... . 61 tiptronic® (6-speed automat ic
Controls and
equipment ................. .
Instruments and controls ..... .
General illustration ............. .
Instruments and
warning/indicator lights ....... .
Instruments .............. ..... .
Warning/indica tor lights ...... .. .
Driver information display ... .. .
Introduction ...... ....... ... ... .
On-Board Diagnostic system (080)
Auto-Check Control ....... ..... .
Speed warning system ... .... .. .
Trip computer ..... ... ... .. .... .
Menu display ... ..... ..... .. ... .
T ir e pressure monitoring system ..
Opening and closing ..... ..... .
Keys . ...... ... ...... ...... .... .
9
11
1 1
12
12
18
24
24
27
28
35
37
39
41
47
47
Power lock ing system . . . . . . . . . . . 50
Keyless entry remote contro l . . . . . 51 Normal operat
ion ....... .. .. .. .
Wind deflector ........ .. ... .. . .
Operate the power top manually
Clear vision ...... . ... .... ... .. .
Lights .... .... .... ... · · · . · · , • · · 61
transm ission) . . . . . . . . . . . . . . . . . . 126
66 multitronic® . . . . . . . . . . . . . . . . . . . 131
68 Homelink® . . . . . . . . . . . . . . . . . . . . . 139
76 Universal remote control . . . . . . . . 139
76
Interior lights . . . . . . . . . . . . . . . . . . 84
Vision ...................... .. .
W iper and washer system ...... .
Mirrors ........ .. .. .. .... .... . .
Digital compass .. . ... ..... ... . .
Seats and storage ....... ... .. .
Genera l recommendat ions ... .. .
Manual seats .. ... ...... ..... . .
Power seats .......... ... ..... .
Cen ter armrest ........ .. ..... . .
Rear seats .. .......... ... ... .. .
Sea t memory .......... ....... .
Luggage compartment ..... ... .
Cupho lder .................... .
Ashtrays .......... ...... ..... .
Cigarette lighter/socket ... .... . .
Storage . ..... ... .... ..... .... .
Warm and cold .......... ... .. .
Climate controls .. ... ......... .
Electrically heated front seats . . .
Elect rically heated rear seats ... .
On the road ............ ... ... . . 84
85
88
90
92
92
93
96
100
101
101
103
104
104
105
107
110
1 10
116
117
1 18
Stee ring . . . . . . . . . . . . . . . . . . . . . . . 118
Ignition lock and ignitio n switch 119
Starting and stopping the engi ne 1 20
Safety first . . . . . . . . . . . . . . . . . 145
Driving Safely . . . . . . . . . . . . . . . . . . 146
General notes . . . . . . . . . . . . . . . . . . 146
Proper occupant seating pos itions 148
Driver and passenger side footwe ll 152
Peda l area . . . . . . . . . . . . . . . . . . . . . 152
S tow ing luggage . . . . . . . . . . . . . . . 153
Report ing Safety Defects . . . . . . . . 155
Automatic rollover protection system . . . . . . . . . . . . . . . . . . . . . . . . 156
Safety belts . . . . . . . . . . . . . . . . . . . . 159
General notes . . . . . . . . . . . . . . . . . . 159
Why safety belts? . . . . . . . . . . . . . . . 160
Safety belts . . . . . . . . . . . . . . . . . . . . 163
Safe ty belt pretensioners . . . . . . . . 166
Page 13 of 340
Instruments and controls
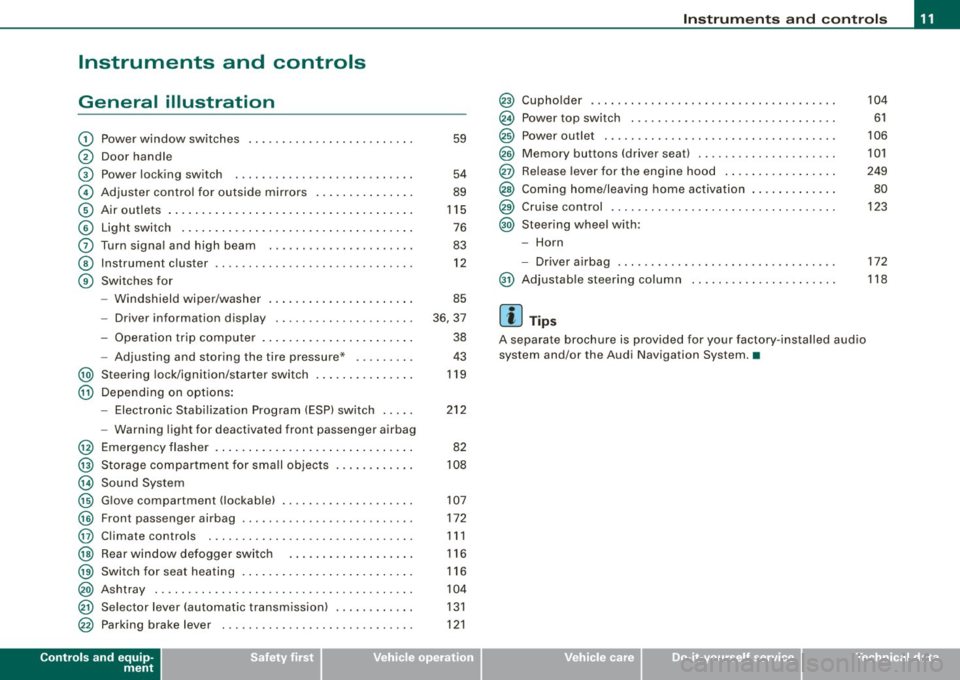
General illustration
G)
0
©
©
©
©
0
©
G)
Power window switches
Door handle
Power locking switch . ..... .. .... .... .... ...... .
Adjuster control for outside mirrors .............. .
Air outlets ...... .. ......... .... .. .. .... .. ..... .
Light switch .. ...... .... ...... .... ... .. .... ... .
Turn signal and high beam .. .... .... ..... ...... .
Instrument cluster ... ...... ... .. ..... ... .... ... .
Switches for
- Windshield wiper/washer ......... ...... ...... .
- Driver information display ........... .... ..... .
- Operation trip computer .. .... ... .... .... .. ... .
- Adjusting and storing the tire pressure" ........ .
@ Steering lock/ignition/starter switch ....... .... ... .
@ Depending on options :
@
@
@
@
@
@
@
@
@
@
@
-Electronic Stabi lization Program (ESP) switch .....
- Warning light for deactivated front passenger airbag
Emergency flasher . ...... ...... .... ... .. ... .... .
Storage compartment for sma ll objects
Sound System
Glove compartment ( lockable) . .... .... .... .... .. .
Front passenger airbag ........................ . .
Climate controls ........ ... .... .... .... .. ..... .
Rear window defogger switch .......... ..... ... .
Switch for seat heating . .... .. .... .. ... .. .... ... .
Ashtray .. ....... .... ... .... .... .... .... .... .. .
Se lector lever (automatic transmission) ....... ... . .
Parking brake lever ....... .. ... ... .. ...... .... . .
Controls and equip
ment
59
54
89
115
76
83
12
85
36,37
38
43
119
212
82
108
107
172
111
116
116
104
131
121
Instruments and controls
@ Cupholder ............ ...... ... .. .... ..... .. .. .
@ Power top switch .............................. .
@) Power outlet . .... ...... ... .. .... .... .... .... .. .
@ Memory buttons (driver seat) .. .... .... .... .... .. .
@ Release lever for the engine hood .............. .. .
@ Coming home/leaving home activation ...... ...... .
@ Cruise control .... .... .... .... ... ........ .... .. .
@ Steering wheel with :
- Horn
- Driver airbag .... .... .... ... .. ...... .... .... . .
@ Adjustable steering column ..................... .
[ i ] Tips
A separate brochure is provided for your factory-insta lled audio
system and/or the Audi Navigation System. •
104
61
106
101
249
80
123
172
118
Page 26 of 340
Driver inf orma tion dis pl ay
Driver information display
Introduction
General notes
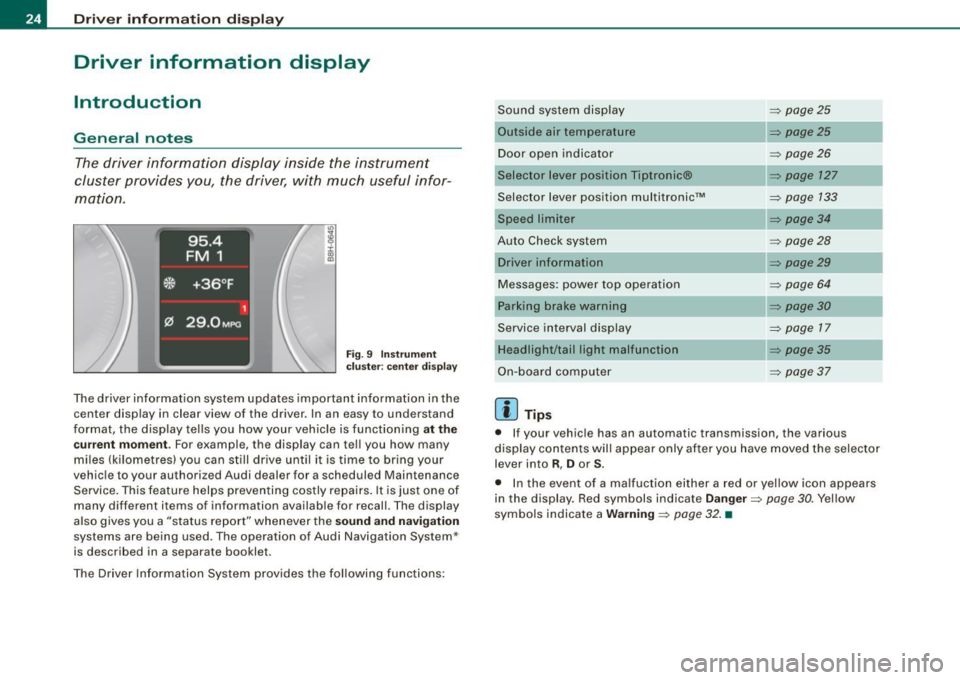
The driver information display inside the instrument
cluster provides you , the driver, with much useful infor
mation.
Fi g. 9 Inst rum en t
c luster : ce nter dis play
The driver information system updates important information in the
c e nter display in clear view of the driver . In an easy to und erstand
format, the display tells you how your vehicle is functioning
a t the
c u rre nt mo ment .
For example, the display can tell you how many
mi les (kilometres) you can still dr ive unt il it is time to bring your
vehic le to your authorized Audi dealer for a scheduled Maintenance
Service . This feature helps preventing costly repairs . It is just one of
many different items of information available for recall . The display
also gives you a "status report" whenever the
so und and navi gati on
systems are being used . The operation of Audi Navigation System *
is described in a separate booklet.
The Driver Information System provides the following functions: Sound system display
Outside air temperature
Door open indicator
Selector
lever position Tiptronic®
Selector lever position multitronic™
Auto Check system Driver informat ion
Messages : power top operation
Par king brak e warning
Service interval display
Headlight/tail light malfunction
On -b oard computer
[ i ] Tip s
=> page 25
=> page25
=> page26
=> page 127
=> page 133
=> page 34
=> page 28
=> page29
=> page 64
=> page30
=> page 17
=> page 35
=> page 37
• If your vehicle has an automatic transmission , the various
display contents will appear only after you have moved the selector
lever into
R , D or S.
• In the event of a ma lfuction either a red or yellow icon appears
in the display. Red symbols indicate
Dan ger => page 30. Yellow
symbo ls indicate a
Warn ing => page 32 . •
Page 27 of 340
Sound system display
Fig . 1 0 Displ ay : soun d
syste m
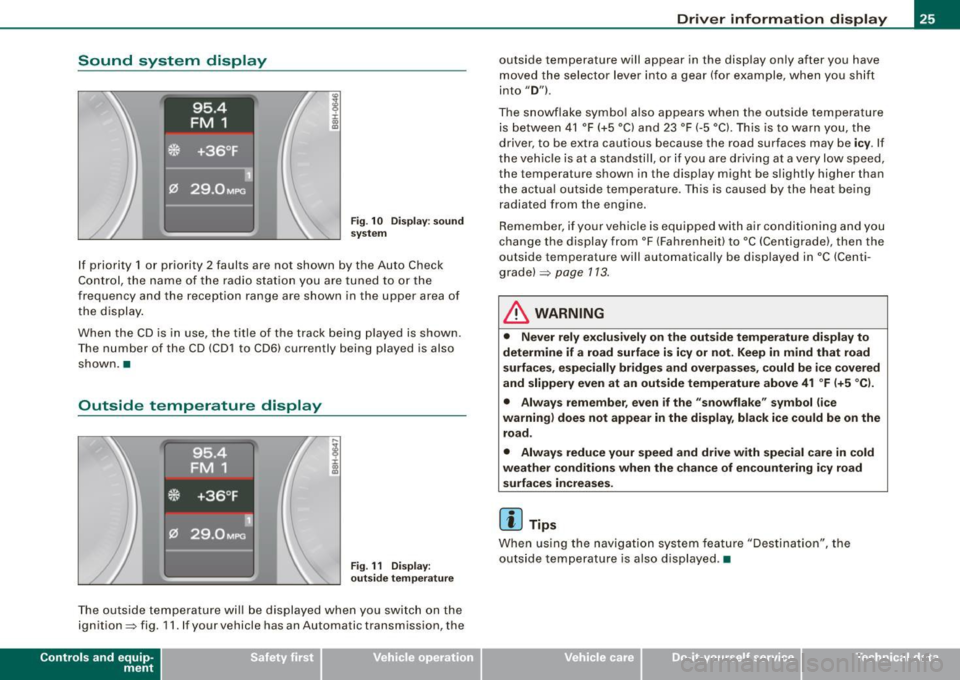
If priority 1 or priority 2 faults are not shown by the Auto Check
Control, the name of the radio station you are tuned to or the
frequency and the reception range are shown in the upper area of
the display .
When the CD is in use , the title of the track being p layed is shown .
The number of the CD (CD1 to CD6) currently being played is also
shown. •
Outside temperature display
Fig . 11 Dis pla y :
o utsi de tem perature
The outside temperature will be displayed when you switch on the
ignition=> fig. 11 . If your vehicle has an Automa tic transmission , the
Contro ls and eq uip
ment
Dri ver informa tio n di spl ay
outside temperature will appear in the disp lay only after you have
moved the selector lever into a gear (for example, when you shift
into
" D ") .
The snowflake symbo l a lso appears when the outside temperature
is between 41 °F (+5 °C) and 23 °F (-5 °Cl. Th is is to warn you, the
driver, to be extra cautious because the road surfaces may be
i c y . If
the vehicle is at a standstill, or if you are driving at a very low speed, the temperature shown in the display might be slightly higher than
the actua l outs ide temperature. This is caused by the heat be ing
radiated from the engine.
Remember , if your vehicle is equipped with a ir conditioning and you
change the display from °F (Fahrenhei t) to °C (Centigrade), then the
outside temperature will automatically be displayed in
•c (Centi
g rade) =>
page 113.
& WARNING
• Never r ely exc lusiv el y o n th e out side t emp erat ure di spl ay to
determine if a ro ad sur face is icy or not. Keep in mind that road
s urf aces , esp eci ally br idge s and overpa sses, co uld b e ic e co ve red
and slipp ery even at an out side temperature above 41 °F (+ 5 °C l.
• Alway s re memb er, eve n if the "snowflake" sy mbol (ic e
warning ) does not ap pea r in the display , b lack ice cou ld be on the
r o ad .
• Alway s reduc e your speed and driv e with sp ec ial care in cold
we ather condition s when th e chance of en countering i cy ro ad
s urf ace s incr eases.
[ i ] Tips
When using the navigation system feature "Destination", the
outside temperature is also displayed. •
~ehicle care irechnical data
Page 31 of 340
A red symbol means Danger, a yellow symbol indicates Warning. In
certain situations, information message for the driver appear in
addition to the red and yellow symbols.
Function test: automatic transmission
Th e Auto -Check Control will automatically perform a test each time
you switch on the ignition. With the selector lever in
P or N, the
following message appears in the display:
When stationary apply footbrake while selecting gear.
When you a select a different gear (for example: R, D, etc.), the
message will disappear and the Auto -Check function is displayed.
If there is a malfunction, then the malfunction message will appear
about 15 seconds after the you start the vehicle. At the same time
you will hear a warning tone. •
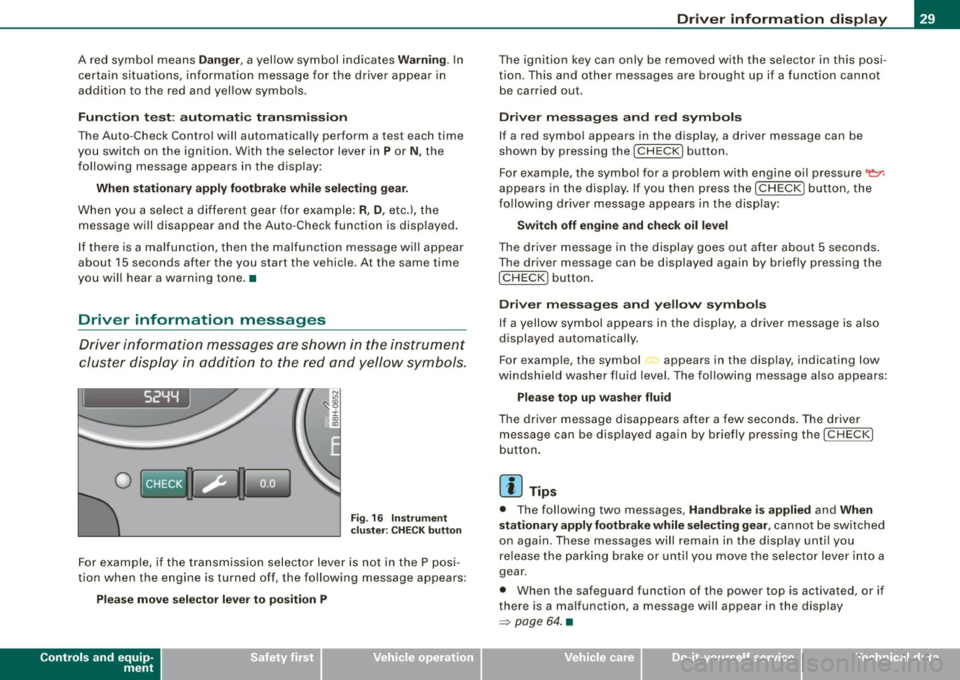
Driver information messages
Driver information messages are shown in the instrument
cluster display in addition to the red and yellow symbols.
I S2YY
0
Fig. 16 Instrument
cluster: CHECK button
For example, if the transmission selector lever is not in the P posi
tion when the engine is turned off, the following message appears:
Please move selector lever to position P
Controls and equip
ment
Driver information display
The ignition key can only be removed with the selector in this posi
tion. This and other messages are brought up if a function cannot
be carried out.
Driver messages and red symbols
If a red symbol appears in the display, a driver message can be
shown by pressing the
I CHECK] button.
For example, the symbol for a problem with engine oil pressure~
appears in the display. If you then press the
I CHECK] button, the
following driver message appears in the display:
Switch off engine and check oil level
The driver message in the display goes out after about 5 seconds.
The driver message can be displayed again by briefly pressing the
!CH ECK) button.
Driver messages and yellow symbols
If a yellow symbol appears in the display, a driver message is also
displayed automatically.
For example, the symbol appears in the display, indicating low
windshield washer fluid level. The following message also appears:
Please top up washer fluid
The driver message disappears after a few seconds. The driver
message can be displayed again by briefly pressing the
I CHECK]
button.
[ i] Tips
• The following two messages, Handbrake is applied and When
stationary apply footbrake while selecting gear,
cannot be switched
on again. These messages will remain in the display until you
release the parking brake or until you move the selector lever into a
gear.
• When the safeguard function of the power top is activated, or if
there is a malfunction, a message will appear in the display
=> page 64. •
Page 122 of 340
• .___O_ n_ t_h _e _ r_o _a_ d __________________________________________________ _
Starting and stopping the engine
Starting the engine
The engine can only be started with your original Audi
key.
- Set the parking brake.
- Move the selector lever to the neutral position (automatic
transmission: selector lever in P or N)
=> &.
- On vehicles with manual transmission, fully depress the
clutch pedal.
- Turn the ignition key to position
0 => page 119, fig. 136
- do not depress the gas pedal when starting the engine!
- Let go of the key as soon as the engine starts.
A cold engine may at first be loud after it has been started. This is
due to the hydraulic valves building up the oil pressure. This normal
and no need for concern.
If the engine does not start immediately, stop trying after 10
seconds and then try to restart the engine about 30 seconds later.
What to do if the engine does not start
• ~ page 304, "Starting with jumper cables"
• ~ page 306, "Emergency towing with commercial tow truck".
& WARNING
Never start or let the engine run in a confined or enclosed area .
Exhaust fumes from the engine contain carbon monoxide, a color
less and odorless gas. Carbon monoxide can be fatal if inhaled.
• Never leave the engine idling unattended. An unattended
vehicle with a running engine poses a danger of personal injury or
theft.
0 Note
• Avoid high engine speeds, fast acceleration or heavy engine
loads while the engine is still cold. This could damage the engine.
• The engine cannot be started by pushing or towing the vehicle.
~ For the sake of the environment
To avoid unnecessary engine wear and to reduce exhaust emis
sions, do not let your vehicle stand and warm up. Be ready to drive
off immediately after starting your vehicle. Maintain moderate
speed until the engine is completely warm. Remember, the engine
performs best at operating temperature.•
Stopping the engine
- Turn the ignition key to position (D => page 119, fig. 136.
& WARNING
• Never turn off the engine until the vehicle has come to a
complete stop.
• The brake booster and servotronic only work when the engine
is running . With the ignition turned off, you have to apply more
force when steering or braking. Since you cannot steer and stop
normally, this can lead to accidents and serious injuries.
• The radiator fan can continue to run for up to 10 minutes even
after you have turned off the engine and removed the ignition key.
The radiator fan can also turn on again if the engine coolant heats
up because of intense sunlight or heat build-up
in the engine
compartment. _,.
Page 126 of 340
• .___O_ n_ t_ h _e _ ro_ a_d __________________________________________________ _
Storing a sp eed
You must set and then store a vehicle speed using the
cruise control.
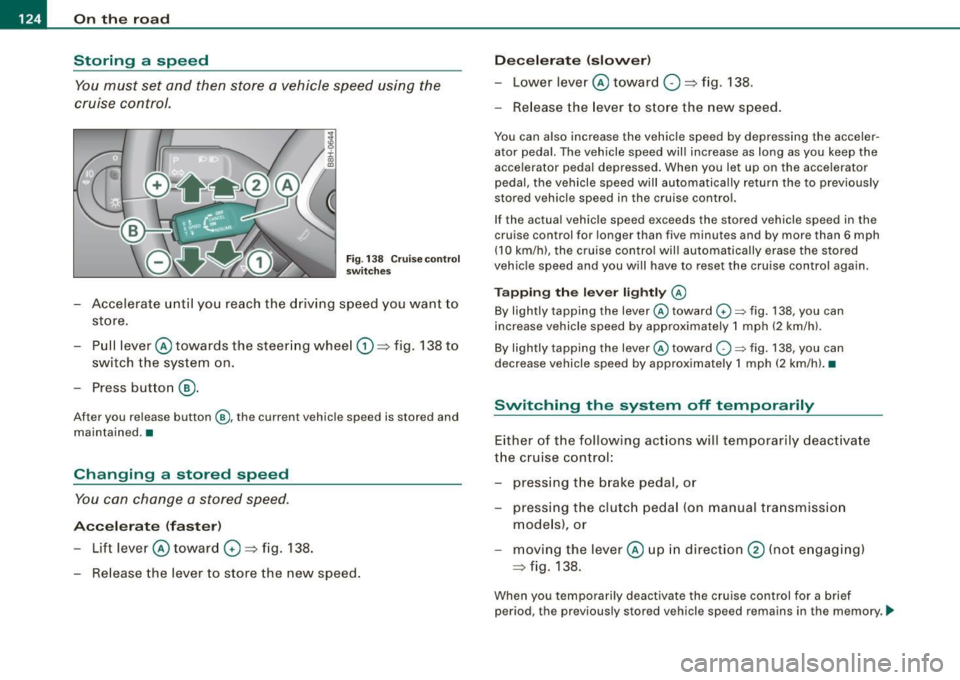
Fig . 138 Cruise control
switches
- Accelerate until you reach the driving speed you want to
store.
Pull lever @ towards the steering wheel
G) => fig. 138 to
switch the system on.
Press button
® ·
After you release button@, the current vehicle speed is stored and
maintained. •
Changing a stored speed
You can change a stored speed.
Accelerate (faster)
-Lift lever @ toward 0 => fig. 138.
Release the lever to store the new speed.
Decelerate (slower)
-Lower lever@ toward O => fig. 138.
- Release the lever to store the new speed.
You can also increase the vehicle speed by depressing the acceler
ator pedal. The vehicle speed will increase as long as you keep the
accelerator pedal depressed. When you let up on the accelerator
pedal, the vehicle speed will automatically return the to previously
stored vehicle speed in the cruise control.
If the actual vehicle speed exceeds the stored vehicle speed in the
cruise control for longer than five minutes and by more than 6 mph
(10 km/h), the cruise control will automatically erase the stored
vehicle speed and you will have to reset the cruise control again.
Tapping the lever lightly @
By lightly tapping the lever@toward G) ~ fig. 138, you can
increase vehicle speed by approximately 1 mph (2 km/h).
By lightly tapping the lever @toward
O ~ fig. 138, you can
decrease vehicle speed by approximately 1 mph (2 km/hl. •
Switching the system off t emporarily
Either of the following actions will temporarily deactivate
the cruise control:
- pressing the brake pedal, or
- pressing the clutch pedal (on manual transmission
models), or
moving the lever@ up in direction
@ (not engaging)
=>fig .138.
When you temporarily deactivate the cruise control for a brief
period, the previously stored vehicle speed remains in the memory. -.,
Page 128 of 340
• .___T_ ra_ n_s_ m_ i_ s _s_ i_ o _n ___________________________________________________ _
Transmission
tiptronic® (6-speed automatic
transmission)
A pplies to vehi cles : w it h 6-s peed auto mati c tra nsm issio n
General information
Your vehic le is equipped with an electronically controlled automatic
transmission. Upshifting and downshifting takes place
automati
cally.
The transmiss ion is also equipped with tiptronic®. It allows the
driver to shi ft gears
manually if desired~ page 130 . •
A pplies to vehi cles: with 6-s p eed autom atic tra nsm ission
Driving the automatic transmission
Start ing th e engine
~ i CD m
- The selector lever must be in N or P .
St art ing off
- Press and hold the brake pedal.
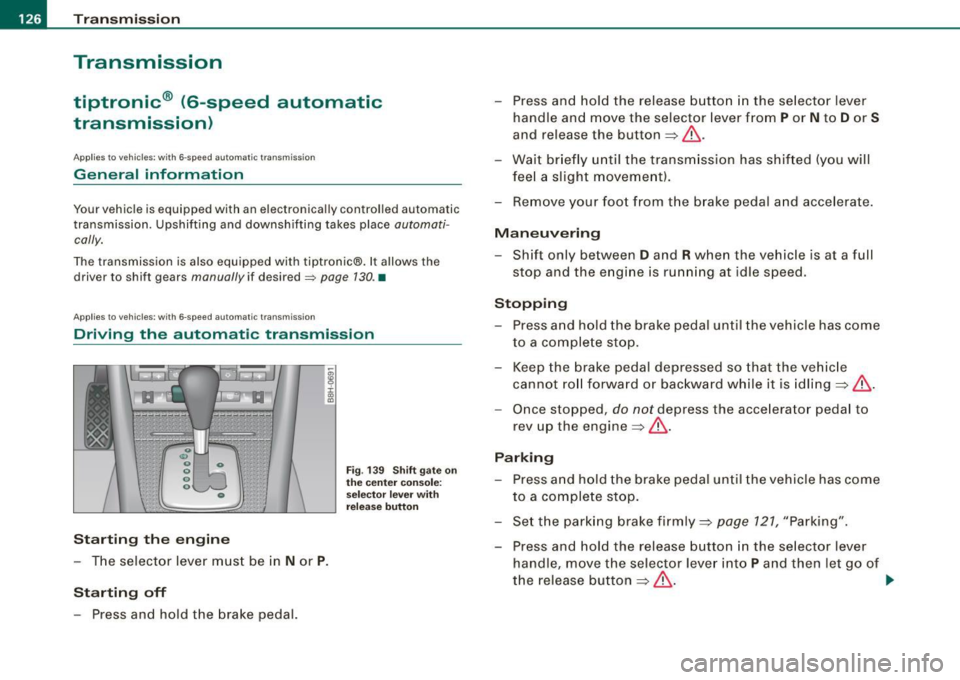
Fig . 139 S hift gate o n
th e ce nter co nso le:
selector leve r with
r e lease butto n
- Press and hold the release b utton in the se lector lever
handle and move the selector lever from
P or N to Dor S
and release the button=>& .
- Wait br iefly until the transm ission has shif ted (you will
fee l a sligh t movement) .
- Remove your foot from the brake ped al a nd accelerate .
Maneuvering
- Shift only between D and R when the vehicle is at a full
stop and the engine is runn ing at idle speed.
Stopping
- Press a nd h old the brake pedal until the vehicle has come
to a complete stop.
- Keep the brake pedal depressed so that the vehic le
cannot ro ll forwa rd or backward while it is idling =>& .
- Once stopped,
do not dep ress the acce lerator pedal to
rev up the engine=>& .
Par king
- Press a nd h old the brake pedal un til the vehicle has com e
to a complete stop.
- Se t the parking brake firmly=>
page 121, "Parking" .
- Press and hold the release button in the se lector lever
handle, move the selector lever into
P and then let go of
the release button => & . _,.
Page 129 of 340
_______________________________________________________ T_ ra_ n_s_ m __ is_s_ io_ n ____ !II
The se lector lever must be in Nor P. If one of the driving positions
is engaged a safety switch w ill preven t the eng ine from being
started. See also=> page 120 .
Before you move the selector lever from the P position, you must
a lways apply the brake peda l before and wh ile de press ing the
button in the hand le of the selector lever.
& WARNING
• Unintended vehicle movement can cause serious injury .
- When the selector lever is in a driving position , the vehicle
may creep , even at idle speed . Therefore do not release the
parking brake or foot brake until you are ready to move,
because power is transmitted to the wheels as soon as a
driving position is engaged.
- Do not accelerate while selecting a driving position . At this
time the engine must be at idle speed so that undue stress is
not placed on the clutches in the transmission .
- Remember: -even when stopped briefly with the automatic
transmission in "D ", "S " or "R ", engine power is being trans
mitted to the wheels. Your vehicle could "creep" forward or
ba ckward . When stopped , keep the brake pedal fully depressed
and use the parking brake if necessary to keep the vehicle from
rolling .
• If the selector lever is unintentionally moved into N while you
are driving , take your foot off the accelerator pedal and wait for
the engine to return to idle speed before selecting a driving posi
tion .
• Never shift into "R " or "P " when the vehicle is in motion .
• Never get out of the driver 's seat when the engine is running .
• If you must get out of the vehicle , move the selector lever
securely into the P pos ition and apply the parking brake firmly .
• If the engine must remain running , never have any dr iving posi
tion engaged when checking under the hood . Make sure the
selector lever has securely engaged and is locked in "P " with the
Controls and equip
ment
& W ARNING (continued )
park ing brake firmly set=> page 242, "Engine compartment ".
Otherwi se , any increase in engine speed may set the vehi cle in
motion , even w ith the parking brake appl ied . •
App lies to veh icles: wi th 6-speed automatic transm ission
Selector lever positions
T his sec tion d escri be s th e sel ector le ver po sitio ns an d
d ri vin g rang es.
Fig. 140 D ispl ay in the
in strument c luster:
se lector lever in posi
tion D
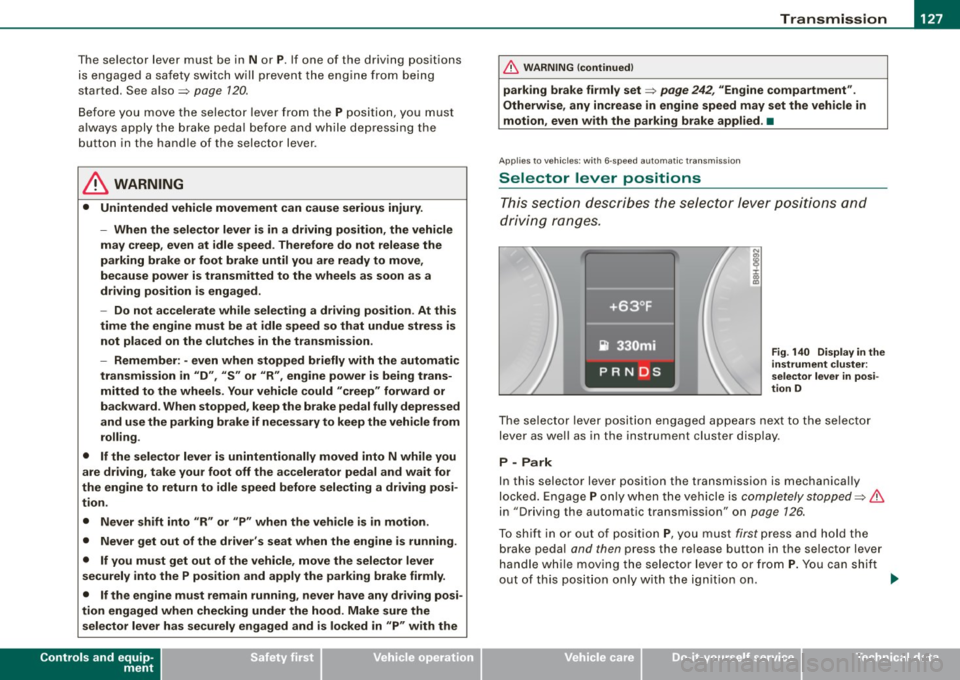
The se lecto r lev er p ositi on engage d ap pears next to t he se lec to r
leve r as well as in the instrument cluster display .
P -Park
In this selecto r lever position the transmission is mechanica lly
l oc ked. Engage P only whe n th e ve hicle is completely stopped=>
&
in "Dr iving the automatic transmission" on page 126.
To shift in or out o f po sition P, yo u m ust firs t pr ess an d hol d th e
brake pedal and then press the re lease button in the se lector lever
handle w hile mov ing the se lector leve r to or from P. Yo u can shif t
out o f this pos it io n onl y wit h th e i gn it ion on. _..,
Page 130 of 340
• .___T_ r_a _n_ s_ m_ is_ s_io _ n ______________________________________________________ _
R -Reverse
The transmission will automatically select the lowest gear ratio
when you shift into reverse.
Select
R only when the vehicle is at a full stop and the engine is
running at idle speed~
& in "Driving the automat ic transmission"
on
page 126 .
Before you move the selector lever to R, press both the button in the
handle of the selector lever
and the brake pedal at the same time.
When the ignition is on, the backup lights illuminate when the selector lever is moved into
R.
N -Neutral
The transmission is in neutral in this position. Shift to this position
for standing with the brakes applied~
page 128.
When the vehicle is stationary or at speeds below 3 mph (5 km/h),
you must always apply the footbrake before and while moving the
lever out of
N.
D -Normal position for driving forward
Position Dis for normal city and highway driving. It ranges from zero
to top speed and all six gears shift automatica lly, depending on
engine load, driving speed and automatically selected shift
programs. The gear engaged is shown in the right of the display
~ page 127, fig. 140.
When the vehicle is stationary or at speeds below 3 mph (5 km/h),
you must always apply the foot brake before and whi le moving the
lever to
D out of N .
In certain circumstances it may be advantageous to temporarily
switch to the manual shift program to manua lly se lect gear ratios to
match specific driving conditions~
page 130.
S -Sport position
Select this position for sportier performance. In this position, the
t ransmission will not upshift as soon, allowing the vehic le to use the increased power available at higher engine speeds
to achieve live
lier accelera tion .
When the vehicle is stationary or at speeds below 3 mph (5 km/h),
you must always apply the foot brake before and while moving the lever to
S out of N.
& WARNING
Read and follow all WARNINGS ~ & in "Driving the automatic
transmission" on
page 126.
(D Note
Coasting downhil l with the transmission in N and the engine not
running w ill result in damage to the automatic transmission and
possibly the catalytic converter. •
Applies t o veh icles: with 6-speed automat ic transmission
Automatic Shift Lock (ASL)
The Automatic Shift Lock safeguards you against acciden
tally shifting into a forward or the reverse gear and
causing the vehicle to move unintentionally.
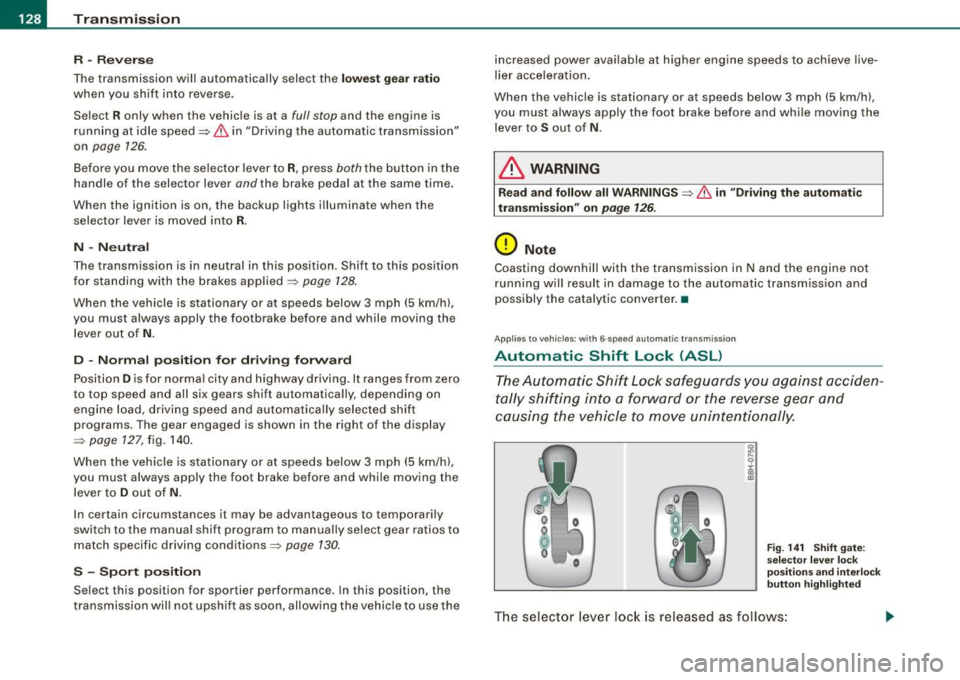
Fig. 141 Shift gate:
se lector leve r lock
position s and interlock
butt on highlighted
The selector lever lock is released as follows :