technical data AUDI S5 2008 8T / 1.G User Guide
[x] Cancel search | Manufacturer: AUDI, Model Year: 2008, Model line: S5, Model: AUDI S5 2008 8T / 1.GPages: 294, PDF Size: 12.13 MB
Page 25 of 294
Downloaded from www.Manualslib.com manuals search engine Driver information system23
Controls
Safety
Driving tips
General maintenance
Self-help
Technical data
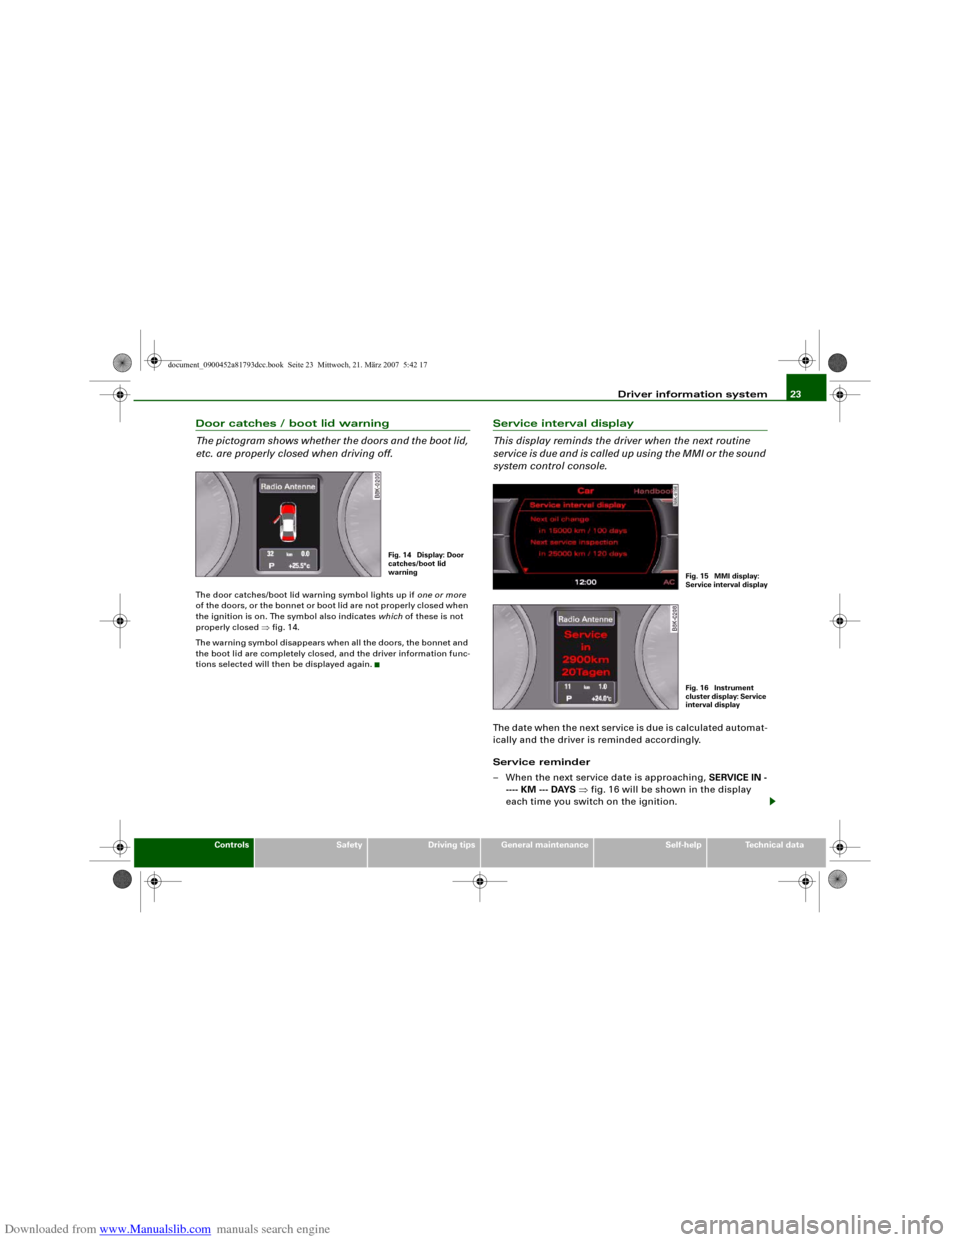
Door catches / boot lid warning
The pictogram shows whether the doors and the boot lid,
etc. are properly closed when driving off.The door catches/boot lid warning symbol lights up if one or more
of the doors, or the bonnet or boot lid are not properly closed when
the ignition is on. The symbol also indicates which of these is not
properly closed ⇒fig. 14.
The warning symbol disappears when all the doors, the bonnet and
the boot lid are completely closed, and the driver information func-
tions selected will then be displayed again.
Service interval display
This display reminds the driver when the next routine
service is due and is called up using the MMI or the sound
system control console.The date when the next service is due is calculated automat-
ically and the driver is reminded accordingly.
Service reminder
– When the next service date is approaching, SERVICE IN -
---- KM --- DAYS ⇒fig. 16 will be shown in the display
each time you switch on the ignition.
Fig. 14 Display: Door
catches/boot lid
warning
Fig. 15 MMI display:
Service interval displa
y
Fig. 16 Instrument
cluster display: Service
interval display
document_0900452a81793dcc.book Seite 23 Mittwoch, 21. März 2007 5:42 17
Page 27 of 294
Downloaded from www.Manualslib.com manuals search engine Driver information system25
Controls
Safety
Driving tips
General maintenance
Self-help
Technical data
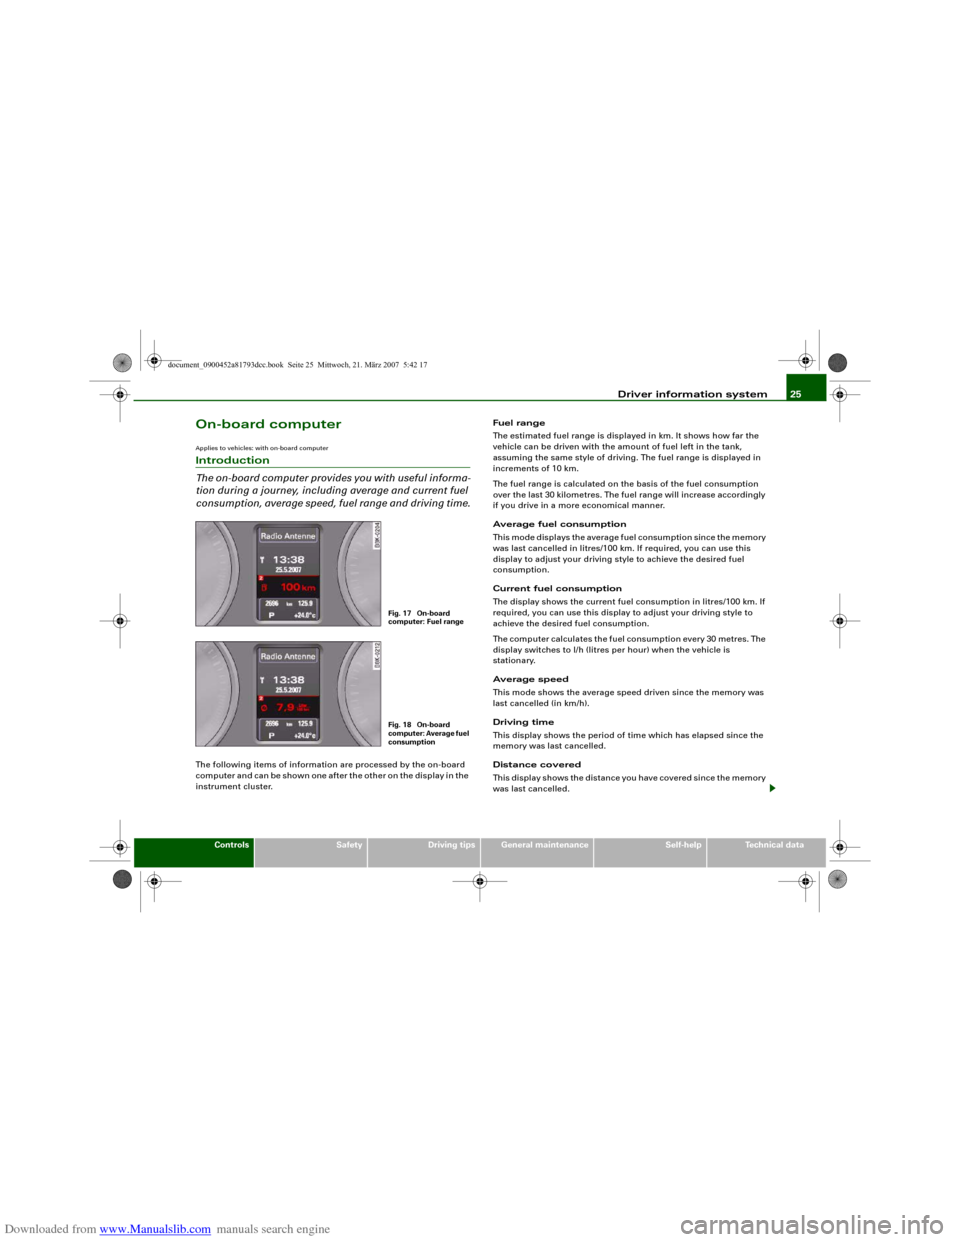
On-board computerApplies to vehicles: with on-board computerIntroduction
The on-board computer provides you with useful informa-
tion during a journey, including average and current fuel
consumption, average speed, fuel range and driving time.The following items of information are processed by the on-board
computer and can be shown one after the other on the display in the
instrument cluster.Fuel range
The estimated fuel range is displayed in km. It shows how far the
vehicle can be driven with the amount of fuel left in the tank,
assuming the same style of driving. The fuel range is displayed in
increments of 10 km.
The fuel range is calculated on the basis of the fuel consumption
over the last 30 kilometres. The fuel range will increase accordingly
if you drive in a more economical manner.
Average fuel consumption
This mode displays the average fuel consumption since the memory
was last cancelled in litres/100 km. If required, you can use this
display to adjust your driving style to achieve the desired fuel
consumption.
Current fuel consumption
The display shows the current fuel consumption in litres/100 km. If
required, you can use this display to adjust your driving style to
achieve the desired fuel consumption.
The computer calculates the fuel consumption every 30 metres. The
display switches to l/h (litres per hour) when the vehicle is
stationary.
Average speed
This mode shows the average speed driven since the memory was
last cancelled (in km/h).
Driving time
This display shows the period of time which has elapsed since the
memory was last cancelled.
Distance covered
This display shows the distance you have covered since the memory
was last cancelled.
Fig. 17 On-board
computer: Fuel rangeFig. 18 On-board
computer: Average fuel
consumption
document_0900452a81793dcc.book Seite 25 Mittwoch, 21. März 2007 5:42 17
Page 29 of 294
Downloaded from www.Manualslib.com manuals search engine Driver information system27
Controls
Safety
Driving tips
General maintenance
Self-help
Technical data eter and navigation system*. Press the Reset button briefly to
switch back and forward between these displays.
Resetting figures to zero
To cancel one of the computer readings individually, select the
required function and press the RESET button for at least one
second. The following values can be reset to zero individually using
the Reset button:
•
Average fuel consumption
•
Average speed
•
Driving time
•
Distance covered
You can also cancel all the values in the single journey memory or
the total journey memory at the same time ⇒page 27.Note
The information in the memory is cancelled if the battery is
disconnected.
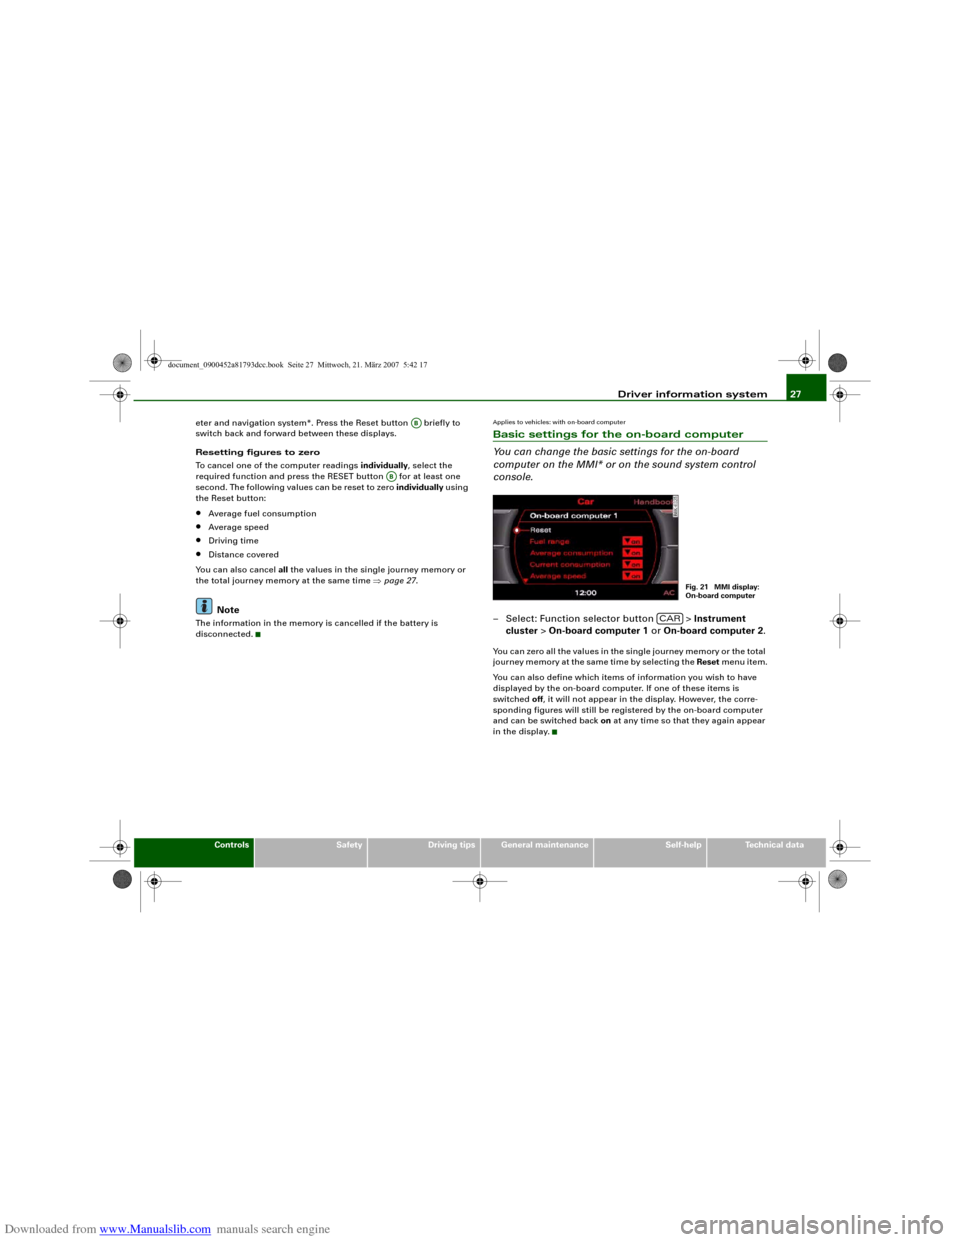
Applies to vehicles: with on-board computerBasic settings for the on-board computer
You can change the basic settings for the on-board
computer on the MMI* or on the sound system control
console.– Select: Function selector button > Instrument
cluster > On-board computer 1 or On-board computer 2.You can zero all the values in the single journey memory or the total
journey memory at the same time by selecting the Reset menu item.
You can also define which items of information you wish to have
displayed by the on-board computer. If one of these items is
switched off, it will not appear in the display. However, the corre-
sponding figures will still be registered by the on-board computer
and can be switched back on at any time so that they again appear
in the display.
AB
AB
Fig. 21 MMI display:
On-board computer
CAR
document_0900452a81793dcc.book Seite 27 Mittwoch, 21. März 2007 5:42 17
Page 31 of 294
Downloaded from www.Manualslib.com manuals search engine Driver information system29
Controls
Safety
Driving tips
General maintenance
Self-help
Technical data
Clearing speed limit
– Drive the vehicle at a minimum of 5 km/h.
– Press the button for at least 2 seconds.The speed warning symbol
lights up briefly in the display to
confirm that the selected speed has been stored. The speed limit
that has been set remains stored until another speed is set with a
brief push of the button, or until the memory is cleared with a long
push of the button.
When the speed limit has been cleared, the display will show a
crossed-out warning symbol .
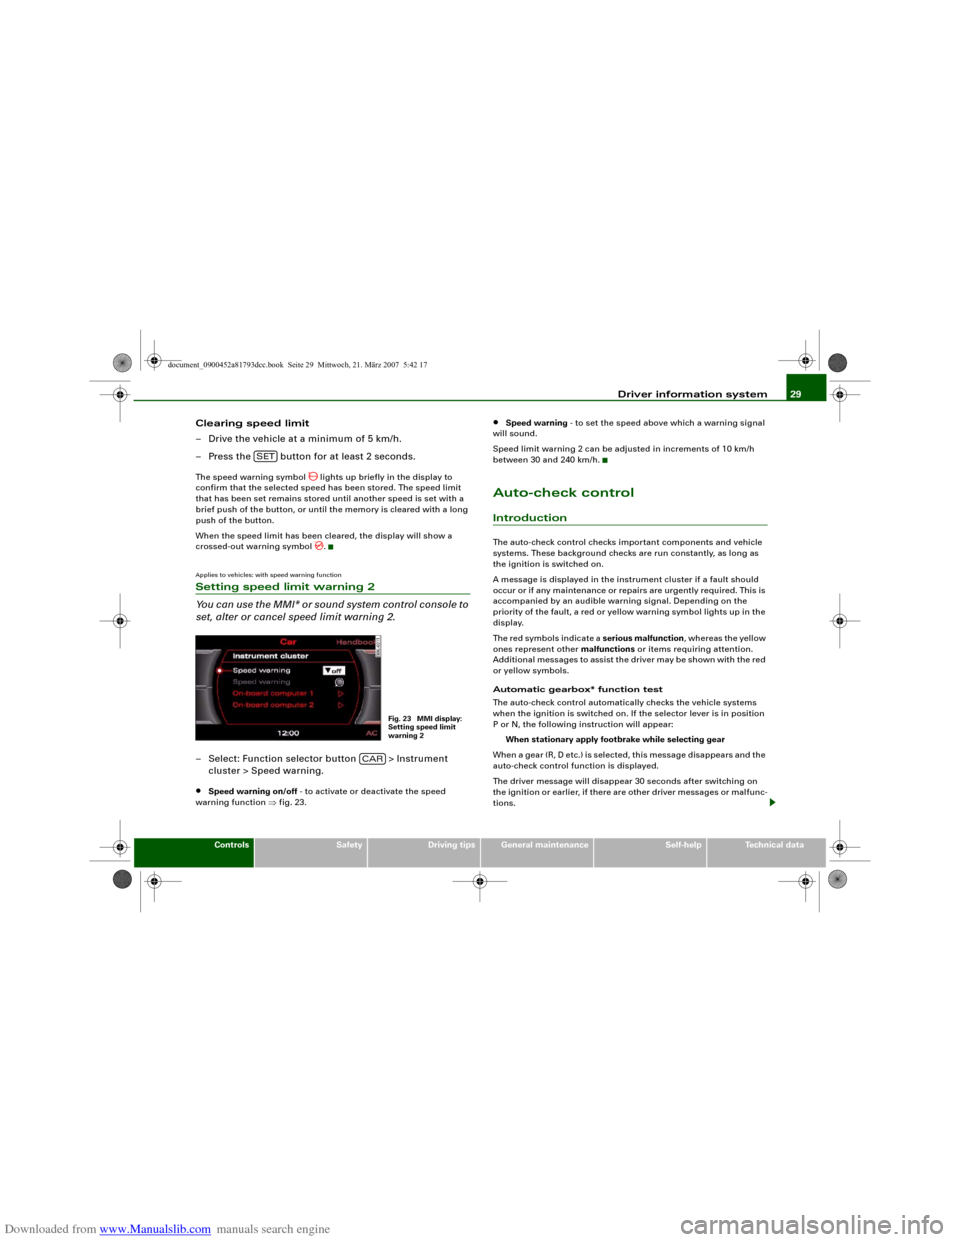
Applies to vehicles: with speed warning functionSetting speed limit warning 2
You can use the MMI* or sound system control console to
set, alter or cancel speed limit warning 2.– Select: Function selector button > Instrument
cluster > Speed warning.•
Speed warning on/off - to activate or deactivate the speed
warning function ⇒fig. 23.
•
Speed warning - to set the speed above which a warning signal
will sound.
Speed limit warning 2 can be adjusted in increments of 10 km/h
between 30 and 240 km/h.
Auto-check controlIntroductionThe auto-check control checks important components and vehicle
systems. These background checks are run constantly, as long as
the ignition is switched on.
A message is displayed in the instrument cluster if a fault should
occur or if any maintenance or repairs are urgently required. This is
accompanied by an audible warning signal. Depending on the
priority of the fault, a red or yellow warning symbol lights up in the
display.
The red symbols indicate a serious malfunction, whereas the yellow
ones represent other malfunctions or items requiring attention.
Additional messages to assist the driver may be shown with the red
or yellow symbols.
Automatic gearbox* function test
The auto-check control automatically checks the vehicle systems
when the ignition is switched on. If the selector lever is in position
P or N, the following instruction will appear:
When stationary apply footbrake while selecting gear
When a gear (R, D etc.) is selected, this message disappears and the
auto-check control function is displayed.
The driver message will disappear 30 seconds after switching on
the ignition or earlier, if there are other driver messages or malfunc-
tions.
SET
Fig. 23 MMI display:
Setting speed limit
warning 2
CAR
document_0900452a81793dcc.book Seite 29 Mittwoch, 21. März 2007 5:42 17
Page 33 of 294
Downloaded from www.Manualslib.com manuals search engine Driver information system31
Controls
Safety
Driving tips
General maintenance
Self-help
Technical data
– Switch off the engine.
– Check the function displayed. Obtain professional assist-
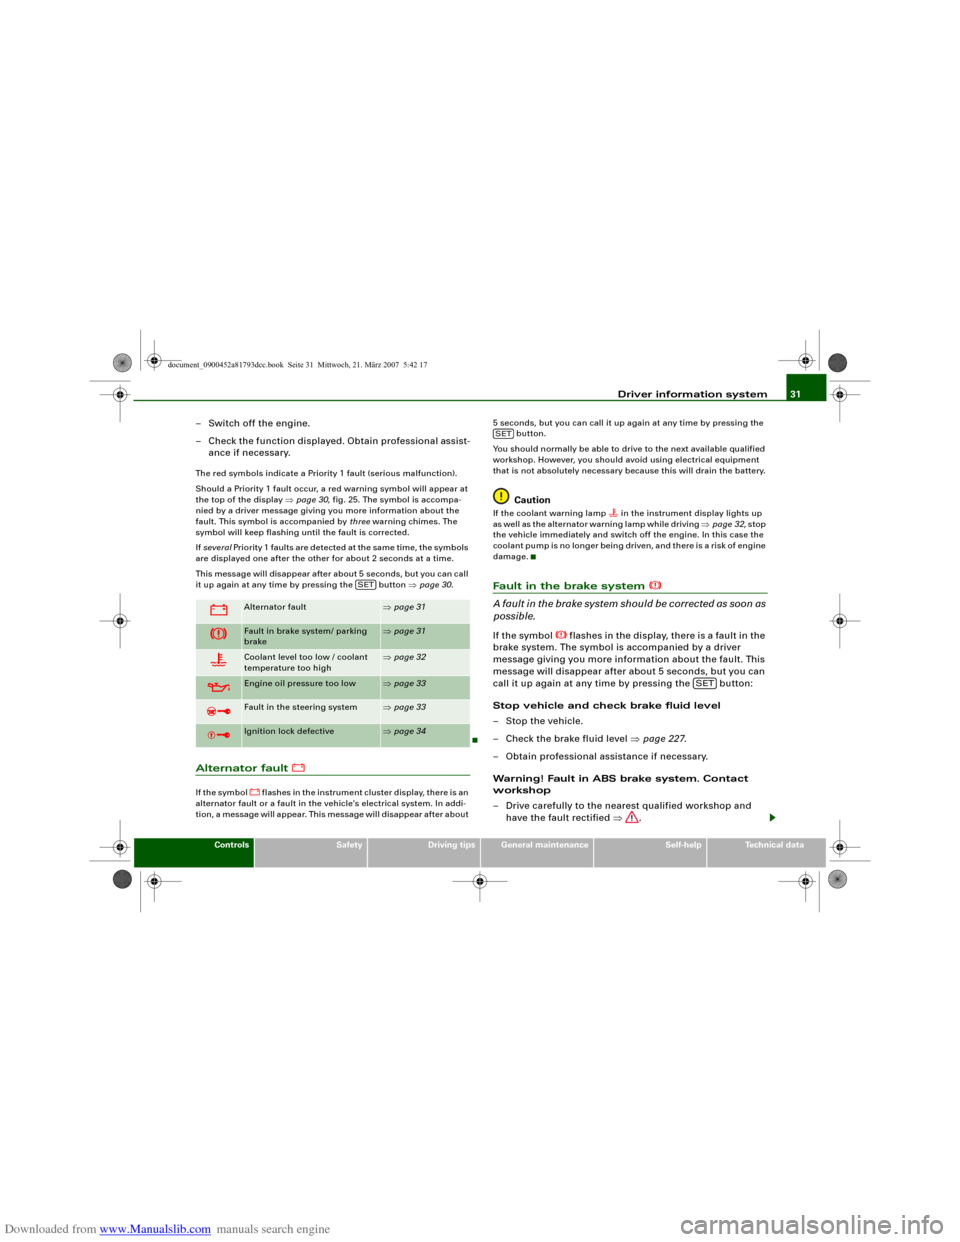
ance if necessary.The red symbols indicate a Priority 1 fault (serious malfunction).
Should a Priority 1 fault occur, a red warning symbol will appear at
the top of the display ⇒page 30, fig. 25. The symbol is accompa-
nied by a driver message giving you more information about the
fault. This symbol is accompanied by three warning chimes. The
symbol will keep flashing until the fault is corrected.
If several Priority 1 faults are detected at the same time, the symbols
are displayed one after the other for about 2 seconds at a time.
This message will disappear after about 5 seconds, but you can call
it up again at any time by pressing the button ⇒page 30.Alternator fault
If the symbol
flashes in the instrument cluster display, there is an
alternator fault or a fault in the vehicle's electrical system. In addi-
tion, a message will appear. This message will disappear after about 5 seconds, but you can call it up again at any time by pressing the
button.
You should normally be able to drive to the next available qualified
workshop. However, you should avoid using electrical equipment
that is not absolutely necessary because this will drain the battery.
Caution
If the coolant warning lamp
in the instrument display lights up
as well as the alternator warning lamp while driving ⇒page 32, stop
the vehicle immediately and switch off the engine. In this case the
coolant pump is no longer being driven, and there is a risk of engine
damage.
Fault in the brake system
A fault in the brake system should be corrected as soon as
possible.If the symbol
flashes in the display, there is a fault in the
brake system. The symbol is accompanied by a driver
message giving you more information about the fault. This
message will disappear after about 5 seconds, but you can
call it up again at any time by pressing the button:
Stop vehicle and check brake fluid level
– Stop the vehicle.
– Check the brake fluid level ⇒page 227.
– Obtain professional assistance if necessary.
Warning! Fault in ABS brake system. Contact
workshop
– Drive carefully to the nearest qualified workshop and
have the fault rectified ⇒.
Alternator fault
⇒page 31
Fault in brake system/ parking
brake
⇒page 31
Coolant level too low / coolant
temperature too high
⇒page 32
Engine oil pressure too low
⇒page 33
Fault in the steering system
⇒page 33
Ignition lock defective
⇒page 34
SET
SET
SET
document_0900452a81793dcc.book Seite 31 Mittwoch, 21. März 2007 5:42 17
Page 35 of 294
Downloaded from www.Manualslib.com manuals search engine Driver information system33
Controls
Safety
Driving tips
General maintenance
Self-help
Technical data
WARNING
•
If your vehicle should break down for technical reasons, stop it
at a safe distance away from moving traffic, switch off the engine
and turn on the hazard warning lights ⇒page 58, “Hazard
warning lights ”.
•
Never open the bonnet if you can see or hear steam or coolant
escaping from the engine compartment; there is a risk of being
scalded. Wait until you can no longer see or hear escaping steam
or coolant.
•
The engine compartment of any motor vehicle is a dangerous
place. Before carrying out any work in the engine compartment,
switch off the engine and allow it to cool down. Please observe the
important safety warnings ⇒page 221, “Working on components
in the engine compartment”.Caution
Do not drive on if the symbol
has come on to indicate a fault in
the cooling system, otherwise there is a risk of damaging the
engine.
Engine oil pressure too low
If the engine oil pressure is too low the fault must be recti-
fied immediately.If the
symbol flashes in the display, the oil pressure is
too low. The symbol is accompanied by a driver message
giving you more information about the fault. This message
will disappear after about 5 seconds, but you can call it up
again at any time by pressing the button:
Switch off engine and check oil level
–Stop the vehicle.– Switch off the engine.
– Check the engine oil level ⇒page 223.
– Obtain professional assistance if necessary.
If the engine oil level is too low
If the engine oil level is too low, add more oil ⇒page 224.
If the engine oil level is correct
If the
symbol flashes and the engine oil level is correct, obtain
professional assistance. Do not drive on. Do not continue to run the
engine, not even at idle speed.
Note
The oil pressure warning lamp
is not an indicator for the oil
level. The oil level should therefore be checked regularly.
Fault in the steering system
The steering wheel cannot be unlocked if there is a fault
in the electronic steering lock.If the symbol
flashes in the display, there is a malfunc-
tion in the electronic steering lock. The symbol is accompa-
nied by a driver message giving you more information
about the fault. This message will disappear after about
5 seconds, but you can call it up again at any time by
pressing the button:
Do not drive vehicle. Steering defective
– You should obtain professional assistance.
–Do not have the vehicle towed away.
SET
SET
document_0900452a81793dcc.book Seite 33 Mittwoch, 21. März 2007 5:42 17
Page 37 of 294
Downloaded from www.Manualslib.com manuals search engine Driver information system35
Controls
Safety
Driving tips
General maintenance
Self-help
Technical data
Note
On some models the speed limit warning 1
and speed limit
warning 2
will also be displayed as yellow symbols. These always
appear as a small symbol at the top of the display ⇒page 28.
Applies to vehicles: with advanced keyKey not in vehicle
Key not in vehicle
This message will appear together with the symbol
if the remote
control key is removed from the vehicle while the engine is running.
This is to remind you not to continue driving without the key (for
example if you change drivers).
If the remote control key is not in the vehicle you will not be able to
switch on the ignition or restart the engine after it has been
switched off. You will also not be able to lock the vehicle from the
outside.
Light sensor/ rain sensor defective
Automatic headlights/ automatic wipers defective
If the symbol appears, this means that the light sensor/ rain
sensor is not functioning. For safety reasons, the dipped beam
headlights will then be switched on permanently when the light
switch is set to the AUTO position. However, you can still switch the
lights on and off in the normal way with the light switch. If the rain
sensor is defective, the functions operated via the windscreen wiper
lever will still be available. You should have the light sensor/ rain
sensor checked by a qualified workshop as soon as possible.
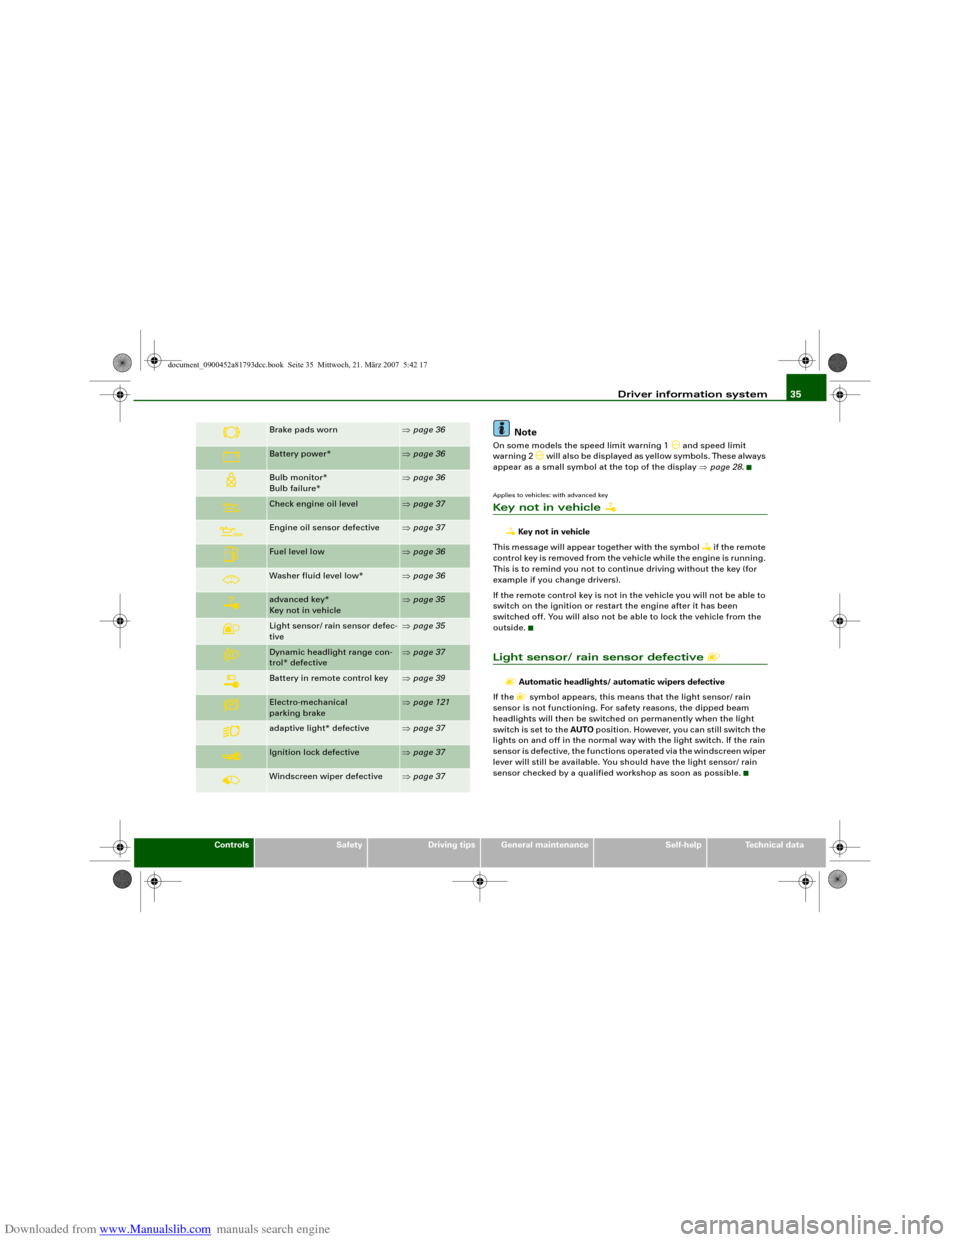
Brake pads worn
⇒page 36
Battery power*
⇒page 36
Bulb monitor*
Bulb failure*
⇒page 36
Check engine oil level
⇒page 37
Engine oil sensor defective
⇒page 37
Fuel level low
⇒page 36
Washer fluid level low*
⇒page 36
advanced key*
Key not in vehicle
⇒page 35
Light sensor/ rain sensor defec-
tive
⇒page 35
Dynamic headlight range con-
trol* defective
⇒page 37
Battery in remote control key
⇒page 39
Electro-mechanical
parking brake
⇒page 121
adaptive light* defective
⇒page 37
Ignition lock defective
⇒page 37
Windscreen wiper defective
⇒page 37
document_0900452a81793dcc.book Seite 35 Mittwoch, 21. März 2007 5:42 17
Page 39 of 294
Downloaded from www.Manualslib.com manuals search engine Driver information system37
Controls
Safety
Driving tips
General maintenance
Self-help
Technical data Message comes on and does not go out
If the message appears in the display after the ignition is switched
on or while driving, and does not go out again, the battery is not
being maintained at the proper power level. Starting reliability may
be impaired. You should have the battery checked by a qualified
workshop as soon as possible.
Check engine oil level
Please check oil level
If the symbol lights up, check the engine oil level as soon as
possible ⇒page 223. Top up the oil at the next opportunity
⇒page 224.
Engine oil sensor defective
Oil level ! Sensor defective
If the
symbol lights up, take the vehicle to a qualified workshop
and have the oil level sensor checked. Until then it is advisable to
check the oil level every time you fill up with fuel ⇒page 223.
Applies to vehicles: with dynamic headlight range controlHeadlight range control defective
Headlight range control defective
This symbol
indicates a malfunction in the dynamic headlight
range control. Take the vehicle to a qualified workshop to have the
dynamic headlight range control function repaired.
Applies to vehicles: with adaptive lightadaptive light defective
adaptive light defective
This symbol
indicates that the adaptive light is defective. Take
the vehicle to a qualified workshop to have the headlights and/or
the control unit for the adaptive light repaired.
Ignition lock defective
Ignition lock defective
If the symbol
lights up in the display, there is a malfunction in
the electronic ignition lock. Take the vehicle to a qualified workshop
to have the problem remedied.
Windscreen wipers defective
Windscreen wipers defective
This symbol
indicates a malfunction in the electronics for the
windscreen wipers. Take the vehicle to a qualified workshop to have
the windscreen wiper system repaired.
document_0900452a81793dcc.book Seite 37 Mittwoch, 21. März 2007 5:42 17
Page 41 of 294
Downloaded from www.Manualslib.com manuals search engine Doors and windows39
Controls
Safety
Driving tips
General maintenance
Self-help
Technical data
WARNING
•
Always switch off the ignition and take the key with you when
leaving the vehicle - even if you only intend to be gone for a short
time. This is especially important if children are left in the car. They
might otherwise be able to start the engine or use power-operated
equipment such as the electric windows - this could lead to inju-
ries.
•
Wait for the vehicle to come to a standstill before removing the
ignition key from the lock. Otherwise the steering lock could
engage suddenly, causing an accident.Note
The function of the remote control key may be impaired by interfer-
ence from other nearby radio signals (for example from a mobile
telephone or TV transmitter) if these are in the same frequency
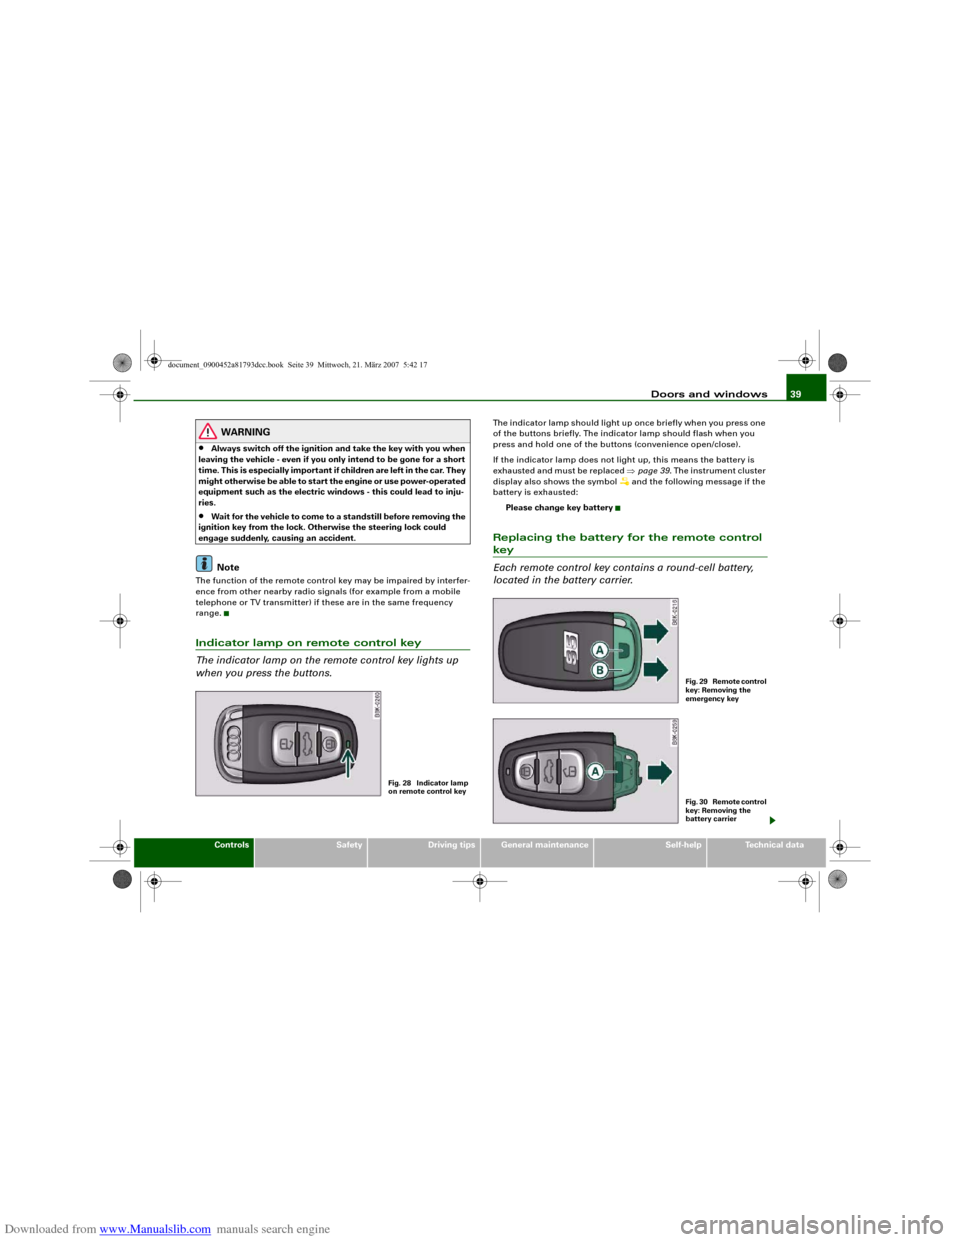
range.Indicator lamp on remote control key
The indicator lamp on the remote control key lights up
when you press the buttons.
The indicator lamp should light up once briefly when you press one
of the buttons briefly. The indicator lamp should flash when you
press and hold one of the buttons (convenience open/close).
If the indicator lamp does not light up, this means the battery is
exhausted and must be replaced ⇒page 39. The instrument cluster
display also shows the symbol
and the following message if the
battery is exhausted:
Please change key battery
Replacing the battery for the remote control key
Each remote control key contains a round-cell battery,
located in the battery carrier.
Fig. 28 Indicator lamp
on remote control key
F i g . 2 9 R e m o t e c o n t r o l
key: Removing the
emergency keyF i g . 3 0 R e m o t e c o n t r o l
key: Removing the
battery carrier
document_0900452a81793dcc.book Seite 39 Mittwoch, 21. März 2007 5:42 17
Page 43 of 294
Downloaded from www.Manualslib.com manuals search engine Doors and windows41
Controls
Safety
Driving tips
General maintenance
Self-help
Technical data
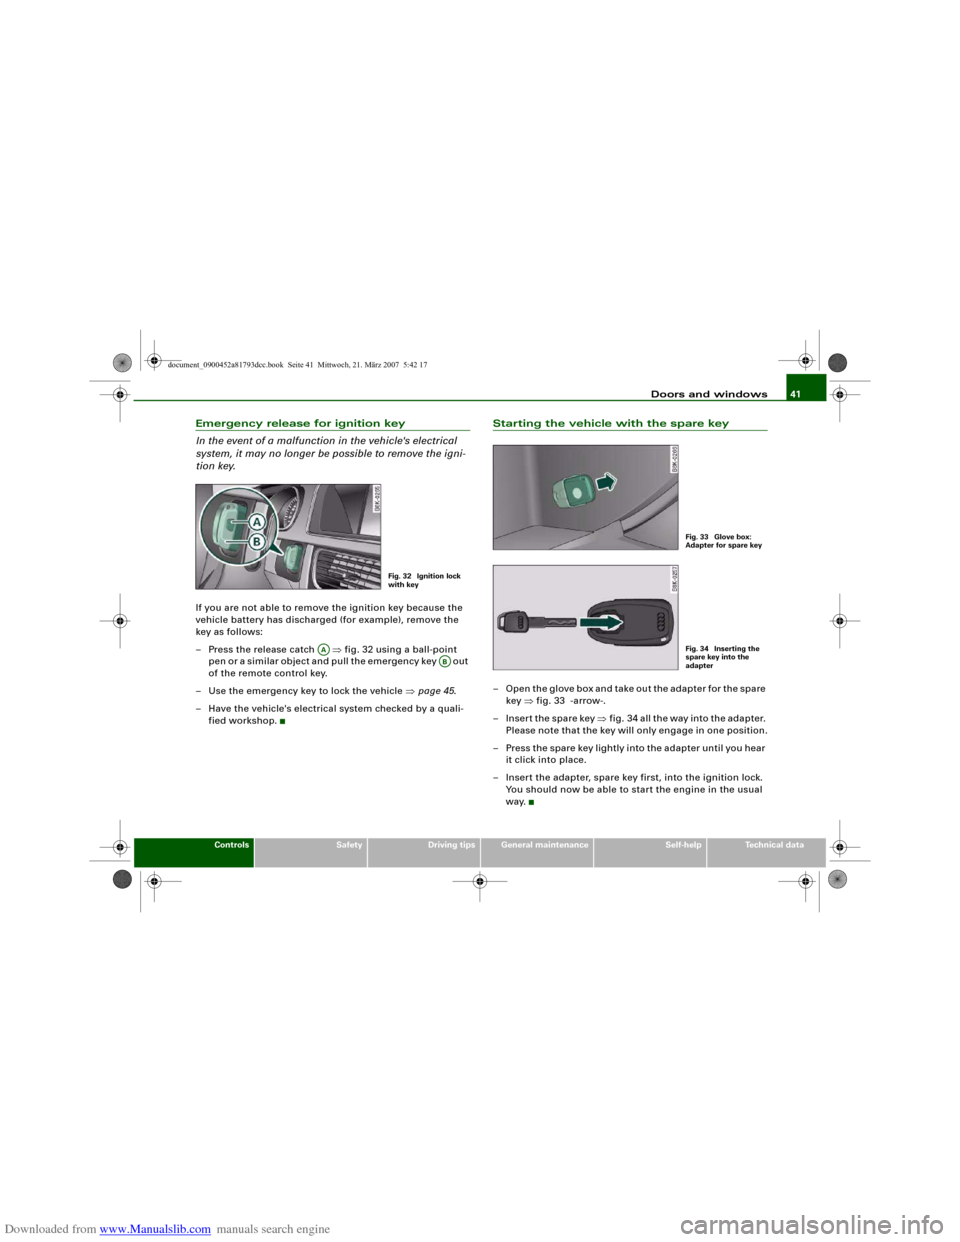
Emergency release for ignition key
In the event of a malfunction in the vehicle's electrical
system, it may no longer be possible to remove the igni-
tion key.If you are not able to remove the ignition key because the
vehicle battery has discharged (for example), remove the
key as follows:
– Press the release catch ⇒fig. 32 using a ball-point
pen or a similar object and pull the emergency key out
of the remote control key.
– Use the emergency key to lock the vehicle ⇒page 45.
– Have the vehicle's electrical system checked by a quali-
fied workshop.
Starting the vehicle with the spare key– Open the glove box and take out the adapter for the spare
key ⇒fig. 33 -arrow-.
– Insert the spare key ⇒fig. 34 all the way into the adapter.
Please note that the key will only engage in one position.
– Press the spare key lightly into the adapter until you hear
it click into place.
– Insert the adapter, spare key first, into the ignition lock.
You should now be able to start the engine in the usual
way.
Fig. 32 Ignition lock
with key
AA
AB
Fig. 33 Glove box:
Adapter for spare keyFig. 34 Inserting the
spare key into the
adapter
document_0900452a81793dcc.book Seite 41 Mittwoch, 21. März 2007 5:42 17