technical data AUDI S5 2008 8T / 1.G Owner's Manual
[x] Cancel search | Manufacturer: AUDI, Model Year: 2008, Model line: S5, Model: AUDI S5 2008 8T / 1.GPages: 294, PDF Size: 12.13 MB
Page 45 of 294
Downloaded from www.Manualslib.com manuals search engine Doors and windows43
Controls
Safety
Driving tips
General maintenance
Self-help
Technical data
WARNING
Do not leave anyone (especially children) in the car if it is locked
from the outside and the deadlock mechanism is activated: the
doors and windows cannot then be opened from the inside.
Locked doors could delay assistance in an emergency, potentially
putting lives at risk.
Note
•
Never leave any valuable items in the vehicle unattended. Even a
locked vehicle is not a safe.
•
If the diode on the driver's window sill lights up for about 30
seconds when the vehicle is locked, the central locking system or
anti-theft alarm* is not working properly. Please have the malfunc-
tion repaired by an Audi dealer or qualified workshop.
•
The interior monitor of the anti-theft alarm* system will only
function as intended if the windows and the tilting panorama roof*
are closed.
Setting the central locking system
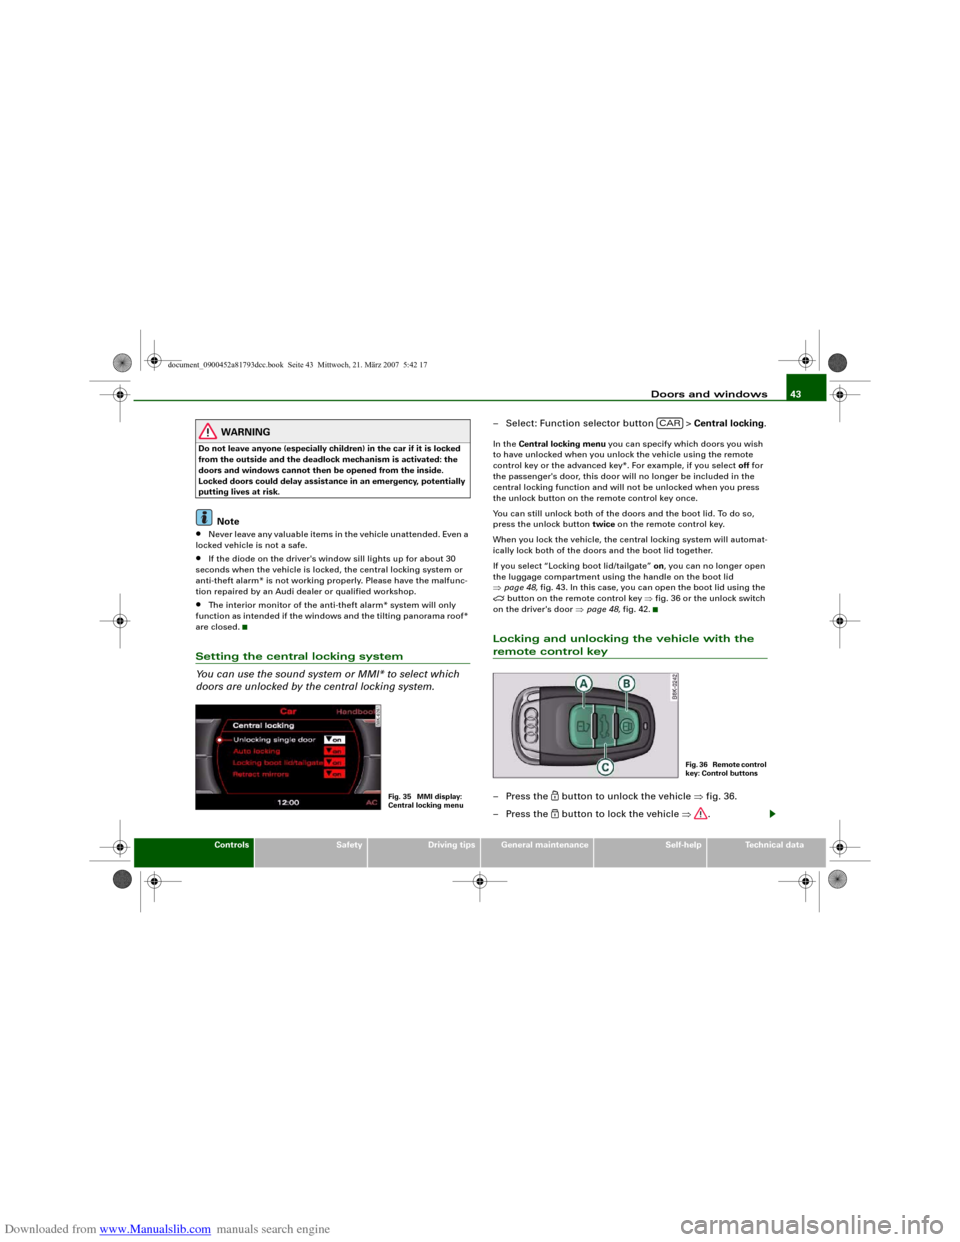
You can use the sound system or MMI* to select which
doors are unlocked by the central locking system.
– Select: Function selector button > Central locking.In the Central locking menu you can specify which doors you wish
to have unlocked when you unlock the vehicle using the remote
control key or the advanced key*. For example, if you select off for
the passenger's door, this door will no longer be included in the
central locking function and will not be unlocked when you press
the unlock button on the remote control key once.
You can still unlock both of the doors and the boot lid. To do so,
press the unlock button twice on the remote control key.
When you lock the vehicle, the central locking system will automat-
ically lock both of the doors and the boot lid together.
If you select “Locking boot lid/tailgate” on, you can no longer open
the luggage compartment using the handle on the boot lid
⇒page 48, fig. 43. In this case, you can open the boot lid using the
button on the remote control key ⇒fig. 36 or the unlock switch
on the driver's door ⇒page 48, fig. 42.
Locking and unlocking the vehicle with the remote control key– Press the
button to unlock the vehicle ⇒fig. 36.
– Press the button to lock the vehicle ⇒.
Fig. 35 MMI display:
Central locking menu
CAR
F i g . 3 6 R e m o t e c o n t r o l
key: Control buttons
document_0900452a81793dcc.book Seite 43 Mittwoch, 21. März 2007 5:42 17
Page 47 of 294
Downloaded from www.Manualslib.com manuals search engine Doors and windows45
Controls
Safety
Driving tips
General maintenance
Self-help
Technical data door is unlocked. The remote control key has to be within a range of
about 1.5 metres of the relevant door or the boot lid. It does not
matter where you carry the key, for instance whether it is in your
jacket pocket or in a briefcase.
The unlocking function may be affected if the sensor area on the
door handle is touched while the vehicle is being unlocked.
The locking function may be affected if you grasp the door handle
while the vehicle is being locked.
Once the doors have been locked, they cannot be opened again
immediately. This will enable you to check that the doors are prop-
erly closed.
The system will either unlock both the doors or one door only,
depending on the settings you have chosen on the sound system or
MMI* ⇒page 43.
WARNING
Do not leave anyone (especially children) in the car if it is locked
from the outside and the deadlock mechanism is activated: the
doors and windows cannot then be opened from the inside.
Locked doors could delay assistance in an emergency, potentially
putting lives at risk.
Note
Please note the following points if the vehicle is left parked for long
periods:•
To save electrical power, the proximity sensors are switched off
after a few days. You will then need to pull the door handle once to
unlock the vehicle, and a second time to open it.
•
To prevent the battery from becoming discharged and thus
maintain the vehicle's starting ability for as long as possible, the
power management system will gradually switch off convenience
functions that are not required. In this case you may not be able to
unlock the vehicle with this convenience function.
Locking and unlocking the vehicle using the key
If the central locking system should fail to work, you can
still lock and unlock the driver's door by turning the emer-
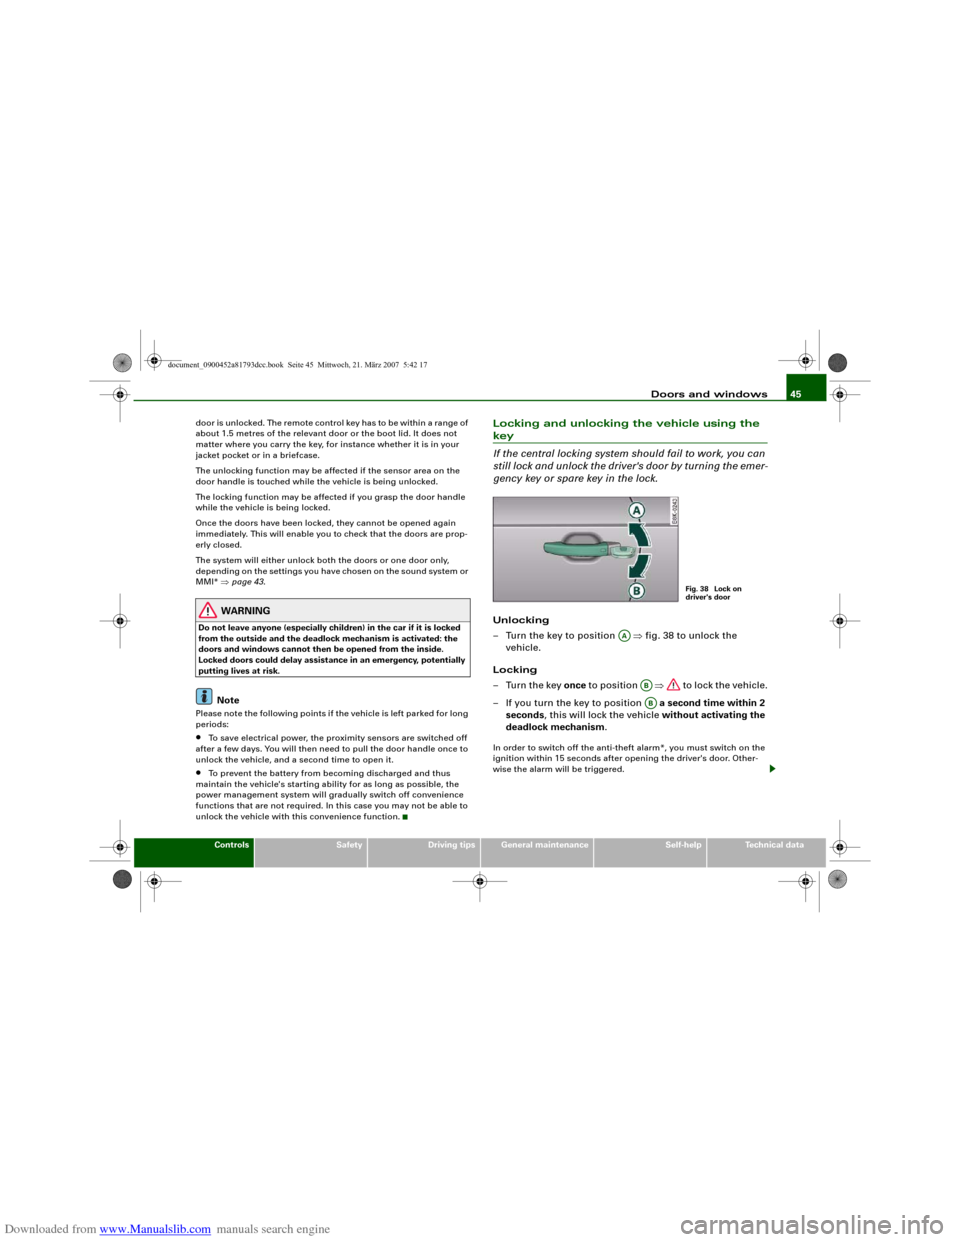
gency key or spare key in the lock.Unlocking
– Turn the key to position ⇒fig. 38 to unlock the
vehicle.
Locking
–Turn the key once to position ⇒ to lock the vehicle.
– If you turn the key to position a second time within 2
seconds, this will lock the vehicle without activating the
deadlock mechanism.In order to switch off the anti-theft alarm*, you must switch on the
ignition within 15 seconds after opening the driver's door. Other-
wise the alarm will be triggered.
Fig. 38 Lock on
driver's door
AA
ABAB
document_0900452a81793dcc.book Seite 45 Mittwoch, 21. März 2007 5:42 17
Page 49 of 294
Downloaded from www.Manualslib.com manuals search engine Doors and windows47
Controls
Safety
Driving tips
General maintenance
Self-help
Technical data
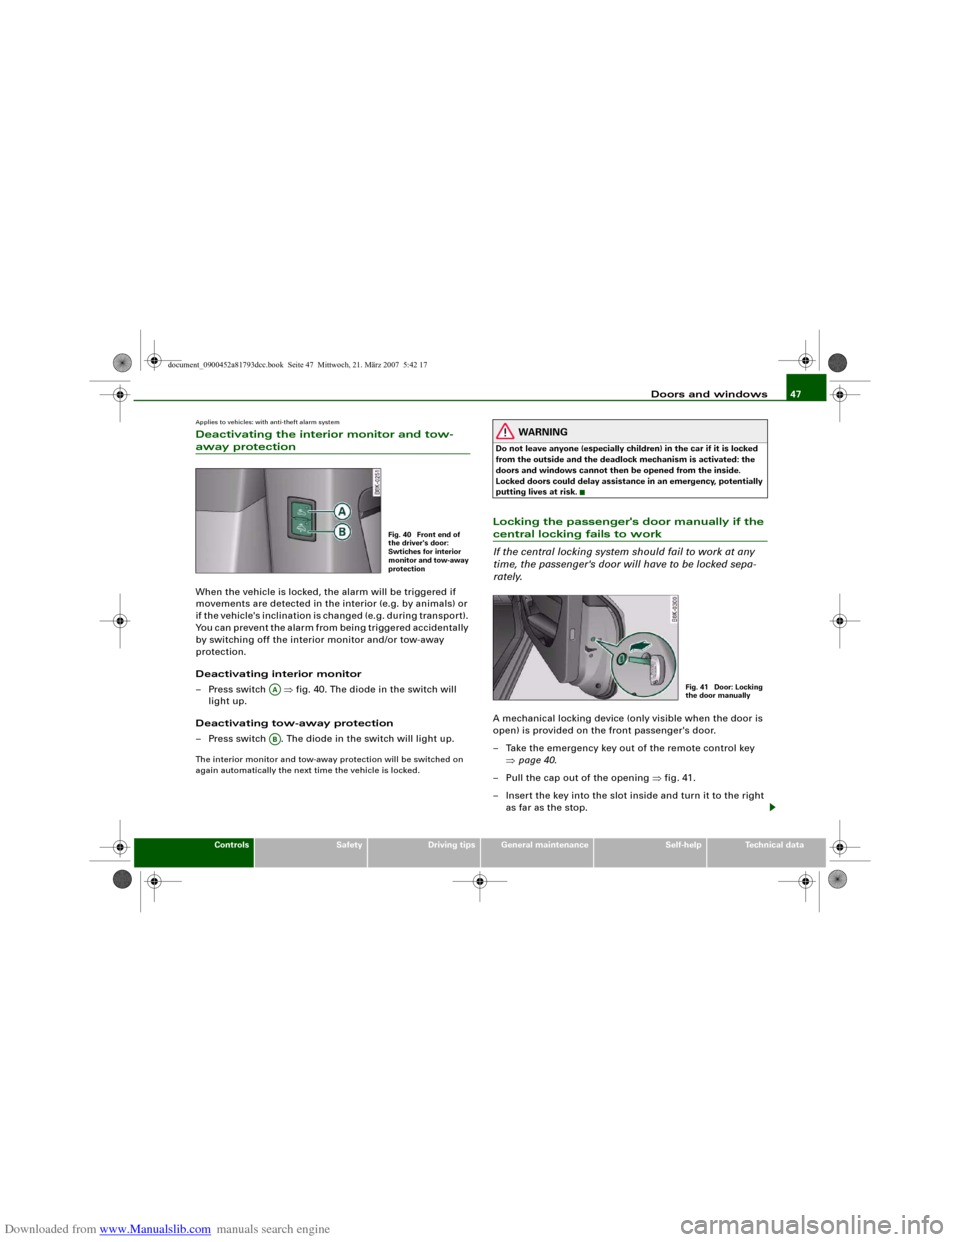
Applies to vehicles: with anti-theft alarm systemDeactivating the interior monitor and tow-away protectionWhen the vehicle is locked, the alarm will be triggered if
movements are detected in the interior (e.g. by animals) or
if the vehicle's inclination is changed (e.g. during transport).
You can prevent the alarm from being triggered accidentally
by switching off the interior monitor and/or tow-away
protection.
Deactivating interior monitor
– Press switch ⇒fig. 40. The diode in the switch will
light up.
Deactivating tow-away protection
– Press switch . The diode in the switch will light up.The interior monitor and tow-away protection will be switched on
again automatically the next time the vehicle is locked.
WARNING
Do not leave anyone (especially children) in the car if it is locked
from the outside and the deadlock mechanism is activated: the
doors and windows cannot then be opened from the inside.
Locked doors could delay assistance in an emergency, potentially
putting lives at risk.Locking the passenger's door manually if the central locking fails to work
If the central locking system should fail to work at any
time, the passenger's door will have to be locked sepa-
rately.A mechanical locking device (only visible when the door is
open) is provided on the front passenger's door.
– Take the emergency key out of the remote control key
⇒page 40.
– Pull the cap out of the opening ⇒fig. 41.
– Insert the key into the slot inside and turn it to the right
as far as the stop.
Fig. 40 Front end of
the driver's door:
Swtiches for interior
monitor and tow-away
protection
AAAB
Fig. 41 Door: Locking
the door manually
document_0900452a81793dcc.book Seite 47 Mittwoch, 21. März 2007 5:42 17
Page 51 of 294
Downloaded from www.Manualslib.com manuals search engine Doors and windows49
Controls
Safety
Driving tips
General maintenance
Self-help
Technical data
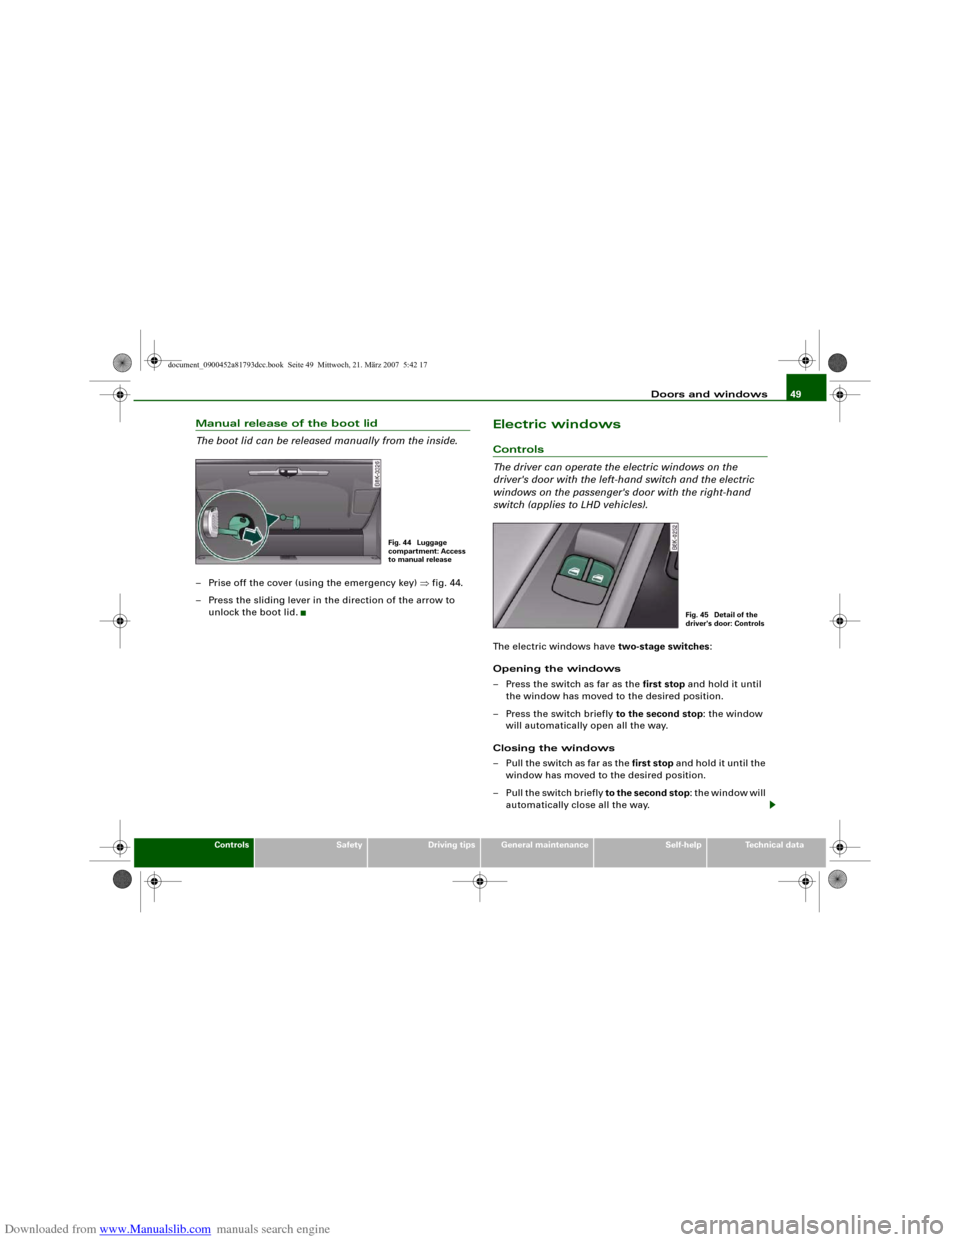
Manual release of the boot lid
The boot lid can be released manually from the inside.– Prise off the cover (using the emergency key) ⇒fig. 44.
– Press the sliding lever in the direction of the arrow to
unlock the boot lid.
Electric windowsControls
The driver can operate the electric windows on the
driver's door with the left-hand switch and the electric
windows on the passenger's door with the right-hand
switch (applies to LHD vehicles).The electric windows have two-stage switches:
Opening the windows
– Press the switch as far as the first stop and hold it until
the window has moved to the desired position.
– Press the switch briefly to the second stop: the window
will automatically open all the way.
Closing the windows
– Pull the switch as far as the first stop and hold it until the
window has moved to the desired position.
–Pull the switch briefly to the second stop: the window will
automatically close all the way.
Fig. 44 Luggage
compartment: Access
to manual release
Fig. 45 Detail of the
driver's door: Controls
document_0900452a81793dcc.book Seite 49 Mittwoch, 21. März 2007 5:42 17
Page 53 of 294
Downloaded from www.Manualslib.com manuals search engine Doors and windows51
Controls
Safety
Driving tips
General maintenance
Self-help
Technical data
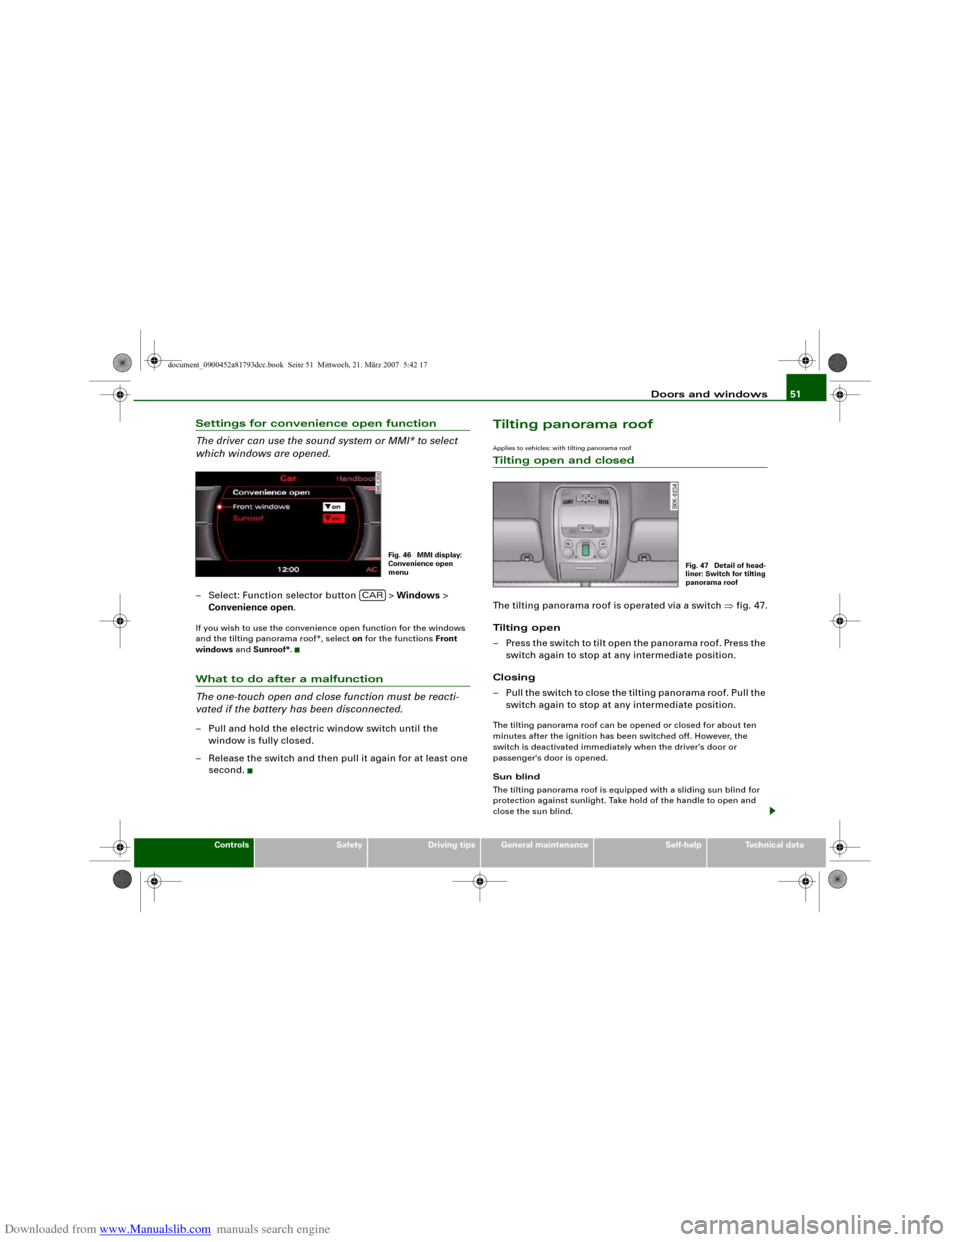
Settings for convenience open function
The driver can use the sound system or MMI* to select
which windows are opened.– Select: Function selector button > Windows >
Convenience open.If you wish to use the convenience open function for the windows
and the tilting panorama roof*, select on for the functions Front
windows and Sunroof*.What to do after a malfunction
The one-touch open and close function must be reacti-
vated if the battery has been disconnected.– Pull and hold the electric window switch until the
window is fully closed.
– Release the switch and then pull it again for at least one
second.
Tilting panorama roofApplies to vehicles: with tilting panorama roofTilting open and closedThe tilting panorama roof is operated via a switch ⇒fig. 47.
Tilting open
– Press the switch to tilt open the panorama roof. Press the
switch again to stop at any intermediate position.
Closing
– Pull the switch to close the tilting panorama roof. Pull the
switch again to stop at any intermediate position.The tilting panorama roof can be opened or closed for about ten
minutes after the ignition has been switched off. However, the
switch is deactivated immediately when the driver's door or
passenger's door is opened.
Sun blind
The tilting panorama roof is equipped with a sliding sun blind for
protection against sunlight. Take hold of the handle to open and
close the sun blind.
Fig. 46 MMI display:
Convenience open
menu
CAR
Fig. 47 Detail of head-
liner: Switch for tilting
panorama roof
document_0900452a81793dcc.book Seite 51 Mittwoch, 21. März 2007 5:42 17
Page 55 of 294
Downloaded from www.Manualslib.com manuals search engine Doors and windows53
Controls
Safety
Driving tips
General maintenance
Self-help
Technical data
– Carefully pull out the light housing.
– Remove the fuse box cover ⇒page 261 ⇒page 261,
fig. 241 on the driver's side.
– Take the crank handle from its mounting.
– Insert the crank handle all the way into the hexagonal
socket ⇒page 52, fig. 49.
– Hold the crank in position and turn it to close the sun
roof.
– Re-install the complete light housing.
– Have the fault rectified.
NoteTo make it easier to turn the crank, you can make use of the screw-
driver handle. Detach the handle from the screwdriver and then fit
the handle onto the crank.
document_0900452a81793dcc.book Seite 53 Mittwoch, 21. März 2007 5:42 17
Page 57 of 294
Downloaded from www.Manualslib.com manuals search engine Lights and vision55
Controls
Safety
Driving tips
General maintenance
Self-help
Technical data
WARNING
The automatic headlights are only intended to assist the driver.
The driver must always ensure that the headlights are used when
required, and may have to switch them on manually when the light
conditions or visibility are poor. For example, the light sensors are
not able to detect fog. Therefore, you should always switch on the
headlights
in these conditions and when driving after dark.
Note
•
The light sensor for automatic headlight control is located in the
mounting for the interior mirror. Do not affix any stickers on this
section of the windscreen to avoid malfunctioning of the sensor.
•
The default sensitivity of the light sensor, which is set at the
factory, can be changed in the MMI menu Auto headlights
⇒page 56.
•
If the lights are left on after the key has been taken out of the
ignition lock, a buzzer sounds when the driver's door is opened.
•
The use of the lighting described here is subject to the relevant
statutory requirements.
•
The coming home/leaving home function is active only when the
light switch is set to AUTO.
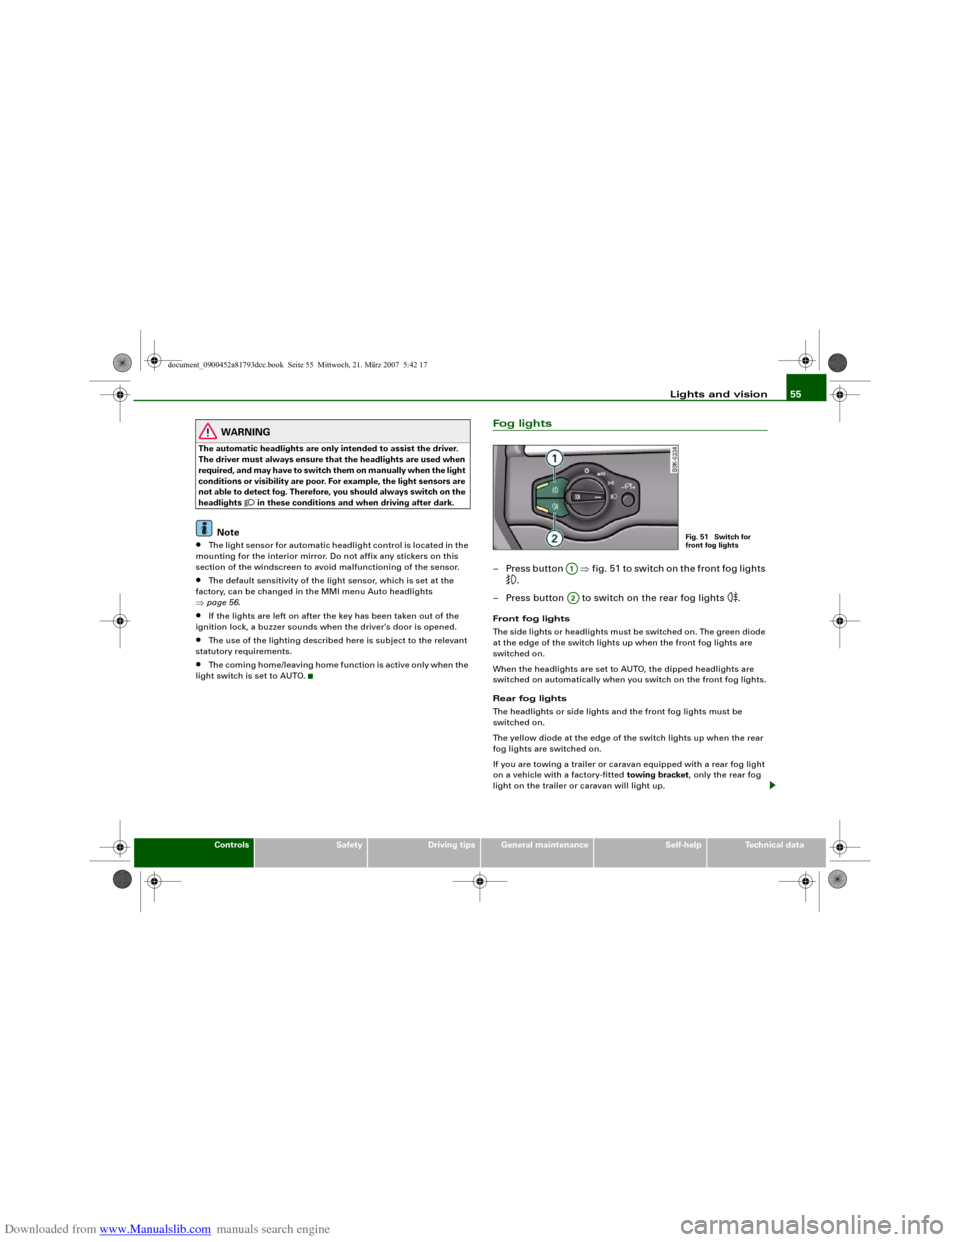
Fog lights– Press button ⇒fig. 51 to switch on the front fog lights
.
– Press button to switch on the rear fog lights
.
Front fog lights
The side lights or headlights must be switched on. The green diode
at the edge of the switch lights up when the front fog lights are
switched on.
When the headlights are set to AUTO, the dipped headlights are
switched on automatically when you switch on the front fog lights.
Rear fog lights
The headlights or side lights and the front fog lights must be
switched on.
The yellow diode at the edge of the switch lights up when the rear
fog lights are switched on.
If you are towing a trailer or caravan equipped with a rear fog light
on a vehicle with a factory-fitted towing bracket, only the rear fog
light on the trailer or caravan will light up.
Fig. 51 Switch for
front fog lights
A1A2
document_0900452a81793dcc.book Seite 55 Mittwoch, 21. März 2007 5:42 17
Page 59 of 294
Downloaded from www.Manualslib.com manuals search engine Lights and vision57
Controls
Safety
Driving tips
General maintenance
Self-help
Technical data
– Turn the button anti-clockwise -” to reduce the bright-
ness of the instrument lighting in dark conditions.
– Press the knob in again to prevent the setting from being
changed unintentionally.The instrument lighting (dials and needles), the centre console illu-
mination and the illumination of the displays are regulated by a
light sensor incorporated in the instrument cluster. In bright condi-
tions any changes made to the brightness of the instrument lighting
have no effect.
Note
The instrument lighting (illumination of dials and needles) is
switched on when the ignition is on and the vehicle's lights are off.
The instrument lighting is dimmed automatically as the daylight
starts to fade; it is switched off completely when the light condi-
tions become very poor. This function is intended to remind the
driver to switch on the dipped-beam headlights in good time when
light conditions become poor.Applies to vehicles: with xenon headlight bulbsDynamic headlight range controlHeadlights with xenon gas-discharge bulbs automatically adapt to
suit the load being carried when the engine is switched on. The
headlights are also automatically adjusted when the vehicle is in
motion (e.g. when accelerating and braking).
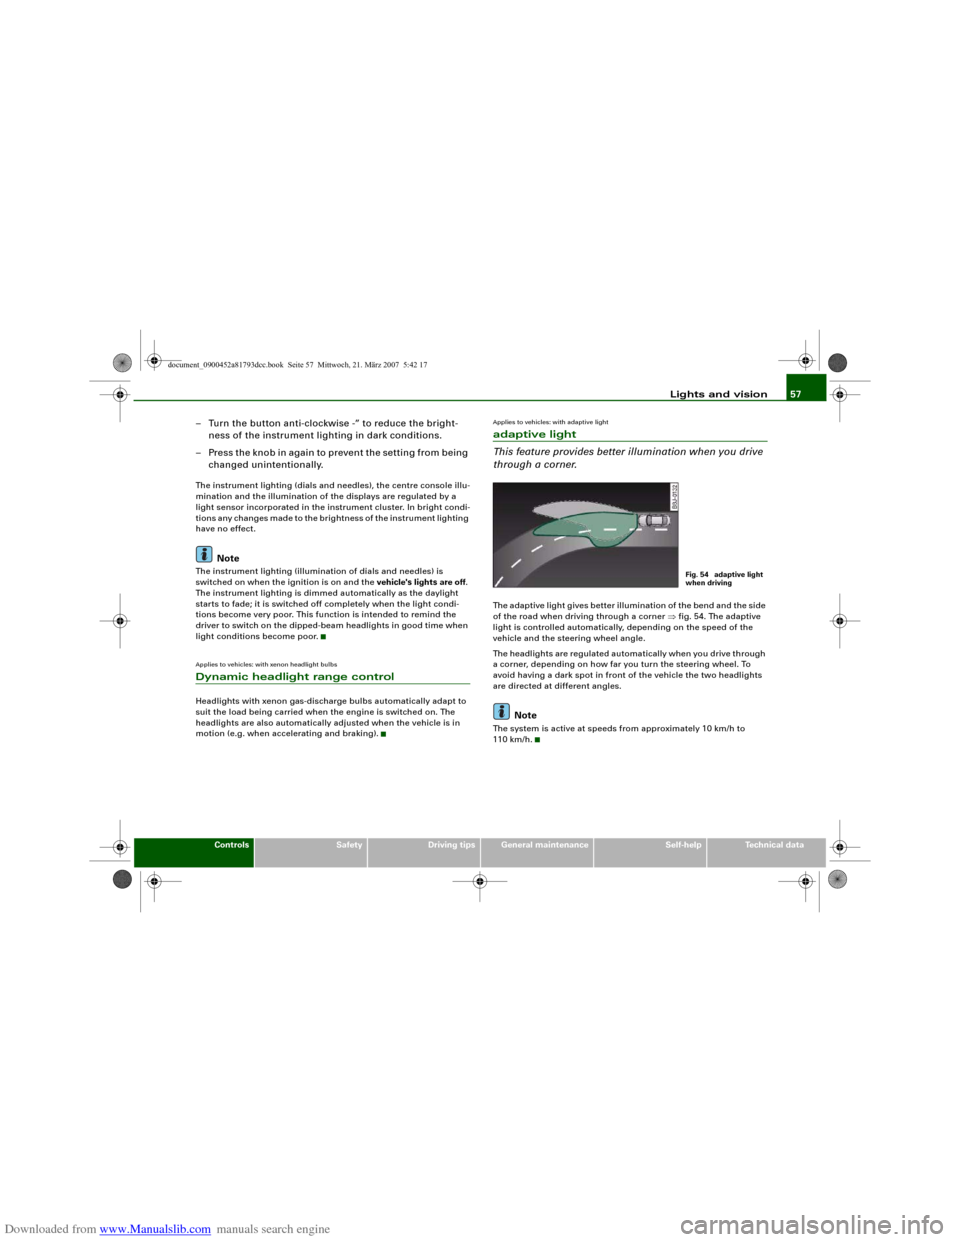
Applies to vehicles: with adaptive lightadaptive light
This feature provides better illumination when you drive
through a corner.The adaptive light gives better illumination of the bend and the side
of the road when driving through a corner ⇒fig. 54. The adaptive
light is controlled automatically, depending on the speed of the
vehicle and the steering wheel angle.
The headlights are regulated automatically when you drive through
a corner, depending on how far you turn the steering wheel. To
avoid having a dark spot in front of the vehicle the two headlights
are directed at different angles.
Note
The system is active at speeds from approximately 10 km/h to
110 km/h.
Fig. 54 adaptive light
when driving
document_0900452a81793dcc.book Seite 57 Mittwoch, 21. März 2007 5:42 17
Page 61 of 294
Downloaded from www.Manualslib.com manuals search engine Lights and vision59
Controls
Safety
Driving tips
General maintenance
Self-help
Technical data
Headlight flasher
– Pull the lever towards the steering wheel to operate the
flasher.
Parking lights
– Switch off the ignition.
– Move the lever up or down to turn on the right or left-
hand parking lights respectively.Notes on these functions•
The turn signals only work when the ignition is switched on. The
corresponding indicator lamp
or
flashes in the instrument
cluster.
•
The turn signals are cancelled automatically when the steering
wheel is returned to the straight-ahead position.
•
The main beam headlights can only be switched on if the dipped
beam headlights are already on. The main beam headlight indicator
lamp then comes on in the instrument cluster.
•
The headlight flasher comes on for as long as you pull the lever –
even if no other lights are switched on. The main beam headlight
indicator lamp
then comes on in the instrument cluster.
•
When the parking lights are switched on, the headlight and the
rear light on one side of the car light up with reduced intensity. The
parking lights will only work with the ignition off. A warning buzzer
will sound for as long as the driver's door is open.Caution
Do not use the main beam headlights or the headlight flasher if this
would dazzle oncoming traffic.
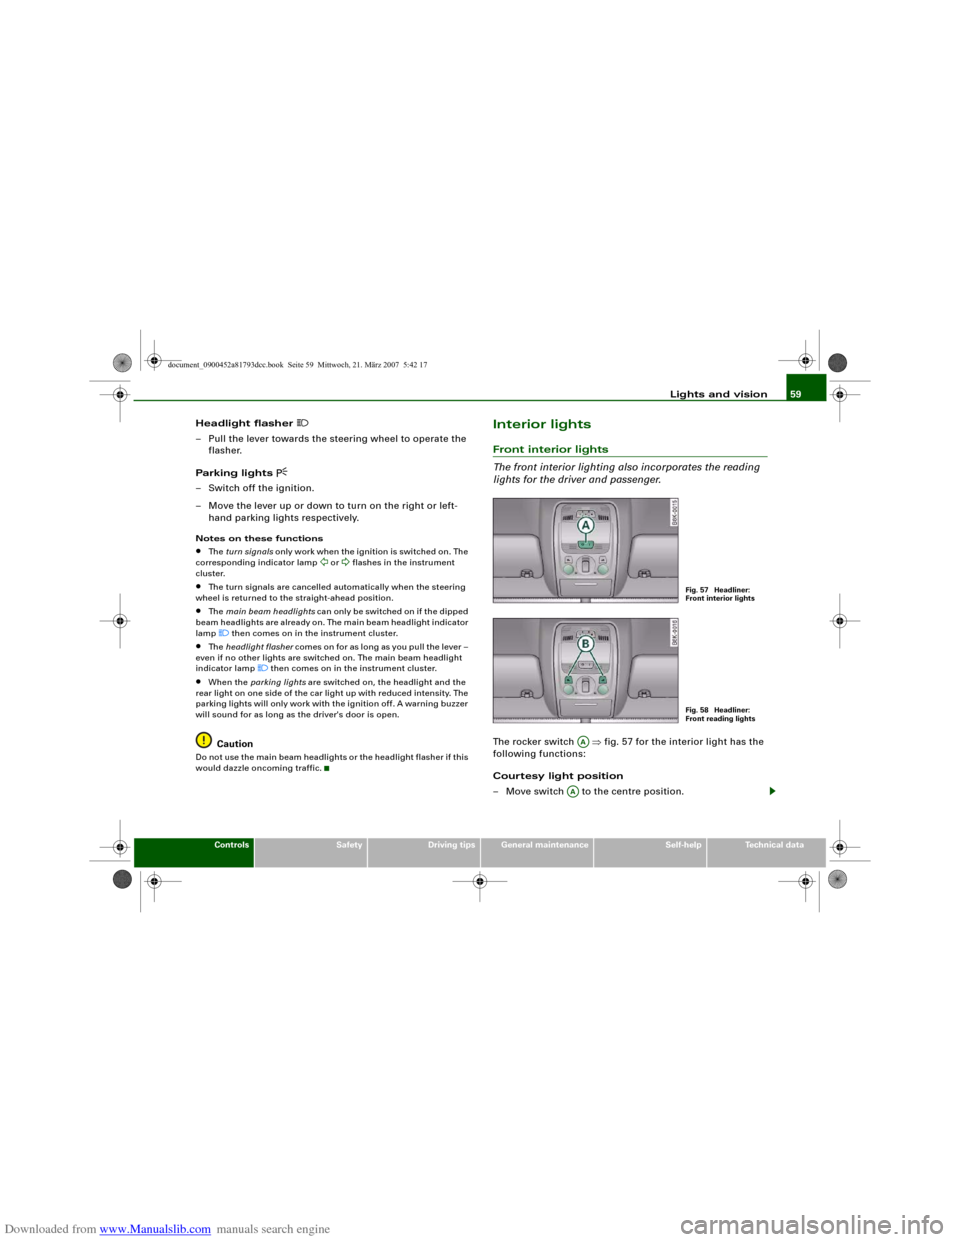
Interior lightsFront interior lights
The front interior lighting also incorporates the reading
lights for the driver and passenger.The rocker switch ⇒fig. 57 for the interior light has the
following functions:
Courtesy light position
– Move switch to the centre position.
Fig. 57 Headliner:
Front interior lightsFig. 58 Headliner:
Front reading lights
AA
AA
document_0900452a81793dcc.book Seite 59 Mittwoch, 21. März 2007 5:42 17
Page 63 of 294
Downloaded from www.Manualslib.com manuals search engine Lights and vision61
Controls
Safety
Driving tips
General maintenance
Self-help
Technical data
Applies to vehicles: with sun blindSun blind
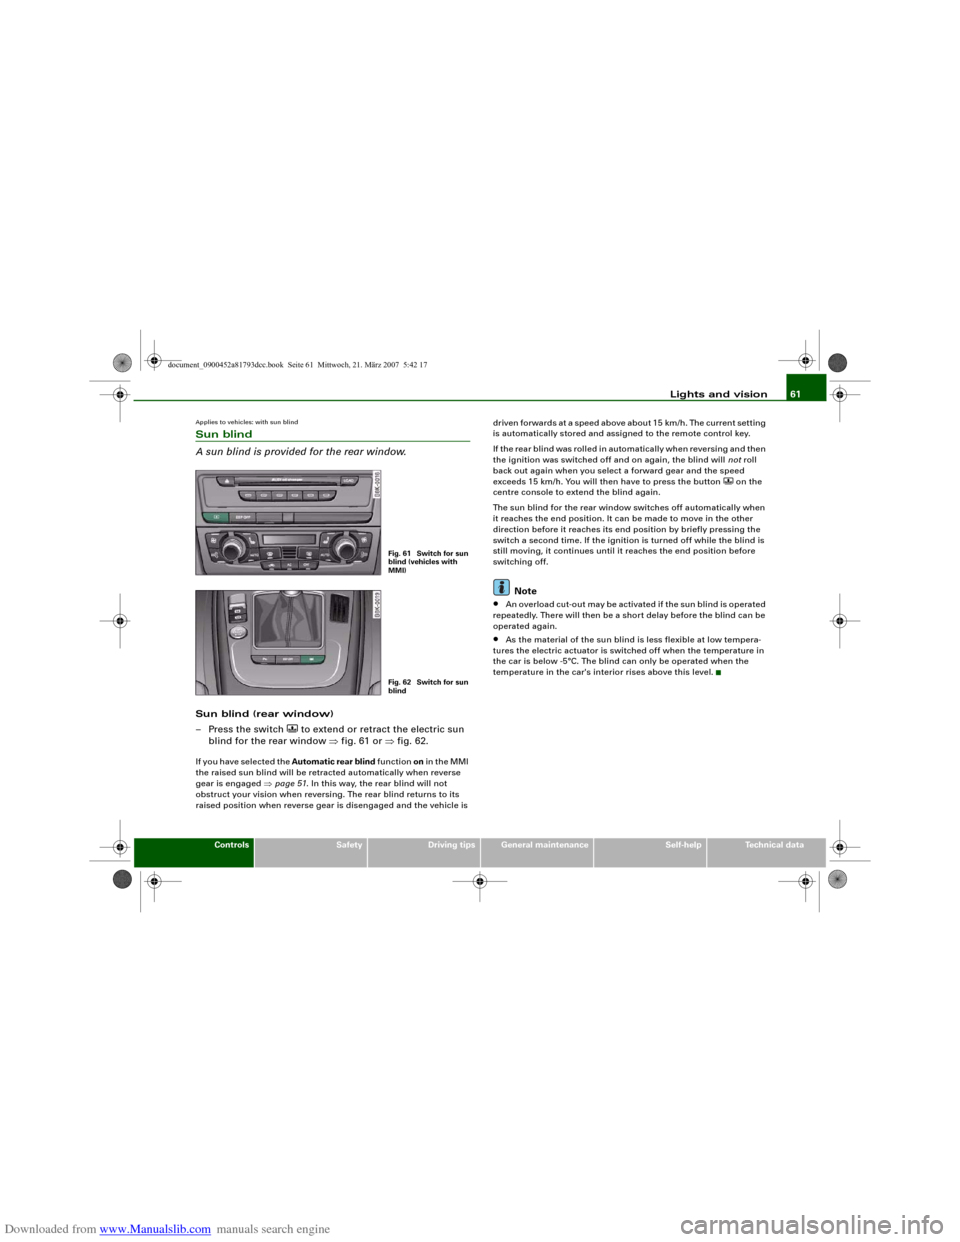
A sun blind is provided for the rear window.Sun blind (rear window)
– Press the switch
to extend or retract the electric sun
blind for the rear window ⇒fig. 61 or ⇒fig. 62.
If you have selected the Automatic rear blind function on in the MMI
the raised sun blind will be retracted automatically when reverse
gear is engaged ⇒page 51. In this way, the rear blind will not
obstruct your vision when reversing. The rear blind returns to its
raised position when reverse gear is disengaged and the vehicle is driven forwards at a speed above about 15 km/h. The current setting
is automatically stored and assigned to the remote control key.
If the rear blind was rolled in automatically when reversing and then
the ignition was switched off and on again, the blind will not roll
back out again when you select a forward gear and the speed
exceeds 15 km/h. You will then have to press the button
on the
centre console to extend the blind again.
The sun blind for the rear window switches off automatically when
it reaches the end position. It can be made to move in the other
direction before it reaches its end position by briefly pressing the
switch a second time. If the ignition is turned off while the blind is
still moving, it continues until it reaches the end position before
switching off.
Note
•
An overload cut-out may be activated if the sun blind is operated
repeatedly. There will then be a short delay before the blind can be
operated again.
•
As the material of the sun blind is less flexible at low tempera-
tures the electric actuator is switched off when the temperature in
the car is below -5°C. The blind can only be operated when the
temperature in the car's interior rises above this level.
Fig. 61 Switch for sun
blind (vehicles with
MMI)Fig. 62 Switch for sun
blind
document_0900452a81793dcc.book Seite 61 Mittwoch, 21. März 2007 5:42 17