check engine light AUDI S5 2008 8T / 1.G Owner's Manual
[x] Cancel search | Manufacturer: AUDI, Model Year: 2008, Model line: S5, Model: AUDI S5 2008 8T / 1.GPages: 294, PDF Size: 12.13 MB
Page 65 of 294
Downloaded from www.Manualslib.com manuals search engine Lights and vision63
Controls
Safety
Driving tips
General maintenance
Self-help
Technical data To reduce the sensitivity level of the rain sensor move control
⇒page 62, fig. 63 to the left. To increase the sensitivity level of the
rain sensor move the control to the right.
If you have selected a high sensitivity level for the rain sensor the
windscreen wipers will react sooner to any moisture on the wind-
screen. The wiper intervals in the intermittent wipe setting are also
varied automatically according to the road speed (in addition to the
sensitivity setting).
WARNING
•
Poor visibility can cause accidents. Always ensure that the
wiper blades are in good condition ⇒page 64, “Changing wiper
blades”.
•
The rain sensor is only intended to assist the driver. The driver
is still obliged to manually operate the windscreen wipers as
required depending on visibility.
•
Do not use water-repellent coatings on the windscreen. In bad
visibility conditions such as light rain, low sun or when driving at
night these coatings can cause increased dazzle, which is a
serious safety hazard. Such coatings can also cause the wiper
blades to judder.Caution
•
In icy conditions, always check that the wiper blades are not
frozen to the glass before using the wiper for the first time. If you
switch on the wipers when the wiper blades are frozen to the glass,
this could damage both the wiper blades and the wiper motor.
•
Make sure you switch off the windscreen wiper system (lever in
position "0") before you use an automatic car wash. This will avoid
inadvertent triggering of the wipers and possible damage to the
wiper system.
Note
•
Check that the washer fluid reservoir is full before starting a long
journey. Filling the reservoir ⇒page 231.
•
Worn or dirty wiper blades can cause smearing on the glass
which can also impair the effectiveness of the rain sensor. Please
check the wiper blades regularly.
Applies to vehicles: with headlight washersHeadlight washer systemThe headlight washer system only operates when the lights
are switched on.
– Move the automatic wash and wipe lever to position
⇒page 62, fig. 63.The headlight washer system is always activated the first time you
operate the automatic wash and wipe. Subsequently, it is only acti-
vated about every five wash and wipe cycles. The headlights are
always washed if you hold the lever for longer than about
2 seconds.
The headlight washer jets come out of the bumper automatically
(under water pressure).
Clean off stubborn dirt (insects, etc.) from the lenses at regular
intervals, for instance when stopping for fuel.
To ensure that the system works properly in winter, keep the nozzle
holders free of snow and remove any ice with a de-icer spray.
AA
A5
document_0900452a81793dcc.book Seite 63 Mittwoch, 21. März 2007 5:42 17
Page 94 of 294
Downloaded from www.Manualslib.com manuals search engine Heating and cooling 92
WARNING
For safety reasons it is important that all the windows are kept
free of ice, snow and condensation. These can cause poor visibility
and lead to an accident. Please familiarise yourself with the oper-
ating controls for the air conditioner, including the demist/defrost
functions for the windows.
Caution
•
If you suspect that the air conditioner is damaged, switch it off
to prevent further damage and have the system checked by a quali-
fied workshop.
•
Repairs to the Audi air conditioner require specialist knowledge
and special tools. For this reason, please contact a qualified work-
shop if the system is not working properly.Note
•
Keep the air intake slots in front of the windscreen clear of snow,
ice and leaves to ensure unimpaired heating and cooling, and to
prevent the windows misting over.
•
The air from the outlets flows through the passenger compart-
ment and out through the slots at the rear of the vehicle. Do not
cover these slots with clothing or other objects.
•
The air conditioner operates most effectively with the windows
and the tilting panorama roof* closed. However, if the vehicle has
heated up after standing in the sun for some time, the air inside can
be cooled more quickly by opening the windows for a short time.
Applies to vehicles: with deluxe automatic air conditionerControls
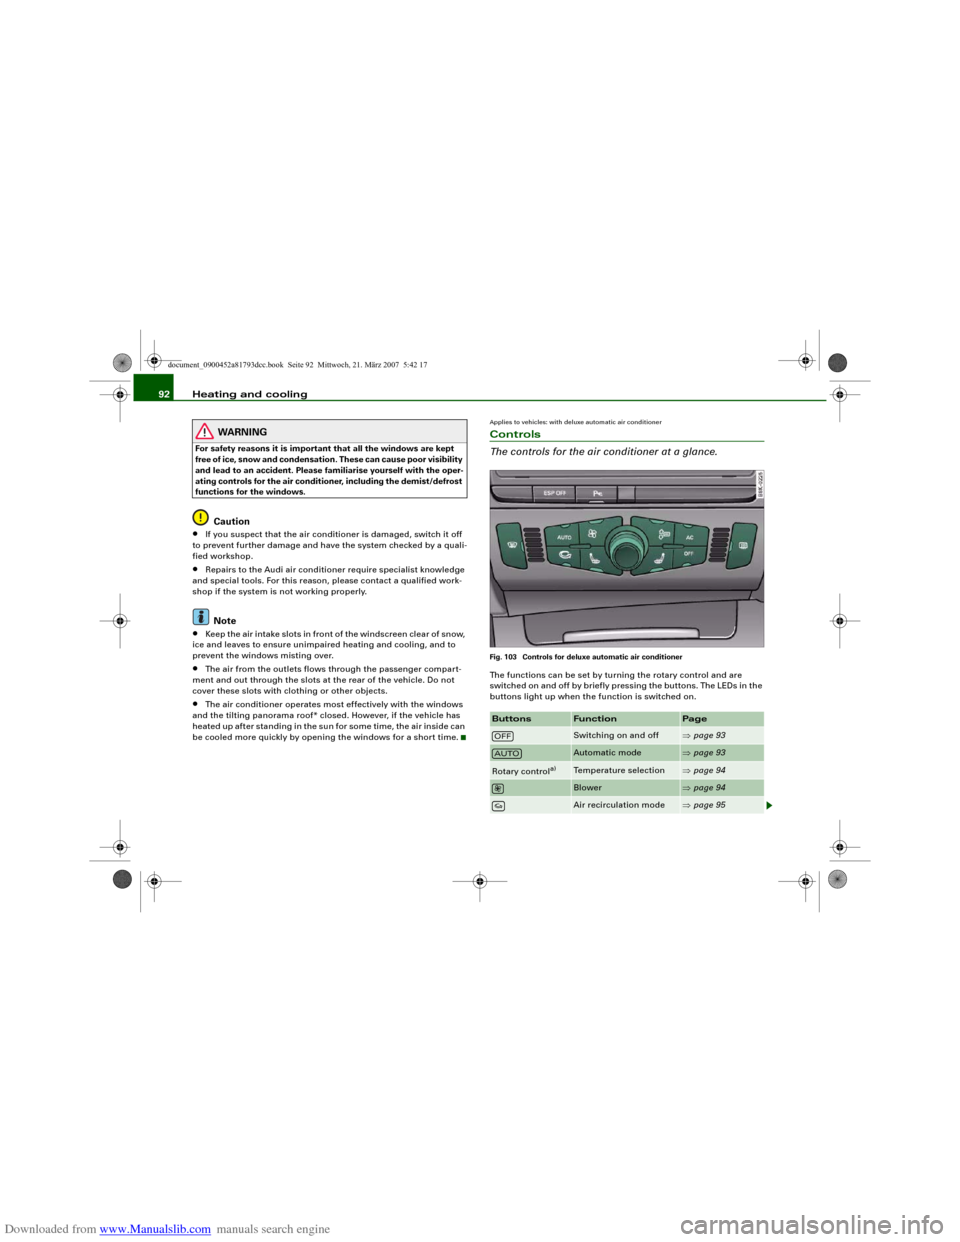
The controls for the air conditioner at a glance.Fig. 103 Controls for deluxe automatic air conditionerThe functions can be set by turning the rotary control and are
switched on and off by briefly pressing the buttons. The LEDs in the
buttons light up when the function is switched on.Buttons
Function
Page
Switching on and off
⇒page 93
Automatic mode
⇒page 93
Rotary control
a)
Temperature selection
⇒page 94
Blower
⇒page 94
Air recirculation mode
⇒page 95
OFFAUTO
document_0900452a81793dcc.book Seite 92 Mittwoch, 21. März 2007 5:42 17
Page 102 of 294
Downloaded from www.Manualslib.com manuals search engine Heating and cooling 100Power management
To prevent the battery from becoming discharged and to maintain
the necessary power level, the system will temporarily shut off the
electrical components that are using a lot of power, or reduce the
current they are consuming ⇒page 192. Heating systems in partic-
ular use a large amount of electrical power. If you notice, for
instance, that the rear window heater is not working, it may have
been temporarily switched off by the power management function,
or regulated to a lower heat output. These systems will be available
again as soon as sufficient electrical power is available.
WARNING
For safety reasons it is important that all the windows are kept
free of ice, snow and condensation. These can cause poor visibility
and lead to an accident. Please familiarise yourself with the oper-
ating controls for the air conditioner, including the demist/defrost
functions for the windows.
Caution
•
If you suspect that the air conditioner is damaged, switch it off
to prevent further damage and have the system checked by a quali-
fied workshop.
•
Repairs to the air conditioning system require specialist knowl-
edge and special tools. For this reason, please contact a qualified
workshop if the system is not working properly.Note
•
Keep the air intake slots in front of the windscreen clear of snow,
ice and leaves to ensure unimpaired heating and cooling, and to
prevent the windows misting over.
•
The air from the outlets flows through the passenger compart-
ment and out through the slots at the rear of the vehicle. Do not
cover these slots with clothing or other objects.
•
The air conditioner operates most effectively with the windows
and the tilting panorama roof* closed. However, if the vehicle has
heated up after standing in the sun for some time, the air inside can
be cooled more quickly by opening the windows for a short time.
Applies to vehicles: with deluxe automatic air conditioner plusControls
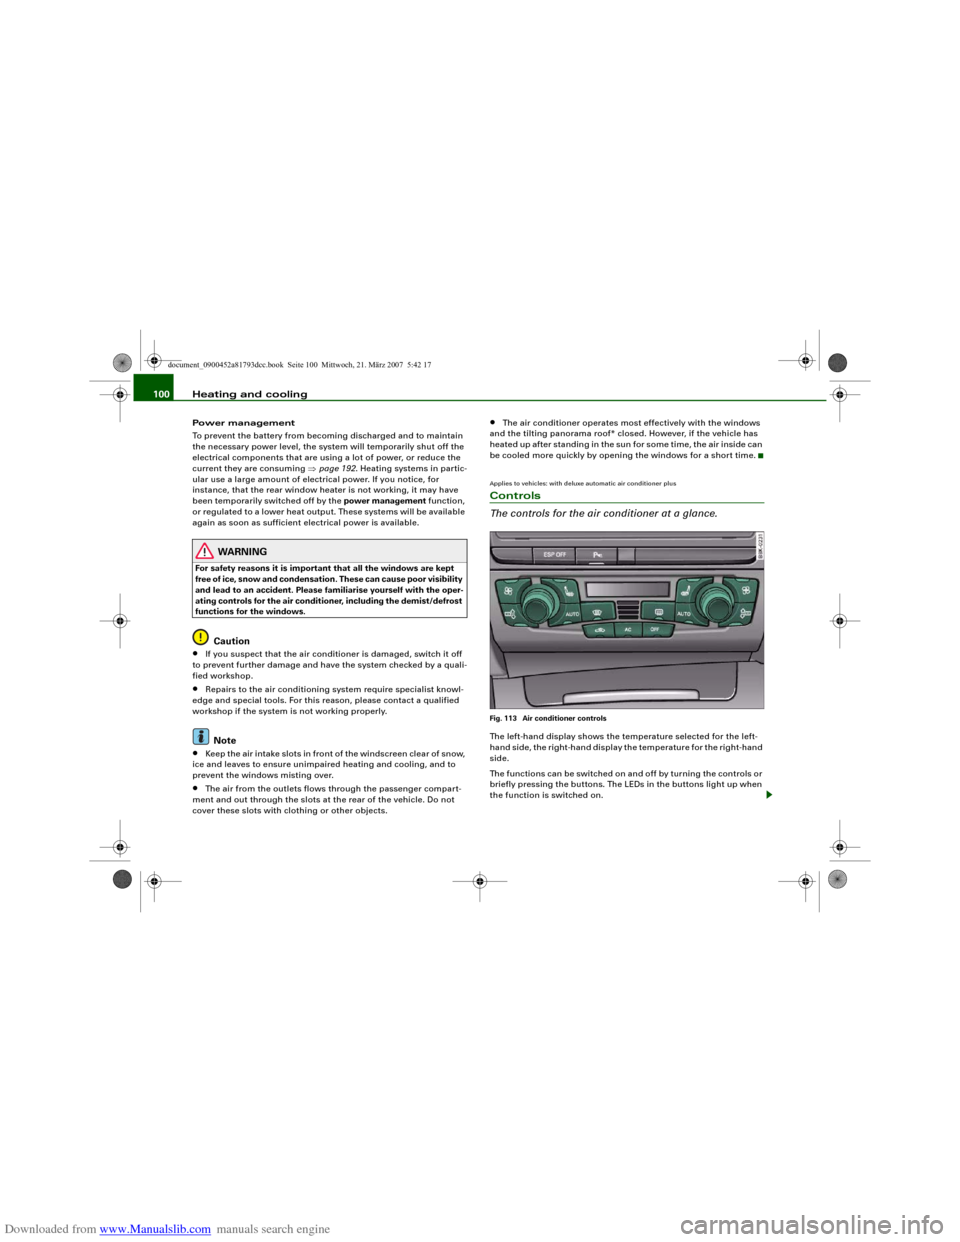
The controls for the air conditioner at a glance.Fig. 113 Air conditioner controlsThe left-hand display shows the temperature selected for the left-
hand side, the right-hand display the temperature for the right-hand
side.
The functions can be switched on and off by turning the controls or
briefly pressing the buttons. The LEDs in the buttons light up when
the function is switched on.
document_0900452a81793dcc.book Seite 100 Mittwoch, 21. März 2007 5:42 17
Page 146 of 294
Downloaded from www.Manualslib.com manuals search engine Audi parking system 144•
Do not allow the camera images in the MMI display to distract
you from watching the traffic.
•
When parking or manoeuvring do not rely solely on the MMI
display. Some objects (e.g. narrow posts or bars) may - due to the
resolution of the display screen - not be displayed in a satisfactory
manner or may not be displayed at all.
•
Only use the reversing camera to assist you if it is supplying
you with a good and clear picture. The quality of the picture could
be impaired by adverse light, dirt on the lens or a defect (accident
risk).
•
If the MMI display is switched on and the picture is obscured or
the area behind the vehicle is not visible (e.g. due to a dirty or
defective lens) you must not use the reversing camera to assist
you when manoeuvring (accident risk).
•
The reversing camera produces two-dimensional images.
Please remember that ridges in the ground, parts protruding on
other vehicles or fixed objects jutting out are all more difficult to
detect on the MMI display screen due to a lack of spatial depth. In
some cases it may not be possible to detect them at all.
•
For safety reasons, you should not use the system if the posi-
tion and installation angle of the camera have been changed, e.g.
in a rear-end collision. Have it checked by a qualified workshop.
•
Only use the reversing camera when the boot lid is completely
c lo s e d . P l e a se m a k e su re t h a t t here are no objects mounted to the
rear end of the vehicle which could block the view of the reversing
camera.Caution
•
Never remove snow and ice from the lens of the reversing
camera using warm or hot water - danger of cracks appearing on the
lens.
•
Never use abrasive cleaning agents on the lens.WARNING (continued)
document_0900452a81793dcc.book Seite 144 Mittwoch, 21. März 2007 5:42 17
Page 147 of 294
Downloaded from www.Manualslib.com manuals search engine HomeLink145
Controls
Safety
Driving tips
General maintenance
Self-help
Technical data
HomeLinkUniversal transmitterApplies to vehicles: with HomeLinkDescription
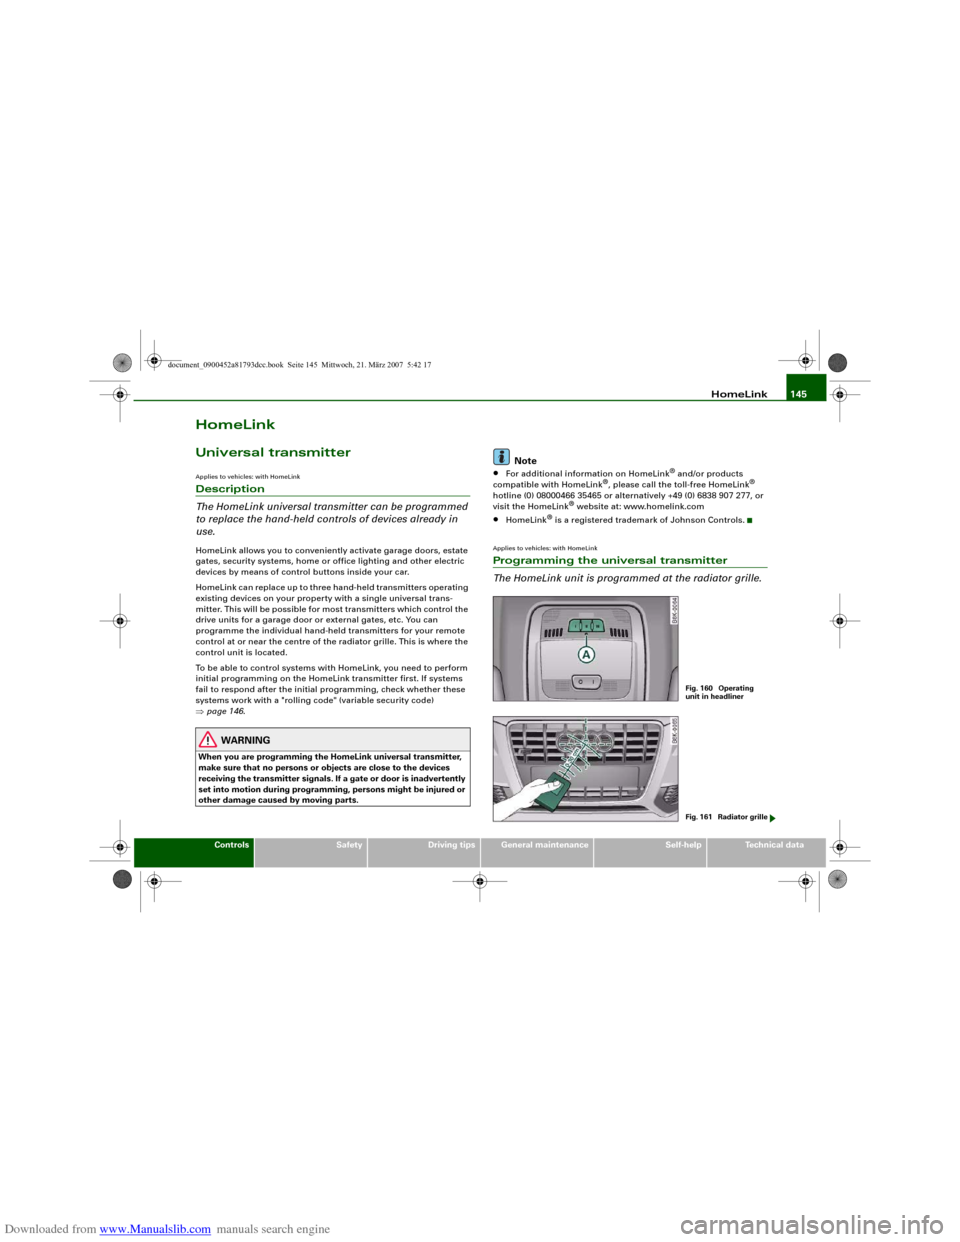
The HomeLink universal transmitter can be programmed
to replace the hand-held controls of devices already in
use.HomeLink allows you to conveniently activate garage doors, estate
gates, security systems, home or office lighting and other electric
devices by means of control buttons inside your car.
HomeLink can replace up to three hand-held transmitters operating
existing devices on your property with a single universal trans-
mitter. This will be possible for most transmitters which control the
drive units for a garage door or external gates, etc. You can
programme the individual hand-held transmitters for your remote
control at or near the centre of the radiator grille. This is where the
control unit is located.
To be able to control systems with HomeLink, you need to perform
initial programming on the HomeLink transmitter first. If systems
fail to respond after the initial programming, check whether these
systems work with a "rolling code" (variable security code)
⇒page 146.
WARNING
When you are programming the HomeLink universal transmitter,
make sure that no persons or objects are close to the devices
receiving the transmitter signals. If a gate or door is inadvertently
set into motion during programming, persons might be injured or
other damage caused by moving parts.
Note
•
For additional information on HomeLink
® and/or products
compatible with HomeLink
®, please call the toll-free HomeLink
®
hotline (0) 08000466 35465 or alternatively +49 (0) 6838 907 277, or
visit the HomeLink
® website at: www.homelink.com
•
HomeLink
® is a registered trademark of Johnson Controls.
Applies to vehicles: with HomeLinkProgramming the universal transmitter
The HomeLink unit is programmed at the radiator grille.
Fig. 160 Operating
unit in headlinerFig. 161 Radiator grille
document_0900452a81793dcc.book Seite 145 Mittwoch, 21. März 2007 5:42 17
Page 155 of 294
Downloaded from www.Manualslib.com manuals search engine Safe driving153
Controls
Safety
Driving tips
General maintenance
Self-help
Technical data
– Make sure that all lights and turn signals are working
properly.
– Check the tyre pressures.
– Make sure that all windows are clean and give good visi-
bility to the outside.
– Secure all luggage and other items carefully ⇒page 75.
– Make sure that no objects can interfere with the pedals.
– Adjust the front seat, head restraint and mirrors
correctly.
– Make sure that the head restraints for all passengers are
adjusted to the correct position.
– Make sure that children are protected with suitable
safety seats and properly worn seat belts ⇒page 175.
– Sit in the correct position in your seat and make sure that
your passengers do the same. ⇒page 70.
– Fasten your seat belt correctly. Make sure that your
passengers do the same ⇒page 160.What affects driving safety?
Safety on the road is directly related to how you drive, and
can also be affected by the passengers in the vehicle.The driver is responsible for the safety of the vehicle and all
its occupants. If your ability to drive is impaired in any way,
you endanger yourself and other road users ⇒. There-
fore:
– Do not let yourself be distracted by passengers or by
using a mobile phone, etc.– Never drive when your driving ability is impaired (by
medication, alcohol, drugs, etc.).
– Obey all traffic regulations and speed limits and always
maintain a safe distance to the vehicle in front.
– Always adjust your speed to suit the road, traffic and
weather conditions.
– Take frequent breaks on long trips. Do not drive for more
than two hours without a stop.
– If possible, avoid driving when you are tired or stressed.
WARNING
•
Distractions while driving or any kind of impairment to your
driving ability increase the risk of accident and injury.
•
Do not store loose objects on the dashboard. These objects
could fly around the interior when the vehicle is moving (under
acceleration or whilst cornering) and distract the driver – this
could lead to an accident.
document_0900452a81793dcc.book Seite 153 Mittwoch, 21. März 2007 5:42 17
Page 189 of 294
Downloaded from www.Manualslib.com manuals search engine Intelligent technology187
Controls
Safety
Driving tips
General maintenance
Self-help
Technical data Switching off
The ESP should normally be left switched on at all times. If required,
you can press the ESP OFF button to switch off the traction control
system (ASR) or the electronic stabilisation program (ESP).
•
Switching off the traction control system (ASR): Press the ESP
button briefly. The traction control system (ASR) can be switched off
in special driving conditions, e.g. if you are driving with snow chains
⇒page 188. The message ASR off will appear in the display.
•
Switching off the ESP/traction control system (ASR): Press the
ESP button for longer than 3 seconds. The ESP/ASR warning lamp
lights up when the system is switched off, see ⇒page 16. The
message ESP switched off will appear in the display.
WARNING
•
The ESP is not able to overcome the physical limits of adhesion.
Even with ESP, you should always adjust your speed to suit the
conditions. Please bear this in mind, especially on wet or slippery
road surfaces. Do not let the extra safety provided tempt you into
taking any risks when driving – this can cause accidents.
•
Please note that, when the ESP or ESP/traction control system
(ASR) is switched off, the driven wheels may start to spin, causing
the vehicle to lose grip, in particular on slippery or wet roads -
danger of skidding!
Anti-lock brake system (ABS)
ABS prevents the wheels from locking up under braking.The anti-lock brake system (ABS) is an important part of the car's
active safety system. However, the ABS will not necessarily guar-
antee shorter stopping distances in all conditions. For instance, on
loose gravel or fresh snow on top of an icy surface (conditions which
anyway require extreme care and reduced speed), the stopping
distance with ABS may even be slightly longer.How the ABS works
The system runs an automatic self-check when the car reaches a
road speed of about 6 km/h. This may be accompanied by a noise
from the ABS pump.
If one of the wheels is turning too slowly in relation to the road
speed, and is close to locking up, the system will reduce the pres-
sure in the brake line to this wheel. The driver is made aware of this
control process by a pulsating of the brake pedal and accompa-
nying noise. This is a deliberate warning to the driver that one or
more of the wheels is tending to lock up and the ABS control func-
tion has intervened. In this situation it is important to keep the brake
pedal fully depressed so the ABS can regulate the brake application
- do not “pump” the brake pedal.
WARNING
The grip provided by ABS is still subject to the physical limits of
adhesion. Always bear this in mind, especially on wet or slippery
roads. If you notice that the ABS is working (to counteract locked
wheels under braking), you should reduce speed immediately to
suit the road and traffic conditions. Do not let the extra safety
provided tempt you into taking any risks when driving – this can
cause accidents.
Note
If a malfunction should occur in the ABS, this is indicated by a
warning lamp ⇒page 17.Brake assist system
The brake assist system helps the driver to achieve
optimum braking effect.The brake assist system helps to increase braking power and thus to
achieve a shorter stopping distance. If the driver presses the brake
document_0900452a81793dcc.book Seite 187 Mittwoch, 21. März 2007 5:42 17
Page 218 of 294
Downloaded from www.Manualslib.com manuals search engine Care of vehicle and cleaning 216Applies to vehicles: with Alcantara seat coversCleaning AlcantaraRemoving dust and dirt
– Moisten a cloth just a little and wipe down the seat
covers.
Removing stains
– Moisten a cloth with lukewarm water or diluted methyl-
ated spirits.
– Dab at the stain. Start at the outside and work inwards.
– Dry the area you have cleaned with a soft cloth.Do not use leather cleaning products on Alcantara seat covers.
You may use a suitable shampoo on dust and dirt.
Dust and grit in the pores and seams can have an abrasive effect
and damage the surface of the leather. If the car is left standing in
the sun for long periods, the leather should be protected against
direct sunlight to prevent it from fading. However, slight colour vari-
ations will arise in normal use.
Caution
•
Do not use solvents, wax polish, shoe cream, stain removers,
leather cleaning products or any similar products on Alcantara.
•
To avoid damage, stubborn stains should be removed by a qual-
ified workshop.
•
On no account use brushes, hard sponges or similar utensils.
Seat belts
Seat belts should be looked after properly to ensure that
they give the full protection.– Keep the seat belts clean.
– For cleaning, use a mild soap solution.
– Check the condition of the seat belts at regular intervals.Very dirty belts may not retract properly.
Make sure that the inertia reel seat belts are completely dry before
allowing them to retract.
Caution
•
Do not remove the seat belts from the vehicle to clean them.
•
Do not use chemical cleaning agents on the seat belts, as this
can damage the webbing. Ensure that the belts do not come into
contact with corrosive fluids.
•
If you find any damage to the belt webbing, belt fittings, the belt
retractor or the buckle, the belt in question must be replaced by a
qualified workshop.
document_0900452a81793dcc.book Seite 216 Mittwoch, 21. März 2007 5:42 17
Page 222 of 294
Downloaded from www.Manualslib.com manuals search engine Checking and topping up fluids 220Checking and topping up fluidsBonnetReleasing the bonnet
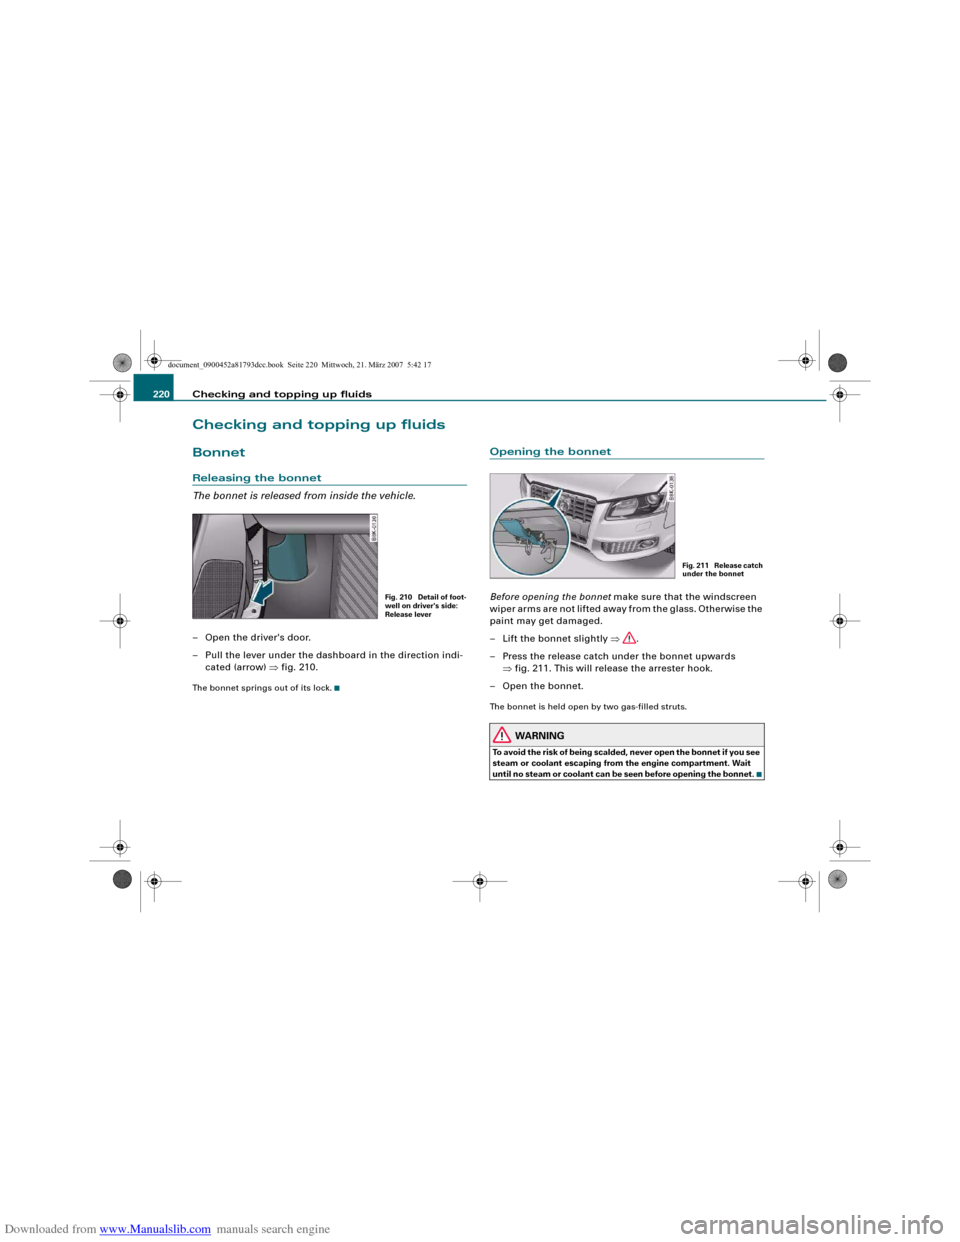
The bonnet is released from inside the vehicle.– Open the driver's door.
– Pull the lever under the dashboard in the direction indi-
cated (arrow) ⇒fig. 210.The bonnet springs out of its lock.
Opening the bonnetBefore opening the bonnet make sure that the windscreen
wiper arms are not lifted away from the glass. Otherwise the
paint may get damaged.
– Lift the bonnet slightly ⇒.
– Press the release catch under the bonnet upwards
⇒fig. 211. This will release the arrester hook.
– Open the bonnet.The bonnet is held open by two gas-filled struts.
WARNING
To avoid the risk of being scalded, never open the bonnet if you see
steam or coolant escaping from the engine compartment. Wait
until no steam or coolant can be seen before opening the bonnet.
Fig. 210 Detail of foot-
well on driver's side:
Release lever
Fig. 211 Release catch
under the bonnet
document_0900452a81793dcc.book Seite 220 Mittwoch, 21. März 2007 5:42 17
Page 227 of 294
Downloaded from www.Manualslib.com manuals search engine Checking and topping up fluids225
Controls
Safety
Driving tips
General maintenance
Self-help
Technical data Countries with warm climate
The coolant concentration must not be reduced by adding plain
water, even in the summer or in warm climates. The concentration
of the anti-freeze additive must always be at least 40%.
Countries with cold climate
If greater anti-freeze protection is required in very cold climates, the
proportion of the anti-freeze additive G12+ can be increased. A
concentration of 60% offers protection down to about -40 °C. The
concentration of the antifreeze additive must not be more than 60%,
otherwise this would reduce the antifreeze protection. In addition,
the cooling effect will be adversely affected.
Vehicles for export to countries with a cold climate (such as Sweden,
Norway and Finland) are supplied with antifreeze protection down
to about -35 °C. The concentration of the antifreeze additive for
these countries should always be at least 50%.
Caution
•
It is advisable to have the cooling system checked before the
winter season to make sure that the antifreeze concentration is
adequate for the conditions to be expected. This applies particularly
if you intend to take the car into a colder climate zone. If necessary,
have the anti-freeze concentration increased to 50 - 60% as required.
•
Use only anti-freeze additive G12+, an additive meeting the spec-
ification “TL-VW 774 F ”. Other additives may give considerably infe-
rior corrosion protection. The resulting corrosion in the cooling
system can lead to a loss of coolant, causing serious damage to the
engine.
•
The coolant additive G12+ can be mixed only with additives G11
and G12.
Checking coolant level
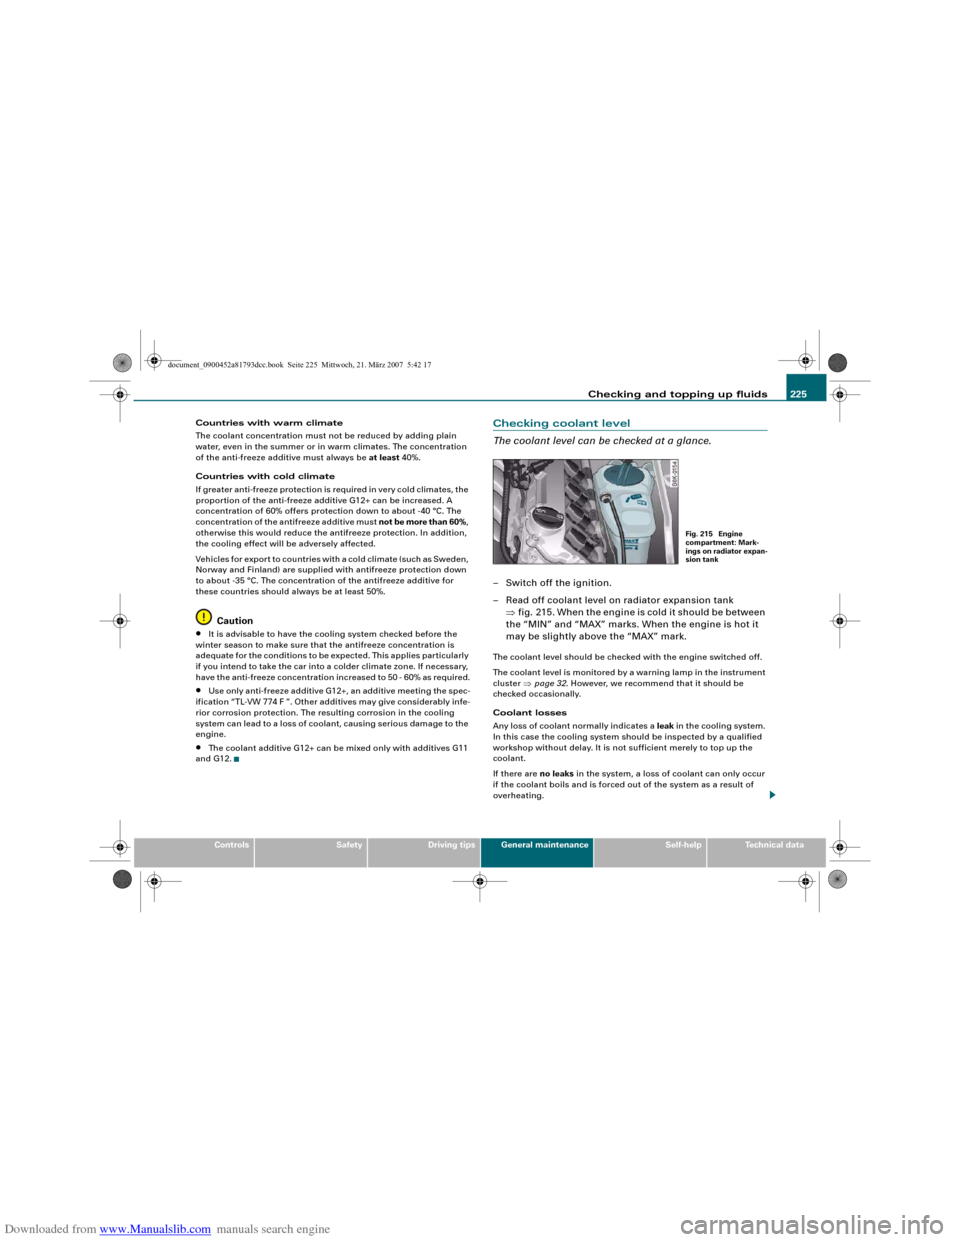
The coolant level can be checked at a glance.– Switch off the ignition.
– Read off coolant level on radiator expansion tank
⇒fig. 215. When the engine is cold it should be between
the “MIN” and “MAX” marks. When the engine is hot it
may be slightly above the “MAX” mark.The coolant level should be checked with the engine switched off.
The coolant level is monitored by a warning lamp in the instrument
cluster ⇒page 32. However, we recommend that it should be
checked occasionally.
Coolant losses
Any loss of coolant normally indicates a leak in the cooling system.
In this case the cooling system should be inspected by a qualified
workshop without delay. It is not sufficient merely to top up the
coolant.
If there are no leaks in the system, a loss of coolant can only occur
if the coolant boils and is forced out of the system as a result of
overheating.
Fig. 215 Engine
compartment: Mark-
ings on radiator expan-
sion tank
document_0900452a81793dcc.book Seite 225 Mittwoch, 21. März 2007 5:42 17