belt AUDI S6 2009 Owners Manual
[x] Cancel search | Manufacturer: AUDI, Model Year: 2009, Model line: S6, Model: AUDI S6 2009Pages: 398, PDF Size: 43 MB
Page 5 of 398
Safety first ........ ... ... .. .
Driving Safely ................. .
General notes . .... ........... . .
Proper occ upant sea ting positions
Peda l area ... ..... ....... .... . .
Sto\Ning luggage . .... .... .... . .
Reporting Sa fety Defects ....... .
Safety belts .......... ....... .. .
Genera l notes ...... ........... .
W hy safe ty belts? .... ... ... ... .
Safety belts ..... ........ ... .. .
Safety belt pretensioners ... ... .
Airbag sy stem ..... ...... ... .. .
Important t hings to kno\N ...... .
Front airbags . ... ... .......... .
Monitoring the Advanced Airbag
System ... .. ... .... ..... ..... .
Side airbags ......... .... .. ... .
Side curtain a irbags ...... ..... .
Child Safety ................... . 193
194
194
196
200
201
203
205
205
206
209
2 13
215
2 15
2 19
226
231
234
238
Impo rtant things to kno\N . . . . . . . 238
Child safety seats . . . . . . . . . . . . . . 243
Insta lling a ch ild safe ty seat . . . . . 248
Add it ional Information . . . . . . . . . . 251
Lo\Ner anchorages and tether for
ch ildren (LA TC H) . . . . . . . . . . . . . . . .
253
Vehicle operation .... ... .
Inte lligent technology ......... .
Not ice about d ata reco rded by
ve hicle contro l modules ........ .
Elect ronic S tabilizat ion Program
!ESP) ...... .... ..... ..... ..... .
B raking ....... ................ .
Servotronic® -advanced po\Ner
s teer ing syst em ............... .
Driv ing \Nit h your quatt ro® ..... .
Energy management .... ....... .
Driving a nd enviro nment ...... .
The first 1,000 miles (1 ,500 km) and
after\Na rds .............. ... ... .
Cata lytic converter ............ .
Avo id damaging the vehicle .. .. .
Operate your vehicle economically
and minimize pollution ......... .
Trailer towi ng ................. .
Driving \Nit h a trailer ..... ... ... .
Trai ler to\Ning tips ....... ..• ....
261
262
262
262
265
267
2 6 8
269
2 7 1
2 7 1
27 2
273
273
276
2 7 6
278
Table of contents
Vehicle care ....... ... ... ... 281
C leaning and protection ........ 282
Gener al in fo rm atio n . . . . . . . . . . . . . 282
Care of exterior . . . . . . . . . . . . . . . . . 282
Care of inte rior . . . . . . . . . . . . . . . . . 28 9
F u el su pp ly and fillin g your fuel
ta nk . . . . . . . . . . . . . . . . . . . . . . . . . . . . 295
Gasoline . . . . . . . . • . . . . • . . . . . . . . . 295
Fuel tank . . . . . . . . . . . . . . . . . . . . . . . 296
C heck in g and filling . . . . . . . . . . . . 300
Engine hood . . . . . . . . . . . . . . . . . . . 300
Engine oil . . . . . . . . . . . . . . . . . . . . . . 303
Engi ne cooling sys te1 T1 . . . . . . . . . . 307
Brake fluid . . . . . . . . . . . . . . . . . . . . . 3 10
Battery . . . . . . . . . . . . . . . . . . . . . . . . 3 11
W indshield/headlight \Nasher
containe r .... .... .. ... .. .... ...
3 16
T iresa ndw hee ls ............ ... 317
T ires ........................ ... 3 17
Tire pressure monitoring system . . 336
Vehicle care I I irechnical data
Page 19 of 398
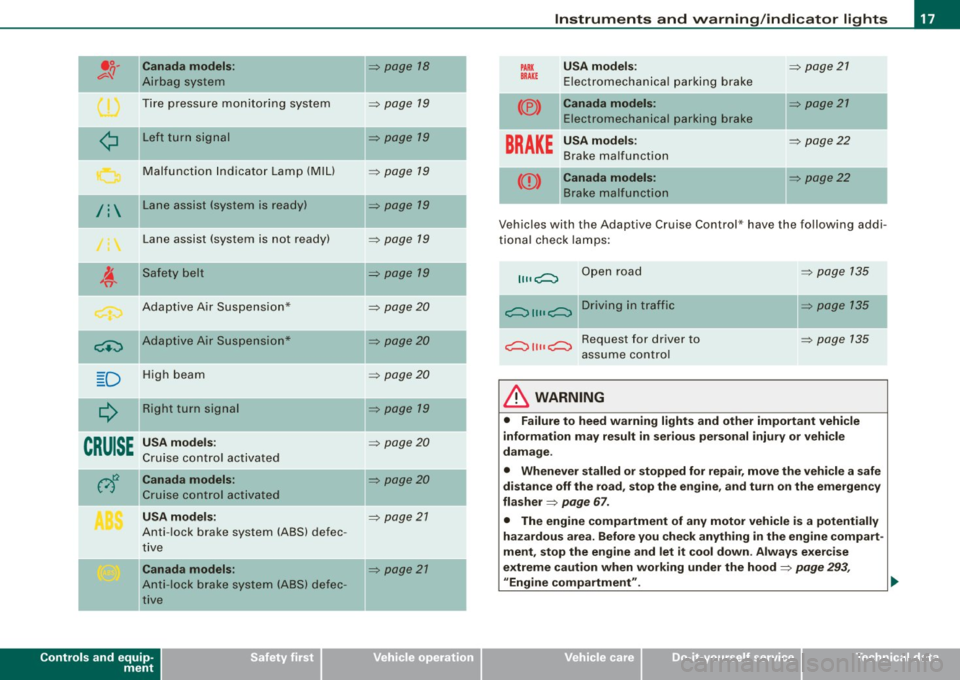
.o. Canada models: ,;:;..{/
Airbag system
Tire pressure monitoring system
-
¢ Left turn signal
Malfunction Indicator Lamp (MIU
/: Lane assist (system is ready)
Lane assist (system is not ready)
~
Safety belt
Adaptive Air Suspension*
-
~ Adaptive Air Suspension*
D High beam
--
Q Right turn signal
CRUISE
USA models:
Cruise control activated
A~ Canada models:
Cruise control activated
USA models:
Anti-lock brake system (ABS) defec -
tive
Canada models:
Anti- lock brake system (ABS) defec-
tive
Controls and equip
ment
=> page 18
=> page 19
=> page 19
=> page 19
=> page 19
=> page 19
=> page 19
=> page20
=> page20
=> page20
=> page 19
=> page20
=> page 20
=> page 21
=> page 21
-
-
-
Instruments and warning/indicator lights
PARX USA models : => page 21
BRAKE Electromechanical parking brake
(® ) Canada models: => page 21
Electromechanical parking brake
BRAKE
USA models: => page 22
Brake malfunction
((D ) Canada models: => page22
Brake malfunction
Vehicles with the Adaptive Cruise Control* have the following addi
tional check lamps:
11,,C::, Open road
C::, 1111 C::, Driving in traffic
c::, 111 1 c::, Request for driver to
assume control
& WARNING
=> page 135
=> page 135
~ page 135
• Failure to heed warning lights and other important vehicle
information may result in serious personal injury or vehicle
damage .
• Whenever stalled or stopped for repair, move the vehicle a safe
distance off the road, stop the engine, and turn on the emergency
flasher
=> page 67.
• The engine compartment of any motor vehicle is a potentially
hazardous area. Before you check anything in the engine compart
ment, stop the engine and let it cool down . Always exercise
extreme caution when working under the hood
=> page 293,
uEngine compartment". .,,
I • •
Page 20 of 398
![AUDI S6 2009 Owners Manual Inst rum ents and w arnin g/indi cat or li ghts
[ i ] Tip s
Many functions are mon itored by the Auto -Check system
=> page 28. Malfunctions or faults wil l be identified either wit AUDI S6 2009 Owners Manual Inst rum ents and w arnin g/indi cat or li ghts
[ i ] Tip s
Many functions are mon itored by the Auto -Check system
=> page 28. Malfunctions or faults wil l be identified either wit](/img/6/57595/w960_57595-19.png)
Inst rum ents and w arnin g/indi cat or li ghts
[ i ] Tip s
Many functions are mon itored by the Auto -Check system
=> page 28. Malfunctions or faults wil l be identified either with a red
symbol (priority 1 - Danger!) o r w ith a yel low sy mbol (priority 2 -
Warning). •
Electronic power control I'
This warning/indicator light monitors the electronic
power control.
The warning/indicator light (Electronic Power Control) i llumi -
nates when you turn on the ignition as a function check.
[ i ] Tip s
If this warning/indicator light illuminates whi le you are driv ing, then
there is a malfunction in the engine electronics . Have the malfunc
tion corrected as soon as possible by your authorized Audi dea ler or
qualified repair facility. •
Electronic stabilization program (ESP) at.
This warning/indicator light monitors the electronic stabi
lization program .
The warning/indicator light has the following functions:
• It blinks while you are dr iving when the ESP is working.
• It illuminates when you sw itch on the ignition for approximately
2 seconds as a function check.
• It illuminates when there is a malfunction in the ESP .
• It illuminates when ESP or ASR (Anti -Slip Regu lation) is deacti
vated. • I
t illuminates if there is a malfunction in the ABS, since the ESP
is part of the ABS sys tem.
If the battery terminals were disconnected and re-connected , the
vehic le was jump started or the battery is very weak, the ESP sensor
system goes through a learning process for the first few yards. The
warning/indicator light illuminates. The warning/indicator light
goes out as soon as the learning process is complete .
I f the ESP warning/indicator light illuminates and stays on after you
have started the engine, this may mean that the control system has
temporarily switched off the ESP . If this is case, you can reactivate
the ESP by turning the ignition off and then on again . The
warning/indicator light should go out to show that the system is
fully functional again.
For more information about the ESP=>
page 262. •
Airbag system
~ (USA models) / !lr (Canada models)
This warning/indicator light monitors the airbag and the
pretensioner systems.
The ~ (USA models) IJ.!r (Canada mode ls) warning light illuminates
for a few seconds each time you switch on the ignition .
If the ~ (USA mode ls)
tJ.! r (Canada models) warning light does not
go out, or if it i lluminates whi le you are driving, or if it starts to b link,
t hen there is a malfunction somewhere in the system. If the light
does not il luminate when you switch on the ignition, this a lso
means there is a malfunction .
& WARNING
If you have a m alfuncti on in the airb ag sy ste m, cont act your autho
ri zed A udi dealer imm ed ia te ly. Othe rwise the airb ag or the belt
preten sioner may not work p roperly in an accident. •
Page 21 of 398
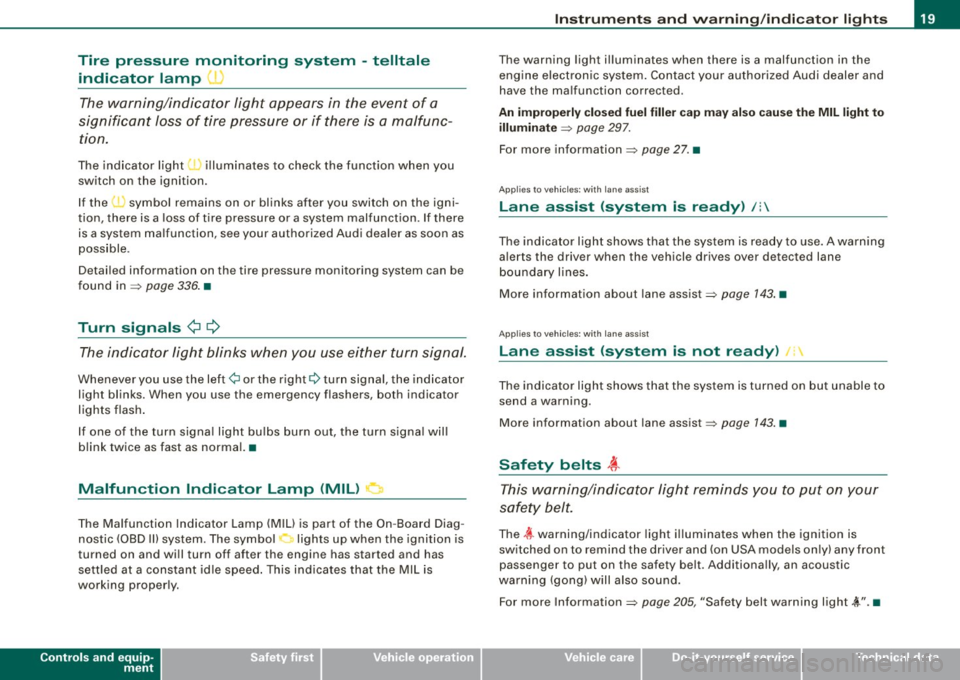
Tire pressure monitoring system -telltale
indicator lamp
The warning/indicator light appears in the event of a
significant loss of tire pressure or if there is a malfunc
tion.
The indicator light' il lum inates to check the function when you
switch on the ignition.
If the
l symbol remains on or blinks after you switch on the igni
tion, there is a loss of tire pressure or a system malfunction . If there
is a system malfunction, see your authorized Audi dea ler as soon as
poss ible .
Detailed information on the tire pressure monitoring system can be
found in=>
page 336. •
Turn signals ¢ ¢
The indicator light blinks when you use either turn signal.
Whenever you use the left¢ or the right Q turn signal, the indicator
light blinks. When you use the emergency flashers, both indica tor
lights flash .
If one of the turn signa l light bu lbs burn out, the turn signal will
blink twice as fast as normal. •
Malfunction Indicator Lamp (MIL) )
The Malfunction Indicator Lamp (MIU is part of the On -Board Diag
nostic (OBD Ill system. The symbol
~ lights up when the ignition is
turned on and wi ll turn off after the engine has started and has
sett led at a constant id le speed . This indicates that the MIL is
working proper ly.
Controls and equip
ment
In st rum ent s a nd w arnin g/indi cato r ligh ts
The warning light il luminates when there is a malfunction in the
engine electronic system. Contact your authorized Audi dealer and
have the malfunction corrected.
An imprope rly c losed fu el filler cap ma y als o ca use t he MIL light to
illuminat e
=> page 297.
For more information => page 27. •
Applies to vehi cles : wi th l ane ass ist
Lane assist (system is ready) Ii
The indicator light shows that the system is ready to use. A warn ing
a lerts the driver when the vehicle drives over detected lane
boundary lines .
More information about lane assist=>
page 143. •
Applies to vehi cles : wi th la ne a ssi st
Lane assist (system is not ready) /'
The indicator light shows that the system is turned on but unable to
send a warning.
More informat ion about lane assist=>
page 143. •
Safety belts ~-
This warning/indicator light reminds y ou to put on your
safety belt.
The t warning/indicator light i lluminates when the ignition is
switched on to remind the driver and (on USA models on ly) any front
passenger to put on the safety belt . Additiona lly, an acoustic
warning (gong) will also sound.
For more Information =>
page 205, "Safety belt warning light 4". •
I • •
Page 33 of 398
& WARNING
• Always observe the warnings in => page 293, "Engine compart
ment", before opening the hood and checking the brake fluid.
• Driving with low brake fluid is a safety hazard . Stop the car and
get professional assistance.
• USA models : If the BRAKE warning light and the -warning
light come on together, the rear wheels could lock up first under
hard braking . Rear wheel lock-up can cause loss of vehicle control
and an accident. Have your vehicle repaired immediately by your
authorized Audi dealer or a qualified workshop. Drive slowly and
avoid sudden, hard brake applications.
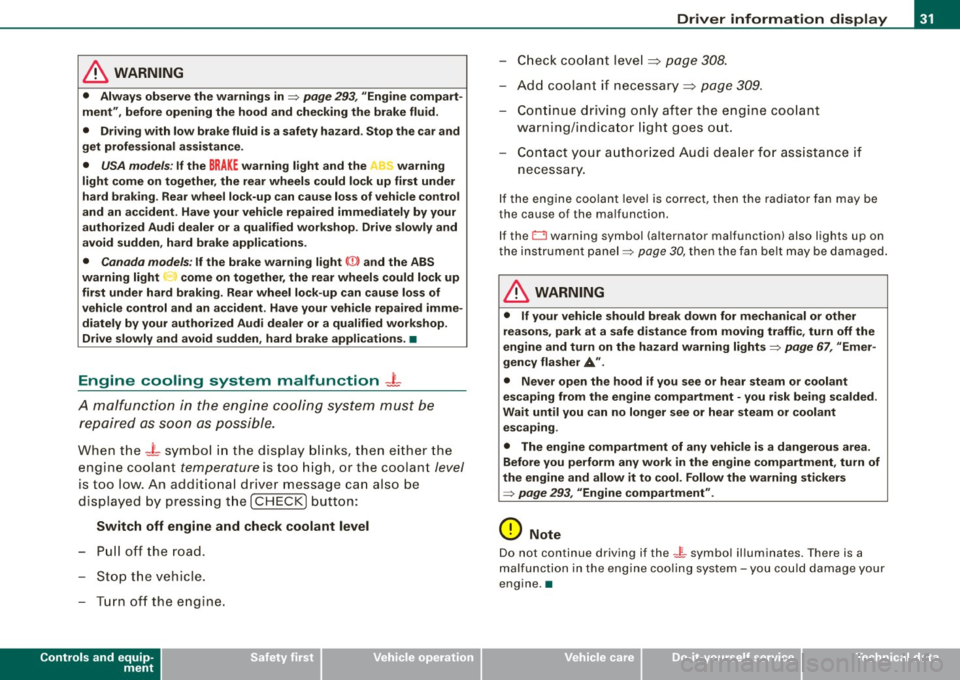
• Canada models: If the brake warning light «D> and the ABS
warning light come on together, the rear wheels could lock up first under hard braking. Rear wheel lock-up can cause loss of
vehicle control and an accident. Have your vehicle repaired imme diately by your authorized Audi dealer or a qualified workshop .
Drive slowly and avoid sudden, hard brake applications. •
Engine cooling system malfunction _t
A malfunction in the engine cooling system must be
repaired as soon as possible.
When the -t symbol in the display blinks, then either the
engine coolant
temperature is too high, or the coolant level
is too low. An additional driver message can also be
displayed by pressing the [
CHECK] button:
Switch off engine and check coolant level
- Pull off the road .
- Stop the vehicle.
- Turn off the engine.
Controls and equip
ment
Driver information display
Check coolant level ~ page 308.
-Add coolant if necessary~ page 309 .
Continue driving only after the engine coolant
warning/indicator light goes out.
Contact your authorized Audi dealer for assistance if
necessary.
If the engine coolant level is correct, then the radiator fan may be
the cause of the malfunction.
If the O warning symbol (alternator malfunction) also lights up on
the instrument panel=>
page 30, then the fan belt may be damaged.
& WARNING
• If your vehicle should break down for mechanical or other
reasons, park at a safe distance from moving traffic, turn off the
engine and turn on the hazard warning lights =>
page 67, "Emer
gency flasher
A".
• Never open the hood if you see or hear steam or coolant
escaping from the engine compartment - you risk being scalded.
Wait until you can no longer see or hear steam or coolant escaping.
• The engine compartment of any vehicle is a dangerous area.
Before you perform any work in the engine compartment, turn of
the engine and allow it to cool. Follow the warning stickers
=>
page 293, "Engine compartment" .
0 Note
Do not continue driving if the -F-symbol illuminates. There is a
malfunction in the engine cooling system -you could damage your
engine .•
I • •
Page 82 of 398
Seats and storage
Seats and storage
General recommendations
Why is your seat adjustment so important?
The safety belts and the airbag system can only provide
maximum protection if the front seats are correctly
adjusted.
There are various ways of adjusting the front seats to provide safe
and comfortable support for the driver and the front passenger.
Adjust your seat properly so that :
• you can easily and quickly reach all the switches and controls in
the instrument panel
• your body is properly supported thus reducing physical stress
and fatigue
• the safety belts and airbag system can offer maximum protec
tion=>
page 215.
In the following sections , you will see exactly how you can best
adjust your seats.
There are special regulations and instructions for installing a child safety seat on the front passenger's seat. Always follow the informa
tion regarding child safety provided in=>
page 238, "Child Safety".
L1}. WARNING
Incorrect seating position of the driver and all other passengers
can result in serious personal injury.
• Always keep your feet on the floor when the vehicle is in motion
- never put your feet on top of the instrument panel, out of the
window or on top of the seat cushion. This applies especially to
the passengers. If your seating position is incorrect, you increase
the risk of injury in the case of sudden braking or an accident. If
& WARNING (continued)
the airbag inflates and the seating position is incorrect, this could
result in personal injury or even death.
• It is important for both the driver and front passenger to keep
a distance of at least 10 inches (25 cm) between themselves and
the steering wheel and/or instrument panel. If you're sitting any closer than this, the airbag system cannot protect you properly. In
addition, the front seats and head restraints must be adjusted to
your body height so that they can give you maximum protection.
• Always try to keep as much distance as possible between your
self and the steering wheel or instrument panel.
• Do not adjust the driver's or front passenger's seat while the
vehicle is moving. Your seat may move unexpectedly, causing
sudden loss of vehicle control and personal injury.
If you adjust
your seat while the vehicle is moving, you are out of position. •
Driver's seat
The correct seat position is important for safe and relaxed
driving.
We recommend that you adjust the driver's seat in the
following manner:
- Adjust the seat in fore and aft direction so that you can
easily push the pedals to the floor while keeping your
knees slightly bent=>&, in "Why is your seat adjustment
so important?".
Adjust the seatback so that when you sit with your back
against the seatback, you can still grasp the top of the
steering wheel. _..
Page 83 of 398
- Position the head restraint according to the occupant's
height=>
page 86. For maximum protection, the top of
the head restraint should be at least at eye level, prefer
ably higher and ideally level with the top of the head
=>
page 199, fig. 197.
& WARNING
Never place any objects in the driver's footwell. An object could
get into the pedal area and interfere with pedal function. In case
of sudden braking or an accident, you would not be able to brake
or accelerate. •
Front passenger's seat
Always move the front passenger seat into the rearmost
position.
To avoid contact with the airbag while it is deploying, do not
sit any closer to the instrument panel than necessary and
always wear the three-point safety belt provided adjusted
correctly. We recommend that you adjust the passenger's
seat in the following manner:
- Move the front passenger seat into the rearmost position
of the fore and aft adjustment range=>
& in "Why is
your seat adjustment so important?" on
page 80.
- Bring the backrest up to an (almost) upright position. Do
not ride with the seat reclined.
- The ideal position for the head restraint is with the upper
edge of the restraint level with the top of your head
=>
page 86. You should not lower the top of the restraint
below the level of your eyes.
Contro ls and eq uip
ment
Seats and storage
- Place your feet on the floor in front of the passenger's
seat. •
Power seat
Controls
The operating logic for the switches corresponds to the
construction and function of the seat.
Fig. 73 Power seat:
Controls for seat
adjustment
The switches to adjust the seats correspond to the layout, the
design and the function of the seat. The seats are adjusted by
moving the switches following this logic.
© Seat adjustment~ page 82
@ Adjusting the angle of the seatback ~ page 82
© Adjusting the lumbar support~ page 83
@ Upper thigh support*~ page 83
& WARNING
• Never adjust the driver's or front passenger's seat while the
vehicle is moving . If you do this while the vehicle is moving , you
will be out of position. Always adjust the driver's or front
passenger's seat when the vehicle is not moving. _.,
Vehicle care I I irechnical data
Page 85 of 398
& WARNING
• Never adjust the seatback while the vehicle is moving . If you
adjust your seat while the vehicle is moving, you are out of posi
tion. Never adjust the seatback when the vehicle is moving.
• To reduce the risk of injury in the case of sudden braking or
accident, front passengers must never ride in a moving vehicle
with the seatback reclined. Safety belts and the airbag system
only offer maximum protection when the seatback is upright and
the safety belts are properly positioned on the body. The more the
seatback is reclined, the greater the risk of personal injury from an
incorrect seating position and improperly positioned safety
belts. •
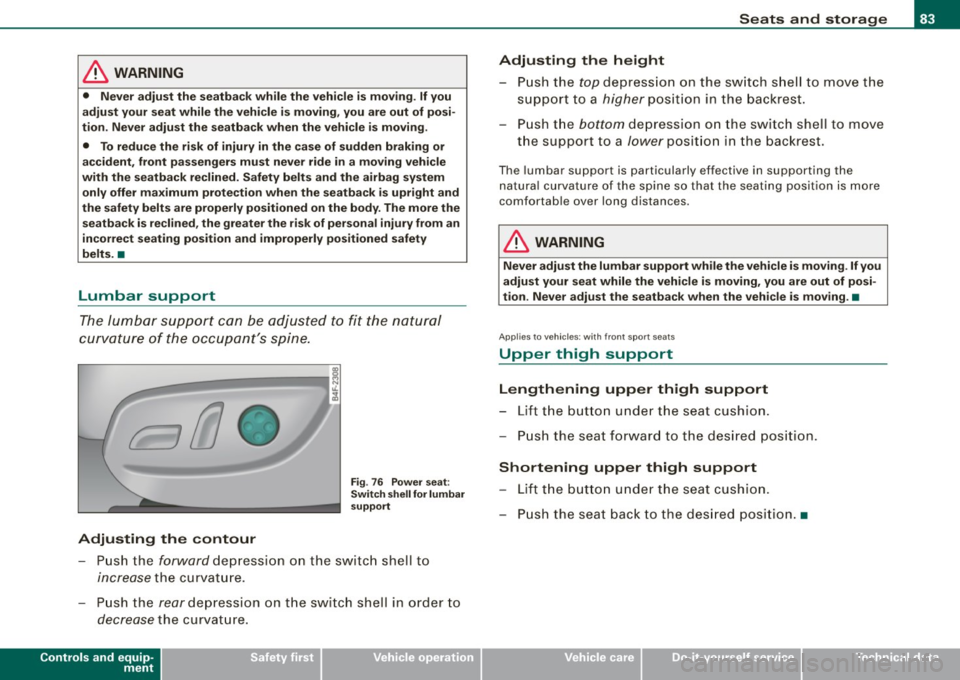
Lumbar support
The lumbar support can be adjusted to fit the natural
curvature of the occupant's spine.
Adjusting the contour
Fig. 76 Power seat;
Switch shell for lumbar
support
- Push the forward depression on the switch shell to
increase the curvature.
- Push the
rear depression on the switch shell in order to
decrease the curvature.
Controls and equip
ment
Seats and storage
Adjusting the height
- Push the top depression on the switch shell to move the
support to a
higher position in the backrest.
- Push the
bottom depression on the switch shell to move
the support to a
lower position in the backrest.
The lumbar support is part icularly effective in supporting the
natural curvature of the spine so that the seating position is more
comfortabl e over long distances .
& WARNING
Never adjust the lumbar support while the vehicle is moving. If you
adjust your seat while the vehicle is moving, you are out of posi
tion. Never adjust the seatback when the vehicle is moving .•
Ap plies to vehi cles; with front s po rt sea ts
Upper thigh support
Lengthening upper thigh support
- Lift the button under the seat cushion.
- Push the seat forward to the desired position .
Shortening upper thigh support
-Lift the button under the seat cushion.
- Push the seat back to the desired position. •
I • •
Page 89 of 398
- Adjust the head restraints so that the top of the head
restraint is
at least level with your eyes or higher.
Removing the head restraint
- Pull the head restraint all the way up.
Press the release button @and pull the restraint out and
clear of the seat.
Installing the head restraint
- Insert the rods into the guides and push the restraint
back in unt il you hear it click.
Refer to~ page 199, "Proper adjustment of head restraints" for
guidelines on how to adjust the height of the front head r estraints
to suit the occupant's body size.
& WARNING
• Driving without head restraints or with head restraints that are
not properly adjusted increases the risk of serious or fatal neck
injury dramatically.
• Read and heed all WARNINGS~
page 199.
[ i J Tips
Correctly adjusted head restraints and safety belts are an extremely
effective combination of safety features .•
Con tro ls and eq uip
ment
Seats and storage
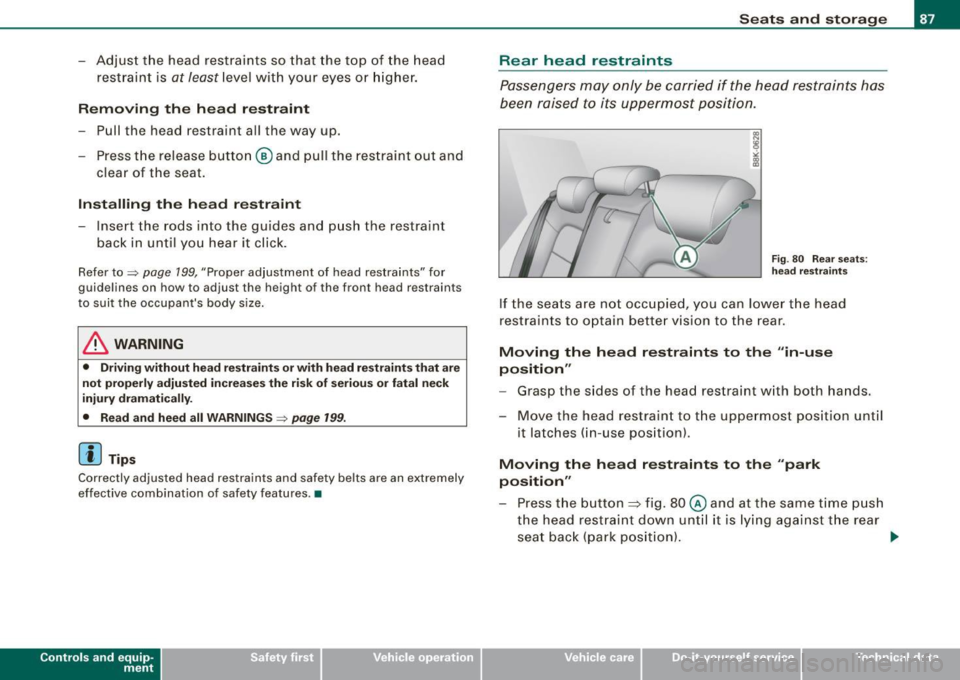
Rear head restraints
Passengers may only be carried if the head restraints has
been raised to its uppermost position.
Fig . 80 Rear seats:
head restraints
If the seats are not occupied, you can lower the head
restraints to optain better vision to the rear.
Moving the head restraints to the "in-use
position"
- Grasp the sides of the head restraint with both hands.
- Move the head restraint to the uppermost position until
it latches (in-use position).
Moving the head restraints to the "park
position"
- Press the button => fig. 80@ and at the same time push
the head restraint down until it is lying against the rear
seat back (park position).
~
Vehicle care I I irechnical data
Page 90 of 398
Seats and storage
& WARNING
• Driving without head restraints or with head restraints that are
not properly adjusted increases the risk of serious or fatal neck
injury dramatically.
• Read and heed all WARNINGS =>
page 199
[ i ] Tips
Correctly adjusted head restraints and safety belts are an extremely
effective combination of safety features. •
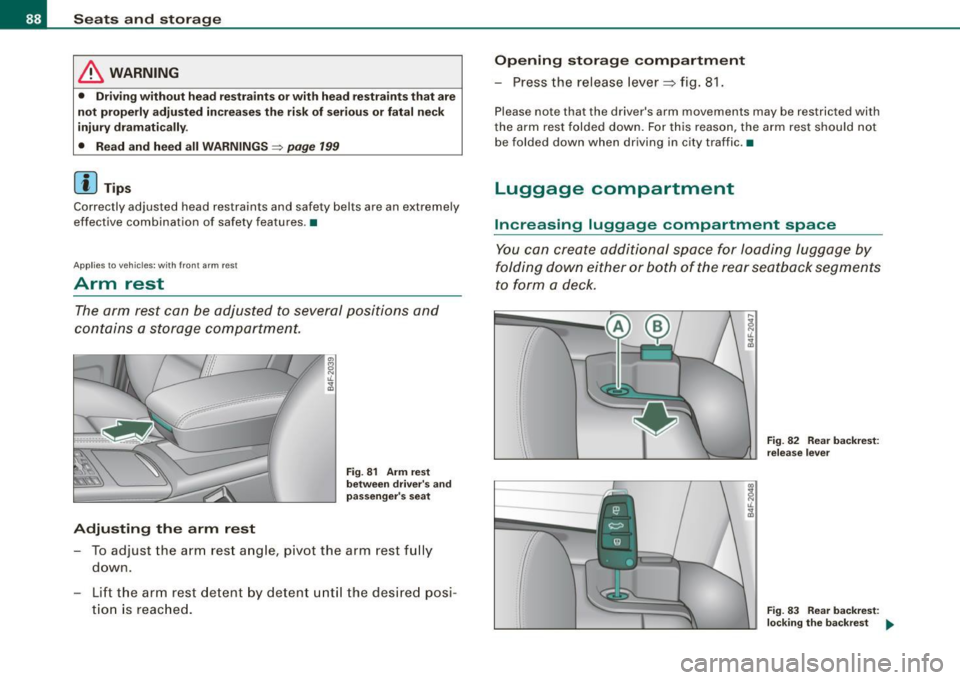
Applies to vehi cles: wit h fro nt arm res t
Arm rest
The arm rest can be adjusted to several positions and
contains a storage compartment.
Adjusting the arm rest
Fig . 81 Arm rest
between driver's and
passenger's seat
- To adjust the arm rest angle, pivot the arm rest fully
down.
- Lift the arm rest detent by detent until the desired posi
tion is reached.
Opening storage compartment
- Press the release lever~ fig. 81.
Please note that the driver's arm movements may be restricted with
the arm rest folded down. For this reason, the arm rest should not
be folded down when driving in city traffic.•
Luggage compartment
Increasing luggage compartment space
You can create additional space for loading luggage by
folding down either or both of the rear seatback segments
to form a deck.
---
Fig. 82 Rear backrest :
release lever
Fig. 83 Rear backrest:
locking the backrest ...