steering AUDI S6 2009 Owners Manual
[x] Cancel search | Manufacturer: AUDI, Model Year: 2009, Model line: S6, Model: AUDI S6 2009Pages: 398, PDF Size: 43 MB
Page 4 of 398
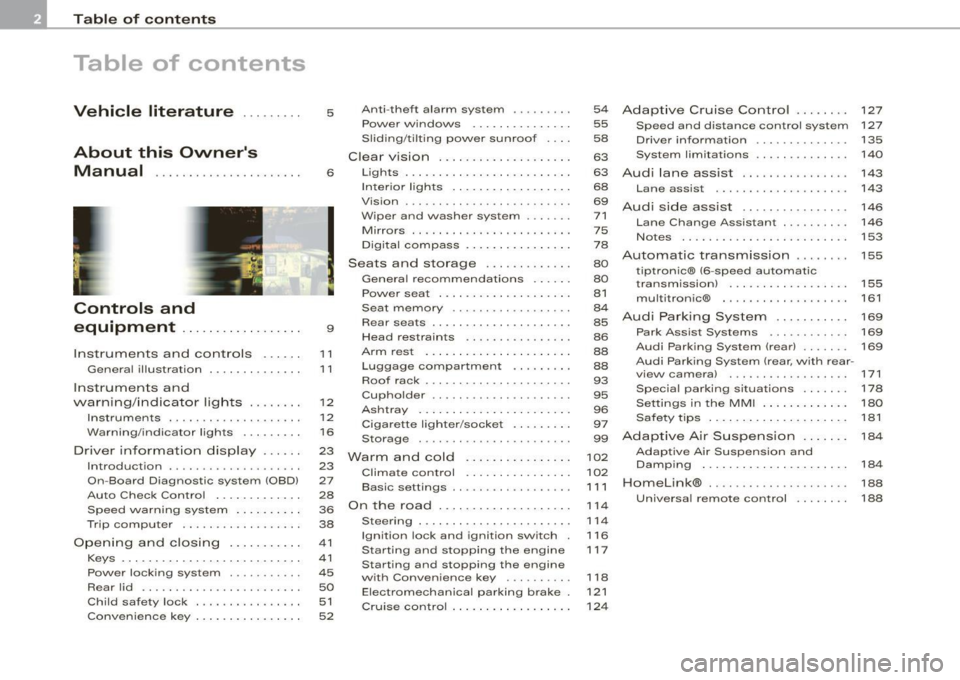
Table of contents
Table of contents
Vehicle literature ........ .
About this Owner's Manual .............. ...... . .
Controls and
equipment ............ ..... .
Instruments and controls ..... .
General il lustration ............. .
Instruments and
warning/indicator lights ....... .
Instruments .............. ..... .
Warning/indicator lights ........ .
Driver information display ..... .
Introduction ................... .
On-Board Diagnostic system (OBD)
Auto Check Control ............ .
Speed warning system ..... .. .. .
Trip computer ..... ... .. .. ... .. .
Opening and closing .......... .
Keys ... ..... .......... ... ..... .
Power locking system ..... ... .. .
Rear lid ....................... .
Child safety lock .... ......... .. . 5
6
9
11
1
1
12
12
16
23
23
27
28
36
38
41
41
45
50
51
Convenience key . . . . . . . . . . . . . . . . 52 Anti-theft
alarm system ........ .
Power windows ... ... .... .... .
S liding/ti lting power sunroof . .. .
Clear vision . .... .. .. .......... .
Lights ... ................ ... .. .
In ter ior l ights ...... ... .. .. .. .. .
Vision ... ... ......... ...... ... .
Wiper and washer system ...... .
Mirrors .................... ... .
Digital compass ............... .
Seats and storage ..... .... ... .
General recommendations ..... .
Power seat . ... ... ......... ... .
Seat m emory ...• ........ .... ..
Rear seats .......... ....... ... .
Head restraints ........ ..... .. .
Arm rest ....... ... ... ... ... •..
Luggage compartment ..... ... .
Roof rack ..... .......... ... .• ..
Cupholder .. ...... ... .. ... ..• ..
Ashtray ................... ... .
Cigarette lighter /socket ........ .
Storage ............ ....... ... .
Warm and cold ............... .
Climate control ........ .. ... .. .
Basic settings ......... •. ... ....
On the road . ... ..... .. ..... ... .
Steering .................... .. .
Ignition lock and ignition switch .
Starting and stopping the engine
Starting and stopping the engine
with Convenience key ....... .. .
Electromechanical parking brake .
Cruise control ......... ........ .
54
55
58
63
63
68
69
71
75
78
80
80
81
84
85
86
88
88
93
95
96
97
99
102
102
1 1 1
114
114
116
117
118
121 124
Adaptive Cruise Control ....... .
Speed and distance control system
Driver informa tion ....... ...... .
System limitations ............. .
Audi lane assist ............... .
Lane assist ......... ........ .. .
Audi side assist ............... .
Lane Change Assistant .. ..... .. .
Notes ....................... •.
Automatic transmission ....... .
tiptronic® (6-speed automatic
transmission) ... .... ... ... .... .
multitronic® ..........•........
Audi Parking System ......... . .
Park Assist Systems .... ... .... .
Audi Park ing System (rear) ...... .
Audi Parking System (rear, with rear-
view camera) .... .. ...... ..... .
Specia l parking situations ..... •.
Settings in the MMI ....... ..... .
Saf ety tips . ............ .... ... .
Adaptive Air Suspension ...... .
Adaptive Air Suspension and
Damping ............. ........ .
Homelink® . ................ ... .
Universal remote control ....... . 127
127
135
140
143
143
146
146
153
155
155
161
169
169
169
171
178
180
181
184
184
188
188
Page 13 of 398
Instruments and controls
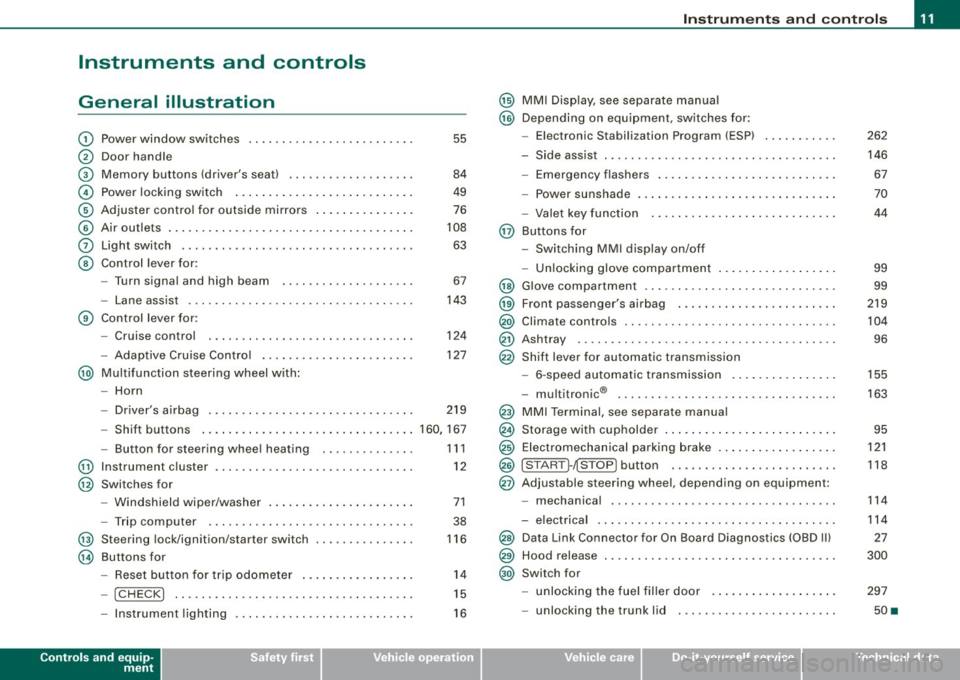
General illustration
G)
0
©
©
©
©
0
©
Power window switches ...... .... ..... .. ....... .
Door handle
Memory buttons (driver's seat)
Power locking switch .......................... .
Adjuster control for outside mirrors .. .... .... .... .
Air outlets ........ ... ...... .... ...... .... ... .. .
Light switch .... .... ........... .... .... .... ... .
Control lever for :
- Turn signal and high beam
- Lane assist .... .... ... .... .... .... .......... .
Control lever for:
- Cruise control
- Adaptive Cruise Contro l .......... ...... .... .. .
@ Multifunction steering wheel with:
- Horn
55
84
49
76
108
63
67
143
124
127
- Driver's airbag . . . . . . . . . . . . . . . . . . . . . . . . . . . . . . . 219
- Shift buttons ................................ 160, 167
@
@
@
@
-Button for steering wheel heating
Instrument cluster ... .... ... .... ...... ......... .
Switches for
- Windshield wiper/washer ..... ...... ..... .. ... .
- Trip computer ..... .. ..... ... .... ...... ... .. .
Steering lock/ignition/starter switch
Buttons for
- Reset button for trip odometer ... .. .... .... ... .
!CHECK] .. .... ....... .... .... ....... .... ... .
Instrument lighting .... ... .... .... ... ..... ... .
Controls and equip
ment
1 1 1
12
71
38
116
14
15
16
Instruments and controls
@ MMI Display, see separate manual
@ Depending on equipment, switches for:
- Electronic Stabilization Program (ESP)
- Side assist .. ... ..... .. .. .. .... .... .... ... ... .
- Emergency flashers .......................... .
- Power sunshade .... .... .... .... ... .... ..... . .
- Valet key function .... ....... ...... .... ...... .
@ Buttons for
- Switching MMI display on/off
- Unlocking glove compartment
@ Glove compartment ........... .... .... ......... .
@ Front passenger's airbag .. .... .... ... .. ...... .. .
@) Climate controls ......... .. .. .... .... .... .. . .. . .
@ Ashtray ..... .... .... ....... .... .... .... ... ... .
@ Shift lever for automatic transmission
- 6-speed automatic transmission .. .. .... .... ... .
I . .
® -
mu t1tron1c ... .... .... .... .... .... ... ...... .
@ MMI Terminal, see separate manual
@ Storage with cupholder . ........ ... .. .... .... ... .
@ Electromechanical parking brake ... .... .... .... .. .
@ ISTART ]-~STOP ] button .. ... ..... ... .... .... ... .
@ Adjustable steering wheel, depending on equipment:
- mechanica l .. .. .... .... ..... .. .... ..... ... .. .
- electrica l ... ...... .... ... .. .... .... ...... ... .
@) Data Link Connector for On Board Diagnostics (OBD II)
@ Hood release . .... .... ...... ... .. .... .... ... ... .
@) Switch for
unlocking the fuel filler door ..... ...... .... ... .
- unlocking the trunk lid . .... .... .... .... ... ... .
I • •
262
146 67
70
44
99
99
219
104
96
155
163
95
121
118
114
114
27
300
297
50 •
Page 31 of 398
Driver messages and yellow symbols
If a yellow symbol appears in the display, a driver message is also
displayed automatically.
For example, the symbol appears in the display, indicating low
windshield washer fluid level. The following message also appears:
Please top up washer fluid
The driver message disappears after a few seconds. The driver
message can be displayed again by briefly pressing the
I CH ECK]
button. •
Red symbols
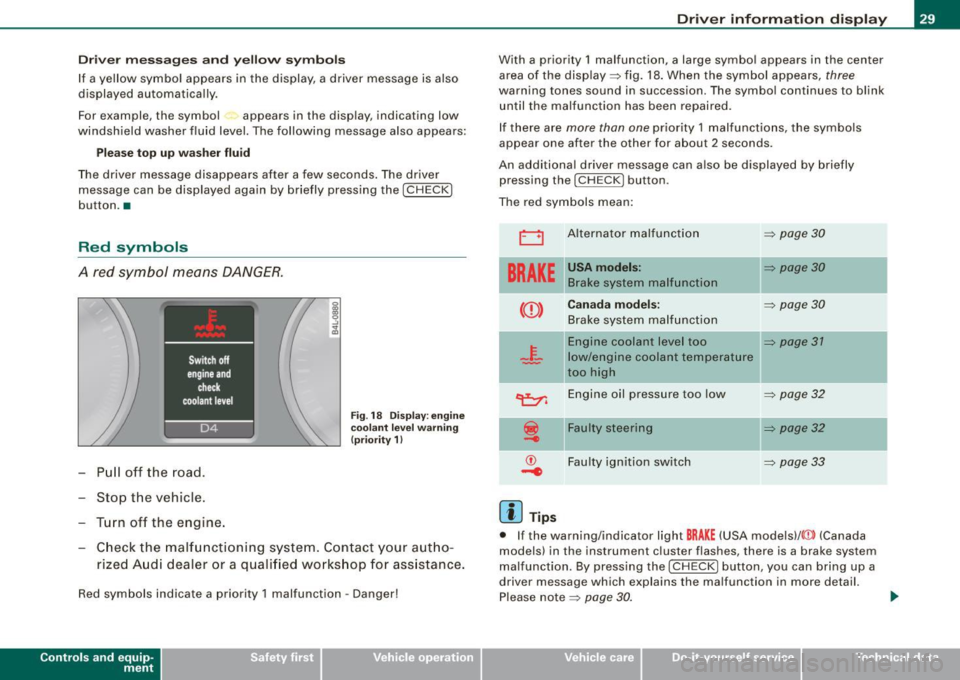
A red symbol means DANGER.
-Pull off the road.
- Stop the vehicle.
Turn off the engine.
Fig . 18 Display: engine
coolant level warning
(priority 1)
- Check the malfunctioning system. Contact your autho
rized Audi dealer or a qualified workshop for assistance.
Red symbols indicate a priority 1 malfunction -Danger!
Con tro ls and eq uip
ment
Driver information display
With a priority 1 malfunction, a large symbol appears in the center
area of the display => fig. 18. When the symbol appears,
three
warning tones sound in succession. The symbol continues to blink
until the malfunction has been repaired.
If there are
more than one priority 1 malfunctions, the symbols
appear one after the other for about 2 seconds.
An additional driver message can also be displayed by briefly
pressing the
! CHECK ] button.
The red symbols mean:
0
BRAKE
[ i] Tips
Alternator malfunction
USA models:
Brake system malfunction
Canada models:
Brake system malfunction
Engine coolant level too
low/engine coolant temperature
too high
Engine oil pressure too low
Faulty steering
Faulty ignition switch
=> page30
=> page 30
=> page30
=> page 31
=> page32
=> page 32
=> page 33
• If the warning/indicator light BRAKE (USA models)/ © (Canada
models) in the instrument cluster flashes, there is a brake system
malfunction. By pressing the
I CH ECK] button, you can bring up a
driver message which explains the malfunction in more detail.
Please note
=> page 30. ..
Vehicle care
I I irechnical data
Page 34 of 398
Driver information display
Engine oil pressure malfunction "t=;f':
The red engine oil pressure warning symbol requires
immediate service or repair. Driving with a low-oil-pres
sure indication is likely to inflict severe damage to the
engine.
If the ~ symbol appears in the display and blinks, the oil
pressure is too low. An additional driver message can also
be displayed by pressing the
!CHECK] button:
Switch off engine and check oil level
Immediate actions
- Pull off the road.
- Stop the vehicle.
- Turn off the engine.
-Check the engine oil level with the dipstick=:> page 305.
Dipstick readings checks too low
-Top off oil to the proper level ::::, page 306.
Make sure that the oil pressure warning symbol~
appears no longer in the display before you start driving
again.
Dipstick reading checks OK
- If the oil pressure warning symbol~ starts flashing
again even though the engine oil level checks OK on the
dipstick,
do not continue driving and do not let the
engine run in idle.
Instead, contact your authorized Audi
dealer for assistance.
[ i] Tips
• The engine oil pressure symbol ~ is not an indicator for a low
engine oil level. Do not rely on it. Instead, check the oil level in your
engine at regular intervals, preferably each time you refuel, and
always before going on a long trip.
• The yellow oil level warning indication ,.. requires oil refill or
workshop service without delay. Do not wait until the red oil pres
sure warning
~ starts to flash before you respond to the low oil
level warning ...... By then, your engine may already have suffered
serious damage. •
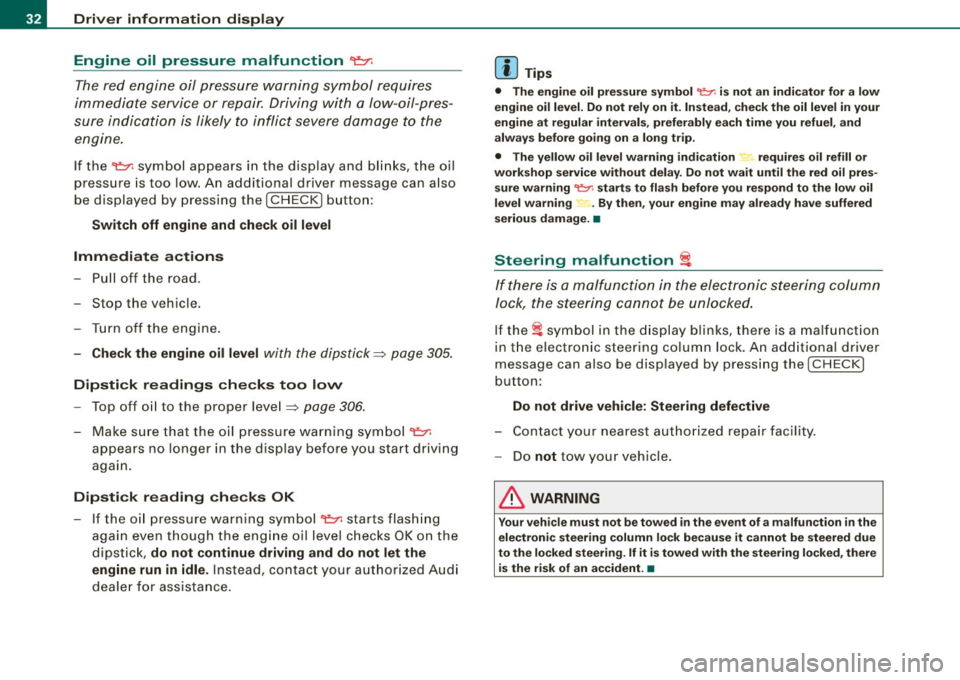
Steering malfunction i
If there is a malfunction in the electronic steering column
lock, the steering cannot be unlocked.
If the i symbol in the display blinks, there is a malfunction
in the electronic steering column lock. An additional driver
message can also be displayed by pressing the
I CHECK]
button:
Do not drive vehicle: Steering defective
-Contact your nearest authorized repair facility.
- Do
not tow your vehicle.
& WARNING
Your vehicle must not be towed in the event of a malfunction in the
electronic steering column lock because it cannot be steered due
to the locked steering. If it is towed with the steering locked, there
is the risk of an accident. •
Page 44 of 398
Opening and closing
• For security reasons, replacement keys are only available from
Audi dealers. •
Master key with remote control
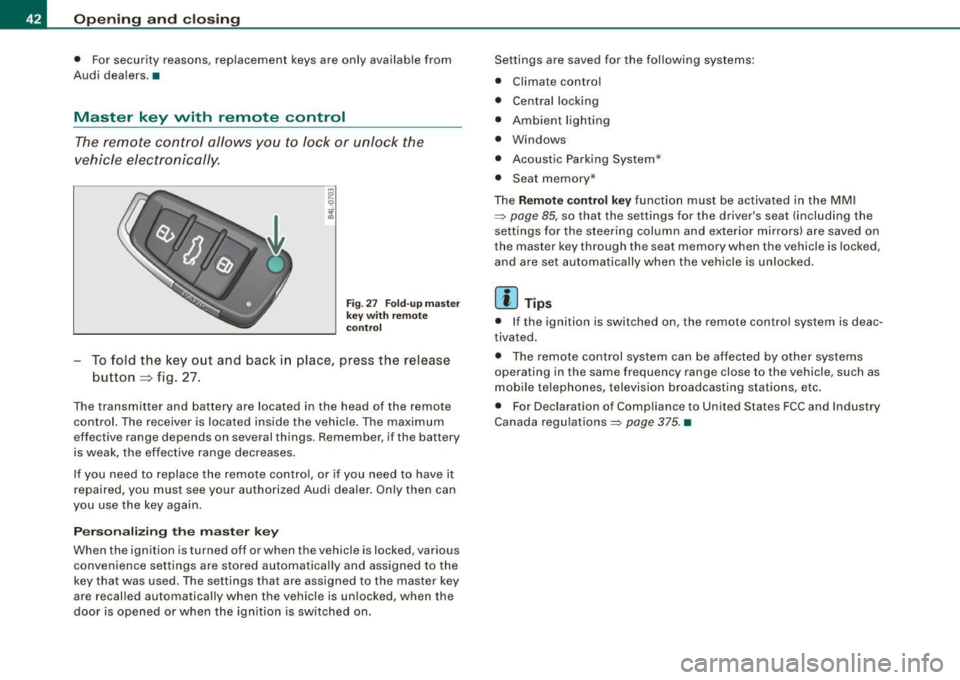
The remote control allows you to lock or unlock the
vehicle electronically .
Fig. 27 Fo ld -up m aste r
k ey with r emot e
c ontr ol
To fold the key out and back in place, press the release
button=> fig. 27.
The transmitter and battery are located in the head of the remote
control. The receiver is located inside the vehicle. The maximum
effective range depends on several things . Remember , if the battery
is weak, the effective range decreases .
If you need to replace the remote contro l, or if you need to have it
repaired, you must see your authorized Audi dealer . On ly then can
you use the key again.
Personalizing the master ke y
When the ignition is turned off or when the vehicle is locked , various
convenience settings are stored automatically and assigned to the
key that was used. The settings tha t ar e ass igned to the master key
are recal led automatically when the vehicle is unlocked, when the
door is opened or when the ignition is switched on . Settings are saved for the fo
llowing systems :
• Climate control
• Central locking
• Ambient lig hting
• Windows
• Acoustic Parking System*
• Seat memory *
T he
Remote control key function must be activated in the MM I
=:> page 85, so that the settings for the driver's seat (including the
settings for the steering column and exte rior mirrors) are saved on
the master key through the seat memory when the vehicle is locked,
and are set automatically when the vehicle is un locked .
[ i ] Tips
• I f the ignition is switched on, the remote c ontr ol system is deac
tivated.
• T he remote control system can be af fected by other systems
operating in the same frequency range close to the vehicle, such as
mobile telephones, television broadcasting stations, etc .
• For Declarat ion of Compliance to United States FCC and Industry
Canada regulations=:>
page 375. •
Page 68 of 398
![AUDI S6 2009 Owners Manual Clear vision
[ i] Tips
With the switch in AUTO front fog lights and rear fog lights cannot
be turned on in addition. •
Applies to vehic les: with Adapt ive Light
Adaptive Light AUDI S6 2009 Owners Manual Clear vision
[ i] Tips
With the switch in AUTO front fog lights and rear fog lights cannot
be turned on in addition. •
Applies to vehic les: with Adapt ive Light
Adaptive Light](/img/6/57595/w960_57595-67.png)
Clear vision
[ i] Tips
With the switch in AUTO front fog lights and rear fog lights cannot
be turned on in addition. •
Applies to vehic les: with Adapt ive Light
Adaptive Light
When making a turn or driving around tight corners, the
relevant area of the road is better illuminated.
Adaptive Light (making turns)
Fig. 55 Adaptive Light
when turning and driving through curves
An additional bulb in the headlight provides a cornering light@ in
addition to the low beam@:::::, fig. 55. Adaptive Light is switched on
and off automatically depending on driving conditions .
When you activate the turn signal lever, the Adaptive Light for the
same side is switched on. Please note that the turn signal lever must
engage.
Adaptive Light is not switched on if you only move the turn signal
lever to the point of resistance to signal a lane change :::::,
page 67,
"Turn signal ¢i ¢ and high beam lsD lever".
When driving around bends, Adaptive Light is controlled according
to steering wheel angle. • It is switched on in tight corners. • It
is not switched on in long, open bends .
Adaptive Light (in curves)
When driving through curves, the low beams © are automatically
controlled depending on driving speed and the steering wheel
angle.
The two main beams pivot at different angles so that there is no
unilluminated area in front of the vehicle.
[ i] Tips
• The system works up to a speed of about 43 mph (70 km/h). If the
speed is higher, it is not activated.
• Adaptive Light (in curves) functions at a speed of about 6 mph
(10 km/h) and is deactivated at speeds below about 4 mph
(6 km/h). •
Applies to vehi cles: with light pac kage
Perimeter lighting in the mirror housing
LEDs in the exterior mirror housing illuminate the ground
during entry.
This function ensures that when unlocking, the vehicle periphery is
illuminated in the dark. LEDs in the exterior mirror housing are
switched on. The function cannot be turned off separately. •
Page 69 of 398
Emergency flasher ~
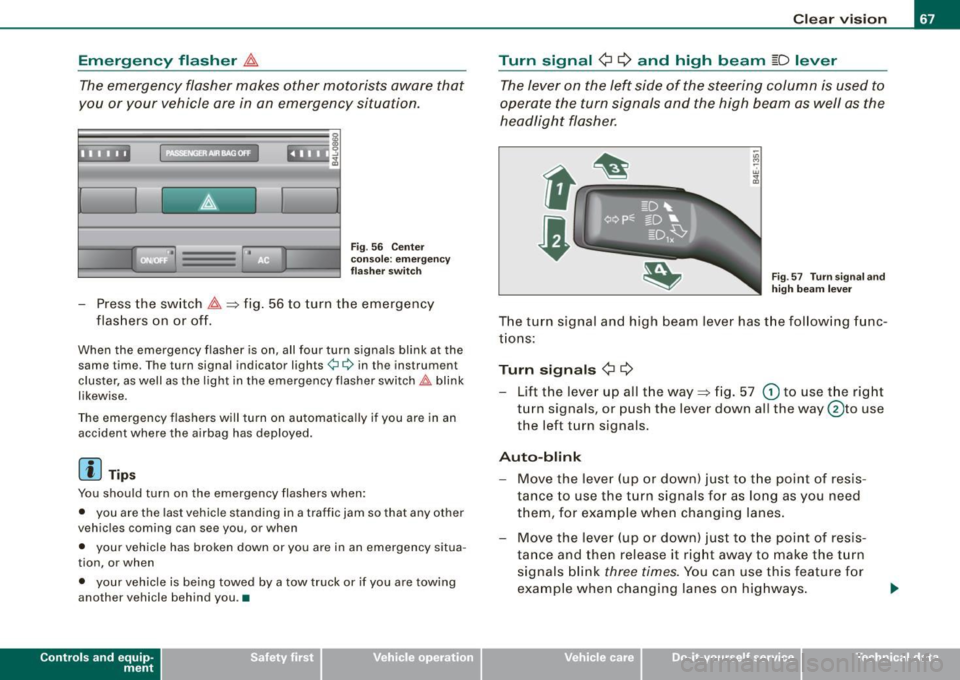
The emergency flasher makes other motorists aware that
you or your vehicle are in an emergency situation.
~ -.:.i.t'
Fig . 56 Cente r
conso le: emergency
f lashe r swi tc h
- Press the switch ~~fig . 56 to turn the emergency
flashers on or off.
When the emergency flasher is on, all four turn signals blink at the same time. The turn signal indicator lights¢¢ in the instrument
cluster, as well as the light in the emergency flasher switch~ blink
likewise.
The emergency flashers will turn on automatica lly if you are in an
accident where the airbag has deployed.
[ i ] Tip s
You should turn on the emergency flashers when:
• you are the last vehicle standing in a traffic jam so that any other
vehicles coming can see you, or when
• your vehicle has broken down or you are in an emergency situa
tion, or when
• your vehicle is being towed by a tow truck or if you are towing
another vehicle behind you .•
Con tro ls and eq uip
ment
C lea r v is ion
Turn signal ¢ ¢ and high beam ~D lever
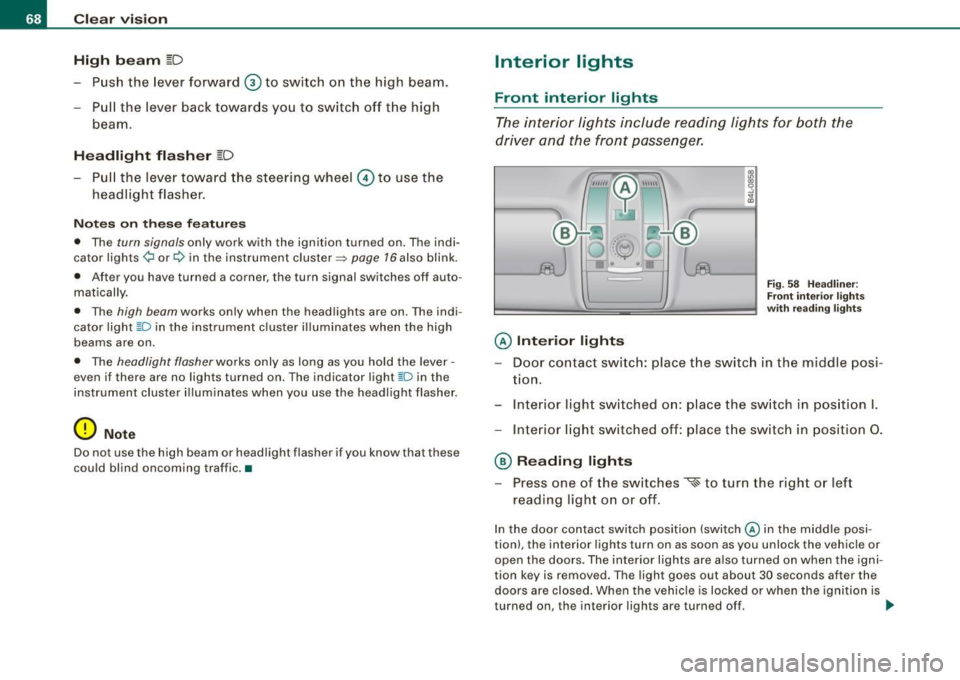
The lever on the left side of the steering column is used to
operate the turn signals and the high beam as well as the
headlight flasher.
-"' M
-w
"' a,
Fig . 57 T urn s igna l and
high beam lever
The turn signal and high beam lever has the follow ing func
tions:
Turn si gnals ¢ ¢
- Lift the lever up all the way~ fig. 57 G) to use the right
turn signals, or push the lever down al l the way @to use
the left turn signals.
Aut o-blink
- Move the lever (up or down) just to t he point of resis
tance to use the turn signals for as long as you need
them, for example when changing lanes.
- Move the lever (up or down) just to t he point of resis
ta nce and then release it right away to make the turn
signals blink
three times. You can use this feature f or
example when changing lanes on highways.
Vehicle care I ' irechnical data
Page 70 of 398
Clear vision
High beam
~D
-Push the lever forward 0 to switch on the high beam.
Pull the lever back towards you to switch off the high
beam.
Headlight flasher
~D
- Pull the lever toward the steering wheel © to use the
headlight flasher.
Notes on these features
• The turn signals only work with the ignition turned on. The indi
cator lights ¢ or¢ in the instrument cluster~ page 16 also blink.
• After you have turned a corner, the turn signal switches off auto
matically.
• The high beam works only when the headlights are on. The indi
cator light ~D in the instrument cluster illuminates when the high
beams are on.
• The headlight flasher works only as long as you hold the lever -
even if there are no lights turned on. The indicator light [Din the
instrument cluster illuminates when you use the headlight flasher.
0 Note
Do not use the high beam or headlight flasher if you know that these
could blind oncoming traffic. •
Interior lights
Front interior lights
The interior lights include reading lights for both the
driver and the front passenger.
@ Interior lights
Fig . 58 Headliner :
Front interior lights
with reading lights
- Door contact switch: place the switch in the middle posi -
tion.
- Interior light switched on: place the switch in position I.
- Interior light switched off: place the switch in position 0.
@ Reading lights
- Press one of the switches
~ to turn the right or left
reading light on or off.
In the door contact switch position (switch@ in the middle posi
tion), the interior lights turn on as soon as you unlock the vehicle or
open the doors. The interior lights are also turned on when the igni
tion key is removed. The light goes out about 30 seconds after the
doors are closed. When the vehicle is locked or when the ignition is
turned on, the interior lights are turned off. ..,_
Page 74 of 398
Clear vision
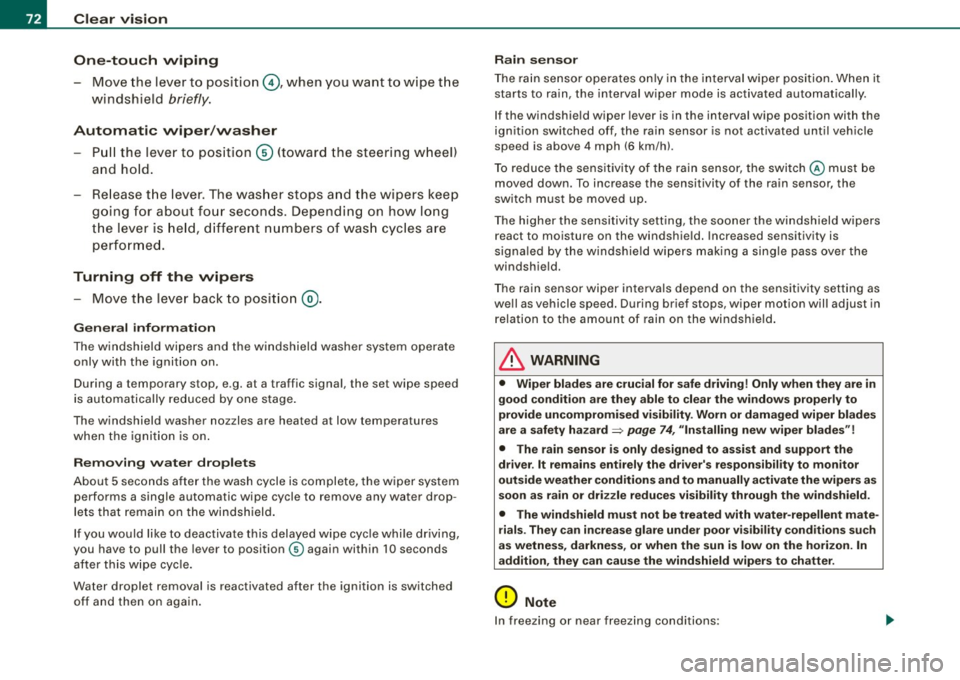
One-touch wiping
- Move the lever to position@, when you want to wipe the
windsh ield
briefly.
Automatic wiper /washer
- Pull the lever to pos ition © (toward the steering wheel)
and ho ld.
- Re lease t he lever. T he wash er stops a nd the wipers keep
g o ing for about fo ur secon ds. Dep ending on h ow long
t h e lever is held, d ifferent numbers of was h cyc les are
performed.
Turning off the wipers
- Move the lever back to position @ .
Gen era l inform ati on
The windshield wipers and the windshield washer system operate
only with the ignition on.
During a temporary stop, e.g. at a traffic signa l, the set wipe speed
is aut omatically reduced by one stage .
The windshield washer nozzles are heated at low temperatures
when the ignition is on .
Removing vv ater drop let s
About 5 seconds after the wash cycle is complete, the wiper system
performs a single automatic wipe cycle to remove any water drop
lets that remain on the windshield .
If you would like to deactivate this delayed wipe cyc le whi le dr iving,
you have to pull the lever to position © again within 10 seconds
af ter this w ipe cyc le .
Water droplet removal is reactivated after the ignition is switched off and then on again .
Rain se nsor
The ra in sensor operates on ly in the interval wiper position . When it
starts to rain, the interval wiper mode is activated automatically .
I f the windshie ld wiper lever is in the interval wipe position with the
ign ition sw itched off, the rain sensor is not activated unt il veh ic le
speed is above 4 mph (6 km/h) .
T o reduce the sens itivi ty of the rain sensor, the swi tch
© must be
moved down. To increase the sensitivity of the rain sensor, the
sw itc h must be moved up .
T he higher the sensitivity sett ing, the sooner the windshield wipers
react to moisture on the windshie ld. Increased sensitivity is
signa led by the windshie ld w ipers making a si ng le pass over the
windshield.
T he rain sensor wiper interva ls depend on the sens itivity setting as
we ll as vehicle speed. During brief stops, wiper motion will adjust in
r elation to the amount of rain on the windshield .
& WARNING
• Wiper blades are crucial for safe driving! Only when they are in
good cond ition are they able to clear the windo ws properly to
provide uncompromised visibility . Worn or d am aged wiper blades
are a safet y hazard ::::> page
74 , "I nst alli ng new wiper blades "!
• The rain sensor is only designed to a ssist and support the
dri ver . It remai ns entirel y the dr iver's respon sibil ity to monitor
out side weather conditions and to manually activate the wiper s as
so on a s rain or dri zzle reduce s vis ibility through the wind sh ield.
• The wind shield must not be treated with water -repellent mate
rials . The y can incre as e g la re under poor visibility condition s su ch
as wetness , darkne ss, or when th e sun is low on t he horizon. In
addition , they can cause the wind shield wiper s to ch att er.
0 Note
In freezing or near freezing conditions :
Page 82 of 398
Seats and storage
Seats and storage
General recommendations
Why is your seat adjustment so important?
The safety belts and the airbag system can only provide
maximum protection if the front seats are correctly
adjusted.
There are various ways of adjusting the front seats to provide safe
and comfortable support for the driver and the front passenger.
Adjust your seat properly so that :
• you can easily and quickly reach all the switches and controls in
the instrument panel
• your body is properly supported thus reducing physical stress
and fatigue
• the safety belts and airbag system can offer maximum protec
tion=>
page 215.
In the following sections , you will see exactly how you can best
adjust your seats.
There are special regulations and instructions for installing a child safety seat on the front passenger's seat. Always follow the informa
tion regarding child safety provided in=>
page 238, "Child Safety".
L1}. WARNING
Incorrect seating position of the driver and all other passengers
can result in serious personal injury.
• Always keep your feet on the floor when the vehicle is in motion
- never put your feet on top of the instrument panel, out of the
window or on top of the seat cushion. This applies especially to
the passengers. If your seating position is incorrect, you increase
the risk of injury in the case of sudden braking or an accident. If
& WARNING (continued)
the airbag inflates and the seating position is incorrect, this could
result in personal injury or even death.
• It is important for both the driver and front passenger to keep
a distance of at least 10 inches (25 cm) between themselves and
the steering wheel and/or instrument panel. If you're sitting any closer than this, the airbag system cannot protect you properly. In
addition, the front seats and head restraints must be adjusted to
your body height so that they can give you maximum protection.
• Always try to keep as much distance as possible between your
self and the steering wheel or instrument panel.
• Do not adjust the driver's or front passenger's seat while the
vehicle is moving. Your seat may move unexpectedly, causing
sudden loss of vehicle control and personal injury.
If you adjust
your seat while the vehicle is moving, you are out of position. •
Driver's seat
The correct seat position is important for safe and relaxed
driving.
We recommend that you adjust the driver's seat in the
following manner:
- Adjust the seat in fore and aft direction so that you can
easily push the pedals to the floor while keeping your
knees slightly bent=>&, in "Why is your seat adjustment
so important?".
Adjust the seatback so that when you sit with your back
against the seatback, you can still grasp the top of the
steering wheel. _..