sunroof AUDI S6 2009 Owners Manual
[x] Cancel search | Manufacturer: AUDI, Model Year: 2009, Model line: S6, Model: AUDI S6 2009Pages: 398, PDF Size: 43 MB
Page 4 of 398
Table of contents
Table of contents
Vehicle literature ........ .
About this Owner's Manual .............. ...... . .
Controls and
equipment ............ ..... .
Instruments and controls ..... .
General il lustration ............. .
Instruments and
warning/indicator lights ....... .
Instruments .............. ..... .
Warning/indicator lights ........ .
Driver information display ..... .
Introduction ................... .
On-Board Diagnostic system (OBD)
Auto Check Control ............ .
Speed warning system ..... .. .. .
Trip computer ..... ... .. .. ... .. .
Opening and closing .......... .
Keys ... ..... .......... ... ..... .
Power locking system ..... ... .. .
Rear lid ....................... .
Child safety lock .... ......... .. . 5
6
9
11
1
1
12
12
16
23
23
27
28
36
38
41
41
45
50
51
Convenience key . . . . . . . . . . . . . . . . 52 Anti-theft
alarm system ........ .
Power windows ... ... .... .... .
S liding/ti lting power sunroof . .. .
Clear vision . .... .. .. .......... .
Lights ... ................ ... .. .
In ter ior l ights ...... ... .. .. .. .. .
Vision ... ... ......... ...... ... .
Wiper and washer system ...... .
Mirrors .................... ... .
Digital compass ............... .
Seats and storage ..... .... ... .
General recommendations ..... .
Power seat . ... ... ......... ... .
Seat m emory ...• ........ .... ..
Rear seats .......... ....... ... .
Head restraints ........ ..... .. .
Arm rest ....... ... ... ... ... •..
Luggage compartment ..... ... .
Roof rack ..... .......... ... .• ..
Cupholder .. ...... ... .. ... ..• ..
Ashtray ................... ... .
Cigarette lighter /socket ........ .
Storage ............ ....... ... .
Warm and cold ............... .
Climate control ........ .. ... .. .
Basic settings ......... •. ... ....
On the road . ... ..... .. ..... ... .
Steering .................... .. .
Ignition lock and ignition switch .
Starting and stopping the engine
Starting and stopping the engine
with Convenience key ....... .. .
Electromechanical parking brake .
Cruise control ......... ........ .
54
55
58
63
63
68
69
71
75
78
80
80
81
84
85
86
88
88
93
95
96
97
99
102
102
1 1 1
114
114
116
117
118
121 124
Adaptive Cruise Control ....... .
Speed and distance control system
Driver informa tion ....... ...... .
System limitations ............. .
Audi lane assist ............... .
Lane assist ......... ........ .. .
Audi side assist ............... .
Lane Change Assistant .. ..... .. .
Notes ....................... •.
Automatic transmission ....... .
tiptronic® (6-speed automatic
transmission) ... .... ... ... .... .
multitronic® ..........•........
Audi Parking System ......... . .
Park Assist Systems .... ... .... .
Audi Park ing System (rear) ...... .
Audi Parking System (rear, with rear-
view camera) .... .. ...... ..... .
Specia l parking situations ..... •.
Settings in the MMI ....... ..... .
Saf ety tips . ............ .... ... .
Adaptive Air Suspension ...... .
Adaptive Air Suspension and
Damping ............. ........ .
Homelink® . ................ ... .
Universal remote control ....... . 127
127
135
140
143
143
146
146
153
155
155
161
169
169
169
171
178
180
181
184
184
188
188
Page 60 of 398
Opening and closing
- Turn a nd ho ld the key in the open pos ition
@ .
The automatic close/open function will cease if the key is returned
to its origina l pos ition.
& WARNING
• Be car eful wh en clos ing th e window s. Ch eck t o see that no one
i s in th e way, or se riou s inju ry could r esult !
• Alwa ys read and heed WARNING=>
& in "General de scription "
on
pa ge 4 5. •
Reactivating the system after battery
disconnection
If t he vehicle battery is disco nnected a nd then reconnected,
the automat ic closing and opening function w ill not work
until it is reactivated. To react iva te this fea ture, per form the
follow ing steps:
R eact ivating clo se /open f eatur e
Pull and hold the power window switch until the window
is completely closed .
- Re lease the switch.
- Pull the switch again for one secon d. T he automatic
cl osing/opening is now reactivate d.•
Sliding/tilting power sunroof
Ap plies to veh icle s: wit h slid ing/ tilt ing powe r su nroof
How the power sunroof works
Fig. 4 6 Sect ion of th e
h ea dlin er: su nroof
s w it ch pos it ion s
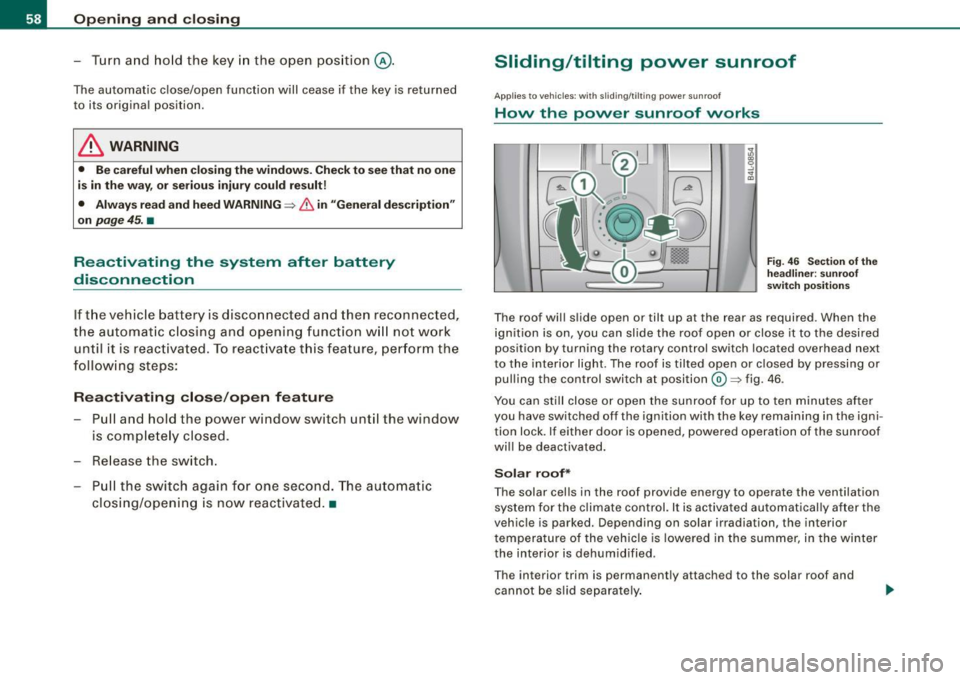
The roof wil l s lide open or tilt up at the rear as required . When the
ignition is on, you can slide the roof open or close it to the desired
position by turning the rotary control switch located overhead next
to the interior light. The roof is tilted open or closed by pressing or pulling the control switch at position@=> fig . 46 .
You can still close or open the sunroof for up to ten minutes af ter
you have switched off the ignition with the key remaining in the igni
tion lock . If either doo r is opened, powered operation of the sunroof
wi ll be deactivated.
Solar roof*
The solar cells in the roof provide energy to operate the ventilation
system for the c limate control. It is activated automatically after the
vehic le is parked . Depending on solar irradiation, the interior
temperature of the vehicle is lowered in the summer, in the winter
the interior is dehumidified .
T he interior trim is permanent ly attached to the solar roof and
cannot be s lid separate ly .
Page 61 of 398
Sola r prot ection w ith slidin g g lass s un ro of*
The sliding glass sun roof is equipped with an adjus table sunshade
to reduce the effects of s trong sun light. The solar protection can be
moved at the recessed hand le to open and close it. To prevent the
vehicle interior from hea ting up , you should close the solar protec
tion when you park your vehicle in the sun.
When the roof is
slid op en , the sunshade is opened automatica lly .
When the roof is c losed , the sunshade can b e clos ed manually.
When the roof is
tilted open , the closed sunshade is also raised at
the rear edge . But it can still be slid open or closed .
0 Note
You should always closed the sliding/tilting sun roof when you leave
your veh icle. Sudden rain can drench the interior equipment and
damage the electron ic convenience features in your vehic le .
[ i ] Tips
If you park your vehicle in the sun, we recommend that you c lose the
sunshade *.•
Ap plies to vehicles: wit h sliding/tilt in g p ower sunroof
Sliding /tilting the power sunroof open
Sliding the power sunroof open to the comfort position
keeps wind noise to a minimum.
Sliding the roof open to the comfort position
- Tur n t he ro tary sw itch to position
G) :::::, page 58, fig. 46
(deten t can be fe lt). The roof is slid open only to a
co mfo rt p osition wi th low wi nd noise.
Controls and equip
ment
Opening and clo sing
Sliding th e roof op en all the way
- Turn the rota ry sw itch to posit ion @. Air flow over t he
fu lly opened sunroof may cause increased wind noise.
Tilting the roof open
- Turn the rota ry sw itch to position @.
- In posi tion @, br iefly
press t he c ontrol to t ilt the roof up
com pletel y.
- To ti lt the roof open to any intermediate position
press
and hold t he switch until the roof reac hes t he desired
p o si tion.
In posit ion @, the switch ju mps back to position G) again as soon
as the switch is released .
When the g lass roof opens, the sun v isor, which is designed to ward
o ff strong sunlight, opens alo ng w ith it. The visor ca n be closed
manual ly when the sunroof is closed .
[ i ] Tips
• Be aware that the sunroof may actually be open when the sun
v isor is c losed . Check and make sure that the sunroof is shut when
par king the car o r if it sudden ly starts raining .
• I f the sunroof is not fully closed but you have pressed and held
the switch for the ti lt position, the sunroof will not t ilt. •
Ap plie s to ve hic les: with sli di ng/ti lt ing powe r su nroo f
Closing the power sunroof
Sliding the roof shut
- Turn t he rota ry sw itch to positio n @ :::::,
page 58, fig. 46
?& . ..
I • •
Page 62 of 398
Opening and closing
Tilting the roof shut
-Briefly pull the rotary switch to close the roof.
- To tilt the roof down to any intermediate position
pull and
hold
the switch until the roof reaches the desired posi
tion.
& WARNING
Improper use of the power sunroof can cause serious personal
injury.
• Be careful when closing the power sunroof. Not paying atten
tion could cause you or others to be trapped and injured as the
roof closes.
• Always take the key with you when you leave the vehicle to
prevent injuries caused by the roof closing.
• Never leave children or persons requiring assistance alone in
the vehicle, especially when they could access the vehicle keys.
Unsupervised use of the keys can result in the engine being
started or use of vehicle systems such as the power windows, etc.
which could result in serious injury. The doors could be locked
with the remote key, delaying help in an emergency.
• The power sunroof will continue to operate until the ignition
key has been removed and one of the front doors has been
opened. •
Applies to vehicl es: with slid ing/ tilt ing power sunroof
Convenience closing feature
The power sunroof can be closed from outside with the
key in the driver's door lock.
- Insert the key into the driver's door lock. - Turn and hold the key
in the lock position @=> page
47,
fig. 32 until the sunroof is completely closed=> & in
"Closing the power sunroof" on page
59.
& WARNING
Be careful when closing the power sunroof. Not paying attention
could cause you or others to be trapped and injured as the roof
closes. •
Applies to vehicles : with s lid ing/t ilting powe r sunroof
Power emergency closing
The sunroof can still be closed electrically if for some
reason the overload protection function becomes acti
vated.
The power sunroof is equipped with an overload protection
feature. If, under normal conditions, the power sunroof will
not close, you can close it using this feature.
- Turn the rotary switch to position @=>page
58, fig. 46 .
- Now pull the switch
and hold it in this position until the
power sunroof closes completely.
& WARNING
Improper use of the power sunroof can cause serious personal
injury.
• Be careful when closing the power sunroof . Not paying atten
tion could cause you or others to be trapped and injured as the
roof closes.
• Always take the key with you when you leave the vehicle to
prevent injuries caused by the roof closing .
Page 63 of 398
& WARNING !continued)
• Never leave children or persons requiring assistance alone in
the vehicle, especially when they could access the vehicle keys.
Unsupervised use of the keys can result in the engine being
started or use of vehicle systems such as the power windows, etc.
which could result in serious injury. The doors could be locked
with the remote key, delaying help in an emergency.
• The power sunroof will continue to operate until the ignition
key has been removed and one of the front doors has been
opened .•
Ap plies to veh icles: w it h sli ding/ tilt in g p ower su nroof
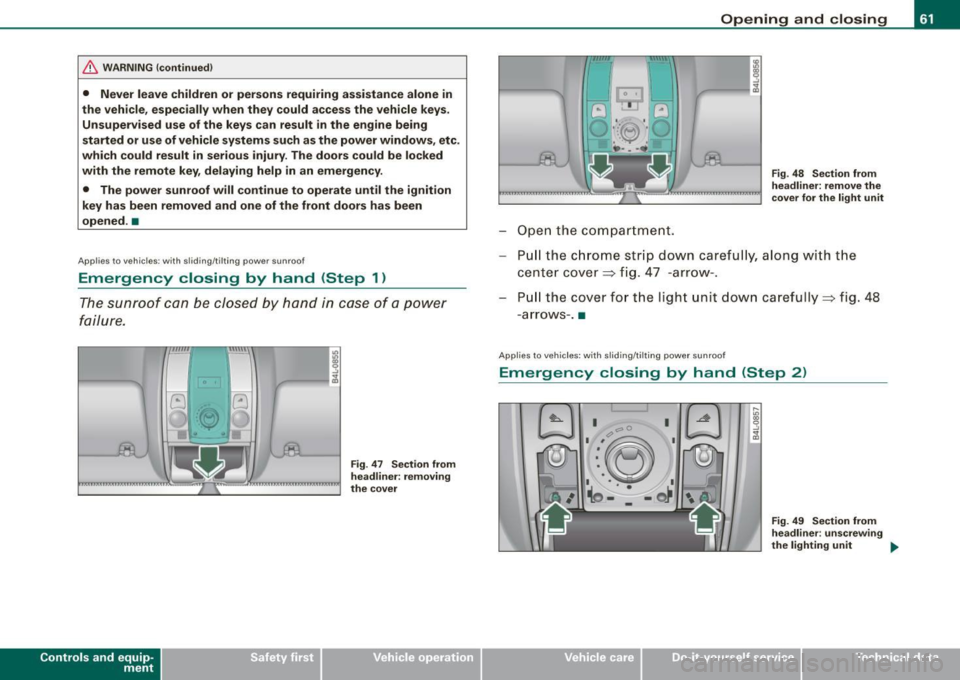
Emergency closing by hand (Step 1)
The sunroof can be closed by hand in case of a power
failure.
Con tro ls and eq uip
ment
Fig . 47 Section from
headliner: removing
the cover
Opening and closing
Open the compartment.
Fig. 48 Section from
headliner: remove the
cover for the light unit
Pull the chrome strip down carefully, along with the
center cover=> fig. 47 -arrow-.
Pu ll the cover for the light unit down carefully=> fig. 48
- arrows -. •
A pplie s to v ehicle s: with sli di ng/ti lt in g p owe r sunroo f
Emergency closing by hand (Step 2)
Vehicle care I I
Fig. 49 Section from
headliner : unscrewing
the light ing unit
~
irechnical data
Page 105 of 398
_________________________________________________ w_ a_ r_ m __ a_n_ d_ c_ o_ld __ _
energy are temporarily cut bac k or switched off~ page 269 .
Hea tin g sys tems in particu lar requi re a g rea t dea l of energy. If yo u
not ice, for example, that the seat * or rear w indow heating is not
heati ng, they have bee n tempora rily cu t bac k or switche d off by
energy management . These systems are avai lable a gain as soon as
the energy balance has been resto re d.
& WARNING
Reduced visibility is dangerous and can cause accidents .
• For safe driving it is very important that all windows be free of
ice , snow and condensation.
• Completely familiarize yourself with the proper use and func
tion of the heating and ventilation system and especially how to defog and defrost the windows .
• Never use the windshield wiper /washer system in freezing
weather until you have warmed the windshield first , using the
heating and ventilation system. The washer solution may freeze
on the windshield and reduce visibility.
0 Note
• I f you suspect that the air conditioner has been damaged, turn
on ECO N and con tac t an autho riz e d Aud i deale r to hav e the system
inspected .
• R epairs to the A udi air co nd it io ner requ ir e sp ecia l te chni cal
know ledge and special tools . Contact an authorized Audi dealer for
assista nce .
[ i J Tips
• Kee p th e air in ta ke s lots (in fron t of the w inds hield) free from i ce,
snow and debris in order to maintain the proper function of the
cl im ate c ontro l sy ste m.
Controls and equip
ment
• T he air flowing out of the vents and throughout the vehic le's
en tire int er ior is discha rge d at the rear o f the vehicle . Make sure th at
the outlet s lots are not covered by clothin g, etc .
• Climate c ontro l wor ks mo st e ffec tively if th e windo ws and the
sunroof are closed . However, if the interior of a park ed vehicl e is
e xt re me ly hot fro m the su n's rays , briefly open ing the windows can
speed up the cooling process .•
I • •
Page 115 of 398
Warm and cold -
----------------
In this way you have the opportunity to have the air flow from the
center vents a little warmer or cooler, depending on the time of year.
A little cooler in the summer and a little warmer in the winter. •
Applies to vehicles: with solar roof
Solar blower fan /solar roof
With sufficient sunlight, the ventilation fan continues to
operate with solar energy to bring in fresh air after the
ignition has been switched off.
- Switch solar operation to on .
The fan motor is operated by solar energy through the solar roof
after the ignition is turned off . Please make certain that vents ©
and © are open to achieve optimal ventilation=>
page 108.
The ventilation operates only with the sunroof closed or in the tilted
position .
If the vehicle was switched off in the recirculation mode, the air
conditioning automatically switches to fresh air operation.
Solar operation is not activated at low temperatures. •
Controls and equip
ment I • •
Page 355 of 398
Fuses and bul bs -_____________ -----=----.;....:..::.:....:.::;______J
No. Equipm ent
29 Not used
30 Not used
31 Back-up light switch, transmission, engine
components
Intelligent power mo dule driver (footwell l ight
32 and front headlights, horn, wiper system, elec
trically adjusta ble steering wheel)
33 Intelligent power modu le driver
(lights left-side)
---,--
34
35
36
37
38
39
I nte lligent power module driver
(lights right-side)
Not used
Headlight washer system
E lectronic Stabilization Program (ESP)
Wip er system
Door control module left -side
Horn
41 Heater fan
42 Control module electronic ignition lock/electri
cally adjustable steering wheel
43 Rear windsh iel d wiper (Avant)
44 Power window opener (left-side) Amps
15
30
25
25
30 25
30
15
25
40
30
15
35
-
•
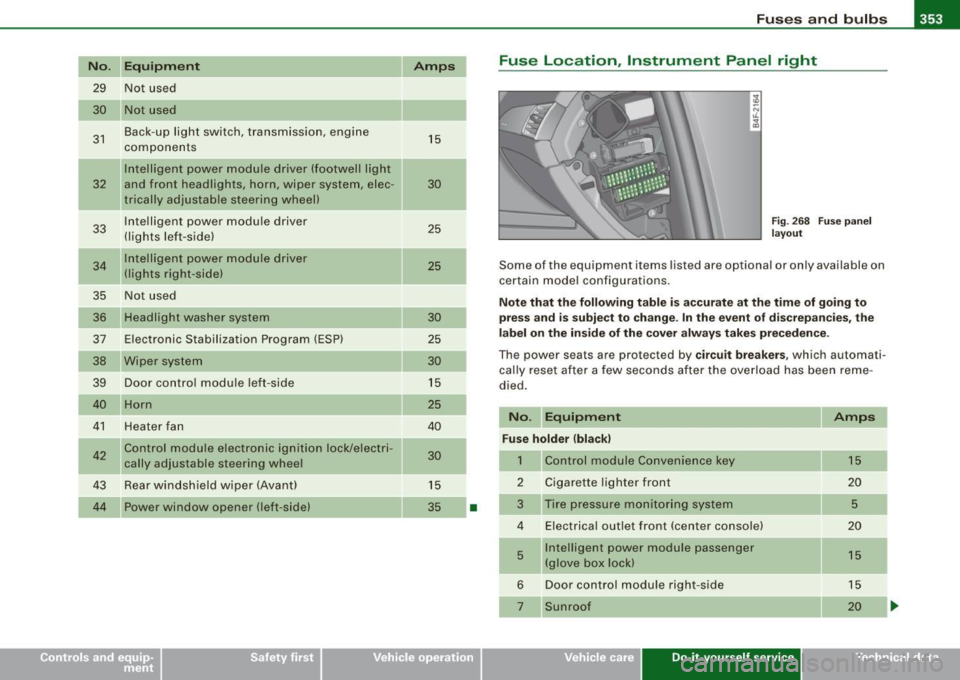
Fuse Location , Instrument Panel right
Fig. 2 68 F use pan el
la yo ut
Some of the equipment items listed are optional or on ly available on
certain model configu rations.
Note that the following table is ac curate at the time of g oing to
press and is subject t o change . In the eve nt of d iscrepan cies , th e
l a b el on t he in side of the cover alw ay s take s prec eden ce.
The power seats are protected by cir cuit breaker s, which automati
ca lly reset after a few seconds a fter the ove rload has been reme
died.
No . Equipment Amps
Fu se holder (bla ck )
1 Control module Convenience key 15
2
Cigarette lighter front 20
3
Tire pressure moni tor ing system 5
4 E lectrica l outlet front (center conso le) 20
5
Intelligent power module passenger 15 (glove box lock)
6 Door control module right -side 15
Sunroof 20
Vehicle care Do-it-yourself service irechnical data
Page 385 of 398
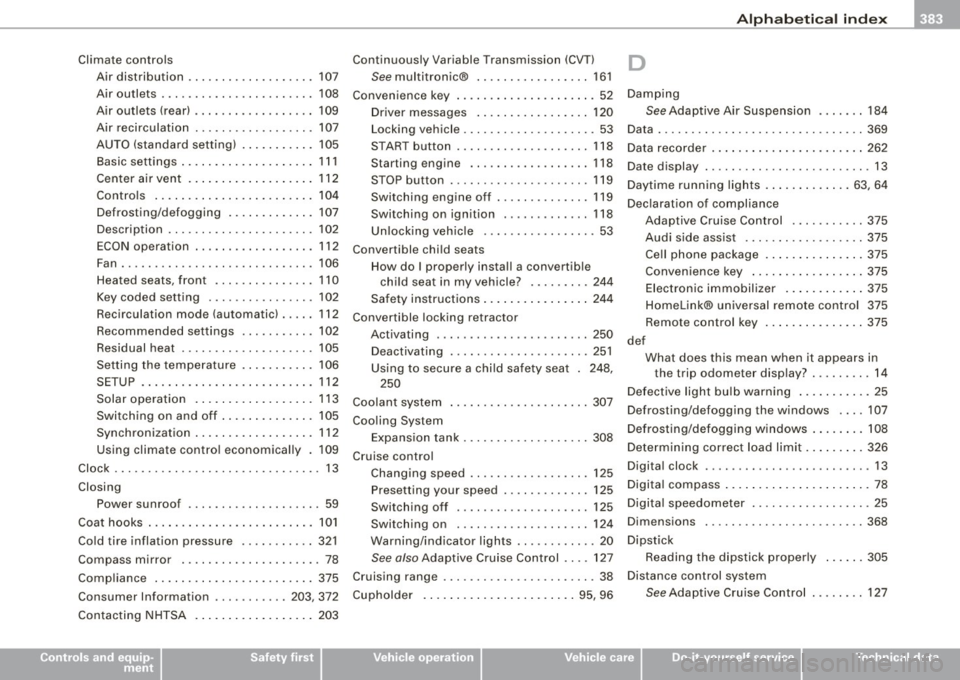
______________________________________________ A_ l_,_ p _h_ a_ b_e _t_i c_ a _ l _in _ d_e _ x __ lllll
Climate controls
Air distribution ... .... .... ........ 107
Air outlets ..... .. .... .... .... .... 108
Air outlets (rear) .... ...... ... ..... 109
Air recirculation .. .... .... ... .... . 107
AU TO (standard setting) ........ .. . 105
Basic se ttings ... .. ... .... .. .. .... 111
Center ai r vent .... .... ... ... ..... 112
Contro ls ..... .... ... .. .... .. .... 104
Defrosting/defogging ..... ... .... . 107
Descr iption ... ... .... .... ...... .. 102
ECON operation .. ..... .. .... .... . 112
Fan . .... ...... .. .... ..... .. ... .. 106
Heated seats , front ..... .. ...... .. 110
Key coded set ting ................ 102
Recircu lation mode (automatic) ..... 112
Recommended settings ... ... .... . 102
Residual heat .... .... .... ...... .. 105
Setting the temperature ..... . .... . 106
SETUP . ......... .... .... ... .... . 112
Solar operat ion ...... .... .. . .... . 113
Switching on and off ...... .. . .... . 105
Synchronization ...... .... ... .... . 112
Using climate contro l economically . 109
Clock ... .... .... .... .... ... .... .... . 13
Closing Pow er sunroof .... ... ... ... .. ..... 59
Coat hooks . . . . . . . . . . . . . . . . . . . . . . . . . 101
Co ld tire inflation pressure .... ...... . 321
Compass m irror . .... .... ... .... .... . 78
Comp liance ... .. ........ ... .. ...... 375
Consumer Information .. ........ . 203, 372
Contacting NHTSA ....... ... .. .. .... 203
Controls and equip
ment Safety first
Continuously Variable
Transmission (CVTJ D
See multitronic® . ........... ..... 16 1
Conven ience key ... .. .... .... ... .... . 52 Damping
Driver messages ...... .... .... ... 1 20
See Adaptive Air Suspension ...... . 184
Locking vehicle ... .... .... .... .... . 53 Data .. ... .... .... .... ... .... .... ... 369
STAR T button . ..... ........ ...... 118
Data reco rder . ... .... .... .. . .... .. .. 262
Star ting engine .. ... .... ... .. .... 118
Date display ....... .... ........ ... ... 13
STO P button ... .. .... ..... .. ..... 1 19
Switching engine off . ....... .... .. 119
Switching on ignition . ...... .. .... 118
Un lock ing vehic le ........ .... .... . 53 Dayti
me runn ing lights ... .... .... .. 63, 64
Dec laration of compliance
Adaptive Cruise Control .... ....... 375
Audi side ass ist ... .... ...... ... .. 375
Convertible chi ld s eats
Cell phone package ... .... .... .. . . 375
How do I prop erly install a convertible
chi ld sea t in my vehicle? .. ...... . 244 Conve
nience key ...... ... .... .. .. 375
E lec tronic immobil izer . ... .... .. .. 375
Safety instruct ions ... .. ....... .... 244
Homelink® universal remote control 375
Conver tible locking re trac tor
Activating .... ...... .... ..... .... 250 Remote control key ..
.... . .... .. .. 375
de f
Deactivati ng . .... ... .... .... .... . 251
Using to secure a chi ld sa fety seat . 248,
250
Co olan t system ..... .. .. .... .... .... 307
Coo ling System
E xpans ion tank .... ..... .. .... .... 308
Cru ise control What does this mean when it appea
rs in
t he trip odomet er disp lay? .. ... .... 14
De fect ive light bu lb warning ...... ... .. 25
D efrosting/defogging the windows ... . 107
Defrosting /defogging windows ....... . 108
Dete rmin ing cor rec t load li mit .. ...... . 3 26
Changing sp eed .. .... ...... ... ... 125
P resetting your speed ....... .... .. 125 Digita
l clock ...... ..... .... .... ...... 13
Digi ta l compass ... .. .... .... .... .. .. . 78
Switching off .................... 125 D
igita l speedometer . ...... .. .... ..... 25
Switching on .... ... .... ... .. .... 124 D
imensions .. .... .... ... .... .... ... 368
Warning/indicato r lights .. .... .... .. 20 Dipstick
See also Adaptive Cruise Control ..
.. 127 Readi
ng th e dipstick p roper ly ..... . 305
Cruising range ... .... .... .... .... ... . 38 Distance control sys
tem
Cupholder ...... ..... .. .... .... .. 95, 96
See Adaptive C ru ise Contro l ..... ... 127
Vehicle operation Vehicle care Do-it-yourself service Technical data
Page 386 of 398
___ A_l.:,. p _h_ a_ b_e _t _ic _ a_l _in _ d_e _x ____________________________________________ _
Doors
Power child safety lock .... .... .... . 51
Power side door closer . . . . . . . . . . . . . 48
Driver information system .... .... .... . 23
Digital speedometer .. ............ . 25
Driver information messages .. .... . 28
Open door or rear lid warning ... .... 25
Outside temperature disp lay .. . .... . 24
Sound system display . .... ...... .. 24
Driver seat
See Seating position . . . . . . . . . . . . . . 196
Driver's seat . . . . . . . . . . . . . . . . . . . . . . . . 81
Driver's seat memory . . . . . . . . . . . . . . . . . 84
Activating remote control key .. ... .. 85
Recalling a seat position .. .... .... . 84
Storing a seat position ..... ... .... . 84
Driving messages .... .... .... ... .... . 28
Driving safely .. .............. ...... 194
Driving time ........ .... ... ........ .. 38
Duplicate key ........................ 41
DVD player for navigation system . . . . . . 91
Dynamic shift program ... .... ... .... 165
E
Easy entry feature 116
Electric seat adjustment
See Power seat . . . . . . . . . . . . . . . . . . . 81
Electromechanica l parking brake
Emergency braking .... ....... .... 123
Malfunction ...... .... .... ...... . 123
Operation . . . . . . . . . . . . . . . . . . . . . . . 121
Parking . . . . . . . . . . . . . . . . . . . . . . . . . 122 Releasing and app
lying ... .. .. .... 121
Starting off with a trailer .. ........ 123
Warning/indicator lights ... .... .... 21
Electronic differential lock (EDU How the system works . .... ....... 263
Warning/indicator lights ....... .... 21
Electronic immobilizer .......... ... 14, 44
Electronic power control (EPC) warning/indicator light ... .... . 18
Electronic speed limiter ..... ....... ... 27
Electronic stabi lization program (ESP)
How the system works ............ 262
Warning/indicator lights ....... .... 18
Emergency braking . . . . . . . . . . . . . . . . . 123
Emergency closing Power sunroof . ... ..... ... .... . 60, 61
Emergency flasher . . . . . . . . . . . . . . . . . . . 67
Warning/indicator lights ........... 19
Emergency locking of doors .. ........ . 50
Emergency starting ........ .... ... .. 357
Emergency towing ... .... .... .... ... 360
Energy management . ....... ... .. ... 269
Battery power . . . . . . . . . . . . . . . . . . . 270
Driver notification 270
Engine Compartment . .... .... .... .... .. 302
Coolant ....... .... ... .... ....... 307
Hood ..... .... .... .... ........ .. 300
Starting .. .... ... .... .... ... 116,117
Starting with jumper cables ... .... 357
Stopping .. .... .... .... .... ...... 118 Engine compartment
Safety instructions . ....... .... ... 301
Working the engine compartment .. 301
Engine coolant system .. ...... ....... 307
Adding coolant .... ....... ....... 309
Checking coo lant level . .... .... ... 308
Checking the engine coo lant level .. 308
Malfunction .. .. .. .. .. .... .... .. . . 31
Radiator fan . .... .... .... .... .... 310
Engine coolant temperature
Temperature gauge ....... .... .... 12
Engine data ...... .... .... ...... .... 369
Engine hood Closing .... .. ... ..... ....... .... 301
How to release the hood . . . . . . . . . . 300
Engine oi l .......................... 303
Adding ... .... .... .... .... ...... 306
Additives .. .... .... .... ... .... ... 306
Changing .. .... .... ... ........ .. 306
Checking the engine oil level ....... 305
Indications and conditions requiring extra
checking .. ...... .... ...... .... 305
Oil consumption . ...... .... .... .. 304
Oil grades .. .... .... ... .... ...... 303
Recommended oil check intervals .. 305
Specification and viscosity .. ..... .. 303
Engine oi l leve l ... .... .... .... ...... . 35
Engine oil pressure
Malfunction ....... ....... ........ 32
Engine oil sensor defective .... .... ... . 35
Engine speed limitation ... .... .... .... 36