oil level AUDI S6 2012 User Guide
[x] Cancel search | Manufacturer: AUDI, Model Year: 2012, Model line: S6, Model: AUDI S6 2012Pages: 298, PDF Size: 74.43 MB
Page 227 of 298

Checking the engine oil level
Fig . 172 D is p la y : o il level indi ca tor
• Park your vehicle on a lev el surfac e.
• Shut the engine off when it is warm.
• Switch only the ignition b ack on.
• W ait approxima tely two minutes .
• Se lect :
ICARI function button > Car s ystem s
control button > Servicing & ch eck s > Oil
level.
• Check the o il leve l in the display ¢ fig. 172 .
Add engine oil if the bar of the oil level indi
cator is near "min "
~page 225.
Depending on the way the veh icle is driven
and the operating conditions, oil consumpt ion
can be up to 1/2 q uart per 600 m iles (0.5 li ter
pe r 1,000 km) . Consumption may be higher
within the f irst 3 ,000 miles (5,000 km).
(D Tips
The oi l level indicator in the MMI Dis play is
only an in format ion disp lay . If the oil leve l
is low, a minimum oi l warning appears in
the instrument cluster. Add oi l
q page 225. If the hood has been opened,
the curre nt oil level is shown in the instru
ment cluste r the next time the ign ition is
sw itched on .
Checkin g and fillin g 225
Adding engine oil 'i=:1:
Fig. 173 Engin e compa rtm en t: co ve r on the engine o il
filler n eck
Before you check anything in the eng ine com
partment ,
alw ay s re ad and he ed all WARN
INGS ¢&.
in Working in the engine compart
ment on page 220.
• Uns crew the cap~ to the eng ine oi l filling
hole
¢ fig . 173.
• Caref ully top off with the appropr iate oil in
0.5 liter doses .
• Check t he oil level aga in after two minutes
¢ page 225 .
• Top off the o il aga in, if necessary .
• Screw the cap back on the filling hole .
A WARNING
-Wh ile topping off, the o il must not come
i n contact w ith hot engine parts -fi re
hazard!
- The oi l filler cap must be p roperly se
cured to prevent oil from bei ng sprayed
on the hot engine and exhaust system
when the engine is runn ing -fire ha zard!
- I f your ski n has come in contact with the
engine o il, you mus t subse quently
cleanse it thoroughly.
(D Note
- Check the oil level using the MMI. If the
message
Please reduce oil level appe ars,
c ontact yo ur a uth ori zed Aud i dea ler o r
ot her qualified workshop to have excess
oil ext racted if necessary.
- Audi d oes not re commend the u se of oil
additiv es. They m ay damage the engine
1111-
Page 229 of 298
Engine cooling system
Coolant
The engine coolant performs two functions: it
keeps the engine from overheating and it pro
tects the engine from freezing in the winter .
The cooling system is sealed and generally re
quires little attention .
The cooling system has been filled at the fac
tory with a permanent coolant which does not
need to be changed. The coolant consists of a
mixture of water and the manufacturer's gly
col-based coolant additive G12++ antifreeze
with anticorrosion additives (50% for USA
models; 60% for Canadian models). This mix
ture both assures the necessary frost protec
tion and protects metal components in the
engine's cooling system from corrosion and
scaling. It also raises the boiling point of the
coolant.
Do not reduce the concentration of the cool
ant in the summer by adding plain water.
The
proportion of coolant additive must be at
least 50% but not more than 60%
to main
tain antifree ze protection and cooling efficien
cy. If the coolant frost protection is too low,
the coolant could freeze and damage the vehi
cle heating and engine cooling system.
For year-round driving, antifreeze is added at
the factory for temperatures down to:
- -31 °F ( -3 5 °C) USA
- -40 °F ( - 40 °C) Canada.
You can mix the G12 ++ coolant additive with
other additives (G12+ or G12). Always check
with your authorized Audi dealer.
& WARNING
Before you check anything in the engine
compartment, always read and heed all
WARNINGS
~ .&. in Working in the engine
compartment on page 220.
(D Note
- Before winter sets in, have the coolant
checked to see if the coolant additive in
Checking and filling 22 7
your vehicle is sufficient to meet the cli
mate conditions. This is especially impor
tant if you live in a region where the win
ter is extremely cold. If necessary, in
crease the proportion of coolant additive
to 60% .
- When adding coolant additive to your
cooling system, remember :
- We recommend using only coolant ad
ditive G12++ (check the label) for your
vehicle. This coolant additive is availa
ble at authorized Audi dealers. Other
types of antifreeze can significantly re
duce corrosion protection. The result
ing corrosion can cause a loss of cool
ant and serious engine damage.
- Do not add any type of radiator leak seal
ant to your vehicle's engine coolant.
Adding radiator repair fluid may adverse
ly affect the function and performance of
your cooling system and could result in
damage not covered by your New Vehicle
Limited Warranty.
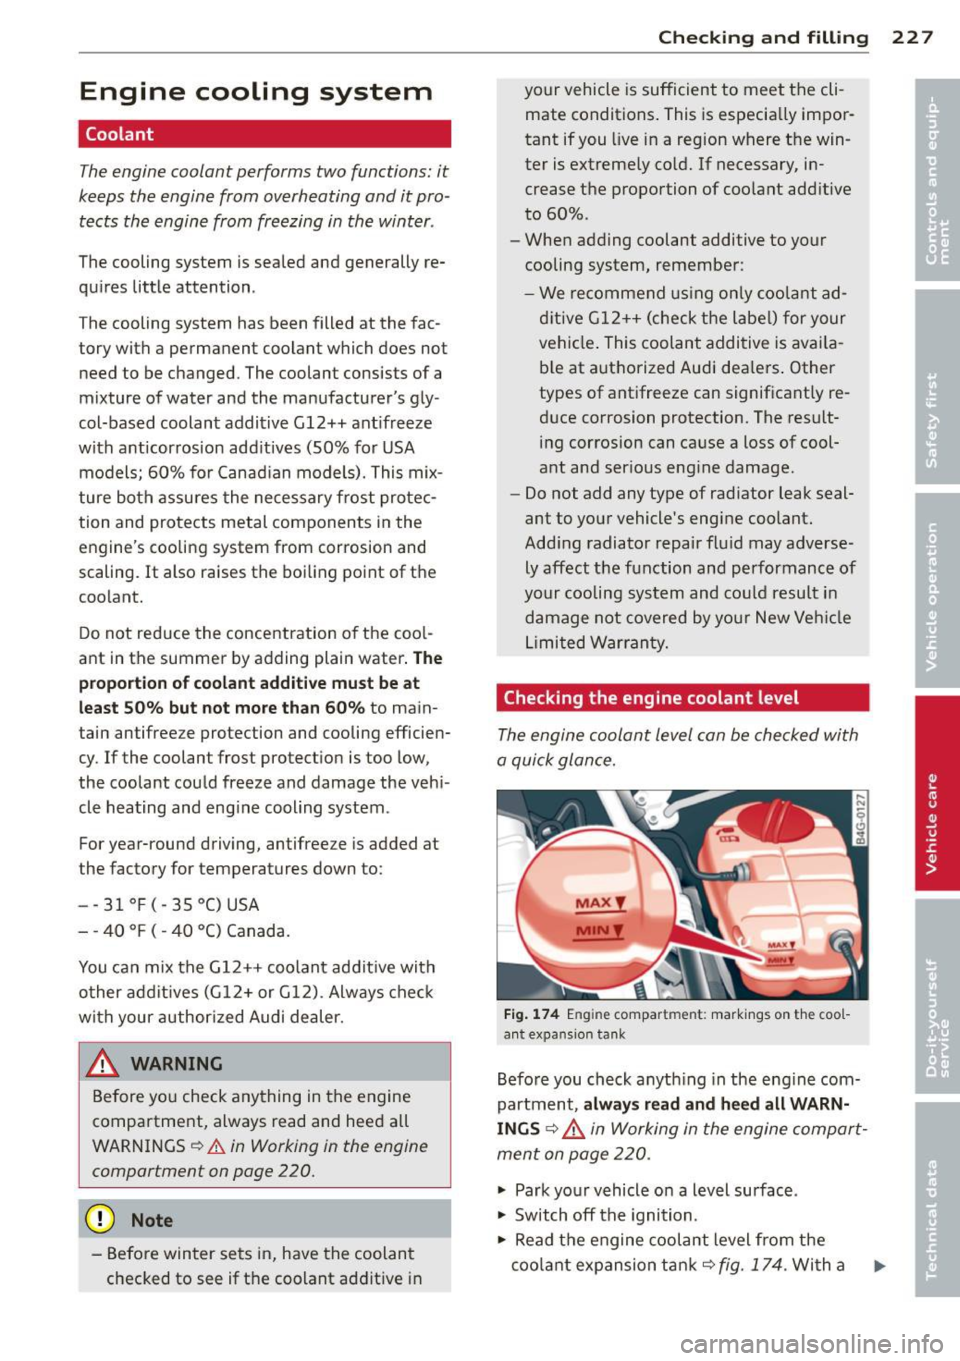
Checking the engine coolant level
The engine coolant level can be checked with
a quick glance.
M AX f
MINf
Fig.174 Engine compar tment: markings on the coo l
an t expa nsion tank
Before you check anything in the engine com
partment,
always read and heed all WARN
INGS ¢.&, in Working in the engine compart
ment on page 220 .
"' Park your vehicle on a level surface .
"' Switch off the ignition.
"' Read the engine coolant level from the
coolant expansion tank~
fig. 174. With a
Page 230 of 298
228 Check ing and filling
cold engine, the coo lant level should be be
tween the "min" and "max" markings. When
the engine is warm, the level may be s light ly
above the "max" marking.
The location of the coolant expansion tank
can be seen in the engine compartment illus
tration
r:::;, page 222.
To obtain an accurate reading, the engine
must be switched
off.
The expansion tank in you r vehicle is equipped
with an e lectric coolant level sensor.
When the coolant level is too low, the warning light in the Auto-Check System
r:::;, page 16 will
i l lum ina te unti l you add coolant and the level
has been restored to normal. Even though
there is an electric coolant level senso r, we
still recommend you check the coolant leve l
from time to time.
Coolant los s
Coolant loss may indicate a leak in the cool ing
system. In the event of coolant loss, the cool
ing system should be inspected immediately
by your authorized Audi dealer. It is not
enough merely to add coolant.
I n a
sea led system, losses can occur only if
the boiling point of the coolant is exceeded as
a result of overheat ing.
A WARNING
The cooling system is under pressure and
can get very hot. Reduce the risk of scald
ing from hot coolant by following these
steps.
- Turn
off the engine and allow it to cool
down.
- Protect yo ur face, hands and arms from
escaping fluid and steam by covering the
cap with a large, thick rag.
- Turn the cap slowly and very carefully in
a counter-clockwise direction wh ile ap
plying light, downward pressure on the
top of the cap.
- To avoid be ing burned, do not spill ant i
freeze or coolant on the exhaust system
'
or hot engine parts. Under certain cond i
tions, the ethylene glycol in engine coo l
ant can catch fire.
(D Note
Do not add any type of radiator leak sea l
ant to your vehicle's engine coolant. Add i ng radiator repa ir fl uid may adverse ly af
fect the funct ion and performance of your
cooling system and could result in damage
not covered by your New Veh icle L imited
War ranty.
Adding coolant
Be very careful when adding engine coolant.
Before you check anyth ing in the eng ine com
partment,
always read and heed all W ARN
INGS c:> A in Working in the engine compart
ment on page
220 .
.. Turn off the engine.
.. Let the engine cool down.
.. Place a thick rag over the coolant expansion
tank
<:;> page 227, fig . 174 and carefully
twist the cap co unte r-clockwise c:> .&, .
.,. Add coolant .
.,. Twist the cap on aga in
tightly.
Replacement engine coo lant must conform to
exact spec ificat ions
r:::;, page 22 7, Coolant.
E ven in an emerge ncy, if coolant add i-
t ive G12 ++, G 12+ or G12 is not available, do
not use a d iffe rent additive. Use plain water
instead unti l you can get the correct additive
and can restore the correct ratio . This shou ld
be done as soon as possible.
If you have lost a considerab le amount o f
coolant, then you sho uld add cold antifreeze
and co ld water on ly w hen the engine is cold.
Always use
new engine coo la nt when refilling.
Do not fill coola nt above the "MAX" mark . Ex
cess coola nt will be fo rced out through the
pressure relief valve in the cap w hen the e n-
gine becomes hot. .,.
Page 274 of 298

272 Emergency situations
@ Tips
Check carefully to make sure the hook- up
is sec ure before moving the ca r up the flat
bed truck ramp.
Lifting vehicle
Lifting with workshop hoist and with
floor jack
T he vehi cle may only be li~ed at the lifting
points illustra ted .
Fig. 207 Fr ont lift in g po int
Fi g. 208 Rear lift ing point
• Read and heed WARNING q &_ .
• Locate lifting points q fig. 207 and
qfig. 208.
• Adjust lift ing arms of workshop hoist or
floor jack to match vehicle lifting points.
• Inse rt a r ubber pad betw een the floor jack/
wor kshop hoist and the lifti ng points.
If you must lift your vehicle with a floor jack
to work underneath, be sure the vehicle is
safely supported on stands intended for thi s
purpose .
Front lifting point
The lifting point is located on t he floor pan re
i n forcement about at the same level as the j
ac k mounting po int
~ fig. 20 7. Do not lift
the veh icle at the vertical sill reinforcement .
Rear lifting point
The lifti ng po int is located o n the vert ica l rein
f orcemen t of the lowe r sill for the on- boar d
j a ck
q fig . 208.
Lifting with vehicle jack
Refer to ¢ page 261.
A WARNING
-- To reduce the risk of s erio us injury and
ve hicl e damage.
- Always lift the vehicle only at the spe
c ia l workshop hoist and floor jack lift
po ints illustrated
¢ fig. 207 and
q fig. 208.
-Fail ure to lift the ve hicle at these
po ints could cause the vehicle to tilt or
fall from a lift if there is a change i n ve
h icle weight distribution and balanc e.
T his mig ht happen, fo r example, whe n
h eavy com ponen ts such as the eng ine
b lo ck o r trans mission a re remove d.
- W hen removi ng heavy compone nts like
t hese, anch or vehicle to h oist or ad d cor
resp onding we ig hts t o main tain t he cen
t er of gravity. Oth erwise, t he ve hicle
might tilt or slip off the ho ist , ca using
serio us personal injury.
(D Note
- B e aw are o f the followin g poin ts before
li ft ing t he vehicle:
-The vehicle should never be lifted or
jacked up from underneath the engine oil pan, the transmission housing, the
front or rear axle or the body side
members. This could lead to serious
damage .
- To avoid damage to the underbody or
chas sis frame, a rubber pad must be
inserted between the floor jack and
the lift points.
-
- Before driving over a workshop hoist,
check that the vehicle weight doe s not .,..
Page 282 of 298
28 0 Con sum er Inf ormation
-Always make sure the transmission se
lector lever (automatic transmiss ion) is
in "P" (Park position) and the park brake
is f irmly app lied .
@) For the sake of the environment
-Changing the engine settings wi ll ad
versely affect em iss ion levels. This is det
rimental to the environment and increas
es fuel consumption .
- Always observe env ironmental regula
tions when dispos ing of old engine oil,
used brake fluid, dirty engine coolant,
spent batteries or worn o ut tires.
- Undeployed airbag modules and preten
s ioners might be classified as Perchlo
rate Material -spec ial handling may ap
ply, see www.dtsc.ca .gov/hazardous
was te/perch lorate . When the veh icle or
parts of the res traint system including
airbag modules safety belts wit h preten
sioners are scrapped, all applicable laws
and regulations must be observed. Your
authori zed Aud i dea ler is familiar with
these requirements and we recommend
that you have your dealer perform this
serv ice for you .
Additional accessories,
modifications and
parts replacement
Additional accessories and parts
replacement
Always consult an authorized Audi dealer be
fore purchasing accessories.
Your veh icle incorporates the latest safety de
sig n featu res ensu ring a high standard of a c
tive and passive safety .
This safety could be comp romised by non-ap
proved changes to the ve hicle. For this reason ,
if pa rts have to be replaced , please obse rve
the following points when install ing addition
a l accessories: Approved Audi accessories and genuine Aud
i
parts are available from authorized A udi deal
ers.
T hese dea le rs a lso have the necessary facili
ties, tools and tra ined specialists to install the
parts and acc essories proper ly .
A WARNING
-Using the wrong spare parts or using non-
approved accessories can cause damage to
the veh icle and ser ious persona l injury.
- Use on ly accessories express ly approved
by Audi and gen uine Audi spare parts
- These parts and accessories have been
specia lly designed to be used on yo ur ve
h icle .
- Never install accessor ies such as tele
phone crad les or beverage ho lders on a ir
bag covers or within the airbag deploy
ment zones . Do ing so will increase the
risk of injury if a irbags are triggered in an
accident!
- Before you check anything in the engine
compa rtment, always read and heed a ll
WARNI NGS
9 page 214 .
(D Note
-If items other than genu ine Audi spare
parts, add-on equipment and accessory
items are used or if repair work is not
performed accord ing to specified meth
ods, this can resu lt in seve re damage to
your vehicle's eng ine and body (such as
corrosion) and adversely affect yo ur vehi
cle's warranty .
- If emergency repairs must be performed
elsewhere, have the vehicle examined by
an authorized Audi dealer as soon as
possible .
- The manufacturer cannot be held liable
for damage wh ich occ urs due to failure
to comply with these stipu lations.
Page 286 of 298
28 4 Index
Automatic transmission . . . . . . . . . 10 1, 106
Automatic Shift Lock (ASL) . . . . . 103, 109
Driving . . . . . . . . . . . . . . . . . . . . . 101, 107
Dynamic shift program . . . . . . . . 104, 110
Emergency mode . . . . . . . . . . . . . 106, 111
Emergency release . . . . . . . . . . . . 106, 112
Kick-dow n . . . . . . . . . . . . . . . . . . . 104, 109
M anual sh ift program . . . . . . . . . 105, 1 10
Selec to r l eve r . . . . . . . . . . . . . . . . 102 , 108
Shift b uttons . . . . . . . . . . . . . . . . 105, 1 11
Steer ing whee l w ith mu lti tronic ... .. . 105
Steering whee l with tiptronic ....... . 11 1
Automatic wipe rs ........... ... .. ... . 46
Auto Safety Hotline . . . . . . . . . . . . . . . . . 131
Average consumption ....... .. .. .... .. 24
Average speed . . . . . . . . . . . . . . . . . . . . . . . 24
Avoid damaging the vehicle . ... ... ... . 197
B
Battery ..... .. . .. ..... ... .. .. .... . 230
Charging .... .. .. ..... ... .. .. .... . 233
Important warnings . ... .. .. ... ... . 23 1
Jump starting .............. .. .... . 268
Locat ion . ............... .. .. .... . 231
low . .. .. .. ... .. ..... ... .... .. .. . 194
Replacing the battery ......... .. ... 234
State of charge ..... ...... .. .. .. .. . 194
W inter operation ......... .. .. .. .. . 230
Wo rking on the battery .... .. .. .. .. . 231
Before driving . . . . . . . . . . . . . . . . . . . . . . 123
Blended gasoline .. ..... ... .. .. .... . 215
Blower (automatic climate cont rol) .. .. .. 67
Blower (climate control) . . . . . . . . . . . . . . . 64
Body cav ity sealing ....... .. .. .. .. .. . 209
Booster seats .............. ... .. .. . 177
Brake fl uid
Changing the brake fl uid ... .. .. .... .
230
Check ing the brake fluid level . .. ..... 229
What is the correct brake flu id leve l? .. 229
What should I do if the brake fluid warn -
ing light comes on? ........ ..... .. .
229
Brake system
Anti-lock braking system ... .... .... ..
19
Brake ass ist system ....... .. .. .. .. . 189
Brake booster .. .... ...... .. .. .. .. . 192
Brake fl uid . ..... ......... ... .. ... 229
B rake fluid specifications fo r r efill and re -
placement . ..... .. ... ..... ... .. ..
230
Brake light defective . . . . . . . . . . . . . . . . 21
Brake pads .... .. ............. .... 196
Electromechanical parking brake . .... . 73
Fluid reservo ir . .. ................ . 229
How does moisture or road salt affect the
brakes? ....... .. .. ........ ...... .
191
Warning/ind icator lights ...... .. .. .. . 14
Worn b rake pads symbo l ........ .. .. . 20
braking guard . .. .. .......... ...... .. 78
Messages ... .. .. .. ... .. ... ..... .. . 85
Settings . . . . . . . . . . . . . . . . . . . . . . . . . . 85
Break -in period .. .. ... .......... .. .. 196
Brake pads .... .. ............. .... 196
Tires ...... ... .. .. ... ........... . 196
Bulbs . ... .. .... .. .. ... ..... ... .. .. 267
C
Cali forn ia Proposition 65 Warn ing . .... 221
Battery specific . ... ... ..... ... .. .. 232
Capac,t,es ...... .. .. ... ........... . 276
Engine oil . .. .. .. ............. .. .. 2 22
Car care .... .... .. ............. .... 204
Exterior . .. .. ... ... ... .. ... ... .. .. 204
Interior ...... ... .. .............. . 210
Cargo area ...... .. ... .. .. ... .... . .. 129
Cargo ne t ... .. .. .. .. ........... .... . 61
Catalytic converter . ............. .. .. 197
Center armrest
Cockpit ... .... .. .. .... . ... ... .. .. .
51
Central lock ing .. .. ............. .. ... 32
E mergency loc king ............... .. . 36
Certification ...... ............... .. 281
Changing a wheel . ... ... ..... ... .. .. 258
Changi ng engine oil ................ . 226
Chassis (undercoat ing) ............. .. 209
Checking
Engine coolant level ..... .... ... .. ..
227
Tire pressure ..... ... .. ..... .... . .. 241
Child rest raints
Danger of using child rest rain ts in t he
fron t seat . . . . . . . . . . . . . . . . . . . . . . . .
144
Where can I get additional in format ion
about child restraints and their use? . .
186
Child rest raint system a nchors .. .. .. .. 182
Page 289 of 298
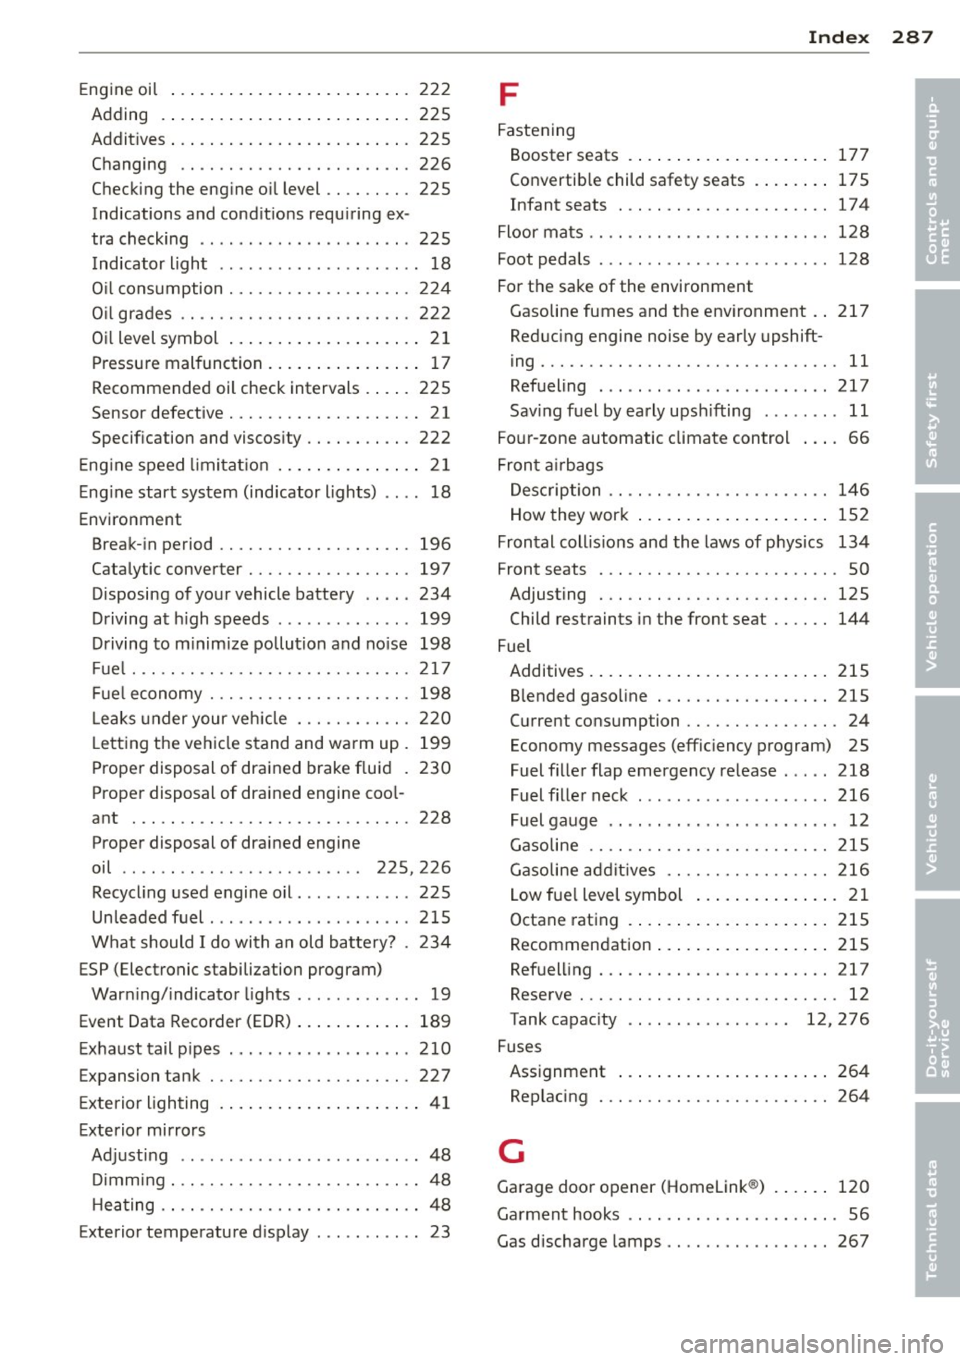
Engine oi l ... .. .... ..... .. .. .. .. ... 222
Adding .... .... .. .... ... .. .. .. ... 225
Addit ives ... .... ...... ... .. .. .. .. . 225
Changing .. ............. .... .. ... 226
Checking the eng ine o il level .. .. .. .. . 225
Indications and cond it ions requ iring ex -
tra check ing ..... .. ...... .. .. .. .. . 225
I ndicator light . . . . . . . . . . . . . . . . . . . . . 18
O il consumption .......... .. .. .. .. . 224
O il gr ad es .. ............. .... .. ... 22 2
O il level symbol ....... ... .. .. .. .... 21
P ressu re mal function ... ... .. .. .. .. .. 17
Recommended oil check intervals .. .. . 225
Sensor defective . . . . . . . . . . . . . . . . . . . . 21
Specification and viscos ity .. .. .. .. .. . 222
E ng ine speed limi tat ion .. ... .. .. .. .. .. 21
E ng ine start system (ind icator l ights) .. .. 18
Environment Break- in period ........... .... .. ... 196
Catalytic converter ........ .. .. .. .. . 197
Disposing of your vehicle batte ry .. .. . 234
Driving at h igh speeds ........ .... .. 199
Driving to m inim ize pollution and no ise 198
F ue l ..... .. ................. .. ... 2 17
Fu el economy ............ .... .. .. . 198
L eaks under your ve hicle ... .. .. .. .. . 220
L ett ing the ve hicle stand and wa rm up. 199
Prope r disposal of drained brake fluid . 230
Prope r disposal of dra ined engine coo l-
ant ..... .. ................. .. ... 228
Proper disposal of drained engine
oil . . . . . . . . . . . . . . . . . . . . . . . . . 225, 226
Recycling used engine o il . ..... .... .. 225
Un leaded f uel ......... ...... .... .. 215
Wha t should I do wi th an old batte ry? . 234
ESP (Electronic s tabilization program)
War ning/ indicator lights ... .. .. .. .. .. 19
Event Data Recorder (EDR) ... .. .. .. .. . 189
E xhaust tail p ipes .... ...... .... .. .. . 210
Expansion tank ............ .... .. .. . 227
E xterior lighting . ... .... ... .. .. .... .. 41
E xterior mirrors
Ad justing ............ .... ... ... ... 48
D imming . .. ............. .... .. .... 48
H eating .. .. .. ........... .. .. .. .... 48
Exterior temperature d isplay ..... ... ... 23
Inde x 287
F
Fastening
Booster seats . . . . . . . . . . . . . . . . . . . . . 177
Convertib le child safety seats . ... .. .. 175
Infant seats . . . . . . . . . . . . . . . . . . . . . . 17 4
Fl oor ma ts .. .. .. .. .. .. ........... .. 1 28
Foot peda ls .... ... .. ..... .......... 128
Fo r th e sake of the environment
Gasoline fumes and the env ironment . . 217
Red ucing engine noise by early upshift -
ing ....... .. .. .. ................. . 11
Refueling . .. .. .... .. ........ ..... 217
Sav ing fuel by early upsh ifting ...... .. 11
Fo ur-zone automatic climate control ... . 66
Fron t air bags
D es cription . . . . . . . . . . . . . . . . . . . . . . . 146
How they wor k . . . . . . . . . . . . . . . . . . . . 152
Frontal coll is io ns and the laws of p hys ics 134
Front seats . . . . . . . . . . . . . . . . . . . . . . . . . 50
Adjusting . .. .. .. .. .. ........... .. 125
Child restraints in the front seat ...... 144
Fuel Additives . ... .... .. . .. .. ..... ... .. 215
B lended gaso line ..... ............. 215
C u rre nt consumption ........... .. .. . 24
Economy messages (effic iency program) 25
Fuel fil le r flap emergency re lease . .... 218
Fuel fi ller nec k ... .. .. .. ...... .... . 216
Fuel gauge . . . . . . . . . . . . . . . . . . . . . . . . 12
Gasoline .. .. .. .. ... ............ .. 215
Gasoline ad di tives .... ........... .. 216
L ow fue l level symbol . . . . . . . . . . . . . . . 21
Octane rat ing . ..... . .. .. ..... ... .. 215
Recommendation ... . .. .. ... ... .. .. 215
Ref uel ling ... .. ...... ............. 217
Reserve ... .. .. .. ... ............ .. . 12
Tank capac ity . . . . . . . . . . . . . . . . . 12, 276
Fuses Ass ignment ..... .. . .. .. ..... ... .. 264
Rep lacing . .. .. .. ................. 264
G
Ga rage door opener (Homelink ®) . ... .. 120
Ga rment hooks . . . . . . . . . . . . . . . . . . . . . . 56
Gas discharge lamps ............. .... 267
•
•