fuel AUDI S6 2012 Owners Manual
[x] Cancel search | Manufacturer: AUDI, Model Year: 2012, Model line: S6, Model: AUDI S6 2012Pages: 298, PDF Size: 74.43 MB
Page 5 of 298
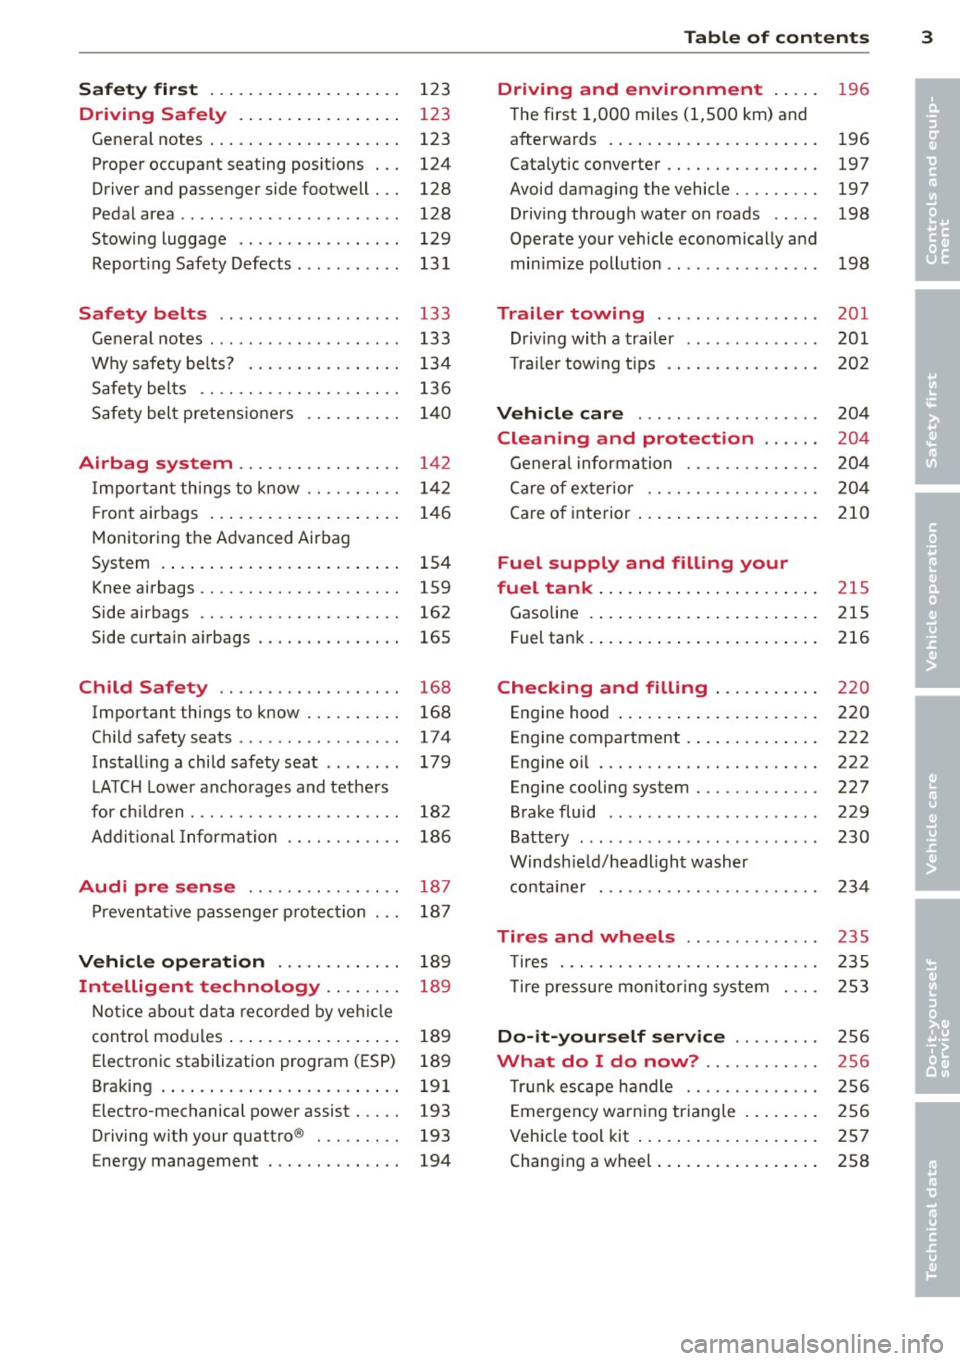
Safet y fir st . . . . . . . . . . . . . . . . . . . . 123
Driving Safely . . . . . . . . . . . . . . . . . 123
General notes . . . . . . . . . . . . . . . . . . . . 123
Proper occupant seating posit ions . . . 124
Driver and passenger side footwell . . . 128
Pedal area . . . . . . . . . . . . . . . . . . . . . . . 128
Stowing luggage . . . . . . . . . . . . . . . . . 129
R eport ing Safety Defects . . . . . . . . . . . 13 1
Safety belts . . . . . . . . . . . . . . . . . . . 133
General notes . . . . . . . . . . . . . . . . . . . . 133
Why safety bel ts? . . . . . . . . . . . . . . . . 134
Safety belts . . . . . . . . . . . . . . . . . . . . . 136
Safety belt p re tens ioners . . . . . . . . . . 140
Airbag system . . . . . . . . . . . . . . . . . 142
I mpor tant th ings to know . . . . . . . . . . 1 42
Fr ont airbags . . . . . . . . . . . . . . . . . . . . 146
M onitoring the Advanced Airbag
System . . . . . . . . . . . . . . . . . . . . . . . . . 154
Knee airbags . . . . . . . . . . . . . . . . . . . . . 159
Side airbags . . . . . . . . . . . . . . . . . . . . . 162
Side curta in a irbags . . . . . . . . . . . . . . . 165
Ch ild Safety . . . . . . . . . . . . . . . . . . . 168
Important things to know . . . . . . . . . . 168
C hi ld safety seats ............ .... . 174
Install ing a chi ld safety seat . . . . . . . . 179
L A TC H L ower ancho rages and tethe rs
fo r ch ild ren . . . . . . . . . . . . . . . . . . . . . . 18 2
Addit io nal Informa tion 186
Audi pre sense . . . . . . . . . . . . . . . . 187
Pr even ta ti ve passe nger p rotec tion 18 7
Vehicle operation . . . . . . . . . . . . . 189
Intelligent technology . . . . . . . . 189
N ot ice about da ta re corded by vehi cle
con trol mo dules . . . . . . . . . . . . . . . . . . 189
Electronic stabilization program (ESP) 189
Bra king . . . . . . . . . . . . . . . . . . . . . . . . . 191
Electro-mechanical power assist . . . . . 193
Driving w ith your quattro ® . . . . . . . . . 193
Energy management . . . . . . . . . . . . . . 194
Table of contents 3
Driving and environment . . . . .
196
T he first 1,000 miles (1 ,500 km) and
afterwa rds . . . . . . . . . . . . . . . . . . . . . . 196
Catalytic co nverter . . . . . . . . . . . . . . . . 197
Avoid damaging the vehicle . . . . . . . . . 197
Drivi ng throug h wate r on roads . . . . . 198
Operate your vehicle eco nomically and
min imize poll ution . . . . . . . . . . . . . . . . 198
Trailer towing . . . . . . . . . . . . . . . . . 201
D riving with a trailer . . . . . . . . . . . . . . 201
T ra ile r tow ing t ips . . . . . . . . . . . . . . . . 202
Vehicle care . . . . . . . . . . . . . . . . . . . 204
Cleaning and protection . . . . . . 204
General infor mation . . . . . . . . . . . . . . 20 4
C are of ex ter ior . . . . . . . . . . . . . . . . . . 20 4
Care o f inte rior . . . . . . . . . . . . . . . . . . . 210
Fuel supply and filling your
fuel tank ... .. .. .. .. .. .. .... ... .
215
Gasoline . . . . . . . . . . . . . . . . . . . . . . . . 215
F uel tank. ... .. .... . ... ...... ... . 216
Checking and filling . . . . . . . . . . . 220
Engine hood . . . . . . . . . . . . . . . . . . . . . 220
Engine compartment . . . . . . . . . . . . . . 222
Engine o il . . . . . . . . . . . . . . . . . . . . . . . 222
Engine cooling system . . . . . . . . . . . . . 227
Brake fluid . . . . . . . . . . . . . . . . . . . . . . 229
Battery . .. .. .. .... .. ........ ... . 230
Windsh ie ld/headlight washer
c onta iner . . . . . . . . . . . . . . . . . . . . . . . 234
Tires and wheels . . . . . . . . . . . . . . 235
T ires . . . . . . . . . . . . . . . . . . . . . . . . . . . 235
T ire pressure mo nitoring system 253
Do-it -yourself s ervice . . . . . . . . . 256
What do I do now? . . . . . . . . . . . . 256
T ru nk escape h andle . . . . . . . . . . . . . . 256
E mergency warn ing triangle . . . . . . . . 256
Vehicle tool kit . . . . . . . . . . . . . . . . . . . 257
Changi ng a wheel . . . . . . . . . . . . . . . . . 258
•
•
Page 13 of 298
Instrument s and warning /indicator lights 11
Instruments and warning/indicator lights
Instruments
Instrument cluster and controls
The instrument cluster is your central source of information.
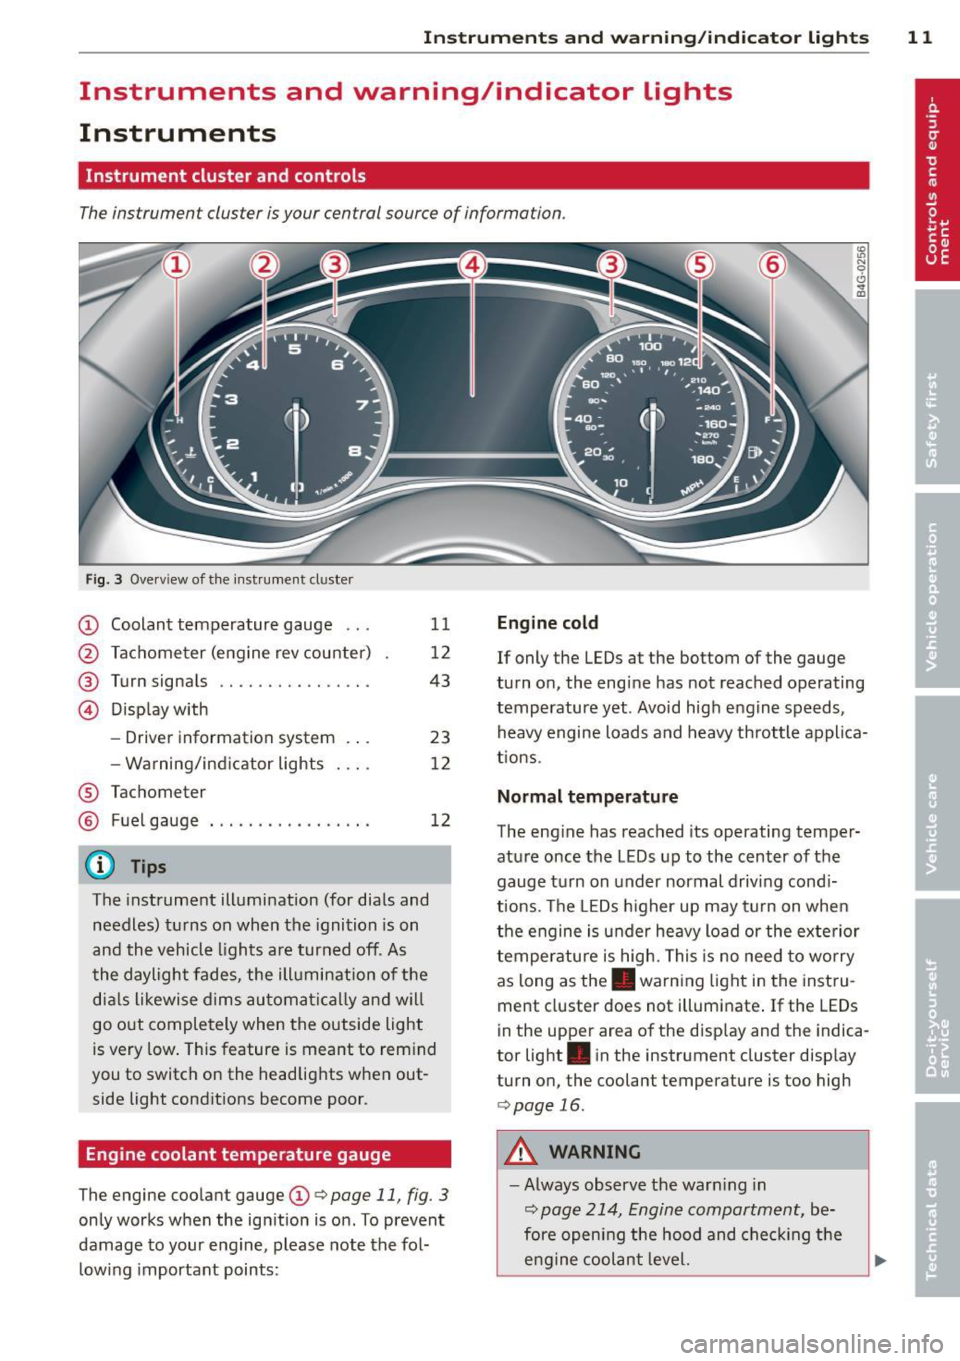
Fig. 3 Overv iew of the instrument cluster
CD Coolant temperature gauge .. .
@ Tachometer (eng ine rev counter)
@ Turn signals ............... .
@ Display with
®
®
-Driver information system .. .
- Wa rning/ind icator lights
Tachometer Fuel gauge
@ Tips
11
12
43
23
12
12
The instrument illumination (for dials and
needles) turns on when the ignition is on
and the vehicle lights are turned off. As
the daylight fades, the illumination of the
dials likewise dims automatically and wil l
go out completely when the outside light
is very low. This feature is meant to rem ind
you to switch on the headlights when out
side light conditions become poor.
Engine coolant temperature gauge
The engine coolant gauge CD¢ page 11, fig. 3
only works when the ignition is on. To prevent
damage to your eng ine, please note the fol
l owing important points:
Engine cold
If only the LEDs at the bottom of the gauge
turn on, the eng ine has not reached operating
temperature yet . Avoid high engine speeds,
heavy engine loads and heavy throttle applica
tions.
Normal temperatu re
The engine has reached its operating temper
ature once the LEDs up to the center of the
gauge turn on under normal driving cond i
t ions. The LEDs higher up may turn on when
the engine is under heavy load or the exterior
temperature is high. This is no need to worry
as long as the. warning light in the instru
ment cluster does not illuminate . If the LEDs
in the upper area of the display and the indica
tor light . in the instrument cluster display
turn on, the coolant temperature is too high
¢page 16.
A WARNING
-Always observe the warn ing in
¢ page 214, Engine compartment, be
fore opening the hood and checking the
engine coolant level.
Page 14 of 298
12 Instrum ent s and w arn ing /indic ato r light s
-Never open the engine hood if you see or
hear steam, or if you see engine coolant
dripping from the engine compartment.
You could burn yourself . Let the engine
cool off first so that you cannot hear or
see any steam or engine coolant .
@ Note
-Mounting additional lights or accessories
i n front of the a ir inlets reduces the cool
i ng effect of the rad iator . At h igh outside
temperatures or high eng ine load, the
engine could overheat.
- The front spo iler has been designed to
proper ly distribute the cooling air when
t h e ve hicle is moving.
If the spoiler is
dam aged, th is co uld red uce the cooling
effect and the engine co uld then over
heat . Ask your authorized Audi dea ler for
assistance .
Tachometer (engine rev counter)
The tachometer indicates the engine RPM
(revolutions per minutes).
If engine RP M drops be low 1,500, yo u should
downshift to the next lower gear. The red a rea
at the end of the sca le indicates maximum
perm iss ib le engine RPM after the break-in pe
riod. Before reaching this area, move these
lector lever to position "D/S (Drive)" or ease
your foot off the accelerator pedal.
(D Note
The tachometer needle should on ly br iefly
be in the red zone: you could damage your
engine! The beginn ing of the red zone var
ies depending on the engine .
@ For the sake of the environment
Upshifting early saves fuel and reduces en
gine noise.
Fuel gauge
The fuel gauge only works when the ignition is
on .
If the fuel level d rops below 2 . 6 ga llons (10 liters), the bottom LED turns red and the
indicator
light~ turns on ¢
page 21. The
bottom LED blinks red when the fuel level is
very low.
T he possible range based on the current fuel
level is shown in tab@¢
page 23, fig . 4 .
(D Note
Never run the tank completely dry. An ir
r egular supply of f uel can cause engine
misfiring and fuel could enter the ex ha ust
system . The catalytic converter could then
overheat and be damaged.
Warning/indicator Lights
Description
The ind icator lights in the instrument cluster
blink or turn on. They indicate funct ions or
malfunctions ¢,& .
Messages may appear with some indicato r
lights. A warning signal will sound at the
same t ime. The indicator lights and messages
in the center of the displays may be rep laced
by other d isplays . To show them again, select
the tab for ind icator lights and messages us
i ng the multifunction steering wheel
¢
page 23. If t here are several malfunc
t ions, you can display them one at a time us
ing the thumbwheel.
Some indicato rs lights in the d isplay can turn
on in severa l co lors.
A WARNING
- F ailure to heed w arning l igh ts and other
important vehicle in forma tion may res ult
in ser io us personal inj ury or vehicle dam
age .
- Whenever stalled or stopped for repair, move the vehicle a safe d istance off the
road, stop the engine, and turn on the
emergency flasher¢
page 42.
-The engine compartment of any motor
veh icle is a potentially hazardous area.
Before you chec k anything in the engine
Page 19 of 298
Instruments and warning/indicator lights 17
Follow the warning stickers¢ page 214,
Engine compartment.
@ Note
Do not continue driving if the . symbol
illuminates. There is a malfunction in the
engine cooling system -you co uld damage
your eng ine.
D Battery
This warning/indicator light detects a mal
function in the generator or in the vehicle's
electrical system.
The . warning/indicator light illuminates
when you switch on the ignition and must go
out after the engine has started.
• Alternator fault: Battery is not being
charged
If the indicator light turns on and the mes
sage appears, there is a malfunction in the
generator or vehicle e lectrica l system.
Drive to you r authorized Audi dealer or quali
fied workshop immediately. Because the vehi
cle battery is discharging, turn off all unnec
essary electrical equipment such as the radio .
Seek professional assistance if the battery
charge leve l is too low.
(•i Low battery charge : battery will be
charged while driving
If the indicator light turns on and the mes
sage appears, there may be limited star ting
ability.
I f this message turns off after a litt le wh ile,
the battery charged enough wh ile driving.
If the message does not turn off, have your
author ized Audi dealer or qualif ied workshop
correct the malfunction.
~ Safety belts
This warning/indicator light reminds you to
put on your safety belt.
The . warning/indicator light illuminates
when the ignition is switched on to remind
the driver and any front passenger to put on
the safety belt. Additionally, an acoustic warn
ing (gong) wi ll also sound.
For more Information¢
page 133, i Safety
belt warning light.
~ Engine oil pressure malfunction
The red engine oil pressure warning symbol
requires immediate service or repair . Driving
with a low-oil-pressure indication is likely to
inflict severe damage to the engine .
• Switch off engine and check oil level
If the indicator light turns on the message ap
pears, the oil pressure is too low.
"" Pull off the road .
... Stop the vehicle.
... Tur n off the engine .
"" Check the engine oil level¢ page 225.
"" If the eng ine oil level is too low, add eng ine
oil ¢
page 225. Make sure that the oil pres
sure warning symbol. appears no longer
in the display before you start dr iv ing again .
"" If the engine oil level is correct and the indi
cator light still turns on, turn the engine off
and do not continue driving. Seek professio
na l assistance .
(D Tips
-The engine oil pressure symbol. is
not an indicator for a low engine oil lev
el. Do not rely on it. Instead, check the
oil level in your engine at regular inter
vals, preferably each time you refuel ,
and always before going on a long trip.
- The yellow oil level warning indication
II requires oil refill or workshop serv
ice without delay. Do not wait until the
red oil pressure warning . starts to
flash before you respond to the low oil ..,
Page 22 of 298
20 Instrum ent s a nd w arn in g/i ndic ato r light s
malfunction in the EDL system c> page 189 .
See your authorized Audi dealer as soon as possib le.
A WARNING
- If the 9 (USA mode ls)l ii] (Canada
models) warning light does not go out,
or if it comes on while driving, the ABS
system is not working properly . The vehi
cle can then be stopped only with the
standard brakes (without ABS). You will
not have the protection ABS provides.
Contact your Audi dealer as soon as pos
sible.
- USA models: If the - warning l ight,
the
ljJ warning light and the m warn
ing light come on together, the rear
wheels could lock up first under hard braking. Rear wheel lock-up can cause
loss of vehicle control and an accident .
Have your vehicle repaired immediately
by your authorized Aud i dealer or a quali
fied workshop . Drive slowly and avoid
sudden, hard bra ke applications.
- Canada models:
If the brake warn ing
light ., the
DJ wa rning light and the
ABS warning light
ii] come on together,
the rear wheels could lock up fi rst under
hard bra king. Rear wheel lock-up can
cause loss of vehicle control and an acci dent. Have your vehicle repaired immedi
ately by your authorized Audi dealer or a
qualified workshop. Dr ive slowly and
avo id sudden, hard brake applicat ions.
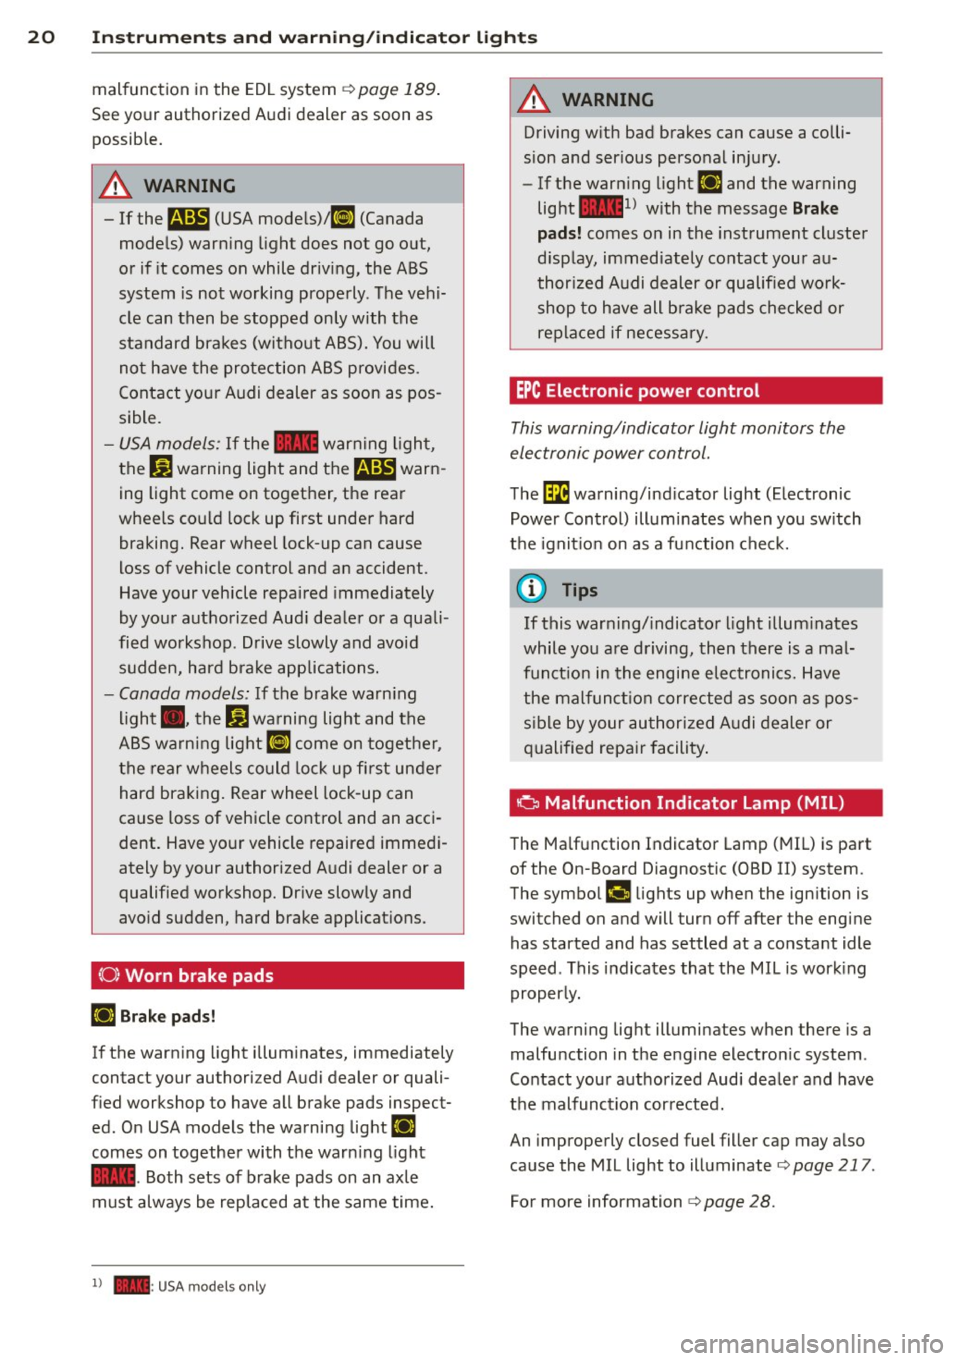
{0) Worn brake pads
El Brak e pad s!
If the warning light illuminates, immediately
contact your authori zed Audi dealer or quali
fied workshop to have all brake pads inspect ed . On USA models the warning light
El
comes on together with the warn ing light
- · Both sets of brake pads on an axle
must always be replaced at the same time.
l ) - : USA m od els only
A WARNING
Driving w ith bad brakes can cause a colli
sion and ser ious personal injury .
- If the warn ing light
El and the warning
light
- l) with the message Brake
p ads!
comes on in the instrument cluste r
d isp lay, immediately contact your au
thor ized Audi dealer or qualified work
shop to have all b rake pads checked or
replaced if necessa ry.
EPC Electronic power control
This warning/indicator light monitors the
electronic power control.
The ~ warning/ind icator light (Electronic
Power Cont rol) illuminates when you sw itch
the ignit io n on as a function check.
-
© Tips
If this warn ing/ indicato r light illum inates
while you are driving, then there is a mal
fun ct io n in the engine electronics. Have
the malf unct io n corrected as soon as pos
s ib le by your au thorized A udi dealer or
qualified repa ir facility .
o Malfunction Indicator Lamp (MIL )
The Ma lfunction Indicator Lamp (MIL) is part
of the On-Board Diagnostic (OBD II) system.
The symbol
f• lights up when the ign ition is
switched on and will turn off after the engine
has started and has settled at a constant idle
speed . This indicates that the MIL is work ing
properly.
The warning light illuminates when there is a
malfunction in the engine electron ic system .
Contact your authorized Audi dea ler and have
the malfunction cor rected.
An improperly closed fuel filler cap may a lso
cause the MIL light to illuminate
c> page 217 .
For more information
c> page 28.
Page 23 of 298
Instruments and warning/indicator lights 21
!?i Engine speed limitation
A ppl ies to vehicles: wit h en gin e s pee d l im itat ion
(II Engine speed maximum XXXX RPM
The engine speed is automatically limited to
the speed displayed in the driver information
system. This protects the engine from over heating.
The engine speed limitation deactivates once
the engine is no longer in the critical tempera
ture range and you have released the accelera
tor pedal once.
If the engine speed limitation was activated by an engine control malfunction, the indica
tor light~ also turns on. Make sure that the
speed does not go above the speed displayed.
Drive to your authorized Audi dealer immedi
ately to have the malfunction corrected.
~ . Engine oil level
II Add oil, max. x qt (l). You may continue
driving
When the symbol Ill and driver message ap
pear, add the amount of oil appearing in the
display at the next opportunity ¢
page 225.
~ .... Engine oil sensor
II Oil level! Sensor defective
If the symbol illuminates, contact your au
thorized Audi dealer and have the oil sensor inspected. Until you have this done, check the
oil level each time you refuel just to be on the
safe side¢
page 225.
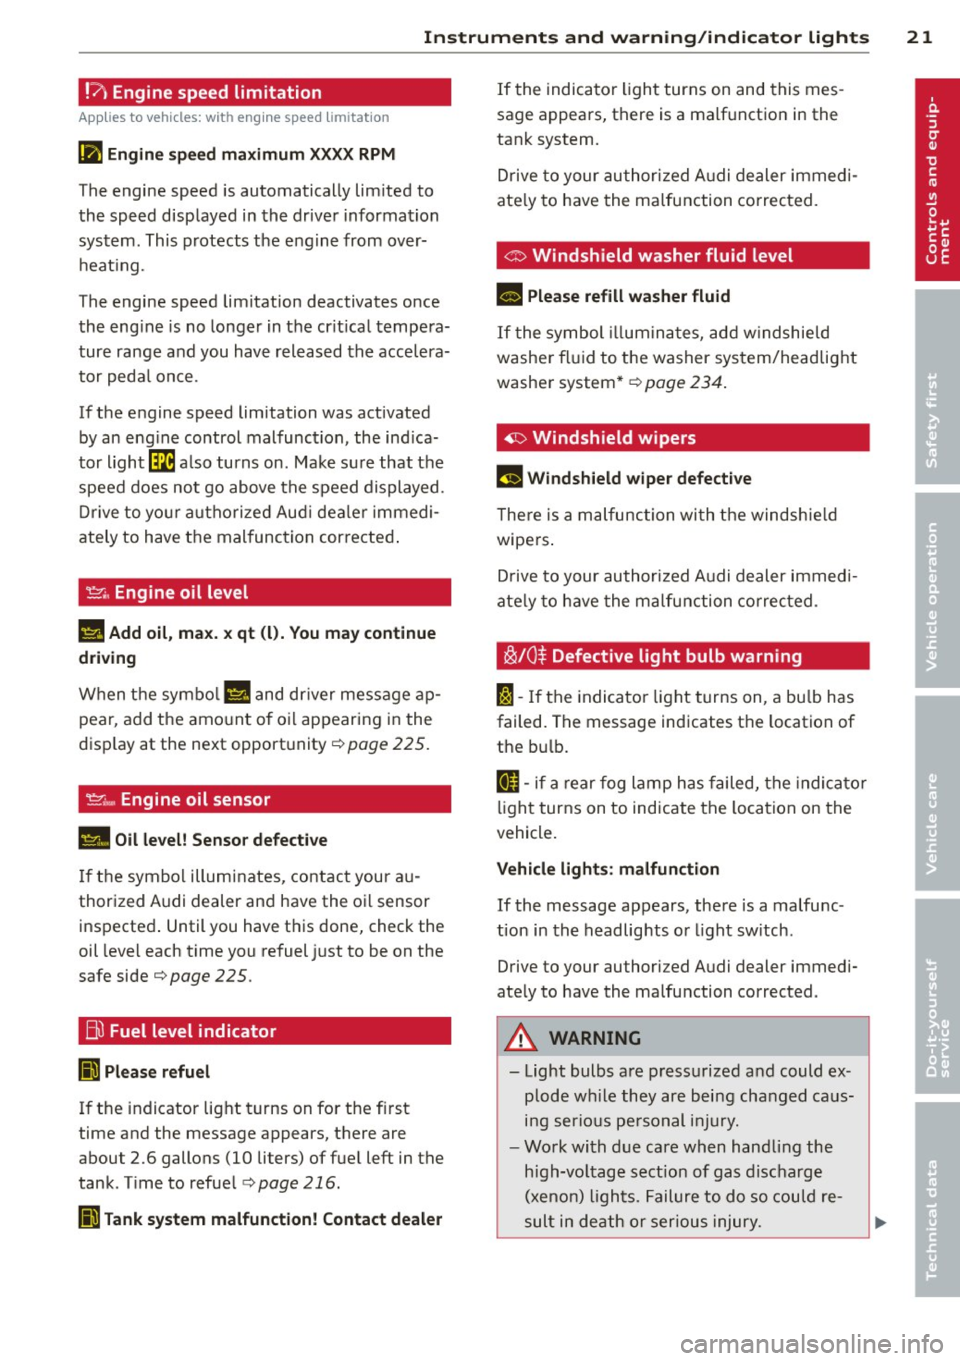
Bil Fuel level indicator
Ii Please refuel
If the indicator light turns on for the first
time and the message appears, there are
about 2.6 gallons (10 liters) of fuel left in the
tank . Time to refuel
¢ page 216.
Ii Tank system malfunction! Contact dealer
If the indicator light turns on and this mes
sage appears, there is a malfunction in the
tank system.
Drive to your authorized Audi dealer immedi
ately to have the malfunction corrected.
C> Windshield washer fluid level
II Please refill washer fluid
If the symbol illuminates, add windshield
washer fluid to the washer system/headlight
washer system* ¢
page 234.
~ Windshield wipers
rlJ Windshield wiper defective
There is a malfunction with the windshield
wipers.
Drive to your authorized Audi dealer immedi
ately to have the malfunction corrected.
~/0$ Defective light bulb warning
f'a-If the indicator light turns on, a bulb has
failed. The message indicates the location of
the bulb.
IJ-if a rear fog lamp has failed, the indicator
light turns on to indicate the location on the
vehicle.
Vehicle lights: malfunction
If the message appears, there is a malfunc
tion in the headlights or light switch .
Drive to your authorized Audi dealer immedi
ately to have the malfunction corrected.
A WARNING
- Light bulbs are pressurized and could ex
plode while they are being changed caus
ing serious personal injury.
- Work with due care when handling the
high-voltage section of gas discharge
(xenon) lights. Failure to do so could re
sult in death or serious injury.
Page 27 of 298

Instrument s and warning /indicator lights 25
on until it is switched off. If yo u continue driv
ing within two hours after switching the igni
tion off, the new val ues are included when
calculating the current tr ip informat ion.
Unlike the short-term memory, the long-term
memory is not e rased automatica lly. You can
se lect the t ime period for eval uat ing trip in
formation yo urself.
F or some vehicle functions, you can access the
trip information from the temporary memory
i n the line
(I) ~ page 23, fig. 5.
Efficiency program
The eff iciency p rogram can help yo u to u se
l ess fuel. I t eva luates dr iving information in
re ference to fue l consumpt ion and shows oth
er equipment inf luencing co nsumption as we ll
as shift recommendations.
c> page 25. Fue l
economy messages
c> page 25 provide tips
for efficient driving. The eff ic iency prog ram
uses distance and consumption data from tr ip
computer
1.
To display the efficiency program, call up Ve
hicle functions and select the menu option
Efficiency program . If the data are deleted in
the efficiency program , those values are also
reset in trip computer.
(D Tips
- All stored va lues w ill be lost if the veh i
cle battery is disconn ected.
- Fuel consumptions (ave rage and cu r
ren t), range and spe ed are displayed in
m etr ic uni ts on Cana dian models .
Other equipment
Fig. 8 Tri p co mpute r: ot her eq uipment
Req uirement: The e fficiency program m ust be
displayed
~ page 25.
1-Tur n the thumbw heel u ntil th e other e quip-
men t ap pears in the display.
Ot her equ ipment t hat is c urrently affe cti ng
fuel consump tion is liste d in t he eff iciency
progr am. The disp lay sh ows up to th ree o ther
items of eq uipment @. The equ ipment using
the most fuel is listed first . If more than th ree
items us ing fuel are switched on, the equip
ment that is c urrently using the most fuel is
displayed .
A scale @also s hows the c urrent tota l co n
sumption of all other equipment .
Fuel economy messages
Fig. 9 Dis play : exa m ple of a fuel eco nomy m essage
Fuel economy me ssage s are di splayed when
fuel consum ption is increased by cert ain con
di tions. If you fo llow these fuel economy mes
sa ges, you ca n re duce your ve hicle's consump
t ion o f fuel. The messages appear a utomat i
ca lly and are only d isp layed in the efficiency
program. The fue l economy messages turn off
automat ica lly afte r a certain period of t ime .
.,. To turn an economy message off immedi-
ately after it appears, press any button on
the mult ifunct ion steering wheel.
{!) Tips
- Once yo u have tur ned a f ue l economy
m essage off, it will o nly appear agai n af
ter yo u turn the ign itio n on again .
- The fue l economy messages are not dis
played in every instance, but rather in in
te rvals over a period of time.
Page 30 of 298
28 Instruments and warning /indicator lights
Display content
In the MMI, you c an specify which informa tion
shoul d be displayed :
- Cru ise cont ro l system*
- Nav igat ion information *
- Audi adaptive cruise control*
- Night vision assistant* (pedestrian warning)
The speed display and some of the red indica
tor lights cannot be hidden in the MMI.
Display brightness
You can adjust the display b rightness in t he
M MI. The display bright ness decreases auto
mat ic all y as the amo unt of light decreases.
The basic leve l of bright ness is adjusted with
the instrument illumination ¢
page 44.
(D Note
To preve nt scratches on the g lass coverin g
the Head -up Display, do not place any ob
jects i n the projection opening.
(D} Tips
- S ung lasses w ith pol ariza tion filters an d
u nfavorable ligh ting co ndi tions can af
fect the display.
- Vehicles wi th sea t memory *: yo ur Hea d
up D isplay setting s are stored automati
ca lly and assigne d to the remote cont ro l
key that you are using .
- A specia l w indshield is needed for the
Head-up Display funct io n.
On-Board Diagnostic
system (OBD)
Malfunction Indicator Lamp (MIL)
The Malfunction In dicator Lamp (MIL) I! in
the instrument cluster is part of the On-Board
Diagnostic (OBD II) system.
The warning/indicator light illumina tes when
the ign ition is switc hed o n and goes o ut afte r
the engine starts and the idle has stab ilized .
This indicates that the MIL is working proper
ly .
If the light does not go out after t he e ngine
is started, or illuminates wh ile you are dr iv
i ng, a mal funct ion may exist in the eng ine sys
tem . If the light illuminates, t he catalytic con
verter could be damaged .
Contin ue driving
with reduced power (avo id
i ng s ustained high speeds and/o r rap id accel
erations) and have the cond ition corrected.
Co ntact your a uthorized Audi dea ler.
If the light i llum inates, the e lectronic speed
li miter may also be mal funct ion ing. Fo r more
information ¢
page 29, Electronic speed
limiter.
An improperly closed fuel filler cap may also
cause the MIL light to illuminate
¢ page 217.
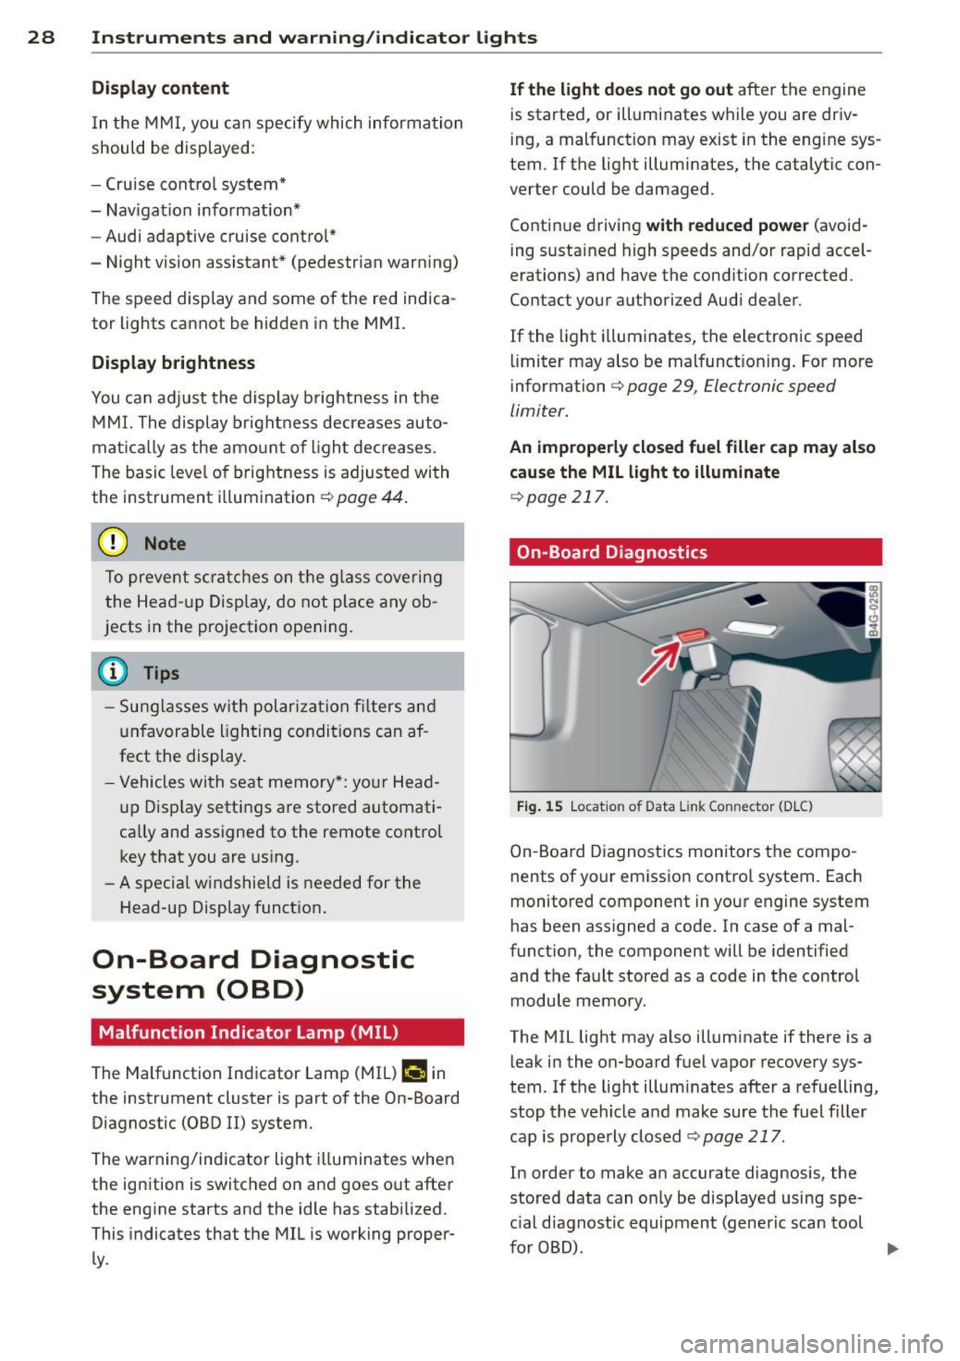
On-Board Diagnostics
Fig. 15 Locat io n of Data Li nk Co nnector (D LC)
On- Boa rd Di agnost ics monitors the compo
nents of your emissio n contro l system . Each
monitored component in your engine system
has been ass igned a code. In case of a mal
funct ion, the component will be identified
and t he fault stored as a code in the control
modul e memo ry.
The MIL light may also illuminate if there is a leak in the on-board fuel vapor recovery sys·
tem. If the light illumi nates afte r a refu elling,
stop the vehicle a nd make sure the fuel fille r
cap is prope rly closed ¢
page 217.
In order to make a n accurate diagnosis, the
stored data can o nly be displayed using spe
c ial d iagnost ic equipment (generic scan tool
fu rOBD) .
~
Page 35 of 298
-When you leave the vehicle, always take
the ignition key with you. This will pre
vent passengers (children, for example)
from accidentally being locked in the ve hicle should they accidentally press the
power locking switch in the doors .
- Do not leave children inside the vehicle
unsupervised. In an emergency it would
be impossible to open the doors from
the outside without the key.
- Applies to vehicles with power side door
closer*:
- When closing a door, make sure noth
ing can interfere with the door. This
could cause serious personal injury.
- You can stop the door from closing at
any time by pulling on the inside or
outside door handle .
@ Tips
-In the event of a crash with airbag de
ployment all locked doors will be auto
matically unlocked to give access to the
vehicle occupants from the outside.
- If the power locking system should mal
function, you can lock the driver's door
using the mechanical key¢
page 36 .
-If the power locking system should fail,
you can still open the fuel tank flap in an
emergency ¢
page 218.
-You are well advised not to keep valua
bles inside an unattended vehicle, visible
or not . Even a properly locked vehicle
cannot provide the security of a safe .
- If the LED in the upper edge of the driv
er's door panel comes on for about 30
seconds after the vehicle is locked, there
is a malfunction in the power locking or
the anti-theft warning system. Have the
malfunction corrected by an authorized
Audi dealership or qualified repair facili
ty.
Opening and closing 33
Setting power locking
T he driver can determine the functions for
power locking in the MMI .
.,. Select: !CAR !function button> Car systems
control bu tton > Vehicle settings > Central
lo cking .
Unlock doors -
You can decide if All doors or
only the
Dri ver should unlock. The rear lid al
so unlocks when
All is selected . If you select
Driver in a vehicle with a convenience key* ,
only the door whose handle you pull will un
lock.
If you select
Driver , all the doors and rear lid
will unlock if you press the
ffi button on the re
mote control master key twice .
Lock exterior trunk handle -If you selec t On,
the rear lid handle is locked . In this case the
rear lid can be opened with the button
a on
the master key or with the
a button in the
driver's door . In vehicles with a convenience
key* , you can still open the rear lid using the
handle if an authorized master key is near the
proximity sensor .
Fold mirrors* -If you select On, the exterior
rearview mirrors fold in automatically when
you press the
(TI button on the remote contro l
master key or touch the sensor* in the handle .
Lock when driving -If you select On, the vehi
cle locks automatically when driving. All of
the doors and rear lid lock.
Tone when locking -When you select On, a
confirmation tone sounds when you lock the
vehicle.
Page 60 of 298
58 Seats and storage
for your vehicle. Contact the nearest Audi
dealer for information on approved modu lar
roof racks for your vehicle.
- Only use roof racks approved for your vehi
cle. These approved roof racks are the basis
for a complete roof rack system. Additional
attachments or carrier systems are needed
to transport luggage and sports equipment.
We recommend using roof racks from the
Audi original accessories program.
- The support feet of the roof rack must al
ways be installed in the holes in the roof
frame ¢
fig. 59. The holes are only visible
when the doors are open. In the case of roof
racks with pins, the pins must be secured in
the holes during assembly.
- We recommend that you keep the installa
t io n instructions for your roof rack system
together with your Owner's literature in the
vehicle.
When should the roof rack be removed?
-Before going through an automatic car wash
(it is best to ask the car wash operator for
advice).
- When not in use, to reduce fuel consump
t io n, w ind no ise and to guard against theft.
.&_ WARNING i.c
-Use of an unapproved roof rack or incor-
rect mounting of an approved roof rack
can cause the roof rack or the items at
tached to it to fall off the roof onto the
road.
- Objects fall ing from the roof of a vehicle
can cause a crash and personal injury.
- Only mount the roof rack on the desig
nated locations on the roof¢
fig. 59.
-The roof rack system must be installed
exactly according to the instructions pro
vided.
- When driving w ith a roof rack system,
changes to the center of gravity and wind
resistance can change the veh icle han
dling and lead to a collision . Always
adapt your driving and your speed to the
current conditions.
(D Note
- Your vehicle warranty does not cover any
damages to the vehicle caused by using
roof racks or mounting structures not
approved by Audi for your veh icle. The
same applies to damage resulting from
incorrect roof rack installation.
- Always check the roof rack mountings
and hardware before each trip and dur
ing a trip to make sure everyth ing is se
curely tightened.
If necessary, retighten
the mountings and check the entire sys
tem from time to time.
- After mounting a roof rack system, or
when you transport objects on the roof
o f you r vehicle, the height of the vehicle
is naturally increased . Be careful when
driving under low bridges or in parking
garages for example. This cou ld cause
damage to the load and even the vehicle
itself.
- Make sure the open rear lid and the sun
roof* do not come into contact with the
roof rack.
Loading the roof rack
Always distribute loads evenly. Make sure
anything on the roof rack is securely tied
down.
.,. Always distribute the loads on the roof rack
even ly.
.,. Always attach items to the roof rack secure-
ly before you drive off.
The maximum permissible roof weight is
220
lb (100 kg).
The roof weight is the total of
the weight of the roof rack, the attachments
and the cargo you are carrying. You must also
not exceed the maximum load weight for the
roof rack you are using.
When using a roof rack system which has a
lower load carrying capacity, you must not use
up the total maximum permissible load carry
ing capacity specified above. Instead, you
should load the roof rack system only to the .,..