steering AUDI S7 2013 User Guide
[x] Cancel search | Manufacturer: AUDI, Model Year: 2013, Model line: S7, Model: AUDI S7 2013Pages: 310, PDF Size: 77.45 MB
Page 47 of 310
Automatic headlights
You can adjust the following settings in the
Automatic headlights menu:
Headlights activation time -You can adjust if
the headlights switch on
Early, Med . or Late
according to the sensitivity of the ligh t sensor.
Audi adaptive light* -You can switch adaptive
light
On and Off.
Daytime running lights
USA models:
You can switch the dayt ime run
n ing lights
on and off .
Canada models :
The function cannot be
turned off . It is activated automatically each
time the ignition is switched on. This menu
item is shown "greyed out" .
Coming home, Leaving home
The coming home function illuminates the
area outside the vehicle when you switch the
ignition off and open the driver's door. To turn
the function on, select
Lights when leaving
car > On .
The leaving home function illuminates the
area outside the vehicle when you un lock the
vehicle. To turn the funct ion on, select
Lights
when unlocking car > On .
The coming home and leaving home functions
only operate when it is dark and the light
switch is in the
AUTO position. Clear
vision 45
Turn signals and high beam lever
The lever on the left side of the steering col
umn is used to operate the turn signals and
the high beam as well as
the headlight flash
er.
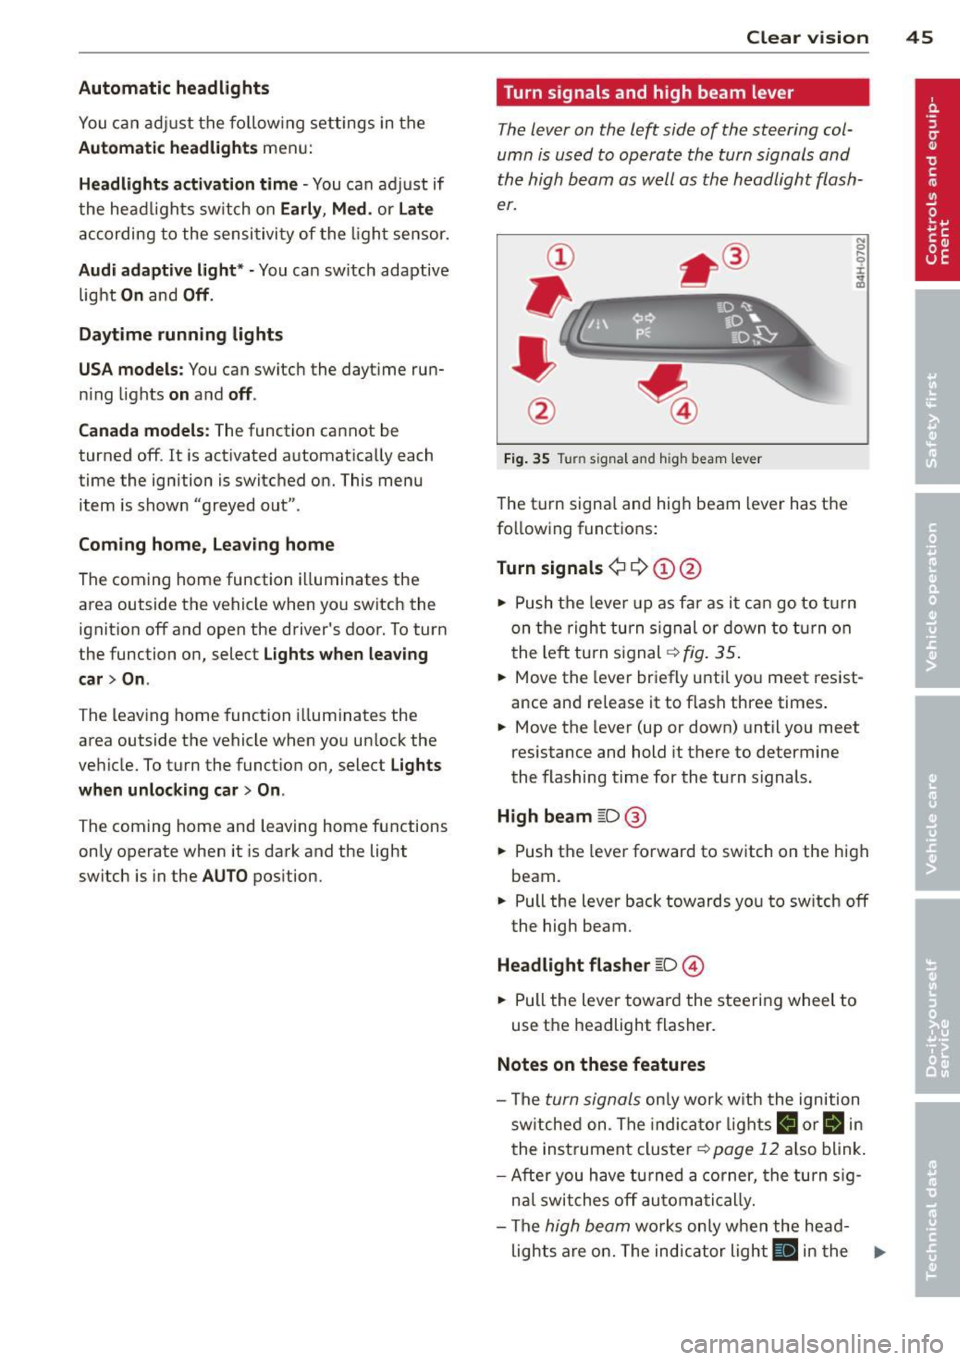
Fig. 35 Tu rn signal and high beam lever
The turn signal and high beam lever has the
following functions:
Turn signals ¢ 9 ©@
.. 0 ....
~
.,. Push the leve r up as far as it can go to turn
on the right turn signa l or down to turn on
the left tu rn s ignal ¢
fig. 35.
... Move the lever briefly until you meet resist
ance and re lease it to flash three times.
.,. Move the lever (up or down) until you meet
resistance and hold it there to determine
the flashing time for the turn signals.
High beam ~D @
... Push the lever forward to switch on the high
beam .
.,. Pull the lever back towards you to sw itch
off
the high beam.
Headlight flasher ~D ©
... Pull the lever toward the steering wheel to
use the headlight flasher.
Notes on these features
-The turn signals on ly work w ith the ignition
sw itched on. The indicator l ights
B or Bin
the instrument cluster¢ page 12 also blink.
-After you have turned a corner, the turn sig-
n al switches
off automatically.
- The
high beam works only when the head-
lights are on. The indicator light
El in the .,.
Page 54 of 310
52 Seat s a nd s tor ag e
Seats and storage
General recommen
dations
Why is your seat adjustment so
important?
The safety belts and the airbag system can
only provide maximum protection if the front
seats are correctly adjusted.
There are various ways of adjust ing the front
seats to provide safe and comfortable support
for the driver and the front passenger . Adjust
you r seat prope rly so that :
- you can easily and quick ly reach all the
switches and controls in the instrument
panel
-your body is prope rly supported thus reduc
ing physical stress and fatigue
- the safety be lts and a irbag system can offer
maximum protection
¢ page 149 .
In the following sec tions, you will see exactly
how you can best adjust you r seats .
There are special regulations and instructions
for insta lling a child seat on the front pas
senger's seat. Always fo llow the information
regarding ch ild safety provided in
q page 175, Child Safety.
A WARNING
Incorrect seating position of the driver and
all other passengers can result in serious
personal in jury.
- Always keep your feet on the floor when
the vehicle is in motion -never p ut your
f eet on top of the instrument panel, out
of the w indow or on top of the seat cush
ion . Th is app lies especially to the passen
gers .
If your seating posi tion is incorrect,
yo u increase the r isk of injury in the case
of sudden braking or an acc ident.
If the
a irbag infla tes and the seating positio n
is incorrect, this could result in personal
injury o r even death.
- It is import ant for bo th the driver and
front passenger to keep a distance of at least 10 inches (25 cm) between them
selves and the steering wheel and/or in
strument panel. If you're s itting any
closer than th is, the a irbag system can
not protect you properly . In addition, the
front seats and head restraints must be
adjusted to your body height so that they
can give you max imum protect ion.
- Always try to keep as much distance as
possible between yourself and the steer
ing wheel o r inst rument pane l.
- Do not adjust the driver's o r front pas
senger's seat whi le the vehicle is moving.
Your sea t may move unexpected ly, caus
ing sudden loss of vehicle cont rol and
personal injury . If you adjust yo ur seat
while the veh icle is moving, yo u are out
of posit ion.
Driver's seat '
The correct seat position is important for safe
and relaxed driving.
We recommend tha t you adjus t the dr iver's
seat in the fo llowing manner :
.,. Adjust t he seat in fo re and aft direction so
t ha t you can eas ily pus h the peda ls to the
floor w hile keeping your knees sl igh tly bent
q A in Why is your seat adjustment so im
portant? on page 52.
.. Adjust the back rest so that when you sit
w ith your back against t he backrest, you can
still grasp the top of the steering wheel.
.. Adjust the head restraint so the upper edge
is as even as poss ible with the top of your
head . If that is not poss ible , try to adjust
t he head restraint so that it is as close to
t his pos it ion as possib le
q page 55.
A WARNING
Neve r place any objects in the dr iver's foot
well. An object could get into the pedal
area and interfere with pedal function . In
case of sudden braking or an acc ident, you
would not be able to brake or accelerate .
Page 58 of 310
56 Seats and storage
until you feel it lock into p lace c::> .& in Prop
er adjustment of head restraints on
page 134.
• To move the head restraint down, press the
button -arrow-
c::> fig. 49 and slide the head
restraint downward .
Removing the head restraints
• Fold the backrest forward ¢ page 64.
• Move the head restraint upward as far as it
can go.
• Press the release
c::> fig. SO with the me
chanical key¢
page 33 and the button
-arrow- ¢
fig. 49 . Pull the head restraint out
of the backrest at the same time¢ ,&.
Installing the head restraints
• Slide the posts on the head restraint down
into the guides until you feel the posts lock
into place .
• Press the button -ar row-
c::> fig . 49 and slide
the head restraint a ll the way down. You
should not be able to pull the head restraint
out of the backrest .
So that the driver can have a better view to
the rea r, the head restraints shou ld be pushed
down completely when the rear seats are not
occupied.
& WARNING
- Only remove the rear seat head restraints
when necessary in order to install a child
seat. Install the head restraint again im
med iately once the child seat is removed.
Driv ing without head restra ints or with
head restraints that are not properly ad
justed increases the r isk of serious or fa
tal neck injury dramatically .
- Read and heed all WARNINGS
¢page 134.
Seat memory
Description
Applies to vehicles: with memory function
The memory function allows you to quick ly
and easi ly store and recall personal seating profiles for
the driver and front passenger*.
The memory function is operated through the
master key and the memory buttons in the
driver's/front passenger's* doors.
T he driver's seating profile is stored and as
signed to the master key each time the vehicle
is locked . The seating profile is reca lled auto
matically when the vehicle is unlocked. If two
people use one vehicle, it is recommended
that each person always uses "their own" master key .
Two seating profiles can be stored in each of
the driver's/front passenger's* doors. Once
stored, these seating profiles can be recalled at any time.
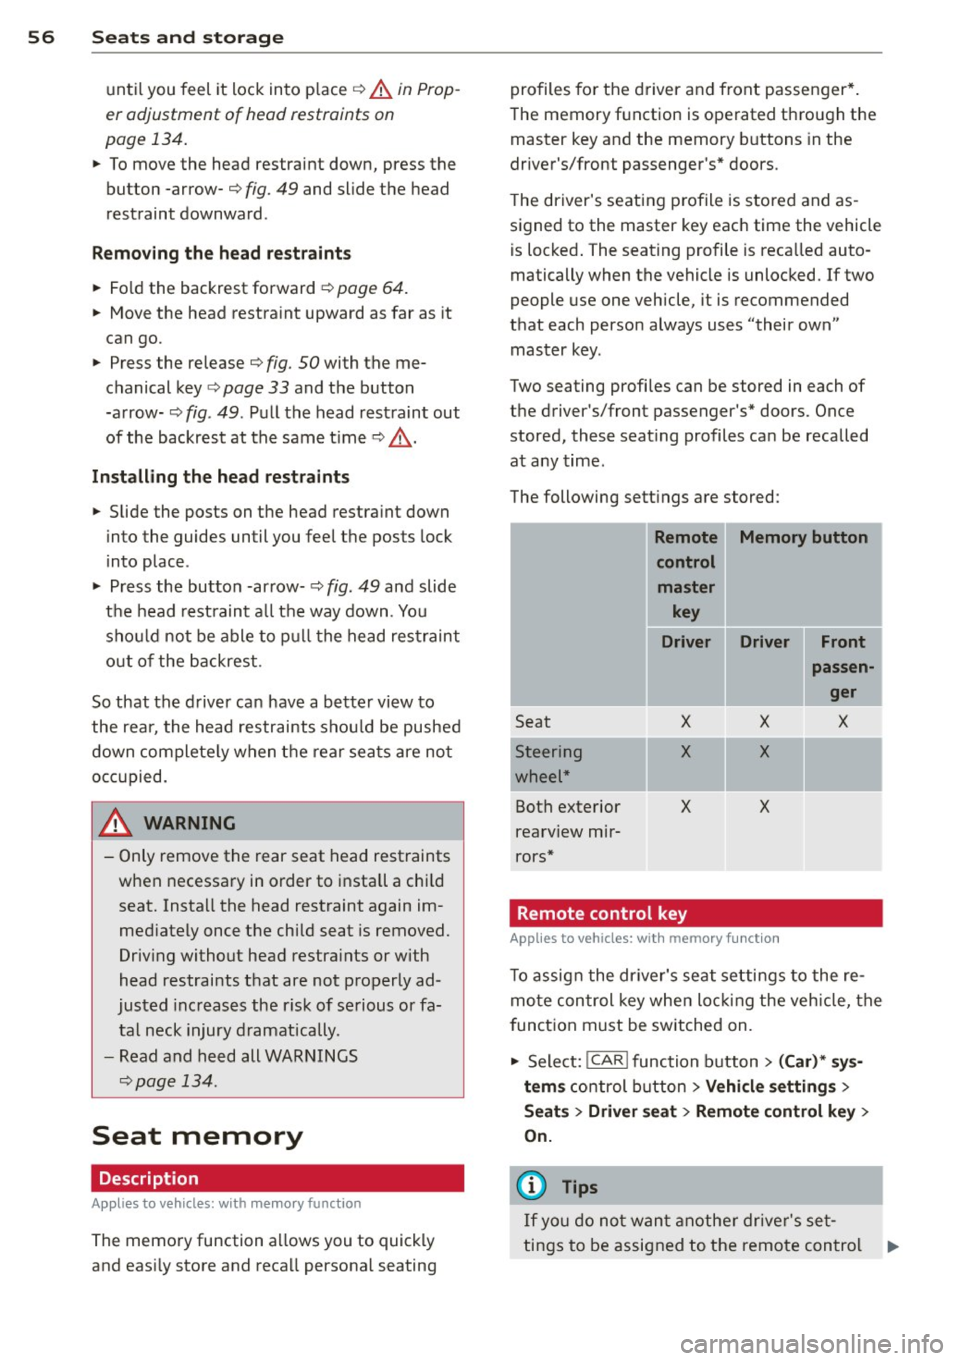
The following sett ings are stored:
- --Remote Memory button
control
master key
Driver Driver Front
I
Seat
-Steering
wheel*
Both exterior
rearv iew mir
rors*
X
X
X
Remote control key X
X
X
Applies to
vehicles: with memory function
passen
ger
X
-
T o assign the driver's seat settings to the re
mote control key when locking the vehicle, the
f unction must be switched on.
• Select:
!CAR ! function button> (Car)* sys
tems
control button > Vehicle settings >
Seats > Driver seat > Remote control key >
On.
(D Tips
If you do not want another driver's set-
tings to be assigned to the remote control .,.
Page 75 of 310
(D Note
To avoid damage to the heating elements in the seats, do not kneel on the seats or
place heavy loads on a small area of the
seat.
Setup
App lies to vehicles: with four-zone a utomat ic climate con·
tro t
The climate con trol system setup is accessed
through the MMI.
" Select: ICARI function button > ( Car) * sys-
tems con trol but ton > AC.
Rear cabin settings*
When this function is selected, all settings for
the rear can be adjusted through the climate
control system in the cockpit. The climate
control system settings cannot be adjusted in
the rear seat at the same time. This function
switches
off after a certain period of time or
when one of the dials in the cockpit is press
ed .
Auto recirculation*
The sensitivity level of the automatic rec ircu
la tion mode can be set at various leve ls from
off to sensitive. The recirculation mode is con
trolled automat ica lly. You must press the~
button if fog forms on the windows.
Footwell temperature
You can adjust the footwell temperat ure so
that it is cooler or warmer.
AC mode
The strength of the airflow can be adjusted to
light, med ium or strong.
Warm and cold 7 3
Steering wheel heating
Applies to vehicles: wit h hea ted stee ring wheel
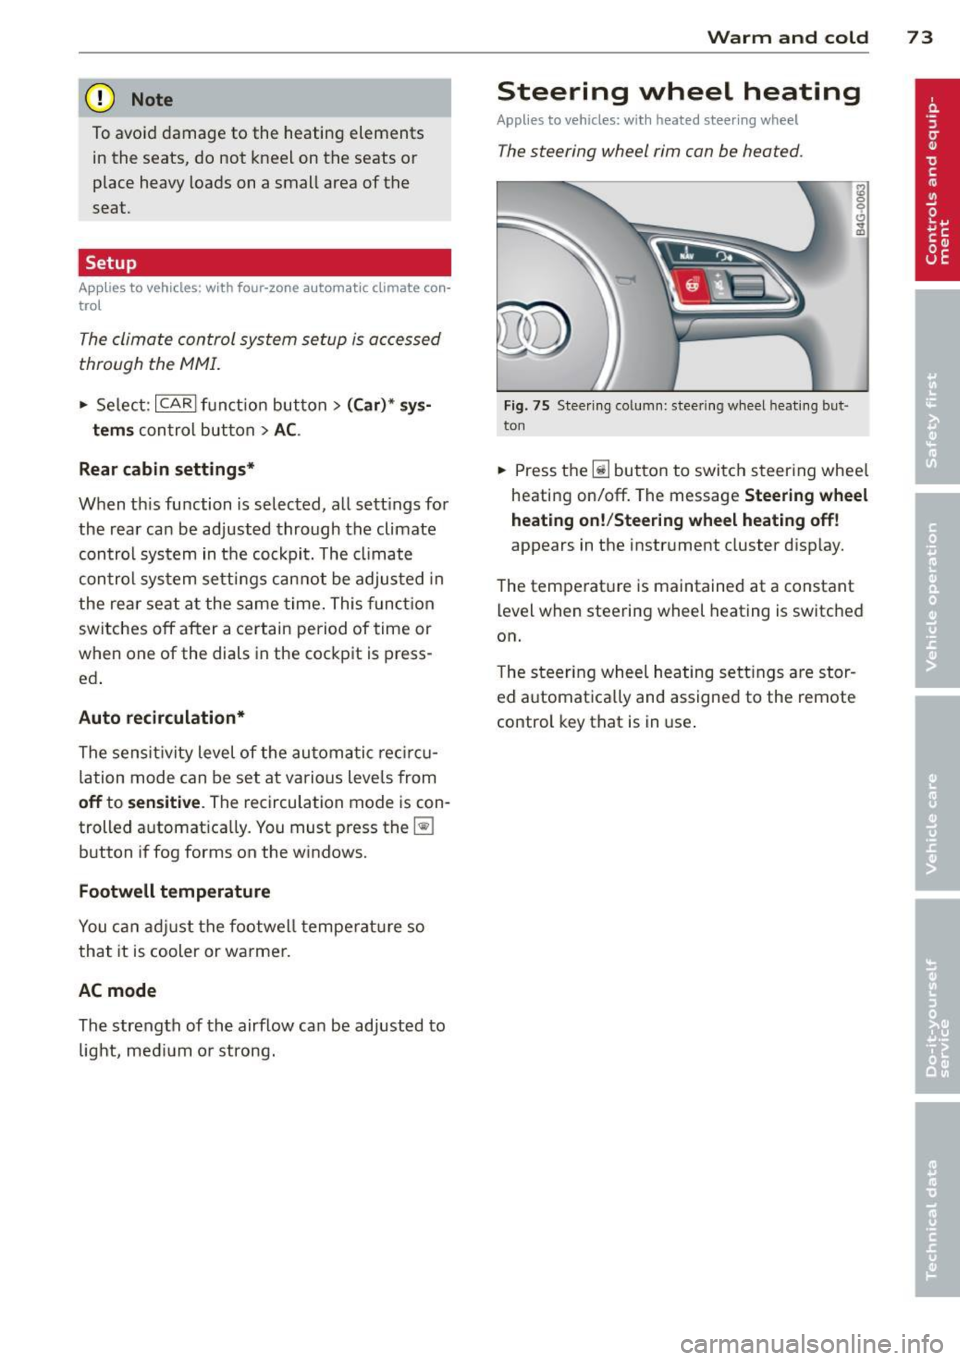
The steering wheel rim con be heated .
Fig. 75 Steering column: steering w heel hea tin g but ·
ton
.. Press the lil bu tton to switch steering whee l
heating on/off. The message
Steering wheel
heating on! /Steering wheel heating off!
appears in the instrument cluster d isp lay.
The temperat ure is maintained at a constant
level when steering wheel heating is switched
on.
T he steering wheel heating settings are stor
ed automat ica lly and assigned to the remote
control key that is in use .
Page 76 of 310
7 4 On the road
On the road
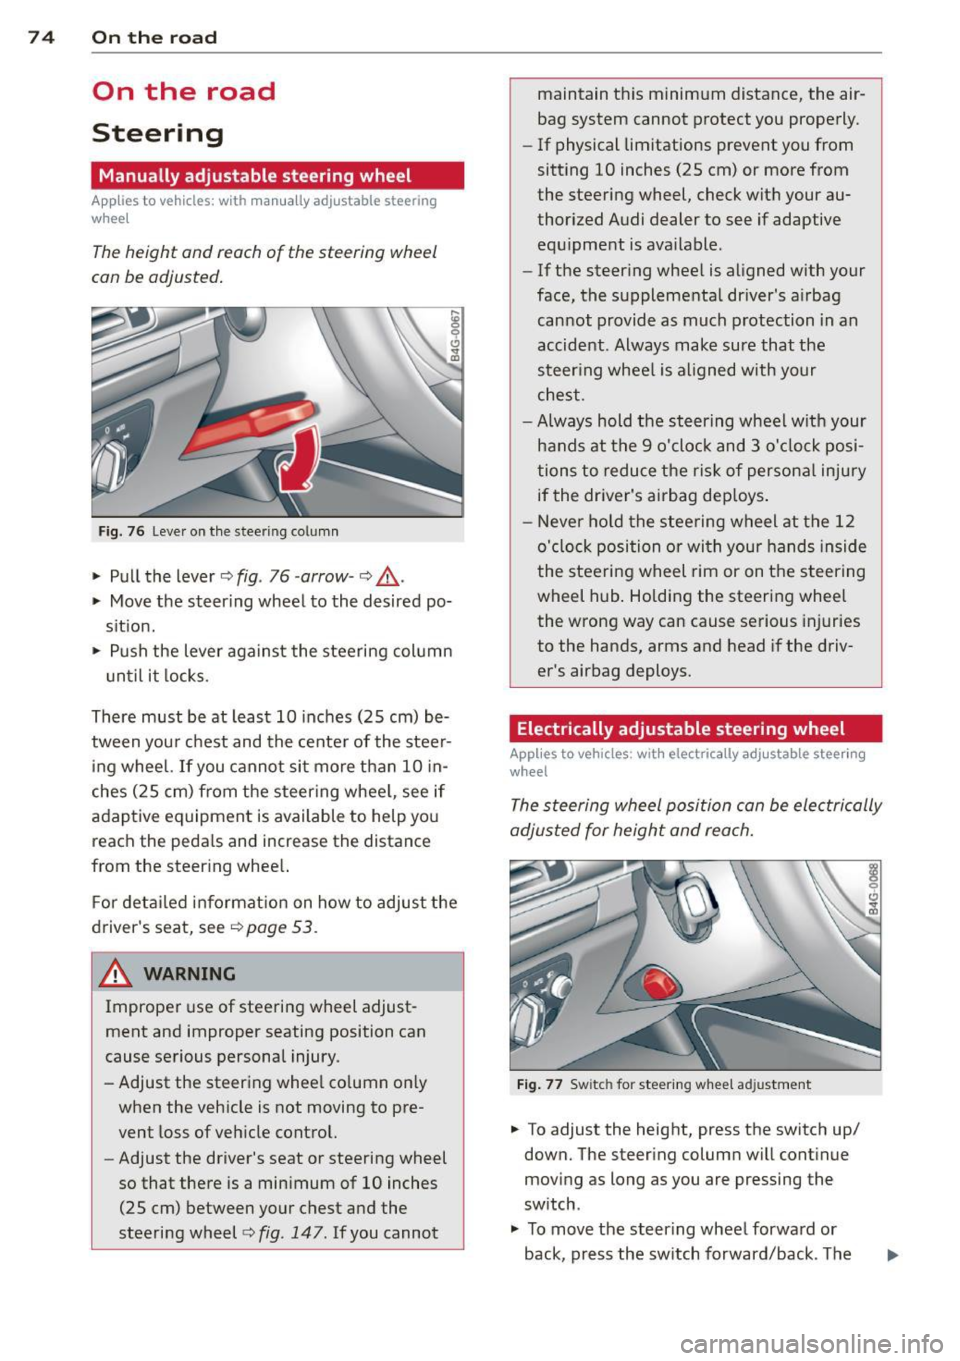
Steering
Manually adjustable steering wheel
Applies to vehicles: with man ua lly adjustable steering
w hee l
The height and reach of the steering wheel
can be adjusted.
Fig. 76 Leve r on the steering co lumn
" Pull the lever c::> fig . 76 -arrow-c::> &_ .
" Move the steer ing wheel to the desired po
sit ion.
" Push the lever against the steering column
until it locks.
There must be at least 10 inches (25 cm) be
tween you r chest and the center of the steer
ing wheel.
If you cannot sit more than 10 in
ches (25 cm) from the steer ing whee l, see if
adaptive equipment is available to help yo u
reach the peda ls and increase the distance
from the steer ing whee l.
F or detailed information on how to adjust the
driver's seat, see
c::>page 53.
~ WARNING
Improper use of steering wheel adjust
ment and improper seating position can
cause serious personal injury.
- Adjust the steering whee l co lumn on ly
when the vehicle is not moving to pre
vent loss of veh icle control.
-
- Adjust the driver's seat or steering wheel
so that there is a minimum of 10 inches
(25 cm) between your chest and the
steering wheel
c::> fig . 147. If you cannot maintain this minimum distance, the air
bag system cannot protect you properly.
-
If physical limitations prevent you from
sitting 10 inches (25 cm) or more from
the steering wheel, check with your au
thorized Audi dealer to see if adaptive
equ ipment is ava ilable .
- If the steer ing wheel is aligned with your
face, the supplementa l driver's a irbag
cannot provide as much protection in an
accident . Always make sure that the
steering wheel is aligned with your
chest.
- Always hold the steering wheel w ith your
hands at the 9 o'clock and 3 o'clock posi
tions to reduce the risk of personal injury
if the driver's airbag dep loys .
- Never hold the steering wheel at the 12
o'clock position or with your hands inside
the steering wheel rim or on the steering
wheel hub. Holding the steering wheel
the wrong way can cause serious injuries
to the hands, arms and head if the driv
er's airbag deploys.
Electrically adjustable steering wheel
App lies to vehicles: wit h electrically adj ustable stee ring
wheel
The steering wheel position can be electrically
adjusted for height and reach.
Fig. 77 Switc h for steering wheel adjustment
" To adjust the height, press the switch up/
down. The steer ing column will continue
moving as long as you are pressing the
switch .
" To
move the steer ing wheel forward or
back, press the switch forward/back . The
Page 77 of 310

steering column will continue moving as long as you are pressing the switch.
There must be at least
10 inches (25 cm) be
tween your chest and the cente r of the steer
ing wheel. If you cannot sit more than
10 in
ches (25 cm) from the steering wheel, see if
adaptive equipment is available to help you
reach the pedals and increase the distance
from the steer ing wheel.
F or detailed information on how to adjust the
driver's seat, see
r::> page 53 .
In vehicles with the memory f unction* , the
steering column settings are stored together
with the seat position.
A WARNING
Improper use of steering wheel adjust
ment and improper seating position can
cause serious personal injury .
- Adjust the steering wheel column only
when the vehicle is not moving to pre
vent loss of veh icle control.
-
- Adjust the driver's seat or steering wheel
so that there is a min imum of
10 inches
(25 cm) between your chest and the
steering wheel ¢
fig. 147. If you cannot
mainta in this min imum d istance, the a ir
bag system cannot protect you properly.
- If physica l limitations prevent you from
sitting
10 i nches (25 cm) or more from
the steering wheel, check with yo ur au
thorized Aud i dea ler to see if adaptive
equipment is availab le.
- If the steering wheel is aligned with you r
f ace, the supp lemental driver's airbag
cannot provide as much protection in an
accident. A lways make sure that the
steering wheel is aligned with your
chest.
- Always hold the steering wheel with your
hands at the 9 o'clock and 3 o'clock posi
t ions to reduce the risk of personal injury
if the driver's airbag deploys.
- Never hold the steering wheel at the 12
o'clock posit ion or with your hands inside
the steering wheel rim or on the steer ing
On th e road 7 5
wheel hub. Holding the steering wheel
the wrong way can cause serious injuries
to the hands, arms and head if the driv
er's airbag deploys.
Easy entry feature
App lies to vehicles: with electrically adj ustable steer ing
wheel
The easy entry feature makes it easier to en
ter and exit the vehicle by automatically ad
justing the steering wheel.
.,. Select in the MMI: ICAR lfunction bu tton>
(C ar)* sys tems control button > Vehicle set
t ing s > Se ats
> Drive r's sea t > Easy entry >
On.
When the easy entry feature is turned on, the
steering wheel moves up to the park position
when you switch off the ignition . After you en
ter the vehicle, the steering wheel moves to
the stored posit ion as soon as you switch on
the ignition.
Starting and stopping
the engine
Starting the engine
This button switches on the ignition and
starts the engine.
F ig. 78 Center console: S TART ENGINE S TOP button
.,. Step on the brake pedal and move the selec
tor lever to
P or N ¢ £..
.,. Press on the ...., , s=T ""'A --=R=T ,..., E= N~ G-::,I N:-:-= E-=s= T::-::0 :-:: Pc-i l button
c::> fig. 78 -the engine will start. ..,.
Page 79 of 310
the sel ector lever is not in the P position. Shift
the s ele ctor lever into th e P position and
sw itch
off the ign ition when you ex it the vehi
cle . Otherwise the vehicle could ro ll. See a lso
¢page 76.
St eeri ng lock
The steering locks when you turn the engine
off using the I S TAR T ENGINE STOP I button
and open the d river 's door. The locked steer
ing helps prevent vehicle theft.
A WARNING
- Never allow the engine to run in confined
spaces -dange r of asphyxiation .
- Never turn
off the eng ine until the vehi
cle has come to a complete stop .
- The brake booster and power steer ing
only work when the engine is running . If
the engine is
off, you have to use more
force when steering or braking . Because
you cannot stee r and brake as you usua l
ly wou ld, this could lead to crashes and
serious injur ies.
(IT),) Note
- Avoid high eng ine rpm , full th rottle and
heavy engine loads unti l the engine has
r eached operating temperat ure -other
wise yo u risk eng ine damage.
- The eng ine cannot be sta rted by pushing
or tow ing the veh icle.
-If the engine has been under heavy load
fo r an ex tended pe riod, hea t builds up in
the engine compartment after the en
gine is switched
off -there is a risk of
damaging the engine. Allow the engine
to run at idle for about 2 m inutes befo re
switching it
off.
@ Tips
- If you open the driver's door with the ig
nitio n on, a buzzer sounds and the mes
sage
Ignition is on appears in the instru
ment cluster disp lay. Switch the ign it ion
off .
- If you leave the vehicle with t he ignit ion
switched on, the igniti on will switch
off
On th e ro ad 77
after a cer tain per iod of t ime. P lease
note that electrical eq uipment such as
exterior lights will sw itch
off as well
when that happens.
Stopping the engine
... Bri ng your ve hicle to a complete stop.
... Move the se lector lever to the P or N posi
tion .
... Press the
I STA RT ENGINE ST OP ! button
¢fig. 78 .
Emergency off
If necessary, the engine can be switched off
with the selector lever in the R or D/S posi
tion . The eng ine stops if you press the
I S TAR T ENG INE S T OPI button at speeds below
6 mph (10 km/h) and press the b rake peda l.
A WARNING
-Never turn off the en gine until the vehi
cle has come to a complete stop .
- The brake booster and p owe r stee ring
only work when the eng ine is r unning .
If
the engine is off, you have to use more
force when steering or braking. Because
you cannot steer and bra ke as you usual
ly would, this cou ld lead to crashes and
serious injuries.
- For safety reasons, you sho uld a lways
park your vehicle w it h the selector lever
in P. Otherwise, the vehicle could inad
vertently roll away .
- After the eng ine has been switched
off,
the radiator fa n can cont in ue to run for
up to 10 minutes - even with the ignition
sw itc hed
off. It can also sw itch on again
afte r some t ime if the coo lant tempera
ture rises as the resu lt of a hea t buildu p
or if the engine is hot and the engine
compa rtment is additionally heated by
the s un's rays .
(D Note
Do no t stop the eng ine immedia tely after
hard o r extended driving . Keep the engine
.
Page 81 of 310

Emergency brake fun ction
An emergency brake ensures that the vehicle
can be slowed down even if the
normal b rakes
fail
c::> pag e 80 , Emergency broking .
Indicat or light s
-If the par king b rake is closed w ith the igni
t ion
s wit ched on the indicator lights come
on - (USA models)/ . (Canada models)
in the instrument cluster and in the switch.
- If the par king brake is closed w ith the igni
tion
s witc hed off the indicator lights come
on - (USA models)/ . (Canada models)
in the instr ument cluster and in the switch
for about 20 seconds.
A WARNING
Do not press the accelerator peda l inadver
tently if the vehicle is stat ionary but the
eng ine is running and a gear is selected .
Otherw ise the vehicle will start to move
immediately and cou ld result in a crash .
(D Note
If the symbol . in the display or the ind i
cato r light
1111 (USA models) . (Cana
da models) in the instrument cluster flash
es , the re is a malfunction in the bra ke sys
tem. Please refer to the detai led descr ip
tion of the indicator lights ¢
page 15.
- If the indicato r light - (USA mod-
els) . (Canada mode ls) or
IIJ tu rns
on, there may be a malfunction in the
parking brake
r=> page 16.
@ Tips
-You can apply the pa rking brake at any
time -even w ith the ignition swi tched
off. The ignition must be on in order to
release the parking brake.
- Occasiona l noises when the parking
brake is applied and re leased are norma l
and are not a ca use for concern .
- When the vehicle is parked, the parking brake goes thro ugh a se lf-test cycle at
r egular intervals . Any assoc iated noises
are norma l.
On the ro ad 79
Parking
Parking
~ Stop the vehicle with the foot brake .
~ Pull the switch(®) to apply t he pa rking
bra ke .
~ Select the P se lec to r lever posit ion
r=> poge 109.
~ Turn the engine off c::> &_.
In addition on inclines and grades
~ Tu rn the steering wheel so that your vehicle
w il l roll aga inst the c urb in c ase it shou ld
s tart to move .
T he park ing brake activates automat ica lly
when you swit ch the ign ition off. This does not
happe n if you select the N selector lever posi
tion or switch the parking off with the~ but
ton before switching the ignition off .
A WARNING
-When you leave your vehicle -even if on
ly briefly -always take the ign it ion key
with you . This applies particularly when
children remain in the vehicle . Othe rwise
the children could start the engine, re lease the parking brake or operate elec
trica l equipment (e.g. power wi ndows).
There is the r is k of an accident.
- When the veh icle is locked, no one -par
ticularly not childre n should rema in in
the vehicle . Locked doors ma ke it mo re
difficult for emergency wo rke rs to ge t in
to the vehicle -putting lives at risk .
Starting from rest
The starting assist function ensures that the
parking broke is released automatically upon
starting .
Stopping and applying parking brake
~ Pull the switch(®) to apply the pa rking
bra ke .
Page 83 of 310

switched on during this stop phase. The en
gine will be automatically restarted when
needed.
The last Start-Stop-System setting (on/off us
ing the button
I CAJ ,.I) will be restored when the
ignition is turned on. The LED in the
l@ "'I but
ton turns on when the Start -Stop-System is
switched off manually.
Basic requirements for the Start-Stop
mode
- The driver's door is closed .
- The driver' seat belt is latched.
- T he hood is closed.
- The vehicle must have been driven faster
than 2.5 mph (4 km/h) since the last stop .
- A tra iler is not hitched to the vehicle.
_&, WARNING
-Never let the vehicle roll with the engine
switched off. You could lose contro l over
the vehicle . This can lead to a collision
and serious injuries .
- The brake booster and the steering sup
port do not work wh ile the engine is
switched off. More force is required to
stop and to steer the vehicle .
- To reduce the risk of injuries, make sure
that the Start-Stop-System is turned off
when working in the engine compart
ment c:>page
82.
(D Note
Always switch off the Start-Stop -System
when driving through water¢ page
82.
On the road 81
Starting/stopping the engine
Applies to veh icles: w it h Sta rt-Stop -System
Fig. 81 Inst rument cluster: en g in e sw itched off (stop
p hase)
~ Slow the veh icle to a stop using the brake
and keep pressing the brake pedal. The en
gine w ill switch off. The
[I] i ndicato r light
appears in the information line in the instru
ment cluster display.
~ When you take your foot off the brake ped
al, the engine restarts . The indicator light
turns off.
Additional information
The eng ine will switch off in the P, D, N and S
positions as well as in manua l mode. In the P
position, the engine will also remain off if you
take your foot off the brake pedal. The engine
starts again when you select another selector
lever position and take your foot off the brake
pedal.
If you select the R position during a Stop
phase, the engine will start again .
Shift from D to P quickly to prevent the engine
from starting unintentionally when shifting
through R.
You can determine for yourself if the engine
will stop or not by reducing or increasing the
amount of force you use to press the brake
pedal. For example, if you only lightly press
on the brake pedal in stop-and and-go traffic
or when turn ing, the engine will not switch off
whe n the vehicle is stationary. As soon as you
press the brake down ha rder, the engine will
switch off.
lill>
Page 84 of 310

82 On the road
@ Tips
When you stop and the start-stop-system
turns the engine off, the ignition remains
on. Make sure that the ignition is switched
off before exiting the vehicle.
General information
Applies to vehicles: with S tart-Stop -System
The standard Start-Stop-mode can be cancel
led for different system-related reasons .
Fig. 82 Instrument cluster: eng ine-Stop tempo rar ily
unavai lable
Engine will not switch off
Before each stop phase, the system checks if
certain conditions have been met. For exam
p le, the engine will
not be switched off in the
following situations:
- The engine has not reached the minimum
r equired temperature for Start-Stop -mode .
- T he interior temperature selected by the A/C
system has not been reached .
- T he outs ide temperature is extremely h igh/
low .
- T he w indshield is being defrosted
9page 70, 9page 72.
- The pa rking system* is switched on.
- The battery charge level is too low .
- The steering wheel is sharply turned or there is a steering movement.
- After engaging the reverse gear.
- On sharp inclines .
The
r,J indicator light appears in the informa
tion line in the instrument cluster disp lay
9 fig. 82.
Engine automatically restarts
The stop phase is interrupted in the following
situations, for example. The engine restarts
without any action by the driver.
- The inte rior temperature varies from the
temperature selected in the A/C system.
- The windsh ield is being defrosted
9 page 70, 9page 72.
-The brake pedal is pressed severa l times in a
row.
- The battery charge level becomes too low .
- High power consumption .
@ Tips
If you shift into the D, Nor S posit ions af
ter shifting into reverse, the vehicle must
be driven faster than 6 mph (10 km/h) in
o rd er for the engine to switch off aga in.
Switching the Start-Stop-System on/off
manually
Appl ies to vehicles : wi th Start-S top-Sys te m
If you do not wish to use the system, you can
switch it off manually.
Fig. 83 Center console: Start-Stop-System button
.,. To switch the Start-Stop -System off/on
manually, press the
! iiil ~·I button. The LED in
the button turns on when the system is
switched off.
(D Tips
If you switch the system off during a stop
phase, the engine will start again auto
matically.