display AUDI S8 2009 Repair Manual
[x] Cancel search | Manufacturer: AUDI, Model Year: 2009, Model line: S8, Model: AUDI S8 2009Pages: 408, PDF Size: 91.63 MB
Page 152 of 408
• .___A_ d_a_ p:- t_iv _ e_ C_ r_u _is _ e_C_ o_ n_ t_ r_ o_ l --------------------------------------------
Ap plies to vehi cles : wi th Ad aptive Cruise Co nt rol
Settings in MMI
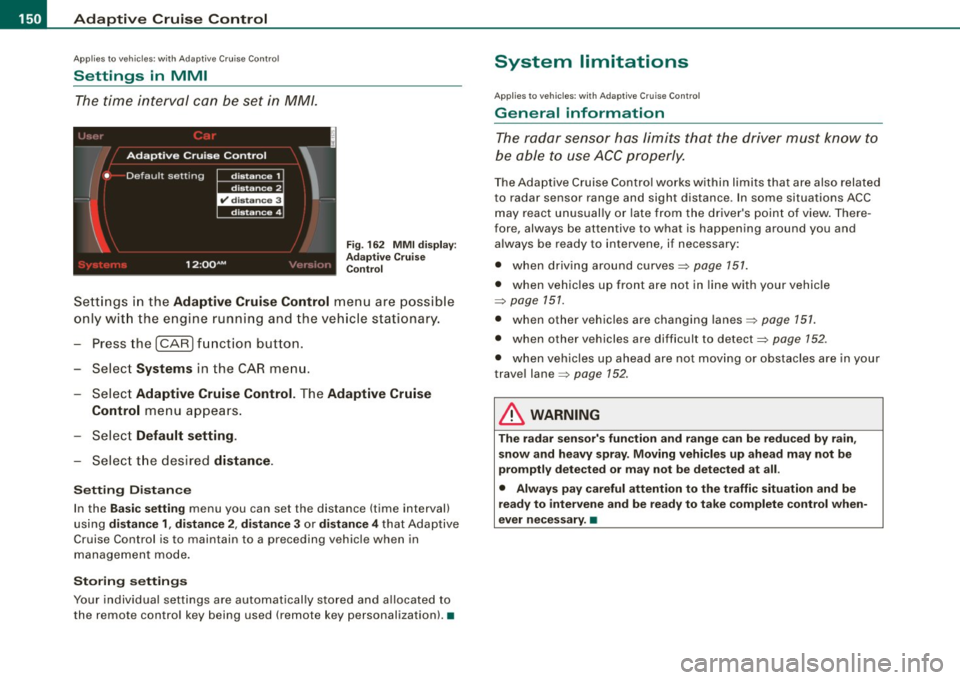
The time interval can be set in MM/.
Fig. 162 MMI display :
Adaptive Cruise
Control
Settings in the Adaptive Cruise Control menu are possible
only with the engine running and the vehicle stationary.
- Press the
I CAR) function button.
- Select
Systems in the CAR menu.
Select
Adaptive Cruise Control. The Adaptive Cruise
Control
menu appears.
Select
Default setting.
- Select the desired distance.
Setting Distance
In the Basic setting menu you can set the distance (time interval)
using
distance 1, distance 2 , distance 3 or distance 4 that Adaptive
Cruise Control is to maintain to a preceding vehicle when in
management mode.
Storing settings
Your individual settings are automatically stored and allocated to
the remote control key being used (remote key personalization). •
System limitations
Applies to vehicles : with Ada ptive C rui se C ont rol
General information
The radar sensor has limits that the driver must know to
be able to use ACC properly.
The Adaptive Cruise Control works within limits that are also related
to radar sensor range and sight distance . In some situations ACC
may react unusually or late from the driver's point of view. There
fore, always be attentive to what is happening around you and
always be ready to intervene, if necessary:
• when driving around curves=>
page 151.
• when vehicles up front are not in line with your vehicle
=>
page 151.
• when other vehicles are changing lanes=> page 151.
• when other vehicles are difficult to detect=> page 152.
• when vehicles up ahead are not moving or obstacles are in your
travel lane=>
page 152.
& WARNING
The radar sensor's function and range can be reduced by rain,
snow and heavy spray. Moving vehicles up ahead may not be
promptly detected or may not be detected at all.
• Always pay careful attention to the traffic situation and be
ready to intervene and be ready to take complete control when
ever necessary. •
Page 156 of 408
• .___A_ u_ d _ i_l_a _n _ e_ a_ s_s _is _ t _________________________________________________ _
I Not ready: The yellow indicator light shows that the system is
turned on but unable to send a warn ing. This can be due to the
following:
• There are no boundary lines, or there is on ly one boundary line
present .
• The boundary lines are not detected (e.g. due to snow, dirt, wet
conditions or light shining into the camera lens).
• More than two boundary lines (such as at construction sites) are
located in the vehicle's lane.
• The vehicle's speed is below the speed needed to activate it,
which is about 40 mph (65 km/h).
• The lane is narrower than about 8 ft . (2.5 ml, or wider than about
16 ft. (5 ml.
• The curve is too sharp.
Notes on the instrument cluster display
When the lane assist turns off automatically, the instrument cluster
indicator goes out and one of the following messages appears on
the display:
Audi lane assist not available: Currently no sensor vision
This message appears when the camera can no longer function
because it cannot detect the boundary lines. This may be due to the
following :
• The exterior s ide of the camera viewing window=>
page 153,
fig. 171 is covered with dirt or ice. Clean this part of the windshield.
• The camera v iewing window is fogged up on the inside. In this
case, wait until the fog disappears before turning lane assist on
again.
• The system was unable to detect boundary lines over an
extended period of time due to road conditions (such as snow
covered lanes). Do not turn lane assist on again until the lines can
be more easily detected.
Audi lane assist not available
A temporary malfunction is preventing lane assist from operating .
Try turning on lane assist again a t a later time.
Audi lane assist: system fault
The system should be checked by an authorized Audi dealer or other
qualified workshop .
[ i ] Tips
• Make sure that the camera viewing window:::> page 153, fig. 171
is not covered by stickers or similar objects .
• Always keep the camera viewing window clean. This can usually
be done by operating the windshield wipers. •
Applies to vehicles: with lane assist
MMI settings
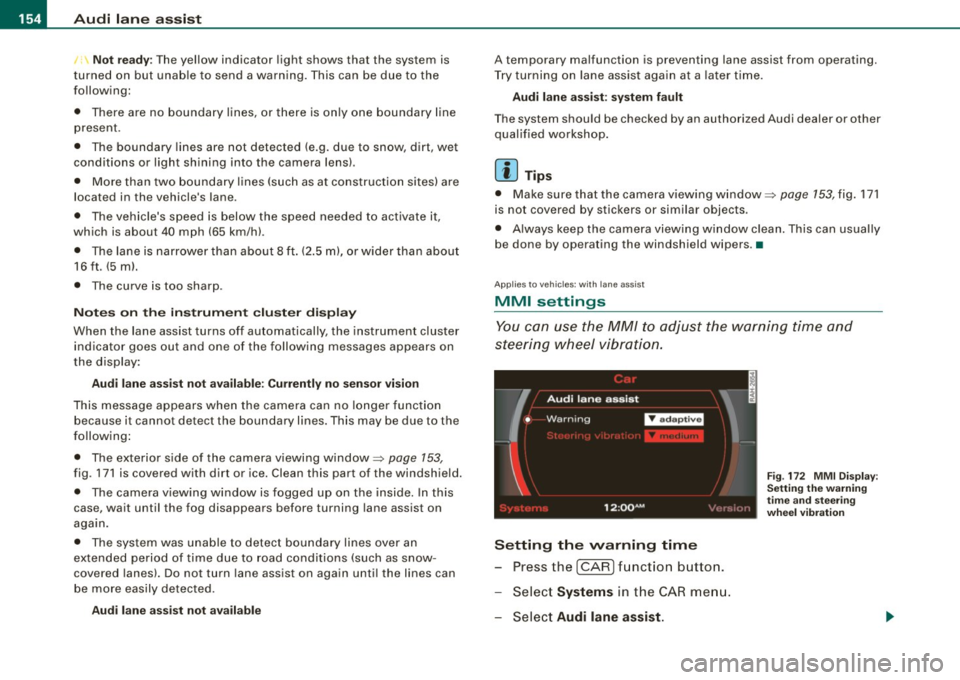
You can use the MM/ to adjust the warning time and
steering wheel vibration.
Setting the warning time
Press the I CAR] function button.
- Select
Systems in the CAR menu.
- Select
Audi lane assist.
Fig. 172 MMI Display :
Setting the warning
time and stee ring
wheel vibration
Page 164 of 408
• ..__A_ u_ d_ i _s _i_d _e_ a_ s_ s _ is_ t __________________________________________________ _
G) Signal on outside mirror does not light up
If you activate your turn signal in driving situation @, the signal still
does not ligh t up on the outside mirror::::;,
& in "Safety tips" on
page 164 . •
A pplies t o vehic les : w it h side assist
MMI settings
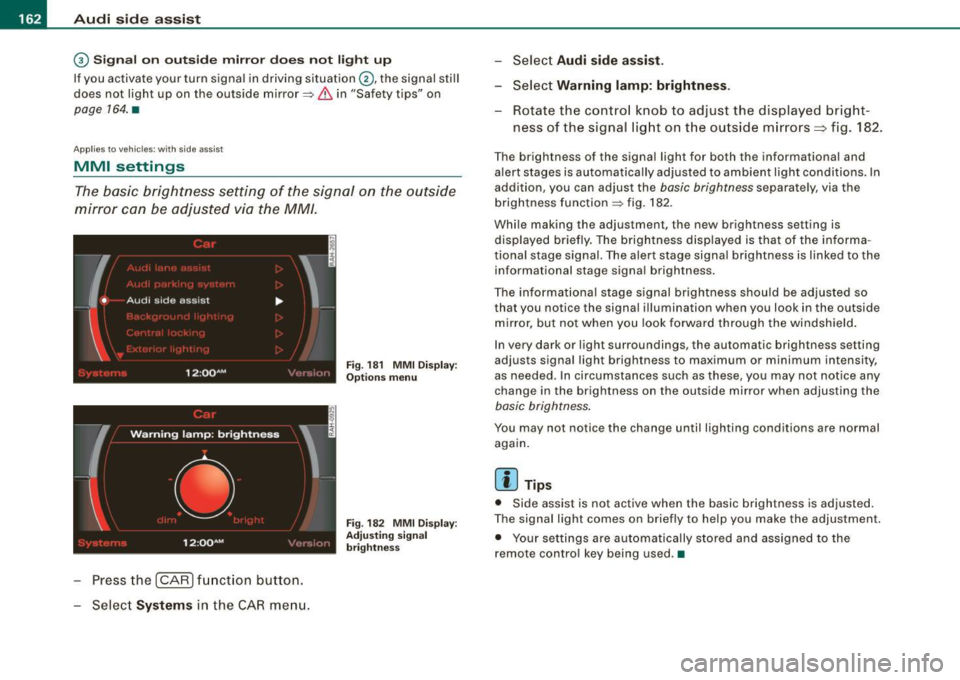
The basic brightness setting of the signal on the outside
mirror can be adjusted via the MM/.
- Pressthe!CAR)function button.
Select
Systems in the CAR menu .
Fig. 18 1 MMI Display:
Options menu
Fig . 182 MMI Display :
Ad justi ng signal
brightness
Select Audi side assist.
-Select Warning lamp: brightness .
Rotate the control knob to adjust the displayed bright
ness of the signal light on the outside mirrors:::::, fig. 182 .
The brightness of the signa l light for both the informational and
alert stages is automatica lly adjusted to ambient light conditions . In
addition, you can adjust the
basic brightness separat ely, via th e
brightness function::::;, fig. 182.
Whi le making the adjustment, the new brightness setting is
displayed briefly. The brightness displayed is that of the informa
tional stage signal. The alert stage signa l brightness is linked to the
informational stage signal brightness.
The informational stage signal brightness shou ld be adjusted so
that you notice the signal i llumination wh en you look in the outside
mirror, but not when you look forward through the windshield .
In very dark or light surroundings, the automatic brightness setting
adjusts signal light brightness to maximum or minimum intensity,
as needed . In circumstances such as these, you may not notice any
change in the brightness on the outside mirror when adjusting the
basic brightness .
You may not notice the change until lighting conditions are normal
again.
[ i ] Tips
• Side assist is not active when the basic brightness is adjusted.
The signal light comes on briefly to help you make the adjustment .
• Your settings are automatically stored and assigned to the
remote con tro l key being used .•
Page 165 of 408
___________________________________________________ A_u_ d_i_ s_ id_e_ a_ s_s _i_s _t _ __.ffllll
Ap plies to vehicle s: with side assist
General information
Side assist has lim its and cannot detect vehic les under all road and
weather conditions. P lease remember system limitations and
never
rely on the system, especially when:
• driving through curves=>
page 763,
• lanes are of different widths=> page 163. •
Applie s to vehicles: with side ass ist
When dr iving through curves
Side assist cannot detect vehicles in curves with a turning radius of
less than 328 feet (100 m).
When driving through a curve , it is possible that side assist may
register a vehicle two lanes
over, and the signal on the outside
m irror will ligh t up .•
A pplies to vehicle s: with side ass is t
Lane width
Con tro ls and eq uip
ment
-
Fi g. 183 Lanes o f a
n orm al w idth are in
d etec tion a rea
Fig . 18 4 Narrow l anes:
Si de ass is t m ay d etec t
v ehicle s tw o la ne s
a w ay
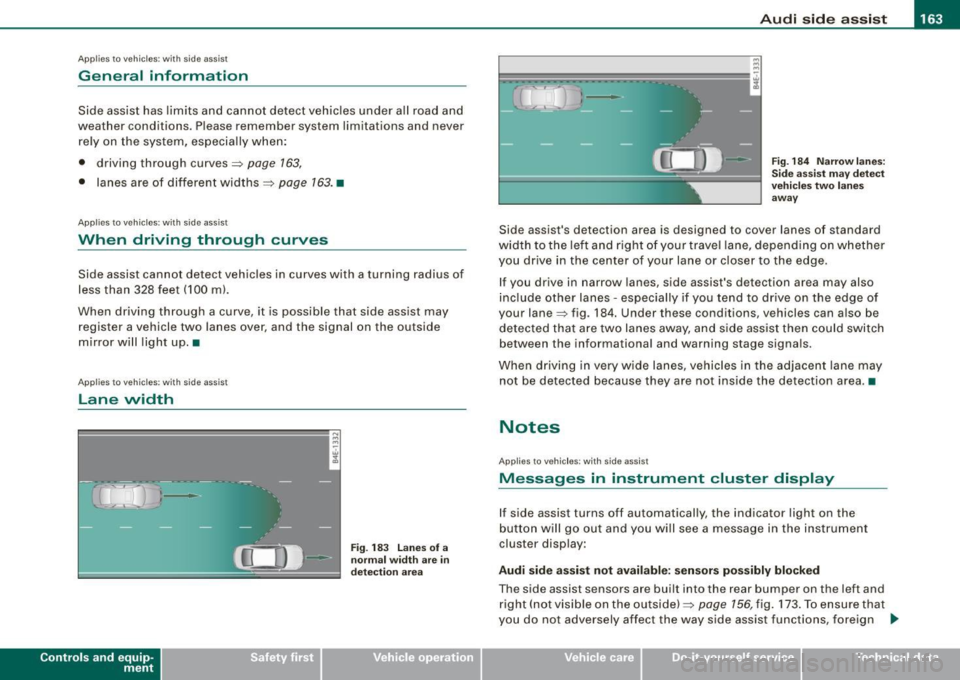
Side assist's detection area is designed to cover lanes of standard
width to the le ft and right o f your trave l lane, depending on whethe r
you drive in the center of your lane or c loser to the edge.
If you drive in narrow lanes, side assist's detection area may also
inc lude other lanes -especially if you tend to dr ive on the edge o f
your lane=> fig . 184. Under these conditions, vehicles can also be
de tected tha t are two lanes away, and s ide assist then could switch
between the informational and warning stage signa ls.
When d riving in
very wide lanes, vehicles in the adjacent lane may
not be detected because they are not inside the detection area. •
Notes
Applies to veh ic les : with s ide ass ist
Messages in instrument cluster display
If side assist turns off automatically, the indicator light on the
button will go out and you will see a message in the instr ument
cluster display:
Audi side a ssist not available : sensors po ssibly blocked
The side assist sensors are built into the rear bumper on the left and
right ( not visible on the outside) =>
page 156, fig. 173 . To ensure that
you do not adversely affect the way side assist functions, foreign .,_
Vehicle care I I irechnical data
Page 169 of 408

_______________________________________________ A_ u_t _o _ m_ a_ t _i_ c_ t_r _a _n _ s_ m __ is_s_ i _o _ n __ !II
T he selector lever must be in Nor P. If one of the driving positions
is engaged a safety switch w ill preven t the eng ine from being
started. See also=>
page 130.
Before you move the selector lever from the P position, you must
a lways apply the brake pedal before and while depressing the
button in the hand le of the se lector lever .
_& WARNING
• Unintended v ehicle movement c an cause serious injury .
- When the selector lever i s in a driving po sition , the vehicle
may creep, even at idle speed . Therefore do not release the
parking brake or foot brake until you are ready to move ,
be cau se power is tran smitted to the wheel s as soon as a
driving po sition i s engaged.
- Do not accelerate while selecting a driving pos ition . At this
time the engine must be at idle speed so that undue stress is
not placed on the clut che s in the t ransmission .
-Remember : - even when stopped briefly with the automatic
transmi ssion in "D" or "R ", engine po wer is being tr ansmitted
to the wheels. Your vehicle could "creep " forward or ba ckward .
When stopped , keep the brake pedal fully depres sed and u se
the parking brake if ne ces sary to keep the vehicle from rolling.
• If the selecto r leve r is unintentionally mo ved into N whi le you
are dr iving, take your foot off the accelerator pedal and wait for
the eng ine to return to idle speed before sele cting a dr iving posi
tion .
• Never shift into "R " or "P " when the ve hicle is in motion .
• Never get out of the driver 's seat when the eng ine i s running .
• If you must get out of the vehicle , move the selector lever
s ecurely into the P po sition and apply the park ing brake firmly.
• If the engine must remain running , never have any driving po si
tion engaged when che cking under the hood . Make sure the
selector lever has securely engaged and is locked in "P" with the
p ark ing br ake firmly set =>
page 301 , "E n gine compart ment ".
Controls and equip
ment
& W ARNING (continued )
Otherwise , any in crease in engine speed may set the vehi cle in
motion , even with the parking brake applied. •
Selector lever positions
This section describes the selector lever positi ons and
drivi ng ra nges .
Fig . 18 6 D ispl ay in the
in strument cluste r:
s elec tor lev er in po si
tion D
The selector leve r posi tion engaged appears next to the selec tor
lever as wel l as in the instrument c luster display . A lso, the current
gear engaged is sh own in positi ons D and S .
P -Park
In this selector leve r pos it ion the transmission is mechanica lly
locked . Engage
P on ly when the vehicle is completely stopped=> &
in "Driving the automatic transm ission" on page 166 .
To shift in or out of position P, you must first press and hold the
brake peda l
and then press the re lease bu tton in t he se lecto r leve r
handle while moving the selector lever to or from
P . You can shift
out of this position only with the ignit ion on.
R -Re ver se
The transmission wi ll au tomatically select the lowest gear ratio
when you shift into reverse .
I • •
Page 173 of 408
Automatic transmi ssio n -
------------------'
Applies to vehi cles : wi th tip troni c-st eerin g wh eel
Steering wheel with tiptronic ®
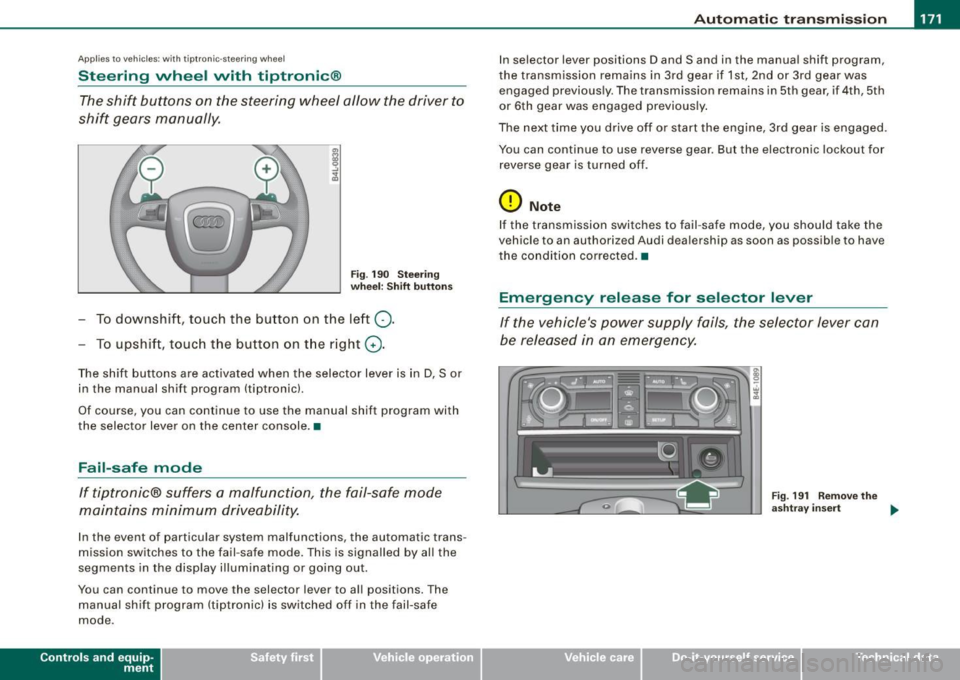
The shift buttons on the steering wheel allow the driver to
shift gears manually.
F ig . 190 Steering
whee l: S hift butt ons
- To downshift, touch the button on the left Q .
- To upshift , touch the button on t he right G) .
The shift buttons are activated when the selector lever is in D, Sor
in the manual shift program (tip tronic) .
Of course, you can continue to use the manual shift program with
the selector lever on the center console .•
Fail-safe mode
If tiptronic® suffers a malfunction, the fail-safe mode
maintains minimum driveability.
In the event of particular system malfunctions, the automatic trans
mission switches to the fail -safe mode. This is s ignalled by all the
segments in the display illuminating or going out .
You can continue to move the selector lever to all positions. The manual shift program (tiptronic) is switched off in the fail-safe
mode .
Contro ls and eq uip
ment
In selector lever positions D and Sand in the manual shift program ,
the transmission remains in 3rd gear if 1st, 2nd or 3rd gear was engaged previous ly. The transmission remains in 5th gear, if 4th, 5th
or 6th gear was engaged previously .
The next time you drive off or start the engine, 3rd gear is engaged .
You can continue to use reverse gear . But the electronic lockout for
reverse gear is turned off .
0 Note
If the transmission switches to fail -safe mode, you should take the
vehicle to an au thori zed Audi dea lership as soon as possib le to have
t he condition corrected .•
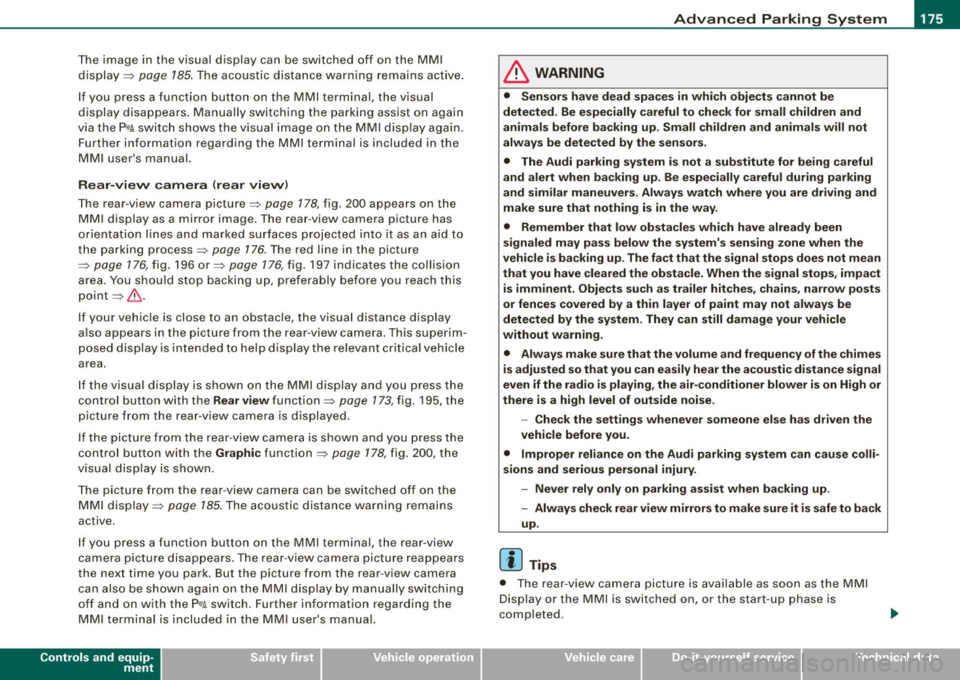
Emergency release for selector lever
If the vehicle's power supply fails, the selector lever can
be released in an emergency.
Fig . 19 1 Rem ove th e
as htray i nser t
~
Vehicle care I I Technical data
Page 175 of 408
Advanced Parking System -
-----------------=----C..----J
Advanced Parking System
Advanced Parking System with rear
view camera
Applies to veh icles : with Advanced Pa rking System with rear view camera
General information
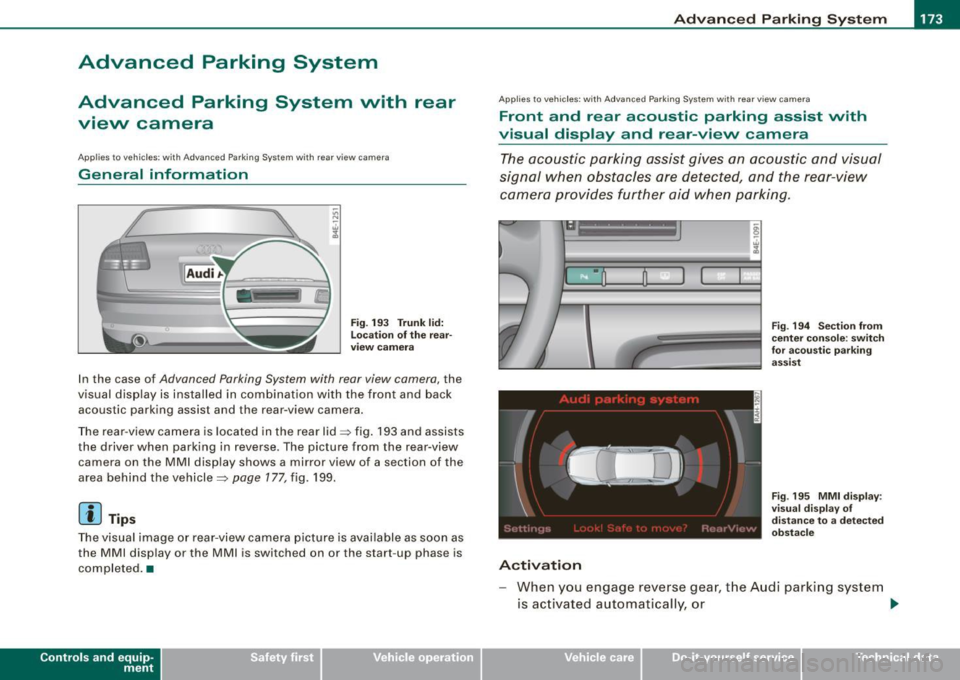
Fig. 193 Trunk lid:
Location of the rear
view camera
In the case of Advanced Parking System with rear view camera, the
visual display is installed in combination with the front and back acoustic parking assist and the rear-view camera.
The rear -view camera is located in the rear lid~ fig. 193 and assists
the driver when parking in reverse . The picture from the rear-view
camera on the MMI display shows a mirror view of a section of the
area behind the vehicle~
page 177, fig. 199.
[ i J Tips
The visual image or rear-view camera picture is available as soon as
the MMI display or the MMI is switched on or the start -up phase is
completed. •
Contro ls and eq uip
ment
App lies to vehicles: with Advanced Parking System w ith re ar view came ra
Front and rear acoustic parking assist with
visual display and rear-view camera
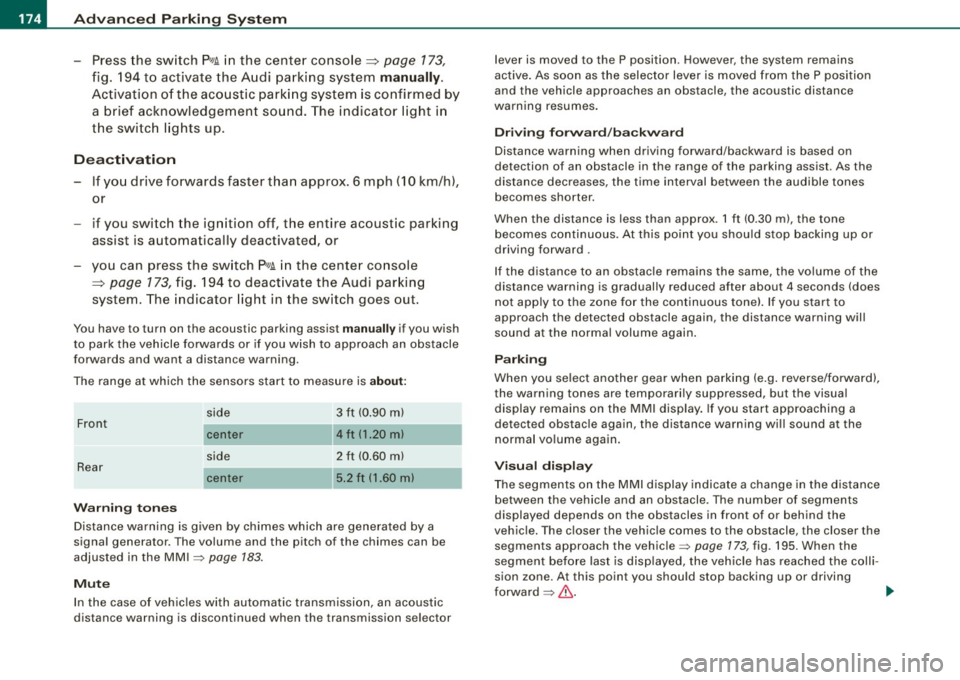
The acoustic parking assist gives an acoustic and visual
signal when obstacles are detected, and the rear-view
camera provides further aid when parking .
•
Activation
Fig. 194 Section from
center console: switch
for acoustic parking
assist
Fig . 195 MMI display:
visual display of
distance to a detected
obstacle
When you engage reverse gear, the Audi parking system
is activated automatically, or .,.
Vehicle care I I irechnical data
Page 176 of 408
• .___A_ d_v_ a_ n_c_ e_ d_ P _a_r_k _i_ n -=g,_ S-=y"- s_ t_ e_ m __________________________________________ _
-Press the sw itch PJJJ! in the cente r console ~ page 173,
fig . 194 t o activate the A udi pa rking system m anually .
Activation of the acoustic parking system is confirmed by
a brief acknowledgement sound . The indicator lig ht in
the switch lights up.
D ea ctivation
If you drive forwards faster tha n approx. 6 mph (10 km/h),
or
- if you switch the ign ition off, the entire acoustic parking
assist is automatically deactivated, or
- you can press the sw itch
P111! i n the center console
=> page 173, fig. 194 to deact ivate the Audi parking
system. The indicator light in the switch goes out.
You have to turn on the acoustic parking assist m anuall y if you wish
to park the vehicle forwards or if you w ish to approach an obstacle
forwards and want a distance warning .
The range at which the sensors start to measu re is
about:
Front
Rear
W arning ton es side
cen
te r
side
cen ter 3 ft (0
.90 ml
4ft
(1.20 ml
2 ft (0.60 ml
5 .2 ft (1.60 ml
Distance warning is given by chimes which are generated by a
signal generator . The volume and the pitch of the chimes can be
adjusted in the MMI => page
183.
Mute
In the case of vehic les with automa tic transmission, an acoustic
distance warning is discontinued when the transmission selector l
ever is moved to the P position. However, the system remains
active . As soo n as the selector lever is moved from the
P posi tion
and the vehicle approaches an obstacle, the acoustic distance
warning resumes .
Dri ving fo rward/ba ckvv ard
Distance warning when driving forward/backward is based o n
detection of an obstacle in the range of the parking assist . As the
distance dec reases, the time interval between the audible tones
becomes shorter.
When the distance is less than approx . 1 ft (0.30 m), the tone
becomes continuous. At this point you shou ld s top backing up or
driving forward .
If the distance to an obstac le remains the same, the vo lume of the
distance warning is gradually reduced after about
4 seconds (does
not app ly to the zone for the cont inuous tone). If you sta rt to
approach the detected obstacle again, the distance warning will
sound at the normal volume again .
P a rk ing
When you selec t ano ther gear when parki ng (e .g . reverse/forward),
the warning tones are temporarily suppressed, but the visual display remains on the MMI display . If you start approaching a
detected obstacle again, the distance warning wi ll sound at the
normal vo lume again .
Visual disp lay
T he segments on the MMI display indicate a change in the distance
between the vehicle and an obstacle . The number of segments
displayed depends on the obstacles in front of or behind the
vehic le. The c loser the vehic le comes to the obstacle, the closer the
segments approach the vehic le => page
173 , fig. 195. When the
segment before last is disp layed, the veh icle has reached the colli
sion zone. At this point you should stop backing up or driving
forward =>
&,. ..,.
Page 177 of 408
Advanced Parking Syst em -
---------------=--=--
The image in the visua l display can be switched off on the MMI
display ::::> page
185. The acoustic distance warning remains active.
If you press a function button on the MMI termina l, the visual
display disappears . Manually switching the parking assist on again
via the
p ,y 1 switch shows the visual image on the MM I display aga in.
Further information regarding the MMI terminal is included in the
MMI user's manual.
R ear-view camera (rear view )
The rear-view camera picture::::> page 178, fig. 200 appears on the
MM I display as a mirror image. The rear -view camera picture has
orientation lines and marked s urfaces projected into it as an aid to
the parking process ::::> page
176. The red line in the picture
::::> pag e
176, fig. 196 or ::::, page 176, fig. 197 indicates th e collis ion
area . You shou ld stop backing up, preferably before you reach this
point ::::>
&.
If your vehicle is close to an obstacle, the visual distance display
a lso appears in the picture from the rear -view camera . This superim
posed display is intended to help d isplay the relevan t critica l vehicle
area.
I f the visual d isplay is shown on the MMI display and you press the
control button with the Rear view function::::> page
173, fig. 195, the
pictu re from the rear -v iew came ra is displayed.
If the picture from the rear -view camera is s hown a nd you press the
control button w ith the Graphic function ::::, page
178, fig. 200, the
visual display is shown.
T he picture from the rear -view camera can be switched off on the
M MI display ::::, page
185 . The acoustic distance warn ing re mains
active.
I f you press a function button on the MMI te rmina l, the rear-view
camera p icture disappea rs. The rear -v iew came ra picture reappears
the next time you park. But the picture from the rear -view camera
can also be shown aga in on the MM I display by ma nually sw itch ing
off and on with the
P •1A switch . Further information regarding the
MMI terminal is i ncluded in the MM I user's ma nual.
Controls and equip
ment
& WARNING
• Sensor s have dead spaces in which obje cts cannot be
detected. Be e spe cially careful to check for small children and
an imals before ba cking up . Small children and animals will not
always be detected by the sensors.
• The Audi parking system is not a substitute for being careful
and alert when backing up. Be e spe cially careful during parking
and similar maneuvers . Always watch where you are dri ving and
make sure that nothing is in the way.
• Remember that low ob sta cles which have already been
s ignaled may pass below the system' s sen sing zone when the
v ehi cle is ba cking up . The fa ct that the signal stops doe s not mean
that you have cleared the obstacle . When the signal stops , impact
is imminent . Obje cts su ch as trailer hit che s, chain s, narrow posts
or fences covered by a thin l ayer of paint may not always be
detected by the sy stem. They can still damage your vehicle
without warning .
• Alway s make sure that the volume and frequency of the chime s
is adjusted so that you can eas ily hear the acoustic distance signal
even if the radio is playing , the air -conditioner blower is on High or
there is a high level of out side noise .
- Check the setting s whenever someone else has dri ven the
vehicle before you.
• Improper relian ce on the Aud i parking sy stem can cau se colli
sions and serious per sonal injury .
- Never rely only on parking assi st when ba cking up .
- Always check rear view mirrors to make sure it is safe to back
up .
[ i ] Tips
• The rear -view camera picture is available as soon as the MMI
Disp lay or the MMI is swi tch ed o n, or the start -up phase is
completed.
I • •
Page 178 of 408
• ..__A_ d_v _ a_ n_c _e _ d_ P_ a_r _k _in ---== g'-- S...:y _ s_ t_ e_ m ___________________________________________ _
• Keep the sensors in the rear bumper and the rear-view camera
lens clean and free of snow and ice, so that the Audi parking system
can work properly. P lease follow the additional notes on
=>
page 186 . •
Ap plie s to v ehic les: wit h Advance d Par kin g Syst em w it h re ar v ie w c am era
Rear -view camera (Rear View)
The rear -vie w camera picture, appearing in the MM/
Dis play, sh ows the area behind the vehicle .
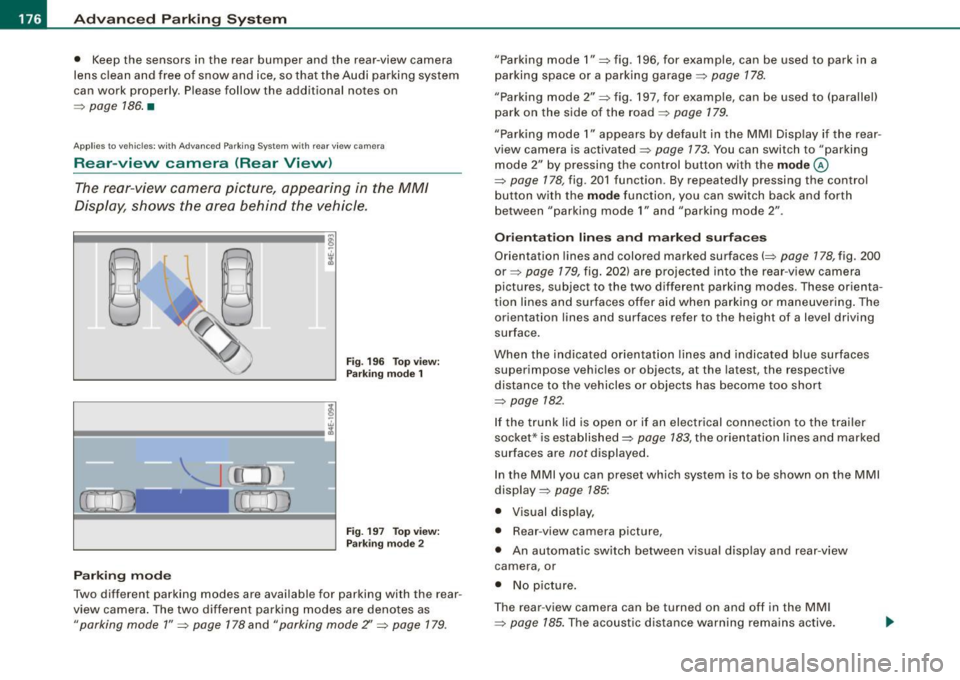
Fig . 19 6 Top view:
Par king mode 1
Fig. 19 7 To p view:
P arki ng m od e 2
Parking m od e
Two different parking modes are available for parking with the rear
view camera . The two different parking modes are denotes as
"parking mode 1 " => page 178 and "parking mode Z' => page 179.
"Parking mode 1 " => fig . 196, for example, can be used to park in a
parking space or a parking garage=>
page 178.
"Parking mode 2" => fig . 197, for example, can be used to (parallel)
park on the side of the road =>
page 179.
"Parking mode 1" appears by default in the MM I Disp lay if the rear
view camera is activated=>
page 173. You can switch to "parking
mode
2" by pressing the control button with the mode ©
=> page 178, fig . 201 function. By repeated ly pressing the control
bu tton with the
mode function, you can switch back and forth
between "parking mode
1" and "parking mode 2" .
Or ientat ion lines and marked surface s
Orientation lines and colored marked surfaces(=> page 178, fig. 200
or=> page 179 , fig. 202) are projected into the rear -view camera
pictures , subject to the two different parking modes . These orienta
t ion lines and surfaces offer aid when parking or maneuvering . The
orientation lines and surfaces refer to the height of a level driving
surface.
When the indicated orientat ion lines and indicated blue surfaces
superimpose vehicles or objects, at the latest, the respective
distance to the vehicles or objects has become too short
=>
page 782 .
If the t runk lid is open or if an electrical connection to the trailer
socket* is established=>
page 783, the orientation lines and marked
surfaces are notdisplayed .
In the MMI you can preset wh ich sys tem is to be shown on the MMI
display =>
page 785:
• Visual disp lay,
• Rear -view camera picture,
• An automatic sw itch between v isual disp lay and rear -view
camera , or
• No p icture .
T he rear -view camera can be turned on and off in the MM I
=>
page 185. The acoustic distance warni ng remains active.