check transmission fluid AUDI S8 2009 Owners Manual
[x] Cancel search | Manufacturer: AUDI, Model Year: 2009, Model line: S8, Model: AUDI S8 2009Pages: 408, PDF Size: 91.63 MB
Page 31 of 408

If a component is malfunctioning or if the need for an urgent repair
has been detected, this will appear in the instrument cluster display.
You will also hear an audible warning tone. The displays are color
coded in either red or yellow depending on their level of priority.
A red symbol means
Danger, a yellow symbol indicates Warning . In
certain situations, information message for the driver appear in
addition to the red and yellow symbols.
Function test: automatic transmission
The Auto-Check Control will automatically perform a test each time
you switch on the ignition. With the selector lever in
P or N, the
following message appears in the display:
When stationary apply foot brake while selecting gear.
When you a select a different gear (for example: R, D, etc.), the
message will disappear and the Auto-Check function is displayed.
I f there is a malfunction, then the malfunction message will appear
about 15 seconds after the you start the vehicle. At the same time
you will hear a warning tone. •
Driver information messages
Driver information messages are shown in the instrument
cluster display in addition to the red and yellow symbols.
Controls and equip
ment
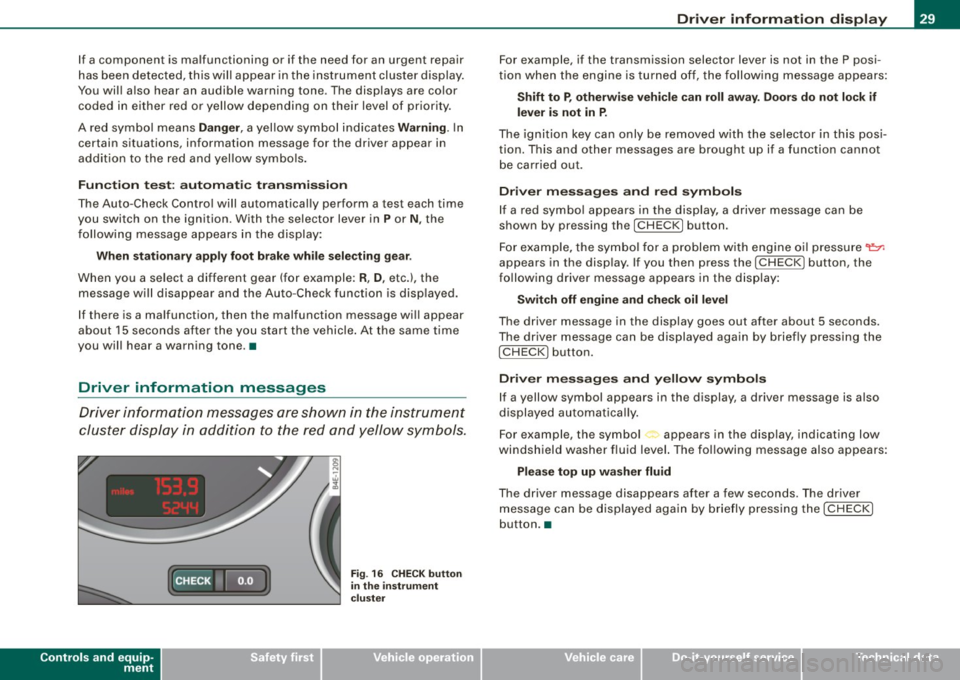
Fig . 16 CHECK button
in the instrument
cluster
Driver information display
For example, if the transmission selector lever is not in the P posi
tion when the engine is turned off, the following message appears:
Shift to P, otherwise vehicle can roll away. Doors do not lock if
lever is not in P.
The ignition key can only be removed with the selector in this posi
tion. This and other messages are brought up if a function cannot
be carried out.
Driver messages and red symbols
If a red symbol appears in the display, a driver message can be
shown by pressing the
I CHECK] button.
For example, the symbol for a problem with engine oil pressure~
appears in the display. If you then press the !CHECK ] button, the
following driver message appears in the display:
Switch off engine and check oil level
The driver message in the display goes out after about 5 seconds.
The driver message can be displayed again by briefly pressing the
I CHECK] button.
Driver messages and yellow symbols
If a yellow symbol appears in the display, a driver message is also
displayed automatically.
For example, the symbol<., appears in the display, indicating low
windshield washer fluid level. The following message also appears:
Please top up washer fluid
The driver message disappears after a few seconds. The driver
message can be displayed again by briefly pressing the
I CHECK]
button. •
I • •
Page 303 of 408

_____________________________________________ C_ l_ e _a_ n_ in_ g_a _ n_d_ p_ r_ o_ t _e_ c_t _io _ n __ _
•
prevent it from fading. Slight color variations will develop in normal
use and are not an indication of material deterioration.
0 Note
• Never use chemical solvents (e.g. lighter fluid, turpentine),
waxes, shoe polish or similar products on Alcantara ® surfaces.
• To avoid damage, have stubborn stains removed by a commer
cial cleaning specialist.
• Do not use brushes, stiff sponges or similarly abrasive cleaning
aids .•
Safety belts
Only well-maintained safety belts work reliably when
needed.
- Keep belts clean.
- For cleaning, use a mild soap and water solution . Let
belts dry thoroughly and away from direct sunlight .
- Do not allow inertia reel safety belts to retract before
they are completely dry.
- Check the condition of your safety belts
regularly.
Heavily soiled safety belts may not retract properly.
& WARNING
Damaged safety belts can break in a crash.
• Anything that might damage your safety belts could mean that
you and your passengers would not be adequately protected in an
accident.
• Safety belt performance depends on correct installation. Never
remove belts from the vehicle to clean them.
& WARNING (continued)
• Do not use chemical cleaning agents, bleach or dyes. They have
corrosive properties which weaken the webbing.
• When cleaning your safety belts, inspect them for damage. If
you discover damage, see your Audi dealer.
• Always read and heed all WARNINGS and other information
~ page290. a
Engine compartment
Be especially careful when cleaning the engine compart
ment.
Always switch off the ignition before cleaning the engine ~ &.
Plenum panel
Remove leaves from the plenum panel in front of the windshield
under the engine hood. This prevents the water drain holes from
becoming blocked, and it prevents debris from entering the vehicle
interior through the heating and ventilation ducts.
Corrosion protection
The engine compartment and transmission have been corrosion
protected at the factory.
Good anti -corrosion treatment is very important, particularly in the
winter. If the vehicle is frequently driven on salt treated roads, the
entire engine compartment and plenum panel should be thor
oughly cleaned at the end of winter and retreated to prevent salt
damage. At the same time, the underside of the vehicle should be
washed as well.
If the engine compartment is cleaned at any time with grease
removing solutions
2 l, or if you have the engine washed, the anti
corrosion treatment is almost always removed as well. It is therefore .,_
21 Use only th e correct cleaning solut ions. N ev er us e gasolin e or di ese l fu el.
Vehicle care I t •
Page 393 of 408

______________________________________________ A_ l_,_ p _h_ a_ b_e _t_i c_ a _ l _in _ d_e _ x __ _
Weight-sensing mat .... .... . ... .. 246
When must the system be inspected?
231
Aircraft Transporting your vehicle .. .... .... 371
All Wheel Drive .. .... ....... .... .... 275
Alloy wheels ... .... .... .... ... .... .. 295
All -whee l drive
Winter tires .. ..... ... .... ..... .. . 343
A lternator
See Generator .... .... ... ..... ... . 18
Anti-freeze
See Engine coolant . ...... ..... .. . 316
Anti-lock brake system How the ABS system works . .... ... 274
Warning/indicator lights ... ... .... .. 21
Anti -Slip Regulation System (ASR)
How the system works ............ 272
An ti-t heft systems
Anti -theft ala rm system ...... .... .. 60
Electronic immob ilizer ... .. .... .... 49
Ashtray Front ... ...... ...... .... ..... ... 106
Rear .... ... .. .... .... ... .... .... 107
ASR How the Anti-Slip Regulation System works .. .... .... .... ... .... .... 272
Audi Service Repair Manua ls and Literature
382
AUTO mode AC climate con tro l .. .. .... ... .... . 1 17
Auto Safety Hotline . .... ........ .... . 209
Auto -Check Contro l .... ... .. .... .... .. 28
Controls and equip
ment Safety first
Automatic belt
retractor ... .. ...... ... 215
Automatic car wash
See Washing ..... .... .... .... .... 291
Au tomatic Shift Lock (ASU .... .... .... 168
Automatic transmission 6-speed automatic transmission .... 166
Automatic Shift Lock (ASU .... ... .. 168
Driving ............. ............ . 166
Dynamic sh ift program .... ........ 169
Emergency release for selector lever 171
Fa il- safe mode . ...... .... .... .... 171
I gnition key safety lock . ...... .... . 130
Kick -d ow n .... .... .... .... ... .... 169
Manual shift program ... .. .... .... 170
Selector lever .... .... .... .... .... 1 67
Shift buttons ... .. .... .... .... ... 1 71
Steering wheel with tiptronic .. .... . 171
Average speed . ...... .... .... .... ... . 38
Avoid damaging the vehicle .. ..... ... . 28 1
B
Background ligh ting . .... ...... ... .... 76
Battery ... .. .... ... .... .... .... .... 320
Battery location inside the luggage compartment ...... .... ... .. .... 32 1
Charging ........................ 323
I mpo rta nt warn ings when work ing o n the
battery . .... .... .... ........ ... 32 1
low ............................. 276
Replacing the battery ....... .... .. 324
State of charge ... .... .... .... .... 276
Winter operation . .... .... .... .... 320
Working on the battery .... .... .... 321 Battery vo
ltage . ... .... .. .... .... .... . 36
Before driving ... .... .... ..... .. .... 201
Blended gasoline . .... .... .... ...... . 303
Body cavity sealing .. .... .... .... ... . 296
Boos ter seat ... .. .... .... ... .... .... 253
How do I properly insta ll a b ooster sea t in
my vehic le? ............... ..... 253
Safety instructions .... .......... .. 253
Brake fluid Changing the brake fluid ... .... .... 320
Checking the brake fluid level .. ... . 319
What is the correct brake fluid level? 319
What should I do if the brake f luid warning
light comes on? ... .. .... .... .... 319
Brake system Ant i-lock brake system . ..... .. .... . 21
Brake assistant .... .... .... ....... 27 4
Brake booster ..... .... ... .... .... 274
Brake fluid .... .... .... ... .... .... 319
Brake f luid specificat ions for re fill and
replacement . .... .... .... ...... . 320
Brake light defective ... ...... ...... 26
Brake pads ....... .... .... .... ... 280
Electromechanica l parking brake .... 134
Fluid reservoir .. ...... ..... .. .... 319
How does m oisture or road salt affec t the
brakes? . .... .... .... ....... .... 272
Malfunction ............ ... .. ..... 30
Warning/indicator lights .... .... .... 22
Worn brake pads symbol ........... 34
Break -in period .. .... .... .... .... ... 279
Brake pads ... .... .... .... ...... . 280
Tires . .... .... .... .... ... .... .... 279
Bu lbs . ... .... .... .... ... .... ...... . 36 4
Vehicle operation Vehicle care Do-it-yourself service Technical data