radio AUDI S8 2009 Owners Manual
[x] Cancel search | Manufacturer: AUDI, Model Year: 2009, Model line: S8, Model: AUDI S8 2009Pages: 408, PDF Size: 91.63 MB
Page 26 of 408

Driver informati on displ ay
Driver information display
Introduction
General notes
The driver information display inside the instrument
cluster provides you, the driver, with much useful infor
mation.
Fig . 8 Inst rum ent
c lu ster : cente r dis pl ay
Information from the Driver Information System is shown in the
display in the cen ter of the instrument clust er.
When you turn on the ignition and while you are driving, some func
tions and vehicle components are scanned for their operating status. Malfunctions or required service procedures are signalled
audibly and shown by red and yellow ligh ted symbols and
reminders to the driver in the display.
The driver is also shown information about radio and CD operation and directions fo r the navigation system . You can find additional
information on these subjects in the MMI manual.
The Driver Information System provides the fol lowing functions : Sound system display
~ page25
Outside air temperature ~ page25
Digital speedometer ~ page25
Door open indicator ~ page26
Defective light bulb ~ page26
Service interval display ~ page27
Au
to Check syst em ~ page28
Driver information ~ page29
Speed limiter ~ page28
Trip computer ~ page38
Tire pressure monito ring* ~ page 41
Selector lever pos ition ~ page 167
[ i ] Tips
In the event of a malfunction either a red or yellow icon appears in
the display. Red symbols indicat e
Danger ~ page 30. Yellow
symbols ind icate a
Warning ~ page 34. •
Page 27 of 408
Sound system display
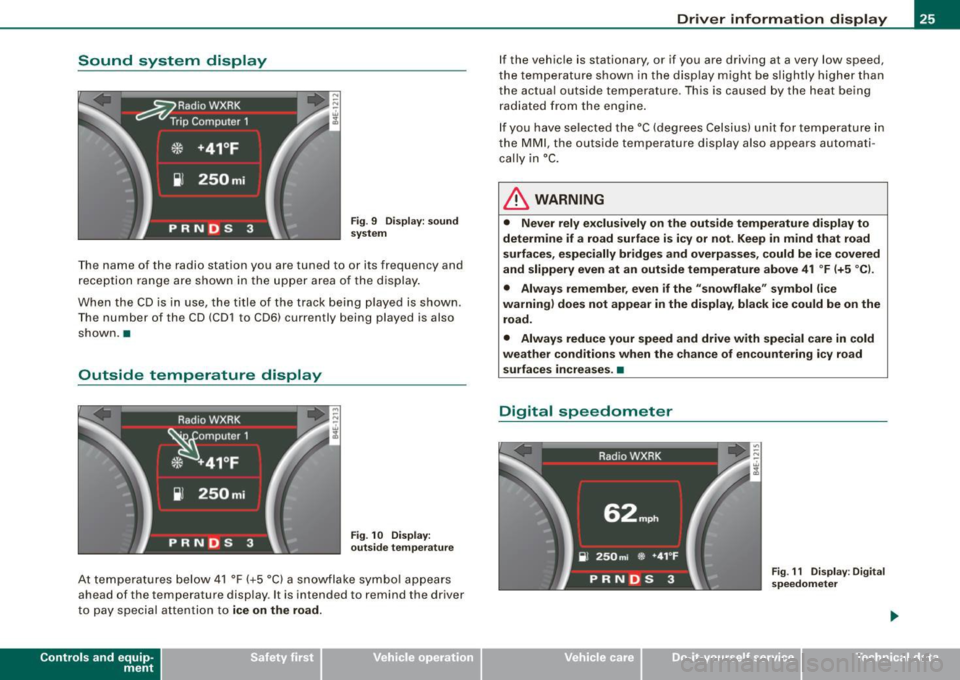
Fig. 9 Displ ay: s ound
system
T he name of the radio stat ion you are tuned to or its frequenc y and
r ece ption range are s how n in the upper area o f the di sp la y.
W hen the CD i s in us e, th e title of the tr ack being played is s how n.
T he nu mber of the CD (CD 1 to CD6) currently being played is also
sho wn. •
Outside temperature display
Fig . 1 O Display:
out side temperature
At t empe ratu re s belo w 41 °F ( +5 °Cl a s nowfl ake s ymb ol a ppea rs
ahead of the temperatu re display . It is intended to remind the driver
t o pay sp ecial a tten tio n to
ice on the road.
Con tro ls and eq uip
ment
Driver information display
I f th e ve hic le is stationary, or if you a re driving at a v ery low spe ed,
t he te mper atu re sho wn in the d isplay mig ht be sli ght ly hig her th an
th e actua l outside t em perature . T h is is caused by the heat be ing
r ad ia ted fr om the e ngi ne.
If you h ave se lecte d the °C (deg rees Celsiu s) u nit for t em pera ture in
the MM I, the outs ide tem perature display also appears automati
cally in °C.
& WARNING
• Never rely exclusively on the outside temperature display to
determine if a road surface is icy or not. Keep in mind that road
surfaces , especially bridges and overpasses , could be ice covered
and slippery even at an outside temperature above 41 °F (+5 °C) .
• Always remember, even if the "snowflake " symbol (ice
warning) does not appear in the display , black ice could be on the
road .
• Always reduce your speed and drive with special care in cold
weather conditions when the chance of encountering icy road
surfaces increases .•
Digital speedometer
Vehicle care I I
Fig . 1 1 Display: Digital
speedometer
irechnical data
Page 44 of 408
Driver inf ormati on displ ay
The warning light n also illuminates in the case of a system
mal fu n ction.
The system continuously receives radio signals from sensors located inside each tire .
Be aware that tire pressure is also dependent on the temperature of
the tire. For every 18 °F (10 °C) increase in tire temperature, tire pres
sure increases by about
1 .5 psi (0.1 bar). The tire warms up while the
vehic le is moving and tire pressure rises. So you should adjust tire
pressure only when the tires are
cold, when the temperature of the
tires is roughly the same as the ambient air temperature .
In order to keep the tire pressure monitoring system properly cali
brated, tire pressure on al l four tires and on the spare tire * should
be checked at regular intervals, adjusted if necessary and sav ed in
the proper setting (recommended pressure) =>
page 44.
The tire pressure is shown on the tire pressure label. On USA vehi
cles, the tire pressure label is located on the driver's side B -pi llar. On
Canada vehicles, the tire pressure labe l is located either on the
driver's side B -pil lar or inside the fuel filler flap . The tire pressu re
label lists the recommended cold t ire inflat ion pressures for the
vehic le at its maximum capacity weight and the tires that were on
your vehicle at the time it was manufactured . For recommended tire
pressures for normal load conditions, please see chapter
=>
page 330 .
The current temperatures and pressure of your tires can be viewed
i n the MMI =>
page 44.
& WARNING
• When the t ire pre ssure moni toring sy st em warning light i s lit ,
one or more of your tir es is s ignifi cantly under -infl ate d . Y ou s hould
s to p and che ck your tir es as soon as poss ible, and infl ate th em to
th e p rop er p ress ure as i ndicated on the vehicle's tire press ure
lab el
=> page 3 30 . Driving on a s ig n ific antly und er-inflated tir e
ca uses the t ire to overheat an d ca n le a d t o tir e fai lur e. U nde r- infl a-
& W ARN IN G (c ontinued )
tion a lso is likel y to imp air t he veh icle 's handling and sto pping
ability .
• Do not adju st t ire press ure when t ire temper atu re i s excessiv e.
T hi s c ould le ad to seriou s tire dam age and even cause the ti re to
bur st, w ith the additional d ange r of an accident .
tread life.
[ i ] Tips
• Each tire, includin g the sp are*, should be checked monthly when
cold and set to the recommended inflation pressure as specified on
the tire pressure label=>
page 330.
• T he tire pressure monitoring system he lps the d river to keep an
eye on tire pressures . But the dr iver st ill has the responsibility for
maintaining the correct tire pressure .
• Tire pressure must only be adjusted when the temperature of the
tires is about the same as ambient air temperature.
• When tires are replaced, the sensors and valves shou ld not be
detached or exchanged . Only the valve core needs to be replaced
and, if necessary, the va lve and the wheel electronics replaced .
• If you should put different whee ls and tires on your vehicle (e.g .
winter wheels and tires), you must be certain that the wheels and
tires are compatible with the tire pressure monitoring system. Otherwise the system will register a ma lfunction and a fault
message will be displayed. For more information , contact your
authorized Audi dea ler.
• Adjust the tire pressure and store the pressure in the tire pres
sure mon itor ing system to the load you are carrying=>
page 330.
• For Declaration of Compliance to United States FCC and Industry
Canada regulations =>
page 385. •
Page 48 of 408
Driver informati on displ ay
Ap plies to vehicles : w ith n,e pre ss ure monito ring syst em
Malfunctions
A malfunction can have various causes.
Fi g. 2 9 Dis p lay :
S ystem m alfun ction
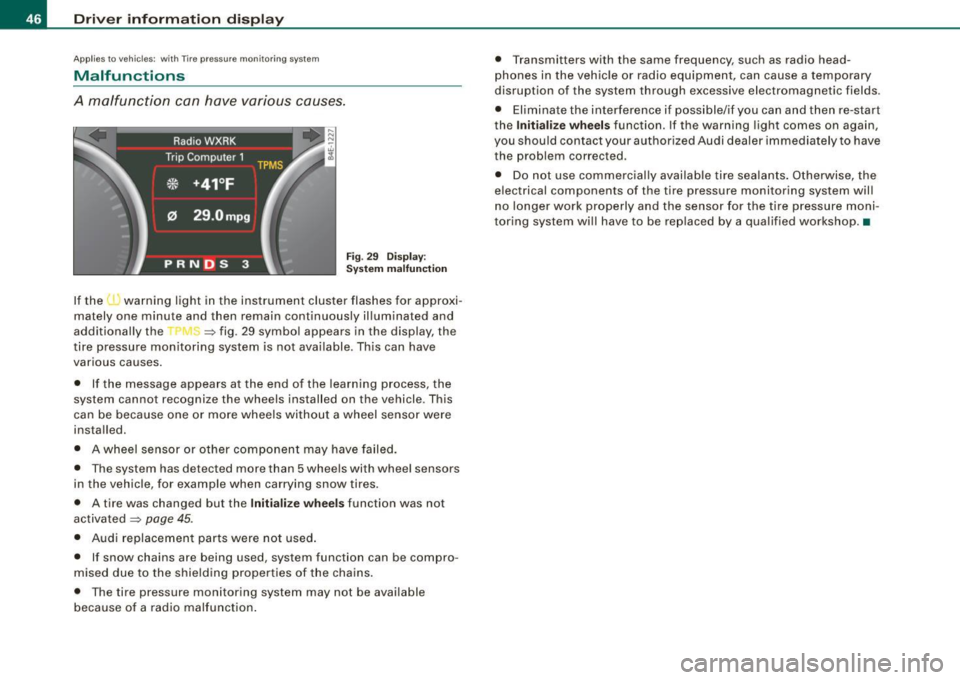
If the l · warning light in the instrument cluster flashes for approxi
mately one minute and then remain continuously il luminated and
additional ly the
-r J ~ fig . 29 symbo l appears in the display, the
tire pressure monitoring system is not ava ilable . Th is can have
various causes.
• If the message appears at the end of the learning process, the
system cannot recognize the wheels installed on the vehicle. This
can be because one or more wheels without a wheel sensor were
installed.
• A wheel sensor or other componen t may have failed.
• The system has detected more than 5 whe els with wheel sensors
in the vehicle, for example when carrying snow tires.
• A tire was changed but the
Initiali ze wheels function was not
activated
=:> page 45.
• Audi replacemen t parts were not used .
• If snow chains are being used, system function can be compro
mised due to the shielding properties of the chains.
• The tire pressure monitoring system may not be available
because of a radio malfunction . • T
ransmitters with the same frequency, such as radio head
phones in the vehicle or radio equipment, can cause a temporary
disruption of the system through excessive electromagnetic fields .
• Eliminate the interference i f possible/if you can and then re-start
the
I n itia lize w heel s function . If the warning light comes on again,
you shou ld contact your authorized Audi dealer immediately to have
the problem corrected .
• Do not use commercial ly availab le tire sealants . Otherwise, the
electrical components of the tire pressure monitoring system will
n o l onger work properly and the sensor for the tire p ressure moni
toring system wi ll have to be replaced by a qua lified workshop .•
Page 135 of 408

On the road -
----------------
& WARN IN G ( continu ed )
required to steer or bra ke the vehicle . If you are not prepa red , th is
c ould re sult in a collision and serious per sonal in jur y.
• For your safet y, move the sele ctor lever t o the P po sition , then
turn off the engine . Otherwise the veh icle could inadvertently roll
away .
• After t urning off th e engine , the r adi ator f an c an come on and
run for up to 10 mi nute s -even if the i gnition i s switc hed off . Like
wise , the fan could come on if the temperature in the engin e
c omp artment r ais e s due to heat build up or if you le ave the vehi cle
s tandin g in direct sunlight .
0 Note
After driving at high engine load, heat can build up in the engine
compartment after you have turned off the engine. This can damage
t he engine . Let the veh icle stand and run in idle for about 2 minutes
before turning off the engine .•
Ap plies to ve hicles : w ith Conve nie nce key
Driver's messages in the instrument cluster
Messages appear in the instrument cluster to let the
driver know if something is missing or if some thing must
be done.
No ke y identified
This message appears when you press the [ START ] button, but
there is no remote control key insi de the vehicle or if the system
does not recogni ze the key . For example, if your key is
shielded by
an object or
encased, i.e . inside an a lum inum briefcase, the signal
from the key cannot be detected. Electronic devices such as cell
phones can also interfere with the radio signal.
Controls and equip
ment P
re ss br ake pedal to start engine
This message appears when you press the I S TART] button when
starting the engine but you have not depressed the brake pedal.
En gage N or P to start e ngine
This message appears when you start the engine but the selector
lever is not in the P or N position. The e ngine can be sta rted o nly if
the selector lever is in one of these two positions.
.!., Key not in vehicle
This message appears together with the ..Z. symbol when the
remote control key is removed from t he vehicle whi le the eng ine is
running . This is to remind you that you should not continue your trip
without you r key .
If the key is no longer inside the veh ic le when you turn off the
engine, you will not be able to switch on the ignition or restart the
engine. Also, you will not be ab le to lock the vehicle from the
outside.
S hift to P, othe rwis e vehi cle ca n roll a way. Door s do not lo ck i f lev er
is not in P.
This message appears for your safety together wit h an aud ib le
warning signa l when you press the [S TO P] button but the selector
lever is not in the P position and you open the driver 's door . Move
the selector lever into P, otherwise the vehic le could roll away. In
addition, you w ill not be able to lock the vehicle with either the lock
button located on the door handle or the remote control.
T o engage steering lo ck, press a nd hold STOP button
This message appears for your personal safety if you switch off the
eng ine and the ignition by pressing the
I S TOP ] button and then
open the driver's door . In this case, the steering will still not be
locked . The stee ring wheel wi ll lock :
• I f you press the
I STOP ] button for longer than 1 second.
• I f you lock the vehicle from the outside .•
I • •
Page 177 of 408
Advanced Parking Syst em -
---------------=--=--
The image in the visua l display can be switched off on the MMI
display ::::> page
185. The acoustic distance warning remains active.
If you press a function button on the MMI termina l, the visual
display disappears . Manually switching the parking assist on again
via the
p ,y 1 switch shows the visual image on the MM I display aga in.
Further information regarding the MMI terminal is included in the
MMI user's manual.
R ear-view camera (rear view )
The rear-view camera picture::::> page 178, fig. 200 appears on the
MM I display as a mirror image. The rear -view camera picture has
orientation lines and marked s urfaces projected into it as an aid to
the parking process ::::> page
176. The red line in the picture
::::> pag e
176, fig. 196 or ::::, page 176, fig. 197 indicates th e collis ion
area . You shou ld stop backing up, preferably before you reach this
point ::::>
&.
If your vehicle is close to an obstacle, the visual distance display
a lso appears in the picture from the rear -view camera . This superim
posed display is intended to help d isplay the relevan t critica l vehicle
area.
I f the visual d isplay is shown on the MMI display and you press the
control button with the Rear view function::::> page
173, fig. 195, the
pictu re from the rear -v iew came ra is displayed.
If the picture from the rear -view camera is s hown a nd you press the
control button w ith the Graphic function ::::, page
178, fig. 200, the
visual display is shown.
T he picture from the rear -view camera can be switched off on the
M MI display ::::, page
185 . The acoustic distance warn ing re mains
active.
I f you press a function button on the MMI te rmina l, the rear-view
camera p icture disappea rs. The rear -v iew came ra picture reappears
the next time you park. But the picture from the rear -view camera
can also be shown aga in on the MM I display by ma nually sw itch ing
off and on with the
P •1A switch . Further information regarding the
MMI terminal is i ncluded in the MM I user's ma nual.
Controls and equip
ment
& WARNING
• Sensor s have dead spaces in which obje cts cannot be
detected. Be e spe cially careful to check for small children and
an imals before ba cking up . Small children and animals will not
always be detected by the sensors.
• The Audi parking system is not a substitute for being careful
and alert when backing up. Be e spe cially careful during parking
and similar maneuvers . Always watch where you are dri ving and
make sure that nothing is in the way.
• Remember that low ob sta cles which have already been
s ignaled may pass below the system' s sen sing zone when the
v ehi cle is ba cking up . The fa ct that the signal stops doe s not mean
that you have cleared the obstacle . When the signal stops , impact
is imminent . Obje cts su ch as trailer hit che s, chain s, narrow posts
or fences covered by a thin l ayer of paint may not always be
detected by the sy stem. They can still damage your vehicle
without warning .
• Alway s make sure that the volume and frequency of the chime s
is adjusted so that you can eas ily hear the acoustic distance signal
even if the radio is playing , the air -conditioner blower is on High or
there is a high level of out side noise .
- Check the setting s whenever someone else has dri ven the
vehicle before you.
• Improper relian ce on the Aud i parking sy stem can cau se colli
sions and serious per sonal injury .
- Never rely only on parking assi st when ba cking up .
- Always check rear view mirrors to make sure it is safe to back
up .
[ i ] Tips
• The rear -view camera picture is available as soon as the MMI
Disp lay or the MMI is swi tch ed o n, or the start -up phase is
completed.
I • •
Page 179 of 408
__________________________________________ A_ d_v _a_ n ___ c...;.e ...;.d _ P_a_ r_ k_ i_n ..::g :::..- S~y~ s::.. t::.. e::.. m:..:...:.._...J_
& WARNING
• The rear -view camera has blind spots , in whi ch objects cannot
be detected . Be especially careful to check for small children and
animals before ba cking up . S mall children and animals will not
always be detected by the sensors .
• The Audi pa rking system is not a substitute for being careful
and alert when backing up. Be especially careful during parking
and similar maneuvers . Always watch where you are driving and
make sure that nothing is in the way.
• Remember that low obstacles which have already been
signaled may pass below the system's sensing zone when the
vehicle is backing up . The fact that the signal stops does not mean
that you have cleared the obstacle . When the signal stops , impact
is imminent . Objects such as trailer hitches , chains , narrow posts
or fences covered by a thin layer of paint may not always be
detected by the system. They can still damage your vehicle
without warning .
• Always make sure that the volume and frequency of the chimes
is adjusted so that you can easily hear the acoustic distance signal
even if the radio is playing , the air -conditioner blower is on High or
there is a high level of outs ide noise .
- Check the settings whenever someone else has driven the
vehicle before you.
• Improper reliance on the Audi parking system can cause colli
sions and serious personal injury .
- Never rely only on parking assist when changing backing up .
- Always check rear view mirrors to make sure it is safe to back
up .
[ i ) Tips
• B efore park ing with the rear -vi ew ca mera , the Adaptive Air
S uspe nsi on s tand ard or automatic m ode mus t be switc h ed on
=>
pa ge 21 .
Con tro ls and eq uip
ment • T
he rear -view camera picture is avai lable as soon as the MMI
Di spl ay or the M MI is swi tch ed on, or the sta rt-up p hase is
completed.
• In order for th e rear-view ca mera to func tion pr operly, the
camera lens=>
page 173, fig . 193 must be k ept clean, and free of
sno w an d ice . Please follo w t he ad dit io nal no tes on=>
pag e 186.
• T he came ra cove rag e angle chang es when the trunk lid is op en.
There fore , th e rear-vi ew came ra picture is dis play ed wit hout o rien
ta tion lines and withou t blue surfaces .
• O bserve a nd follow th e notes o n to wi ng m ode on =>
page 183 . •
A pplie s to veh ic les : w it h Adva nce d Park in g Sy ste m w it h re ar view c amera
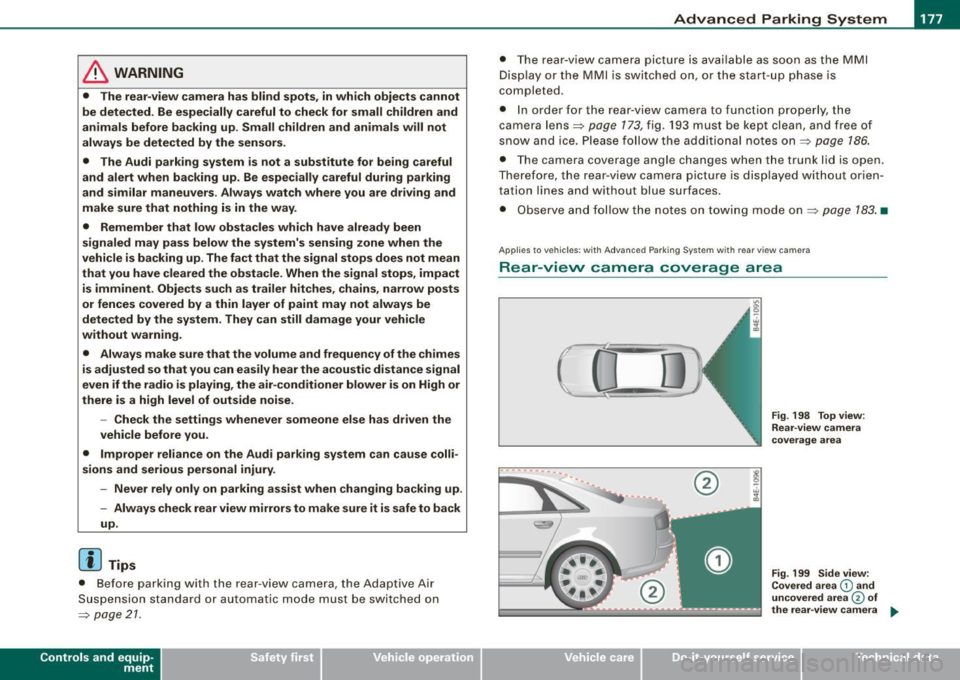
Rear -view camera coverage area
0
-- ·---.... __ --
Vehicle care I I
®
Fig . 198 Top view :
Re ar-v iew came ra
coverage area
Fig . 199 Side view:
Covered area
G) and
uncovered a rea
© of
the rea r-view camera ...
irechnical data
Page 186 of 408

• ..__A_ d_v _ a_ n_c _e _ d_ P_ a_r _k _in ---== g'-- S...:y _ s_ t_ e_ m ___________________________________________ _
The volume and frequency settings are automatically stored and
assigned to the remote master key.
& WARNING
Always make sure that the volume and frequency of the chimes is
adjusted so that you can easily hear the acoustic distance signal
even if the radio is playing, the air-conditioner blower is on High or
there is a high level of outside noise. Check the settings whenever
someone else has driven the vehicle before you. •
Applies to veh icles: with Advanced Parking System with rear view ca me ra
Adjusting the chimes -option 2
The menu for adjusting signal sounds can also be called
up via the control button with the "settings" function.
Fig . 208 MMI Display:
Rear-view camera
picture Fig
. 209 MMI Display:
Audi parking system
-Activate the Audi parking system:::::, page 173 . The rear
view camera picture appears in the MMI Display.
- Select
Settings :::::, fig. 208. The menu for adjusting Front
volume, Front frequency , Rear volume
and Rear
frequency
appears in the MMI Display:::::, fig. 209.
Select
Front volume to change the volume of the front
audible signal generator, or
Rear volume to change the
volume of the rear audible signal generator.
- Select
Front frequency to change the frequency of the
front audible signal generator or
Rear frequency if you
want to change the frequency of the rear audible signal
generator.
- Select
Settings :::::, fig. 209, or
- Pressthe[RETURN]button. The rear -view camera picture
appears in the MMI Display again.
When adjusting the volume and frequency, the new setting will
sound for about 2 seconds from each audible signal generator. The
volume and frequency settings are automatically stored and
assigned to the master key with remote control. _..
Page 198 of 408
• .___H_ o_m_ e_ L_ i _n_ k_ ® __________________________________________________ _
9 . The emergency flashers will flash
thre e tim es (after
about 15-60 seconds) when the programming is
successful. Release the button on the remote control.
- To program more devices, repeat steps 4 to 9.
10. Press and hold the trained Homelink® button and
observe the indicator light @=>
page 195, fig. 215.
- If the indicator light is solid/continuous, programming is
complete and your device should act ivate when you
press and release the trained Homelink® button.
- If the indicator light b links rapidly for 2 seconds and is
then a solid/continuous light, proceed with phase 3 to
program a rolling code device .
Phas e 3: rollin g code pro gra mming
- A second person on a ladder who can safely reach the garage door opener motor is recommended.
11. Locate the "learn" button on the garage door opener
motor (refer to the operating instructions for the opener,
as the location of this button may vary by manufacturer).
1 2. Press and release the learn button on the garage door
opener motor.
- Note: once the button is pressed, the re are 3 0 seconds in
which to initiate the next step.
1 3 . On the Homelink® keypad inside the vehicle, firmly
press and hold the Homelink® button previously
programmed in phases 1 and 2 for two seconds and
release. Repeat this sequence
tw ice.
- Some vehicles may require the press/ho ld/release
sequence up to three times to comple te the tra ining
process .
-Homelink® should now activate your rolling code
equipped device.
If the 5 minute time limit is exceeded, the em erge ncy flas hers will
fl as h one time
to indicate that the process has been terminated. In
this case, repeat steps 4 through 9.
If the emergency flashers do not flash
three times (after about 15 -
60 seconds), programming was not successful. In this case, repeat
steps 4 through 9.
Remote control units for garage door openers in Canada are set to
stop transmitting radio frequency s ignals after two seconds. This
time may not be sufficient for the HomeLink® system to learn the
radio frequency signal. Perform a ll other s teps as described
above. •
Applies to vehicles: with Homelink® unive rsa l remote contro l
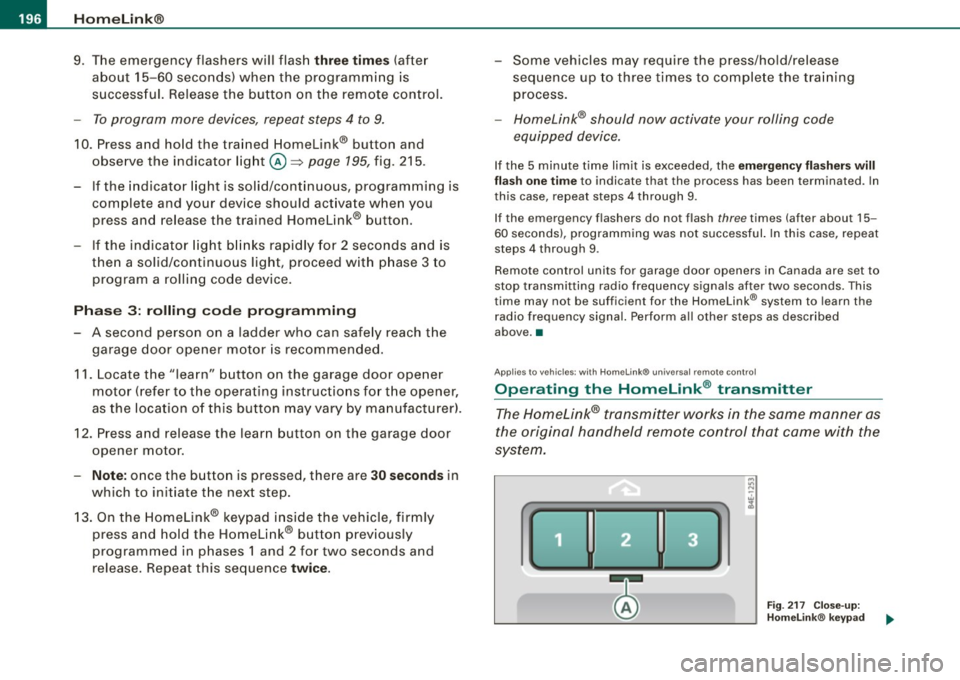
Operating the Homelink ® transmitter
The Homelink® transmitter works in the same manner as
the original handheld remote control that came with the
system.
,..
"' N
-
~
F ig . 2 17 C lose- up:
H omelink® keypad
Page 236 of 408
llffll,___A_ ir_ b_ a.::g <-- s--
• A tight tether or other strap on a rearward-facing child restraint
attached to the front passenger seat c an put too much p res su re
on the weight-sensing mat in the seat and reg ister more weight
than is actually on the seat . The heavier weight registered can
make the system work as though an adult were on the seat and
deploy the Advanced Airbag when it mu st be suppre ssed causing
serious or even fatal injury to the child .
• If, in exceptional circumstances , you must install a forward
f ac ing child restraint on the front passenger seat , always move the
seat into its rearmost position in the seat's fore and aft adjust
ment range , as far away from the airbag as possible . The ba ckrest
must be adju sted to an upright position. Make sure that the
PASSENGER AIR BAG OFF light comes on and stays on all the time
whenever the ignition is switched on .
& WARNING
• If the PASSENGER AIR BAG OFF light does not go out when an
adult is sitting on the front passenger seat after tak ing the steps
described above, make sure the adult i s properly seated and
restrained at one of the rear seat ing positions .
• Have the airbag system inspected by your Audi dealer before
transporting anyone on the front passenger seat .
[ i ] Tips
If the we ight -sens ing mat in the front passenger seat detects an
e m pty s eat, th e front airbag on the passenge r side wil l be tur ned
off , and the PASSENGER AIR BAG OFF li ght wil l stay on .•
Repair, care and disposal of the airbags
Parts of the airbag system are insta lled at many different places on
yo ur Audi. Ins tal li n g, r em oving, s ervicing o r rep airi ng a part in an area of the vehicle can damage a part of an airbag system and
p revent that sys tem from wo rking pr operly in a c ollisi on.
Th ere are some important th ings you have to know to ma ke sure
that the effectiveness of the system will not be impai red and that
discarded co mponents do no t cause i njury or po llute the enviro n
ment.
& WARNING
Improper care , servicing and repair procedures can increase the
risk of personal injury and death by preventing an airbag from
deploying when needed or deploying an airbag unexpectedly :
• Never cover , obstruct , or change the steering wheel horn pad
or airbag cover or the instrument panel or modify them in any way.
• Never atta ch any objects su ch as cup holders or telephone
mountings to the surfaces covering the airbag units .
• For cleaning the horn pad or instrument panel , use only a soft ,
dry cloth or one moistened with plain water . Solvents or cleaners
could damage the airbag cover or change the stiffness or strength
of the material so that the airbag cannot deploy and protect prop
erly .
• Never repair , adjust, or change any parts of the airbag system .
• All work on the steering wheel , instrument panel , front seats or
electrical system (including the installation of audio equipment ,
cellular telephones and CB radios , etc .I must be performed by a
qualified technician who has the train ing and special equipment
necessary .
• For any work on the airbag system, we strongly recommend
that you see your author ized Audi dealer or qualified workshop .
• Never modify the front bumper or parts of the vehicle body .
• Always make sure that the side airbag can inflate without inter-
ference :
~