warning light AUDI S8 2016 Owners Manual
[x] Cancel search | Manufacturer: AUDI, Model Year: 2016, Model line: S8, Model: AUDI S8 2016Pages: 302, PDF Size: 75.68 MB
Page 231 of 302
& WARNING
-The cooling system is under pressure and
can get very hot. Reduce the risk of scald ing
from hot coolant by following these steps.
- Turn off the engine and allow it to coo l
down.
- Protect your face, hands and arms from
escaping flu id and steam by cover ing the
cap w ith a la rge, thick rag.
- Turn the cap slowly and very carefully in a
counter-clockwise d irection while applying
light, downward p ressure on t he top of
the cap.
- T o avoid bei ng bu rned, do not spill anti
free ze or coo la nt on the e xhaust sys tem or
hot engi ne parts. Under certa in cond i
tions, the ethylene glycol in eng ine cool
ant can catch fire .
- An tifreeze is poisonous. Always store anti
freeze in its original con tainer and well ou t
of the reach of children.
- If you dra in the coolant, it m ust be ca ught
and safely stored in a proper conta iner
clearly marked "poison" .
(D Note
-Do no t add coolant if the expa nsion tank is
empty. Air cou ld enter the cooling sys tem
and damage the eng ine. If this is the case,
do not continue driving. Seek professional
ass istance.
- Coolant po llutes the environment and could
ca use an eng ine fire . Excess coolant will be
fo rced o ut through the pressure relief valve
i n the cap when the eng ine becomes hot.
- If, in an emergency, only wate r can be add
ed, the correct ratio between water and an
tifreeze¢
page 22 7 must be restored as
soon as possib le.
@) For the sake of the environment
Drained coolant sho uld not be reused. Always
dispose of used coolant while observing all
,...,
"' environmental regulat io ns. 0 J:
'SI: ,...,
Ch eck ing and Filling
Rad iator fan
The radiator fan switches on automatically by it
self .
The radiator fan is driven by the engine via the V
belt. The v iscous clutch regulates t he speed of
the fan accord ing to the temperature of the cool
ant .
An auxiliary e lectr ic radiator fan* sw itches on and
off depend ing o n coo lant temperature and other
vehicle operating conditions.
After you switch the engine off, the auxiliary fan
can continue ru nning for up to 10 m inutes -even
with the ignition off. It can even switch on aga in
later by itself¢,& , if
- the temperature of the engine coolant rises due
to the heat build-up from the engine in the en
gine compartment, or
- the engine compartment heats up beca use the
veh icle is parked in intense sunlight.
& WARNING
- To reduce the r isk of persona l injury neve r
touch the radia to r fan .
- The auxiliary e lectr ic fan is temperature
controlled and can switch on s uddenly even
when the engine is not ru nning .
- The a uxiliary radiator fan sw itches on auto
mat ically when the eng ine coolant reaches a
certa in temperature a nd will continue to run
until the coolant temperature d rops.
229
Page 232 of 302
Checking and Filling
Brake fluid
Checking brake fluid level
The brake fluid level can be checked with a quick
glance.
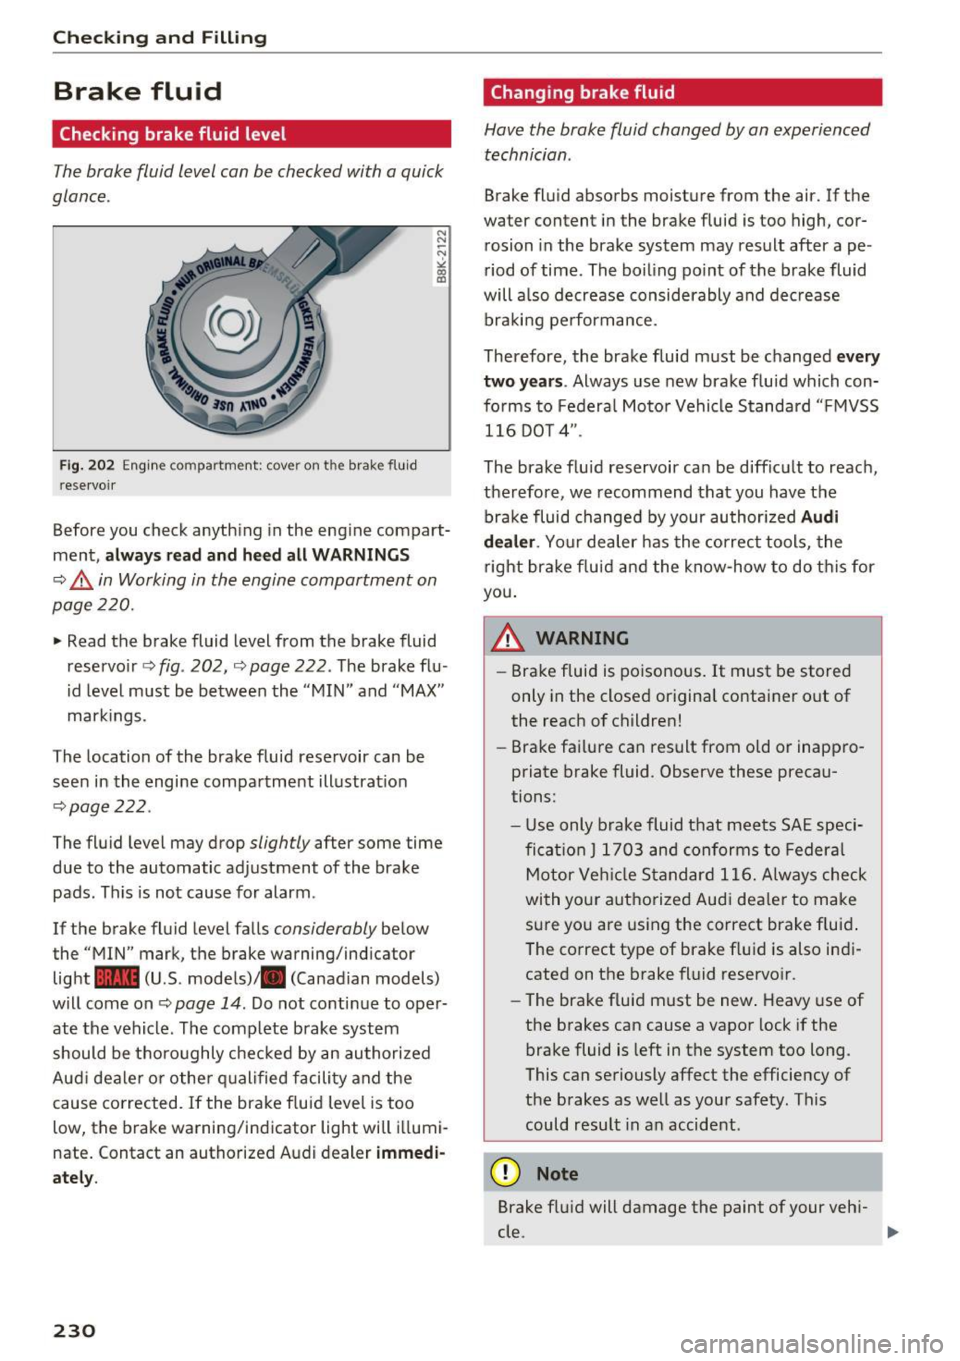
Fig. 202 Eng ine compartment: cove r o n th e brake flu id
r eservoi r
Before you check anything in the engine compart
ment,
always re ad a nd hee d all W ARNING S
¢ A in Working in the engine compartment on
page 220.
., Read the brake fluid level from the brake fluid
reservoir
<=> fig . 202, ¢page 222. The brake flu
id level must be between the "MIN" and "MAX"
mark ings.
The location of the brake fluid reservoir can be seen in the engine compartment illustration
¢ page 222.
The fluid level may drop slightly after some time
due to the automatic adjustment of the brake
pads . This is not cause for alarm .
If the brake fluid level falls
considerably below
the ' 'MIN" mark, the brake warning/indicator
light
1111 (U.S. models)/ . (Canadian models)
will come on¢
page 14 . Do not continue to oper
ate the vehicle . The complete brake system
should be thoroughly checked by an authorized
Aud i dealer or other q ualified facili ty and the
cause corrected.
If the brake f luid level is too
low, the brake warning/indicator light will i llumi
nate. Contact an authorized Audi dealer
immedi
at ely.
230
Changing brake fluid
Have the brake fluid changed by an experienced
technician .
Brake fluid absorbs moisture from the air. If the
water content in the brake fluid is too high, cor rosion in the brake system may result after ape
riod of time . The boiling po int of the brake fluid
will a lso decrease considerably and decrease
braking performance.
Therefore , the brake fluid must be changed
eve ry
two y ears . Always use new brake fluid which con
forms to Feder-al Motor Vehicle Standard "FMVSS 116 DO T 4".
The brake fluid reservoir can be difficult to reach ,
therefore, we recommend that you have the brake fluid changed by your author ized
Audi
d ea ler . Your dealer has the correct tools, the
right brake fluid and the know -how to do this for
you.
A WARNING
- Brake fluid is po isonous. It must be stored
only in the closed original container out of
the reach of children!
- Brake fai lure can result from o ld or inappro
priate brake fluid . Observe these precau
tions:
- Use only brake fluid that meets SAE speci ficat ion
J 1703 and conforms to Federal
Motor Ve hicle Standard 116. Always check
with your authorized Audi dealer to make
sure you are using the correct brake f luid .
The correct type of brake f luid is also indi
cated on the brake fluid reservoir.
- The brake fluid must be new . Heavy use of
the brakes can cause a vapor lock if the
brake fluid is left in the system too long .
This can seriously affect the efficiency of
the brakes as well as your safety. This
could result in an accident.
(D Note
Brake fluid will damage the paint of your vehi-
cle .
lilJJ,
Page 233 of 302
@ For the sake of the environment
Because of the problem of proper disposal of
brake fluid as we ll as the special toots re
quired and the necessary expertise, we rec
ommend that you have the brake fluid
changed by your authorized Audi dealer .
Battery
General information
Under normal operating conditions, the battery
in your Audi does not need any maint enance.
With
high outside temperatures or long daily
drives we recommend tha t you have the electro
lyte level checked by a service facility. The elec
trolyte level should also be checked each time
the battery is charged ¢
page 233.
Have the battery checked when you take your ve
hicle in for serv ice. You are well advised to re
place a battery that is older than 5 years .
With certain types of airbag deployment, the batte ry is disconnected from the vehicle electri
cal system for safety reasons¢
& in Repair, care
and disposal of the airbags on page 159 .
Disconnecting the battery terminals
Some vehicle functions (power window regu la
tors, for example) are lost if the battery te rmi
nals are disconnected. These functions have to be
relearned after the battery terminals are con
nected again. To prevent th is, the battery should
only be disconnected from the vehicle e lectr ica l
system when abso lutely necessary for repairs.
Vehicles not driven for long periods
If you do not drive your vehicle over a period of
several days or weeks, electrical components are
gradually cut back or sw itched off. This reduces
ene rgy consumption and ma inta ins starting ca
pability over a longer period ¢
page 195. Some
of the convenience functions may not operate,
such as the interior lights or the power seat ad
justment. The convenience funct ions will be
ava ilable again when you switch on the ignition
and start the engine.
Checking and Filling
Winter operation
During the winter months, battery capacity tends
to decrease as temperatures drop . This is be
cause more power is also consumed while start
ing, and the headlights, rear window defogger,
etc., are used more often.
Avo id unnecessary power consumption, particu
larly in city traffic or when traveling only short
distances . Let your authorized Audi dealer check
the capacity of the vehicle battery before winter
sets in ¢
page 233. A well charged battery will
not only prevent starting problems when the
weather is cold, but will also last longer .
(D Tips
If your vehicle is left standing for several
weeks at extremely low temperatures, the ve
hicle battery should be removed and stored
where it w ill not freeze . This will prevent it
from be ing damaged and having to be re
placed.
Working on the battery
Be especially careful when working on or near
the battery.
The battery is located in the luggage compart
ment under the floor . Before you check anything
in the luggage compartment,
read and heed all
WARNINGS ¢
&-
Always heed the safety warnings, when working
on the vehicle battery or the veh icle electrical
system to prevent injury.
The following WARNINGS are very important
when working on the battery:
Always heed the following WARNING SYM·
BOLS and safety precautions when working on
the battery.
®
Always wear eye protection.
~
Battery acid contains sulfuric acid. Al-
ways wear gloves and eye protection.
231
Page 234 of 302
Check ing and F illing
@
No
- spark s
- fl ame s
- smokin g.
~
Wh en a b att ery is ch arg ed , it produc es
h yd ro ge n ga s which i s explosive and
could cau se per sonal injury.
®
Always keep the b atter y well out of
r each of child ren.
A WARNING
Whenever work ing on the battery or on the
elect rical system, there is the risk of injury,
accident and
even fire. Read and heed the fol
lowing WARN INGS :
- Always wear eye protection. Do not let bat
te ry acid or any lead particles get on your
sk in or cloth ing . Sh ield your eyes. Explosive
gases can cause blindness or other injury .
- Battery acid con tains su lfu ric acid. Sulfur ic
acid can cause blindness and severe b urns.
- Always wear gloves and eye protection. Do
no t tilt the battery because acid could leak
out of the ventilat ion open ings .
- If you get battery ac id in your eyes or on
your skin, immediately rinse with cold wa
ter for several minutes and get medical at tention .
- If you should ingest any battery acid, seek
medical attention immediately .
- Do not expose the battery to an open flame,
electric sparks or an open light .
- Do not smoke.
- Do not interchange the positive and nega-
t ive cables.
- When working on the battery, be sure not to
short-circuit the terminals with tools or oth
er metal objects. Th is wou ld cause the bat
tery to heat up
very quickly, which could
lead to damage or explosion and personal
injury .
- When a battery is charged, it produces hy
drogen gas which is explosive and could
ca use personal injury.
- Always keep the battery well out of the reach of ch ildre n.
232
-
-Before work is done on the electrical sys
tem, disconnect the negative gro und cable.
- Before performing any work on the e lectri
cal system, switch off the engine and ign i
tion as well as any electrical equ ipment . The
negat ive cab le on the battery must be dis
connected . If you are just going to replace a
light bulb, then it is enough to switch off
the lights.
- Before d isconnecting the battery, switch off
the anti-theft alarm system! Otherwise you
will set off the alarm.
- When disconnecting the battery, first dis
connect the negative cab le and then the
positive cable.
- Before reconnect ing the battery, make sure
all electr ica l consume rs a re switched off .
Reconnect the positive cable first and then
the negative cable . Never in terch ange t he
cables -this could sta rt a fire!
- Never cha rge a frozen or a thawed-out bat
tery . It cou ld explode ! If a ba ttery has fro
zen, then it must be replaced. A discharged
battery can freeze over at 32 ° F (0 °C).
- Make sure the
vent hose is always attached
to the opening on the side of the battery .
- Never use batter ies which are damaged.
There is the danger of an exp losion! Always
replace a damaged battery .
A WARNING
Califo rnia Proposition 65 Warning :
- Batte ry posts, te rm inals and related acces
sories contain lead and lead compounds,
chemicals known to the State o f Cali fornia
to cause cancer and reproductive problems.
Wash hands after handling.
(D Note
- Do not disconnect the vehicle battery when
the ignition is on or when the engine is run
ning, otherwise, you w ill damage electronic
components in the electrical system.
- If your veh icle is go ing to stand for a long
period of time w ithout being driven, protect
the battery from "freezing", otherwise it ..,.
Page 236 of 302
Check ing and F illing
warm water and baking soda to neutralize
the acid.
CD Note
Never use a fast charger as a booster to start
the engine . This will serious ly damage sensi
tive electronic components, such as control
units, relays, radio, etc., as well as the battery
charger.
Battery replacement
T he new battery must have the same specifica
t ions and dimensions as the original equipmen t
bat tery.
Int elli g ent en ergy managem ent in your vehicle is
responsible for distributing the electrical energy
throughout your vehicle
r=> page 195. The intelli
gent energy management system will keep the
engine battery charged better than veh icles w ith
out this system . To make sure the addit ional
e lectrical energy is avai lab le once again after you
have changed the battery, we recommend that
you install batteries of the same type and manu facture on ly (the same as those installed at the
time your vehicle was delivered). Specifications
are listed on the battery housing. Your author
i z ed dealer must code the battery in the energy
management system to enable you to use the en
ergy management functions correctly after re
placing the battery .
The new battery must have the same capacity,
voltage (12 volts) , amperage, construction and
plug sealing .
When installing the battery, make sure the igni
tion and all electrical consumers are sw itched
off.
CD Note
- Make sure the ventilation hose on the s ide
of the battery is connected, otherw ise
fumes or battery ac id can leak out.
- Vehicles with the Start-Stop-System* are equipped with a special cycle-proof AGM battery . Installing a d ifferent type of bat
tery can cause problems in the vehicle elec -
234
trical system. When replacing the vehicle
battery, always install one with the same
specifications as the original battery .
- Battery mounts and clamps m ust always be
secured correctly.
- Read and follow the warnings under
¢ page 231, Working on the battery before
performing any work on the battery .
@ For the sake of the environment
Because of the p roblem of proper disposal of
a battery, we recommend your authorized
A udi dealer change the battery for you . Bat
teries contain sulfur ic acid and lead and must
a lways be disposed of properly in compliance
with all environmental regulations . Disposing
of veh icle batteries improperly is very danger
ous to the environment .
Windshield washer
system
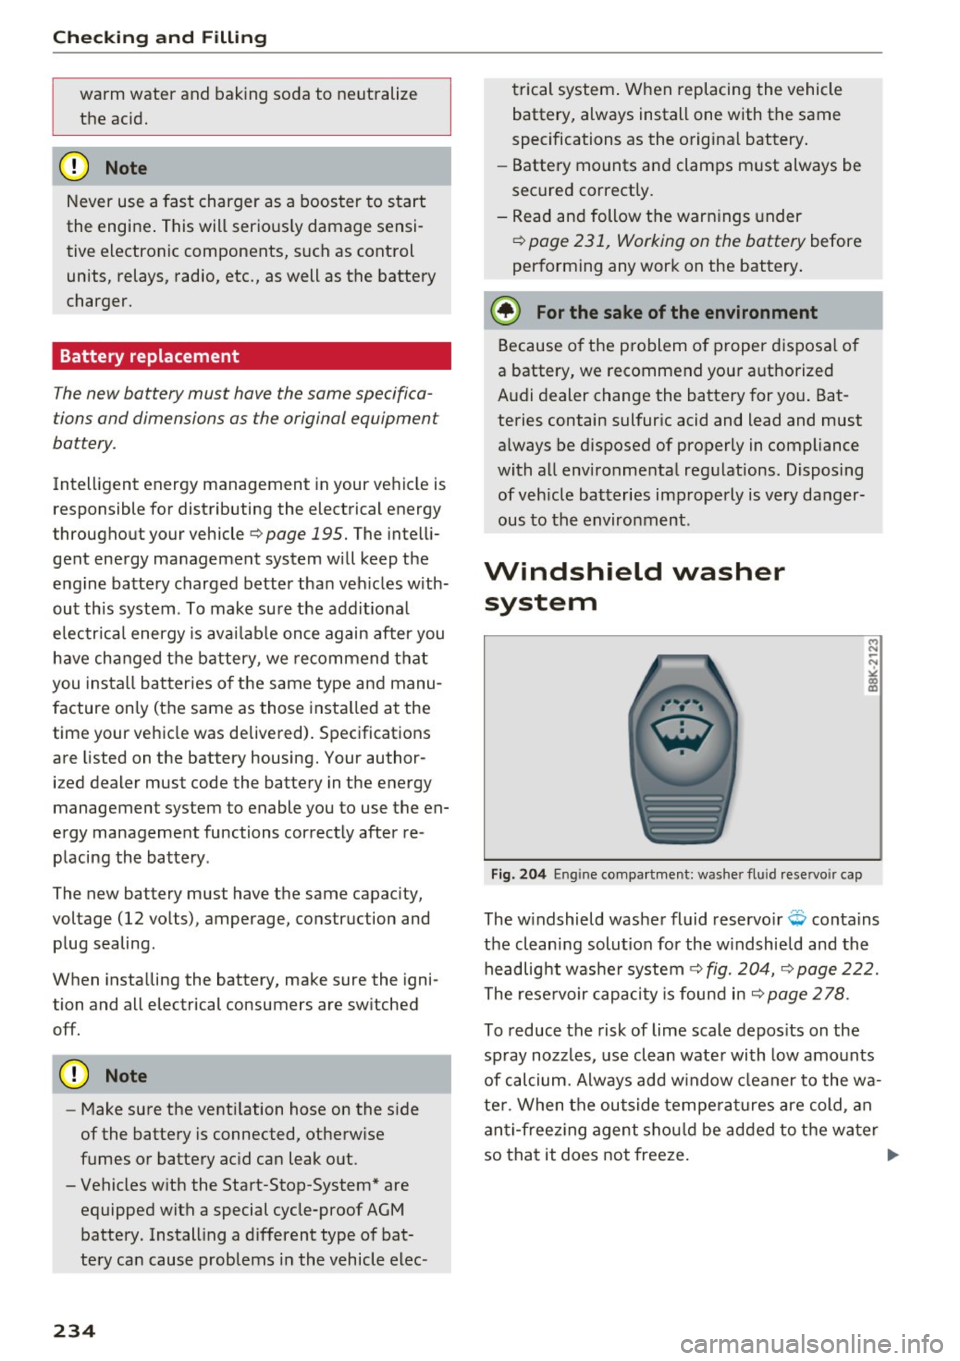
Fig. 204 En gin e compa rt ment: washer fluid rese rvoir cap
The w indshield washer fluid reservo ir Q conta ins
the cleaning solution for the w indshield and the
headlight washe r system ¢
fig. 204, ¢ page 222.
The reservoir capacity is found in
r=> page 2 78 .
To reduce the risk of lime scale depos its on the
spray nozzles, use clean water with low amounts
of calcium. Always add w indow cleaner to the wa
ter . When the outside temperat ures are cold , an
anti-freez ing agent shou ld be added to the water
so that it does not freeze. ..,.
Page 256 of 302
Wheels
_& WARNING
Temperature grades apply to tires that are
properly inflated and not over or underinf lat
ed.
Tire pressure monitoring system
U) General notes
Applies to: vehicles with tire pressure monito ring system
Each tire, including the spare (if provided),
should be checked monthly when cold and inflat
ed to the inflation pressure recommended by the
vehicle manufacturer on the vehicle placard or
tire inflat ion pressure label. (If your vehicle has
tires of a different size than the size indicated on
the vehicle placard or tire inflation pressure la
bel, you should determine the proper tire infla
tion pressure fo r those tir es) .
As an added safety feature, your vehicle has been
equipped with a t ire pressure monitoring system
(TPMS) that illuminates a low tire pressure tell
tale when one or more of your tires is significant
ly under-inflated . Accord ingly, when the low tire
p ressure telltale illuminates, you should stop and
check your tires as soon as possible, and inflate
them to the proper pressure. Driving on a signifi
cantly under-inflated tire causes the tire to over
heat and can lead to tire failure. Under-inflation
also reduces fuel efficiency and tire tread life,
and may affect the vehicle's handling and stop
ping ability.
Please note that the TPMS is not a substitute for
proper tire maintenance, and it is the driver's re
sponsib ility to maintain correct tire pressure,
even if under-inflation has not reached the level
to trigger illumination of the TPMS low tire pres
sure telltale.
Your vehicle has also been equipped with a TPMS
malfunct ion indicator to indicate when the sys
tem is not operating properly. The TPMS mal
function indicator is comb ined w ith the low tire
pressure telltale. When the system detects a
malfunction, the telltale will flash for approxi
mately one minute and then remain cont inuous ly
illuminated. This sequence will continue upon
254
subsequent vehicle start-ups as long as the mal
function exists.
When the malfunction indicator is illum inated,
the system may not be able to detect or s ignal
low tire pressure as intended . TPMS malfunctions
may occur for a variety of reasons, including the
i nstallation of replacement or alternate tires or
wheels on the vehicle that prevent the TPMS
from functioning properly. Always check the
TPMS malfunction telltale after replacing one or
more tires or wheels on your vehicle to ensure
that the replacement or alternate tires and
whee ls allow the TPMS to continue to function
properly.
If the Tire Pressure Monitoring System
indicator appears
Applies to: vehicles with tire pressure monitoring system
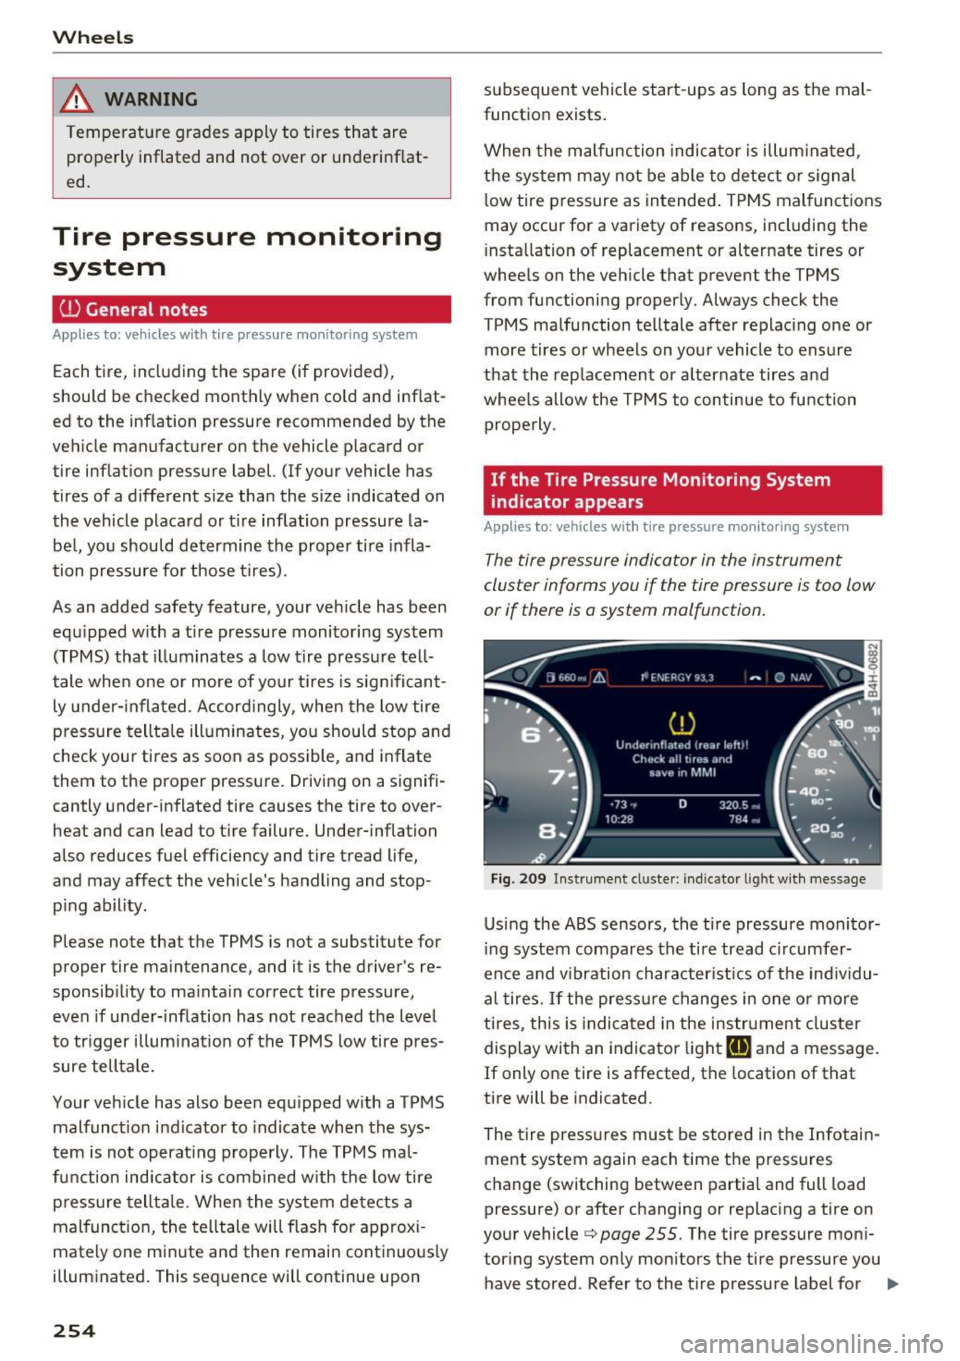
The tire pressure indicator in the instrument
cluster informs you if the tire pressure is too low
or if there is a system malfunction.
Fig . 209 Instrument cl uste r: indicator light with me ssage
Using the ABS sensors, the tire pressure monitor
ing system compares the tire tread c ircumfer
ence and v ibration characteristics of the individu
al tires.
If the pressure changes in one or more
ti res, this is ind icated in the instrument cluster
display with an indicator light
[I] and a message.
If only one tire is affected, the locat ion of that
tire will be indicated.
The tire pressures must be stored in the Infotain
ment system again each time the pressures
change (switching between partial and full load
pressure) or after changing or replacing a tire on
your vehicle ¢
page 255. The tire pressure moni
tor ing system only monitors the tire pressure you
have stored . Refer to the t ire pressure label for ..,.
Page 257 of 302
the recommended tire pressure for you r ve hicle
¢ page 246, fig . 208.
T ire tread circumference and v ibrat ion character
istics can change and cause a ti re pressure warn
ing if :
- the tire p ressure in one o r more tires is too low.
- the tire has structura l damage .
- the tire was replaced or the tire pressure was
changed and it was not stored¢
page 255 .
-the spare t ire* is installed.
Ind icat or light s
IE Loss of press ure in at least one tire q &. .
Check the tires and replace or repair if necessary.
Check/correct the pressures of a ll four tires and
store the pressure again in the Infotainment sys
tem ¢
page 255.
ffim (T ire Pressure Monitoring System) Tire
pressu re: Sys tem malfunction !.
Iffflm appears
after switching the ignition on or wh ile driving
and the
IE indicator light in the instrument clus
ter blinks for approximate ly one minute and then
stays on, there is system malfunction . Try to
store the correct tire pressures¢ page 255 . If
the indicator light does tur n off or t urns on again
a fte r a short period of time, dr ive to you r author
ized A udi dealer or qualified repair fac ility imme
diate ly to have the ma lfunction co rrected.
&_ WARNING
- If the tire pressu re indicator appears in the
display, reduce your speed immed iate ly and
avoid any hard steer ing or braking maneu
vers. Stop as soon as possib le and check the
t ir es and their press ure .
- The driver is responsib le for maintaining the
correct tire pressure. You must check the
t ir e pressu re regu la rly .
- Under certa in conditions (such as a sporty
dr iv ing style, wi nter cond itions or unpaved
roads), the tire p ressure monitoring system
indicator may be de layed.
- Do not use r un-flat tires on your vehicle. Us
ing them when not permitted can lead to
vehicle damage or accidents.
Wh eel s
(D Tips
-The tire p ressure monitoring system can al
so stop working when there is an ESC mal
function.
- Using snow c hains may result in a system
ma lf u nction.
- The tires wit h the identification "AO" or
"RO"
q page 243 have been matched wit h
your Audi t ire press ure monitoring system.
We recommend that you use these tires.
Storing tire pressures
If the tire pressure changes or a tire is replaced,
it must be confirmed in the Infotainment sys tem.
.,. Ma ke sure befo re storing t hat the t ire pressures
of all four tires meet the specified values and
are adapted to the load ¢
page 244.
.,. Switch the ignit ion on .
.,. Select: the
I CAR ! funct io n button > Car Systems
cont rol button > Serv icing & check s > Tire
pressure monitoring > Store tire pressures >
Ye s, store now .
(j) Tips
Do not sto re the tire pressures if snow chains
are ins talled. Ot he rw ise the system could
malfunc tion.
255
Page 261 of 302
Replacing wheels
Before changing a wheel
Observe the following precautions for your own
and your passenger's safety when changing a
wheel.
.,. After you experience a tire failure, pull the car
well away from moving traffic and try to reach
level ground before you stop¢.,&. .
.. All passengers should
leave the car and move
to a safe location (for instance, beh ind the
guardrail) ¢.,&. .
.,. Engage the
parking brake to prevent your vehi
cle from rolling unintentionally ¢.,&. .
.. Move
selector lever to position P ¢ .,&. .
1> lfyou are towing a trailer, unhitch the trailer
from your vehicle.
.,. Take the
jack and the spare tire out of the lug
gage compartment,
¢page 257.
..&, WARNING
You or your passengers could be injured wh ile
changing a wheel if you do not follow these
safety precautions:
- If you have a flat tire, move a safe distance
off the road. Turn off the engine, turn the
emergency flashers on and use other warn
ing devices to alert other motorists.
- Make sure that passengers wa it in a safe
place away from the vehicle and well away
from the road and traffic.
- T o help prevent the vehicle from moving
sudden ly and possibly slipping off the jack,
always fully set the parking brake and block
the wheel diagonally opposite the wheel be
ing changed. When one front wheel is lifted
off the ground, plac ing the Automatic
Transmission in "P" (Park) will
not prevent
the vehicle from moving.
- Before you change a wheel, be sure the
ground is level and firm . If necessary, use a
sturdy board under the jack .
- Always store the vehicle tool k it, the jack
and the replaced tire in the luggage com
partment ¢
page 135.
Emergency assistance
{!) Tips
Before changing the wheel, you must activate
the jacking mode, so that the automat ic con
tro ls for the Adaptive Air Suspension do not
make it more difficult to lift the vehicle with
the jack ¢
page 261 .
Changing a wheel
When you change a wheel , follow the sequence
described below step-by-s tep and in exactly tha t
order .
l. Activate the vehicle jack mode ¢ page 261 .
2. Remove the decorative wheel cover*. For
more details see also¢
page 260, Decora
tive wheel covers
or¢ page 260, Wheels
with wheel bolt caps .
3. Loosen the wheel bolts¢ page 260.
4. Locate the proper mounting point for the
jack and align the jack below that point
¢ page 261 or¢ page 262.
5. Raise the car with the jack¢ page 261 or
¢page 262.
6. Remove the wheel with the flat tire and then
install
the spare ¢ page 263.
7. Tighten all wheel bolts lightly .
8.
Lower the vehicle with the jack .
9. Use the wheel bolt wrench and
firmly tighten
all wheel bolts<=>
page 260.
10. Replace the decorative wheel cover*.
11. Deactivate the vehicle jack mode in the MMI :
I CAR! function button > Car systems contro l
button
> Servicing & checks > Air susp.: jack
mode > Off.
The vehicle jack mode switches off automatically
at speeds above 10 km/h .
..&, WARNING
Always read and follow all WARNINGS and in
formation
¢ .&. in AB: Raising the vehicle on
page 262
and ¢ page 264.
259
Page 268 of 302
Fuses and bulbs
Fuses and bulbs
Fuses
Replacing fuses
A fuse that has blown will have me tal strips that
have burned through .
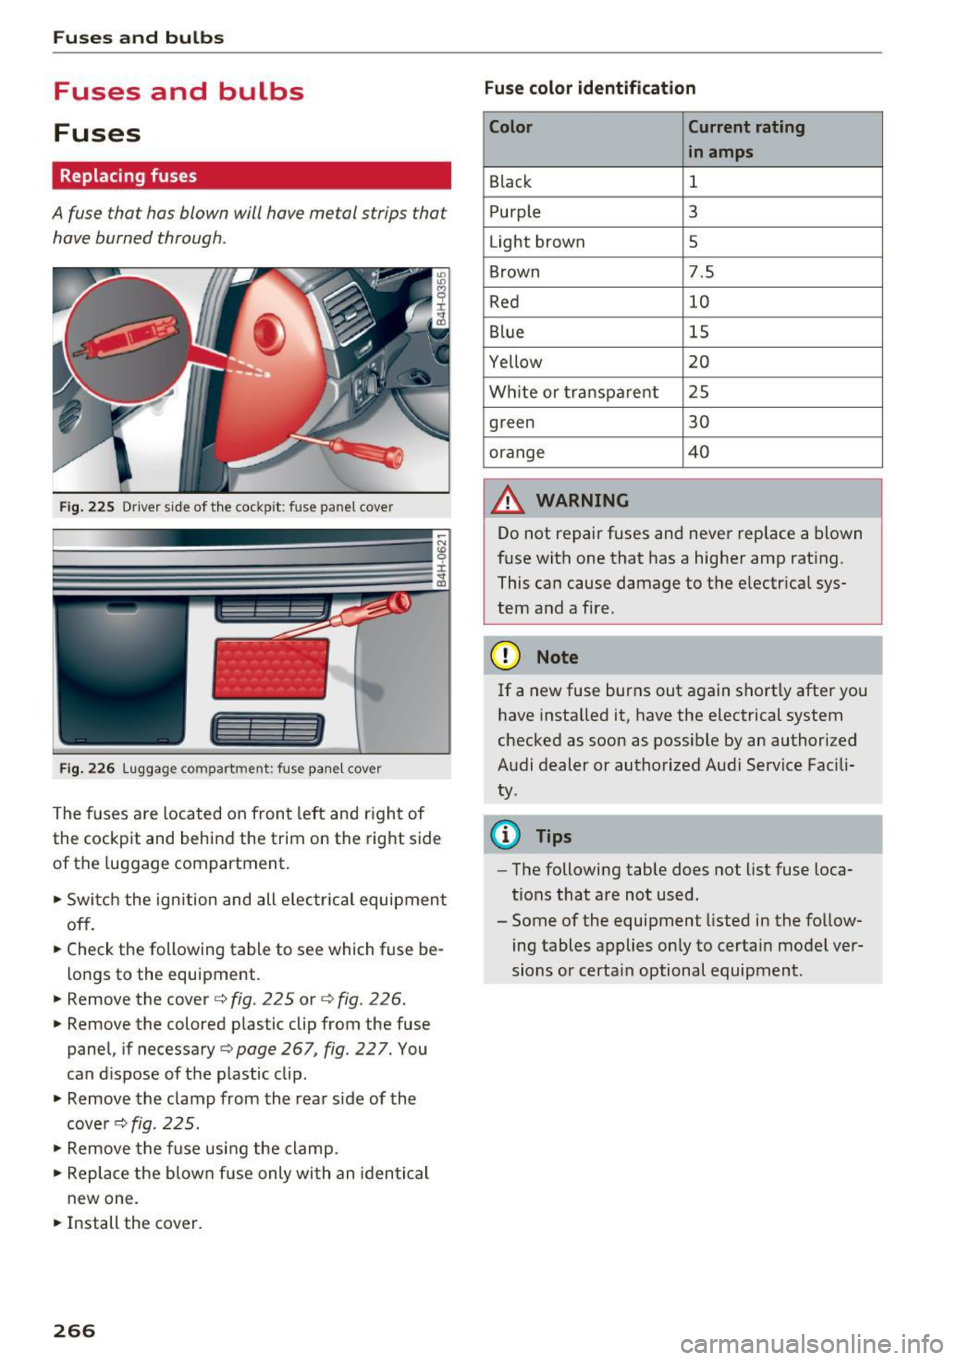
Fig. 2 25 Driver s ide of th e cockp it: fuse pa nel cover
I l I
Fig. 2 26 Lu ggage compartment: fuse pane l cover
The fuses are loca ted on front left and r igh t of
the cockpit and behind the trim on the right side
of the luggage compartment.
.. Swi tch the ignition and all e lec trica l equipment
off.
.. Check the following table to see which fuse be
lo ngs to the equipment .
.. Remove the cover c::> fig. 225 or
c:> fig. 226 .
.. Remove the colored plastic clip from the fuse
panel, if necessary
c:> page 267, fig. 22 7. You
can d ispose of the p lastic clip .
.. Remove the clamp from the rear s ide of the
cove rc::> fig. 225 .
.. Remove the f use usi ng the clamp .
.. Re place the b low n fu se only wi th an identi cal
new one .
.. Install the cover.
266 Fuse color identification
Color Current rating
in amps
Black 1
P urple 3
Light brown 5
Brown 7.5
Red 10
Blue 15
Yellow 20
Wh ite or transpa re nt 2 5
green 30
orange 40
A WARNING
-
Do not repair fuses and never replace a blown
f u se with one that has a highe r amp rat ing.
This ca n cause damage to t he e lectr ica l sys
tem and a fire.
(D Note
If a new fuse burns out again sho rtly after you
h ave insta lled it, have the electrical system
checked as soon as possible by an authorized
A udi dealer or authorized Aud i Service Fac ili
ty .
(D Tips
-The following table does not list fuse loca
tions that are no t used .
- Some of the equipment listed in the fo llow
ing tables applies on ly to certai n model ver
sions or certa in optional equipment .
Page 272 of 302
Fuses a nd bul bs
Bulbs
Replacing light bulbs
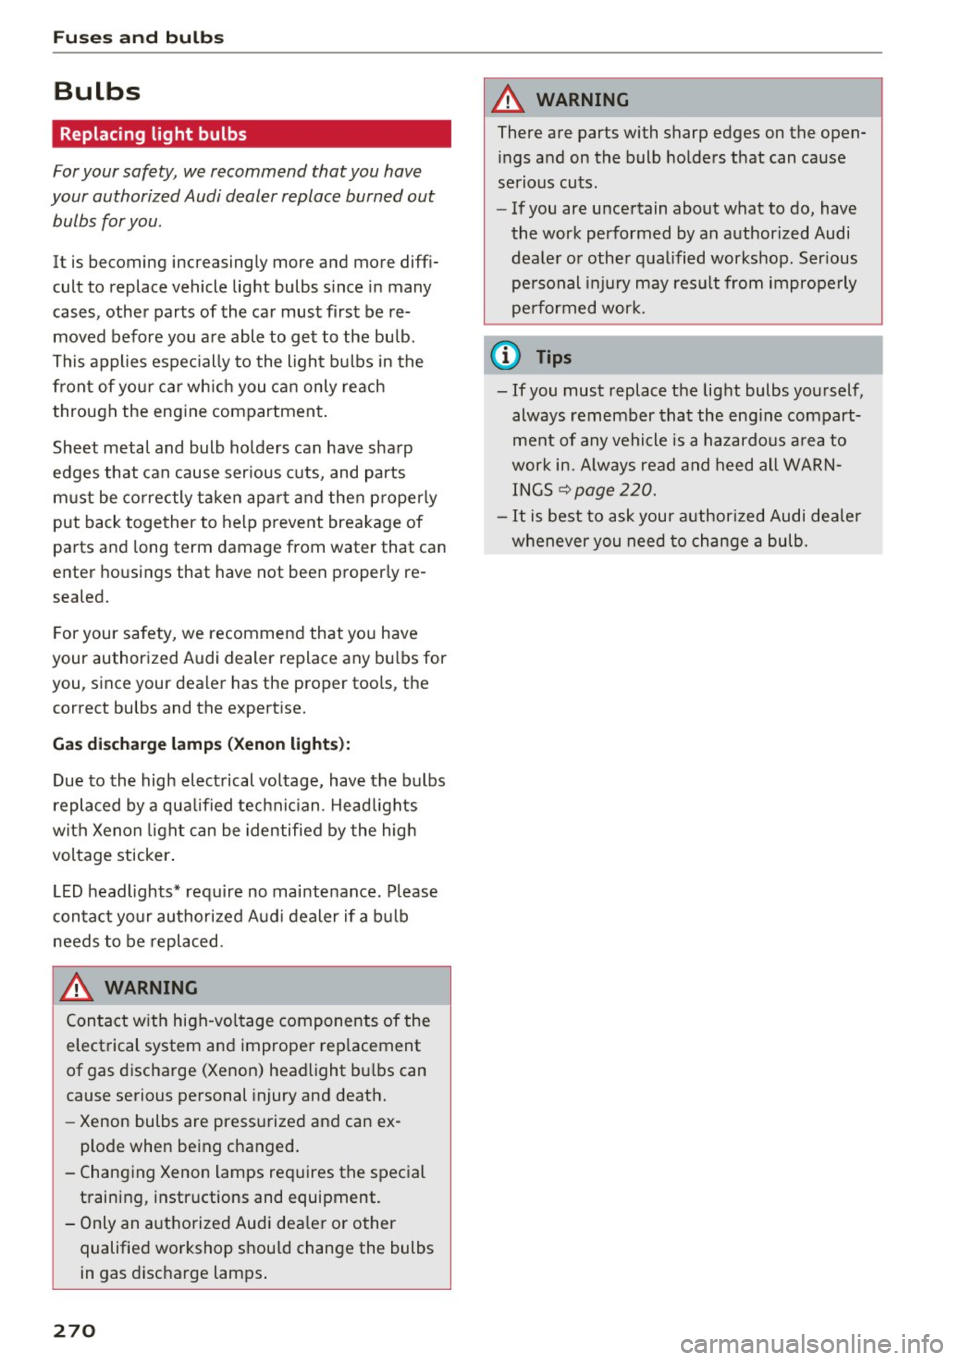
For your safety, we recommend that you have
your authorized Audi dealer replace burned out
bulbs for you.
It is becoming increasingly more and more diffi
cult to replace vehicle light bulbs since in many
cases, other parts of the car must first be re
moved before you are able to get to the bu lb .
This applies espec ially to the light bulbs in the
front of your car wh ich you can only reach
through the engine compartment .
Sheet metal and bulb holders can have sharp
edges that can cause ser ious cuts, and parts
m ust be correctly taken apa rt and then p roperly
put back together to help prevent breakage of
parts and long term damage from water that can
enter housings that have not been properly re
sealed.
For your safety, we recommend that you have
your authorized Audi dealer replace any bu lbs for
you, since your dealer has the proper tools, the correct bulbs and the expertise.
G as di sc harg e l am ps (Xe non li ghts):
Due to the high electrical voltage, have the bulbs
replaced by a qua lified technic ian . Headlights
with Xenon light can be identified by the high
voltage sticker.
LED headlights* require no maintenance. Please
contact your authorized Aud i dealer if a bulb
needs to be replaced.
A WARNING
Contact w ith high-voltage components of the
electrical system and improper rep lacement
of gas discharge (Xenon) headlight bulbs can
cause serious personal injury and death.
- Xenon bulbs are pressurized and can ex
plode when being changed.
- Changing Xenon lamps requires the special training, instructions and equipment.
- Only an a uthorized Audi dea ler or other
qualified workshop should change the bulbs
in gas discharge lamps .
270
A WARNING
-
There are parts with sharp edges on the open- ings and on the bulb holders that can cause
serious cuts.
- If you are uncertain about what to do, have
the work performed by an authorized Audi
dealer or other qualified workshop. Ser ious
pe rsonal injury may resu lt from improperly
pe rformed wor k.
@ Tips
- If you must replace the light bulbs yourself,
always remember that the eng ine compart
ment of any vehicle is a hazardous area to
work in. Always read and heed all WARN INGS ~
page 220.
-It is best to ask your authorized Audi dealer
whenever you need to change a bulb.