transmission oil AUDI TT 2013 Owner´s Manual
[x] Cancel search | Manufacturer: AUDI, Model Year: 2013, Model line: TT, Model: AUDI TT 2013Pages: 262, PDF Size: 65.91 MB
Page 4 of 262
2 Table of contents Vehicle literature ............. .
About this Owner's Manual ...
Controls and equipment .. ... .
Cockpit ................... ... . .
General illustration .............. .
Instruments and warning/
indicator lights ............... .
Instruments ............ ... .. ... .
Warning/indicator lights .......... .
Driver information system .. .
Introduction .............. ... ... .
Trip computer ........... ... .. ... .
Menu display ................... .
Eng ine oil temperature display .. ... .
Efficiency program ............... .
Service interval display ......... .. .
Boost and engine oil temperature
ind icator ................ ....... .
Lap timer ....... ........ ...... . .
On-Board Diagnostic system (OBD) .. .
Opening and closing ...... .. . .
Keys .. .. .. ................ ... . .
Power locking system ..... .. .. ... .
Rear lid/trunk lid ................ .
Anti-theft alarm system .......... .
Power windows ................. .
Clear vision ......... ... .. .. ... .
Lights ... .. ................ .... .
Interior lights ................... .
V1s1on . ...... .............. .... .
Mirrors .. .. ... .... ...... ...... . .
Wiper and washer system ...... .. . .
Digital compass ................. .
Seats and storage ......... .. . .
General recommend ations ... .. .. . .
Adjusting front seats manually .. .. . .
5
6
8
8
8
10
10
12
22
22
23
24
26
26
28
28
29
30
32
32
34
37
38
39
42
42
45
46
47
48
52
54
54
55
Power seats . . . . . . . . . . . . . . . . . . . . . 56
H ead restraints .............. ... .
Rear seats . ............. .... .... .
Luggage compartment ........ ... .
Roof rack ....... ........ ...... . .
57
58
59
60
Cup holder .... .. .......... ..... .
Ashtray ... .... .. .. .......... ... .
Cigarette lighter/socket ........... . 62
62
63
Storage . . . . . . . . . . . . . . . . . . . . . . . . . 64
Warm and cold ............. .. .
Climate controls .. ............... .
Rear window defogger ............ .
Heated seats .... ............... .
On the road ... .............. . .
Steering ....................... .
Ignit ion lock and ignition sw itch .... .
Starting and stopping the engine ... .
Parking brake ... . .......... .... . .
Starting on hills ................. .
Speed warning system ............ .
Cruise control .... ............... .
Audi magnetic ride ............. .. .
Sport mode ..... .......... ..... .
Acoustic parking system
Transmission .. ............ ... .
Manual transmission ............. .
66
66
70
70
71
71
71
72
73
74
74
76
78
78
78
80
80
S tronic transmission . . . . . . . . . . . . . . 80
Homelink ® . . . . . . . . . . . . . . . . . . . . 87
Universal remote control . . . . . . . . . . . 87
Safety first . . . . . . . . . . . . . . . . . . . . 90
Driving Safely . . . . . . . . . . . . . . . . . 90
General notes . . . . . . . . . . . . . . . . . . . . 90
Proper occupant seating positions . . .
91
Driver and passenger side footwell . . . 95
Pedal area . . . . . . . . . . . . . . . . . . . . . . . 95
Stowing luggage . . . . . . . . . . . .. . . . . 96
Reporting Safety Defects . . . . . . . . . . . 98
Safety belts . . . . . . . . . . . . . . . . . . . 100
General notes . . . . . . . . . . . . . . . . . . . . 100
Why safety belts? . . . . . . . . . . . . . . . . 101
Safety belts . . . . . . . . . . . . . . . . . . . . . 104
Safety belt pretensioners . . . . . . . . . . 106
Airbag system . . . . . . . . . . . . . . . . . 108
Important things to know . . . . . . . . . . 108
Front airbags .... .......... ...... 112
Page 74 of 262
72 On the road
you leave your veh icle . This makes a vehicle
theft even more difficult ¢ .&. .
Ignition ke y saf ety lock
After swi tching off the ignition, the ig nit ion
key can on ly be removed from the ign it ion
lock when the se lector lever is in the "P"
(Park) position . After you have removed the
key, the selector lever is locked and cannot be
moved.
Ignition on @
If it is diffic ult to turn the key after you have
inserted it into the ignition lock, turn the
steering wheel back and forth. This will take
the load
off the steering lock mechanism and
you will be able to turn the key freely and
start the engine.
Starting the engine @
In this position the engine starts . While the
engine is starting, the power supply to the headlights and other e lectrica l consumers is
temporari ly interrupted to conserve battery
power. After the engine has started, release
the key and it will return to posit ion
(D .
Before the starter can be operated again the
key must be turned back to position @. The
non -repeat loc k prevents you from damaging
the starter when the engine is runn ing .
A WARNING
-Never remove the key from the ign ition
lock whi le the vehicle is moving. The
steeri ng wheel will lock causing loss of
c ontrol.
- If you have to leave your vehicle -even
for just a m inute -always remove t he ig
nition key and take it with you. This is es
pecially important if you a re going to
leave ch ildren behind in the vehicle. The
children co uld start the engine or use
other vehicle controls. Unsupervised use
of vehicle controls (for examp le, power
windows) can cause serious personal in
jur ies .
(!) Tips
If the vehicle battery has been disconnect
ed and then reconnected, then you must
l eave the key in position
(D for about 5
seconds before you can start the engine.
Starting and stopping
the engine
Starting the engine
The engine can only be started with an origi
nal Audi key.
.,. Set the park ing brake.
.,. Move the se lector lever to the neutral posi
tion (automatic transmission): selector lever
in
P or N) ¢ .&_ .
.,. On vehicles with manua l transmission, fully
depress the clutch pedal.
.,. Turn the ignition key to pos it ion @
¢ page 71, fig . 71 -do not depress the gas
pedal when starting the engine!
.,. Let go of the key as soon as the engine
starts.
A cold engine may at first be loud after it has
been sta rted. This is due to the hydrau lic
valves bu ild ing up the oil pressure. This nor
mal and no need for co nce rn .
If the engine does not start immediately, stop
trying after 10 seconds and then try to restart
the engine abou t 30 seconds late r.
A WARNING
Neve r star t or let the eng ine run in a con
f ined or enclosed area . Exhaust fumes
from the engine contain carbon monoxide,
a colorless and odor less gas . Ca rbon mon
oxide can be fatal if inhaled.
- Never leave the engine id ling unattend
ed. An unattended veh icle w ith a runn ing
engine poses a danger of personal injury
or theft.
Page 156 of 262
154 Intellig ent technolog y
down continuously. Pump the brakes at inter
va ls.
Noises may occur when braking depending on
the speed, braking force and outside condi
tions such as temperature and humidity.
Moistu re or road salt
Under certain conditions, for examp le, when
d riving through water or ve ry heavy rain, or
even after washing your vehicle , the bra king
effect can be reduced due to moisture (o r in
freezing conditions ice) on the brake pads. A
few cautious brake applications should dry off
the brake pads or remove any ice coatings.
The effectiveness of the b rakes can be reduced
when the vehicle is driven on a salt -covered
road and the brakes are not used. Likewise,
you clean off accumulated sa lt coating from
brake discs and pads with a few caut ious ap
plications of the brake
q .&. .
Co rrosion
There may be a tendency for dirt to bui ld up
on the brake pads and corrosion to form on
the discs if the car is not driven regularly or
only for short trips with little use of the brakes.
If the brakes are not used frequently, or if cor rosion has formed on the discs, it is advisable
to clean off the pads and discs by braking
f irmly a few times from a moderately high
speed
Q .&. .
Fa ults in th e brak e system
If you should notice a sudden increase in
brake peda l travel, then one of the two brake
circu its may have failed
q .&. .
Low brake flu id le vel
Malfunct ions can occur in the brake system if
the brake fluid level is too low. The brake fluid
leve l is monitored electronically.
B rake boo ste r
The brake booster increases the press ure that
you gene rate w it h the brake pedal. It works
on ly when the engine is running
.Q .&.
Brake lining wear statu s
Brake lining wear may be checked by visual in
spection of the condition of the brake pads
thro ugh the openings in the wheel. If neces
sary, the wheel may be removed for this in
spection
q page 224, What should I be
aware of when changing a tire?.
A WARNING
-- You shou ld perform braking maneuvers
for the purpose of cleaning the brake system only if road conditions permit .
Othe r road use rs must not be put at risk -
you may ca use an accident!
- Before descend ing a steep grade, reduce
speed and sh ift transmission into a lower
gear or lower dr iving range. Do not ride
the brakes or hold the pedal down too
long or too often. This could cause the
brakes to get hot and diminish braking
efficiency.
- Do not "ride the brakes" by rest ing your
foot on the pedal when you do not intend
to brake. This may cause the brakes to
overheat, premature wear and increased
stopping distance .
- Under certain climatic and operat ing
conditions such as passing through wa
ter, dr iving in heavy rain or after washing
the vehicle, the effectiveness of the b rakes can be reduced. In winte r, ice can
accumu late on the bra ke pads, lin ings,
d iscs and drums. Carefully app ly bra kes
for a test . Brakes will dry and ice coat
ings will be cleaned off after a few care
fu l brake applications.
- Driving for an extended period of time on salt-covered roads without using your brakes can a lso affect braking efficiency.
Clean off accumulated salt coating from
brake discs and pads with a few cautious
brake applications .
- If you damage the front spoiler, or if you
install a different spoiler, be sure the a ir
f low to the front brakes is not obstruct-
ed. Otherwise the brake system could
Ill>
Page 176 of 262
174 Cleaning and protection
• Once the stain is no longer visib le, use a
soft dry cloth or tissue to soak up the mois
ture.
Do not use leather cleaning products on Al
cantara .
You may use a suitable shampoo fo r remov ing
d ust and dirt.
Dust and grit in the pores and seams can
scratch and damage the surface. If the ca r is
l eft standing i n the sun fo r long periods, the
A lcantara should be protected against direc t
sunlight to prevent it from fading. Slight co lor
variations will deve lop in normal use and are
not an indication of material deterioration.
{[) Note
-Never use chemical solvents (e.g . lighter
fl uid, turpentine), waxes, shoe polis h or
similar products on Alcantara ® surfaces.
- To avoid damage, have stubborn stains removed by a commercial cleaning spe
cia list.
- Do not use br ushes, stiff sponges or sim
ilarly abrasive cleaning aids.
Safety belts
Only well -maintained safety belts work relia
bly when needed .
Heavily soiled safety belts may no t retr act
p roperly.
• Keep be lts clean.
• Fo r cl eaning, use a m ild soap and wate r sol
u tion. Let be lts dry thoro ughly and away
from direct sunlight .
• Do not a llow inertia reel safety be lts to re
tract before they are completely dry .
• Check the condition of your safety belts
reg
ularly.
.&_ WARNING
Damaged safety belts can break in a crash.
1l Use o nly the co rrect cleaning so lu tions. Never use gas
o line or d iese l fue l.
-Anyth ing that might damage your safety
be lts could mean that you and your pas
sengers would not be adequate ly pro
tected in an accident.
- Safety belt performance depends on cor
rect insta llation. Never remove be lts
from the veh icle to clean them .
- Do not use chemical clean ing agents,
b leach or dyes. They have co rrosive prop
erties which wea ken the webb ing.
- When clean ing your safety be lts, inspect
them for damage . If you discover dam
age, see your Audi dealer.
'
- Always read a nd heed all WARNINGS and
the information
<=;> page 164.
Engine compartment
Be especially careful when cleaning the en
gine comportment.
Alway s swit ch off the ign ition before clean
ing the engine <=;>.&, .
Plenum panel
Remove leaves from the plenum panel in front
of the w indshield under the eng ine hood . This
prevents the water drain holes from becoming
blocked, and it prevents debris from enter ing
the vehicle interior t hro ugh the heating and
ventilat ion ducts.
Corrosion protection
T he engine compartment and transmission
have been corrosion -protected at the factory .
Good anti- corrosion treatmen t is very impor
tant, particu larly in the w inter.
If the vehicle
is frequently driven on salt treated roads, the
entire engine compartment and p lenum panel
shou ld be thoroughly cleaned at the end of
winter and retreated to prevent salt damage.
At the same time, the underside of the vehicle
shou ld be washed as well.
If the engine compartment is cleaned at any
time with grease removing solutions
1>, or if ..,.
Page 183 of 262
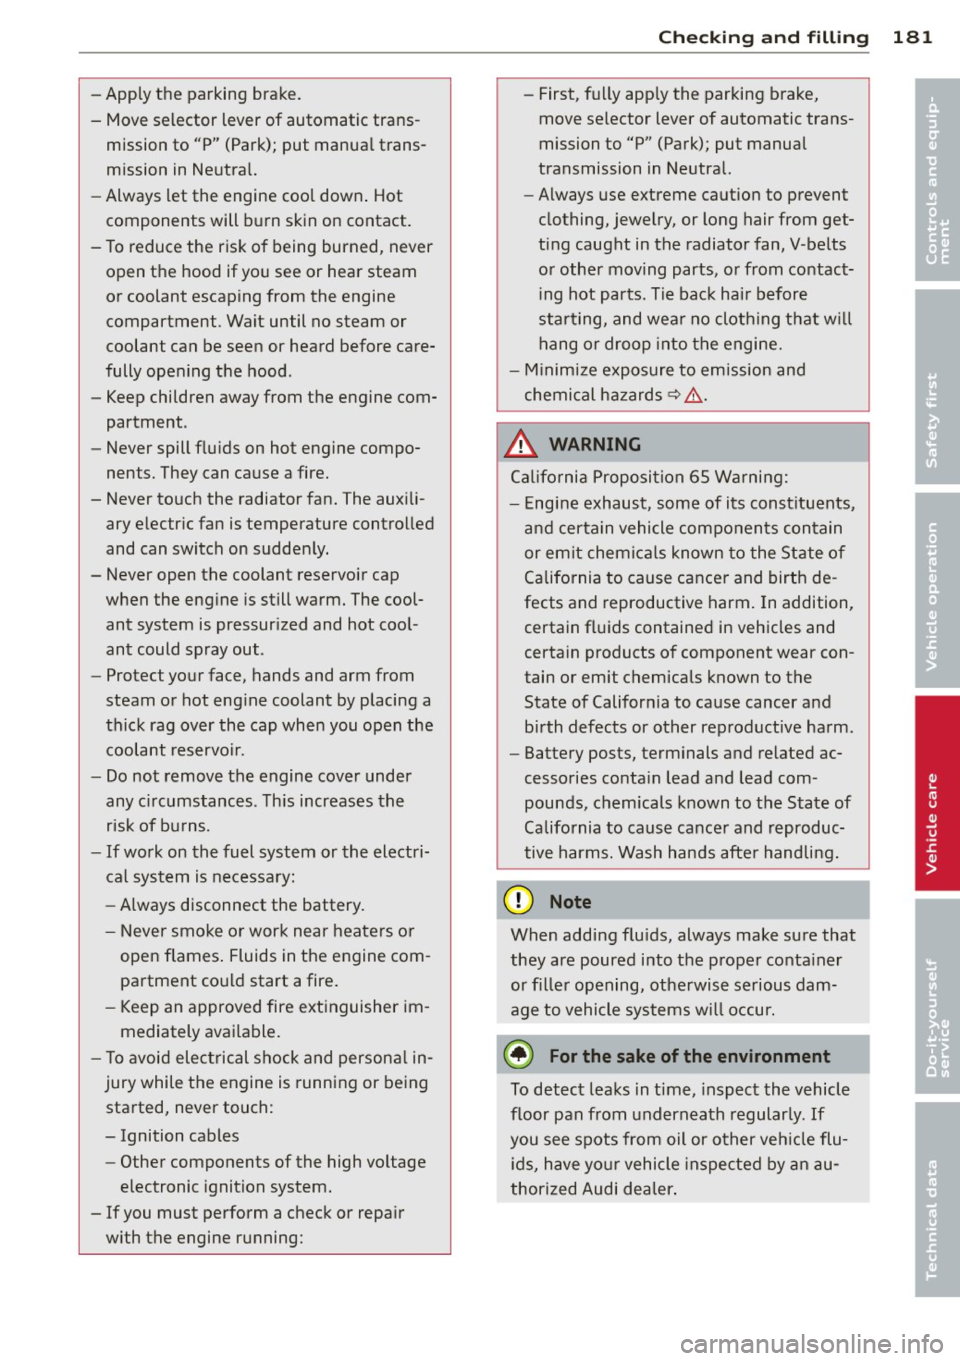
-Apply the parking brake.
- Move selector lever of automatic trans-
mission to "P" (Park); put manual trans
mission in Neutral.
- Always let the engine cool down . Hot
components will burn skin on contact.
- To reduce the risk of being burned, never
open the hood if you see or hear steam
or coolant escaping from the engine
compartment . Wait until no steam or
coolant can be seen or heard before care
fully opening the hood.
- Keep children away from the engine com
partment .
- Never spill fluids on hot engine compo
nents. They can cause a fire.
- Never touch the radiator fan. The auxili
ary electric fan is temperature controlled
and can switch on suddenly.
- Never open the coolant reservoir cap
when the engine is still warm. The cool
ant system is pressurized and hot cool ant could spray out .
-Protect your face, hands and arm from
steam or hot engine coolant by placing a
thick rag over the cap when you open the
coolant reservoir .
- Do not remove the engine cover under
any circumstances. This increases the
risk of burns.
- If work on the fuel system or the electri
cal system is necessary:
- Always disconnect the battery.
- Never smoke or work near heaters or
open flames. Fluids in the engine com
partment could start a fire.
- Keep an approved fire extinguisher im
mediately available.
- To avoid electrical shock and personal in
jury while the engine is running or being
started, never touch:
- Ignition cables
- Other components of the high voltage
electronic ignition system.
-If you must perform a check or repair
with the engine running:
Checking and filling 181
- First, fully apply the parking brake,
move selector lever of automatic trans
mission to "P" (Park); put manual
transmission in Neutral.
- Always use extreme caution to prevent
clothing, jewelry, or long hair from get
ting caught in the radiator fan, V -belts
or other moving parts, or from contact ing hot parts. Tie back hair before
starting, and wear no clothing that will hang or droop into the engine.
- Minimize exposure to emission and
chemical hazards~,& .
.8, WARNING
California Proposition 65 Warning:
- Engine exhaust, some of its constituents,
and certain vehicle components contain
or emit chemicals known to the State of
California to cause cancer and birth de
fects and reproductive harm. In addition,
certain fluids contained in vehicles and
certain products of component wear con
tain or emit chemicals known to the
State of California to cause cancer and
birth defects or other reproductive harm.
- Battery posts, terminals and related ac
cessories contain lead and lead com
pounds, chemicals known to the State of
California to cause cancer and reproduc
tive harms. Wash hands after handling.
(D Note
When adding fluids, always make sure that
they are poured into the proper container
or filler opening, otherwise serious dam
age to vehicle systems w ill occur.
@ For the sake of the environment
To detect leaks in time, inspect the vehicle
floor pan from underneath regularly. If
you see spots from oil or other veh icle flu
id s, have your vehicle inspected by an au
thorized Audi dealer . •
•
Page 232 of 262
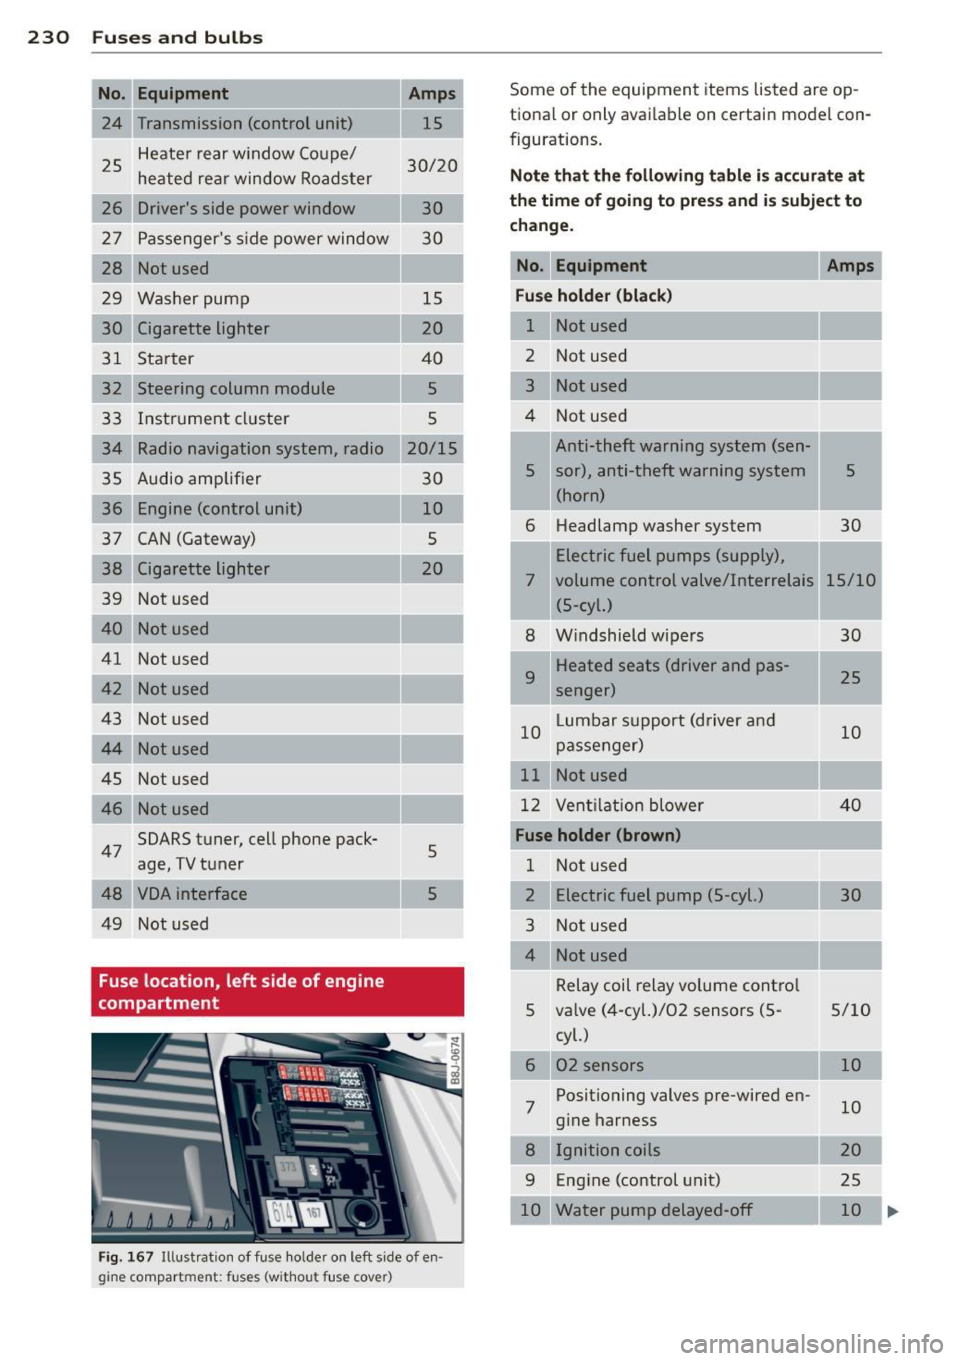
230 Fuses and bulbs
-No. Equipment
24 Transmission (control unit)
25 Heater rear
window Coupe/
heated rear window Roadster
26 Driver's side power window
27 Passenger's side power window
28 Not used
29 Washer pump
30 Cigarette lighter
31 Starter
32 Steering column module
33 Instrument cluster
34 Radio navigation system, radio
35 Audio amplifier
36 Engine (control unit)
37 CAN (Gateway)
38 Cigarette lighter
39 Not used
40
------------4 l Not used
42
43 Not used
44
45 Not used
46
47 SOARS tuner, cell phone pack-
age, TV tuner
48
49 Not used
Fuse location, left side of engine
compartment Amps
15
30/20
30
30
-15
20
40 5
5
20/15
30
10 5
20
-
-
5
5
Fig. 167 Illust ration of fuse holder on left side of en·
gine compartment: fuses (without fuse cover)
Some of the equipment items listed are op-
t ional or only available on certain model con-
figurations.
Note that the following table is accurate at
the time of going to press and is subject to
change.
No. Equipment Amps
Fuse holder (black)
1 Not used
-2 Not used
3 Not used
4 Not used
Anti-theft warning system (sen-
'
5 sor), anti-theft warning system 5
(horn)
6 Headlamp
washer system
30
Electric fuel pumps (supply),
7 volume control valve/Interrelais 15/10 (5-cyl.)
8 Windshield wipers
30
9 Heated seats (driver and pas-
25
senger)
10 Lumbar
support (driver and
10
passenger)
11 Not used
12 Ventilation blower 40
Fuse holder (brown)
1 Not used
2 Electric fuel pump (5-cyl.) 30
3 Not used
Relay coil relay volume control
5 valve (4-cyl.)/02 sensors (5- 5/10
7 cyl.)
02 sensors
Positioning valves pre-wired en
gine harness
Ignition coils
9 Engine (control unit)
10 Water pump delayed-off 10
10
20
25 10 ..,_.
Page 239 of 262
Lifting vehicle
lifting with workshop hoist and with
floor jack
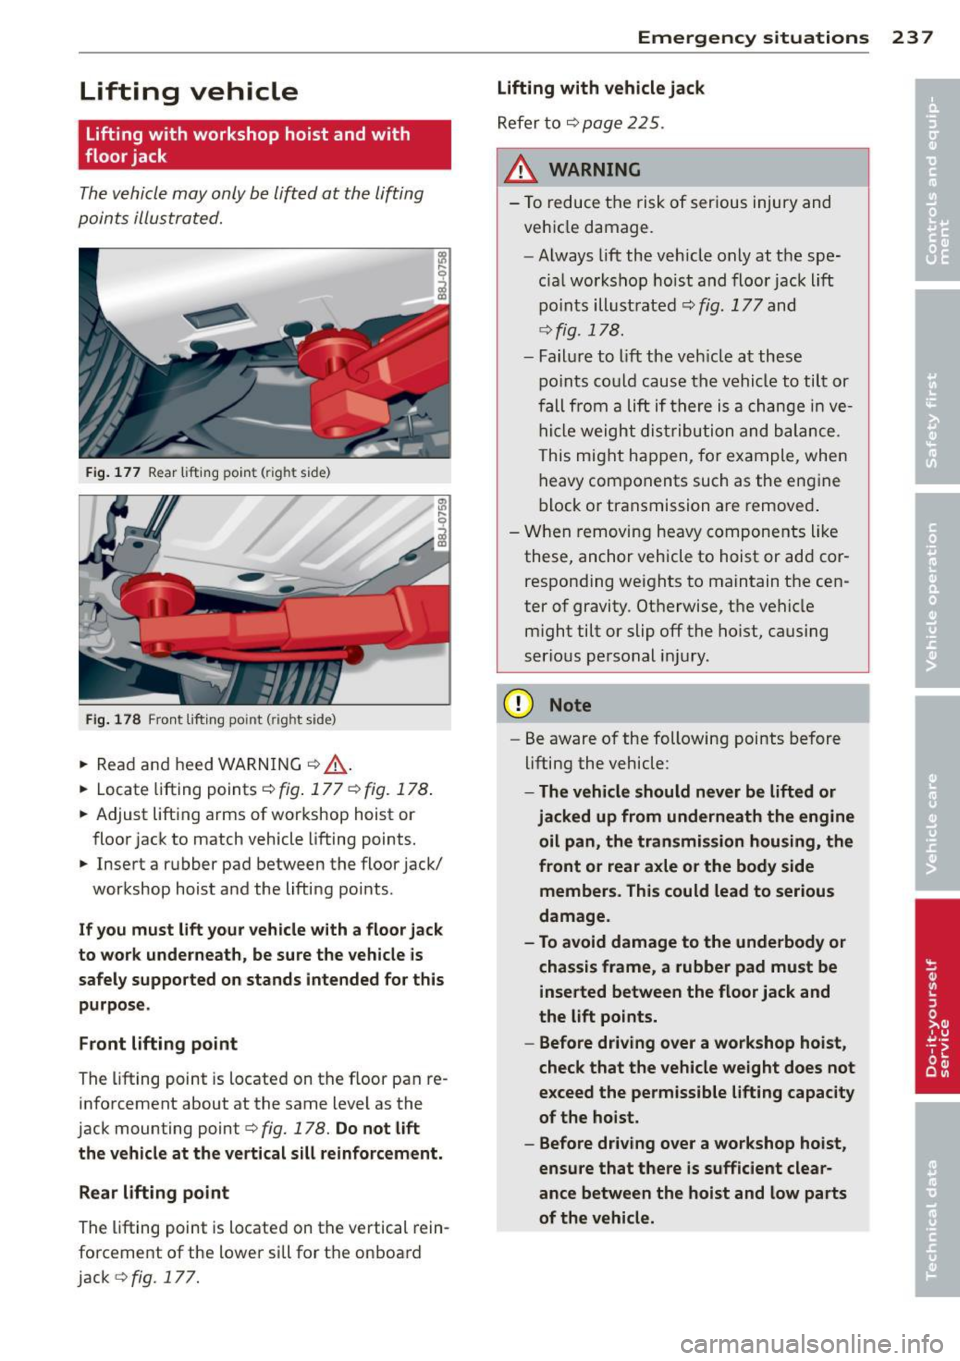
The vehicle may only be lift ed at the lifting
poin ts illustra ted.
F ig. 177 Rear lift ing point (r ig ht side)
Fi g. 178 Front lift ing po int frig h t side)
• Rea d and h eed WARN ING c:::> A-
• Locate lifting points c:::> fi g. 177 c:::> fig. 178 .
• Adjust lift ing arms o f wor kshop hoist or
f loor jac k to match vehicle lifting points.
• Inse rt a r ubber pad between the floor jac k/
workshop hoist a nd the lifti ng points.
If you must lift your vehicle with a floor jack
to work underneath, be sure the vehicle is safely supported on stands intended for this
purpose.
Front lifting point
The lifting point is locate d on the f loor pan re
info rcement about at the same level as the
jack mounting point
c:::> fig. 178. Do not lift
the vehicle at the vertical sill reinforcement .
Rear lifting point
The lifting poi nt is locate d on t he vertical rein
forcement of the lower sill for t he on boa rd
jack
c:::> fig. 177.
Emergency situations 237
lifting with vehicle jack
Re fer to c:::> page 225 .
_&. WARNING
-To re duce t he risk of ser ious injury an d
ve hicl e damage.
- Alwa ys lift the veh icl e only at the spe
c ial w orkshop hoist and floor jack lift
p oin ts ill ust rated
c:::> fig. 177 and
c:::> fig. 178 .
-Fa il u re to Lift th e ve hicl e at th ese
p o ints co uld cau se the ve hi cle to til t or
f all from a lift if th ere i s a cha nge in ve
h icl e weigh t distr ibu tion and balan ce.
This mi ght h app en, fo r ex am ple, whe n
h eavy co mpon ent s such as the eng ine
b lock o r transmission are remove d.
- Wh en removin g hea vy componen ts li ke
these, anchor vehicle to h oist or ad d cor
respo nding wei ghts to ma intain t he ce n
ter of gravity. Ot herwis e, th e ve hicle
might tilt or slip off the ho ist, caus ing
serio us pe rso nal i nju ry.
CI) Note
-Be aware of the following points before
lifting the vehicle:
- The vehicle should never be lifted or
jacked up from underneath the engine
oil pan, the transmission housing, the
front or rear axle or the body side
members. This could lead to seriou s
damage.
- To avoid damage to the underbody or
chassis frame, a rubber pad must be inserted between the floor jack and
the lift points.
- Before driving over a workshop hoist ,
check that the vehicle weight does not
exceed the permissible lifting capacity
of the hoist.
- Before driving over a workshop hoist ,
ensure that there is sufficient clear
ance between the hoist and low parts
of the vehicle.
-
Page 255 of 262
-----------------------------~I~ n~ d~ e~x 253
LA T CH . ..... .. ............ .... .... 143
Description ................. ... ... 144
Guidance f ixtures for lower anchorages 145
Installing a child restraint .. .... .. ... 146
Location
144
Mounting and releasing the anchorage
hook .. .. .. .. ........ ... .. ... ... . 146
Launch Control Program . . . . . . . . . . . . . . 85
L eather . . . . . . . . . . . . . . . . . . . . . . . . . . . 172
C leaning . .. ............. .. .. .. .. . 173
Leaving home ................ .... ... 43
Lifting jack .. ................ ... ... 225
Lifting vehicle ............. .. .. .. .. . 237
Light/rain sensor defective .. .. .. .. .. .. 21
Lights . ..... .. ................ ..... 42
Coming/Leaving home ........... .. .. 43
Emergency flasher .................. 45
Exterior lighting .......... .... .. .. .. 43
Front fog lights .......... .. .. .. .. .. 44
Headlights ............... ... ... ... 42
High beam . . . . . . . . . . . . . . . . . . . . 42, 44
Instrument panel illumination .. . ... .. 46
Side marker lights ........ .. .. .. .. .. 42
Turn signals .. ........... .. .. .. .... 44
Xenon headlights ......... .. .. .. .. .. 42
Loading the luggage compartment ...... 96
Loading the roof rack .......... ... .. .. 61
L ocking
Power locking switch ........ .. .. .. .. 36
Rear lid/trunk lid . . . . . . . . . . . . . . . . . . . 3 7
Remote master key .......... ... .. .. 35
Using the key .................. .... 36
L ower universal anchorage ba rs (Canada) 143
Lower universal anchorages (Canada) 143
L uggage compartment
Cover . ... .. .. ................ ..... 60
Expanding . . . . . . . . . . . . . . . . . . . . . . . . 59
Fastening eyelets ......... .. .. .. .. .. 59
Light .. ... . .... ............. .. .. .. 46
Loading . ... ... .. .. ...... .. .. .. .. .. 96
M
Maintenance . ............. .... .. ... 243
Malfunction Indicator Lamp (MIL) . . 19, 30
Manual transmission ............ .... . 80
Gearshift lever ... .. ...... .. .. .. .. .. 80 Master key ...
..... .................. 33
Battery replacement . . . . . . . . . . . . . . . . 33
Matte finish paint .. ................. 166
Menu button .. .. .. ................. . 25
Menu display . . . . . . . . . . . . . . . . . . . . . . . . 24
Mirrors Activating the dig ita l compass ...... .. 52
Adjusting the exterior mirrors .... .. .. . 47
dimming .. .. .. .. ... .. .......... .. . 47
Monitoring the Advanced Airbag System 119
N
Natural leather .. .. ................. 172
New tires and wheels
NHTSA 207
Contacting ...... .. ................ 98
Number of seats . .. .... ............. 100
0
Occupant seating positions .......... .. 91
Octane rating ... .. .... ........... . .
Odometer
.. .. .. .. ..................
Oil 176
12
refer to Engine oil ................ . 182
On-Board Diagnostic System (OBD)
Data Link Connector (DLC) ....... .. .. . 30
Electronic speed limiter ......... .. .. . 31
Malfunction Indicator Lamp (MIL) ... .. 30
Open door or front lid warn ing ....... .. 22
Operate your vehicle economically and
minimize pollution . ................. 161
Optional eq uipment
Marked with an asterisk . . . . . . . . . . . . . . . 6
Other equipment (efficiency program) .. . 27
Outlets ...... .. ...... ............. . 63
Outs ide mirrors
refer to Exterior mirrors ............. 47
Outs ide temperature display . . . . . . . . . . . 22
Owner's manual How the Owner's Manual is organized . .. 6
p
Paint
Touch-up ... ... .... ............... 168
Pa int No . 238
•
•
Page 259 of 262
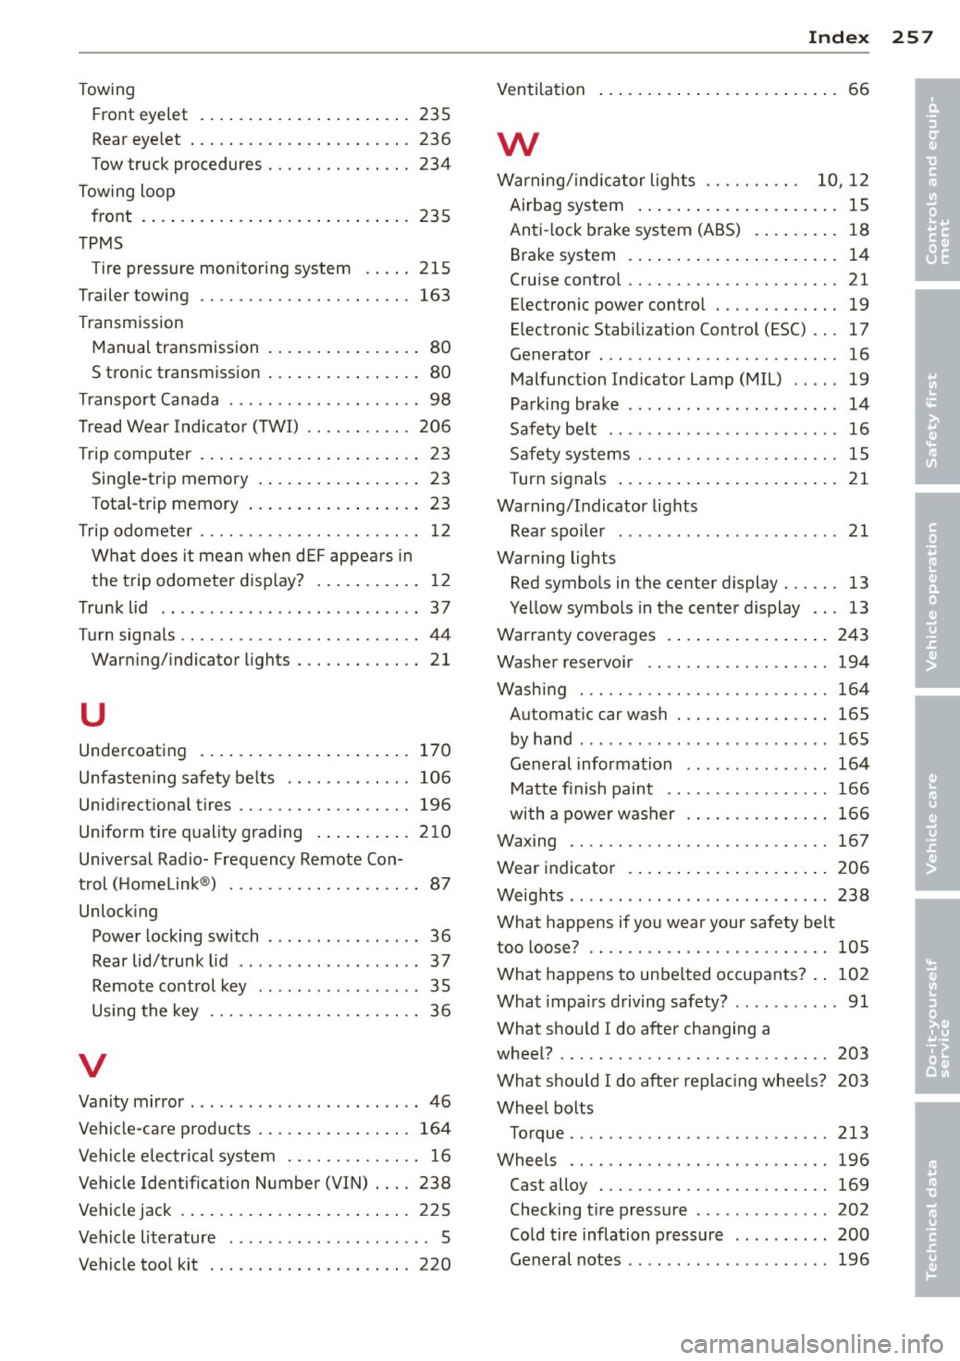
Towing Front eyelet ................ ... ... 235
Rear eyelet ................. ... .. . 236
Tow truck procedures ...... .. .. .. .. . 234
Towing loop front .... .. .. ................ .... 235
TPMS Tire pressure monitoring system .. .. . 215
Trailer towing ............. .... .. .. . 163
Transmission Manual transmission ......... ... .. .. 80
S tronic transmission ......... ... .. .. 80
Transport Canada .......... .. .. .. .. .. 98
Tread Wear Indicator (TWI) .. .. .. .. .. . 206
Trip computer . . . . . . . . . . . . . . . . . . . . . . . 23
Single-trip memory .......... ... .. .. 23
T otal-trip memory . . . . . . . . . . . . . . . . . . 23
Trip odometer ............. .... .. .. .. 12
What does it mean when dEF appears in
the trip odometer display? ....... .. .. 12
Trunk lid . . . . . . . . . . . . . . . . . . . . . . . . . . . 3 7
T urn signals .. .. ........... .. .. .. .... 44
Warning/indicator lights ..... .. .. .. .. 21
u
Undercoating
170
Unfasten ing safety belts .... .. .. .. .. . 106
Unidirectional tires ......... .. .. .. .. . 196
Uniform tire quality grading ....... .. . 210
Universal Radio- Frequency Remote Con-
trol (Homelink ®) . . . . . . . . . . . . . . . . . . . . 87
Unlocking Power locking switch ...... .. .. .. .. .. 36
Rear lid/trunk lid ............ .. .... . 37
Remote control key ....... .. .. .. .. .. 35
Using the key ............ .. .. .. .... 36
V
Vanity mirror . .. .............. ... ... . 46
Vehicle-care products .......... ... .. . 164
Vehicle electrical system .... .. .. .. .. .. 16
Vehicle Identification Number (VIN) . .. . 238
Vehicle jack . ... .............. ... ... 225
Vehicle literature . . . . . . . . . . . . . . . . . . . . . 5
Vehicle tool kit ............ .. .. .. .. . 220
Index 257
Ventilation . . . . . . . . . . . . . . . . . . . . . . . . . 66
w
Warning/indicator lights . . . . . . . . . . 10, 12
Airbag system ... .. ................ 15
Anti-lock brake system (ABS) . . . . . . . . . 18
Brake system . . . . . . . . . . . . . . . . . . . . . . 14
Cruise control .. .. ................. . 21
Electronic power control . . . . . . . . . . . . . 19
Electronic Stabilization Control (ESC) .. . 17
Generator . ....... ................. 16
Malfunction Indicator Lamp (MIL) .. .. . 19
Parking brake .. .... ... .. ..... ..... . 14
Safety be lt .. .. .. .. . .............. . 16
Safety systems . .. .... ........... .. . 15
Turn signals . . . . . . . . . . . . . . . . . . . . . . . 21
Warning/Indicator lights Rear spoiler ...... ................. 21
Warning lights Red symbols in the center display . .. .. . 13
Yellow symbols in the center display .. . 13
Warranty coverages . ................ 243
Washer reservoir .. .... ........... .. 194
Washing ... .. .. .. ................. 164
Automatic car wash . ... ..... ... .. .. 165
by hand ......... .. ............... 165
General information ..... .. .... .... 164
Matte finish paint .... ........... .. 166
with a power washer ........... .... 166
Waxing .... .. .. .. .. . .............. 167
Wear indicator ...... ............... 206
Weights .......... .. ..... .......... 238
What happens if you wear your safety belt
too loose? ...... ...... ............. 105
What happens to unbelted occupants? . . 102
What impairs driving safety? .. .... .... . 91
What should I do after changing a
wheel? ..... .. .. .. ... ............ .. 203
What should I do after replacing wheels? 203
Wheel bolts Torque ...... .. .... .......... ..... 213
Wheels .... .. .. .. ................. 196
Cast alloy . .. .. .. ................. 169
Checking tire pressure ......... .... . 202
Cold tire inflation pressure ......... . 200
General notes . . . . . . . . . . . . . . . . . . . . . 196
•
•