engine AUDI TT COUPE 2009 Owner's Manual
[x] Cancel search | Manufacturer: AUDI, Model Year: 2009, Model line: TT COUPE, Model: AUDI TT COUPE 2009Pages: 316, PDF Size: 71.16 MB
Page 42 of 316
Opening and closing
Master key battery replacement
Each master key contains a battery housed under the
cover.
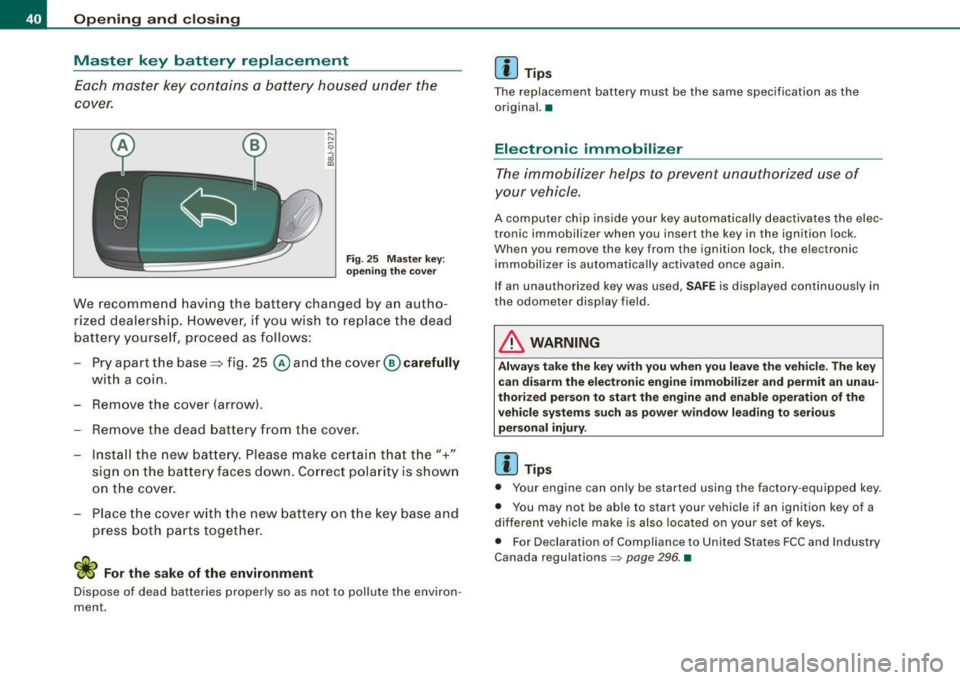
Fig. 25 Master key:
opening the cover
We recommend having the battery changed by an autho
rized dealership. However, if you wish to replace the dead
battery yourself, proceed as follows:
- Pry apart the base::::::,fig. 25
@andthecover @carefully
with a coin.
- Remove the cover (arrow) .
- Remove the dead battery from the cover.
- Install the new battery. Please make certain that the"+"
sign on the battery faces down. Correct polarity is shown
on the cover.
- Place the cover with the new battery on the key base and
press both parts together.
For the sake of the environment
Dispose of dead batteries properly so as not to pollute the environ
ment.
[ i ] Tips
The replacement battery must be the same specification as the
original. •
Electronic immobilizer
The immobilizer helps to prevent unauthorized use of
your vehicle.
A computer chip inside your key automatically deactivates the elec
tronic immobilizer when you insert the key in the ignition lock .
When you remove the key from the ignition lock, the electronic
immobilizer is automatically activated once again .
If an unauthorized key was used,
SAFE is displayed continuously in
the odometer display field.
& WARNING
Always take the key with you when you leave the vehicle. The key can disarm the electronic engine immobilizer and permit an unau
thorized person to start the engine and enable operation of the
vehicle systems such as power window leading to serious
personal injury.
[ i ] Tips
• Your engine can only be started using the factory -equipped key.
• You may not be able to start your vehicle if an ignition key of a
different vehicle make is also located on your set of keys.
• For Declaration of Compliance to United States FCC and Industry
Canada regulations ~
page 296. •
Page 44 of 316
Opening and closing
[ i J Tip s
• In the event of a crash with airbag deployment all locked doors
will be automatically unlocked to give access to the vehicle occu
pants from the outside .
• If the power locking system should malfunction, you can lock
each door individually using the vehicle key.
• If the power locking system should fail, you can still open the
fue l tank flap in an emergency~
page 215.
• You are well advised not to keep va luables inside an una tten ded
vehic le, visib le or not . Even a properly locked vehic le cannot provide
the security of a safe! •
Unlocking and locking the vehicle vvith the
remote control
How the remote control works .
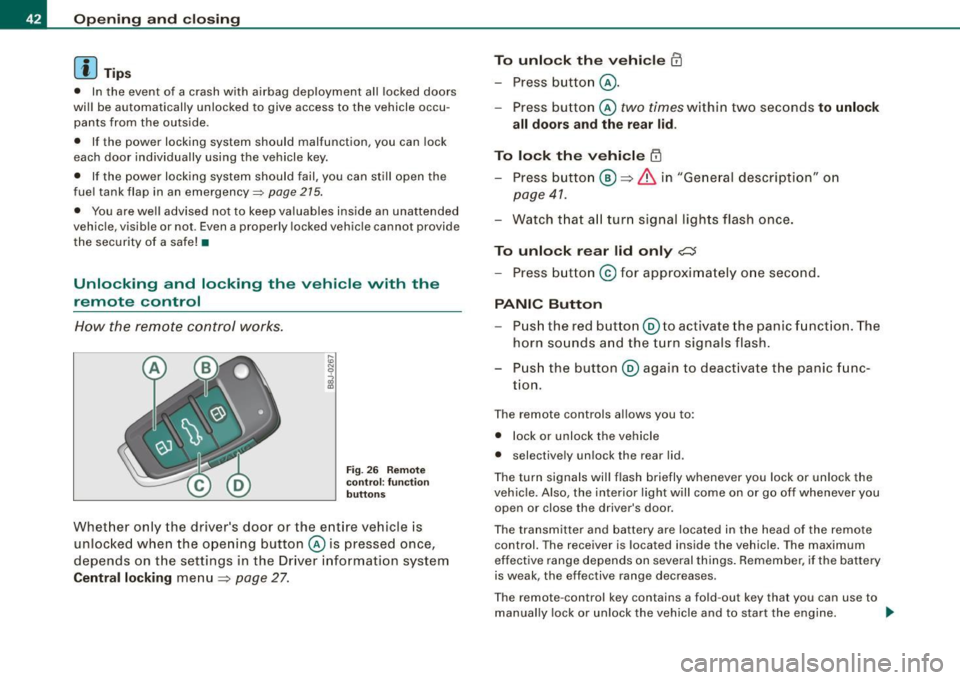
Fig. 26 Remote
co ntro l: functi on
butt on s
Whet her only the driver 's door or the ent ire vehicle is
unloc ked when the ope ning button © is pressed once,
depends on the settings in the Driver information system
Central locking menu
~ page 27.
To unlock th e vehicle CD
- Press b utton @ .
- Press button © two times within two seconds to unlock
all doors and the rear lid .
To lock the vehicle ~
- Press butto n@ ~ & in "Ge neral desc ripti on" o n
page 41.
- Watch t hat a ll turn s ignal lights flash once .
To unlock rear lid only c:J
- Press b utton © for approximately o ne second .
PANIC Button
-Pu sh the re d butto n@ to activate the panic funct ion . The
horn so unds a nd the turn signals flash .
P us h the button ® again to deact ivate the panic f unc
tion.
T he remote controls allows you to :
• l ock or unlock the vehicle
• selective ly unlock the rear lid .
The tu rn signa ls will flash briefly whenever you lock or un lock the
vehicle. Also , the interior light wi ll come on or go off whenever you
open or clos e the driver's door .
The transmitter and battery are located in the head of the remote
control. The receiver is located inside the vehicle. The maximum
effect ive range depends on several things. Remember, if t he battery
is weak , the effective range decreases.
T he remote -control key contains a fo ld -out key that you can use to
manually lock or unlock the vehicle and to start the engine. .,,_
Page 45 of 316
If you need to replace the remote control, or if you need to have it
repaired, you must see your authorized Audi dealer. Only then can
you use the key again.
& WARNING
Read and follow all WARNINGS => & in "General description" on
page 41.
[ i] Tips
• The remote control key is automatically deactivated when the
ignition is switched on.
• The operation of the remote control key can be temporarily
disrupted by interference from transmitters in the vicinity of the
vehicle working in the same frequency range (e.g. a cell phone, radio equipment) .
• In order to make sure the locking function is working, you should
always keep your eye on the vehicle to make sure it is properly
locked.
• Do not use the remote control if you are inside the car, otherwise
you may unintentionally lock the vehicle, and then you would set off the anti-theft alarm when you try to start the engine or open a door .
In case this happens anyhow, push the unlock button
II).
• Use the panic function only if you are in an emergency
situation. •
Resetting the remote control
The remote control must be reset if the vehicle does not
unlock.
- Press the unlock CD button on the remote control.
- Unlock or lock the vehicle once at the door lock using the
stem of the remote control key.
Controls and equip
ment
Opening and closing
The synchronization process must not take longer than 30
seconds. •
Operating locks with the key
To lock and unlock the vehicle from the outside, turn the
key in the lock of the driver's door.
To unlock the vehicle
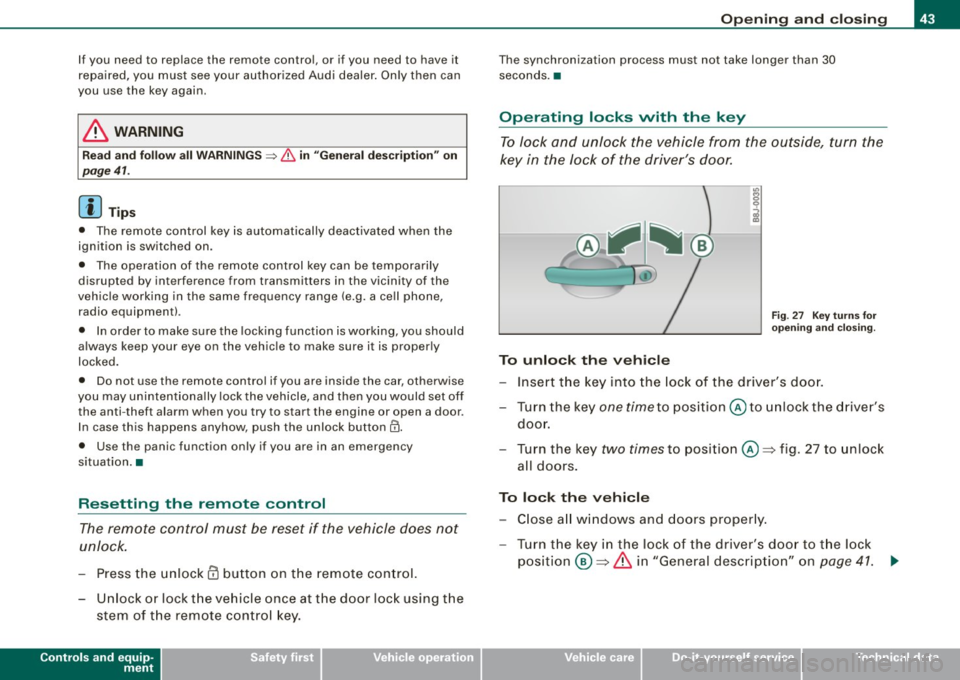
Fig. 27 Key turns for
opening and closing.
-Insert the key into the lock of the driver's door.
- Turn the key
one time to position @to unlock the driver's
door.
- Turn the key
two times to position @~ fig . 27 to unlock
all doors.
To lock the vehicle
- Close all windows and doors properly.
- Turn the key in the lock of the driver's door to the lock
position @~
& in "General description" on page 41. ~
I • •
Page 49 of 316
-Fold down the lef t rear seat back.
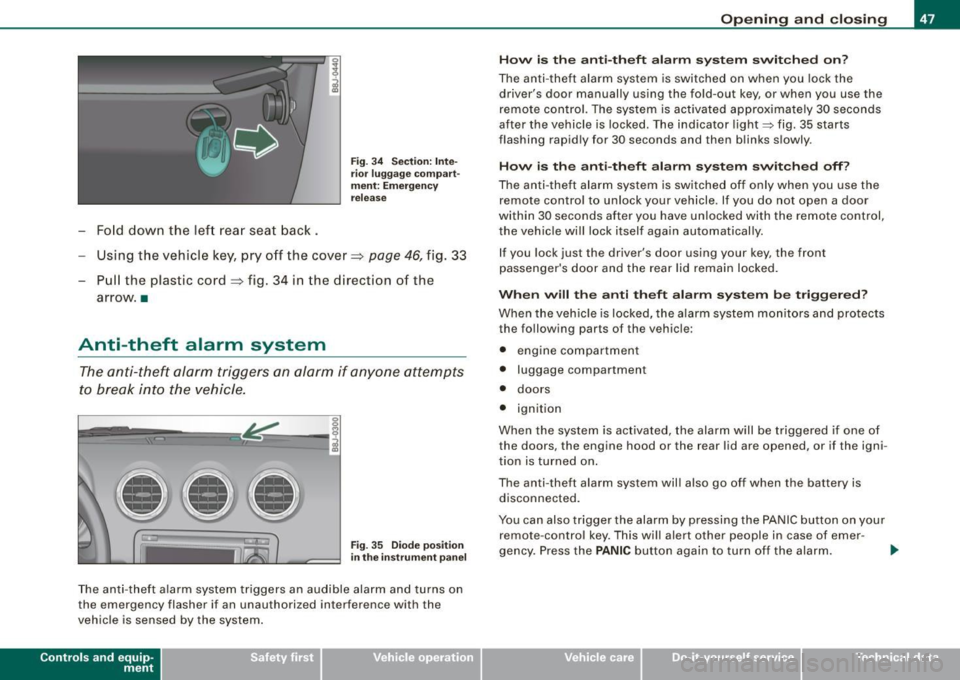
Fig . 3 4 Sec tio n: In te
r ior luggage co mpart
m ent: E merg en cy
re lease
Using the vehicle key, pry off the cover => page 46, fig . 33
- Pull the plastic cord~ fig. 34 in the direction of the
arrow. •
Anti-theft alarm system
The anti-theft alarm triggers an alarm if any one attempts
to break into the vehicle.
llllD
Fig. 35 Dio de posi tion
i n th e ins trum en t pane l
The anti-theft a larm system triggers an audible alarm and turns on
the emerg ency flasher i f an unauthorized inter ference with the
vehicle is sensed by the system .
Contro ls and eq uip
ment
Op ening and clo sing
H ow i s th e a nti-th eft al arm sys te m sw itch ed o n?
The anti -theft alarm system is switched on when you lock the
driver's door manually using the fo ld-out key, or when you use the
remote con trol. The system is activated approximately 30 seconds
after the vehicle is locked . The indicator light~ fig. 35 starts
flashing rapidly for 30 seconds and then blinks slowly.
How i s th e a nti-th eft ala rm s yste m sw itch ed off?
The anti -theft alarm system is switched off only when you use the
remote contro l to unlock your veh icle . If you do not open a door
within 30 seconds after you have unlocked with the remote control,
the vehicle will lock itself again automatically.
If you lock jus t th e driv er's door using your key , the front
passenger 's door and the rear lid remain locked .
When w ill th e anti th eft ala rm sys te m b e trigge re d ?
When the vehic le is locked, the alarm system mon itors and protects
the following parts of the v ehicl e:
• engine compartment
• luggage compartment
• doors
• ignition
When the system is activated, the alarm will be triggered if one of
the doors , the engine hood or the rear lid are opened , or if the igni
tion is turned on .
The anti- theft alarm system will also go off when the battery is
disconnected.
You can also trigger the alarm by pressing the PANIC button on your remote -contro l key. This will alert other people in case of emer -
gency . Press the
PANIC button again to turn of f the alarm. ..,_
Vehicle care I I irechnical data
Page 50 of 316

Opening and closing
H ow is th e a nti-th eft alarm swit ch ed off when
trigger ed?
The alarm system is switched off when you unlock the vehicle using
the remote -con trol key or when the ignition is switched on . The
alarm wi ll also switch itse lf off when it comes to the end of its cycle.
Em ergenc y flasher
The emergency flasher will blink brief ly when the doors, engine
hood and rear lid are properly closed .
If the emergency flashers do not blink, check the doors, engine hood
and rear lid to make sure they are properly closed. If you close a
door, the hood or the rear lid with the anti-theft alarm switched on,
the emergency flashers will blink only after you have closed the
door or lid.
[ i ] Tips
• For the anti -theft a larm system to function p roperly, make sure
a ll vehicle doors and windows are closed before leav ing the vehicle .
• When you open the vehicle fr om the driver's door using the key,
the central locking switch will work only after you have switched on
the ignition . •
Power windows
Controls
The driver can ope rate all windows.
Fi g. 36 D riv er's door:
powe r window
sw itch es
Fig . 37 Passenge r's
doo r: p ower window
sw itch
If the respective switch is pushed or pulled the window will
open or c lose. The power window switches have a
two -posi
tion function :
Opening the windows
Press the sw itch and hold it down until the window has
reached the des ired position.
Page 51 of 316

-Press the switch briefly to open the window automat i
cally. By briefly pressing the switch again, the downward
travel of the window can be stopped in any position
=> & .
Closing the windows
-Pull the sw itch and hold it until the window has reached
the des ired pos ition.
- Pull the switch
briefly to close the window automatically .
By briefly pressing the sw itch again, the upward travel of
the window can be stopped in any position=>& .
Switch @~ page 48 , fig. 36 operates the window in the driver's
door.
Switch @ operates the window in the front passenger 's door .
& WARNING
• Do not leave children unattended in the vehicle, especially with
access to vehicle keys. Unsupervised use of the keys can result in
starting of the engine and use of vehicle systems such as power
windows, etc. which could result in serious injury.
• Remember -you can still open or close the power windows for
about ten minutes after the ignition is switched off. Only when
either of the front doors are opened are the power windows
switched off.
• Be careful when closing the windows . Check to see that no one
is in the way, or serious injury could result!
• Always remove the ignition key whenever you leave your
vehicle.
• If you lock your vehicle from the outside, no one, especially chil
dren, should remain in the vehicle.
• Do not stick anything on the windows or the windshield that
may interfere with the driver's field of vision.
Controls and equip
ment
Opening and closing
[ i] Tips
• When the doors are opened, the windows are automatically
lowered 10 mm.
• The windows can st ill be opened and closed for abou t ten
minutes after the ignition has been turned off. The power windows
are not shut off until one of the front doors is opened. •
Convenience close/open feature
You can close or open the windows from outside when
you lock or unlock your car with the key.
Closing the windows
Fig. 38 Key turns for
opening and closing
- Insert the key into the lock of the driver's door.
- Make sure that the windows are not blocked => & .
- Turn and hold the key in the lock position@=> fig. 38
until the w indows are completely closed.
Opening the windows
- Insert the key into the lock of the driver's door.
- Turn and hold the key in the open posit ion
@ .
I • •
Page 53 of 316
Clear vision
Lights
Switching the headlights on and off ·'t!-·
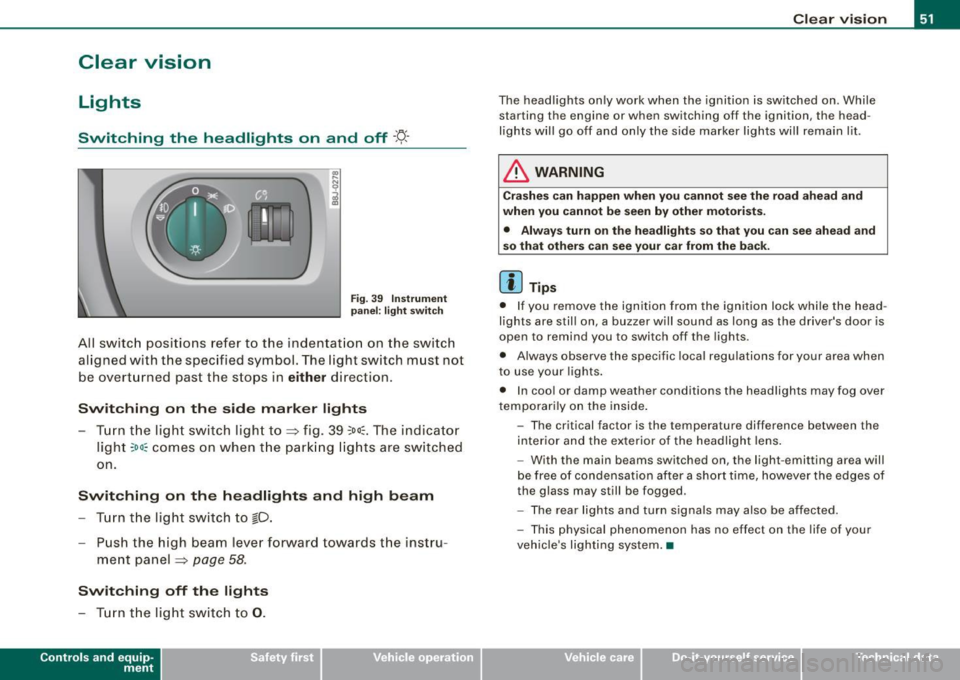
Fig. 3 9 I nstrum ent
p ane l: lig ht sw itch
All sw itc h positions refer to the indentat ion on the switch
aligned with the specified symbol. The light switch must not
be overturned past the stops in
either direction .
Switching on the side marker lights
-Tur n t he light switch ligh t to ==> fig. 39 ;oo; . The indi ca tor
light
; oo ~ comes o n when t he park ing lig hts are sw itched
on .
Switching on the headlights and high beam
- Turn t he light switch to lD.
- Push the high beam leve r fo rward towards t he instru -
ment panel ==> page
58.
Switching off the lights
-Tur n t he lig ht switch to 0 .
Con tro ls and eq uip
ment
Clear vision
The headlights only work when the ignition is switched on . While
starting the engine or when switching off the ignition, the head
lights will go off and only the side marker lights will remain lit .
& WARNING
Crashe s can happen when you cannot see the road ahead and
when you c annot be seen by other motori sts.
• Always tu rn on the headlight s so th at you can see ahead and
so that others can see your ca r from the ba ck.
[ i ] Tips
• I f you remove the ignition from the ignition lock wh ile the head
lights are still on, a buzzer will sound as long as the driver's doo r is
open to remind you to switch off the lights .
• Always observe the spec ific local regulations for your area when
to use your lights .
• I n coo l or damp weather conditions the headlights may fog over
tempo ra rily on the inside .
- The critical factor is the t emperature diff erence between the
interior and the ex te rior of the headlight lens .
- With the main beams switched on, the light -emitting area will
be free o f condensation after a short time, however the edges of
the glass may still be fogged .
- The rear lights and turn signa ls may also be affected.
- This physical phenomenon has no effect on the life of your
vehicle 's lighting system. •
Vehicle care I I irechnical data
Page 63 of 316

& WARNING
• Wiper blades are crucial for safe driving! Only when they are in
good condition are they able to clear the windows properly to
provide uncompromising visibility. Worn or damaged wiper blades
are a safety hazard~
page 63, "Replacing front wiper blades"!
• The light/rain sensor* is only designed to assist and support
the driver. It remains entirely the driver's responsibility to monitor outside weather conditions and to manually activate the wipers as
soon as rain or drizzle reduces visibility through the windshield.
• The windshield must not be treated with water-repellent mate
rials. They can increase glare under poor visibility conditions such
as wetness, darkness, or when the sun is low on the horizon. In
addition, they can cause the windshield wipers to chatter.
0 Note
In freezing or near freezing conditions:
• Always check that the wiper blades are not frozen to the glass
before you turn the wipers on. Loosen a wiper blade which is frozen
in place before operating the wipers to prevent damage to the wiper
blade or the wiper motor.
• Do not use the wipers to clear a frosted window . Using the
wipers as a convenient ice scraper will destroy the wiper blades.
• Before you take your vehicle to an automatic car wash, make sure
you have the windshield wiper system switched off (lever in position
0), otherwise the windshield wiper system could get damaged in the
car wash if it should suddenly come on.
[ i] Tips
• The rain sensor is part of the interval wiping system. Turning off
the ignition will also deactivate the rain sensor . To reactivate the
sensor, switch off the interval wiping function, then switch it back
on again.
Controls and equip
ment
Clear vision
• Worn or dirty windshield wiper blades cause smearing, which
can affect the operation of the light/rain sensor*. Check the condi
tion of your windshield wiper blades regularly.
• Applies to vehicles with light/rain sensor: When the wipers are
switched on manually and in rain conditions, the automatic head
lights* turn on~
page 52, "Sensor activated head and tail light
control" or off during the day when the wipers are no longer oper
ating. The automatic headlights * function is available in this case
only when the light switch is in the "AUTO" position~
page 52,
fig. 40.
• Make sure the washer fluid reservoir in the engine compartment
is topped off before going on a long trip. Look up~
page 233 for
checking and filling the washer container .
• The wipers only operate with the hood completely closed. •
Applie s to v ehi cles: with he adli gh t wash er syst em
Headlight washer system
The headlight washer system cleans the headlights.
Operate the windshield wiper/washer system=> page 60,
fig. 50 ® with the headlights turned on by holding the
lever for longer than one second.
The washer jets extend forward out of the front bumper driven by
water pressure to spray the front headlights with water .
You should inspect the headlights regularly (for example when refu
eling) and clean off any solid dirt or insects from the lenses.
To ensure the system works properly in winter, keep the washer jets
free of snow and remove any ice using a de -icing spray. •
I • •
Page 64 of 316
Clear vision
Service position The wiper blades can be changed more easily in the
service position .
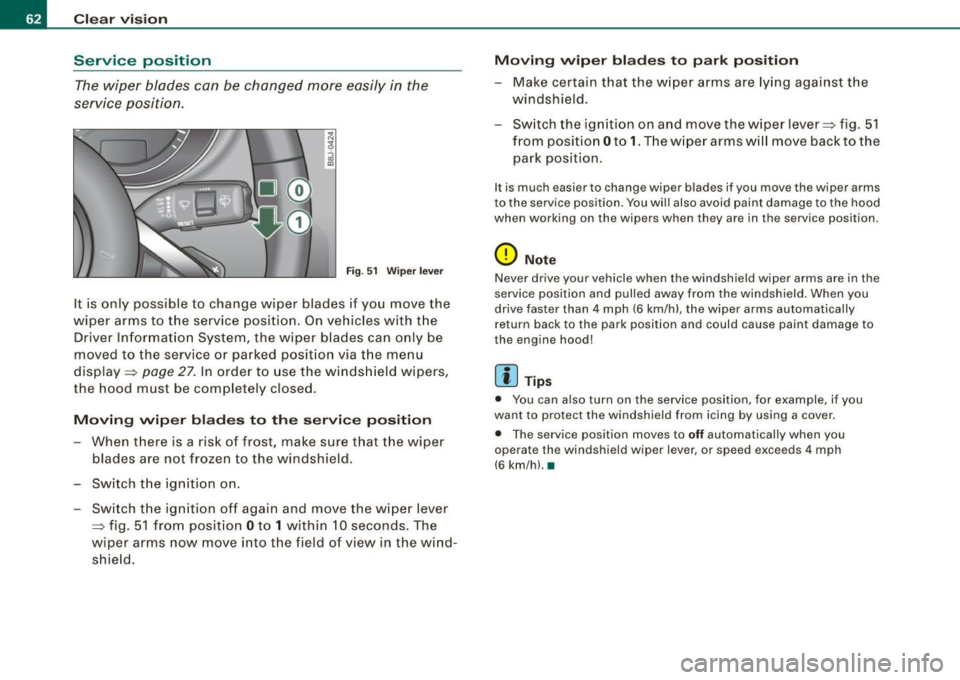
Fig . 51 Wiper lever
It is only possible to change wiper blades if you move the
w iper arms to the service position. On vehicles with the
Driver Information System , the wiper blades can only be
moved to the service or parked position via t he menu
display =>
page 27. In order to use the windshield wipers,
the hood must be completely closed.
Moving wiper blades to the service position
-When there is a risk of frost, make sure that the wiper
blades are not frozen to the windshield .
- Switch the ignition on .
- Switch the ignition off again and move the wiper lever
~ fig. 51 from position Oto 1 within 10 seconds . The
wiper arms now move into the field of view in the wind
shie ld.
Moving wiper blades to park position
-Make certain that the wiper arms are lying against the
windshield .
- Switch the ignition on and move the wiper lever~ fig . 51
from position Oto
1. The w iper arms w ill move back to the
park position.
I t is much easier to chang e wiper blad es if you mov e th e wiper arms
to the service position. You wil l also avoid paint damage to the hood
when working on the wip ers when they are in the service position .
0 Note
Never drive your vehicle when the windshield wiper arms are in the
service position and pulled away from the windshield . When you
drive faster than 4 mph (6 km/h) , the wiper arms automatica lly
return back to the park position and could cause paint damage to
the engine hood!
[ i ] Tips
• You can also turn on the service position, for example, if you
want to protect the windshield from icing by using a cover.
• The service position moves to
off automatically when you
operate the windshield wiper lever, or speed exceeds
4 mph
(6 km/hl. •
Page 84 of 316
Seats and stor ag e
Cigarette lighter /socket
Cigarette lighter
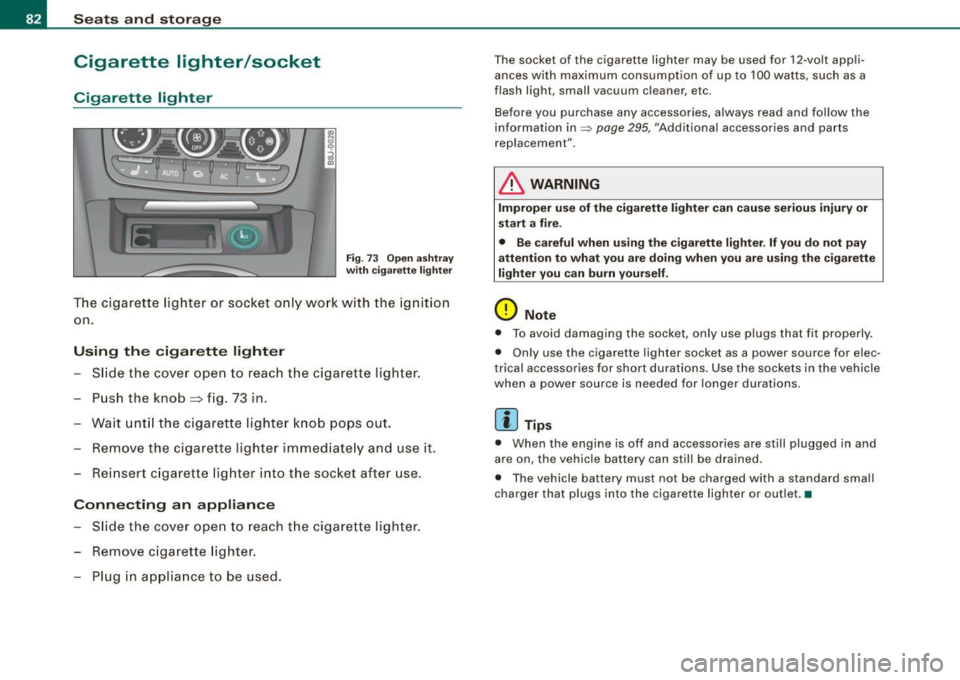
F ig . 7 3 O pen ashtra y
w it h cig arett e lig ht er
T he cigare tte lighter or socket o nly work w ith the ignition
on.
Using the cigarette lighter
- Slide the cover open to reach t he cigarette lighter .
- Push the knob=> fig. 73 in .
- Wait unt il the cigarette light er k no b pops out.
Remove the cigarette ligh ter immedi ate ly and use it.
Re insert c igarette lighter into the socket after use .
Connecting an appliance
-Slide th e cover ope n to rea ch t he cigarette light er.
- Remove c iga rette lighter.
Plug in applia nce to be used.
T he socket of the cigarette lighter may be used for 12 -volt appli
ances with maximum consumption o f up to 100 wa tts, such as a
flash light , small vacuum c leaner, e tc.
Before you purchase any accessories, always read and follow the
information in=>
page 295 , "Additional accessories and parts
replacement" .
& WARNING
Improper use of the cig arett e light er can cau se seriou s inju ry or
start a fire .
• Be car eful when u sing th e cigarette lighter . If you do not pa y
attention to w hat y ou are doing when yo u are u sing the cigar ette
lighter you can burn your self .
0 Note
• To avoid damaging the socke t, only use plugs that fit properly.
• Only use the cigarette lighter socke t as a power sour ce for ele c
trical accessories for short durations . Use the sockets in the vehicle
when a power source is needed for longer durations .
[ i ] Tips
• When the engine is off and accessories are still plugged in and
are on, the vehicle battery can still be drained.
• The vehicle battery must not be charged with a s tandard sma ll
cha rger that plugs into the cigarette lighter or ou tlet .•