key AUDI TT COUPE 2009 Owner's Manual
[x] Cancel search | Manufacturer: AUDI, Model Year: 2009, Model line: TT COUPE, Model: AUDI TT COUPE 2009Pages: 316, PDF Size: 71.16 MB
Page 95 of 316
Starting and stopping the engine
Starting the engine
The engine can only be started with on original Audi key
and the clutch pedal* depressed.
- Set the parking brake.
Move the selector lever to the neutral position (automatic
transmission: selector lever in P or N)
~ & .
- On vehicles with manual transmission, fully depress the
clutch pedal.
- Turn the ignition key to position
0 ~ page 92, fig. 79 -
do not depress the gas pedal when starting the engine!
- Let go of the key as soon as the engine starts.
A cold engine may at first be loud after it has been started. This is
due to the hydraulic valves building up the oil pressure . This normal
and no need for concern.
If the engine does not start immediately, stop trying after 10
seconds and then try to restart the engine about 30 seconds later.
& WARNING
Never start or let the engine run in a confined or enclosed area.
Exhaust fumes from the engine contain carbon monoxide, a color
less and odorless gas. Carbon monoxide can be fatal if inhaled.
• Never leave the engine idling unattended. An unattended
vehicle with a running engine poses a danger of personal injury or
theft.
Controls and equip
ment
On the road
0 Note
• Avoid high engine speeds, fast acceleration or heavy engine
loads while the engine is still cold. This could damage the engine.
• The engine cannot be started by pushing or towing the vehicle.
~ For the sake of the environment
To avoid unnecessary engine wear and to reduce exhaust emis
sions, do not let your vehicle stand and warm up. Be ready to drive
off immediately after starting your vehicle. Maintain moderate
speed until the engine is completely warm. Remember, the engine
performs best at operating temperature. •
Stopping the engine
-Turn the ignition key to position G) ~ page 92, fig. 79.
& WARNING
• Never turn off the engine until the vehicle has come to a
complete stop.
• The brake booster and servotronic only work when the engine
is running. With the ignition turned off, you have to apply more
force when steering or braking. Since you cannot steer and stop
normally, this can lead to accidents and serious injuries.
• The radiator fan can continue to run for up to 10 minutes even
after you have turned off the engine and removed the ignition key.
The radiator fan can also turn on again if the engine coolant heats
up because of intense sunlight or heat build-up
in the engine
compartment. .,
I • •
Page 97 of 316

-Wit h a manual transm issi on, engage 1st gea r, or with a n
a utomatic transmission place the se lector lever in P
=> & .
- Remove the ignition key from the ignit io n lock.
Wha t el se you should do wh en parking yo ur v ehi cle on
a n incli ne or d ecline
Turn the steering whee l so that if the vehicle shou ld start to rol l, it
wi ll roll into the curb.
I f you are park ing on a
decline (the front of you r ve hicle facing
downhill) , turn the front wheels to the right so that they poin t
toward the curb .
If you are park ing on an in cline (the font of your vehicle facing
uphill!, turn the front whe els to the left so that they point
away from
the curb .
& WARNING
This is how you can reduce the ri sk of injury when le avi ng your
vehicle .
• Never p ark the vehi cle w here it can come
in cont act w ith dry
gra ss, s pilled fuel or any other flammable mater ial s.
• Never allow anyone -espe cially small ch ildren -to remain
in the
vehicle when it is locked . Locked doors make it more difficult for
re scu ers to ac ce ss the pa ssenger compartment in the e vent of an
emergency . Danger to life!
• Never lea ve childr en un super vis ed in the vehicle . Children
c ould release the parking brake or move the gearsh ift l ever out of
gear . The vehicle could start to r oll away a nd cau se an a ccident .
• No matter what the season i s, the temperature
in a parked
v ehi cle can reach dangerou s level s. •
Controls and equip
ment
On th e road
Acoustic parking system
Applies to veh ic les : wit h 4 -ch anne l a cou stic park ass is t
Rear acoustic park assist
Acoustic park assist gives a warning a bout o bstacles
behind the vehicle.
Description
The rear acoustic park assist (4 -channel acoustic park assist) deter
mines the d istance of the vehic le from an obstac le using u ltrasonic
sensors. The sensors are in the rear bumper. The volume and the
pitch of the chimes can be adjusted through the menu display
=> page 27.
The range at which the sensors start to m easure is about :
To the side
Center rear
Acti v atio n
2 feet (0 .60 m)
5 feet (1.60 ml
The pa rking assist is activated when rever se ge ar is engaged . A brief
tone confirms that the system is activated .
Backing up
Distance warning when backing up starts when an obstacle is
detec ted in the range of the park ass ist system . As the distance
decreases, the time interval between the aud ible tones becomes
shorter .
When the distance is less than 1 foot (0.30 m) , the tone becomes
continuous . At this point you should stop backing up.
Please note that low objects a lready signalled by a warning can
disappear from the sys tem's detection range and wil l not continue
t o be signa lled . ..,
I • •
Page 103 of 316
_______________________________________________________ T_ r _a_ n_s_ m __ is_ s_ io_ n _ __. _
& WA RN ING !continue d)
hood). Other wise the vehi cle will immediately start to move -
s ometime s even if the p arking brake is firmly applied -ris k of an
a ccident !
• Before you or other per sons open the hood and work on a
running e ngine , the sel ector le ver must be moved to P and the
parking brake applied firmly -ris k of an a cc iden t! Follow the
wa rning sti ck ers
~ pag e 209, "Engine compa rt me nt".
[ i ] Tips
If you have inadvertently shifting into N while the vehic le is moving ,
you shou ld remove y our foo t from the acce lerator and wait unti l the
engine speed has dropped to idle before shifting back to Dor S . •
Ap plies to ve hicles : with S tro ni c®
Selector lever lock
The selector lever lock prevents a gear from being
engaged accidentally and unin tentionally setting the
vehicle in motion.
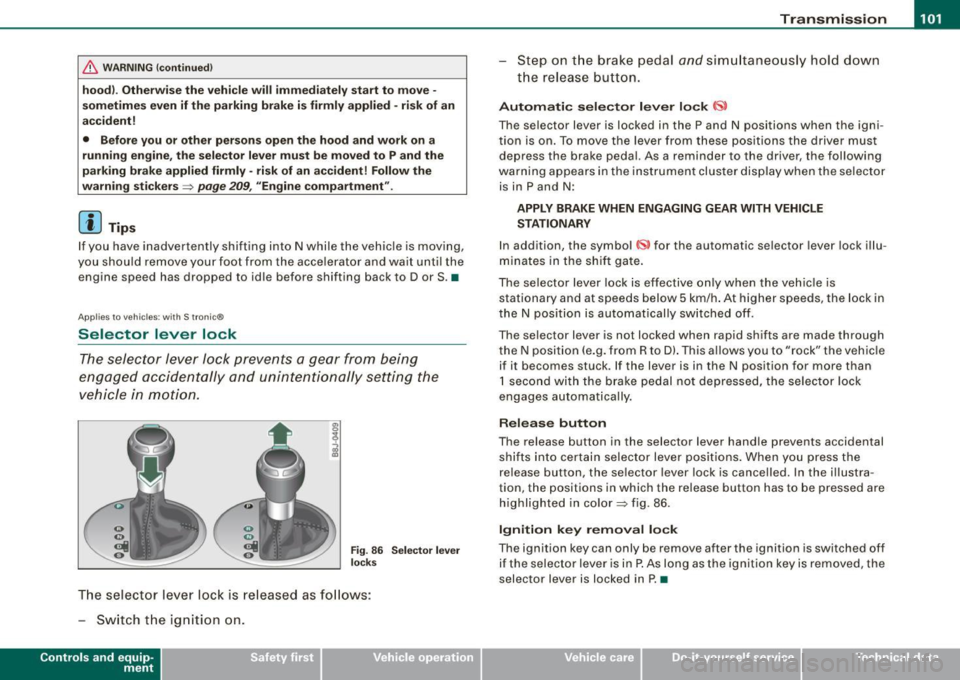
F ig . 8 6 Sel ector l ever
l oc ks
The selector lever lock is released as fo llows:
- Switch the ign ition on .
Contro ls and eq uip
ment
St ep on t he br ake pedal and simu ltan eously hold down
the rel ease button.
Autom ati c sele ctor le ver lo ck 6ll
The selector lever is locked in the P and N positions when the igni
tion is on. To move the lever fr om these pos itions the driver mus t
depress the brake pedal. As a reminder to the driver, the fol lowing
warning appears in the ins trument cluster display when the selector
is in P and N:
APPLY BRAKE WHEN ENGAGING GEAR WITH VEHICLE
S TATIONAR Y
In addition, the symbol «s> for the automatic selector lever lock i llu
minates in the shif t gate .
The selector lever lock is effective only when the vehic le is
stationary and at speeds below 5 km/h . At higher speeds, the lock in
the N position is automatically sw itched o ff .
The selector lever is not locked when rapid shifts are made through
the N posi tion (e .g. from R to DI. This allows you to "rock" the vehicle
if it becomes stuck . If the lever is in the N position for more than
1 second with the brake pedal not depressed, the selector lock
engages automatically.
Release button
The release button in the selector lever handle prevents accidental shifts into certain selector lever positions . When you press the
re lease button, the selector lever lock is cancelled. In the i llustra
tion , the positions in which the release button has to be pressed are
h ighlighted in co lor~ fig. 86 .
Ignition key removal lock
The ignition key can only be remove after the ignition is switched off
if the selector lever is in P . As long as the ignition key is removed, the
selector lever is locked in P. •
Vehicle care I I irechnical data
Page 110 of 316
• ..__H_ o_m_ e_ L_ i_ n _k_ @_R __________________________________________________ _
Applies to vehicles: with Home li nk® universal remote control
Programming the Homelink ® transmitt er
The transmitter is programmed in two phases. For rolling
code transmitters, a third phase is also necessary.
1----------------.....:!i:l
Fig . 93 Overhead
console : Homelink®
keypad
Fig. 94 Front bumper,
driver side: location of
transmitter unit
Phase 1: programming the overhead keypad
1. Make sure your vehicle is within operating range of the
remote controlled garage door opener .
2. Set the parking brake~
& in "General information" on
page 107.
3. Turn the ignition on. Do not start the engine! 4. Press and hold the two outside Homelink® buttons
(D
and
@for approximately 20 seconds until indicator
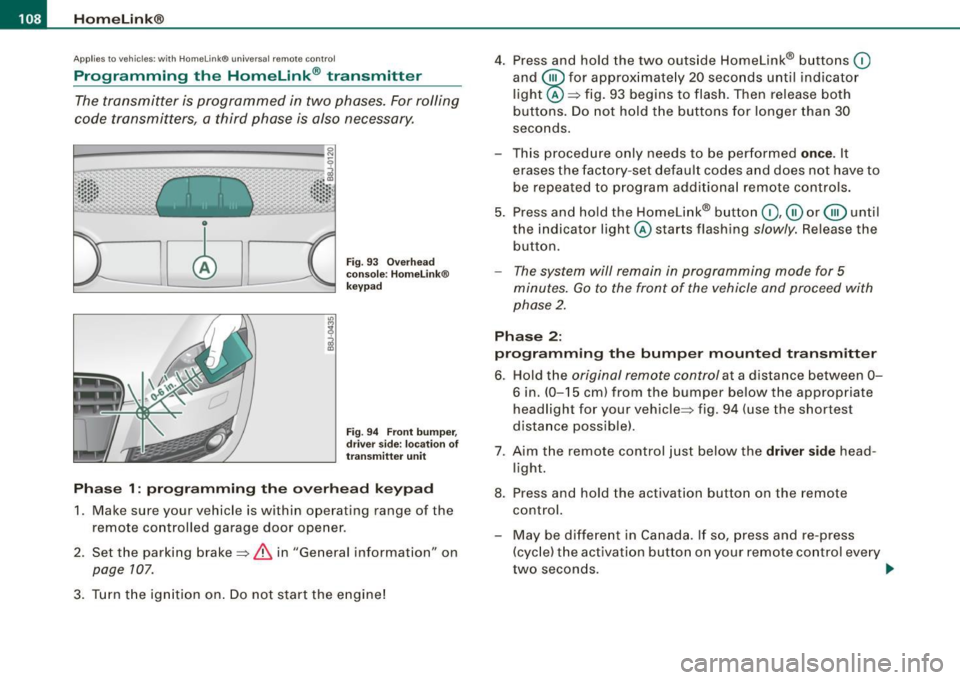
light @::::::, fig. 93 begins to flash. Then release both
buttons. Do not hold the buttons for longer than 30
seconds.
This procedure only needs to be performed
once . It
erases the factory-set default codes and does not have to
be repeated to program additional remote controls.
5. Press and hold the Homelink® button
(D , ® or @ until
the indicator light @starts flashing
slowly. Release the
button.
- The system will remain in programming mode for 5
minutes.
Go to the front of the vehicle and proceed with
phase 2.
Phase 2:
programming the bumper mounted transmitter
6. Hold the original remote control at a distance between 0-
6 in. (0-15 cm) from the bumper below the appropriate
headlight for your vehicle~ fig . 94 (use the shortest
distance possible) .
7. Aim the remote control just below the
driver side head
light.
8. Press and hold the activation button on the remote control.
- May be different in Canada. If so, press and re-press
(cycle) the activation button on your remote control every
two seconds. .-,,
Page 111 of 316
___________________________________________________ H_ o_m _ e_ L_ i_ n _k_ ® _ ___.ffllll
9. The emergency flashers will flash three times (after
about 15-60 seconds) when the programming is
successful. Release the button on the remote control.
-To program more devices, repeat steps 4 to 9.
10. Press and hold the trained Homelink® button and
observe the indicator light@=>
page 108, fig. 93 .
- If the indicator light is solid/continuous, programming is
complete and your device should activate when you
press and release the trained Homelink® button.
- If the indicator light blinks rapidly for 2 seconds and is
then a solid/continuous light , proceed with phase 3 to
program a rolling code device.
Phase 3: rolling code programming
-A second person on a ladder who can safely reach the
garage door opener motor is recommended.
11. Locate the "learn" button on the garage door opener
motor (refer to the operating instructions for the opener,
as the location of this button may
vary by manufacturer).
12. Press and release the learn button on the garage door
opener motor.
- Note: once the button is pressed, there are 30 seconds in
which to initiate the next step.
13. On the Homelink® keypad inside the vehicle, firmly
press and hold the Homelink® button previously
programmed in phases 1 and 2 for two seconds and
release. Repeat this sequence
twice .
Contro ls and eq uip
ment
- Some vehicles may require the press/hold/release
sequence up to three times to complete the training
process.
- Homelink® should now activate your rolling code
equipped device.
If the 5 minute time limit is exceeded , the emergency flashers will
flash one time to indicate that the process has been terminated . In
this case, repeat steps 4 through 9.
If the emergency flashers do not flash
three times (after about 15-
60 seconds), programming was not successful. In this case, repeat
steps 4 through 9.
Remote control units for garage door openers in Canada are set to
stop transmitting radio frequency signals after two seconds. This
time may not be sufficient for the Homelink® system to learn the
radio frequency signal. Perform all other steps as described
above. •
Applies to veh ic le s: with Homelink® un iversal re m ote contro l
Operating the HomeLink ® transmitter
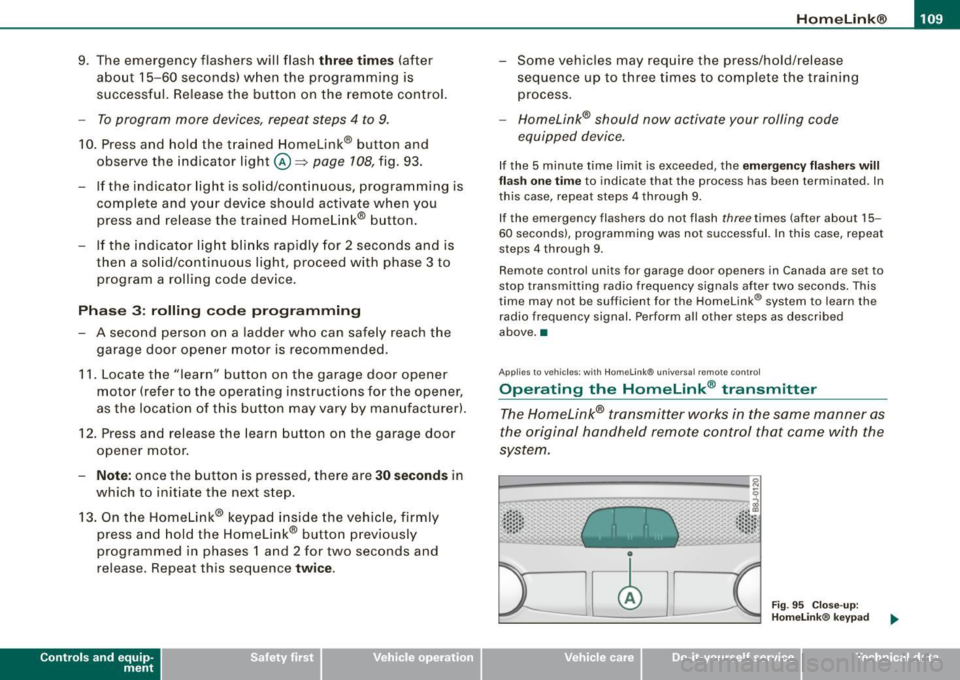
The HomeLink® transmitter works in the same manner as
the original handhe/d remote control that came with the
system.
~--------------: !:3
~ ......
· ·····
1 :::::; ...... , .. t.,•.• ..
Vehicle care I I
..... a:) . ....... •••• •.• 1 .......... j ·::; ,~
Fig . 95 Close-up :
Homelink® keypad
irechnical data
Page 112 of 316
....... _H _o_ m _ e _L_i_n _k _ ® ____________________________________________________ _
- Press the appropriate programmed button
(0, ® or @
to activate the desired remote control function
~ & in
"General information" on
page 107. •
Applies to v ehic les : wit h Home link® univers al rem ote con tro l
Reprogramming a single button
A Homelink® button can be reprogrammed individually without affecting the other button a/locations.
Programming the overhead keypad
- Press the appropriate Homelink® button until the indi
cator light begins flashing slowly.
Programming the bumper mounted transmitter 1. Hold the
original remote control at a distance between 0-
5 in. (0-13 cm) from the bumper below the appropriate
headlight for your vehicle (use the shortest distance
possible) .
2. Aim the remote control just below the driver side head
light.
3. Press and hold the act ivation button on the remote
control.
4. The emergency flashers w ill flash three times (after
about
15-60 seconds) when the programming is
successful. Now release the button on the remote
control.
- If the device ut ilizes a rolling code, please follow phase 3
of ~
page 108, "Programming the Homelink® trans
mitter" for rolling code programming.
This procedure will cause the existing programming on the
Homelink ® button to be erased! •
App lies to ve hicl es: wit h Homeli nk® uni versal remote cont rol
Erasing the programming of the Homelink ®
transmitter
When you erase the programming, the programming on
all three of the transmitter channels with be lost!
- Perform steps 1 to 4 as described on~ page 108, "Phase
1: programming the overhead keypad".
When completed , the Homelink ® system will be in the p rog ram
ming mode and is then ready to learn the codes for remote
controlled devices.
[I) Tips
• Programmed buttons cannot be erased individually.
• For security reasons you are advised to erase the programming
of the Homelink ® system befo re you sell your vehicle. •
Page 131 of 316
- Make sure that your safety be lt s ar e alw ay s re ady fo r use
a nd are not damaged.
& WARNING
Not wearing safety belts or wearing them improperly increases
the risk of ser ious personal injury and death . Safety belts can work
only when used correctly.
• Always fasten your safety belts correctly before driving off and
make sure all passengers are properly restrained .
• For maximum protection , safety belts must always be posi
tioned correctly on the body.
• Never strap more than one person , including small children ,
into any single safety belt .
• Never place a safety belt over a child sitting on your lap.
• Always keep feet in the footwell in front of the seat while the
vehicle is being driven.
• Never let any person ride with feet on the instrument panel or
sticking out the window or on the seat.
• Never remove a safety belt while the vehicle is moving. Doing
so will increase your risk of being injured or killed.
• Never wear belts twisted.
• Never wear belts over rigid or breakable objects in or on your
clothing, such as eye glasses, pens, keys , etc ., as these may cause
injury .
• Never wear the shoulder part of the belt under your arm or
otherwise out of position .
• Several layers of heavy clothing may interfere with correct posi
tioning of belts and redu ce their effectiveness .
• Always keep belt buckles free of anything that may prevent the
bu ckle from latching securely .
• Never use comfort clips or devices that create slack in the
shoulder belt . However , special clips may be required for the
correct use of some child restraint systems.
Safety first
Safety belts
& WARNING !continued)
• Never allow safety belts to become damaged by being caught
in door or seat hardware.
• Torn or frayed safety belts can tear and damaged belt hardware
can break in an accident . Inspect belts regularly . If webbing , bind
ings, buckles, or retractors are damaged, have belts replaced by an
authori zed Audi dealer or qualified workshop.
• Safety belts that have been worn and loaded in an accident
must be replaced with the correct replacement safety belt by an
authorized Audi dealer or qualified workshop . Replacement may
be necessary even if damage cannot be clearly seen. Anchorages
that were loaded must also be inspected .
• Never remove , modify , disassemble, or try to repair the safety
belts yourself .
• Always keep the belts clean. Dirty belts may not work properly
and can impair the function of the inertia reel
=> page 209 , "Safety
belts" .•
Safety belts
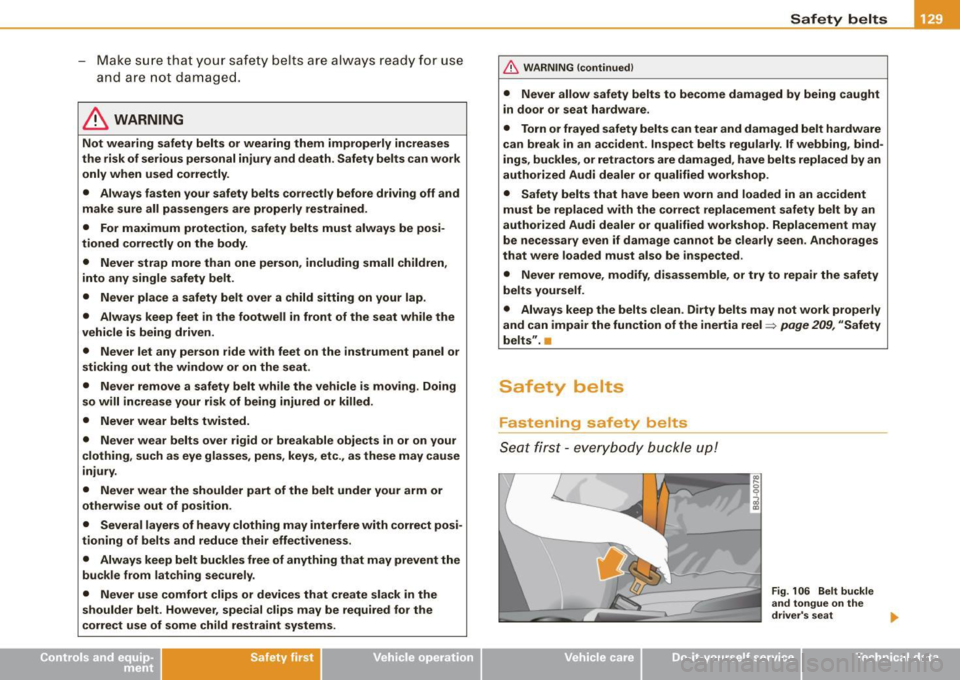
Fastening safety belts
S eat firs t - everybo dy b uckle u p!
Vehicle care I I
Fig . 106 Belt buckle
and tongue on the
driver 's seat
Iii>-
irechnical data
Page 132 of 316
___ S_a_ f_ e_ t-= y_ b_e_ l_ t _s _______________________________________________ _
To provide maximum protection, safety belts must always
be positioned correctly on the wearer's body.
Adjust the front seat and head restraint properly
=> page 69, "General recommendations ".
Hold the belt by the tongue and pull it evenly across the
chest and pelvis=>&.
- Insert the tongue into the correct buckle of your seat
until you hear it latch securely => page
129, fig. 106.
Pull on the belt to make sure that it is securely latched in
the buckle.
Automatic safety belt retractors
Every safety belt is equipped with an automatic belt retractor on the
shoulder belt. This feature locks the belt when the belt is pulled out
fast, during hard braking and in an accident . The belt may also lock
when you drive up or down a steep hill or through a sharp curve.
During normal driving the belt lets you move freely.
Safety belt pretensioners
The safety belts on the front seats are equipped with a belt preten
sion er that helps to tighten the safety belt and remove slack when
the pretensioner is activated. The function of the pretensioner is
monitored by a warning light:::::,
page 78, "Airbag system
t!A (USA models) /!.ir (Canada models)".
Switchable locking feature
Every safety belt except the one on the driver seat is equipped with
a switchable locking feature that
must be used when the safety belt
is used to attach a child seat. Be sure to read the important informa
tion about this feature:::::,
page 168.
& WARNING
Improperly positioned safety belts can cause serious injury in an
accident :::::,
page 130, "Safety belt position".
• Safety belts offer optimum protection only when the seat back
is upright and belts are properly positioned on the body.
• Never attach the safety belt to the buckle for another seat.
Attaching the belt to the wrong buckle will reduce safety belt
effectiveness and can cause serious personal injury.
• A passenger who is not properly restrained can be seriously
injured by the safety belt itself when it moves from the stronger
parts of the body into critical areas like the abdomen.
• Always lock the convertible locking retractor when you are
securing a child seat in the vehicle:::::,
page 170. •
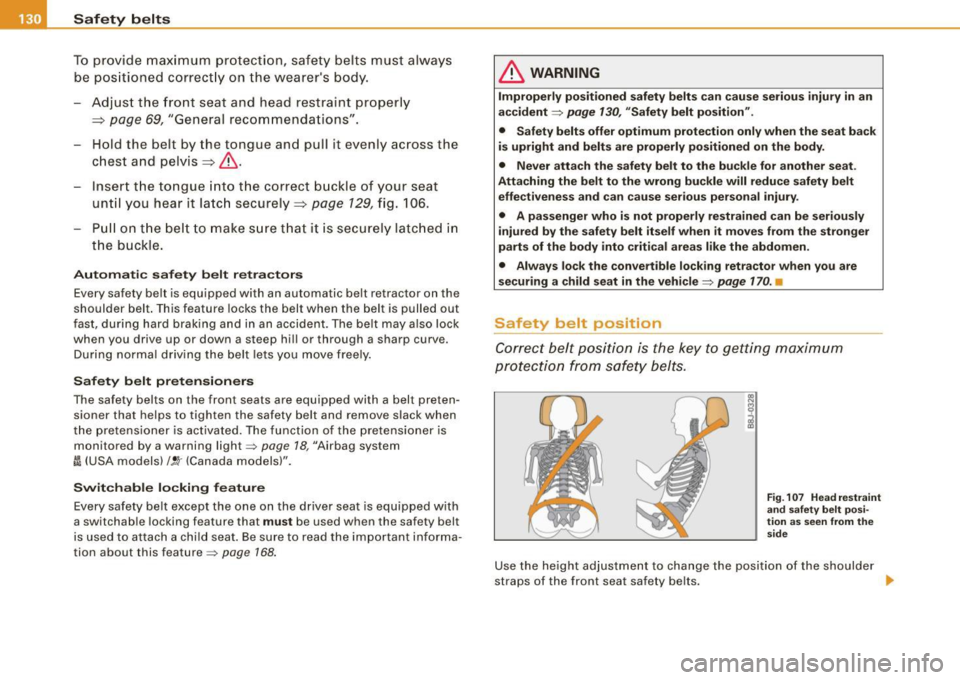
Safety belt position
Correct belt position is the key to getting maximum
protection f ram safety belts.
Fig. 107 Head restraint
and safety belt posi
tion as seen from the
side
Use the height adjustment to change the position of the shoulder
straps of the front seat safety belts.
~
Page 212 of 316
___ C_ le_ a _ n_i_n ~g _ a_ n_ d __ p_r _o _t _e _c_ t_ i_o _n ___________________________________________ _
surfaces, seams, joints and compon ents in the en gin e comp art
ment.
& WARNING
Be aware: The engine compartment of any motor vehicle is a
potentially hazardous area .
• Before working in the engine compartment, be sure to read the
information
=> page 209 .
• Before reaching into the front plenum panel, always remove the
ignition key . Otherwise , the windsh ield wiper system could unin
tentionally be switched on , possibly causing personal injury from
the moving wiper link age .
• Never reach into the area around or touch the radiator fan . The
auxiliary fan is temperature controlled and can switch on suddenly
- even when the ignition is off.
• Do not wash, wax or dry the engine with the engine running .
Moving or hot parts could injure you.
• Do not clean the underside of the chassis , fenders , wheel
covers , or other hard to reach parts without protecting your hands
and arms. You may cut yourself on sharp -edged metal parts.
• Always read and heed all WARNINGS and other informat ion
=> page 198 . •
Page 219 of 316

___________________________________________ C_ h_e _c_ k_ i_n _g _ a_n _d_ f_il _li _n _g __ fflllll
•
Closing the engine hood
- Pull the hood down until the pressure from the struts is
reduced .
- Let the hood
drop down and latch in place. Do not try to
push it shut;
it may fail to engage => &.
& WARNING
A hood that is not completely latched could fly up and block your
view while driving.
• When you close the engine hood, check it to make sure the
safety catch has properly engaged. The hood should be flush with
the surrounding vehicle body parts.
• If you notice while driving that the hood is not secured prop
erly, stop at once and close it. •
Working in the engine compartment
Be especially careful whenever you work in the engine
compartment!
Whenever you must perform any work in the engine compartment,
for example checking and filling the different fluids, there is a risk of injury, burns and accidents. To prevent personal injury always
observe the following WARNINGS. The engine compartment of any
vehicle is a hazardous area!
~ &
& WARNING
To help avoid injury, before you check anything under the hood :
• Switch off the engine.
• Remove the ignition key.
• Apply the parking brake .
& WARNING (continued)
• Move selector lever of automatic transmission to "P" (Park);
put manual transmission in Neutral .
• Always let the engine cool down. Hot components will burn
skin on contact.
• To reduce the risk of being burned, never open the hood if you
see or hear steam or coolant escaping from the engine compart
ment. Wait until no steam or coolant can be seen or heard before
carefully opening the hood .
• Keep children away from the engine compartment.
• Never spill fluids on hot engine components . They can cause a
fire.
• Never touch the radiator fan. The auxiliary electric fan is
temperature controlled and can switch on suddenly.
• Never open the coolant reservoir cap when the engine is still
warm. The coolant system is pressurized and hot coolant could
spray out.
• Protect your face, hands and arm from steam or hot engine
coolant by placing a thick rag over the cap when you open the
coolant reservoir.
• If work on the fuel system or the electrical system is necessary:
- Always disconnect the battery.
- Never smoke or work near heaters or open flames. Fluids in
the engine compartment could start a fire .
- Keep an approved fire extinguisher immediately available.
• To avoid electrical shock and personal injury while the engine
is running or being started, never touch :
- Ignition cables
- Other components of the high voltage electronic ignition
system.
• If you must perform a check or repair with the engine running: ..,
Vehicle care
I t •