hood open AUDI TT COUPE 2009 Owners Manual
[x] Cancel search | Manufacturer: AUDI, Model Year: 2009, Model line: TT COUPE, Model: AUDI TT COUPE 2009Pages: 316, PDF Size: 71.16 MB
Page 16 of 316
Instruments and warning/indicator lights
& WARNING
• Always observe the warning in =;, page 209 , "Engine compart
ment" before opening the engine hood and checking the engine
coolant level.
• Never open the engine hood if you see or hear steam , or if you
see engine coolant dripping from the engine compartment . You
c ould burn your self. Let the engine cool off first so that you cannot
hear or see any steam or engine coolant .
0 Note
• Mounting additiona l lights or accessories in front of the a ir inlets
reduces the co oling effect of the radiat or. At high outside tempera
tures or h igh engi ne load , the eng ine could overheat.
• The fron t spoile r has been designed t o properly dist rib ute the
coo ling air when the veh icle is mov ing . If the spo iler is damaged,
this could red uce the coo ling effect and the engine cou ld then ove r
heat. Ask your authorized Audi deale r for assistance. •
Fuel gauge
The fuel gauge wor ks only when the ignition is on .
When the needle reaches the red area, the warning light in the instrument cluster w ill illu m ina te =;,
page 35 . Thi s means yo u
have approx imate ly 1.9 gallons (7 litres) of fuel left in the tank.
Time
to refuel!
The tota l tank capacity of your vehicle is listed in=;, page 297. Be
awa re of the diffe rent ta nk capaci ties of front -wheel a nd q uat tro®
a ll- w hee l d ri ve models .
0 Note
Never run the tank comple tely dry! An irre gular suppl y of fuel can
cause engine m isf iring and fuel could enter into the exhaust system.
The catalytic converter could then overheat and be
damag ed. •
Speedometer with odometer
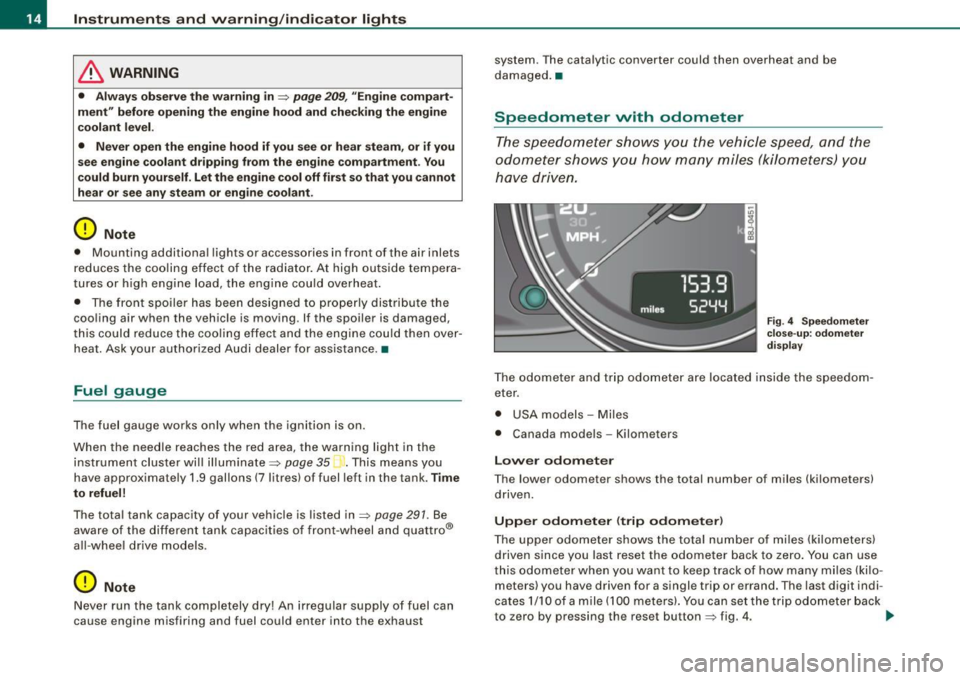
The speedometer shows y ou t he vehicle speed, and the
o dome ter sho ws you ho w ma ny m iles (kilo meters) yo u
hove dri ven.
Fig . 4 Speedomete r
close -up : odomet er
displ ay
T he od ometer an d trip odo mete r are locate d insid e th e spe edom
eter .
• USA model s - Miles
• Canada mode ls - Kilometers
Lower odometer
The lower odometer shows the total number of miles (kilometers)
d riven.
Upper odometer (trip odometer )
The upper o dometer shows the tota l number o f mi les ( kilom eters)
driven since you last reset the odometer bac k to ze ro . You can use
thi s odomete r w hen you want to keep track of how ma ny m iles ( kilo
meters) you have driven for a single trip or errand. The last digit indi
cates 1/10 of a m ile (10 0 meters). You ca n set th e tr ip od o meter back
to zero by pressing the reset button
=;, fig. 4 . ..,,
Page 36 of 316
Driver information system
Parking brake set
The parking brake warning light Brake /((D) (Canada models) illumi
nates when the parking brake is set. In addition , a warning tone will
sound after you have driven for longer than 3 seconds and faster
than 3 mph (5 km/h).
L1}. WARNING
• Always observe the warnings in => page 209, "Engine compart
ment", before opening the engine hood and checking the brake
fluid.
• Driving with low brake fluid is a safety hazard! Stop the car and
get professional assistance.
• If the brake system warning/indicator light illuminates
together with the ABS warning/indicator light, then the ABS system is malfunctioning. The rear wheels could quickly lock up
when you apply the brakes. This could lead to loss of control and
your vehicle could slide! Drive carefully to the nearest authorized
Audi dealer and have the malfunction corrected. •
Engine cooling system malfunction ¾
A malfunction in the engine cooling system must be
repaired as soon as possible.
When the _t symbol in the display flashes, then either the
engine coolant
temperature is too high, or the coolant level
is too low. In addition to the symbol, the following message
also appears in the display:
Switch off engine and check coolant level
-Pull off the road and stop the vehicle.
- Turn off the engine.
- Check coolant level
~ page 225.
-Add coolant if necessary ~ page 225.
-Continue driving only after the engine coolant
warning/indicator light goes out.
- Contact your authorized Audi dealer for assistance if
necessary .
If t he engine coolant lev el is correct, then th e radia tor fan may be
the cause of the malfunction.
If the gene rator warning/indicator light should also illuminate
=> page 18, then the fan belt may be damaged.
L1}. WARNING
• If your vehicle should break down for mechanical or other
reasons, park at a safe distance from moving traffic, turn off the
engine and turn on the hazard warning lights
=> page 57, "Emer
gency flasher A" .
• Never open the hood if you see or hear steam or coolant
escaping from the engine compartment -you risk being scalded.
Wait until you can no longer see or hear steam or coolant escaping.
• The engine compartment of any vehicle is a dangerous area.
Before you perform any work in the engine compartment, turn off
the engine and allow it to cool. Follow the warning stickers
=> page 209, "Engine compartment" .
0 Note
Do not continue driving if the-~- symbol illuminates. There is a
malfunction in the engine cooling system -you could damage your
engine .•
Page 49 of 316
-Fold down the lef t rear seat back.
Fig . 3 4 Sec tio n: In te
r ior luggage co mpart
m ent: E merg en cy
re lease
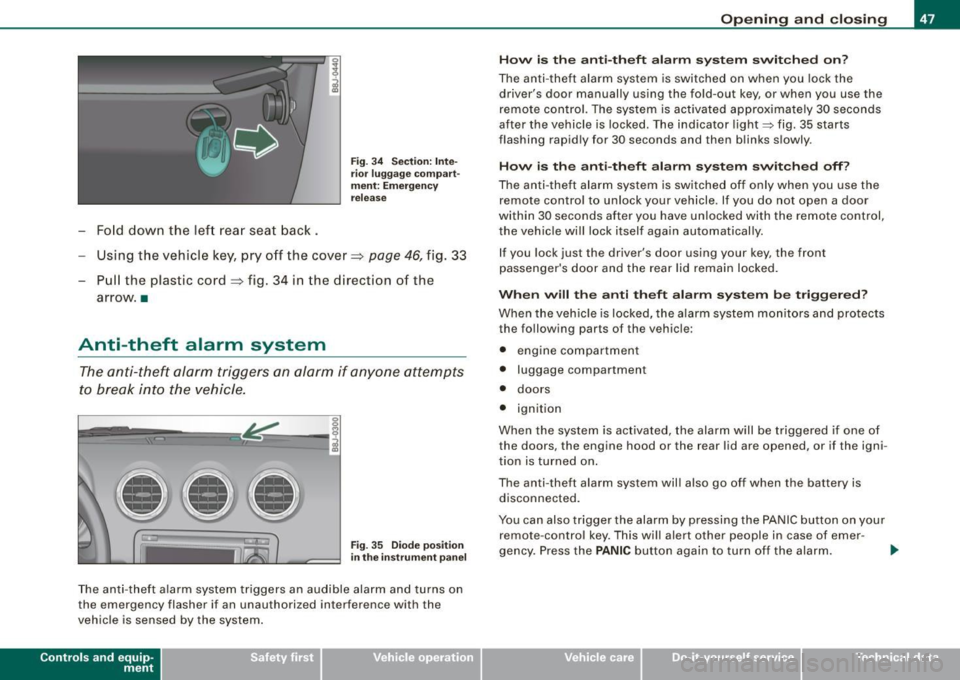
Using the vehicle key, pry off the cover => page 46, fig . 33
- Pull the plastic cord~ fig. 34 in the direction of the
arrow. •
Anti-theft alarm system
The anti-theft alarm triggers an alarm if any one attempts
to break into the vehicle.
llllD
Fig. 35 Dio de posi tion
i n th e ins trum en t pane l
The anti-theft a larm system triggers an audible alarm and turns on
the emerg ency flasher i f an unauthorized inter ference with the
vehicle is sensed by the system .
Contro ls and eq uip
ment
Op ening and clo sing
H ow i s th e a nti-th eft al arm sys te m sw itch ed o n?
The anti -theft alarm system is switched on when you lock the
driver's door manually using the fo ld-out key, or when you use the
remote con trol. The system is activated approximately 30 seconds
after the vehicle is locked . The indicator light~ fig. 35 starts
flashing rapidly for 30 seconds and then blinks slowly.
How i s th e a nti-th eft ala rm s yste m sw itch ed off?
The anti -theft alarm system is switched off only when you use the
remote contro l to unlock your veh icle . If you do not open a door
within 30 seconds after you have unlocked with the remote control,
the vehicle will lock itself again automatically.
If you lock jus t th e driv er's door using your key , the front
passenger 's door and the rear lid remain locked .
When w ill th e anti th eft ala rm sys te m b e trigge re d ?
When the vehic le is locked, the alarm system mon itors and protects
the following parts of the v ehicl e:
• engine compartment
• luggage compartment
• doors
• ignition
When the system is activated, the alarm will be triggered if one of
the doors , the engine hood or the rear lid are opened , or if the igni
tion is turned on .
The anti- theft alarm system will also go off when the battery is
disconnected.
You can also trigger the alarm by pressing the PANIC button on your remote -contro l key. This will alert other people in case of emer -
gency . Press the
PANIC button again to turn of f the alarm. ..,_
Vehicle care I I irechnical data
Page 50 of 316

Opening and closing
H ow is th e a nti-th eft alarm swit ch ed off when
trigger ed?
The alarm system is switched off when you unlock the vehicle using
the remote -con trol key or when the ignition is switched on . The
alarm wi ll also switch itse lf off when it comes to the end of its cycle.
Em ergenc y flasher
The emergency flasher will blink brief ly when the doors, engine
hood and rear lid are properly closed .
If the emergency flashers do not blink, check the doors, engine hood
and rear lid to make sure they are properly closed. If you close a
door, the hood or the rear lid with the anti-theft alarm switched on,
the emergency flashers will blink only after you have closed the
door or lid.
[ i ] Tips
• For the anti -theft a larm system to function p roperly, make sure
a ll vehicle doors and windows are closed before leav ing the vehicle .
• When you open the vehicle fr om the driver's door using the key,
the central locking switch will work only after you have switched on
the ignition . •
Power windows
Controls
The driver can ope rate all windows.
Fi g. 36 D riv er's door:
powe r window
sw itch es
Fig . 37 Passenge r's
doo r: p ower window
sw itch
If the respective switch is pushed or pulled the window will
open or c lose. The power window switches have a
two -posi
tion function :
Opening the windows
Press the sw itch and hold it down until the window has
reached the des ired position.
Page 103 of 316
_______________________________________________________ T_ r _a_ n_s_ m __ is_ s_ io_ n _ __. _
& WA RN ING !continue d)
hood). Other wise the vehi cle will immediately start to move -
s ometime s even if the p arking brake is firmly applied -ris k of an
a ccident !
• Before you or other per sons open the hood and work on a
running e ngine , the sel ector le ver must be moved to P and the
parking brake applied firmly -ris k of an a cc iden t! Follow the
wa rning sti ck ers
~ pag e 209, "Engine compa rt me nt".
[ i ] Tips
If you have inadvertently shifting into N while the vehic le is moving ,
you shou ld remove y our foo t from the acce lerator and wait unti l the
engine speed has dropped to idle before shifting back to Dor S . •
Ap plies to ve hicles : with S tro ni c®
Selector lever lock
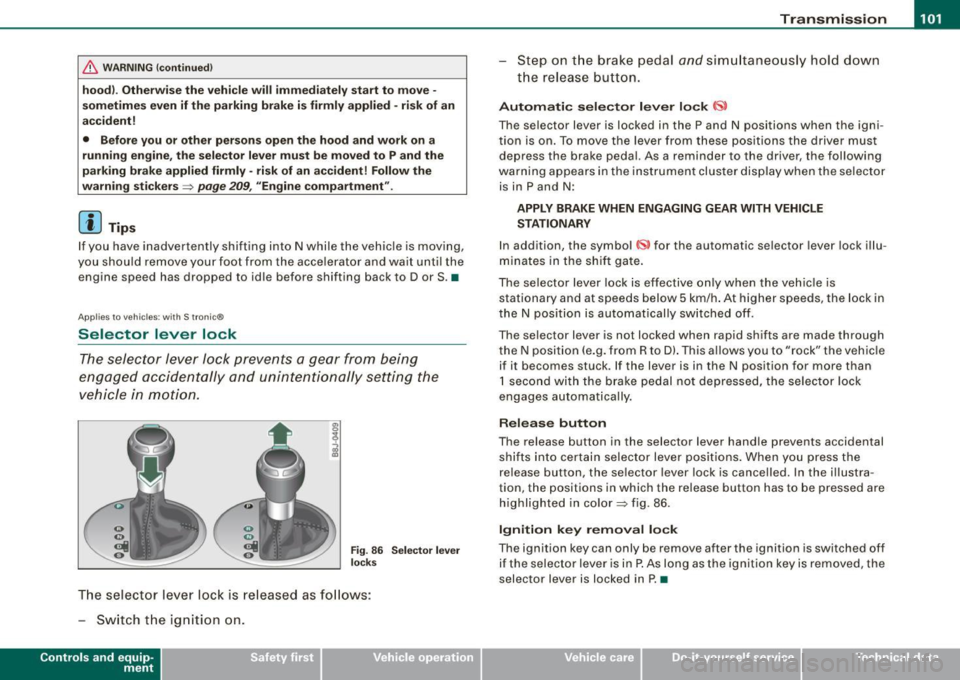
The selector lever lock prevents a gear from being
engaged accidentally and unin tentionally setting the
vehicle in motion.
F ig . 8 6 Sel ector l ever
l oc ks
The selector lever lock is released as fo llows:
- Switch the ign ition on .
Contro ls and eq uip
ment
St ep on t he br ake pedal and simu ltan eously hold down
the rel ease button.
Autom ati c sele ctor le ver lo ck 6ll
The selector lever is locked in the P and N positions when the igni
tion is on. To move the lever fr om these pos itions the driver mus t
depress the brake pedal. As a reminder to the driver, the fol lowing
warning appears in the ins trument cluster display when the selector
is in P and N:
APPLY BRAKE WHEN ENGAGING GEAR WITH VEHICLE
S TATIONAR Y
In addition, the symbol «s> for the automatic selector lever lock i llu
minates in the shif t gate .
The selector lever lock is effective only when the vehic le is
stationary and at speeds below 5 km/h . At higher speeds, the lock in
the N position is automatically sw itched o ff .
The selector lever is not locked when rapid shifts are made through
the N posi tion (e .g. from R to DI. This allows you to "rock" the vehicle
if it becomes stuck . If the lever is in the N position for more than
1 second with the brake pedal not depressed, the selector lock
engages automatically.
Release button
The release button in the selector lever handle prevents accidental shifts into certain selector lever positions . When you press the
re lease button, the selector lever lock is cancelled. In the i llustra
tion , the positions in which the release button has to be pressed are
h ighlighted in co lor~ fig. 86 .
Ignition key removal lock
The ignition key can only be remove after the ignition is switched off
if the selector lever is in P . As long as the ignition key is removed, the
selector lever is locked in P. •
Vehicle care I I irechnical data
Page 202 of 316
___ C_ le_ a _ n_i_n ~g _ a_ n_ d __ p_r _o _t _e _c_ t_ i_o _n ___________________________________________ _
0 Note
• Never try to remove d irt, mud or dust if the surface of the vehicle
is dry . Never use a dry cloth or sponge, since this cou ld scratch your
vehic le's paint or w indows.
• Never wash your car in bright sunlight. Drops of water act as
magnify ing lenses and may damage your paint.
• When you wash your car in the winter : if you rinse your vehicle
with a hose, be careful not to aim the stream of water directly at
locks, or at door or hatch openings -they can freeze shut.
• Never use sponges designed to remove insects, or any kitchen
scouring sponges or similar products. They can damage your paint
finish .
• Never use a dry cloth or sponge to c lean the head ligh ts. Only use
wet cloths or sponges to prevent scratches . It is best to use soapy
water.
For the sake of the environment
In the interest of the environment, the vehicle should on ly be
washed in specia l wash bays. •
Washing your vehicle with a power washer
Cleaning the exterior of your car with a high -p ressure
power washer is safe as l ong as y ou observe a few simple
rules .
-Before using the power washer, make s ure you have read
and understood the WAR NINGS=::;,
& in "General infor
mati on" o n
page 198.
-Always follow the operating instructions for the power
washer. - Make sure that the jet o
n the spray hose pro duces a "fan
sha ped sp ray".
D o
not hold the spray nozzle too close to soft materials.
When cleaning the vehicle with a power washer always follow the
operating instructions. This applies particula rly to the
operating
pre ssure
and the spraying di stance . Maintain a sufficient distance
to soft materia ls such as rubber hoses and sound/vibration dead
ening materia ls (part icularly on the underside of the engine hood).
Do not use a jet which sprays water in a
direct stream or one that
has a
rotating jet.
Water temperature should not exceed 140 °F (60 °Cl.
& WARNING
Never wash tire s with a jet that sp ra ys water in a dir e ct stream .
Thi s could cau se invisible damage to the tire s and we ake n them ,
eve n if th e spra y is from a re lativel y lo ng dis tanc e an d f or a sh o rt
time . Damaged and weakened tire s can f ail and cau se ac cident s
a nd per sona l injur y.
0 Note
To avoid damaging your vehicle, always make sure that there is
suffic ient distance between the spray head and soft materia ls like
rubber hoses, plastic parts and sound -deadening materials . Never
aim the spray head at the same p oint for a long time . This also
applies to cleaning headlights and painted bumpers . Remember :
the c loser the nozzle is to the surface of the material, the greater the
stress on the mater ial. •
Page 218 of 316

___ C_h_ e_ c_k _in --== g'-- a_n _d_ f_il _li _n ..:::g:::..- ___________________________________________ _
Checking and filling
Engine hood
Releasing the engine hood
The engine hood is released from inside the vehicle.
-Open the driver's door .
Fig. 135 Driver's side
footwell: engine hood
release lever
-Pull the release lever on the left under the instrument
panel
=> fig. 135 in the direct ion of the arrow.
The hood pops up slightly under spring pressure. •
Opening the engine hood
Fig. 136 Release lever
under the engine hood
Before opening the engine hood, make sure that the wind
shield wipers are flat against the windshield. Otherwise,
they could damage the paint on the hood.
Lift the hood slightly =>&, .
Pull up on the release under the hood => fig. 136. This
releases the catch.
- Open the hood all the way.
The hood is kept in the open position by two gas struts.
& WARNING
Hot engine coolant can burn you.
• To reduce the risk of being burned, never open the hood if you
see or hear steam or coolant escaping from the engine compart
ment. Wait until no steam or coolant can be seen or heard before
carefully opening the hood. •
Page 219 of 316

___________________________________________ C_ h_e _c_ k_ i_n _g _ a_n _d_ f_il _li _n _g __ fflllll
•
Closing the engine hood
- Pull the hood down until the pressure from the struts is
reduced .
- Let the hood
drop down and latch in place. Do not try to
push it shut;
it may fail to engage => &.
& WARNING
A hood that is not completely latched could fly up and block your
view while driving.
• When you close the engine hood, check it to make sure the
safety catch has properly engaged. The hood should be flush with
the surrounding vehicle body parts.
• If you notice while driving that the hood is not secured prop
erly, stop at once and close it. •
Working in the engine compartment
Be especially careful whenever you work in the engine
compartment!
Whenever you must perform any work in the engine compartment,
for example checking and filling the different fluids, there is a risk of injury, burns and accidents. To prevent personal injury always
observe the following WARNINGS. The engine compartment of any
vehicle is a hazardous area!
~ &
& WARNING
To help avoid injury, before you check anything under the hood :
• Switch off the engine.
• Remove the ignition key.
• Apply the parking brake .
& WARNING (continued)
• Move selector lever of automatic transmission to "P" (Park);
put manual transmission in Neutral .
• Always let the engine cool down. Hot components will burn
skin on contact.
• To reduce the risk of being burned, never open the hood if you
see or hear steam or coolant escaping from the engine compart
ment. Wait until no steam or coolant can be seen or heard before
carefully opening the hood .
• Keep children away from the engine compartment.
• Never spill fluids on hot engine components . They can cause a
fire.
• Never touch the radiator fan. The auxiliary electric fan is
temperature controlled and can switch on suddenly.
• Never open the coolant reservoir cap when the engine is still
warm. The coolant system is pressurized and hot coolant could
spray out.
• Protect your face, hands and arm from steam or hot engine
coolant by placing a thick rag over the cap when you open the
coolant reservoir.
• If work on the fuel system or the electrical system is necessary:
- Always disconnect the battery.
- Never smoke or work near heaters or open flames. Fluids in
the engine compartment could start a fire .
- Keep an approved fire extinguisher immediately available.
• To avoid electrical shock and personal injury while the engine
is running or being started, never touch :
- Ignition cables
- Other components of the high voltage electronic ignition
system.
• If you must perform a check or repair with the engine running: ..,
Vehicle care
I t •
Page 305 of 316

______________________________________________ A_ l_,_ p _h_ a_ b_e _ t_i c_ a_l _in _ d_e _ x __ lllll
Daytime running lights .. ..... .. .... ... 53
Daytime running lights (Canada) . .... .. 53
Declaration of compliance Cell phone package ............... 296
Electronic immob ilizer . .... ... .... 296
Homelink® universal remote control 296
Remote control key . ... .. .... .... . 296
Tire pressure monitoring sys tem ... 296
de f
What does this mean when it appears in
the trip odometer display? .. ....... 14
Defect ive light bulb warning ...... .... . 36
Defrosting the windows .. .......... ... 88
Determining correct load lim it ... ... .. 243
Digital clock .... .... .... .... ... .... .. 13
Setting the time ................... 13
D igital compass . ...... ... ...... .... .. 67
Dimensions ... .. .... .... ... .... .... 290
Dipstick Reading the dipstick properly
Di rect Shift Gearbox 221
Emergency release . . . . . . . . . . . . . . . 106
Distance .. ...... .... .... ... .... .... . 26
Driver information ..... ... .. .... ..... . 33
Driver information system
Gearshift indicator ... .... .... .... .. 23
Menu button ..................... 28
Menu display . ... .... ...... .... ... 27
Open door or front lid warning ...... 22
Outside temperature display ....... . 22
Red symbols .. .... .... ... ... ... .. . 32
Service interval disp lay .... .... ..... 23
Setting .......................... 29
Controls and equip
ment Safety first
Sound system display
.... .. ..... .. . 22 Emergency starting . ... .. .... .... .... 279
Trip computer ............ ..... .. . 25
Emerge ncy towing ...... .... .... ... . 282
yellow symbo ls ................... 32
Engine
Driver seat Cecking and fil ling locations .. .... . 219
See Seating position .. ..... .... ... 116
Checking and fi lling locations .. ... . 218
Dr iving Coolant ...... .... ... .... .... .... 224
Run-flat tires ..... ... .. ...... .... . 259 Hood .. ...... .... .... ... .... .. .. 216
Dr iving safely .......... ............ . 114 Start
ing ...... .... .... ... .... .. 92, 93
Duplicate key .... ...... ... .. .... .... . 38 Start
ing with jumper cables .... .... 279
Dust filter ........................... 86 Stopping
...... .... ... .... .... .... 93
Engine compart ment .. ...... .... .... 218
E Safety instruc tions .. ...... .... ... . 217
Working in the engine compa rtment . 217
Elapsed time .... .... ........ ....... . 26
Engine coolant system ......... ...... 224
Electro -mecha n ica I power assist .. .. 20, 188 Adding coo
lant ..... ........ ...... 225
Electron ic different ial lock (EDU Check
ing the eng ine coolant level ... 225
How the sys te m works .. ...... .... 184 Radiator fan ..
.... ....... .... .... 226
Warning/indicator lights ...... ...... 20 Te
mpe rature gauge ...... .... .... .. 13
Electronic immobilizer .... ..... .. .. 14, 40 Engine cooling system
Electronic power cont ro l Malfunction
............ ... .. ..... 34
EPC warning/indicator light ......... 17 Engine data
... .. .... .... .... .... ... 29 1
E lectron ic speed limiter . ...... .... .... 25 E
ngine hood
Electronic Stability Program .. .... .... 182 Closing
... .... .... ... .... ...... . 217
Electronic stabilization program (ESP) How to release
the hood . ...... .... 216
Warning/indicator lights .. .... .... .. 17 Engine oil
..... .. .......... ... .. .... 219
Emergency flasher Warning/indicator lights ...... .... .. 18
Emergency flashers .................. 57
Emergency locking .. .... ........ ... .. 45
Emergency operation Adding
......... .... ........ ..... 222
Additives .. .... .... ......... ..... 222
Changing . ..... ... .... .... ... ... . 223
Checking the eng ine oi l leve l ....... 221
Indica tions and condit ions requiring ext ra
checking ....................... 221
Rear lid ...... ... .... .... .... .... . 46
Oil consumption ... ... ...... ...... 221
Emergency release for selector lever ... 106
Oil grades .... .... .... ..... .. .... 2 19
Vehicle operation Vehicle care Do-it-yourself service Technical data
Page 307 of 316

______________________________________________ A_ l_,_ p _h_ a_ b_e _t_i c_ a _ l _in _ d_e _ x __ _
H
Head restraints .. ..... ... ... .... ... . 119
Adjusting . .. .. .. ...... .... ..... . 119
Headlight defective . .... .... ....... ...... ... 36
Headlight range control defective . ... ... .... .. ... ..... .... 36
Headlights . ...... .. .... .... ..... .. .. 51
adaptive light .... .... .... ... .... .. 54
Front fog l ights .... ..... ... ..... .. 55 How many a
irbags does my vehicle have? ..
142
How often should I check my tire pressures? 242
How safety belt pretensioners work .... 133
Hydroplaning .... .. .... ......... .... 245 Instruments and controls
General illustra tion . ... .... ...... .. 11
Interior lights ... ... .. .... .. . .... .. .. . 59
Luggage compartment .. ...... ..... 59
J
I Jump start location ...... ... .... .... . 280
Jump starting ..... .... ... .... .... ... 280
Ignit ion key ... ... .. .... .... ..... ... · 92 Jumper cables .. .. ... ..... .. .... .... 280
Ignition lock .. .... .... .... ...... ..... 92 Jump -starting . ... .. ... ... .... .. .. . . 279
Switching off .. ........ .... .... ... 51 Ignition lock positions .. ... .... .... ... 92
Switching on . ... .... .... .. . .... .. 51
Washer system ..... .... .... ..... .. 61
Heated front seats (c limate control) ...... ... 90
rear window .. .... .... ... .... .... . 89
Heat ed outs ide mirrors . .... .... .... .. 65
Hea ted seats .... ..... ........ .... ... 90
Seats . ..... .... .... .. ... .. .. ... .. 90
Heated washer jets Wiper and washer system . .... .... . 60
Heating . .... .... .... .... ... .... .... . 85
High beam . ... .... .... . ... ... . ... 51, 58
Warning/indicator lights . ... .. .... .. 18
High vo ltage warning label ...... .... . 288
Hi ll Descent Ass ist . .... .. ... .. .. .... 103
Home link® ..... ...... .... ....... .. 107
Homelink® universal remo te control .. . 107
Hood Opening ... .. ...... .... ... .... .. 216
Release lever . ... .... .... .. . ..... 216
Horn ......... ... .. .... .... ....... .. 11
Controls and equip
ment Safety first
Immobilizer
.... ....... ..... ... ... .. . 14 K
Important things to do before driving .. 114
Improp erly worn safety belts . ....... .. 132
Indicator light
Airbag system .. . .. .. .... .... 146, 147
Audi magnetic ride . .... ..... ...... 16
PASSENGER AIR BAG OF F ..... ... .. 147
Ind icator lights .... .... .... .... ..... . 15
Red symbols in the center display .. .. 32
Yel low symbols in the center display . 32
Infant seats .... .... ...... .... ... .. . 162
How do I properly insta ll an infant seat in
my vehicle? ... .... .. ...... ... .. 162
Saf ety instructions . .... ....... .... 162
Inside rearview mirror .... ..... .... ... 64
Installing child safety seats Safe ty bel ts ... ...... ......... ... . 168 Key
..... .. .. .... ...... .... .... ... . .. 38
Battery replacement ...... .... ..... 40
Convenience opening and closing of windows . .... .... ... ..... ... .... 49
Emergency key .. ..... ... .... ...... 38
Key replacement .... .... ... .. .. . .. 38
Master key . ...... .... .. . .... ... .. 38
Valet key ... .. .... .... .. .... .... .. 38
Key less en try remote control .. .... ..... 39
Kick -down
Automat ic transm iss ion .... ... .... 105
Knee airbags ... .. .. ...... ........ .. 151
Description . .... .... .... .... ..... 151
How they work ... ..... .. . .... .. .. 152
Important safety instructions .. ..... 153
Instrument cluster and controls . .... ... 12
Instrument pane l
I ll umination ... .. .. . ... ... .. .... .. 56
Vehicle operation Vehicle care Do-it-yourself service Technical data