key battery AUDI TT COUPE 2009 Owners Manual
[x] Cancel search | Manufacturer: AUDI, Model Year: 2009, Model line: TT COUPE, Model: AUDI TT COUPE 2009Pages: 316, PDF Size: 71.16 MB
Page 41 of 316
Master key with remote control
The remote control allows you to lock or unlock the
vehicle electronically.
"' N
0
i
F ig . 23 Fold -u p m as ter
k ey wit h re mo te
co ntrol
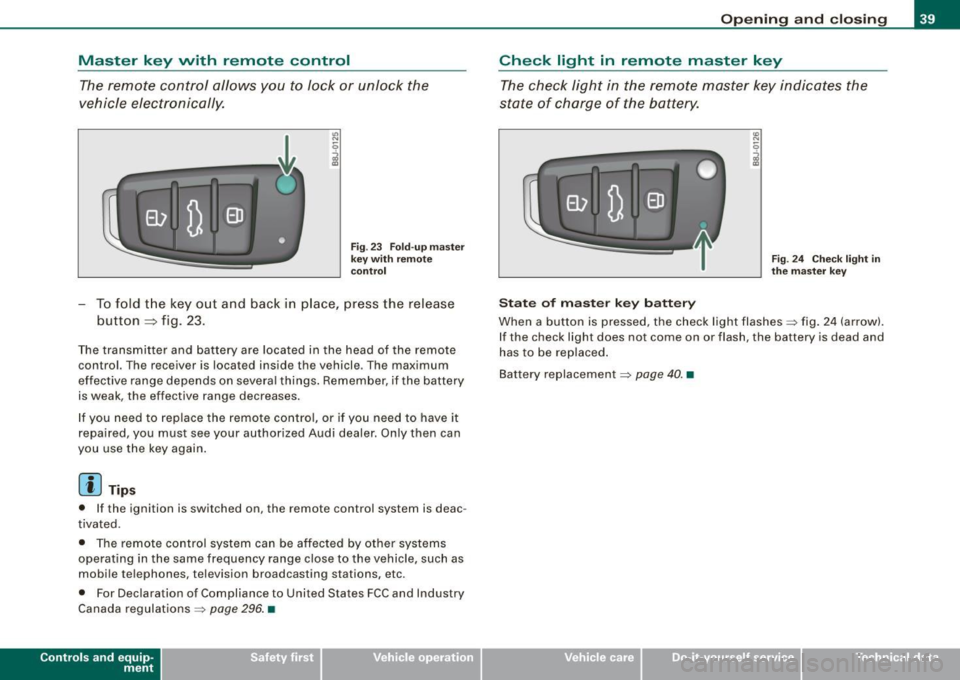
- To fold t he key out and back in place, p ress the release
button
=> fig. 23.
The transmitter and battery are located in the head of the remote
control. The receiver is located inside the vehicle . The maximum
effective range depends on severa l things . Remember, if the battery
is weak, the effective range decreases.
I f you need to replace the remote co ntro l, or if you need to have it
repaired , you must see your authorized Audi dealer. Only then can
you use the key again .
[ i] Tip s
• If the ignition is switched on, the remote control system is deac
tivated .
• T he remote control system can be affected by other systems
operating in the same frequency range close to the vehicle , such as
mobi le telephones, television broadcasting stations, etc.
• For Declaration of Compliance to United States FCC and Industry
Canada regulations =>
page 296. •
Contro ls and eq uip
ment
Op ening and clo sing
Check light in remote master key
The check light in the remote master key indicates t he
state of charge of the battery.
St ate o f m aster k ey b att ery
Fig . 2 4 Chec k ligh t in
th e m as ter k ey
When a button is pressed, the check light flashes~ fig . 24 (arrow).
I f the check light does not come on or flash, the battery is dead and
has to be replaced .
Bat tery replacement
~ page 40. •
Vehicle care I I Technical data
Page 42 of 316
Opening and closing
Master key battery replacement
Each master key contains a battery housed under the
cover.
Fig. 25 Master key:
opening the cover
We recommend having the battery changed by an autho
rized dealership. However, if you wish to replace the dead
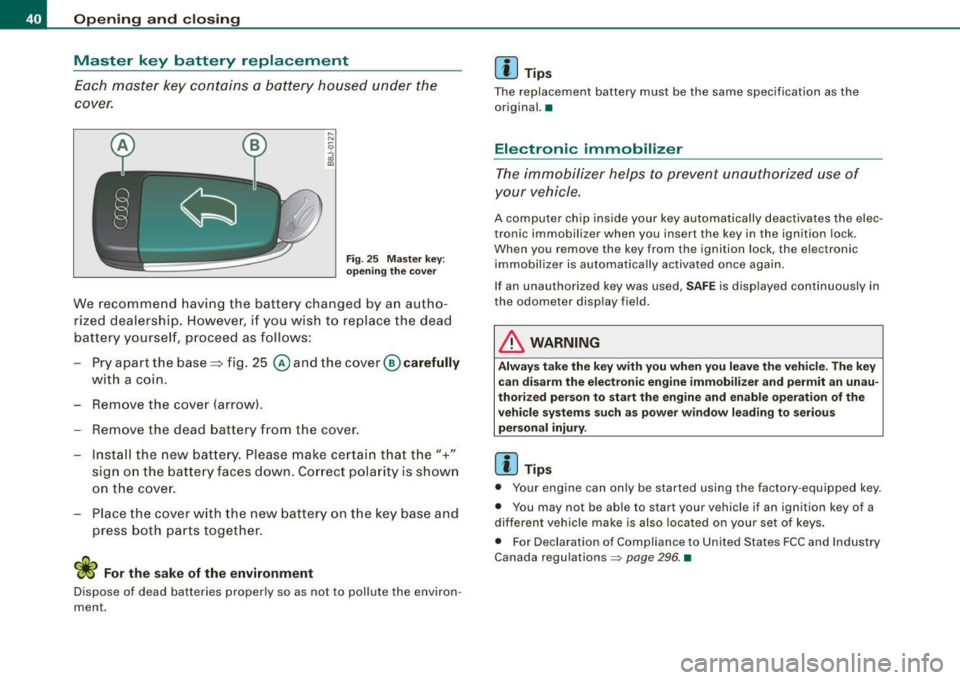
battery yourself, proceed as follows:
- Pry apart the base::::::,fig. 25
@andthecover @carefully
with a coin.
- Remove the cover (arrow) .
- Remove the dead battery from the cover.
- Install the new battery. Please make certain that the"+"
sign on the battery faces down. Correct polarity is shown
on the cover.
- Place the cover with the new battery on the key base and
press both parts together.
For the sake of the environment
Dispose of dead batteries properly so as not to pollute the environ
ment.
[ i ] Tips
The replacement battery must be the same specification as the
original. •
Electronic immobilizer
The immobilizer helps to prevent unauthorized use of
your vehicle.
A computer chip inside your key automatically deactivates the elec
tronic immobilizer when you insert the key in the ignition lock .
When you remove the key from the ignition lock, the electronic
immobilizer is automatically activated once again .
If an unauthorized key was used,
SAFE is displayed continuously in
the odometer display field.
& WARNING
Always take the key with you when you leave the vehicle. The key can disarm the electronic engine immobilizer and permit an unau
thorized person to start the engine and enable operation of the
vehicle systems such as power window leading to serious
personal injury.
[ i ] Tips
• Your engine can only be started using the factory -equipped key.
• You may not be able to start your vehicle if an ignition key of a
different vehicle make is also located on your set of keys.
• For Declaration of Compliance to United States FCC and Industry
Canada regulations ~
page 296. •
Page 44 of 316
Opening and closing
[ i J Tip s
• In the event of a crash with airbag deployment all locked doors
will be automatically unlocked to give access to the vehicle occu
pants from the outside .
• If the power locking system should malfunction, you can lock
each door individually using the vehicle key.
• If the power locking system should fail, you can still open the
fue l tank flap in an emergency~
page 215.
• You are well advised not to keep va luables inside an una tten ded
vehic le, visib le or not . Even a properly locked vehic le cannot provide
the security of a safe! •
Unlocking and locking the vehicle vvith the
remote control
How the remote control works .
Fig. 26 Remote
co ntro l: functi on
butt on s
Whet her only the driver 's door or the ent ire vehicle is
unloc ked when the ope ning button © is pressed once,
depends on the settings in the Driver information system
Central locking menu
~ page 27.
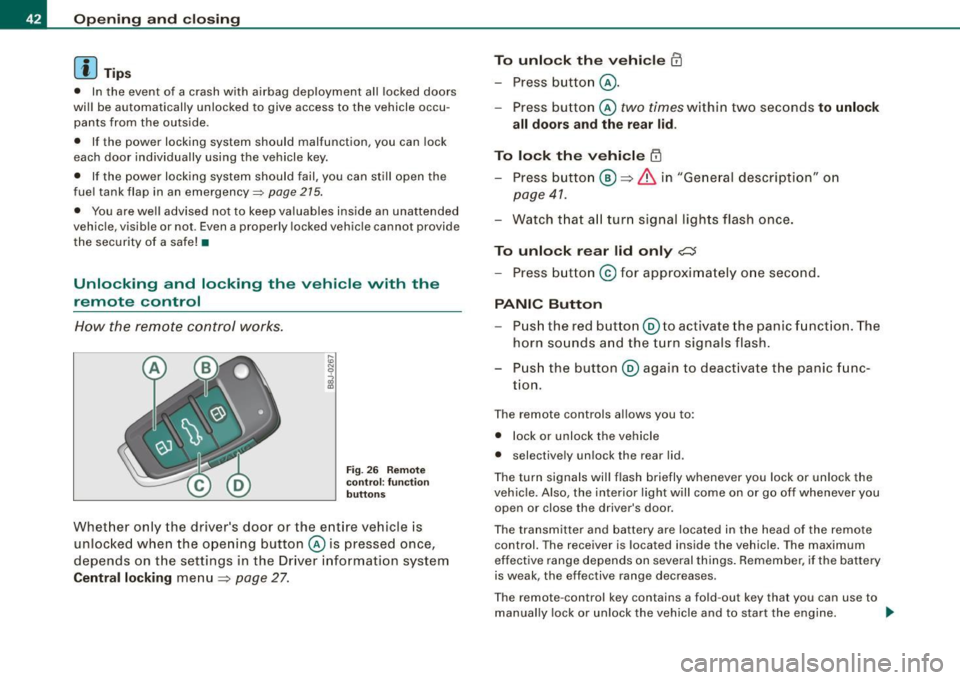
To unlock th e vehicle CD
- Press b utton @ .
- Press button © two times within two seconds to unlock
all doors and the rear lid .
To lock the vehicle ~
- Press butto n@ ~ & in "Ge neral desc ripti on" o n
page 41.
- Watch t hat a ll turn s ignal lights flash once .
To unlock rear lid only c:J
- Press b utton © for approximately o ne second .
PANIC Button
-Pu sh the re d butto n@ to activate the panic funct ion . The
horn so unds a nd the turn signals flash .
P us h the button ® again to deact ivate the panic f unc
tion.
T he remote controls allows you to :
• l ock or unlock the vehicle
• selective ly unlock the rear lid .
The tu rn signa ls will flash briefly whenever you lock or un lock the
vehicle. Also , the interior light wi ll come on or go off whenever you
open or clos e the driver's door .
The transmitter and battery are located in the head of the remote
control. The receiver is located inside the vehicle. The maximum
effect ive range depends on several things. Remember, if t he battery
is weak , the effective range decreases.
T he remote -control key contains a fo ld -out key that you can use to
manually lock or unlock the vehicle and to start the engine. .,,_
Page 49 of 316
-Fold down the lef t rear seat back.
Fig . 3 4 Sec tio n: In te
r ior luggage co mpart
m ent: E merg en cy
re lease
Using the vehicle key, pry off the cover => page 46, fig . 33
- Pull the plastic cord~ fig. 34 in the direction of the
arrow. •
Anti-theft alarm system
The anti-theft alarm triggers an alarm if any one attempts
to break into the vehicle.
llllD
Fig. 35 Dio de posi tion
i n th e ins trum en t pane l
The anti-theft a larm system triggers an audible alarm and turns on
the emerg ency flasher i f an unauthorized inter ference with the
vehicle is sensed by the system .
Contro ls and eq uip
ment
Op ening and clo sing
H ow i s th e a nti-th eft al arm sys te m sw itch ed o n?
The anti -theft alarm system is switched on when you lock the
driver's door manually using the fo ld-out key, or when you use the
remote con trol. The system is activated approximately 30 seconds
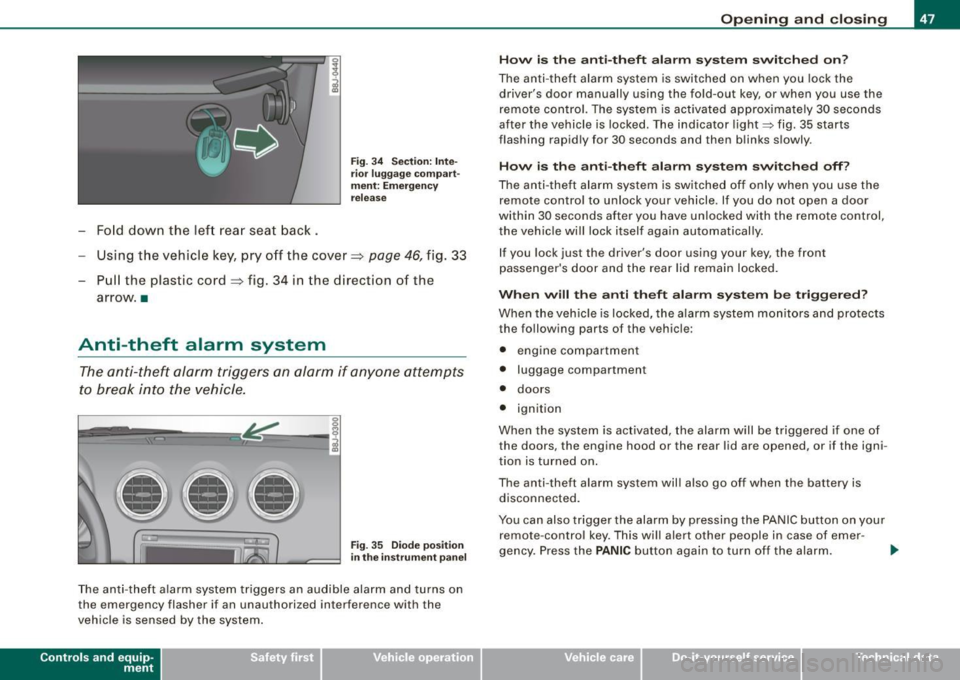
after the vehicle is locked . The indicator light~ fig. 35 starts
flashing rapidly for 30 seconds and then blinks slowly.
How i s th e a nti-th eft ala rm s yste m sw itch ed off?
The anti -theft alarm system is switched off only when you use the
remote contro l to unlock your veh icle . If you do not open a door
within 30 seconds after you have unlocked with the remote control,
the vehicle will lock itself again automatically.
If you lock jus t th e driv er's door using your key , the front
passenger 's door and the rear lid remain locked .
When w ill th e anti th eft ala rm sys te m b e trigge re d ?
When the vehic le is locked, the alarm system mon itors and protects
the following parts of the v ehicl e:
• engine compartment
• luggage compartment
• doors
• ignition
When the system is activated, the alarm will be triggered if one of
the doors , the engine hood or the rear lid are opened , or if the igni
tion is turned on .
The anti- theft alarm system will also go off when the battery is
disconnected.
You can also trigger the alarm by pressing the PANIC button on your remote -contro l key. This will alert other people in case of emer -
gency . Press the
PANIC button again to turn of f the alarm. ..,_
Vehicle care I I irechnical data
Page 52 of 316
Opening and closing
The automatic close function will cease if the key is released .
& WARNING
• Be careful when closing the windows. Check to see that no one
is in the way, or serious injury could result!
• Always read and heed WARNING=>
& in "General description"
on
page 41. •
Reactivating the system after battery
disconnection
Reactivating the convenience close/open feature
If the vehicle battery is disconnected and then reconnected,
the automatic closing and opening function will not work until it is reactivated. To reactivate this feature, perform the
following steps :
Reactivating close/open feature
-Pull and hold the power window switch until the window
is completely closed.
- Release the switch.
- Pull the switch again for one second. The automatic
closing/opening is now reactivated. •
Page 61 of 316
Interior lights
Interior lights
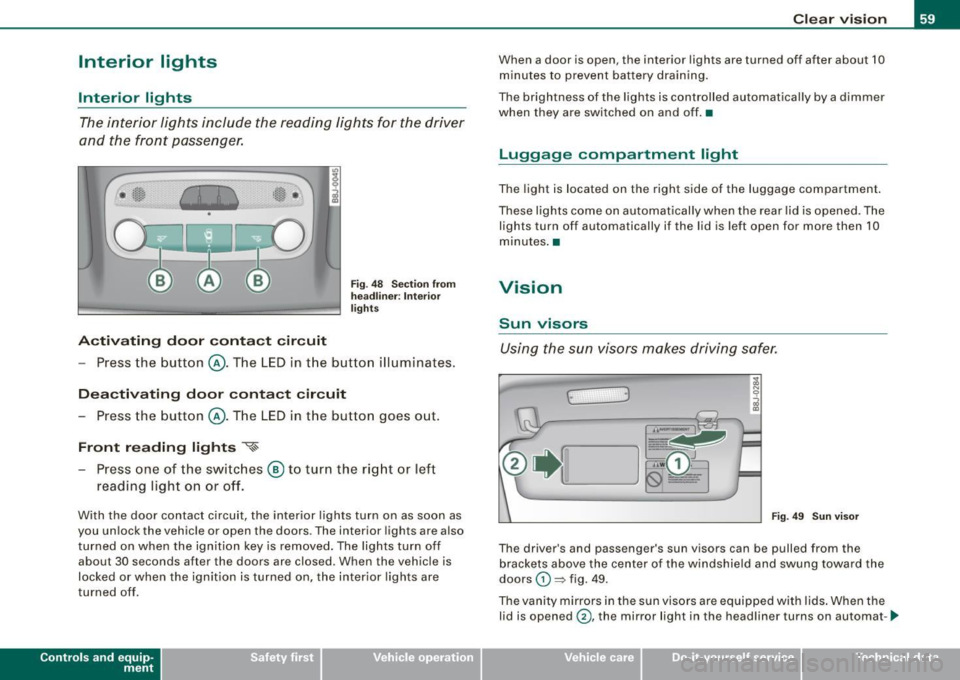
The interior lights include the reading lights for the driver
and the front passenger.
Activating door contact circuit
Fig. 48 Section from
headliner: Interior
lights
- Press the button @. The LED in the button illuminates.
Deactivating door contact circuit
- Press the button @. The LED in the button goes out.
Front reading lights ~
- Press one of the switches @ to turn the right or left
reading light on or off.
With the door contact circuit, the interior lights turn on as soon as
you unlock the vehicle or open the doors . The interior lights are also
turned on when the ignition key is removed. The lights turn off
about 30 seconds after the doors are closed. When the vehicle is
locked or when the ignition is turned on, the interior lights are
turned off .
Contro ls and eq uip
ment
Clear vision
When a door is open, the interior lights are turned off after about 10
minutes to prevent battery draining.
The brightness of the lights is controlled automatically by a dimmer
when they are switched on and off. •
Luggage compa rtm ent light
The light is located on the right side of the luggage compartment.
These lights come on automatically when the rear lid is opened. The
lights turn off automatically if the lid is left open for more then 10
minutes. •
Vision
Sun visors
Using the sun visors makes driving safer.
Fig. 49 Sun visor
The driver's and passenger's sun visors can be pulled from the
brackets above the center of the windshield and swung toward the
doors
G) ~ fig . 49 .
The vanity mirrors in the sun visors are equipped with lids. When the
lid is opened @, the mirror light in the headliner turns on automat-
~
Vehicle care I I irechnical data
Page 85 of 316
Outlet
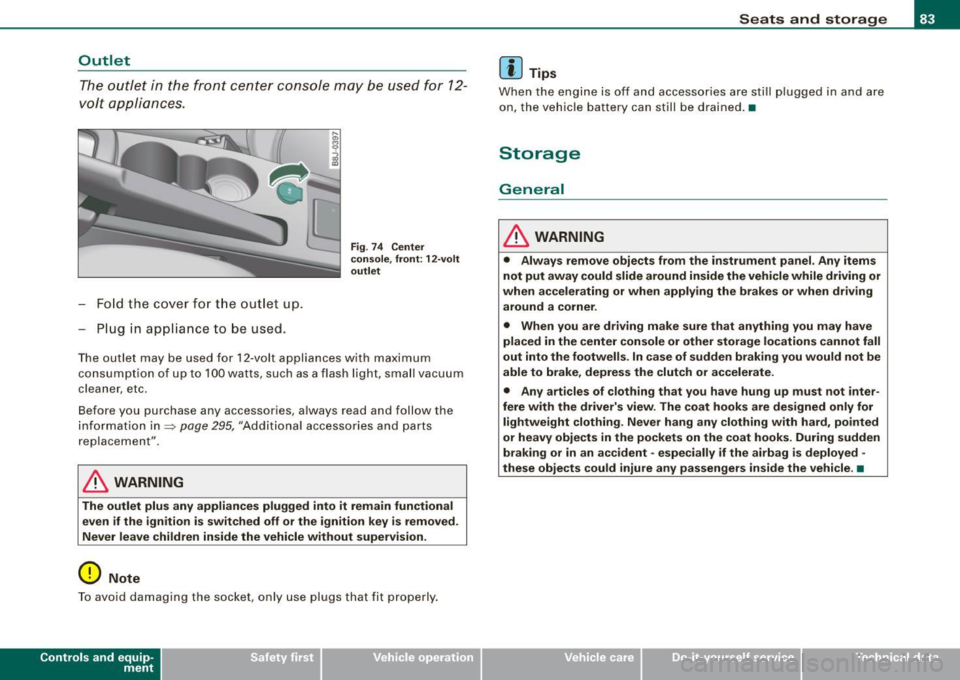
The o utle t in the fron t center cons ole may be used for 12 -
volt appliances .
-Fold the cove r for th e out let up.
- Plug in app lia nce to be used .
Fig . 7 4 Center
co nso le, fron t: 12 -vo lt
o utl et
The outlet may be used for 12-volt appliances with maximum
co nsumpt ion of up to 100 watts , such as a flash light. small vacuu m
cleaner , etc.
Before you purchase any accessories, a lways read and follow the
information in~
page 295, "Additiona l accessories and parts
replacement ".
& WARNING
The outlet plu s any appliances plugged into it remain functional
even if the ignition i s swit ched off or the ignition key i s removed .
Never l eave chi ldren in side the vehicle without supervision .
0 Note
To avoid damag ing the socket, only use plugs that fit properly.
Con tro ls and eq uip
ment
Seats and storag e
[ i ] Tips
Whe n the engine is off and accessories are stil l p lugged in and are
on, the vehicle battery can still be drained .•
Storage
General
& WARNING
• Alway s remo ve obje cts from the instrument panel. Any items
not put away could slide around in side the vehicle while driving or
when a ccelerating or when applying the br ake s or when driv ing
around a corner .
• When you are driving m ake sure t hat anything you may h ave
placed in the center con sole or oth er storage lo cations cannot fall
out into the foot wells . In case of sudden braking you would not be
able to brake , depres s the clut ch or accelerate .
• Any articles of clothing that you have hung up must n ot inter
fere with the driver' s view. The coa t hook s are de sig ned only for
lightwe ight clothing. Ne ver hang any clothing with hard , po inted
or heavy obj ects in the pockets on the coat ho oks . Dur ing sudden
braki ng or in an ac cident · especiall y if the airbag i s de plo yed ·
these ob je cts could injure any pa ssengers in side the vehicle . •
Vehicle care
I I irechnical data
Page 94 of 316
On the ro ad
Ignition lock and ignition switch
Ignition lock
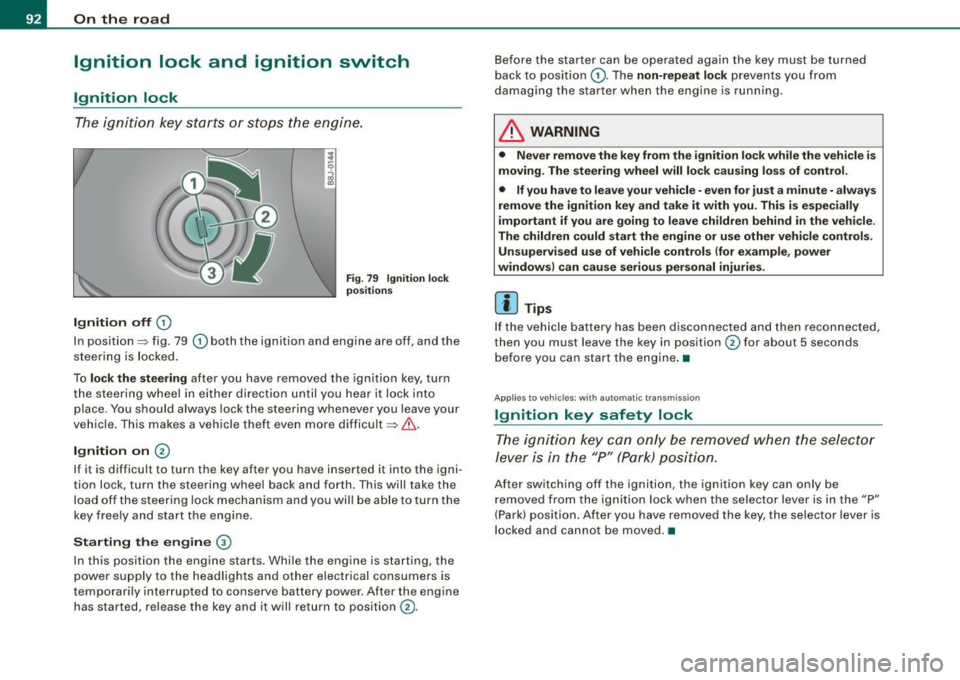
The igniti on key starts or s tops the eng ine.
Ignition off G)
Fi g. 7 9 I gnition lock
po sition s
In position => fig . 79 G) both the ignition and engine are off , and the
steering is locked.
To
lo ck the steering after you have removed the ignition key, turn
the steering whee l in either direction until you hear it lock into
place . You should always lock the steering whenever you leave your
vehic le. This makes a vehicle theft even more difficult=>& .
Ignition on 0
If it is difficult to turn the key after you have inserted it into the igni
tion lock, turn the steering wheel back and forth. This will take the
load off the steering lock mechanism and you wil l be able to turn the
key freely and start the engine.
Starting the engine ®
In this position the engine starts . Whi le the engine is starting, the
power supply to the headlights and other electrical consumers is
temporari ly interrupted to conserve battery power . After the engine
has started, release the key and it will return to position
G) .
Before the starter can be operated again the key must be turned
back to posi tion
G) . The non -repeat lock prevents you from
damaging the starter when the engine is running.
& WARNING
• Never remove the key from the ignition lo ck while the veh icle is
moving. The steering wheel will lo ck causing lo ss of control .
• If you have to leave your vehicle -even for just a minute -always
remove the ign ition key and take it with you . This i s especially
i mportant if you are going to l eave children behind in the vehi cle .
The children could start the eng ine or u se other vehi cle control s.
Unsupe rv ised use of vehicle controls (for e xample , power
window s) can cau se serious per sonal injurie s.
[ i ] Tips
If the veh icle ba ttery has been disconnected a nd then reconnected,
then you must leave the key in position
G) for about 5 seconds
bef ore you can start the engine .•
Ap plies to v ehicle s: w ith a utom at ic tr ansmiss io n
Ignition key safety lock
The ig nition ke y can only be rem oved when the selec tor
le ver i s in the "P" (Par k) p osition.
After switching off the ignition, the ignition key can only be
r emoved from the igni tio n lock w hen the se lector leve r is in the "P"
(Park) position . After you have removed the key, the selector lever is
l ocked and cannot be moved. •
Page 219 of 316

___________________________________________ C_ h_e _c_ k_ i_n _g _ a_n _d_ f_il _li _n _g __ fflllll
•
Closing the engine hood
- Pull the hood down until the pressure from the struts is
reduced .
- Let the hood
drop down and latch in place. Do not try to
push it shut;
it may fail to engage => &.
& WARNING
A hood that is not completely latched could fly up and block your
view while driving.
• When you close the engine hood, check it to make sure the
safety catch has properly engaged. The hood should be flush with
the surrounding vehicle body parts.
• If you notice while driving that the hood is not secured prop
erly, stop at once and close it. •
Working in the engine compartment
Be especially careful whenever you work in the engine
compartment!
Whenever you must perform any work in the engine compartment,
for example checking and filling the different fluids, there is a risk of injury, burns and accidents. To prevent personal injury always
observe the following WARNINGS. The engine compartment of any
vehicle is a hazardous area!
~ &
& WARNING
To help avoid injury, before you check anything under the hood :
• Switch off the engine.
• Remove the ignition key.
• Apply the parking brake .
& WARNING (continued)
• Move selector lever of automatic transmission to "P" (Park);
put manual transmission in Neutral .
• Always let the engine cool down. Hot components will burn
skin on contact.
• To reduce the risk of being burned, never open the hood if you
see or hear steam or coolant escaping from the engine compart
ment. Wait until no steam or coolant can be seen or heard before
carefully opening the hood .
• Keep children away from the engine compartment.
• Never spill fluids on hot engine components . They can cause a
fire.
• Never touch the radiator fan. The auxiliary electric fan is
temperature controlled and can switch on suddenly.
• Never open the coolant reservoir cap when the engine is still
warm. The coolant system is pressurized and hot coolant could
spray out.
• Protect your face, hands and arm from steam or hot engine
coolant by placing a thick rag over the cap when you open the
coolant reservoir.
• If work on the fuel system or the electrical system is necessary:
- Always disconnect the battery.
- Never smoke or work near heaters or open flames. Fluids in
the engine compartment could start a fire .
- Keep an approved fire extinguisher immediately available.
• To avoid electrical shock and personal injury while the engine
is running or being started, never touch :
- Ignition cables
- Other components of the high voltage electronic ignition
system.
• If you must perform a check or repair with the engine running: ..,
Vehicle care
I t •
Page 303 of 316

______________________________________________ A_ l.:.. p _h_ a_ b_e _t_ic _ a _ l _in _ d_e _ x __ _
Automatic transmission ..... ... .. .... . 99
Driving Notes ... .. .... ... .... .... 102
Emergency program .. .... ... .... . 105
Emergency release . . . . . . . . . . . . . . . 106
Ignition key safety lock ....... .... .. 92
Kick-down .. ... .. .... .... ...... .. 105
Launch Control Program ........... 105
Selector lever lock .. ...... ...... .. 101
Selector lever positions ........... 100
Tiptronic ... .. .... .... ........... 103
Tiptronic controls on the steering wheel
104
Average fuel mileage ... .... .... .... .. 26
Average speed . ... .. .... .... .... .... . 26
Avoid damaging the vehicle ......... . 192
B
Battery . ...... ..... ... .... .... . 228, 231
Battery location inside the engine compartment ... .... .... .... 218,219
Charging . .... .... .... ... .... .... 232
Checking battery acid level .... 231, 232
Connecting ... ... ..... ... .... ... . 228
Disconnecting ....... ....... .... . 228
Important warnings when working on the
battery ..... .... ....... ...... .. 229
Replacing the battery . ....... .... . 228
Winter operation . .... .... ... .... . 228
Working on the battery ... .... .... . 229
Battery voltage ......... .... ......... 36
Before driving .. ...... .. ....... ..... 114
Bi -Xenon headlights ........... .. .... . 57
Blended gasoline ... .... .... ... .... . 211
Controls and equip
ment Safety first
Body
cavity sealing .... .. ..... ... ... . 204
Booster seats .... .... .... .... .... ... 165
How do I properly install a booster seat in
my vehicle? . ... ... ....... .. .... 165
Safety instructions ..... .... ... .... 165
Brake fluid Changing the brake fluid .. .... .... 227
Checking the brake fluid level ...... 227
What is the correct brake f luid level? 227
What should I do if the brake fluid warning
light comes on? . ........ ... ..... 227
Brake fluid reservoir ..... .... .... .... 227
Brake system . ... ...... ......... .... 227
Anti-lock brake system ... .... ... .. . 20
Brake Assistan t .... . .. .. .. . ... ... 187
Brake fluid .... ... .... ...... ...... 227
Brake fluid specifications for refi ll and
replacement . ... ..... ... .... .... 227
Brake light defective . .... .... .... .. 37
Brake pads ... ... ..... ... .... ... . 191
General information . .... .. .. .. ... 186
How does the moisture or road salt affect
the brakes? ............... ...... 1 86
Malfunction .... ........... ...... . 33
Warning/indicator lights .. ..... .... . 19
Worn brake pads symbo l .... ...... . 36
Break -in period ........ ............. 190
Brake pads ...... ..... ....... .... 191
Tires .... . ... ... ... ... .... .... ... 190
Bulbs ..... .. .... ..... .. ... ... ...... 278 C
California Proposition 65 Warning . .... 218
Battery specific .... ... .... .... .... 231
Capacities ... .... .... .... ... .... .... 291
Car care ... ..... .. .. .... .... .... .. . . 198
Interior .... ... .. .. .... ........ ... 205
Plastic and vinyl .. ............... . 202
Weatherstrips ... .. .... .. . .... ... . 203
Care of exterior . ..... ....... ....... . 198
Cargo area
See Luggage compartment . ... .... . 121
Cargo net .. .... .. .. .... .... .... .... . 78
Catalytic converter .. .... .... .... ... . 191
CD changer .... ... .. .... .... .... .. .. . 84
Certification .. ....... ....... ..... ... 296
Changing a flat tire ......... .... ... .. 268
Changing engine oi l .. .... ... .... .. .. 223
Chassis Undercoating . ... .... .... .... ... . 205
See also Audi magnetic ride .... .... . 98
Checking Battery acid level .. ....... .... 231, 232
Engine coolant level ...... .... .... 225
Checking tire pressure ..... .... ...... 241
Child restraint Danger of using ch ild restraints in the
front seat ... .... .... .... ... ... . 137
Child restraints What types of child restraint anchors are
avai lable? ... .... .... .... ...... . 171
Where can I get additional information
about child restraints? ........... 171
Vehicle operation Vehicle care Do-it-yourself service Technical data