set clock AUDI TT COUPE 2009 Owners Manual
[x] Cancel search | Manufacturer: AUDI, Model Year: 2009, Model line: TT COUPE, Model: AUDI TT COUPE 2009Pages: 316, PDF Size: 71.16 MB
Page 15 of 316
<£> For the sake of the environment
Upshifting early saves fuel and reduces engine noise. •
Digital clock with date display
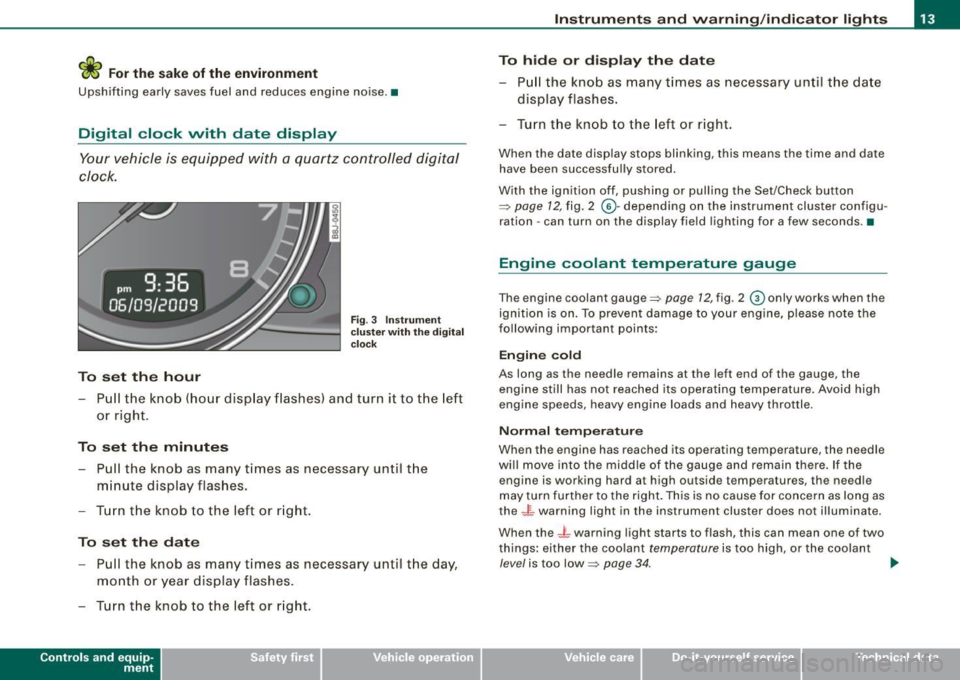
Your vehicle is equipped with a quartz controlled digital
clock.
To set the hour
Fig. 3 Instrument
c luste r with the digital
c lock
- Pull the knob (hour display flashes) and turn it to the left
or right.
To set the minutes
- Pull the knob as many times as necessa ry until the
m in ute display flashes.
- Turn the knob to the left or right.
To set the date
-Pull the knob as many times as necessary until the day,
month or year display flashes.
- Turn the knob to the left or right.
Con tro ls and eq uip
ment
Instruments and warning /indicator lights
To hide or display the date
- Pull the knob as many times as necessary until the date
display flashes .
- Turn the knob to the left or right.
When the date display stops blinking, this means the time and date
have been successfully stored.
With the ignition off, pushing or pulling the Set/Check button
~ page 12, fig. 2 ©-depending on the instrument cluster configu
ration - can turn on the display field lighting for a few seconds .•
Engine coolant temperature gauge
The engine coolant gauge~ page 12, fig. 2 © only works when the
ignition is on. To preven t damage to your engine, please note the
following important points:
Engine cold
As long as the needle remains at the left end of the gauge, the
engine still has not reached its operating temperature . Avoid high
engine speeds, heavy engine loads and heavy throttle.
Normal temperature
When the engine has reached its operating temperature, the needle
will move into the middle of the gauge and remain there. If the
engine is working hard at high outside temperatures, the needle
may turn further to the right. This is no cause for concern as long as
the -~- warning light in the instrument cluster does not illuminate.
When the
_J _ warning light starts to flash, this can mean one of two
things: either the coolant
temperature is too high , or the coolant
level is too low~ page 34. ~
Vehicle care I I irechnical data
Page 17 of 316
With the ignition off, pushing of the Set/Check button=> page 12,
fig. 2 © can turn on the display field lighting for a few seconds .
Malfunction message
If there is a malfunction somewhere in the instrument cluster,
dEF
will appear in the trip odometer and will stay on. Contact your
authorized Audi dealer to have the problem corrected.
Immobilizer
When the ignition is switched on, the data on the ignition key are
scanned automatically.
If an unauthorized key was used,
SAFE is displayed continuously in
the odometer display field . The vehicle cannot be operated
=> page 40.
[ i ] Tips
• The digital c lock and the odometer are turned on for about 30
seconds when the driver's door is opened .
• When the ignition is turned off, the odometer reading and the
digital clock with date display can be switched on for about
30 seconds by pressing the Set/Check button =>
page 12, fig. 2 @ . •
Con tro ls and eq uip
ment
Instruments and warning /indicator lights
Warning /indicator lights
Overview
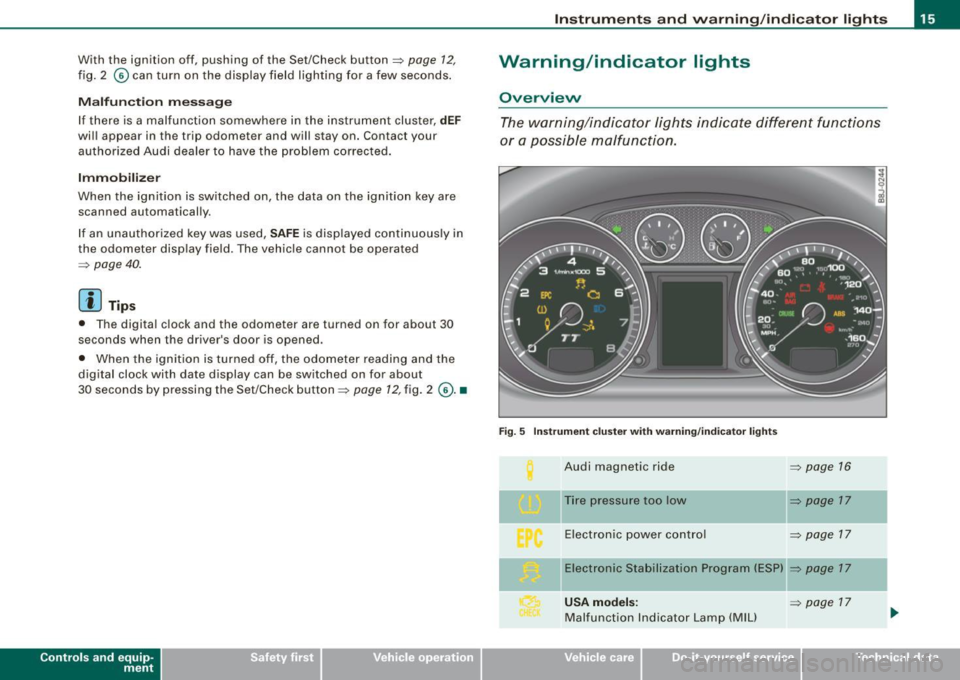
The warning/indicator lights indicate different functions
or a possible malfunction.
Fig. 5 Instrument cluster with warning/indicator lights
Audi magnetic ride => page 16
Tire pressure too low => page 17
Electronic power control => page 17
-Electronic Stabilization Program (ESP) => page 17
USA models : => page 17
Malfunction Indicator Lamp (MIU
Vehicle care I I irechnical data
Page 30 of 316
Driver inf ormation sy ste m
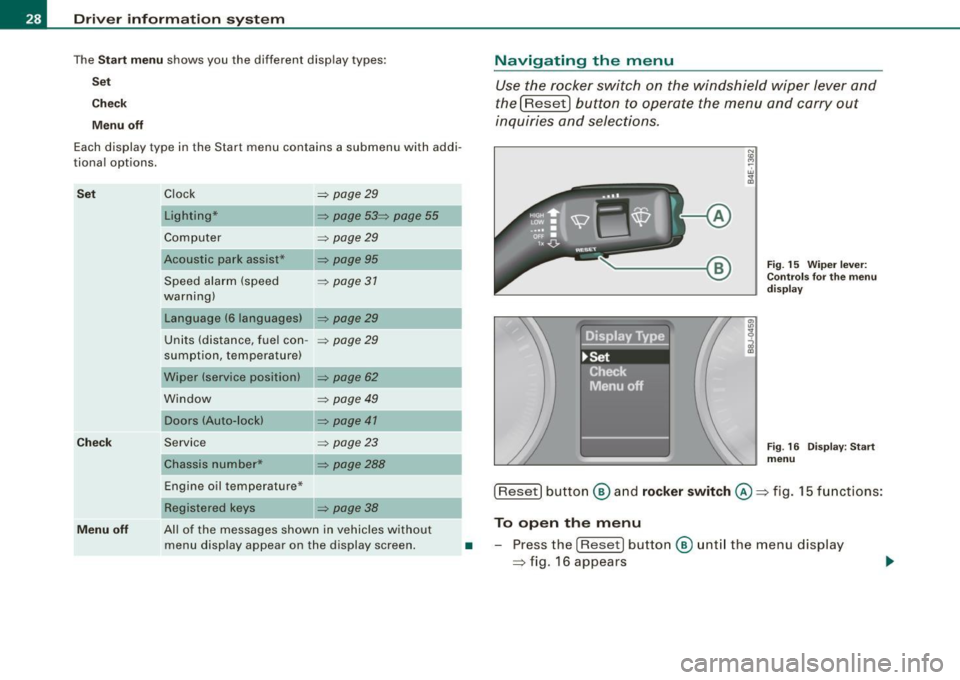
The Sta rt m enu shows you the different disp lay types:
Se t
Check
M enu off
Each display type in the Start menu contains a submenu with addi
tional options.
S et
Ch eck
Clock ~ page29
Lighting* ~ page 53~ page 55
Computer ~ page29
Acoustic park assist* ~ page95
Speed alarm (speed ~ page 37
warning)
Language (6 languages)
~ page29
Units (distance, fuel con -~ page29
sumption, temperature)
Wiper (service position)
~ page 62
Window ~ page 49
Doors (Auto-lock) ~ page 41
Service
Chassis number* ~ page23
~ page288
Navigating the menu
Use the rocker switch on the windshield wiper lever and
the[Reset) button to operate the menu and carry out
inquiries and selec tions.
-A
N
"' cc
Fig . 15 Wiper leve r:
Con trols fo r th e m enu
d is pla y
Fig . 16 Disp lay: Start
menu
Engine oil temperature* ___ __, [Reset] button ® an d rock er swit ch @ => fig. 15 functions:
Menu off
Registered keys ~ page 38
All of the messages shown in vehicles without
menu display appear on the display screen. To open the menu
• -Press the [Reset ) button ® unt il the menu display
=> fig. 16 appears
Page 33 of 316
- Press the knob button:::> page 30, fig. 19 until the
=>
page 30, fig. 18 symbol appears.
Resetting the maximum speed
- Drive the vehicle at a speed of at least 3 mph (5 km/h)
- Press the knob for more than 2 seconds .
The speed warning symbol ~ (USA models) /~ (Canada models) will
appear briefly in the display when you release the button to indicate
that the maximum speed has been stored successfully.
The maximum speed remains stored until it is changed by pressing
the button again briefly or un til it is del ete d by a l engthy push on the
button. •
Speed warning 2: setting a speed limit
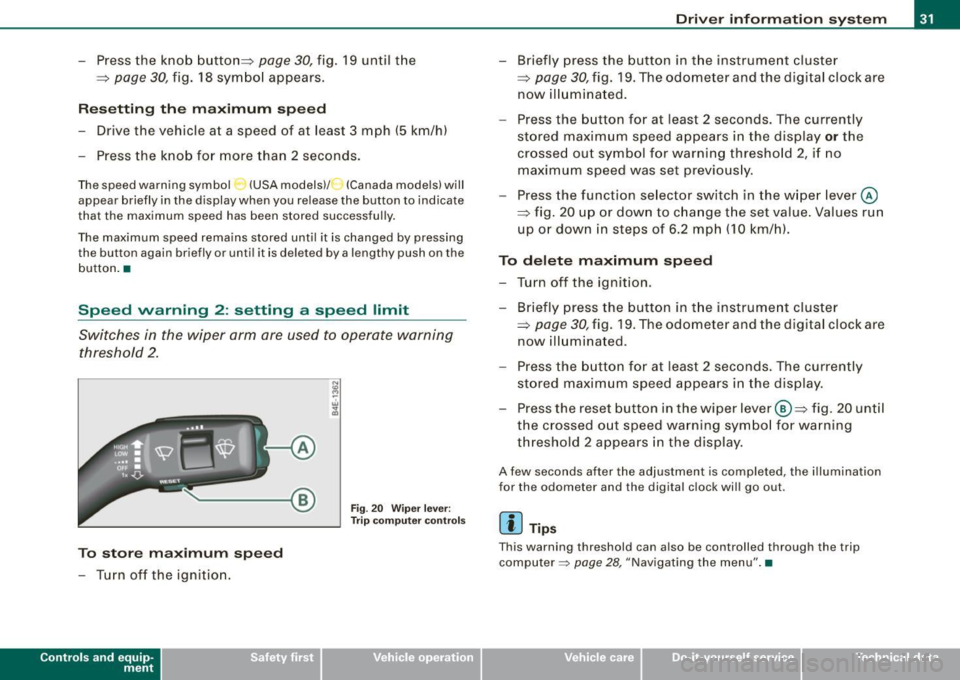
Switches in the wiper arm are used to operate warning
threshold 2 .
To store maximum speed
- Turn off the ignition.
Con tro ls and eq uip
ment
A
Fig . 20 Wiper lever:
Trip computer controls
Driver information system
- Briefly press the button in the instrument cluster
=;, page 30, fig. 19. The odometer and the digital clock are
now illuminated.
- Press the button for at least 2 seconds. The currently
stored maximum speed appears in the display
or the
crossed out symbol for warning threshold 2, if no maximum speed was set previously.
- Press the function selector switch in the wiper lever @
::::> fig. 20 up or down to change the set value. Values run
up or down in steps of 6.2 mph (10 km/h).
To delete maximum speed
- Turn off the ignition.
- Briefly press the button in the instrument cluster
=>
page 30, fig. 19. The odometer and the digital clock are
now illuminated .
- Press the button for at least 2 seconds. The currently
stored maximum speed appears in the display.
Press the reset button in the wiper lever ®=> fig. 20 until
the crossed out speed warning symbol for warning threshold 2 appears in the display.
A few seconds after the adjustment is completed , the illumination
for the odometer and the digital clock will go out.
[ i] Tips
Th is warning threshold can also be controlled through the trip
computer =>
page 28, "Navigating the menu". •
Vehicle care I I irechnical data
Page 304 of 316
___ A_l.:. p _h_ a_ b_e _t _ic _ a_l _in _ d_e _x ____________________________________________ _
Child safety ...... ... .... ...... . 157,162
Booster seats . . . . . . . . . . . . . . . . . . . . 165
Convertible child safety seats . . . . . . 163
Convertible locking retractor . . . . . . . 168
Guidance fixtures for lower anchorages
173
Important safety instructions for using child safety seats .... ....... .... 160
Important things to know when driving
with children ................... 157
Infant seats ..................... 162
Insta lling a child restraint using the
LATCH system . . . . . . . . . . . . . . . . . . 175
Lower anchorages . . . . . . . . . . . . . . . 173
Mounting and releasing the anchorage hook .. ...... .... ....... ....... 176
Older children and safety belts . . . . . 167
Safety belts and older children . . . . . 167
Tether strap . . . . . . . . . . . . . . . . . . . . . 176
Which restraint system should my older child wear? ................. ... 167
Child safety seat .. ........... ....... 162
Convertible locking retractor . . . . . . . 168
Installing . .... ... ..... ..... .. ... 168
child safety seat LATCH system . . . . . . . . . . . . . . . . . . . 175
Child safety seats How do I properly insta ll a chi ld safety
seat in my vehicle? ... .... ....... 160
Safety instructions . . . . . . . . . . . . . . . 160
Cigarette lighter ..................... 82
Cleaning Alcantara (synthetic suede) . . . . . . . . 208
Engine compartment ... .. .... .... 209 Fabrics and fabric c
,overings ....... 205
Instrument panel ... .... .... .... .. 206
Interior ......................... 205
Leather ......................... 207
Plast ic and vinyl ....... .... ...... 202
P lastic parts ............... ... ... 206
Safety belts . . . . . . . . . . . . . . . . . . . . . 209
Trim strips ... .... ... .. .... .. 201,202
Cleaning and protection .. ........ ... 198
Climate control A/C operation . . . . . . . . . . . . . . . . . . . . . 89
Air distribution .... ........ ....... 87
Automatic mode . . . . . . . . . . . . . . . . . . 88
Defrost ............. ...... ....... 88
Economical use ... ...... ..... ... .. 89
Fan ............................. 87
Heated seats . . . . . . . . . . . . . . . . . . . . . 90
Rear window defogger . . . . . . . . . . . . . 89
Switching on and o ff ...... .... .... 87
Climate controls ........ ........... .. 85
Air recirculation mode . ...... ...... 88
Controls . . . . . . . . . . . . . . . . . . . . . . . . . 85
Dust filter ..... ....... ............ 85
Heating .. .... .... ... .. .... .... ... 85
Pollen fi lter ... ....... ...... .... ... 85
Venti lation ... ... .. .... .... ....... 85
Clock ....... ....... ... .............. 13
Coat hooks ............... .... ... .... 84
Co ld tire inflation pressure ........... 238
Coming -home -function ... .... ....... . 55
Compass mirror ............... ...... 67
Compliance .. .... ... .... ... ... .. ... 296
Consumer Information .... ....... 123, 293 Contacting NHTSA
... .. .. .... .... ... 123
Controls and disp lays ...... ...... .... . 11
Convenience close/open feature Windows ... ... .... .... ... .... .... 49
Convertible child seats How do I properly install a convertible chi ld seat in my vehicle? ......... 163
Safety instructions .... .... .... ... 163
Convertible locking retractor Activating ............. .... ...... 170
Deactivating ... .... ....... .... ... 170
Using to secure a child safety seat .. 168,
170
Coolant System Expansion tank ... .... .... .... ... 225
Coolant system .. .... .... .... ....... 224
Cornering light ...................... 54
Cruise contro l ........ ... .... .... .... 96
Changing speed . ...... .... .... ... 97
Presetting your speed .......... .... 97
Switching off ... .. .... .... .... .... 97
Switching on ...... .... ... .... .... 96
Warning/indicator lights .... ....... . 18
Cup holder ... .... .... ....... .... .... 81
Current fuel mileage .................. 26
D
Damping
See Audi magnetic ride .... ... .. .... 98
Data .............................. 291
Data recorder ...................... 182
Datedisplay . ......... .... ... .... .... 13
Page 305 of 316

______________________________________________ A_ l_,_ p _h_ a_ b_e _ t_i c_ a_l _in _ d_e _ x __ lllll
Daytime running lights .. ..... .. .... ... 53
Daytime running lights (Canada) . .... .. 53
Declaration of compliance Cell phone package ............... 296
Electronic immob ilizer . .... ... .... 296
Homelink® universal remote control 296
Remote control key . ... .. .... .... . 296
Tire pressure monitoring sys tem ... 296
de f
What does this mean when it appears in
the trip odometer display? .. ....... 14
Defect ive light bulb warning ...... .... . 36
Defrosting the windows .. .......... ... 88
Determining correct load lim it ... ... .. 243
Digital clock .... .... .... .... ... .... .. 13
Setting the time ................... 13
D igital compass . ...... ... ...... .... .. 67
Dimensions ... .. .... .... ... .... .... 290
Dipstick Reading the dipstick properly
Di rect Shift Gearbox 221
Emergency release . . . . . . . . . . . . . . . 106
Distance .. ...... .... .... ... .... .... . 26
Driver information ..... ... .. .... ..... . 33
Driver information system
Gearshift indicator ... .... .... .... .. 23
Menu button ..................... 28
Menu display . ... .... ...... .... ... 27
Open door or front lid warning ...... 22
Outside temperature display ....... . 22
Red symbols .. .... .... ... ... ... .. . 32
Service interval disp lay .... .... ..... 23
Setting .......................... 29
Controls and equip
ment Safety first
Sound system display
.... .. ..... .. . 22 Emergency starting . ... .. .... .... .... 279
Trip computer ............ ..... .. . 25
Emerge ncy towing ...... .... .... ... . 282
yellow symbo ls ................... 32
Engine
Driver seat Cecking and fil ling locations .. .... . 219
See Seating position .. ..... .... ... 116
Checking and fi lling locations .. ... . 218
Dr iving Coolant ...... .... ... .... .... .... 224
Run-flat tires ..... ... .. ...... .... . 259 Hood .. ...... .... .... ... .... .. .. 216
Dr iving safely .......... ............ . 114 Start
ing ...... .... .... ... .... .. 92, 93
Duplicate key .... ...... ... .. .... .... . 38 Start
ing with jumper cables .... .... 279
Dust filter ........................... 86 Stopping
...... .... ... .... .... .... 93
Engine compart ment .. ...... .... .... 218
E Safety instruc tions .. ...... .... ... . 217
Working in the engine compa rtment . 217
Elapsed time .... .... ........ ....... . 26
Engine coolant system ......... ...... 224
Electro -mecha n ica I power assist .. .. 20, 188 Adding coo
lant ..... ........ ...... 225
Electron ic different ial lock (EDU Check
ing the eng ine coolant level ... 225
How the sys te m works .. ...... .... 184 Radiator fan ..
.... ....... .... .... 226
Warning/indicator lights ...... ...... 20 Te
mpe rature gauge ...... .... .... .. 13
Electronic immobilizer .... ..... .. .. 14, 40 Engine cooling system
Electronic power cont ro l Malfunction
............ ... .. ..... 34
EPC warning/indicator light ......... 17 Engine data
... .. .... .... .... .... ... 29 1
E lectron ic speed limiter . ...... .... .... 25 E
ngine hood
Electronic Stability Program .. .... .... 182 Closing
... .... .... ... .... ...... . 217
Electronic stabilization program (ESP) How to release
the hood . ...... .... 216
Warning/indicator lights .. .... .... .. 17 Engine oil
..... .. .......... ... .. .... 219
Emergency flasher Warning/indicator lights ...... .... .. 18
Emergency flashers .................. 57
Emergency locking .. .... ........ ... .. 45
Emergency operation Adding
......... .... ........ ..... 222
Additives .. .... .... ......... ..... 222
Changing . ..... ... .... .... ... ... . 223
Checking the eng ine oi l leve l ....... 221
Indica tions and condit ions requiring ext ra
checking ....................... 221
Rear lid ...... ... .... .... .... .... . 46
Oil consumption ... ... ...... ...... 221
Emergency release for selector lever ... 106
Oil grades .... .... .... ..... .. .... 2 19
Vehicle operation Vehicle care Do-it-yourself service Technical data
Page 309 of 316

______________________________________________ A_ l_,_ p _h_ a_ b_e _t_i c_ a _ l _in _ d_e _ x __ lll
Outside temperature display .. .. .. ... .. 22
Owner's manual How the Owner's Manual is organized . 6
p
Paint Touch -up . ... .... ...... ... .. ... .. 202
Paint No . .... .... .... .... .... .... ... 288
Parking . ...... .. ............ ....... . 94
Automatic transmission ... ... ... .. 102
Parking brake ........... .... ..... .. .. 94
Parking brake warning ................ 33
Parking on a decline (downhi ll) .. ... .. .. 94
Park ing on an incline (uphill) .. ..... .. .. 94
Parts replacement ..... .............. 295
P ASSENGER AI R BAG O FF light ... .. ... 147
Passive safety system ................ 114
Pedals .. ........ ... .... .... ........ 120
Physica l principles of a frontal collision 126
Polishing .......................... 201
Pollen filter ... .. ... ..... ... .... .... . 86
Pollutant fi lter . ... .. .... .... ... .... .. 86
P ower locking switch ... .... .... ...... 44
Power locking sys tem . ...... .... .... .. 41
Convenience close/open feature ... .. 49
Locking and unlocking the vehicle from inside .. .. ... ... .... ... .... .... . 44
Opening and c losing the windows .. . 49
Rear lid/trunk l id ... .. .... .... .... . 45
Remote control ...... .... ... .... .. 39
Un locking and locking vehicle ... .. .. 42
Controls and equip
ment Safety first
Power outlets .
...... ....... .. .. .... .. 83
Power seats
Adjusting the seatback .... .... .... . 73
Adjustment . ...... .... .... .... ... . 71
Fo lding the seatback forward .. ...... 73
Power steering
See Electro-mechanica l power assist 20,
188
Power window switches ... .. .... .... .. 48
Reactivating the system ...... ...... 50
Pregnant women Specia l considerations when wearing a
safety belt . .... ....... .... .... . 131
Prog ramming the Homelin k® universal re -
mote control .... ... ..... .... ... 107
P roper occupant seati111g pos itions ... .. 11 6
Proper safety belt posi tion ............ 130
P roper seating position
Front passenger .................. 117
Occupants ......... .. ... ... .. .... 116
Rear passengers ................. 118
a
Quartz clock .... .... ..... .. .... .... .. 13
quattro®
See All Wheel Drive .. .... .... .... . 189
Ques tion
What happens to u nbelted occupan ts? .
127
Why safety belts? ................. 125
R
Radiator fan ...... .. .... ........ .... 226
Rain sensor defective ..... ... .... .... . 37
Reading lights ....................... 59
Rear lid . ......... ... .... ..... .. ... .. 45
Emergency release ................ 46
Rear light defective ...... .... .... ... .. 36
Rear spoiler . .... ........ .... ...... . 185
Rear window defogger ... .... ... ..... . 89
Rear window shelf ... .... .... .... ... .. 76
Rearview mirror Inside rearview mirror .. ............ 64
See also Mirrors ... ... ... .. ...... .. 64
Refuelling .......................... 213
Release lever for hood . ...... .... .... 216
Remote control .. .... .... ...... .... .. 39
Resetting remote control ........... 43
Remote control garage door opener (Homelin k®l ................... 107
Remote control key Unlocking and locking .. ...... ... ... 42
Remote master key
Batte ry replacement ...... .... .... . 39
Check light . ...... .... ..... .. .... . 39
Remote rear lid release .... ... ... ... .. . 45
Repair manuals .. .... .... ........ ... 293
Repairs Airbag system .... .... .... ...... . 149
Replacement parts ... .... ... ... .... . 295
Replacing Wheel rims .................. 2 46, 248
Vehicle operation Vehicle care Do-it-yourself service Technical data
Page 311 of 316

______________________________________________ A_ l_,_ p _h_ a_ b_e _t_i c_ a _ l _in _ d_e _ x __ lll
Seats
Number of seats 125
Selector lever positions Automatic transmission . .... ..... . 100
Service and disposal Safety belt pretensioner .. .... ..... 133
Service interval display ............... 23
Service position for windshield wipers .. 62
Set menu .. ... ... .. .... ..... .. ... ... 29
S etting
Date display . ....... .... .......... 13
Digi tal clock ........... ........... 13
Side airbags Description . ..... .... .... ....... . 154
How they work . . . . . . . . . . . . . . . . . . . 155
Snow chains ... .... ..... .. .... .... . 251
Sockets .... ... ....... .. ....... ... 82, 83
Sound system disp lay . ...... .. .. .... . 22
Speed rating letter code .. ... ..... ... . 247
Speed warning .. .... .... ... .... .... . 36
Speed warn ing system ... .... .. .. .... . 30
Speedomet er .. .. .... .... ... .... ... .. 14
Starting assistance ...... .... ... .... . 280
Starting the engine . ......... ... ... 92 , 93
What should I do if the engine does not start? ... .. ..... ....... ...... .. . 93
Stee l whee ls .... ... .... .... .. . .. .. . 203
Steering
See E lectro -mechanica l power assist
188
Controls and equip ment Safety first
20, Steering co
lumn
Adjusting .... ...... ........ ..... . 91
L ocking the steering .. ... ...... ... . 92
Steps for determining correct load limit 243
Stopping the eng ine . .... .... .... .... . 93
Storage . .... .... ...... .... ... .. ... .. 83
Compartment in the front sea ts ... ... 84
Cu p holder ..... ....... .... ... .. .. 81
G love compartment .. ... .... ...... . 84
Storage compartment Expanding .... ...... ........ ... .. . 76
Sun v isors ...... ... .... .... .... .... . 59
Switches Emergency flasher ..... ... .... ... .. 57
Symbols
T
Red symbols in the center display ... . 32
Yel low symbols in the center d isplay . 32
Tachomet er . .... ... ... ......... ... .. 12
Tank f lap
Un locking the f uel filler flap by hand 2 15
Technical modif ications . .... ... ... ... 296
Temperature .... .... .... .... ....... . 86
Tether strap ... .. .. . .. .. .... .... .... 1 76
Securing the upper t ether strap ..... 177
The first 1,0 00 mi les ( 1,500 km) and
afterward s ..... .. .. .... .... .... 1 90
Tie -downs ... ..... ... .... .... .... 77, 123
Tightening whee l bolts .... ... .... .... 268
Tips for the env ironment
Savi ng fuel ...... .... .... .... .... . 81 T
ire mobility system ..... ... . .. .. .... 264
Tire p ress ure .. ...... .... ... .... .. .. 241
Tire pressure monitoring system .. .... 254
Chan ging whee ls . .... .... .... ... . 257
Learning process .. .... ... .... ... . 256
Loss of air pressu re .... ... .... . 17, 255
Mal fu nct io ns ... .. .... .... .... .... 257
Se nso rs ...... .... .... ... .... .. .. 248
Stor ing tire pressures ... .. .... .. . . 256
Tires and wheels ...... ... .... .. . . 2 48
Valves . ...... .... .... ... .... .. .. 248
Warning ligh t .. ... ... .... ........ . 37
Tire repair kit .. .. .... .... ... .... .. .. 264
Tire service life ..... .... ............. 244
Tires .. ... .. .... .... .... ... .... .... 234
Replacing .. ...... .... ... .... 246 , 248
run -flat ... .... .... .... ... .... .... 258
Service life .... .... ... .... .... ... 244
speed rating letter cod e ...... .... . 247
T ire manufacturing date .. ... .. .... 247
Tire specifications ........... ..... 247
Tread depth ........ .. .... ...... . 244
Un iform tire quality grading .... .... 249
Winter tires ....... .... ... .. ...... 250
T ires and vehicle load limits .. ... ... .. 242
Tires and wheels Checking tire pressure ... .. .... ... 241
Co ld tire inflation pressure ..... ... . 238
Dimensions ... .... .... ... .... .... 246
Genera l notes .. ...... ... .... .... . 23 4
G lossary of tire and loading terminology
235
New tires and whee ls ..... .... .... 246
Vehicle operation Vehicle care Do-it-yourself service Technical data