start stop button AUDI TT COUPE 2014 User Guide
[x] Cancel search | Manufacturer: AUDI, Model Year: 2014, Model line: TT COUPE, Model: AUDI TT COUPE 2014Pages: 284, PDF Size: 34.42 MB
Page 71 of 284
Downloaded from www.Manualslib.com manuals search engine 0
N
co
,-j
\D Lfl
N
Lfl
,-j hold
assist function tempt you into taking any
risks when driving -this can cause accidents.
- The hold assist cannot keep the vehicle sta-
tionary in all conditions on a gradient (e.g. if
the road is slippery or icy).
- Always ensure that the vehicle is stopped
properly and safely -risk of accident!
Switch off the hold assist function before
driving the vehicle into a car wash.
i Note
- The last setting of the hold assist (on/off} is
restored when the ignition is switched on.
The LED in the button is lit when the hold
assist is on.
- Automatic gearbox: When the hold assist
function is switched on, it stops the vehicle
from creeping forwards when you take your
foot off the brake pedal.
- In certain situations, the hold assist cannot
hold the vehicle. The LED in the button will
go out.
Hill hold assist
Applies to vehicles: with hill hold assist
The hill hold assist function makes it easier to
drive away on a slope.
Important: The driver's door must be closed, the
seat belt buckled and the engine running.
The system is activated when you press and hold
the brake pedal for a few seconds.
When you release the brake pedal the braking
force will be maintained for a moment in order to
hold the vehicle and make it easier for you to
drive away.
A WARNING
- The intelligent technology in the hill hold
assist function cannot defy the laws of phys
ics. Do not let the extra convenience affor
ded by the hill hold assist function tempt
you into taking any risks when driving -this
can cause accidents. Driving
- The hill hold assist function cannot keep the
vehicle stationary in all conditions on a gra
dient (e.g. if the road is slippery or icy).
-If you do not drive away immediately after
releasing the brake pedal the vehicle could
start to roll back. You should therefore im
mediately press the brake pedal or apply the
parking brake.
- If the engine should stall you must immedi
ately press the brake pedal or apply the
parking brake.
- If you are driving away on a slope in stop
and-go traffic press and hold the brake ped
al for a few seconds before driving off. This
will prevent the vehicle from rolling back
unintentionally.
(I) Note
To find out whether your vehicle is equipped
with the hill hold assist function please con
tact an Audi dealership or qualified workshop.
Kick-down feature
Applies to vehicles: with manual gearbox and efficiency mode
The kick-down feature is designed to give maxi
mum acceleration.
If you press the accelerator right down past the
point of resistance at full throttle when the drive
select* function is set to efficiency* mode
¢ page 91, the engine power is automatically
controlled to give your vehicle maximum acceler
ation.
A WARNING
Please note that if the road surface is slippery
or wet, the kick-down feature could cause the
driving wheels to spin, which could result in
skidding.
69
Page 74 of 284
Downloaded from www.Manualslib.com manuals search engine Automatic
gearbox
The selector lever lock only works if the vehicle is
stationary or driving at speeds up to 2 km/h. At
higher speeds the selector lever lock in the N po
sition is disengaged automatically.
The selector lever lock is not engaged if the selec
tor lever is moved quickly through position N
(e.g. when shifting from R to D). This makes it
possible, for instance, to "rock" the vehicle back
wards and forwards if it is stuck in snow or mud.
The selector lever lock engages automatically if
the brake pedal is not depressed and the lever is
in position N for more than about two seconds.
Interlock button
The interlock button on the selector lever handle
prevents the driver from inadvertently engaging
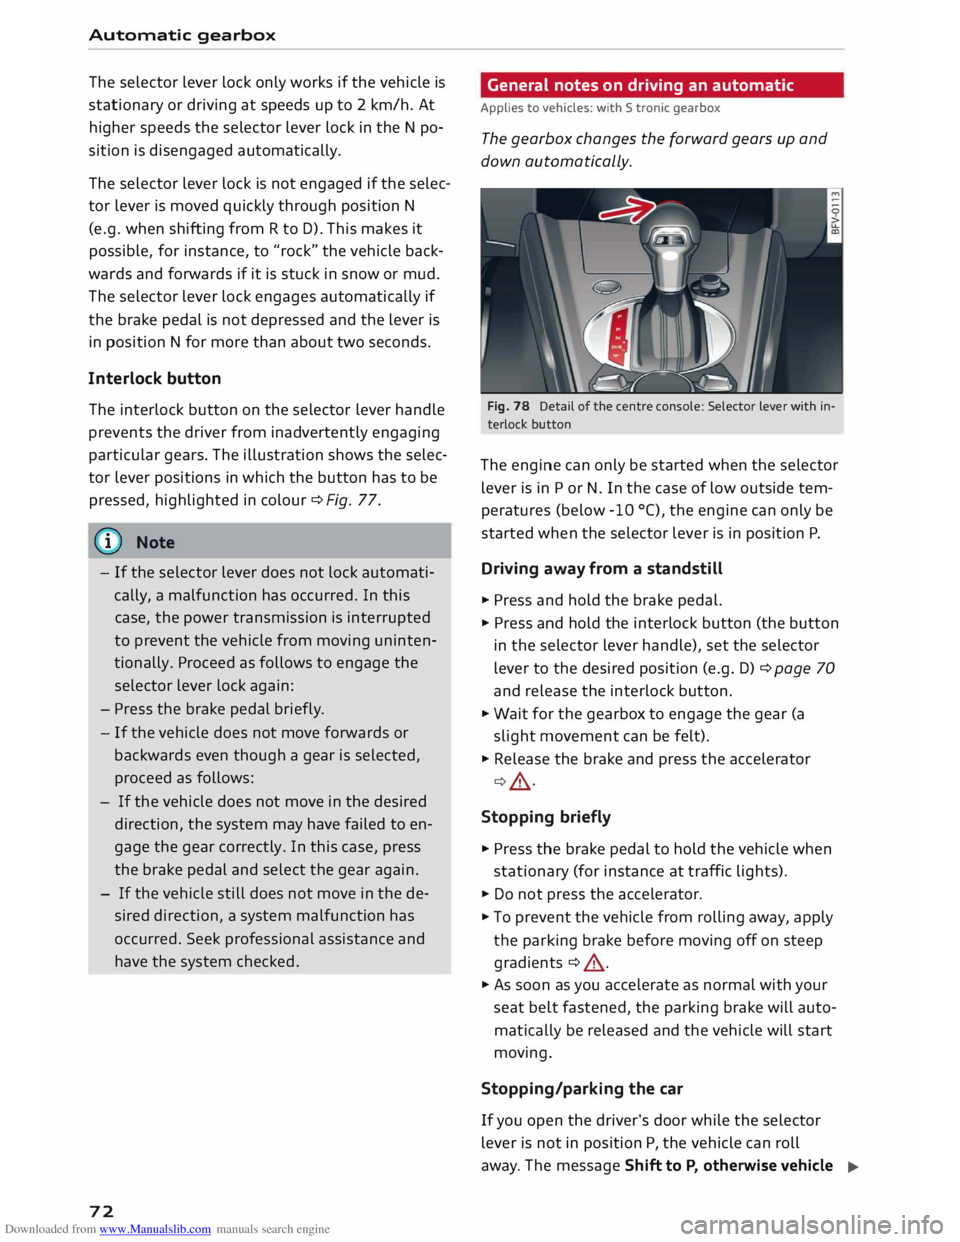
particular gears. The illustration shows the selec
tor lever positions in which the button has to be
pressed, highlighted in colour¢ Fig. 77.
@ Note
- If the selector lever does not lock automati
cally, a malfunction has occurred. In this
case, the power transmission is interrupted
to prevent the vehicle from moving uninten
tionally. Proceed as follows to engage the
selector lever lock again:
- Press the brake pedal briefly.
- If the vehicle does not move forwards or
backwards even though a gear is selected,
proceed as follows:
- If the vehicle does not move in the desired
direction, the system may have failed to en
gage the gear correctly. In this case, press
the brake pedal and select the gear again.
- If the vehicle still does not move in the de
sired direction, a system malfunction has
occurred. Seek professional assistance and
have the system checked.
72 General
notes on driving an automatic
Applies to vehicles: with S tronic gearbox
The gearbox changes the forward gears up and
down automatically.
Fig. 78 Detail of the centre console: Selector Lever with in
terlock button
The engine can only be started when the selector
lever is in P or N. In the case of low outside tem
peratures (below -10 °(), the engine can only be
started when the selector lever is in position P.
Driving away from a standstill
� Press and hold the brake pedal.
� Press and hold the interlock button (the button
in the selector lever handle), set the selector
lever to the desired position (e.g. D) ¢ page 70
and release the interlock button.
� Wait for the gearbox to engage the gear (a
slight movement can be felt).
� Release the brake and press the accelerator
¢ A .
Stopping briefly
� Press the brake pedal to hold the vehicle when
stationary (for instance at traffic lights).
� Do not press the accelerator.
� To prevent the vehicle from rolling away, apply
the parking brake before moving off on steep
gradients ¢ A.
� As soon as you accelerate as normal with your
seat belt fastened, the parking brake will auto
matically be released and the vehicle will start
moving.
Stopping/parking the car
If you open the driver's door while the selector
lever is not in position P, the vehicle can roll
away. The message Shift to P, otherwise vehicle
�
Page 78 of 284
Downloaded from www.Manualslib.com manuals search engine Automatic
gearbox
when approaching a speed restriction in a built
up area).
Switching on coasting mode
Important: Selector lever must be in D, gradient
must be less than 12 %.
"' Select efficiency mode in drive select*
9page 90 (you only have to do this once).
"' Ta ke your foot off the accelerator.
If you have selected the "on-board computer"
display, the message Coasting will then appear.
The gearbox automatically disengages the clutch
at speeds above 20 km/h and lets the vehicle
coast without the engine braking effect. The en
gine ticks over at idling speed while the vehicle is
coasting.
Stopping coasting mode
"' Press the brake pedal or accelerator.
To use the engine braking effect and overrun fuel
cut-off again, all you need to do is tap the brake
pedal briefly.
You can improve your fuel economy and help to
reduce emissions by using a combination of the
coasting mode (i.e. coasting with low fuel con
sumption on a longer stretch of road) and the
overrun fuel cut-off (i.e. using the engine brak
ing effect with no fuel consumption on a shorter
stretch of road).
A WARNING
- If you are approaching an obstruction when
coasting mode is switched on, please re
member that the vehicle will not slow down
as quickly as usual when you take your foot
off the accelerator -risk of accident!
- The vehicle can pick up speed if you are driv
ing down a slope in coasting mode -risk of
accident!
l l
The ESC lamp lights up permanently and the message
Stabilisation control (ESC): sport. Warning! Restricted
stability appears temporarily in the infotainment display
to indicate the deactivation status.
76 -
If other people are using your car, you
should draw their attention to the coasting
mode.
@ Note
- Coasting mode is only available in efficiency
mode (drive select*).
- The message Coasting only appears when
the current fuel consumption display is se
lected. The gear is no longer displayed when
you are in coasting mode (e.g. E instead of
E6).
- The coasting mode is deactivated tempora
rily on gradients of 15 % or greater.
' Launch control programme
Applies to vehicles: with S tronic gearbox and launch control
The launch control programme enables maxi
mum acceleration.
Important: The engine must be warm and the
steering wheel must be pointing straight-ahead.
"' Deactivate the start/stop system*¢ page 65.
The LED in the button l(A)'*'I will light up.
"' Deactivate the hold assist* ¢ page 68. The LED
in the button will go out.
"' Press the IJ'}OFF!
button once briefly while the
engine is running 1
).
"' Briefly pull the selector lever back from posi
tion D/S to select position S, or move the selec
tor lever to the right into the tiptronic gate, or
select dynamic mode in drive select*
¢page 90.
"' Press the brake pedal firmly with your left foot
and hold it down for at least one second.
"'At the same time, press the accelerator all the
way down with your right foot until the engine
revs are high and steady.
"' Ta ke your left foot off the brake.
�
Page 79 of 284
Downloaded from www.Manualslib.com manuals search engine 0
N
co
....
\D U'l
N
U'l
.... ,&.
WARNING
- Always adapt your driving style to the traffic
conditions.
- Only use the launch control programme
when road and traffic conditions permit,
and make sure your manner of driving and
accelerating the vehicle does not inconven
ience or endanger other road users.
- Please note that the driven wheels may
start to spin when the sport mode is switch
ed on, causing the vehicle to lose grip, in
particular on slippery or wet roads -danger
of skidding!
- When acceleration has been completed, you
should deactivate the sport mode again by
briefly pressing
the I� OFF! button.
ij)) Note
- The gearbox may be hot after you have used
the launch control programme. In this case,
the programme may not be available for
several minutes. The programme will be
available again after a cool-down period.
- Accelerating with the launch control pro
gramme places a heavy load on all parts of
the vehicle. This can result in increased wear
and tear.
Back-up programme
Applies to vehicles: with S tronic gearbox
A back-up programme is in place should a fault
occur in the control system.
If all selector lever positions are highlighted in
the infotainment display, a system malfunction
has occurred. In this case, the S tronic gearbox
will switch to a backup programme. The vehicle
can still be driven in the backup programme,
however only at reduced speed and not in all
gears. In certain cases, you may not be able to se
lect reverse gear.
CD CAUTION
If the gearbox switches to the back-up pro
gramme, drive to a qualified workshop with
out delay and have the fault rectified . Automatic
gearbox
Gearbox malfunction
• Gearbox malfunction! Please stop the vehi
cle and select P
There is a malfunction in the gearbox. Park the
vehicle safely and do not drive on. Obtain profes
sional assistance.
• Gearbox overheating: please stop vehicle
The gearbox is overheating and could be dam
aged. Stop the vehicle and let the gearbox cool
down with the engine idling and the selector lev
er in pos ition P. If the indicator lamp and the
message disappear, drive to a qualified workshop
soon and have the fault rectified. Do not drive on
if the warning lamp stays on and the message
does not disappear. You should obtain professio
nal assista nce.
DD Gearbox malfunction: you can continue driv
ing
Drive to a qualified workshop soon and have the
fault rectified.
DD Gearbox malfunction: no reverse gear. You
can continue driving
Drive to a qualified workshop without delay and
have the fault rectified.
DD Gearbox malfunction: you can continue driv
ing in D until engine off
Park your vehicle well away from moving traffic.
Obtain professional assistance.
DD Gearbox overheating: please adapt driving
style
You can continue driving at moderate speed. You
can resume normal driving if the indicator lamp
goes out.
DD Gearbox: please press brake pedal and select
gear again
If a gearbox malfunction has occurred due to
overheating, this message will appear once the
gearbox has cooled down again.
77
Page 100 of 284
Downloaded from www.Manualslib.com manuals search engine Parking
aids
- The best parking results will be achieved if
you position the vehicle as parallel as possi
ble to the line of parked cars or the kerb be
fore you start the actual parking manoeu
vre.
- If there are suitable parking spaces on both
sides of the road (for instance on a one-way
street), you can change the direction of the
turn signals to park on the other side, even
if you have already activated the park assist.
Parking parallel to the roadside
Applies to vehicles: with park assist
The driver is responsible for parking the vehicle.
�' 3 "
I
- IR t;
-
- 1 '"*-� )
,-...-
\ D�
)__
�
READY
\. ,. OFF
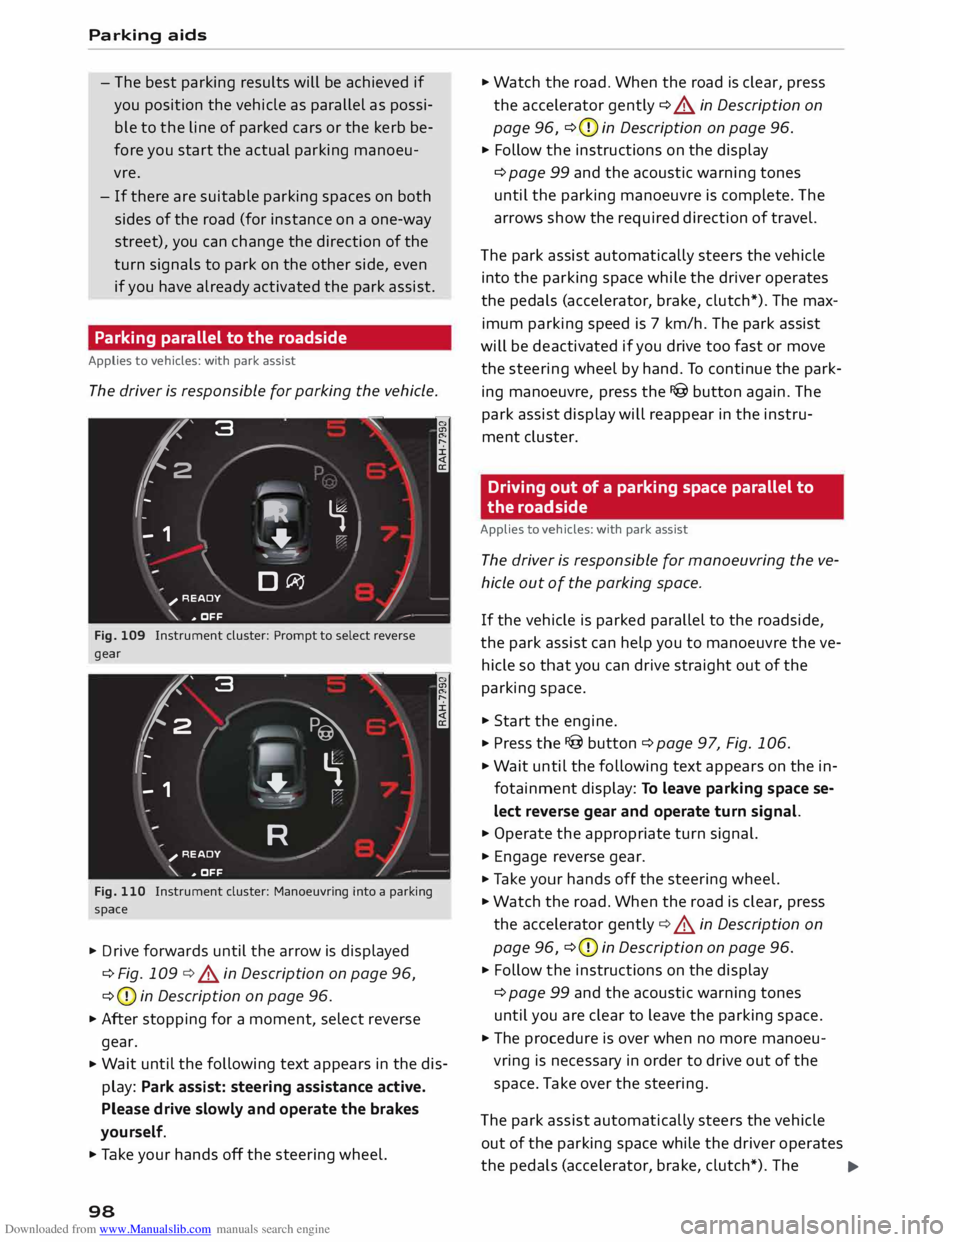
Fig. 109 Instrument cluster: Prompt to select reverse
gear
t' 3
2 ,
I I
-
-
- 1 "
� \
�
"'+-
, -- ':" ' I
R )__
�
READY
_,..-
\. ,. OFF
Fig. 110 Instrument cluster: Manoeuvring into a parking
space
... Drive forwards until the arrow is displayed
¢ Fig. 109 ¢&. in Description on page 96,
¢ (D
in Description on page 96.
... After stopping for a moment, select reverse
gear.
... Wait
until the following text appears in the dis
play: Park assist: steering assistance active.
Please drive slowly and operate the brakes
yourself.
... Take your hands off the steering wheel.
98 ...
Watch the road. When the road is clear, press
the accelerator gently ¢ &. in Description on
page 96, ¢(D
in Description on page 96.
... Follow the instructions on the display
¢ page 99 and the acoustic warning tones
until the parking manoeuvre is complete. The
arrows show the required direction of travel.
The park assist automatically steers the vehicle
into the parking space while the driver operates
the pedals (accelerator, brake, clutch*). The max
imum parking speed is 7 km/h. The park assist
will be deactivated if you drive too fast or move
the steering wheel by hand. To continue the park
ing manoeuvre, press the I@ button again. The
park assist display will reappear in the instru
ment cluster.
Driving out of a parking space parallel to
the roadside
Applies to vehicles: with park assist
The driver is responsible for manoeuvring the ve
hicle out of the parking space.
If the vehicle is parked parallel to the roadside,
the park assist can help you to manoeuvre the ve
hicle so that you can drive straight out of the
parking space .
... Start the engine .
.., Press the !@button ¢page 97, Fig. 106 .
... Wait until the following text appears on the in
fotainment display: To leave parking space se
lect reverse gear and operate turn signal.
... Operate the appropriate turn signal.
... Engage reverse gear .
.., Ta ke your hands off the steering wheel.
... Watch the road. When the road is clear, press
the accelerator gently¢&. in Description on
page 96, ¢(D
in Description on page 96 .
... Follow the instructions on the display
¢ page 99 and the acoustic warning tones
until you are clear to leave the parking space .
... The procedure is over when no more manoeu
vring is necessary in order to drive out of the
space. Take over the steering.
The park assist automatically steers the vehicle
out of the parking space while the driver operates
the pedals (accelerator, brake, clutch*). The
..,.
Page 102 of 284
Downloaded from www.Manualslib.com manuals search engine Parking
aids
II Park assist: not stopped long enough
After you select reverse gear, the vehicle has to
remain stationary for a moment so that the park
assist can activate the steering. Follow the direc
tions given in the display.
Ill Park assist: fault. Please contact workshop
II Park assist: fault. Continue steering vehicle!
Please contact workshop
Please contact a qualified workshop. The park as
sist cannot be used to park the vehicle if a system
fault occurs.
II Park assist: cancelled. Space too small. Con
tinue steering vehicle!
The park assist cannot be used to park the vehicle
in this space. Park the vehicle without using the
park assist or look for a bigger space.
Ill Park assist: stabilisation control (ESC) input
The detected space could not be used because
the stabilisation control intervened.
Adjusting graphic display
and warning beeps
Applies to vehicles: with parking system plus/park assist
The settings for the graphic display and acoustic
signals are controlled via the infotainment sys
tem.
.., Select the following on the infotainment sys
tem: IM EN u I button > Car > left control button
> Driver assist> Parking aid.
Warning beeps
Front volume -Volume for the front and side*
zones
Rear volume -Volume for the rear zone
In-car entertainment fader -The volume of the
current audio or video source is reduced when the
parking aid is switched on.
You will hear a short test tone each time you
make a new setting.
100 @
Note
The settings will be automatically stored and
assigned to the remote control key in use.
Fault warnings
Applies to vehicles: with rear parking aid/parking system
plus/park assist
Rear parking aid: fault. Obstacles cannot be de
tected
Front parking aid: fault. Obstacles cannot be
detected
Parking aid: fault. Obstacles cannot be detected
If the LED in the P,1
1i button starts flashing when
you switch the system on, a system fault has oc
curred. If the fault is not corrected before you
switch off the ignition, it will only be indicated by
the flashing LED in the P111i button the next time
you switch on the parking aid by engaging re
verse gear. The fault warning can be displayed in
the second tab of the driver information system
as long as the fault is active.
Parking system plus*/parking system plus
and park assist*
If a sensor or loudspeaker malfunctions, the J;l4:
symbol will be shown on the infotainment sys
tem in front of or behind the vehicle. If a rear
sensor malfunctions, obstacles will only be dis
played in zones @and @ ¢ page 94, Fig. 101. If
a front sensor malfunctions, obstacles will only
be displayed in zones © and@ .
Drive to a qualified workshop soon and have the
fault rectified.
Page 151 of 284
Downloaded from www.Manualslib.com manuals search engine 0
N
co
....
\D U'l
N
U'l
.... Using
a destination from the map
Applies to vehicles: with navigation system
A Location on the map can be set as a destina
tion.
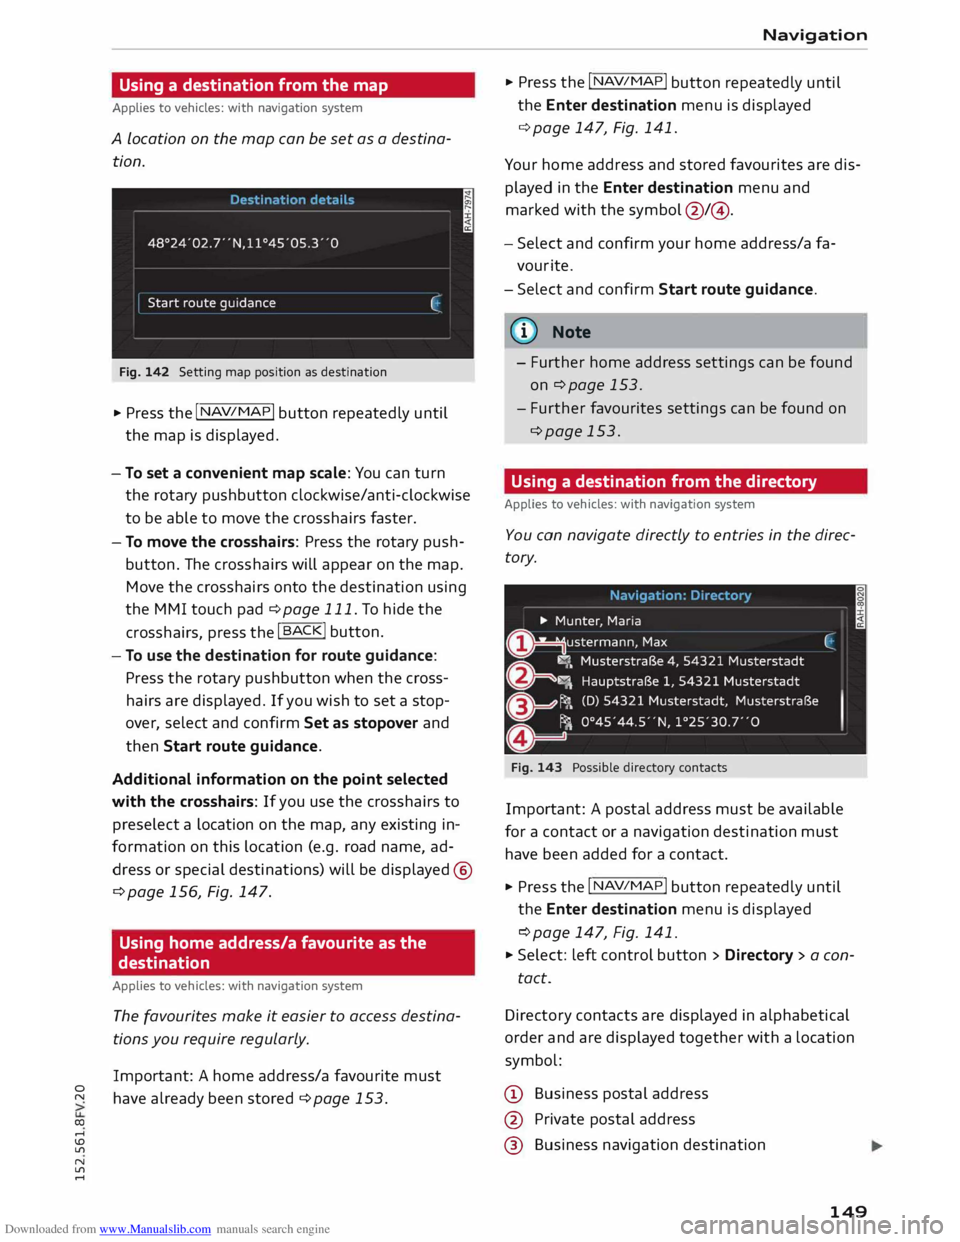
Fig. 142 Setting map position as destination
... Press the I NAV/MAPI
button repeatedly until
the map is displayed.
- To set a convenient map scale: You can turn
the rotary pushbutton clockwise/anti-clockwise
to be able to move the crosshairs faster.
- To move the crosshairs: Press the rotary push
button. The crosshairs will appear on the map.
Move the crosshairs onto the destination using
the MMI touch pad ¢ page 111. To hide the
crosshairs, press the I B A
CK! button.
- To use the destination for route guidance:
Press the rotary pushbutton when the cross
hairs are displayed. If you wish to set a stop
over, select and confirm Set as stopover and
then Start route guidance.
Additional information on the point selected
with the crosshairs: If you use the crosshairs to
preselect a location on the map, any existing in
formation on this location (e.g. road name, ad
dress or special destinations) will be displayed @
q page 156, Fig. 147.
Using home address/a favourite as the
destination
Applies to vehicles: with navigation system
The favourites make it easier to access destina
tions you require regularly.
Important: A home address/a favourite must
have already been stored ¢page 153. Navigation
... Press the I N
A V/MAP
!
button repeatedly until
the Enter destination menu is displayed
¢ page 147, Fig. 141.
Your home address and stored favourites are dis
played in the Enter destination menu and
marked with the symbol @/@.
- Select and confirm your home address/a fa
vourite.
- Select and confirm Start route guidance.
(i} Note
- Further home address settings can be found
on¢ page 153.
- Further favourites settings can be found on
¢page 153.
Using a destination from the directory
Applies to vehicles: with navigation system
You can navigate directly to entries in the direc
tory.
Fig. 143 Possible directory contacts
Important: A postal address must be available
for a contact or a navigation destination must
have been added for a contact.
... Press the I N
A V/ MAP
!
button repeatedly until
the Enter destination menu is displayed
¢ page 147, Fig. 141.
... Select: left control button > Directory > a con-
tact.
Direc tory contacts are displayed in alphabetical
order and are displayed together with a location
symbol:
(!) Business postal address
@ Private postal address
@ Business navigation destination
149
Page 152 of 284
Downloaded from www.Manualslib.com manuals search engine Navigation
@ Private navigation destination
- Select and confirm a postal address or a naviga
tion destination. If you select a navigation des
tination, route guidance is started immediately.
- If you select a postal address, you can check the
address details again.
- You can then select and confirm Start route
guidance.
Further directory functions in the navigation sys
tem can be found on ¢page 153.
((!) Note
- Addresses which you have imported from
your mobile phone into the MMI can also be
used as navigation destinations.
- If a directory contact is greyed out, no navi
gation destination/postal address has yet
been added for the contact.
Entering a special destination
Applies to vehicles: with navigation system
Navigation • Special destinations
Search area (In imm ediate vicinity)
Find entry
Select category
[:J myAudi special destinations
B1 Petrol station
P Parking space
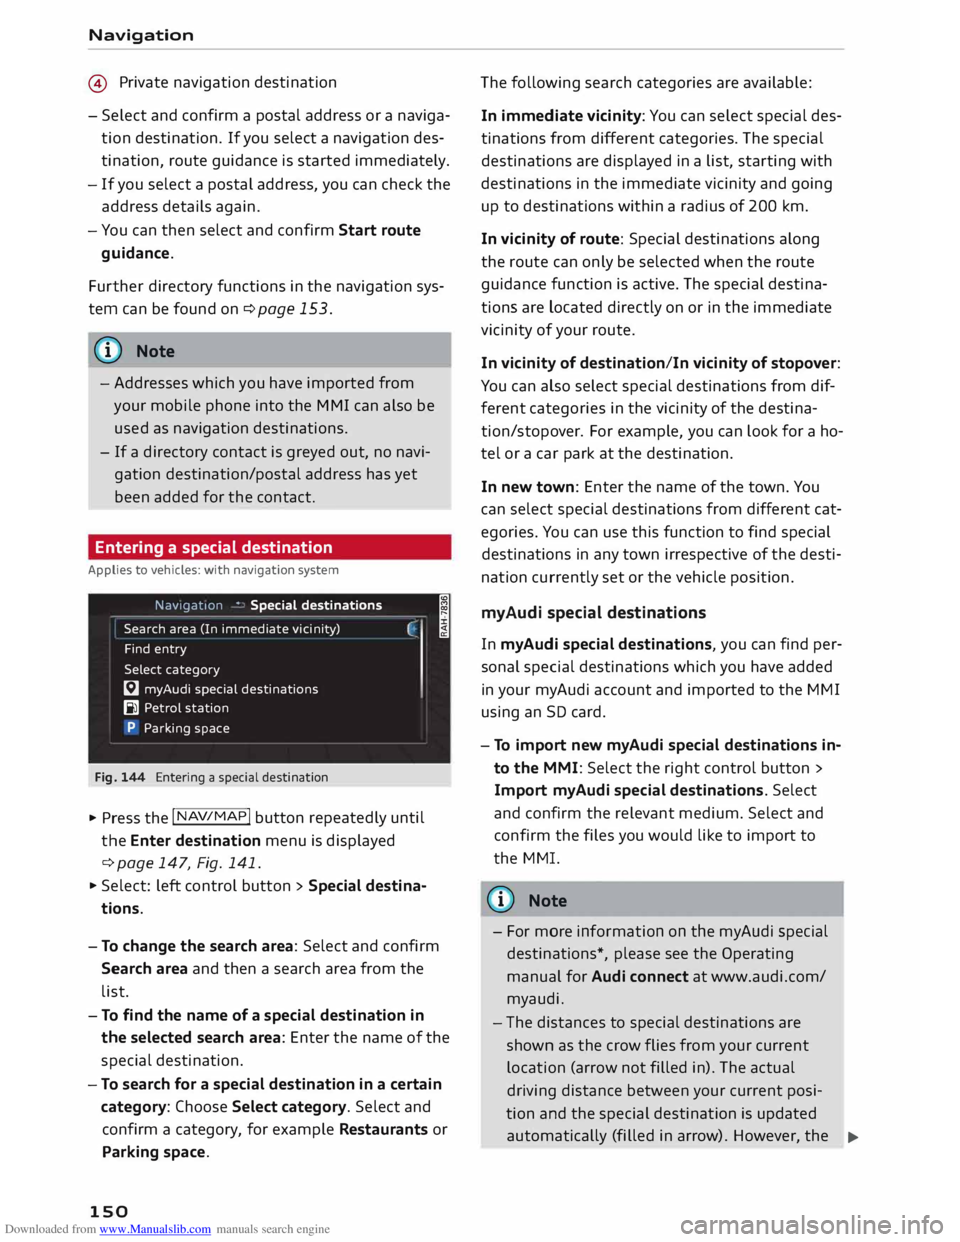
Fig. 144 Entering a special destination
.,. Press the I NAV/MAP!
button repeatedly until
the Enter destination menu is displayed
¢ page 147, Fig. 141 .
.,. Select: left control button > Special destina
tions.
- To change the search area: Select and confirm
Search area and then a search area from the
list. I
- To find the name of a special destination in
the selected search area: Enter the name of the
special destination.
- To search for a special destination in a certain
category: Choose Select category. Select and
confirm a category, for example Restaurants or
Parking space.
150 The
following search categories are available:
In immediate vicinity: You can select special des
tinations from different categories. The special
destinations are displayed in a list, starting with
destinations in the immediate vicinity and going
up to destinations within a radius of 200 km.
In vicinity of route: Special destinations along
the route can only be selected when the route
guidance function is active. The special destina
tions are located directly on or in the immediate
vicinity of your route.
In vicinity of destination/In vicinity of stopover:
You can also select special destinations from dif
ferent categories in the vicinity of the destina
tion/stopo ver. For example, you can look for a ho
tel or a car park at the destination.
In new town: Enter the name of the town. You
can select special destinations from different cat
egories. You can use this function to find special
destinations in any town irrespective of the desti
nation currently set or the vehicle position.
myAudi special destinations
In myAudi special destinations, you can find per
sonal special destinations which you have added
in your myAudi account and imported to the MMI
using an SD card.
- To import new myAudi special destinations in
to the MMI: Select the right control button >
Import myAudi special destinations. Select
and confirm the relevant medium. Select and
confirm the files you would like to import to
the MMI.
{(!) Note
- For more information on the myAudi special
destinations*, please see the Operating
manual for Audi connect at www.audi.com/
myaudi.
- The distances to special destinations are
shown as the crow flies from your current
location (arrow not filled in). The actual
driving distance between your current posi-
tion and the special destination is updated
automatically (filled in arrow). However, the
�
Page 159 of 284
Downloaded from www.Manualslib.com manuals search engine 0
N
co
....
\D L/'l
N
L/'l
.... ®
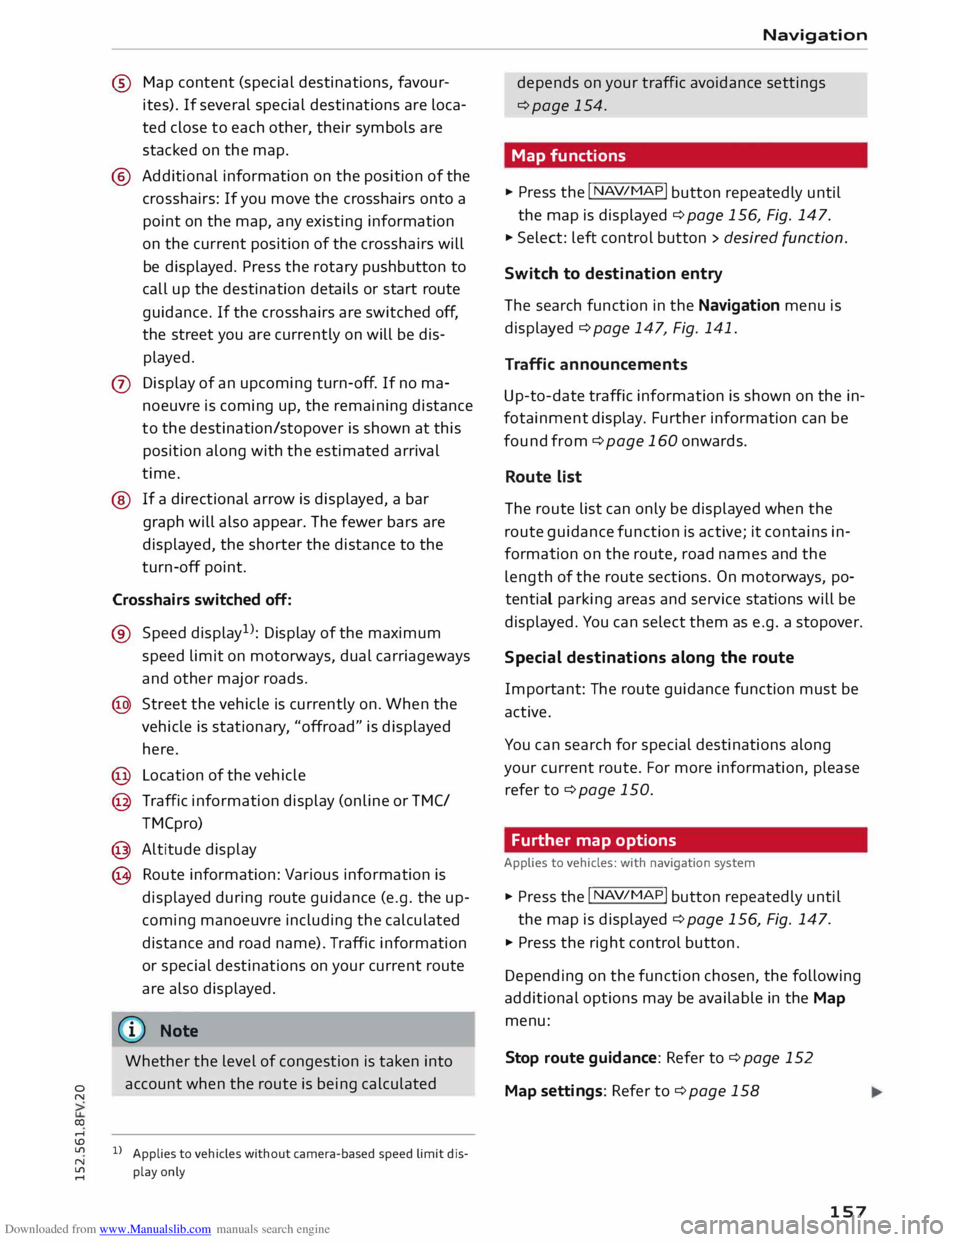
Map content (special destinations, favour
ites). If several special destinations are loca
ted close to each other, their symbols are
stacked on the map.
® Additional information on the position of the
crosshairs: If you move the crosshairs onto a
point on the map, any existing information
on the current position of the crosshairs will
be displayed. Press the rotary pushbutton to
call up the destination details or start route
guidance. If the crosshairs are switched off,
the street you are currently on will be dis
played.
0 Display of an upcoming turn-off. If no ma
noeuvre is coming up, the remaining distance
to the destination/stopover is shown at this
position along with the estimated arrival
time.
@ If a directional arrow is displayed, a bar
graph will also appear. The fewer bars are
displayed, the shorter the distance to the
turn-off point.
Crosshairs switched off:
® Speed display !
): Display of the maximum
speed limit on motorways, dual carriageways
and other major roads.
@ Street the vehicle is currently on. When the
vehicle is stationary , "offroad" is displayed
here.
@ Location of the vehicle
@ Traffic information display (online orTMC/
TM Cpro)
@ Altitude display
@ Route information: Various information is
displayed during route guidance (e.g. the up
coming manoeuvre including the calculated
distance and road name). Traffic information
or special destinations on your current route
are also displayed.
(D Note
Whether the level of congestion is taken into
account when the route is being calculated
ll Applies to vehicles without camera-based speed limit dis
play only Navigation
depends on your traffic avoidance settings
¢page 154.
Map functions
� Press the I NA
V/MAP!
button repeatedly until
the map is displayed ¢ page 156, Fig. 147.
� Select: left control button > desired function.
Switch to destination entry
The search function in the Navigation menu is
displayed ¢page 147, Fig. 141.
Traffic announcements
Up-to-date traffic information is shown on the in
fotainment display. Further information can be
found from ¢ page 160 onwards.
Route list
The route list can only be displayed when the
route guidance function is active; it contains in
formation on the route, road names and the
length of the route sections. On motorways, po
tential parking areas and service stations will be
displayed. You can select them as e.g. a stopover.
Special destinations along the route
Important: The route guidance function must be
active.
You can search for special destinations along
your current route. For more information, please
refer to ¢page 150.
Further map options
A pplies to vehicles: with navigation system
� Press the I NA
V
/MAP!
button repeatedly until
the map is displayed ¢ page 156, Fig. 147.
� Press the right control button.
Depending on the function chosen, the following
additional options may be available in the Map
menu:
Stop route guidance: Refer to¢ page 152
Map settings: Refer to¢ page 158
157
Page 268 of 284
Downloaded from www.Manualslib.com manuals search engine Index
Closing Bonnet 222
Windows ........................... 33
Coasting mode . . . . . . . . . . . . . . . . . . . . . . . .
75
Coat hooks . . . . . . . . . . . . . . . . . . . . . . . . . . .
SO
Colour code . . . . . . . . . . . . . . . . . . . . . . . . . . 257
Coming home . . . . . . . . . . . . . . . . . . . . . . . . . 40
Command (speech dialogue system) . . . . . .
116
Compact temporary spare wheel . . . . . . . . . 247
Compartments . . . . . . . . . . . . . . . . . . . . . . . . 49
Compass in mirror
Conference calling
Connecting a mobile phone 44
129
Requirements . . . . . . . . . . . . . . . . . . . 124, 137
Connection manager . . . . . . . . . . . . . . . . . .
187
Audi MMI connect app . . . . . . . . . . . . . . . .
187
Bluetooth settings . . . . . . . . . . . . . . . . . . .
188
Data connection . . . . . . . . . . . . . . . . . . . . . 187
Directory . . . . . . . . . . . . . . . . . . . . . . . . . . .
188
Music . . . . . . . . . . . . . . . . . . . . . . . . . . . . . 187
Network settings . . . . . . . . . . . . . . . . . . . .
188
Online settings . . . . . . . . . . . . . . . . . . . . . .
188
Options . . . . . . . . . . . . . . . . . . . . . . . . . . . .
188
SIM PIN settings . . . . . . . . . . . . . . . . . . . .
188
Telephone . . . . . . . . . . . . . . . . . . . . . . . . . .
187
Connections see Media drives. . . . . . . . . . . . . . . . . . . . .
168
Consumption (fuel) . . . . . . . . . . . . . . . . 22, 257
Contact Calling . . . . . . . . . . . . . . . . . . . . . . . . . . . . 133
Deleting . . . . . . . . . . . . . . . . . . . . . . . 133, 135
Editing . . . . . . . . . . . . . . . . . . . . . . . . . . . .
133
Finding . . . . . . . . . . . . . . . . . . . . . . . . . . . . 131
Greying out . . . . . . . . . . . . . . . . . . . . . . . . .
135
Having read out . . . . . . . . . . . . . . . . . . . . .
133
Importing/exporting . . . . . . . . . . . . . . . . . 133
Navigating to . . . . . . . . . . . . . . . . . . . 133, 149
Searching for . . . . . . . . . . . . . . . . . . . . . . .
132
Sending as text message . . . . . . . . . . . . . .
133
Using from another mobile phone . . . . . .
132
Contacts Favourites . . . . . . . . . . . . . . . . . . . . . . . . . . 129
Controls Multi-function steering wheel . . . . . . . . . . .
19
Controls and displays (overview) . . . . . . . . . . . 6
Controls (MMI control console) . . . . . . . . . .
109
Control units . . . . . . . . . . . . . . . . . . . . . . . . . 107
266 Convenience key
Indicator lamp . . . . . . . . . . . . . . . . . . . . . . . 62
Locking and unlocking the vehicle . . . . . . .
28
Switching off engine (START ENGINE STOP
button) . . . . . . . . . . . . . . . . . . . . . . . . . . . . . 61
Convenience open/close . . . . . . . . . . . . . . . . . 34
Cooling mode (automatic air conditioner) . . 55
Cooling mode (manual air conditioner) . . . . . 54
Cooling system
Anti-freeze . . . . . . . . . . . . . . . . . . . . . . . . . 224
Checking coolant level . . . . . . . . . . . . . . . .
225
Coolant temperature gauge . . . . . . . . . . . . . 8
Topping up coolant . . . . . . . . . . . . . . . . . . 225
Warning lamp . . . . . . . . . . . . . . . . . . . . . . . 12
Copyright Media drives . . . . . . . . . . . . . . . . . . . . . . . . 168
Cornering light . . . . . . . . . . . . . . . . . . . . . . . . 90
Country information . . . . . . . . . . . . . . . . . . . 157
Cruise control system
Adjusting stored speed . . . . . . . . . . . . . . . .
81
Pre-selecting a speed . . . . . . . . . . . . . . . . . .
81
Switching off . . . . . . . . . . . . . . . . . . . . . . . .
81
Switching on . . . . . . . . . . . . . . . . . . . . . . . . .
80
Cup holder . . . . . . . . . . . . . . . . . . . . . . . . . . . .
49
Current fuel consumption . . . . . . . . . . . . . . . 22
D
DAB (digital radio)
Data connection
Configuring ....................... .
Data connection .................... .
Data roaming ...................... .
Resetting configuration .............. .
Usage meter ....................... .
Data encryption
Data protection
Audi connect 166
144 144
144
144
188
186
146
Date . . . . . . . . . . . . . . . . . . . . . . . . . . . . . 22, 186
Daytime running Lights.. . . . . . . . . . . . . . . . . 37
Deactivatiing front passenger's airbag . . . . . 211
Defrosting (windows)
Automatic air conditioner . . . . . . . . . . . . . .
56
Manual air conditioner. . . . . . . . . . . . . . . . .
54
DEF (instrument cluster) . . . . . . . . . . . . . . . .
22