instrument cluster AUDI TT COUPE 2014 Owners Manual
[x] Cancel search | Manufacturer: AUDI, Model Year: 2014, Model line: TT COUPE, Model: AUDI TT COUPE 2014Pages: 284, PDF Size: 34.42 MB
Page 9 of 284
Downloaded from www.Manualslib.com manuals search engine 0
N
co
....
\D L/'l
N
L/'l
.... (D
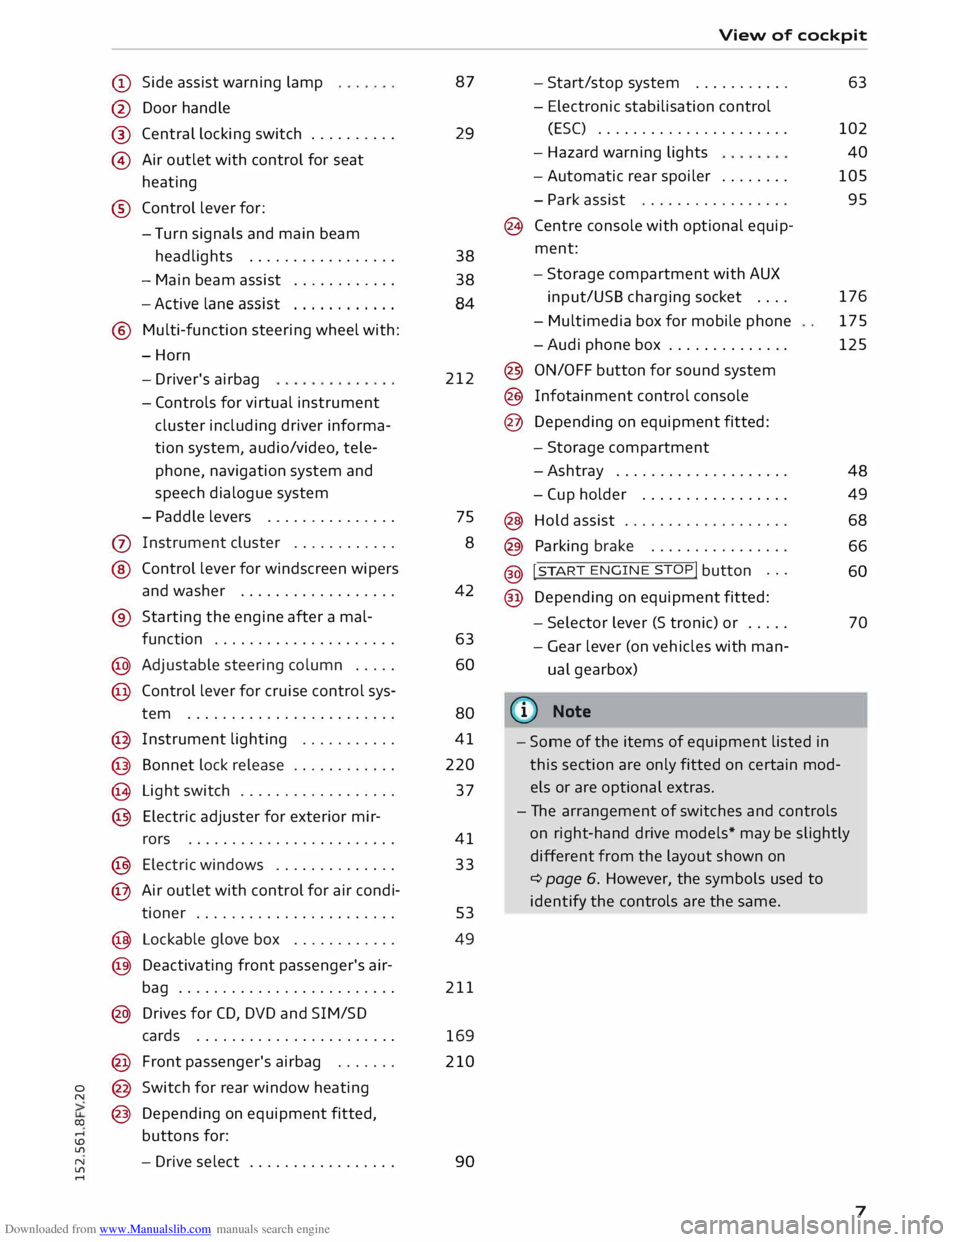
Side assist warning lamp
@ Door handle
®
© Central
locking switch ......... .
Air outlet with control for seat
heating
® Control lever for:
- Turn signals and main beam
headlights ................ .
- Main beam assist
........... .
- Active lane assist
........... .
® Multi-function steering wheel with:
-Horn
- Driver's airbag
- Controls for virtual instrument
cluster
including
driver informa
tion system, audio/video, tele
phone, navigation system and
speech dialogue system
- Paddle levers .............. .
(j) Instrument cluster ........... .
@ Control lever for windscreen wipers
and washer ................. .
® Starting the engine after a mal-
function .................... .
@ Adjustable steering column .... .
@ Control lever for cruise control sys-
tem ....................... .
@ Instrument lighting .......... .
@ Bonnet lock release ........... .
@ Light switch ................. .
@ Electric adjuster for exterior mir-
rors ....................... .
@ Electric windows ............. .
@ Air outlet with control for air condi-
tioner ...................... . 87
29
38
38 84
212
75 8
42
63 60
80
41
220
37
41
33
53
@ Lockable glove box . . . . . . . . . . . .
49
@ Deactivating front passenger's air-
bag . . . . . . . . . . . . . . . . . . . . . . . . . 211
@ Drives for CD, DVD and SIM/SD
cards . . . . . . . . . . . . . . . . . . . . . . .
169
@ Front passenger's airbag ...... . 210
@ Switch for rear window heating
@ Depending on equipment fitted,
buttons for:
- Drive select ................ . 90 View
of cockpit
- Start/stop system .......... .
- Electronic stabilisation control
(ES() ..................... .
- Hazard warning lights
- Automatic rear spoiler ....... .
- Park assist ................ .
@ Centre console with optional equip
ment:
- Storage compartment with AUX
input/USS charging socket ....
- Multimedia box for mobile phone
-Audi phone box ............. .
@ ON/OFF button for sound system
@ Infotainment control console
@ Depending on equipment fitted:
- Storage compartment
-Ashtray ................... .
- Cup holder ................ .
@ Hold assist .................. .
@ Parking brake ............... .
@ !
S TAR
T ENGINE ST
OP! button ..
.
@ Depending on equipment fitted: 63
102 40
105
95
176 175
125
48 49
68
66 60
- Selector lever (S tronic) or . . . . .
70
- Gear lever (on vehicles with man
ual gearbox)
((ij} Note
- Some of the items of equipment listed in
this section are only fitted on certain mod
els or are optional extras.
- The arrangement of switches and controls
on right-hand drive models* may be slightly
different from the layout shown on
¢ page 6. However, the symbols used to
identify the controls are the same.
7
Page 10 of 284
Downloaded from www.Manualslib.com manuals search engine Instruments
and warning/indicator lamps
Instruments and warning/indicator lamps
Instruments Instrument cluster overview
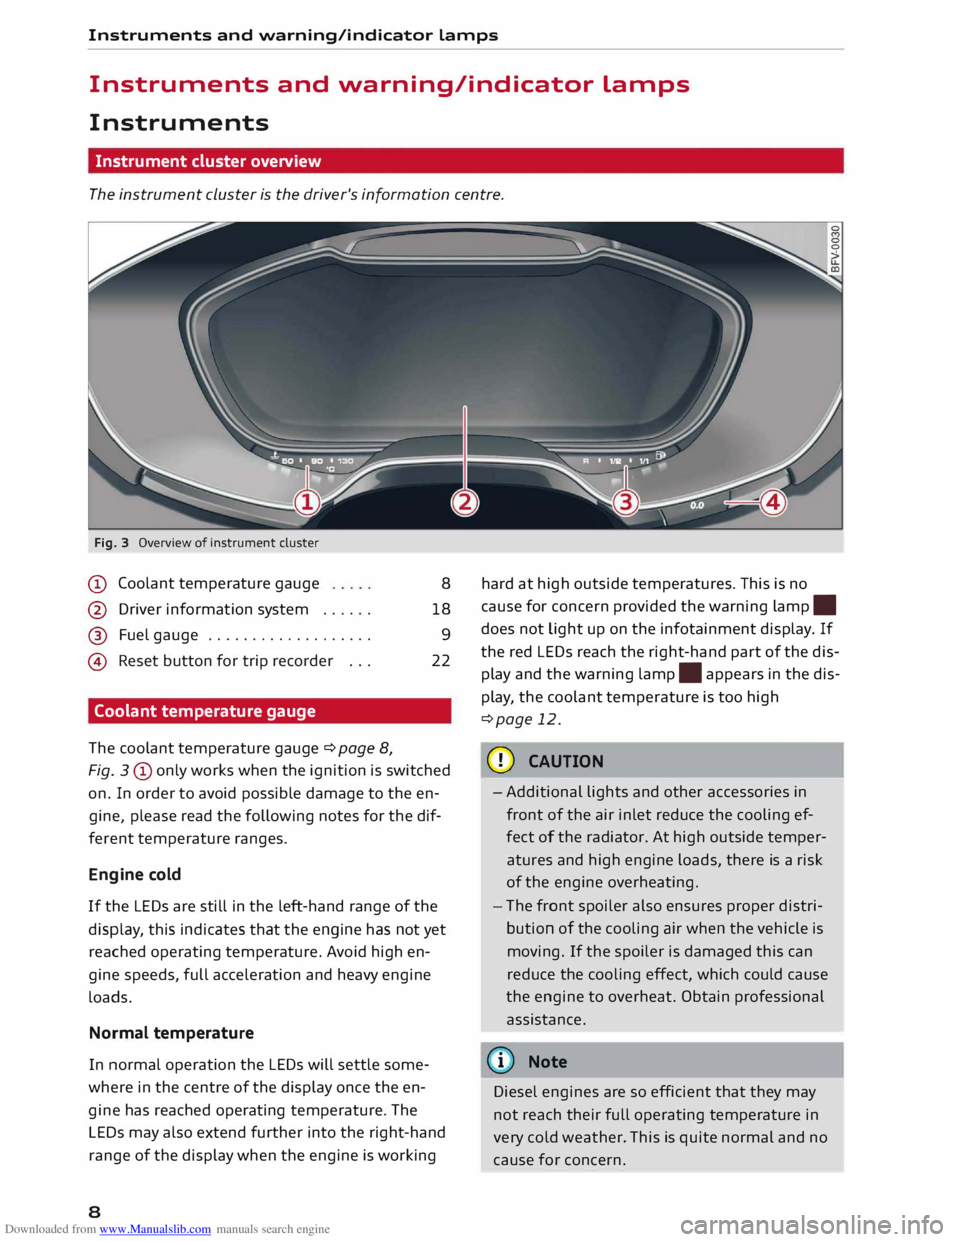
The instrument cluster is the driver's information centre.
Fig. 3 Overview of instrument cluster
CD Coolant temperature gauge
@ Driver information system ..... .
@ Fuel gauge .................. .
@ Reset button for trip recorder .. .
Coolant temperature gauge
The coolant temperature gauge ¢page 8, 8
18 9
22
Fig. 3 CD only works when the ignition is switched
on. In order to avoid possible damage to the en
gine, please read the following notes for the dif
ferent temperature ranges.
Engine cold
If the LEDs are still in the left-hand range of the
display, this indicates that the engine has not yet
reached operating temperature. Avoid high en
gine speeds, full acceleration and heavy engine
loads.
Normal temperature
In normal operation the LEDs will settle some
where in the centre of the dis play once the en
gine has reached operating temperature. The
LEDs may also extend further into the right-hand
range of the display when the engine is working
8 hard
at high outside temperatures. This is no
cause for concern provided the warning lamp.
does not Light up on the infotainment display. If
the red LEDs reach the right-hand part of the dis
play and the warning lamp.
appears in the dis
play, the coolant temperature is too high
¢page 12.
CD CAUTION
- Additional lights and other accessories in
front of the air inlet reduce the cooling ef
fect of the radiator. At high outside temper
atures and high engine loads, there is a risk
of the engine overheating.
- The front spoiler also ensures proper distri
bution of the cooling air when the vehicle is
moving. If the spoiler is damaged this can
reduce the cooling effect, which could cause
the engine to overheat. Obtain professional
assistance.
� Note
Diesel engines are so efficient that they may
not reach their full operating temperature in
very cold weather. This is quite normal and no
cause for concern.
Page 11 of 284
Downloaded from www.Manualslib.com manuals search engine Instruments
and warning/indicator lamps
Fuel gauge
The gauge @ only works when the ignition is
switched on. If there is less than 7 litres of fuel in
the tank, the LED at the bottom of the dial will
light up in red and the indicator lamp tD will ap
pear c:::>page 16. The LED at the bottom of the
dial will flash in red if the fuel level is very low.
The tank capacity of your vehicle is given in the
Technical data section c:::> page 258.
CD CAUTION
Never run the tank completely dry. If there is
an irregular fuel supply, misfiring can occur.
Unburnt fuel can then enter the exhaust sys
tem. This can lead to overheating and dam
age to the catalytic converter.
Warning and indicator
lamps
Description
The warning and indicator lamps light up or flash
in the instrument cluster. Their purpose is to in
dicate functions or faults.
Some of the warning and indicator lamps may be
accompanied by a driver message and a warning
tone. The warning/indicator lamps and driver
messages on the display can be masked by fur
ther displays. To display a warning or message
again, use the controls on the multi-function
steering wheel to select the display tab for warn
ing/indicator lamps and messages c:::> page 18.
If several malfunctions have occurred, you can
use the thumbwheel to scroll through them on
the display.
Some of the warning lamps may be displayed in
different colours.
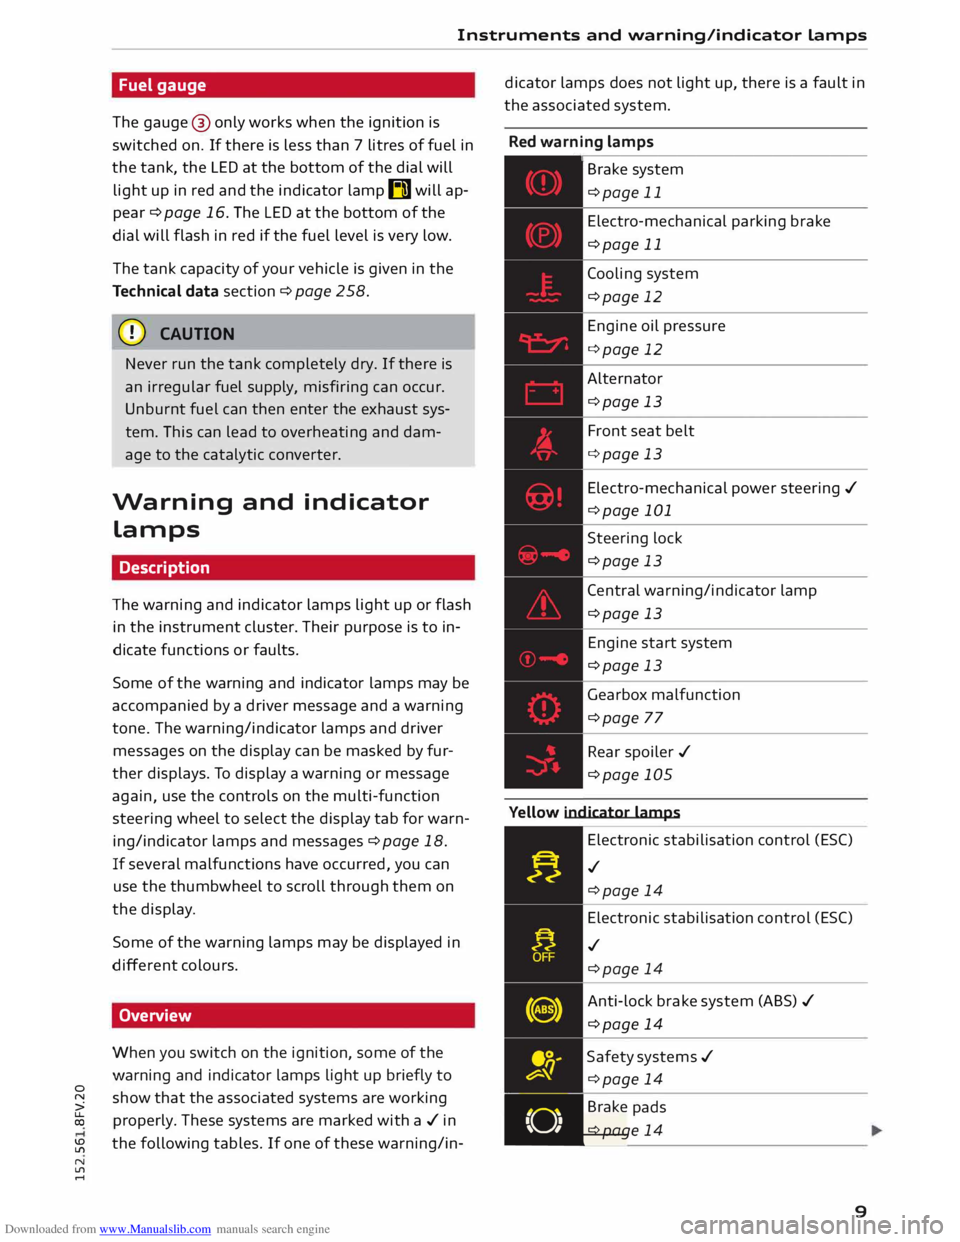
Overview
When you switch on the ignition, some of the
warning and indicator lamps light up briefly to
0
� show
that the associated systems are working
� properly.
These systems are marked with a./ in
� the
following tables. If one of these warning/in-
N
ll'l
.... dicator
lamps does not light up, there is a fault in
the associated system.
Red warning lamps
,---------------
Br a k e system
c:::>page 11
Electro-mechanical parking brake
c:::>page 11
Cooling system
c:::>page 12
Engine oil pressure
c:::>page 12
Alternator c:::>page 13
Front seat belt
c:::>page 13
Electro-mechanical power steering ./
c:::>page 101
Steering lock
c:::>page 13
Central warning/indicator lamp
c:::>page 13
Engine start system
c:::>page 13
Gearbox malfunction
c:::>page 77
Rear spoiler ./
c:::>page 105
Yellow indicator lamps
Electronic stabilisation control (ES()
./ c:::>page 14
Electronic stabilisation control (ES()
./ c:::>page 14
Anti-lock brake system (ABS)./
c:::>page 14
Safety systems ./
c:::>page 14
• Brake
pads
. c:::>page 14
9
Page 15 of 284
Downloaded from www.Manualslib.com manuals search engine Instruments
and warning/indicator lamps
Switch off the engine and do not drive on. Check
the engine oil level ¢ page 22 3.
- If the engine oil level is too low, add more oil
¢ page 224. Do not drive on until the warning
lamp has gone out.
-If the engine oil level is OK and the warning
lamp is flashing, switch off the engine and do
not drive on. Obtain professional assistance.
(I}) Note
The oil pressure warning lamp is not an indi
cator for the oil level. The oil level should
therefore be checked regularly.
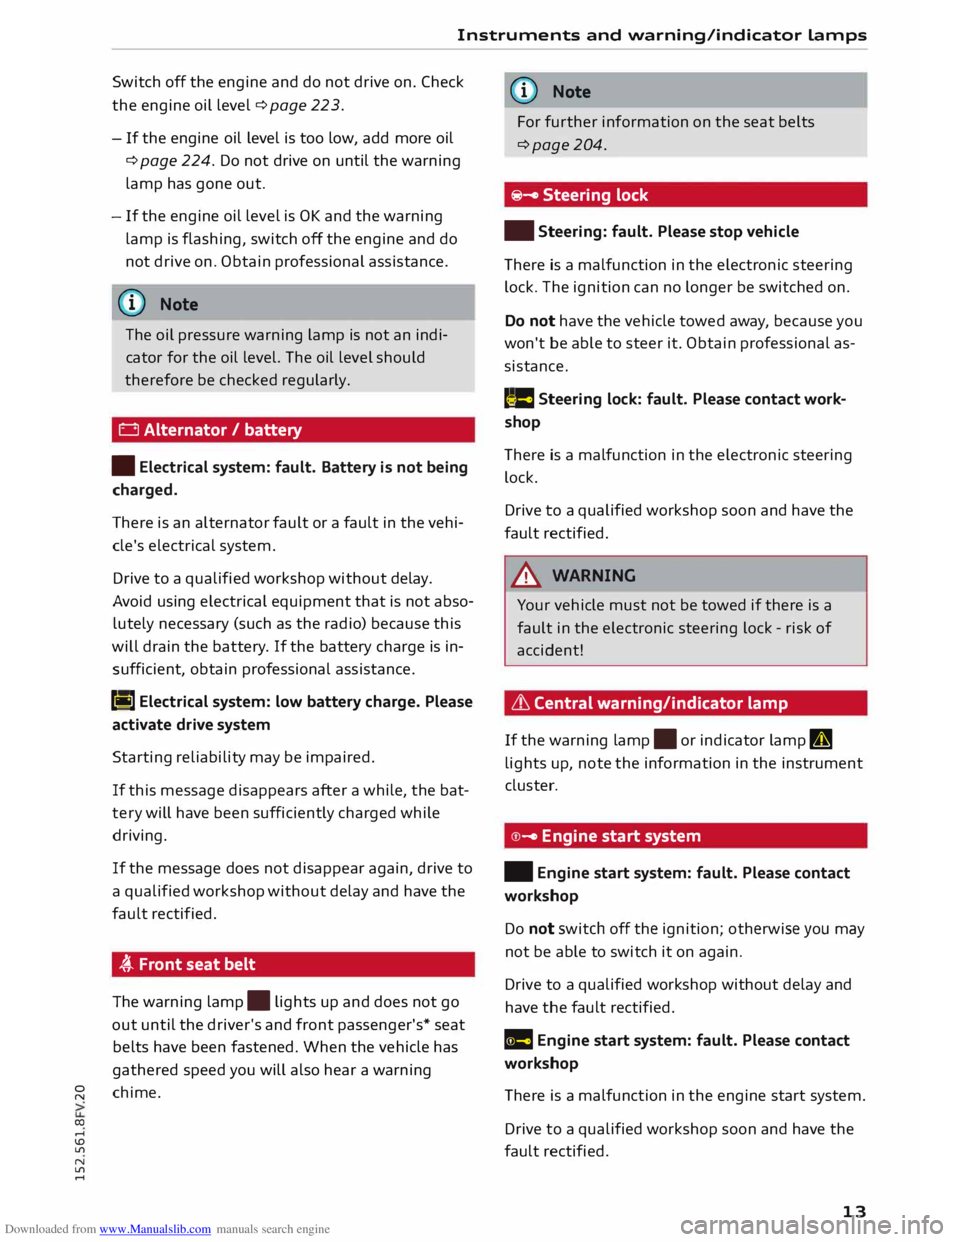
0 Alternator / battery
• Electrical system: fault. Battery is not being
charged.
There is an alternator fault or a fault in the vehi
cle's electrical system.
Drive to a qualified workshop without delay.
Avoid using electrical equipment that is not abso
lutely necessary (such as the radio) because this
will drain the battery . If the battery charge is in
sufficient, obtain professional assistance.
(•] Electrical
system: low battery charge. Please
activate drive system
Starting reliability may be impaired.
If this message disappears after a while, the bat
tery will have been sufficiently charged while
driving.
If the message does not disappear again, drive to
a qualified workshop without delay and have the
fault rectified.
� Front seat belt
The warning lamp.
lights up and does not go
out until the driver's and front passenger's* seat
belts have been fastened. When the vehicle has
gathered speed you will also hear a warning
� chime.
co ....
\D L/'l
N
L/'l
.... (D)
Note
For further information on the seat belts
¢page 204.
�- Steering lock
• Steering: fault. Please stop vehicle
There is a malfunction in the electronic steering
lock. The ignition can no longer be switched on.
Do not have the vehicle towed away, because you
won't be able to steer it. Obtain professional as
sistance.
,�. e Steering
lock: fault. Please contact work
shop
There is a malfunction in the electronic steering
lock.
Drive to a qualified workshop soon and have the
fault rectified.
,&. WARNING
Your vehicle must not be towed if there is a
fault in the electronic steering lock -risk of
accident!
L'.h Central warning/indicator lamp
If the warning lamp.
or indicator lamp II
lights up, note the information in the instrument
cluster.
© - Engine start system
• Engine start system: fault. Please contact
workshop
Do not switch off the ignition; otherwise you may
not be able to switch it on again.
Drive to a qualified workshop without delay and
have the fault rectified.
Ill Engine start system: fault. Please contact
workshop
There i
is
a malfunction in the engine start system.
Drive to a qualified workshop soon and have the
fault rectified.
13
Page 24 of 284
Downloaded from www.Manualslib.com manuals search engine Driver
information system
Mileage recorder
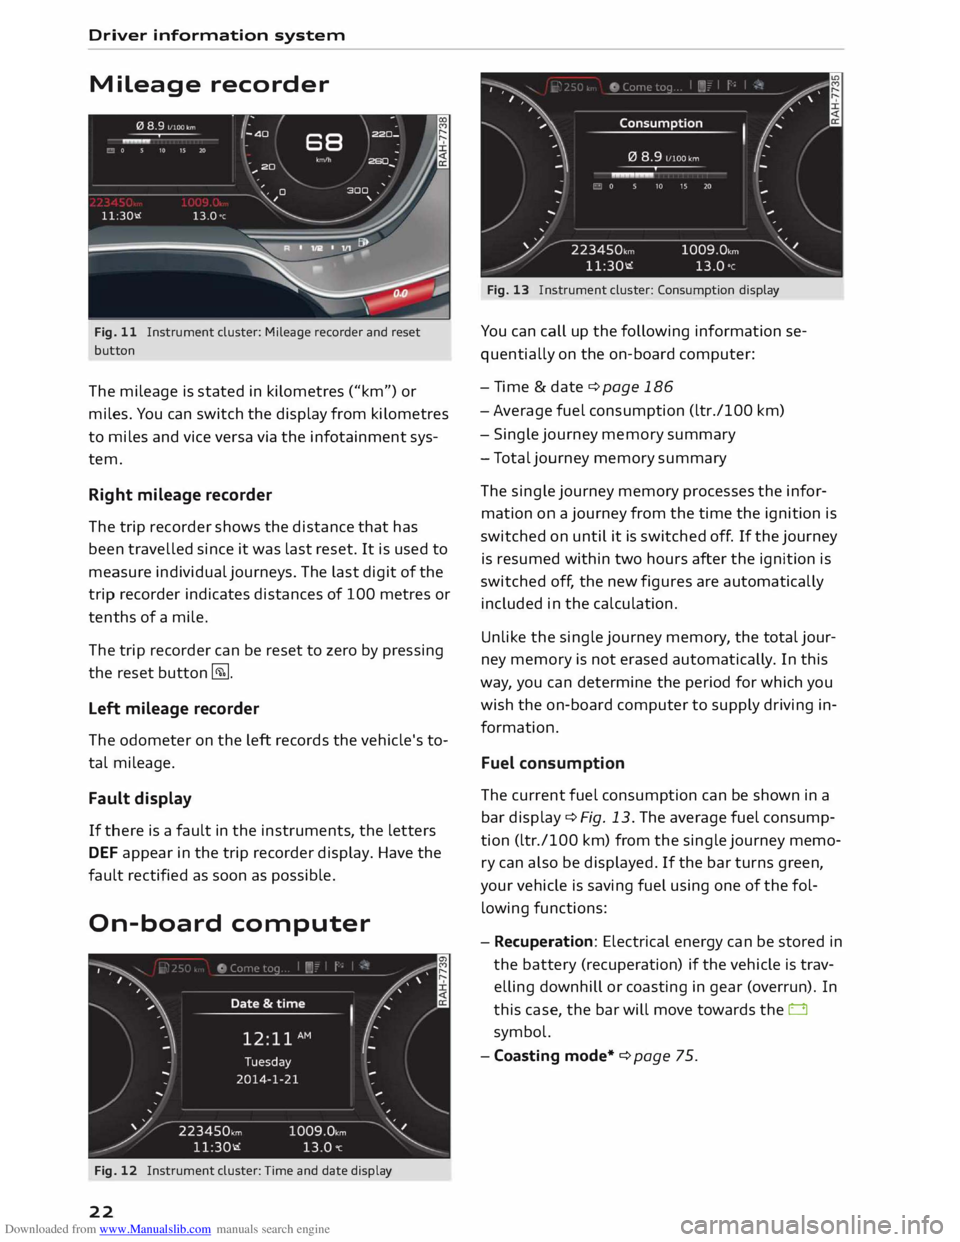
Fig. 11 Instrument cluster: Mileage recorder and reset
button
The mileage is stated in kilometres ("km") or
miles. You can switch the display from kilometres
to miles and vice versa via the infotainment sys
tem.
Right mileage recorder
The trip recorder shows the distance that has
been travelled since it was last reset. It is used to
measure individual journeys. The last digit of the
trip recorder indicates distances of 100 metres or
tenths of a mile.
The trip recorder can be reset to zero by pressing
the reset button �-
Left mileage recorder
The odometer on the left records the vehicle's to
tal mileage.
Fault display
If there is a fault in the instruments, the letters
DEF appear in the trip recorder display. Have the
fault rectified as soon as possible.
On-board computer
Fig. 12 Instrument cluster: Time and date display
22 Fig.
13 Instrument cluster: Consumption display
You can call up the following information se
quentially on the on-board computer:
- Time & date ¢ page 186
- Average fuel consumption (ltr./100 km)
- Single journey memory summary
- Total journey memory summary
The single journey memory processes the infor
mation on a journey from the time the ignition is
switched on until it is switched off. If the journey
is resumed within two hours after the ignition is
switched off, the new figures are automatically
included in the calculation.
Unlike the single journey memory, the total jour
ney memory is not erased automatical ly. In this
way, you can determine the period for which you
wish the on-board computer to supply driving in
formation.
Fuel consumption
The current fuel consumption can be shown in a
bar display ¢ Fig. 13. The average fuel consump
tion (ltr./100 km) from the single journey memo
ry can also be displayed. If the bar turns green,
your vehicle is saving fuel using one of the fol
lowing functions:
- Recuperation: Electrical energy can be stored in
the battery (recuperation) if the vehicle is trav
elling downhill or coasting in gear (overrun). In
this case, the bar will move towards the 0
symbol.
- Coasting mode*¢ page 75.
Page 25 of 284
Downloaded from www.Manualslib.com manuals search engine 0
N
co
....
\D Lfl
N
Lfl
.... Camera-based
traffic
sign recognition
Description
Applies to vehicles: with camera-based traffic sign recognition
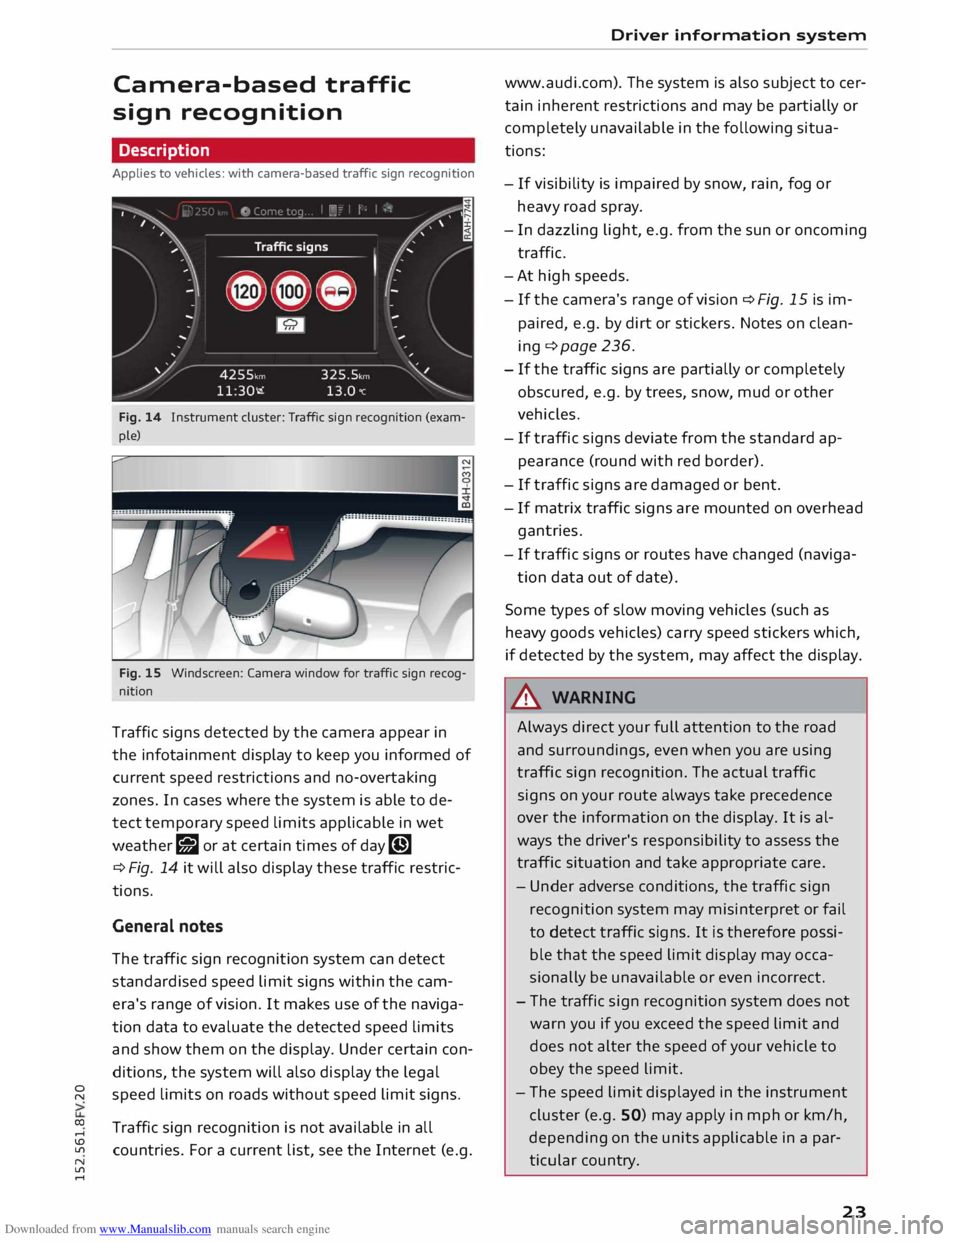
Fig. 14 Instrument cluster: Traffic sign recognition (exam
ple)
Fig. 15 Windscreen: Camera window for traffic sign recog
nition
Traffic signs detected by the camera appear in
the infotainment display to keep you informed of
current speed restrictions and no-overtaking
zones. In cases where the system is able to de
tect temporary speed limits applicable in wet
weather g;J or at certain times of day�
¢ Fig. 14 it will also display these traffic restric
tions.
General notes
The traffic sign recognition system can detect
standardised speed limit signs within the cam
era's range of vision. It makes use of the naviga
tion data to evaluate the detected speed limits
and show them on the display. Under certain con
ditions, the system will also display the legal
speed limits on roads without speed limit signs.
Traffic sign recognition is not available in all
countries. For a current list, see the Internet (e.g. Driver
information system
www.audi.com). The system is also subject to cer
tain inherent restrictions and may be partially or
completely unavailable in the following situa
tions:
- If visibility is impaired by snow, rain, fog or
heavy road spray.
- In dazzling light, e.g. from the sun or oncoming
traffic.
-At high speeds.
- If the camera's range of vision � Fig. 15 is im-
paired, e.g. by dirt or stickers. Notes on clean
ing ¢ page 236.
- If the traffic signs are partially or completely
obscured, e.g. by trees, snow, mud or other
vehicles.
- If traffic signs deviate from the standard ap
pearance (round with red border).
- If traffic signs are damaged or bent.
- If matrix traffic signs are mounted on overhead
gantries.
- If traffic signs or routes have changed (naviga-
tion data out of date).
Some types of slow moving vehicles (such as
heavy goods vehicles) carry speed stickers which,
if detected by the system, may affect the display.
& WARNING
Always direct your full attention to the road
and surroundings, even when you are using
traffic sign recognition. The actual traffic
signs on your route always take precedence
over the information on the display. It is al
ways the driver's responsibility to assess the
traffic situation and take appropriate care.
- Under adverse conditions, the traffic sign
recognition system may misinterpret or fail
to detect traffic signs. It is therefore possi
ble that the speed limit display may occa
sionally be unavailable or even incorrect.
- The traffic sign recognition system does not
warn you if you exceed the speed limit and
does not alter the speed of your vehicle to
obey the speed limit.
- The speed limit displayed in the instrument
cluster (e.g. SO) may apply in mph or km/h,
depending on the units applicable in a par
ticular country.
23
Page 26 of 284
Downloaded from www.Manualslib.com manuals search engine Driver
information system
Controls
Applies to vehicles: with camera-based traffic sign recognition
')· ·.
I
,
,··· .. ,
,· Date
&time
12: 11 AM (.
�1\
.
I
..
' Tuesday
2014-1-21 ...
/ 223450,,,,
11:30-.i �
-- .
1009.0,m ?® Y
13.0"C �
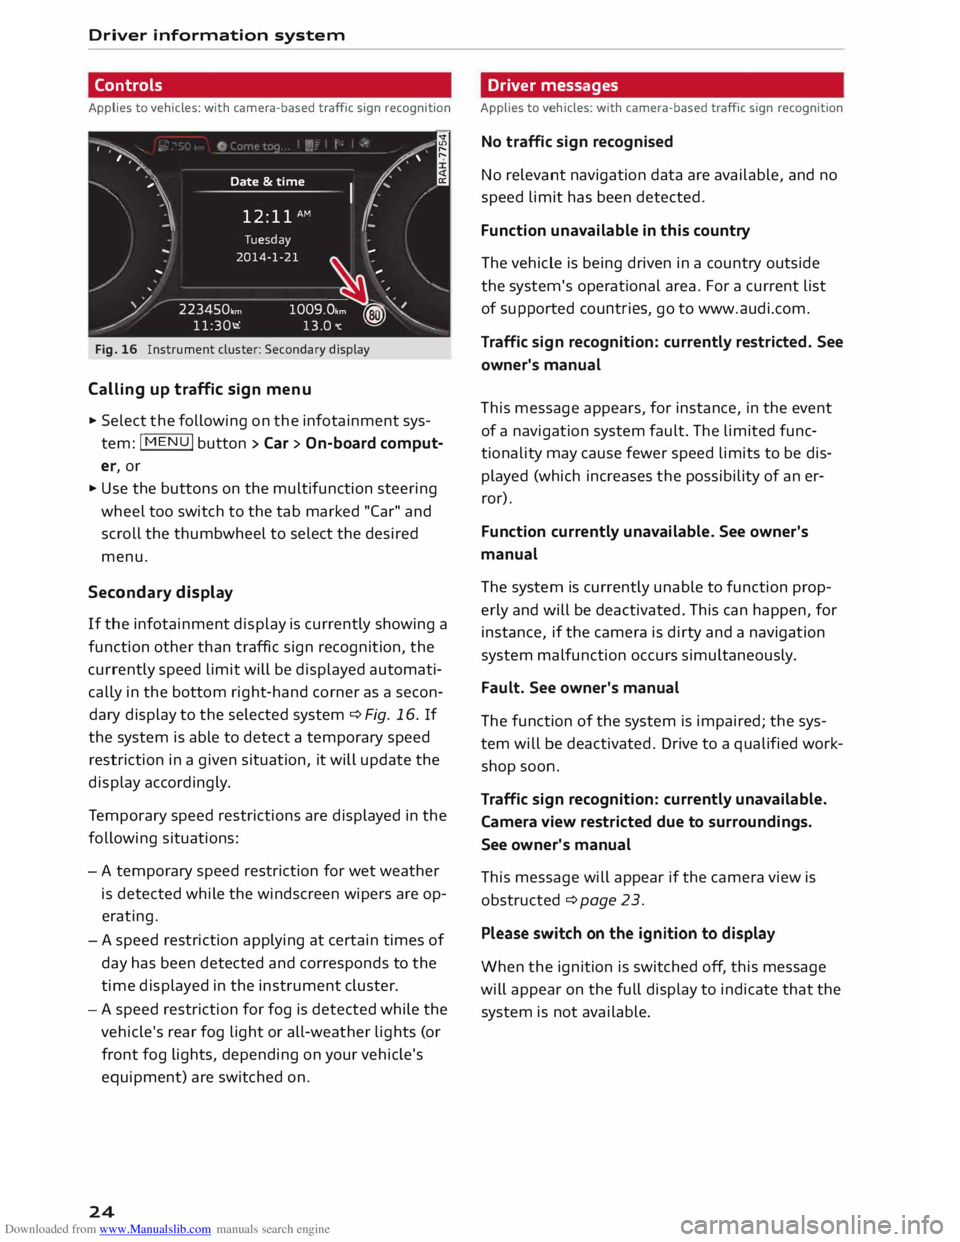
Fig. 16 Instrument cluster: Secondary display
Calling up traffic sign menu
.,. Select the following on the infotainment sys
tem: jMENUj button> Car > On-board comput
er, or
.,. Use the buttons on the multifunction steering
wheel too switch to the tab marked "Car" and
scroll the thumbwheel to select the desired
menu,
Second ary display
If the infotainment display is currently showing a
function other than traffic sign recognition, the
currently speed limit will be displayed automati
cally in the bottom right-hand corner as a secon
dary display to the selected system ¢ Fig, 16, If
the system is able to detect a temporary speed
restriction in a given situation, it will update the
display accordingly.
Te mporary speed restrictions are displayed in the
following situations:
- A temporary speed restriction for wet weather
is detected while the windscreen wipers are op
erating.
- A speed restriction applying at certain times of
day has been detected and corresponds to the
time displayed in the instrument cluster.
- A speed restriction for fog is detected while the
vehicle's rear fog light or all-weather lights (or
front fog lights, depending on your vehicle's
equipment) are switched on.
24 Driver
messages
Applies to vehicles: with camera-based traffic sign recognition
No traffic sign recognised
No relevant navigation data are available, and no
speed limit has been detected.
Function unavailable in this country
The vehicle is being driven in a country outside
the system's operational area. For a current list
of supported countries, go to www.audi.com.
Traffic sign recognition: currently restricted. See
owner's manual
This message appears, for instance, in the event
of a navigation system fault. The limited func
tionality may cause fewer speed limits to be dis
played (which increases the possibility of an er
ror).
Function currently unavailable. See owner's
manual
The system is currently unable to function prop
erly and will be deactivated. This can happen, for
instance, if the camera is dirty and a navigation
system malfunction occurs simultaneously.
Fault. See owner's manual
The function of the system is impaired; the sys
tem will be deactivated. Drive to a qualified work
shop soon.
Traffic sign recognition: currently unavailable.
Camera view restricted due to surroundings.
See owner's manual
This message will appear if the camera view is
obstructed ¢ page 23.
Please switch on the ignition to display
When the ignition is switched off, this message
will appear on the full display to indicate that the
system is not available.
Page 43 of 284
Downloaded from www.Manualslib.com manuals search engine 0
N
co
,-j
\D L/'l
N
L/'l
,-j functions
can be adjusted on the infotainment
system. Select the following on the infotainment
system: I MENU! button> Car > Left control button
> Vehicle settings > Background lighting.
Instrument lighting
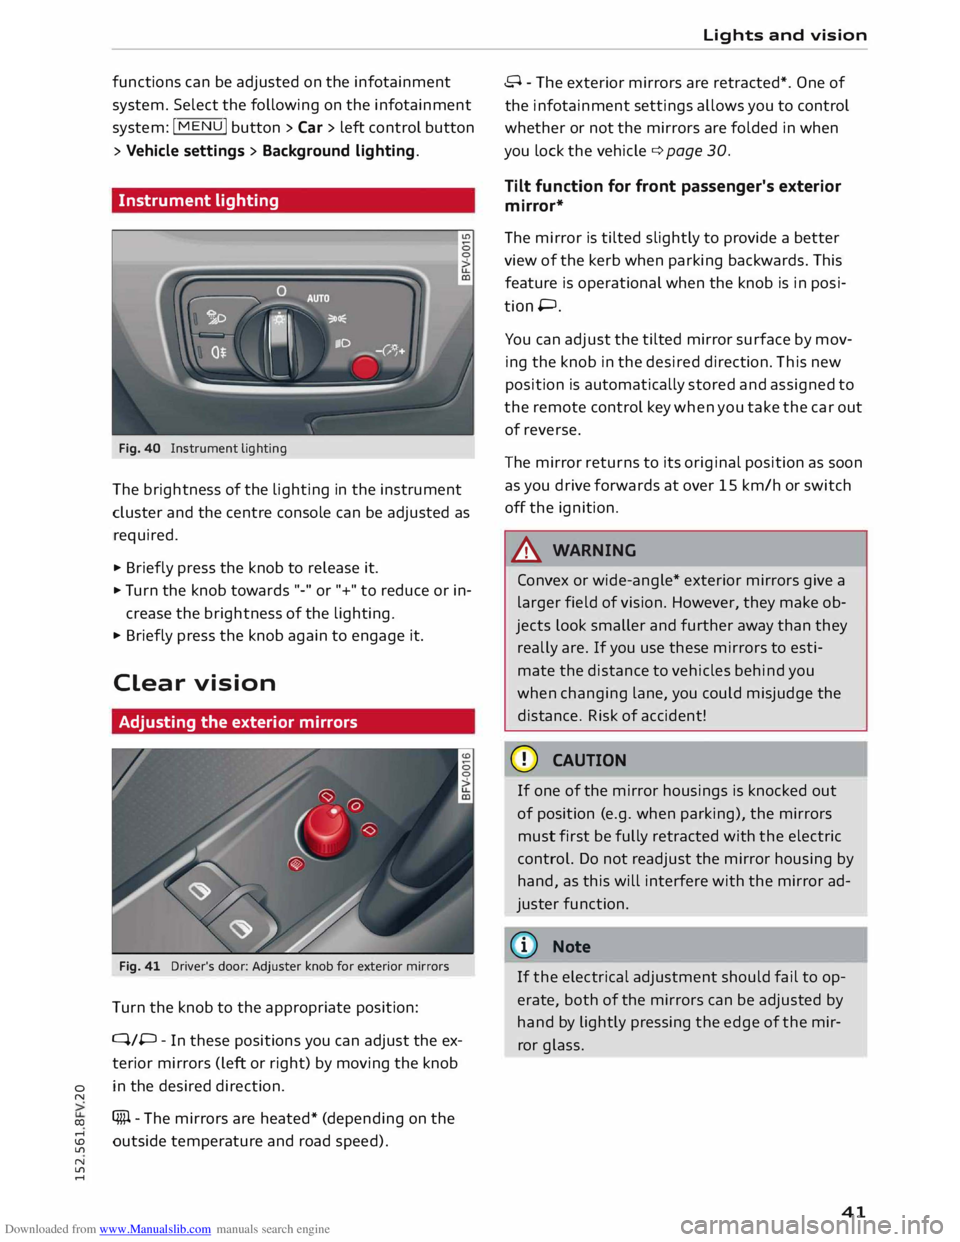
Fig. 40 Instrument lighting
The brightness of the Lighting in the instrument
cluster and the centre console can be adjusted as
required.
.,. Briefly press the knob to release it.
.,. Tu rn the knob towards "-" or"+" to reduce or in
crease the brightness of the lighting.
.,. Briefly press the knob again to engage it.
Clear vision
Adjusting the exterior mirrors
Fig. 41 Driver's door: Adjuster knob for exterior mirrors
Turn the knob to the appropriate position:
Q/P -In these positions you can adjust the ex
terior mirrors (Left or right) by moving the knob
in the desired direction.
(fill - The mirrors are heated* (depending on the
outside temperature and road speed). Lights
and vision
8 - The exterior mirrors are retracted*. One of
the infotainment settings allows you to control
whether or not the mirrors are folded in when
you Lock the vehicle q page 30.
Tilt function for front passenger's exterior
mirror*
The mirror is tilted slightly to provide a better
view of the kerb when parking backwards. This
feature is operational when the knob is in posi
tion P.
You can adjust the tilted mirror surface by mov
ing the knob in the desired direction. This new
position is automatically stored and assigned to
the remote control key when you take the car out
of reverse.
The mirror returns to its original position as soon
as you drive forwards at over 15 km/h or switch
off the ignition.
A WARNING
Convex or wide-angle* exterior mirrors give a
Larger field of vision. However, they make ob
jects Look smaller and further away than they
really are. If you use these mirrors to esti
mate the distance to vehicles behind you
when changing Lane, you could misjudge the
distance. Risk of accident!
CD CAUTION
If one of the mirror housings is knocked out
of position (e.g. when parking), the mirrors
must first be fully retracted with the electric
control. Do not readjust the mirror housing by
hand, as this will interfere with the mirror ad
juster function.
{CD) Note
If the electrical adjustment should fail to op
erate, both of the mirrors can be adjusted by
hand by Lightly pressing the edge of the mir
ror glass.
41
Page 66 of 284
Downloaded from www.Manualslib.com manuals search engine Driving
Switching off/ starting the engine
Applies to vehicles: with start/stop system
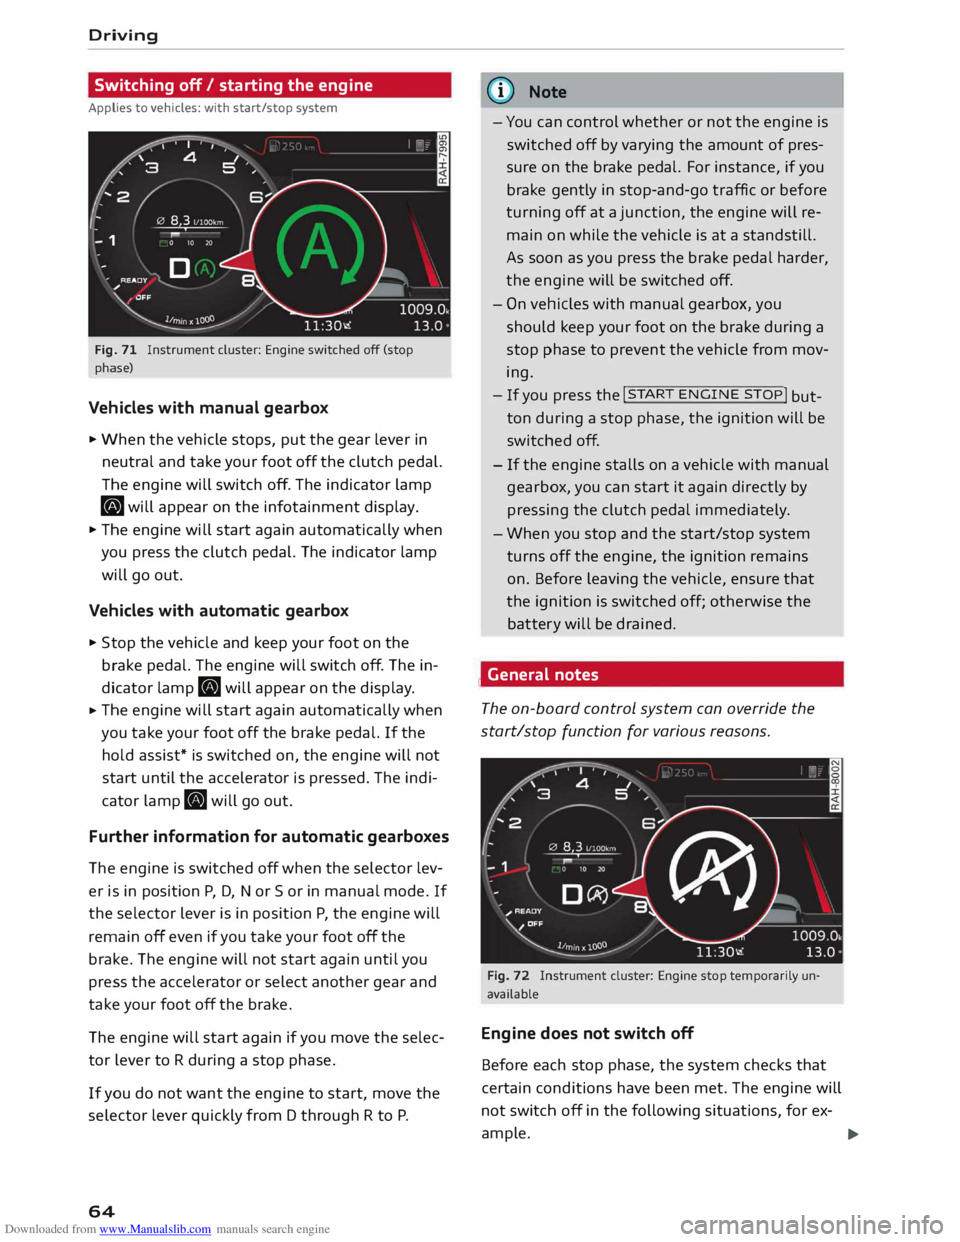
Fig. 71 Instrument cluster: Engine switched off (stop
phase)
Vehicles with manual gearbox
.. When the vehicle stops, put the gear lever in
neutral and take your foot off the clutch pedal.
The engine will switch off. The indicator lamp
• will appear on the infotainment display.
.. The engine will start again automatically when
you press the clutch pedal. The indicator lamp
will go out.
Vehicles with automatic gearbox
.. Stop the vehicle and keep your foot on the
brake pedal. The engine will switch off. The in
dicator lamp. will appear on the displa y.
.. The
engine will start again automatically when
you take your foot off the brake pedal. If the
hold assist* is switched on, the engine will not
start until the accelerator is pressed. The indi
cator lamp. will go out.
Further information for automatic gearboxes
The engine is switched off when the selector lev
er is in position P, D, Nor Sor in manual mode. If
the selector lever is in position P, the engine will
remain off even if you take your foot off the
brake. The engine will not start again until you
press the accelerator or select another gear and
take your foot off the brake.
The engine will start again if you move the selec
tor lever to R during a stop phase.
If you do not want the engine to start, move the
selector lever quickly from D through R to P.
64 @
Note
- You can control whether or not the engine is
switched off by varying the amount of pres
sure on the brake pedal. For instance, if you
brake gently in stop-and-go traffic or before
turning off at a junction, the engine will re
main on while the vehicle is at a standstill.
As soon as you press the brake pedal harder,
the engine will be switched off.
- On vehicles with manual gearbox, you
should keep your foot on the brake during a
stop phase to prevent the vehicle from mov
ing.
- If you press the !START
ENGINE STOP!
but
ton during a stop phase, the ignition will be
switched off.
-If the engine stalls on a vehicle with manual
gearbox, you can start it again directly by
pressing the clutch pedal immediately .
- When you stop and the start/stop system
turns off the engine, the ignition remains
on. Before leaving the vehicle, ensure that
the ignition is switched off; otherwise the
batte ry will be drained .
, General notes
The on-board control system can override the
start/stop function for various reasons.
Fig. 72 Instrument cluster: Engine stop temporarily un
available
Engine does not switch off
Before each stop phase, the system checks that
certain conditions have been met. The engine will
not switch off in the following situations, for ex-
ample. ..,.
Page 68 of 284
Downloaded from www.Manualslib.com manuals search engine Driving
Driver messages in the instrument cluster
display
Automatic start/stop deactivated: please
restart engine manually
This message appears if certain conditions have
not been met during the stop phase and the
start/stop system cannot start the engine again
aut omatically. The !START
ENGINE STOP!
button
must be used to start the engine.
Start/stop system: fault. Function
unavailable. Please contact workshop
There is a malfunction in the start/stop system.
Drive to a workshop soon and have the fault recti
fied.
Electro-mechanical
parking brake
Operation
The electro-mechanical parking brake replaces
the handbrake.
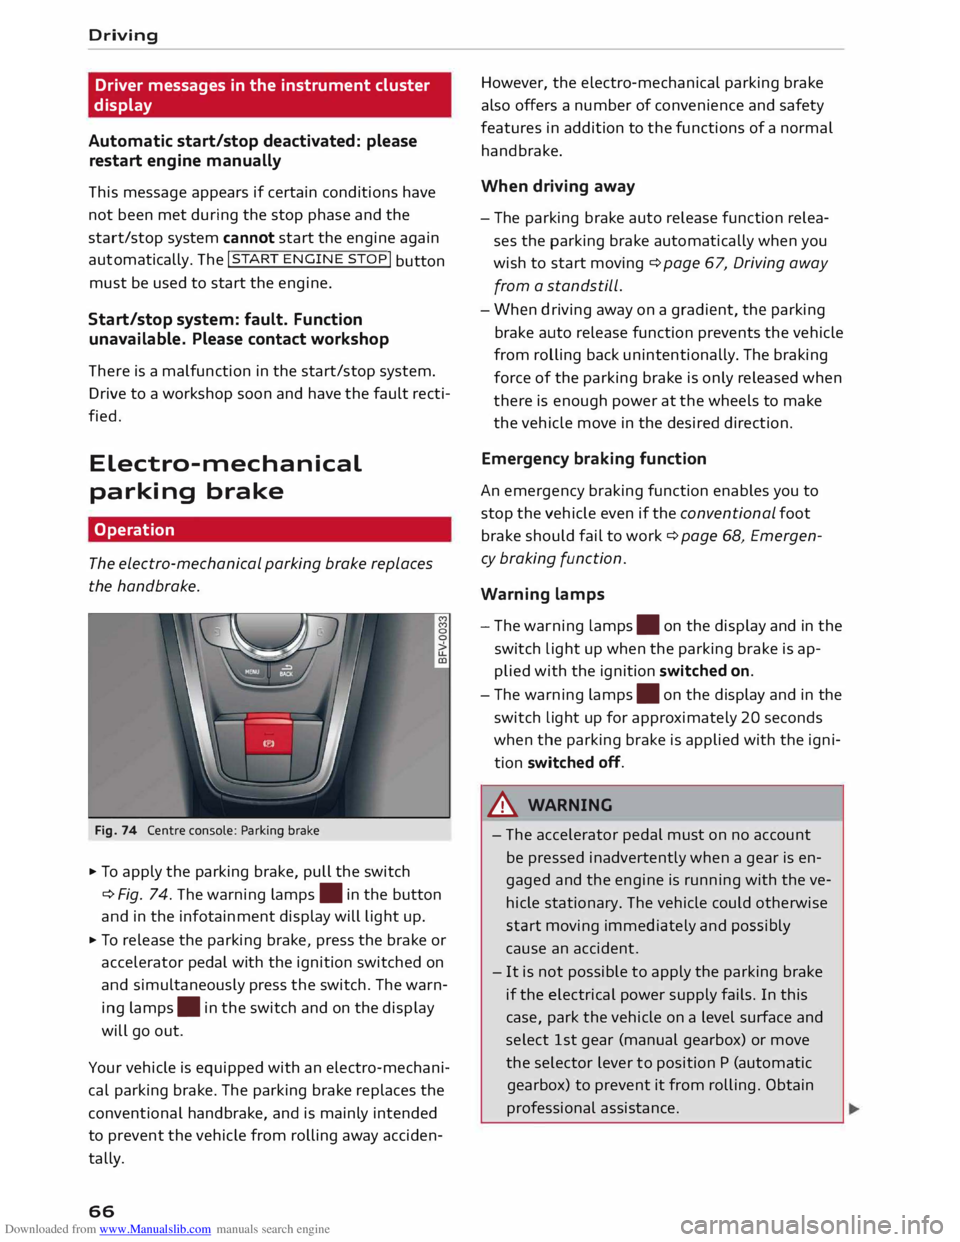
Fig. 74 Centre console: Parking brake
� To apply the parking brake, pull the switch
� Fig. 74. The warning Lamps.
in the button
and in the infotainment display will light up.
� To release the parking brake, press the brake or
accelerator pedal with the ignition switched on
and simultaneously press the switch. The warn
ing Lamps .
in the switch and on the display
will go out.
Your vehicle is equipped with an electro-mechani
cal parking brake. The parking brake replaces the
conventional handbrake, and is mainly intended
to prevent the vehicle from rolling away acciden
tally.
66 However,
the electro-mechanical parking brake
also offers a number of convenience and safety
features in addition to the functions of a normal
handbrake.
When driving away
- The parking brake auto release function relea
ses the parking brake automatically when you
wish to start moving ¢ page 67, Driving away
from a standstill.
- When
driving away on a gradient, the parking
brake auto release function prevents the vehicle
from rolling back unintentionally. The braking
force of the parking brake is only released when
there is enough power at the wheels to make
the vehicle move in the desired direction.
Emergency braking function
An emergency braking function enables you to
stop the vehicle even if the conventional foot
brake should fail to work ¢ page 68, Emergen
cy braking function.
Warning lamps - The warning Lamps.
on the display and in the
switch Light up when the parking brake is ap
plied with the ignition switched on.
- The warning Lamps.
on the display and in the
switch Light up for approximately 20 seconds
when the parking brake is applied with the igni
tion switched off.
_& WARNING
- The accelerator pedal must on no account
be pressed inadvertently when a gear is en
gaged and the engine is running with the ve
hicle stationary. The vehicle could otherwise
start moving immediately and possibly
cause an accident.
- It is not possible to apply the parking brake
if the electrical power supply fails. In this
case, park the vehicle on a Level surface and
select 1st gear (manual gearbox) or move
the selector Lever to position P (automatic
gearbox) to prevent it from rolling. Obtain
professional assistance.