wipers AUDI TT COUPE 2014 Owners Manual
[x] Cancel search | Manufacturer: AUDI, Model Year: 2014, Model line: TT COUPE, Model: AUDI TT COUPE 2014Pages: 284, PDF Size: 34.42 MB
Page 4 of 284
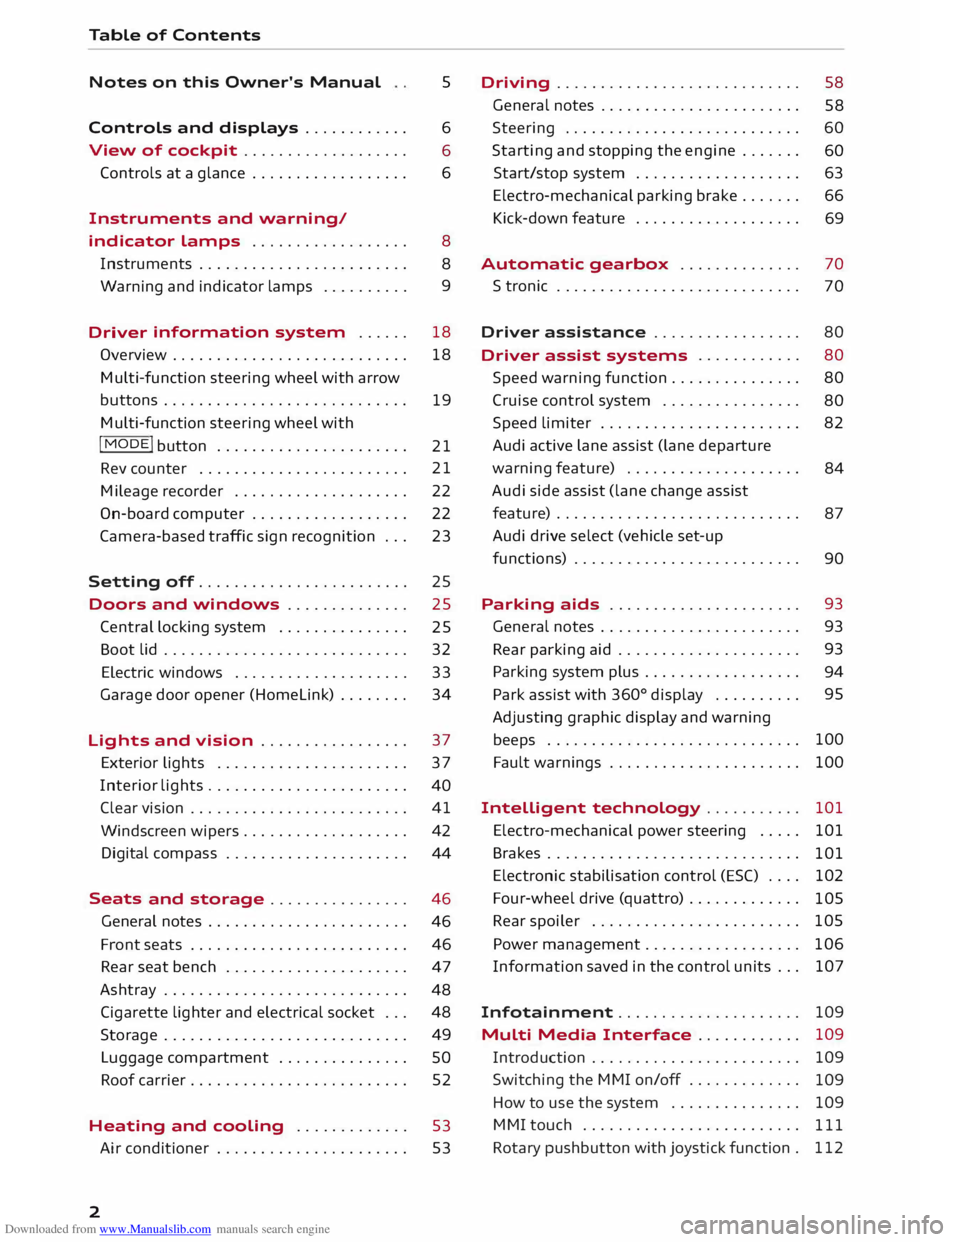
Downloaded from www.Manualslib.com manuals search engine Table
of Contents
Notes on this Owner's Manual
Controls and displays ........... .
View of cockpit .................. .
Controls at a glance ................. .
Instruments and warning/ 5
6
6
6
indicator lamps . . . . . . . . . . . . . . . . . .
8
Instruments . . . . . . . . . . . . . . . . . . . . . . . .
8
Warning and
indicator lamps . . . . . . . . . . 9
Driver information
system . . . . . . 18
Overview . . . . . . . . . . . . . . . . . . . . . . . . . . .
18
Multi-function steering wheel with arrow
buttons............................ 19
Multi-function steering wheel with
I MODE!
button . . . . . . . . . . . . . . . . . . . . . .
21
Rev counter . . . . . . . . . . . . . . . . . . . . . . . . 21
Mileage recorder . . . . . . . . . . . . . . . . . . . .
22
On-board computer . . . . . . . . . . . . . . . . . . 22
Camera-based traffic sign recognition . . .
23
Setting off........................ 25
Doors and windows . . . . . . . . . . . . . .
25
Central locking system . . . . . . . . . . . . . . .
25
Boot lid . . . . . . . . . . . . . . . . . . . . . . . . . . . . 32
Electric windows . . . . . . . . . . . . . . . . . . . . 33
Garage door opener (Homelink) . . . . . . . .
34
Lights and vision . . . . . . . . . . . . . . . . . 37
Exterior lights . . . . . . . . . . . . . . . . . . . . . . 37
Interior lights . . . . . . . . . . . . . . . . . . . . . . .
40
Clear vision . . . . . . . . . . . . . . . . . . . . . . . . .
41
Windscreen wipers. . . . . . . . . . . . . . . . . . .
42
Digital compass . . . . . . . . . . . . . . . . . . . . .
44
Seats and storage ................ 46
General notes . . . . . . . . . . . . . . . . . . . . . . .
46
Front seats . . . . . . . . . . . . . . . . . . . . . . . . .
46
Rear seat bench . . . . . . . . . . . . . . . . . . . . .
47
Ashtray . . . . . . . . . . . . . . . . . . . . . . . . . . . .
48
Cigarette lighter and electrical socket . . .
48
Storage . . . . . . . . . . . . . . . . . . . . . . . . . . . .
49
Luggage compartment . . . . . . . . . . . . . . .
SO
Roof carrier . . . . . . . . . . . . . . . . . . . . . . . . .
52
Heating and cooling . . . . . . . . . . . . .
53
Air conditioner . . . . . . . . . . . . . . . . . . . . . . 53
2 Driving
............................ 58
General notes . . . . . . . . . . . . . . . . . . . . . . .
58
Steering . . . . . . . . . . . . . . . . . . . . . . . . . . .
60
Starting and stopping the engine . . . . . . .
60
Start/stop system . . . . . . . . . . . . . . . . . . .
63
Electro-mechanical parking brake . . . . . . . 66
Kick-down feature . . . . . . . . . . . . . . . . . . .
69
Automatic gearbox . . . . . . . . . . . . . . 70
S tronic . . . . . . . . . . . . . . . . . . . . . . . . . . . .
70
Driver assistance . . . . . . . . . . . . . . . . . 80
Driver assist systems . . . . . . . . . . . .
80
Speed warning function . . . . . . . . . . . . . . .
80
Cruise control system . . . . . . . . . . . . . . . .
80
Speed limiter . . . . . . . . . . . . . . . . . . . . . . .
82
Audi active lane assist (lane departure
warning feature) . . . . . . . . . . . . . . . . . . . .
84
Audi side assist (lane change assist
feature) . . . . . . . . . . . . . . . . . . . . . . . . . . . .
87
Audi drive select (vehicle set-up
functions) . . . . . . . . . . . . . . . . . . . . . . . . . .
90
Parking aids . . . . . . . . . . . . . . . . . . . . . . 93
General notes . . . . . . . . . . . . . . . . . . . . . . .
93
Rear parking aid . . . . . . . . . . . . . . . . . . . . . 93
Parking system plus . . . . . . . . . . . . . . . . . . 94
Park assist with 360°
display . . . . . . . . . . 95
Adjusting graphic display and warning
beeps . . . . . . . . . . . . . . . . . . . . . . . . . . . . . 100
Fault warnings . . . . . . . . . . . . . . . . . . . . . .
100
Intelligent technology . . . . . . . . . . .
101
Electro-mechanical power steering . . . . .
101
Brakes . . . . . . . . . . . . . . . . . . . . . . . . . . . . .
101
Electronic stabilisation control (ES() . . . .
102
Four-wheel drive (quattro) . . . . . . . . . . . . .
105
Rear spoiler . . . . . . . . . . . . . . . . . . . . . . . .
105
Power management . . . . . . . . . . . . . . . . . .
106
Information saved in the control units . . . 107
Infotainment . . . . . . . . . . . . . . . . . . . . .
109
Multi Media Interface . . . . . . . . . . . . 109
Introduction . . . . . . . . . . . . . . . . . . . . . . . .
109
Switching the MMI on/off . . . . . . . . . . . . .
109
How to use the system . . . . . . . . . . . . . . .
109
MMI touch . . . . . . . . . . . . . . . . . . . . . . . . .
111
Rotary pushbutton with joystick function .
112
Page 9 of 284
Downloaded from www.Manualslib.com manuals search engine 0
N
co
....
\D L/'l
N
L/'l
.... (D
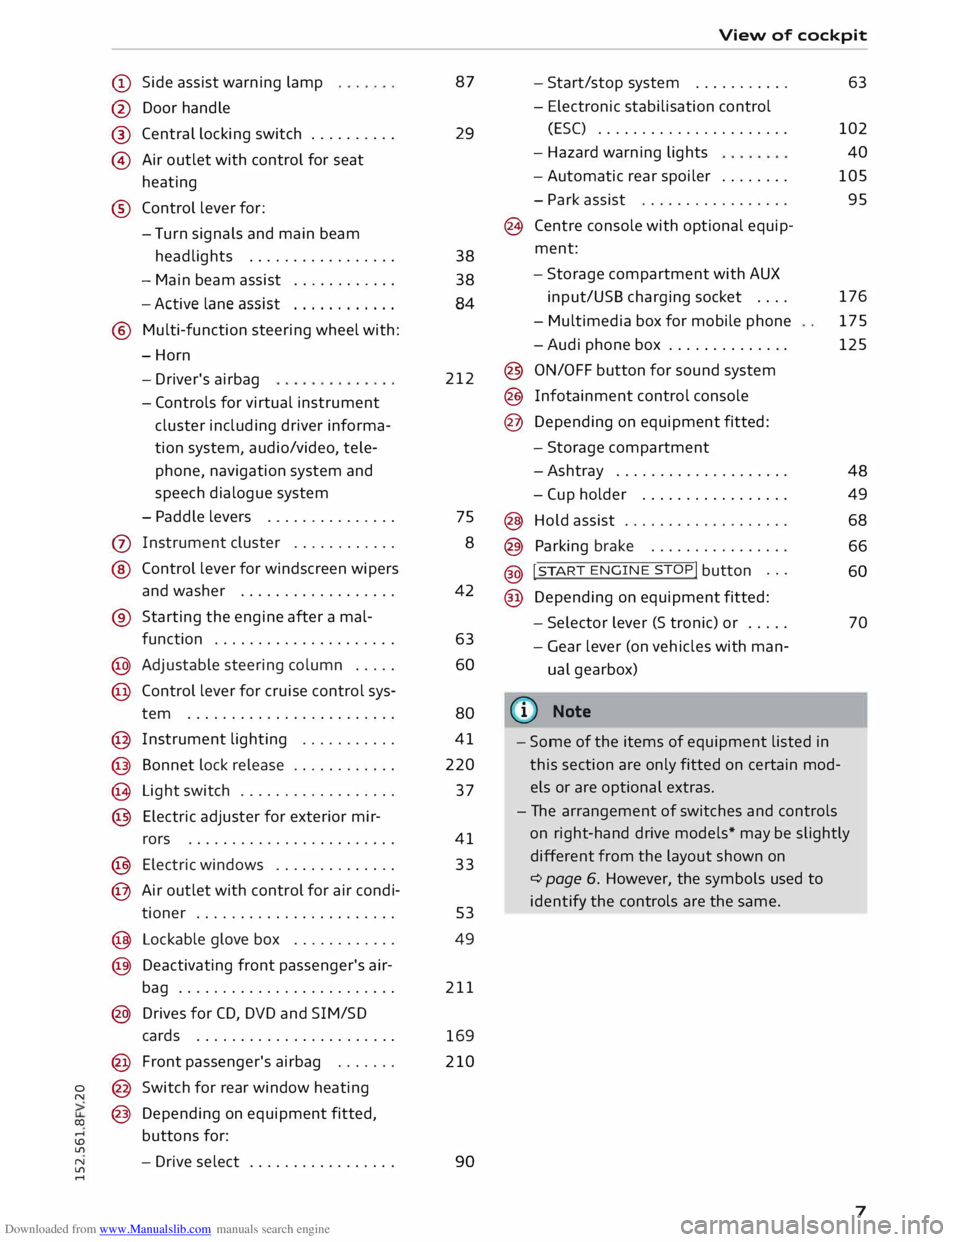
Side assist warning lamp
@ Door handle
®
© Central
locking switch ......... .
Air outlet with control for seat
heating
® Control lever for:
- Turn signals and main beam
headlights ................ .
- Main beam assist
........... .
- Active lane assist
........... .
® Multi-function steering wheel with:
-Horn
- Driver's airbag
- Controls for virtual instrument
cluster
including
driver informa
tion system, audio/video, tele
phone, navigation system and
speech dialogue system
- Paddle levers .............. .
(j) Instrument cluster ........... .
@ Control lever for windscreen wipers
and washer ................. .
® Starting the engine after a mal-
function .................... .
@ Adjustable steering column .... .
@ Control lever for cruise control sys-
tem ....................... .
@ Instrument lighting .......... .
@ Bonnet lock release ........... .
@ Light switch ................. .
@ Electric adjuster for exterior mir-
rors ....................... .
@ Electric windows ............. .
@ Air outlet with control for air condi-
tioner ...................... . 87
29
38
38 84
212
75 8
42
63 60
80
41
220
37
41
33
53
@ Lockable glove box . . . . . . . . . . . .
49
@ Deactivating front passenger's air-
bag . . . . . . . . . . . . . . . . . . . . . . . . . 211
@ Drives for CD, DVD and SIM/SD
cards . . . . . . . . . . . . . . . . . . . . . . .
169
@ Front passenger's airbag ...... . 210
@ Switch for rear window heating
@ Depending on equipment fitted,
buttons for:
- Drive select ................ . 90 View
of cockpit
- Start/stop system .......... .
- Electronic stabilisation control
(ES() ..................... .
- Hazard warning lights
- Automatic rear spoiler ....... .
- Park assist ................ .
@ Centre console with optional equip
ment:
- Storage compartment with AUX
input/USS charging socket ....
- Multimedia box for mobile phone
-Audi phone box ............. .
@ ON/OFF button for sound system
@ Infotainment control console
@ Depending on equipment fitted:
- Storage compartment
-Ashtray ................... .
- Cup holder ................ .
@ Hold assist .................. .
@ Parking brake ............... .
@ !
S TAR
T ENGINE ST
OP! button ..
.
@ Depending on equipment fitted: 63
102 40
105
95
176 175
125
48 49
68
66 60
- Selector lever (S tronic) or . . . . .
70
- Gear lever (on vehicles with man
ual gearbox)
((ij} Note
- Some of the items of equipment listed in
this section are only fitted on certain mod
els or are optional extras.
- The arrangement of switches and controls
on right-hand drive models* may be slightly
different from the layout shown on
¢ page 6. However, the symbols used to
identify the controls are the same.
7
Page 12 of 284
Downloaded from www.Manualslib.com manuals search engine Instruments
and warning/indicator lamps
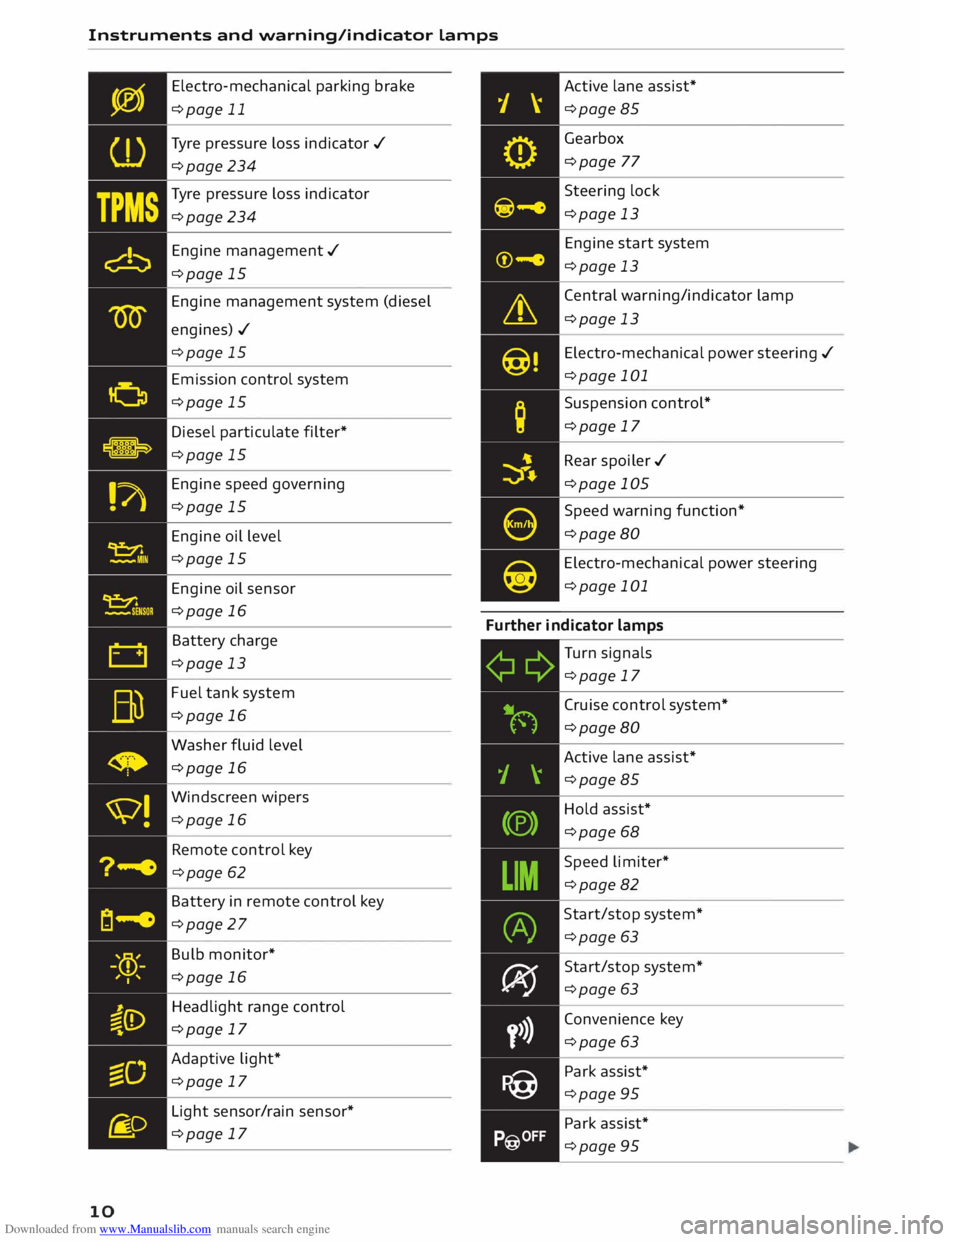
10 Electro-mechanical
parking brake
¢page 11
Tyre pressure loss indicator ./
¢page 234
Tyre pressure loss indicator
¢page 234
Engine management./
¢page 15
Engine management system (diesel
engines)./ ¢page 15
Emission control system
¢page 15
Diesel particulate filter*
¢page 15
Engine speed governing
¢page 15
Engine oil level
¢page 15
Engine oil sensor
¢page 16
Battery charge
¢page 13
Fuel tank system
¢page 16
Washer fluid level
¢page 16
Windscreen wipers
¢page 16
Remote control key
¢page 62
Battery in remote control key
¢page 27
Bulb monitor*
¢page 16
Headlight range control
¢page 17
Adaptive light*
¢page 17
Light sensor/rain sensor*
¢page 17 Active
lane assist*
¢page 85
Gearbox ¢page 77
Steering lock
¢page 13
Engine start system
¢page 13
Central warning/indicator lamp
¢page 13
Electro-mechanical power steering ./
¢page 101
Suspension control*
¢page 17
Rear spoiler ./
¢page 105
Speed warning function*
¢page 80
Electro-mechanical power steering
¢page 101
Further indicator lamps
Turn signals
¢page 17
Cruise control system*
¢page 80
Active lane assist*
¢page 85
Hold assist*
¢page 68
Speed limiter*
¢page 82
Start/stop system*
¢page 63
Start/stop system*
¢page 63
Convenience key
¢page 63
Park assist*
¢page 95
Park assist*
¢page 95
Page 18 of 284
Downloaded from www.Manualslib.com manuals search engine Instruments
and warning/indicator lamps
- If the engine oil level is normal but the indica
tor lamp stays on, drive to a qualified workshop
without delay and avoid high engine speeds.
-e:r ..,. Engine oil sensor
l!I Oil level sensor system: fault. Please contact
workshop
The sensor for checking the engine oil level has
failed. Drive to a qualified workshop soon and
have the fau Lt rectified.
Bu Fuel tank system (petrol/diesel)
Applies to vehicles: with petrol or diesel engine, without nat
ural gas engine
GD Please refuel
When the indicator lamp lights up for the first
time and the message appears, there are still
about 7 litres of fuel left in the tank.
GD Please refuel immediately
If the indicator lamp lights up and the message
appears , the fuel tank is almost empty. Drive to a
filling station without delay.
GD Tank system malfunction! Please contact
workshop
If the indicator lamp lights up and the message
appears:
- there is a malfunction in the tank system, or
- on vehicles with a diesel engine, water may
have collected in the fuel filter.
Drive to a qualified workshop without delay and
have the fau Lt rectified.
CD CAUTION
Applies to vehicles with diesel engine: If poor
quality diesel fuel is used, it may be necessary
to have the water separator 1
>
on the fuel fil
ter drained more frequently than is specified
in the Service Schedule. This helps to prevent
potential engine faults.
l l
This function is not available on all export versions.
16 (®
For the sake of the environment
Never pour fuel down drains or into the
ground.
(CD) Note
For more information about filling the tank,
refer to¢ page 218.
• Washer fluid level
C Please add washer fluid
With the ignition switched off, top up the fluid
for the winds creen washer and headlight washer
system* ¢ page 229.
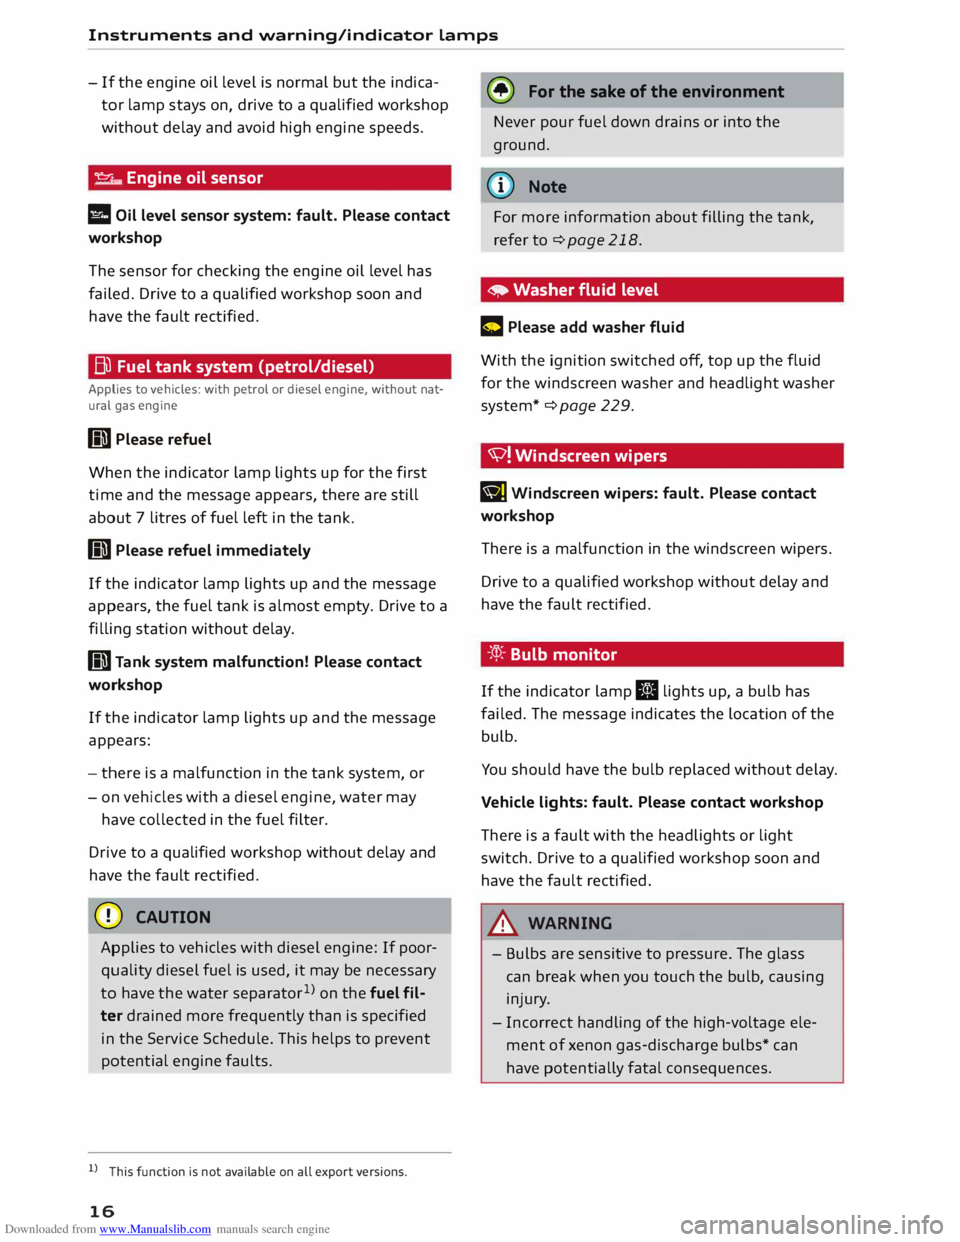
'V! Winds creen wipers
B] Windscreen
wipers: fault. Please contact
workshop
There is a malfunction in the windscreen wipers.
Drive to a qualified workshop without delay and
have the fault rectified.
-:cp:- Bulb monitor
If the indicator lamp II lights up, a bulb has
failed. The message indicates the location of the
bulb.
You should have the bulb replaced without delay.
Vehicle lights: fault. Please contact workshop
There is a fault with the headlights or light
switch. Drive to a qualified workshop soon and
have the fault rectified.
_& WARNING
- Bulbs are sensitive to pressure. The glass
can break when you touch the bulb, causing
injury.
- Incorrect handling of the high-voltage ele
ment of xenon gas-discharge bulbs* can
have potentially fatal consequences.
Page 19 of 284

Downloaded from www.Manualslib.com manuals search engine 0
N
co
....
\D L/'l
N
L/'l
.... Instruments
and warning/indicator lamps
i,(D Headlight range control
II Headlight range control: fault. See owner's
manual
There is a malfunction in the headlight range
control which may cause other road users to be
dazzled.
Drive to a qualified workshop without delay and
have the fault rectified.
§§0 Audi adaptive light
Applies to vehicles: with Audi adaptive light
Ill Audi adaptive light: fault. See owner's man
ual
There is a malfunction in the adaptive light. The
dipped beam headlights will still be working nor
mally.
Drive to a qualified workshop soon and have the
fault rectified.
fi. o Light sensor/ rain sensor
Applies to vehicles: with light sensor/ rain sensor
El Automatic headlights: fault. See owner's
manual
El Automatic wipers: fault. See owner's man
ual
The light sensor/rain sensor is out of action.
For safety reasons, the dipped beam headlights
will then be switched on permanently when the
light switch is set to the AUTO position. You can
still switch the lights on and off in the normal
way with the light switch. You can also continue
to use all the other wiper functions that do not
use the rain sensor.
Drive to a qualified workshop soon and have the
fault rectified.
Q Suspension control
Applies to vehicles: with Audi drive select
I) Suspension: fault. You can continue driving
There is a malfunction in the suspension control
system. Drive
to a qualified workshop without delay and
have the fault rectified.
¢ ¢ Turn signals and hazard warning
lights
If the indicator lamp.
or.
flashes, the turn
signals are on. If both indicator lamps flash, the
hazard warning lights are on.
If one of the indicator lamps flashes twice as fast
as usual, a turn signal bulb has failed. You should
have the bulb replaced without delay.
Of� Rear seat belt
Applies to vehicles: with seat belt warning system (rear)
The warning lamp 111,tfil lights up briefly when
the ignition is switched on.
If a rear seat belt is buckled/unbuckled, the cor
responding indicator lamp lights up briefly.
H- If the indicator lamp lights up briefly, the
corresponding rear seat is not occupied or the
seat belt is not buckled. If the seat belt is un
buckled while the vehicle is moving, you will also
hear a warning tone.
ill- If the indicator lamp lights up briefly, the
seat belt has been fastened.
@ Note
For further information on the seat belts
c::>page204.
17
Page 26 of 284
Downloaded from www.Manualslib.com manuals search engine Driver
information system
Controls
Applies to vehicles: with camera-based traffic sign recognition
')· ·.
I
,
,··· .. ,
,· Date
&time
12: 11 AM (.
�1\
.
I
..
' Tuesday
2014-1-21 ...
/ 223450,,,,
11:30-.i �
-- .
1009.0,m ?® Y
13.0"C �
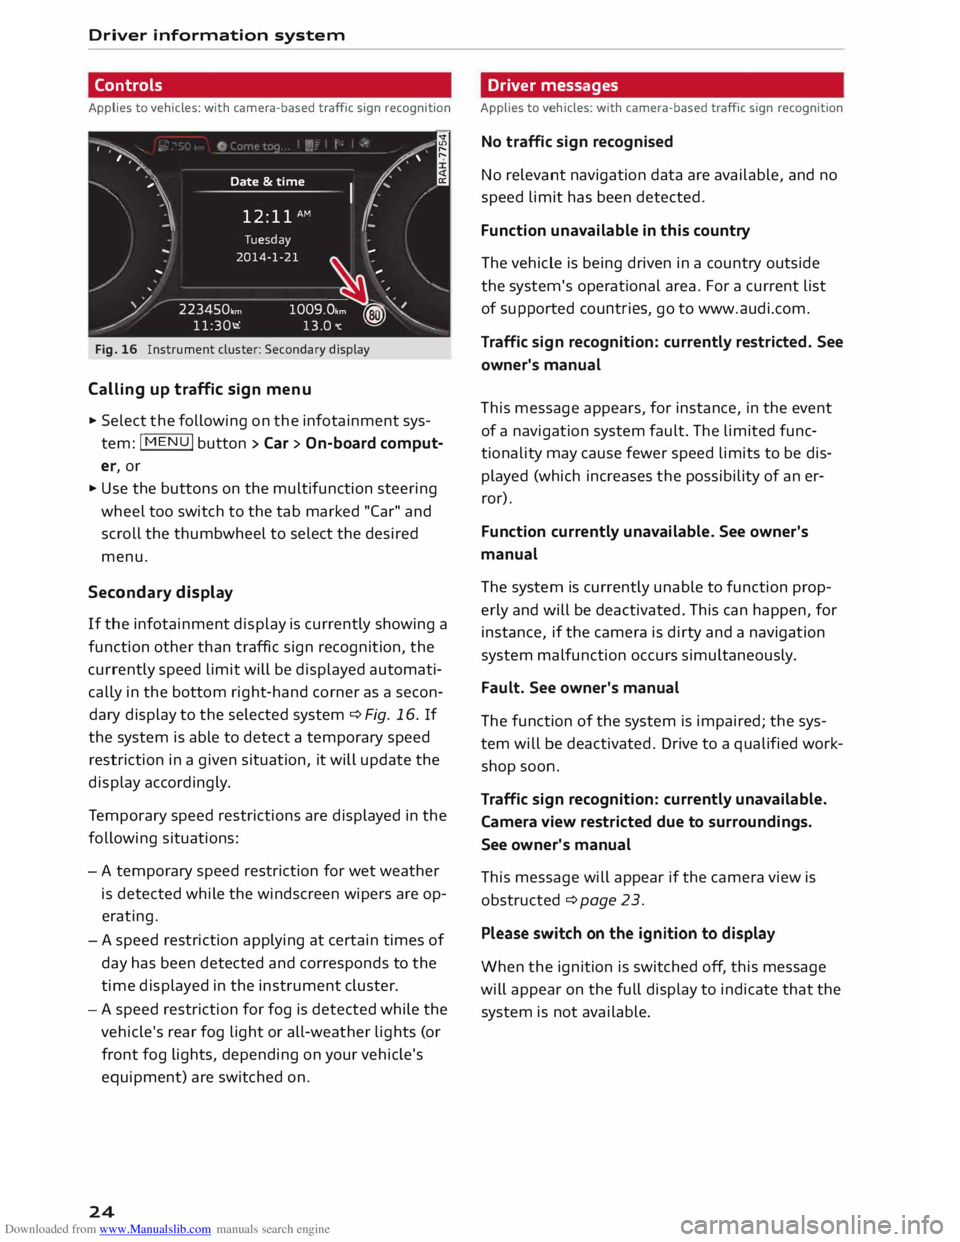
Fig. 16 Instrument cluster: Secondary display
Calling up traffic sign menu
.,. Select the following on the infotainment sys
tem: jMENUj button> Car > On-board comput
er, or
.,. Use the buttons on the multifunction steering
wheel too switch to the tab marked "Car" and
scroll the thumbwheel to select the desired
menu,
Second ary display
If the infotainment display is currently showing a
function other than traffic sign recognition, the
currently speed limit will be displayed automati
cally in the bottom right-hand corner as a secon
dary display to the selected system ¢ Fig, 16, If
the system is able to detect a temporary speed
restriction in a given situation, it will update the
display accordingly.
Te mporary speed restrictions are displayed in the
following situations:
- A temporary speed restriction for wet weather
is detected while the windscreen wipers are op
erating.
- A speed restriction applying at certain times of
day has been detected and corresponds to the
time displayed in the instrument cluster.
- A speed restriction for fog is detected while the
vehicle's rear fog light or all-weather lights (or
front fog lights, depending on your vehicle's
equipment) are switched on.
24 Driver
messages
Applies to vehicles: with camera-based traffic sign recognition
No traffic sign recognised
No relevant navigation data are available, and no
speed limit has been detected.
Function unavailable in this country
The vehicle is being driven in a country outside
the system's operational area. For a current list
of supported countries, go to www.audi.com.
Traffic sign recognition: currently restricted. See
owner's manual
This message appears, for instance, in the event
of a navigation system fault. The limited func
tionality may cause fewer speed limits to be dis
played (which increases the possibility of an er
ror).
Function currently unavailable. See owner's
manual
The system is currently unable to function prop
erly and will be deactivated. This can happen, for
instance, if the camera is dirty and a navigation
system malfunction occurs simultaneously.
Fault. See owner's manual
The function of the system is impaired; the sys
tem will be deactivated. Drive to a qualified work
shop soon.
Traffic sign recognition: currently unavailable.
Camera view restricted due to surroundings.
See owner's manual
This message will appear if the camera view is
obstructed ¢ page 23.
Please switch on the ignition to display
When the ignition is switched off, this message
will appear on the full display to indicate that the
system is not available.
Page 44 of 284
Downloaded from www.Manualslib.com manuals search engine Lights
and vision
Anti-dazzle setting
Your vehicle is equipped with a manual or auto
matic* anti-dazzle interior mirror.
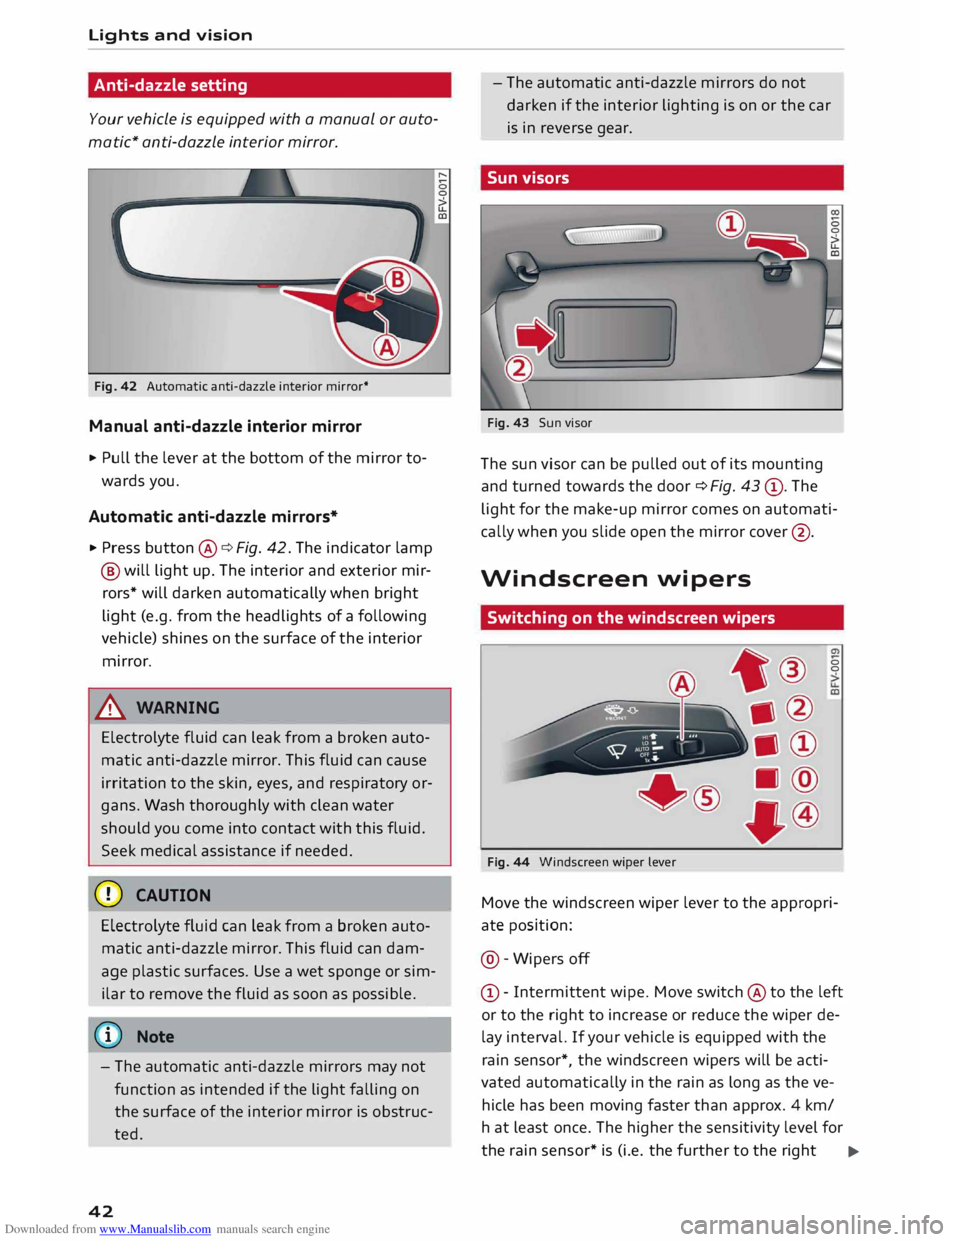
Fig. 42 Automatic anti-dazzle interior mirror*
Manual anti-dazzle interior mirror
.,. Pull the lever at the bottom of the mirror to
wards you.
Automatic anti-dazzle mirrors*
.,. Press button @¢ Fig. 42. The indicator lamp
@ will light up. The interior and exterior mir
rors* will darken automatically when bright
light (e.g. from the headlights of a following
vehicle) shines on the surface of the interior
mirror.
& WARNING
Electrolyte fluid can leak from a broken auto
matic anti-dazzle mirror. This fluid can cause
irritation to the skin, eyes, and respiratory or
gans. Wash thoroughly with clean water
should you come into contact with this fluid.
Seek medical assistance if needed.
CD CAUTION
Electrolyte fluid can Leak from a broken auto
matic anti-dazzle mirror. This fluid can dam
age plastic surfaces. Use a wet sponge or sim
ilar to remove the fluid as soon as possible.
(©) Note
- The automatic anti-dazzle mirrors may not
function as intended if the light falling on
the surface of the interior mirror is obstruc
ted.
42 -
The automatic anti-dazzle mirrors do not
darken if the interior lighting is on or the car
is in reverse gear.
Sun visors
Fig. 43 Sun visor
The sun visor can be pulled out of its mounting
and turned towards the door ¢ Fig. 43 ®· The
light for the make-up mirror comes on automati
cally when you slide open the mirror cover@ .
Windscreen wipers
Switching on the windscreen wipers
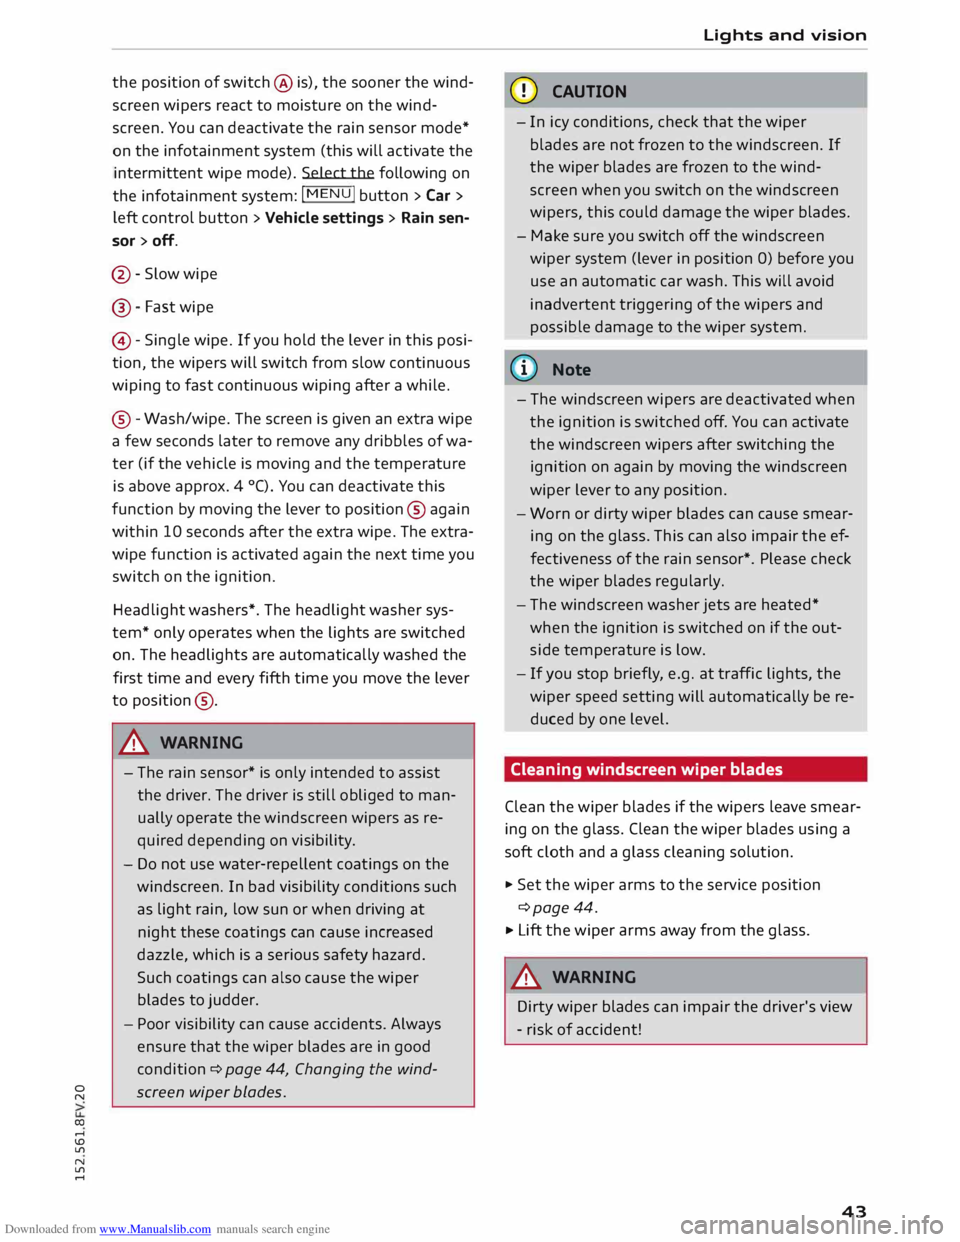
Fig. 44 Windscreen wiper Lever 0
0
Move the windscreen wiper lever to the appropri
ate position:
@ -Wipers off
© -Intermittent wipe. Move switch @ to the left
or to the right to increase or reduce the wiper de
lay interval. If your vehicle is equipped with the
rain sensor*, the windscreen wipers will be acti
vated automatically in the rain as long as the ve
hicle has been moving faster than approx. 4 km/
ha t least once. The higher the sensitivity level for
the rain sensor* is (i.e. the further to the right ..,.
Page 45 of 284
Downloaded from www.Manualslib.com manuals search engine 0
N
co
....
\D U'l
N
U'l
.... the
position of switch @ is), the sooner the wind
screen wipers react to moisture on the wind
screen. You can deactivate the rain sensor mode*
on the infotainment system (this will activate the
intermittent wipe mode). Select the following on
the infotainment system: I MENU! button
> Car >
left control button > Vehicle settings > Rain sen
sor > off.
@ -Slow wipe
@- Fast wipe
©- Single wipe. If you hold the lever in this posi
tion, the wipers will switch from slow continuous
wiping to fast continuous wiping after a while.
® -Wash/wipe. The screen is given an extra wipe
a few seconds later to remove any dribbles of wa
ter (if the vehicle is moving and the temperature
is above approx. 4 °C). You can deactivate this
function by moving the lever to position® again
within 10 seconds after the extra wipe. The extra
wipe function is activated again the next time you
switch on the ignition.
Headlight washers*. The headlight washer sys
tem* only operates when the lights are switched
on. The headlights are automatically washed the
first time and every fifth time you move the lever
to position ®·
.&_ WARNING
- The rain sensor* is only intended to assist
the driver. The driver is still obliged to man
ually operate the windscreen wipers as re
quired depending on visibility.
- Do not use water-repellent coatings on the
windscreen. In bad visibility conditions such
as light rain, low sun or when driving at
night these coatings can cause increased
dazzle, which is a serious safety hazard.
Such coatings can also cause the wiper
blades to judder.
- Poor visibility can cause accidents. Always
ensure that the wiper blades are in good
condition ¢ page 44, Changing the wind
screen wiper blades. Lights
and vision
CD CAUTION
- In icy conditions, check that the wiper
blades are not frozen to the windscreen. If
the wiper blades are frozen to the wind
screen when you switch on the windscreen
wipers, this could damage the wiper blades.
- Make sure you switch off the windscreen
wiper system (lever in position 0) before you
use an automatic car wash. This will avoid
inadvertent triggering of the wipers and
possible damage to the wiper system.
(1)) Note
- The windscreen wipers are deactivated when
the ignition is switched off. You can activate
the windscreen wipers after switching the
ignition on again by moving the windscreen
wiper lever to any position.
- Worn or dirty wiper blades can cause smear
ing on the glass. This can also impair the ef
fectiveness of the rain sensor*. Please check
the wiper blades regularly.
- The windscreen washer jets are heated*
when the ignition is switched on if the out
side temperature is low.
- If you stop briefly, e.g. at traffic lights, the
wiper speed setting will automatically be re
duced by one level.
Cleaning windscreen wiper blades
Clean the wiper blades if the wipers leave smear
ing on the glass. Clean the wiper blades using a
soft cloth and a glass cleaning solution.
..,. Set the wiper arms to the service position
¢page 44.
..,. Lift the wiper arms away from the glass.
.&_ WARNING
Dirty wiper blades can impair the driver's view
- risk of accident!
43
Page 46 of 284
Downloaded from www.Manualslib.com manuals search engine Lights
and vision
Changing the windscreen wiper blades
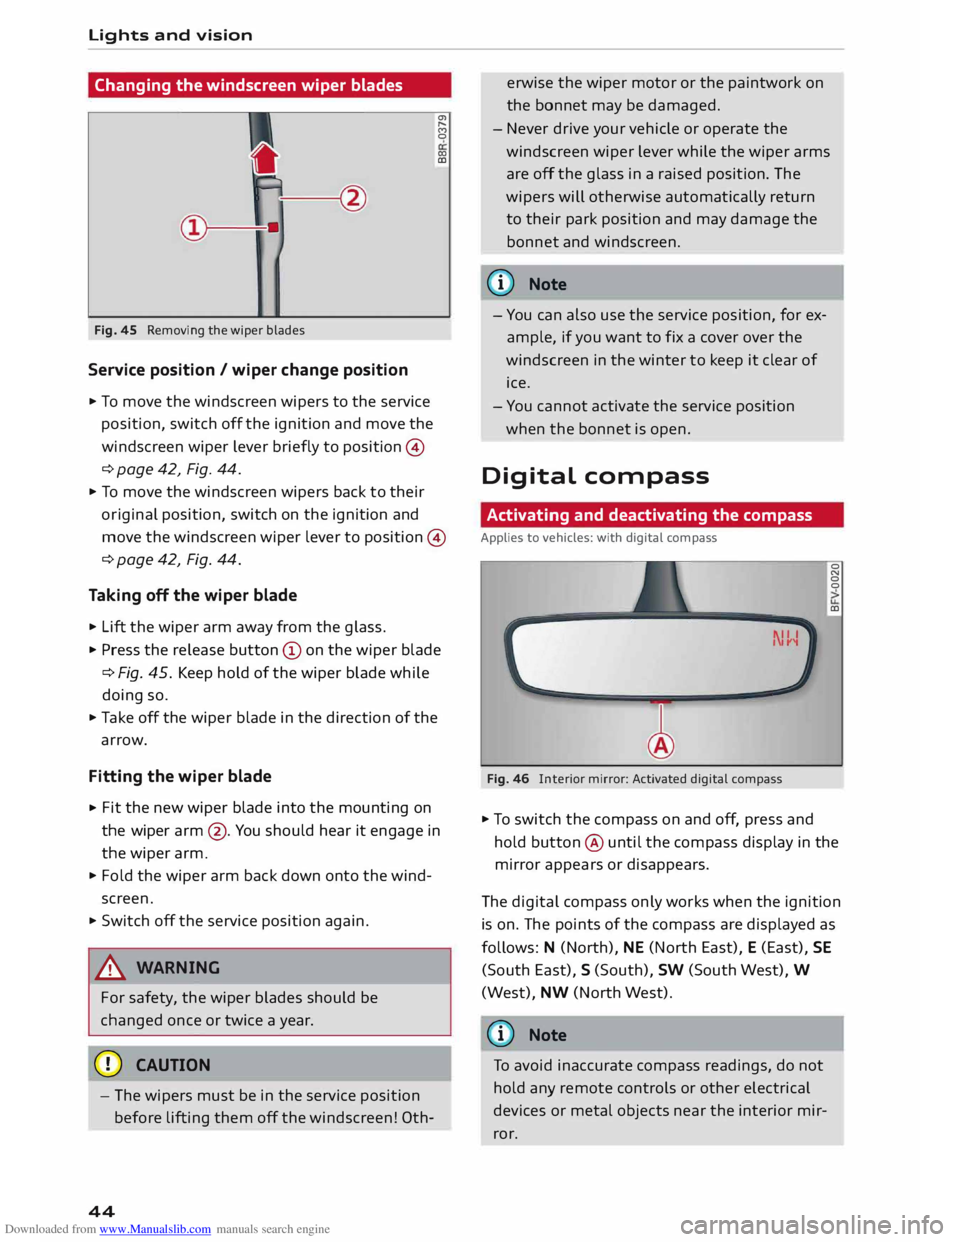
Fig. 45 Removing the wiper blades
Service position / wiper change position
.., To move the windscreen wipers to the service
position, switch off the ignition and move the
windscreen wiper lever briefly to position ©
¢ page 42, Fig. 44. a,
,.....
f')
0
(X)
co
.., To move the windscreen wipers back to their
or iginal position, switch on the ignition and
move the windscreen wiper lever to position ©
¢ page 42, Fig. 44.
Taking off the wiper blade
.., Lift the wiper arm away from the glass .
.., Press the release button© on the wiper blade
¢Fig. 45. Keep hold of the wiper blade while
doing so .
.., Take off the wiper blade in the direction of the
arrow.
Fitting the wiper blade
.., Fit
the new wiper blade into the mounting on
the wiper arm@. You should hear it engage in
the wiper arm.
.., Fold the wiper arm back down onto the wind
screen .
.., Switch off the service position again.
& WARNING
For safety, the wiper blades should be
changed once or twice a year.
CD CAUTION
- The wipers must be in the service position
before lifting them off the windscreen! 0th-
44 erwise
the wiper motor or the paintwork on
the bonnet may be damaged.
- Never drive your vehicle or operate the
windscreen wiper lever while the wiper arms
are off the glass in a raised position. The
wipers will otherwise automatically return
to their park position and may damage the
bonnet and windscreen.
@ Note
- You can also use the service position, for ex
ample, if you want to fix a cover over the
windscreen in the winter to keep it clear of
ice .
- You cannot activate the service position
when the bonnet is open.
Digital compass
Activating and deactivating the compass
Applies to vehicles: with digital compass
Fig. 46 lllterior mirror: Activated digital compass 0
N
0
0
co
.., To switch the compass on and off, press and
hold button @ until the compass display in the
mirror appears or disappears .
The digital compass only works when the ignition
is on. The points of the compass are displayed as
follows: N (North), NE (North East), E (East), SE
(South East), S (South), SW (South West), W
(West), NW (North West).
(D Note
To avoid inaccurate compass readings, do not
hold any remote controls or other electrical
devices or metal objects near the interior mir
ror.
Page 103 of 284
Downloaded from www.Manualslib.com manuals search engine Intelligent
technology
Electro-mechanical
power steering
Electro-mechanical power steering assists the
driver when steering.
The degree of power assistance is adapted elec
tronically, depending on the speed.
If the power steering should fail at any time or
the engine is switched off (for instance when be
ing towed), the car can still be steered. However,
substantially more effort than normal will be re
quired to turn the steering wheel.
Warning/indicator lamps and driver
messages
• Steering: fault. Please stop vehicle
If the warning lamp lights up permanently and
the message appears, there may be a power
steering failure.
Do NOT drive on. Obtain professional assistance.
• Steering: fault. Please stop vehicle
There is a malfunction in the electronic steering
lock. The ignition can no longer be switched on.
Do not have the vehicle towed away, because you
won't be able to steer it. Obtain professional as
sistance.
G'!b Steering:
fault. You can continue driving
If the indicator lamp lights up, the steering re
sponse may be heavier or lighter than usual. In
addition, it is possible that the steering wheel
will be off centre when driving in a straight line.
Drive slowly to a qualified workshop and have the
fault rectified.
Ive Steering
lock: fault. Please contact work
shop
There is a malfunction in the electronic steering
lock.
� Drive
to a qualified workshop soon and have the
a: fault rectified.
....
\D Lfl
N
Lfl
.... Intelligent
technology
A WARNING
Have the system malfunction repaired by a
qualified workshop as soon as possible -risk
of accident!
«]} Note
You can drive on if the warning/indicator lamp
• or mJ lights up only briefly.
Brakes
New brake pads
New brake pads do not give full braking effect for
the first 400 km, they must first be "bedded in".
However, you can compensate for the slightly re
duced braking effect by applying more pressure
on the brake pedal. Avoid placing a heavy load on
the brakes during the running-in period.
Wear The rate of wear on the brake pads depends a
great deal on how you drive and the conditions in
which the vehicle is operated. Negative factors
are, for instance, city traffic, frequent short trips
or hard driving with abrupt starts and stops.
Noises Brake noise may develop in certain situations, de
pending on the speed, braking force and ambient
conditions (such as temperature and relative hu
midity).
Effect of moisture and salt
In certain conditions, such as in heavy rain, or af
ter washing the car or driving through water, the
full braking effect can be delayed by moisture (or
in winter by ice) on the discs and brake pads. The
brakes should be "dried" by pressing the pedal to
restore full braking effect.
When you are driving at higher speeds with the
windscreen wipers on, the brake pads are very
briefly brought into contact with the brake discs.
This automatic process which goes unnoticed by
the driver is carried out at regular intervals and is
intended to improve braking response in wet con-
ditions. ..,..
101