AUDI TT ROADSTER 2008 Owners Manual
Manufacturer: AUDI, Model Year: 2008, Model line: TT ROADSTER, Model: AUDI TT ROADSTER 2008Pages: 316, PDF Size: 70.1 MB
Page 111 of 316
_________________________________________________ O .=.:.n.:....: t~h :.::e ::....:.. r.::o :.::a :.:d::...__lfflll
- Wit h a manual transm issi on, engage 1st gea r, or with a n
a utomatic transmission place the se lector lever in P
=> & .
- Remove the ignition key from the ignit io n lock.
Wha t el se you should do wh en parking yo ur v ehi cle on
a n incli ne or d ecline
Turn the steering whee l so that if the vehicle shou ld start to rol l, it
wi ll roll into the curb.
I f you are park ing on a
decline (the front of you r ve hicle facing
downhill) , turn the front wheels to the right so that they poin t
toward the curb .
If you are park ing on an in cline (the font of your vehicle facing
uphill!, turn the front whe els to the left so that they point
away from
the curb .
& WARNING
This is how you can reduce the ri sk of injury when le avi ng your
vehicle .
• Never p ark the vehi cle w here it can come
in cont act w ith dry
gra ss, s pilled fuel or any other flammable mater ial s.
• Never allow anyone -espe cially small ch ildren -to remain
in the
vehicle when it is locked . Locked doors make it more difficult for
re scu ers to ac ce ss the pa ssenger compartment in the e vent of an
emergency . Danger to life!
• Never lea ve childr en un super vis ed in the vehicle . Children
c ould release the parking brake or move the gearsh ift l ever out of
gear . The vehicle could start to r oll away a nd cau se an a ccident .
• No matter what the season i s, the temperature
in a parked
v ehi cle can reach dangerou s level s. •
Controls and equip
ment
Acoustic parking system
A pplies to veh ic les : wit h 4 -ch anne l a cou stic park ass is t
Rear acoustic park assist
Acoustic park assist gives a warning a bout o bstacles
behind the vehicle.
Description
The rear acoustic park assist (4 -channel acoustic park assist) deter
mines the d istance of the vehic le from an obstac le using u ltrasonic
sensors. The sensors are in the rear bumper. The volume and the
pitch of the chimes can be adjusted through the menu display
=> page 27.
The range at which the sensors start to m easure is about :
To the side
Center rear
Acti v atio n
2 feet (0 .60 m)
5 feet (1.60 ml
The pa rking assist is activated when rever se ge ar is engaged . A brief
tone confirms that the system is activated .
Backing up
Distance warning when backing up starts when an obstacle is
detec ted in the range of the park ass ist system . As the distance
decreases, the time interval between the aud ible tones becomes
shorter .
When the distance is less than 1 foot (0.30 m) , the tone becomes
continuous . At this point you should stop backing up.
Please note that low objects a lready signalled by a warning can
disappear from the sys tem's detection range and wil l not continue
t o be signa lled . ..,
I • •
Page 112 of 316
• ..__O_ n_ t_h _ e_ r_ o_ a_ d ____________________________________________________ _
Pote nt ial malf un cti ons
If a warning buzzer sounds for a few seconds when the ign ition is
switched on, there is a system malfunction with the acoustic park
assist. If the malfunction persists until the ignition is switched off,
there will be no acoustic warning at the next attempt to activate the system. Have the problem corrected.
There is no confirmation tone when reverse gea r is engaged if there
is a system malfunction .
For the parking assist to operate, the sensors must be kept clean
and free of ice.
& WARNING
• Sen sor s hav e blind spots in w hic h obj ec ts can not b e dete cted.
P ay s pecial attenti on to small childr en and anim als . They cannot
al ways be dete cte d b y the sensor s -dan ger of an accident !
• The p arking a ssis t cann ot r eplace th e driver' s attention . The
d rive r alone is re spon sible f or p ark ing an d simil ar d riv ing mane u
ver s. A lway s wat ch whe re you are driving .
(D Note
Low obstacles a lready signa lled by a warn ing can disappear from
the system's detection range as they are approached and wi ll not
continue to be signalled. Objects such as barrier chains, trailer draw
bars, thin pa inted vertical poles , or fences may not be detected by
the system -risk of damage.
[ i J Tip s
For the parking assist to operate, the sensors must be kept clean
and free of snow and ice. •
Cruise control
Switching the system on
The cruise control system makes it possible t o drive at a
constant speed sta rting at 20 mph (30 km/h) .
Fig. 103 C ontrol l ever
w ith se t butt on
Fig . 104 Di sp lay :
Se lec te d spee d
Pull the lever @ to posit ion (D ::::> fig. 103 to sw itch t he
system on.
Drive at the speed y ou wis h to se t.
Press button
@ to set that speed.
The disp lay=> fig. 104 will show the set speed . The display may vary
depending on the type of display in your vehicle . The indicator light
~
Page 113 of 316
On the road -
----------------
CRUISE (US mod ell/ f-f (Canadian mod ell will a lso light up in the
instrument cluster .
& WARNING
• Always pay att enti on to traffic ev en whe n the c rui se control is
swi tched o n. Yo u are alway s resp onsi ble for your spe ed and the
di stanc e betw een your veh icle and other ve hic le s.
• Fo r sa fet y re as on s, th e c ruise control shou ld not be u sed in the
c it y, in stop -and -go traffic , on twi sting road s and when road condi
t ion s a re poor (such as ice, fog, gra vel, hea vy ra in and hydro
planing ) - risk of accid ent.
• Turn off the cr uis e control t empor arily when e nte ring turn
lane s, highwa y ex it lane s or in con stru ctio n z one s.
• Please note that inad vertentl y "re sting " your foot on the a ccel
er ato r ped al ca use s t he crui se control not to br ake . Thi s is because
the cru ise control i s overridden b y the dri ve r's acc eleration .
[ i] Tip s
• Vehicles w ith manua l transmission : You can at tain the set speed
only if the currently engaged gear allows it and the engine is not
stressed. Shifting to a higher or lower gear promptly will allow the
engine to run smooth ly .
• The cruise control cannot maintain a constant speed when
driving downhi ll. The vehicle will acce lerate under its own weight .
Downshift to a lower gear or use the brakes to s low down. •
Changing speed
-Press lever © in the 0 or O direction ~ page 110,
fig. 103 to increase or dec rease your speed.
- Release the lever to save that speed .
Controls and equip
ment
Change speed in increments of 1 mph (1 km/h) by lightly pressing
the lever . If you keep the lever pressed down, you will a lter your
speed in 5 mph (10 km /h) increments .
You can a lso press the acce lerator pedal down to increase your
speed, e.g. if you want to pass someone. The speed you saved
earlier will resume as soon as you release the accelerator pedal.
I f , however, you exceed your saved speed by 5 mph (10 km/h) for
longer than 5 minutes, the cruise control will turn off temporarily .
The symbol will go ou t but the saved speed will be retained. •
Presetting your sp eed
You can preset your desired speed while the vehicle is not
moving.
Turn on the ignition.
P ull lever @into position
0 ~ page 110, fig. 103.
Press the lever in the
0 or O direction to increase or
decrease your speed.
- Release the lever to save that speed .
This function makes it possible, for example, to save the speed you
want before driving on the highway . Once on the highway, activate
the cruise contro l by pulling the lever toward
(D . •
Switching the system off
Tempor ary d ea ctiv ati o n
Press the brake pedal, or
- Keep the c lutch pedal pressed down
longer, or
- Press t he lever © into positio n
0 (n ot c licked i nto pla ce)
~ page 110 , fig. 1 03 , or ~
I • •
Page 114 of 316
-On th
e ro ad
..___ ______________ _
- Drive for longer than 5 minutes at more than 5 m ph
(10 km/h) above the st ored speed .
Switching off compl etely
Press lever @ into pos ition 0 (c licked into place), or
- Sw itch the ignition off .
The system retains the saved speed if you deactivate the cruise
control temporarily. To resume the saved speed, release the brake or
clutch peda l and pull the leve r to position
G) .
Switching the igni tion off erases the saved speed .
& WARNING
You should only return t o the saved speed if it i s not t oo f ast for
the current tr affi c c ondition s -ri sk of an accid ent! •
App lies t o vehicles: wit h magn etic rid e
Audi magnetic ride
Damping can be adjusted to the driver's preference and it
a dap ts automa tically t o the current driv ing si tuation.
F ig . 105 C enter
co nsole: Sw itch for
A udi m agn etic ride
Press the switch => fig. 105 to turn sport sett ing on or off .
Audi magnetic ride is an e lectronically controlled damping system.
This chassis system assists the driver by adap ting to the particular
situation through imperceptib le control processes. The
damping
provides individua l modulation of damp ing forces. For example,
with damping characteristics set to provide greater comfort ,
damping is set somewhat harder for a brief period only as required,
when rounding a curve and when braking .
Standard setting
Select the standard setting if you prefer a suspension setting
emphasizing comfort .
Spo rt setting
Se lect the sport setting if you prefer a sporty suspension setting .
The LED in the switch comes on to indicate sport setting.
[ i ] Tip s
The warning/indicator light in the ins trument cluster comes on in
the event of a malfunction. Drive to the c losest authori zed Audi
dea ler as soon as possible and have the malfunction repaired. •
Page 115 of 316
Transmi ssion -_______________ ___.
Transmission
Manual transmission
Applies to vehicles: with manual transmission
Gearshift lever
The clutch pedal must be depressed all the way before
you can start the engine .
The manual transmission in your Audi is equipped with a n
interlock-feature.
-Depress the clutch pedal all the way.
- Start the eng ine with t he gearshift
lever i n Neutra l and
the clutch pedal depressed .
0 Note
Always depress the clutch pedal fully when changing gears. Do not
hold the vehicle on a hi ll with the c lutch pedal partially depressed .
This may cause premature clutch wear or damage .
[ i J Tip s
• Resting your hand on the gearshift lever knob while driving will
cause premature wear in the transmission .
• T he back -up lights go on when you shift into Reverse with the
ignition on .•
Con tro ls and eq uip
ment
App lies to vehicles: with manual transm ission
Gearshift pattern (6-speed manual
transmission )
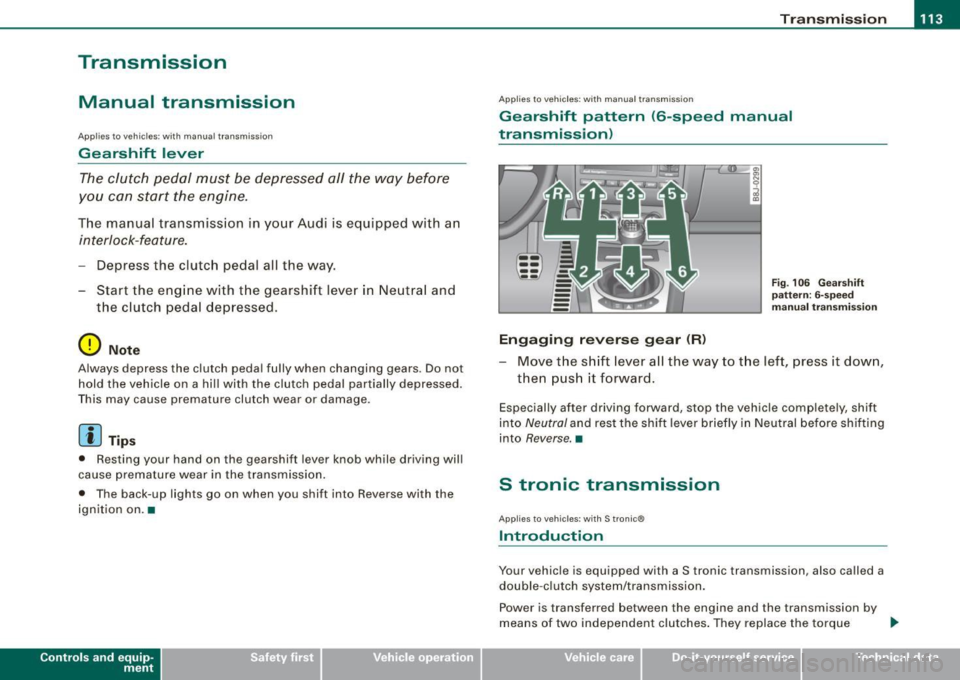
Engaging reverse gear (R)
Fi g. 106 G ear sh ift
patt ern : 6-s peed
manual tr an sm iss ion
Move the shift lever all the way to t he left, press it dow n,
then pus h it forward .
Especially after driving forward, stop the vehic le completely, shift
into
Neutral and rest the shift lever briefly in Neutral before shifting
into
Reverse. •
S tronic transmission
Applies to vehic les: w ith S tronic®
Introduction
Your vehicle is equipped with a S tronic transmission, also called a
double -c lu tch system/transmission .
Power is transferred between the engine and the transmission by
means of two independent clutches. They replace the torque
tJ,,,
Vehicle care I I irechnical data
Page 116 of 316
_L--_T.:...:.. ra:::.:.. n;.:s:..: m:.:....:..: i;.: s ;.:s:..: i;.: o :....:n...:.... __________________________________________________ _
converter of conventional automatic transmissions and allow the
vehic le to accelerate without a noticeable break in the power flow.
With the aid of
tiptronic , the gears can optionally be shifted manu
ally~ page 118 . •
Ap plies to ve hic les: w ith S troni c®
Driving Notes
The forward gears are shifted up or down automatically.
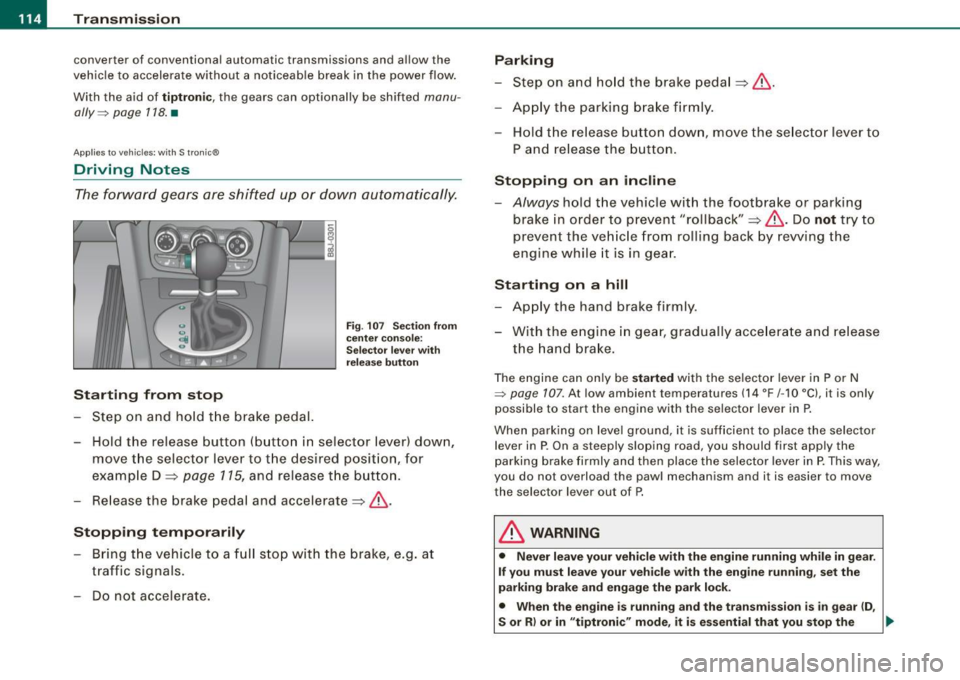
Starting from stop
Step on and hold t he brake pedal.
Fig. 107 Section from
ce nter console:
Selector lever with
release button
-Hold the release button (button in selector lever) down,
move the selector lever to t he desired position, for
example D :::>
page 115, and release the button.
- Release the brake pedal and accelerate:::>& .
Stopping temporarily
-Bring th e vehicle to a full stop with the brake, e.g. at
traffic signals.
- Do not accelerate.
Parking
-Step on and hold the brake pedal :::> & .
- Apply the parking brake firmly .
- Hold the release button down, move the selector lever to
P and release the button.
Stopping on an incline
-Always hold the vehic le with the footbrake or parking
brake in orde r to prevent "rollback":::> &. Do
not try to
prevent the vehicle from rolling back by rewing the
engine while it is in gear.
Starting on a hill
- Apply the hand brake firmly .
- With the engine in gear, gradually accelerate and release
the hand brake.
The engine can on ly be started with the selector lever in P or N
~ page 107. At low ambient temperatures (14 °F /-1 O °C), it is only
possible to start the engine with the se lector lever in P.
When park ing on leve l ground, it is sufficient to place the selector
lever in P. On a steeply sloping road , you should first apply the
parking brake firmly and then place the selector lever in
P. This way,
you do not overload the paw l mechanism and it is easier to move
the selector lever out of P.
& WARNING
• Never leave your vehicle with the engine running while in gear.
If you must leave your vehicle with the engine running, set the
parking brake and engage the park lock .
• When the engine is running and the transmission is in gear (D ,
S or R ) or in "tiptronic " mode , it is essential that you stop the
~
Page 117 of 316
Transmission -
----------------
& WARNIN G (continu ed )
vehi cle w it h the footbrake . When idl ing , the tr ansmission of power
does not stop completely -the vehicle "creeps ".
• Do not ac celerate when you change the selector lever position
with the vehicle stationary and the engine running -risk of an acci
dent!
• Never place the selector lever
in the R or N position while the
vehicle is mov ing -risk of an accident !
• If you have to bring your vehicle to a stop while on an incline ,
keep the foot brake depressed all the way down so that the vehicle
does not start to roll backward. You should never hold the vehicle
using the clutch pedal if you are going to be stopped on an incline .
If you do , the clutch will start to slip when it overhe ats cau sed by
the constant overload . This is dangero us because if the vehicle
starts to roll backward , you could cause an accident. If the clutch
should start to slip , you will feel the vehicle "jerk" and the sele ctor
lever display will start blinking.
• Before driving down a steep slope , reduce your speed and shift
into a lower gear with "tiptronic ".
• Do not ride the brakes or apply the brake pedal too often or too
long. Constant braking causes the brakes to overheat and
substantially reduces braking performance , increases braking
di stance or cau ses complete failure of the brake system. •
Controls and equip
ment
Ap plies to vehic les: w ith S tronic®
Selector lever positions
All the selec tor le ver posi tions are e xplai ned in this
se cti on.
Fig . 108 D ispl ay:
Selector lever po si
tion s
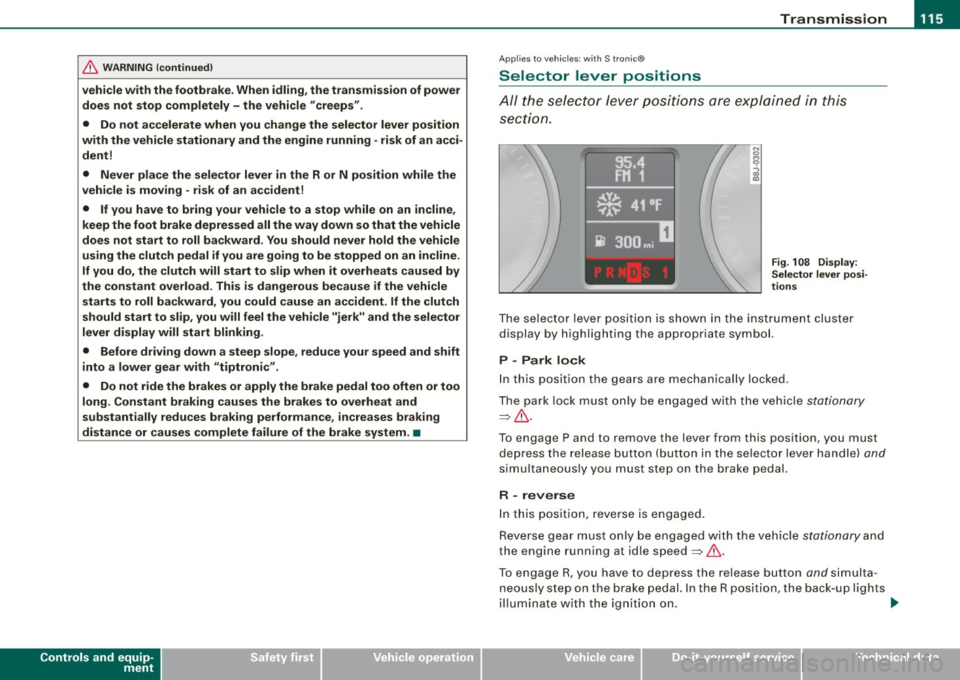
The se lector l ever po siti on i s sho wn in t he instr ument cluste r
display by highlighting the appropriate symbol.
P -Park lock
In this position the gears are mechanically locked .
T he pa rk lock must only be e ngage d with th e ve hicle
stationa ry
=> & .
T o engage P and to remove the lever from this position, you must
de press the re lease button (but to n i n the se lec to r l ever ha ndle)
and
simu ltaneously you must step on the brake pedal.
R -reverse
In this positio n, reve rse is engaged.
Reverse gear mus t o nl y be engaged with the vehic le
stationary and
the engine running at id le speed =>& .
To e ngage R, you ha ve to depres s the re lease button
and s im ult a
neous ly st ep on the brake p edal. In the R position, the back -up l ights
il lu mina te with the ig niti on on. ...
I • •
Page 118 of 316
....... _T _r_a _ n_ s_m _ i_s _s _i_o _n ______________________________________________________ _
N -Neutral
The transmission is in neutral in this position.
D -Normal position for driving forward
In this position, the forward gears are automatically shifted up and
down, depending on engine load and vehicle speed.
To engage S from N, the brake pedal must be depressed at speeds
below 5 km/h or when the vehicle is stationary=>&.
In certain circumstances (driving in the mountains for example) it
can be beneficial to switch temporarily to the manual shift program
=> page 118 in order to adjust the gear ratios to driving conditions
manually.
S -Sport setting
The S setting should be selected for sporting driving. The power
reserves of the engine can be fully exploited through later upshifts .
To engage S from N, the brake pedal must be depressed at speeds
below 5 km/h or when the vehicle is stationary=>&,.
& WARNING
• Never place the selector lever in the R or P position while the
vehicle is moving -risk of an accident!
• With the engine running, it is necessary to hold the vehicle with
the foot brake in all selector lever positions (except P and N), because even at idle speed the transfer of power is never
completely interrupted -the vehicle "creeps". If the vehicle is
stationary and the transmission is engaged, the engine should
never be speeded up unintentionally (e.g. manually from under the
hood). Otherwise the vehicle will immediately start to move -
sometimes even if the parking brake is firmly applied - risk of an
accident!
• Before you or other persons open the hood and work on a
running engine, the selector lever must be moved to P and the
& WARNING (continued)
parking brake applied firmly -risk of an accident! Follow the
warning stickers=>
page 212, "Engine compartment".
[ i] Tips
If you have inadvertently shifting into N while the vehicle is moving,
you should remove your foot from the accelerator and wait until the
engine speed has dropped to idle before shifting back to Dor S. •
Applies to vehicles : wi th S tronic ®
Selector lever lock
The selector lever lock prevents a gear from being
engaged accidentally and unintentionally setting the
vehicle in motion.
Fig. 109 Selector lever
locks
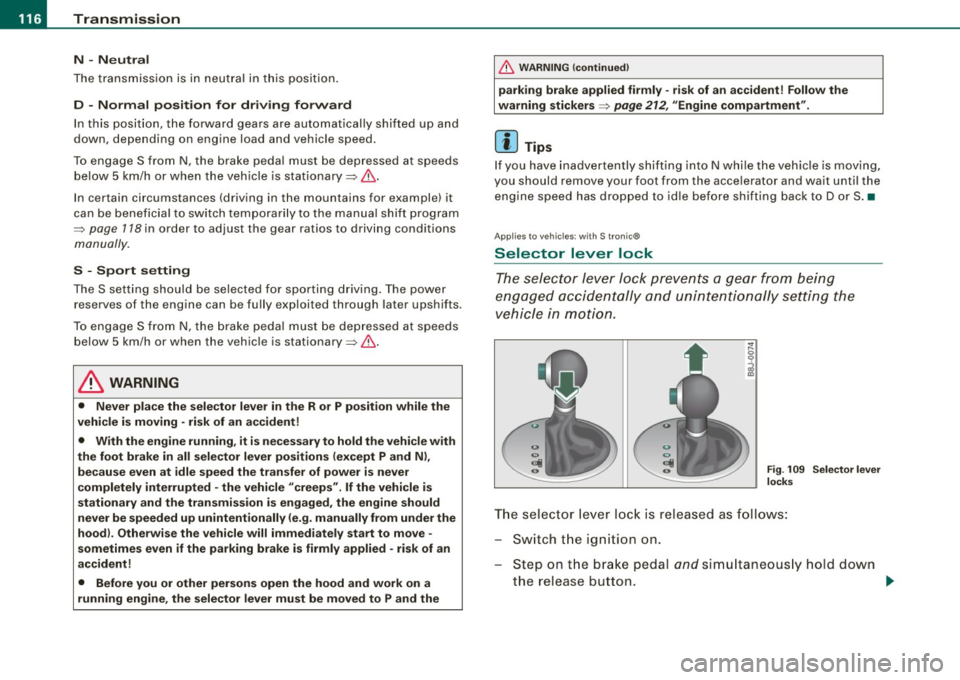
The selector lever lock is released as follows:
Switch the ignition on.
Step on the brake pedal
and simultaneously hold down
the release button. _.,
Page 119 of 316
____________________________________________________ T_ r_a _n _ s_ m __ is_ s_ i _o _ n __ ftllll
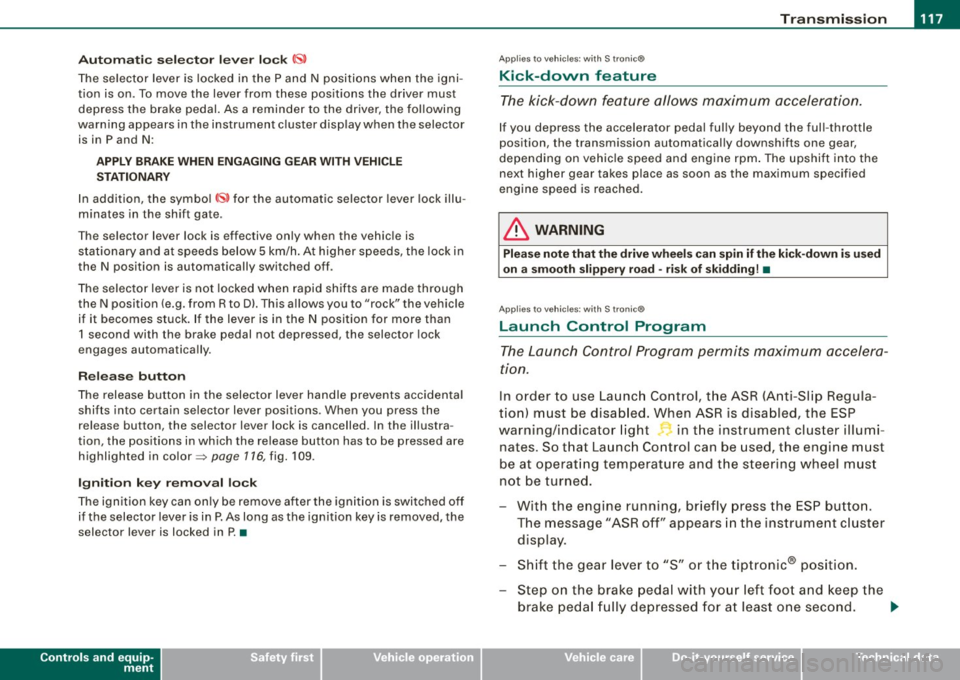
A ut omat ic selec to r l ever lock <&
The se lector lever is locked in the P and N positions when the igni
tion is on . To move the lever from these positions the driver must
depress the brake pedal. As a reminder to the driver, the fol lowing
warning appears in the instrument cluster display when the selector is in P and N:
A PP LY BRAK E WHEN ENGAGING GEAR WITH VEHIC LE
S TATIONARY
In addition, the symbo l<& for the automat ic selector lever lock illu
minates in the shift gate.
T he selector lever lock is effective only when the vehicle is
stationary and at speeds below 5 km/h . At higher speeds, the lock in
the N position is automatically switched off .
The selecto r lever is not locked when rapid shifts are made through
the N position (e.g . from R to Dl. This allows you to "rock" the vehicle
if it becomes stuck. If the lever is in the N position for more than
1 second with the brake pedal not depressed, the selector lock
engages automatica lly.
R elease button
The release button in the selector lever handle prevents accidenta l
shifts into certain selector lever positions . When you press the
release button, the selector lever lock is cancelled. In the illustra
tion, the positions in wh ich the release button has to be pressed are
highlighted in color=>
page 116, fig. 109 .
I g nition key re m ova l lock
The ignition key can on ly be remove after the ignition is switched off
if the selector lever is in P. As long as the ignition key is removed, the
selector lever is locked in P. •
Controls and equip
ment
Ap plies to vehicles: with S tronic®
Kick -down feature
T he kick-down feature allows maximum acceleration.
If you depress the accelerator pedal ful ly beyond the ful l- th rott le
position, the transmission automatical ly downshifts one gear,
depending on vehicle speed a nd engine rpm . The upshi ft into the
next higher gear takes place as soon as the maximum specified
engine speed is reached.
& WARNING
Pl ease note that the driv e wheel s can sp in if the kick -do wn is used
o n a s mooth slipper y ro ad -ri sk of sk id d ing! •
Applies to vehicles: with S tronic®
Launch Control Program
The Launch Control Program permits maximum accelera
tion.
In order to use Launc h Control, t he ASR (Anti-Slip Regula
tion) must be disab led. When ASR is disabled, the ESP
warning/indicator light
f in t he instrument cluster illumi
nates . So that Launch Control can be used, the engine must
be at operat ing temperature and the steering wheel must
not be turned.
- With the engine running, briefly press the ES P button.
The message "ASR off" appears in the instrument cluster
display .
- Shift the gear lever to "S" or the tiptronic® position.
- Step on the brake peda l w ith yo ur left foo t an d keep the
brake peda l fully depressed for at least one second. ._
I • •
Page 120 of 316
• ..__T_ ra_ n_s_ m_ i_ s _s_ i_ o _n ___________________________________________________ _
- With your right foot, step on the accelerator to the wide
open throttle position or Kickdown. The engine speed
settles at about 3,200 rpm (6-cylinder engine) or about
2,600 rpm (4-cylinder engine).
- Take your left foot off the brake.
The S tronic® in your vehicle is electronically controlled. A special
Launch Control Program provides the best acceleration from a
standing start .
& WARNING
• Always adapt your driving to the traffic flow.
• Only use Launch Control when road and traffic conditions allow
it and other drivers will not be endangered or annoyed by your
driving and the acceleration of the vehicle.
• Make sure that ESP remains enabled. With the ESP disabled,
the vehicle could brake away, particularly on a slick and slippery
road -risk of skidding!
• Once acceleration is finished, switch ASR on again by briefly
pushing the ESP button. •
Applies to vehicles: wi ths tronic®
tiptronic operation
Tiptronic allows the driver to shift gears manually.
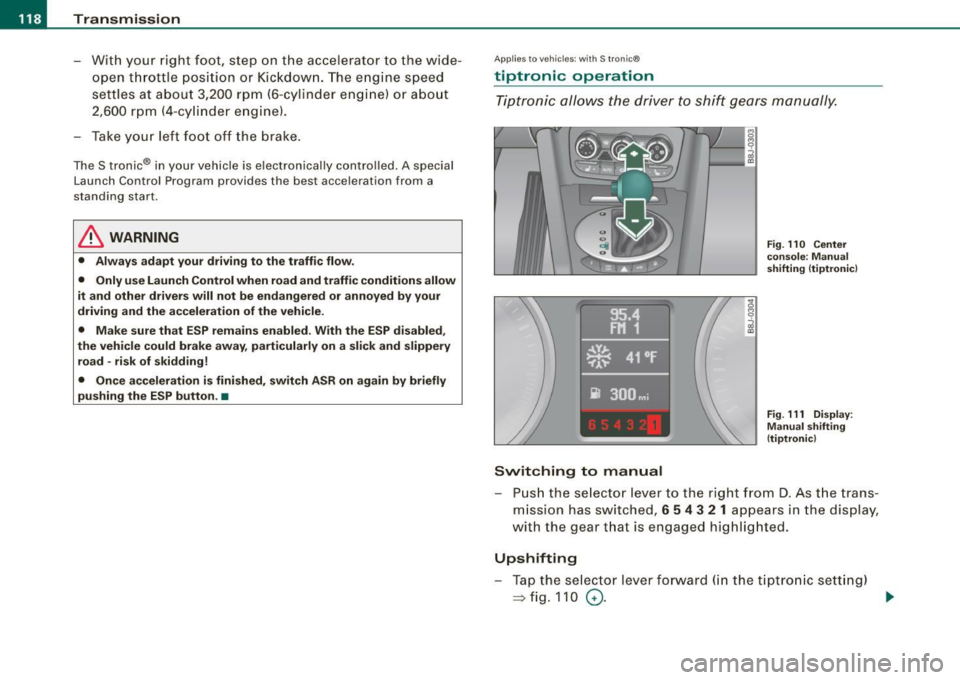
Switching to manual
Fig. 110 Center
console : Manual
shifting (tiptronicl
Fig . 111 Display:
Manual shifting
(tiptronicl
- Push the selector lever to the right from D. As the trans
mission has switched,
6 5 4 3 2 1 appears in the display,
with the gear that is engaged highlighted.
Upshifting
- Tap the selector lever forward (in the tiptronic setting)
=> fig. 110 0- ...