fuel pressure AUDI TT ROADSTER 2014 Owners Manual
[x] Cancel search | Manufacturer: AUDI, Model Year: 2014, Model line: TT ROADSTER, Model: AUDI TT ROADSTER 2014Pages: 244, PDF Size: 60.87 MB
Page 5 of 244
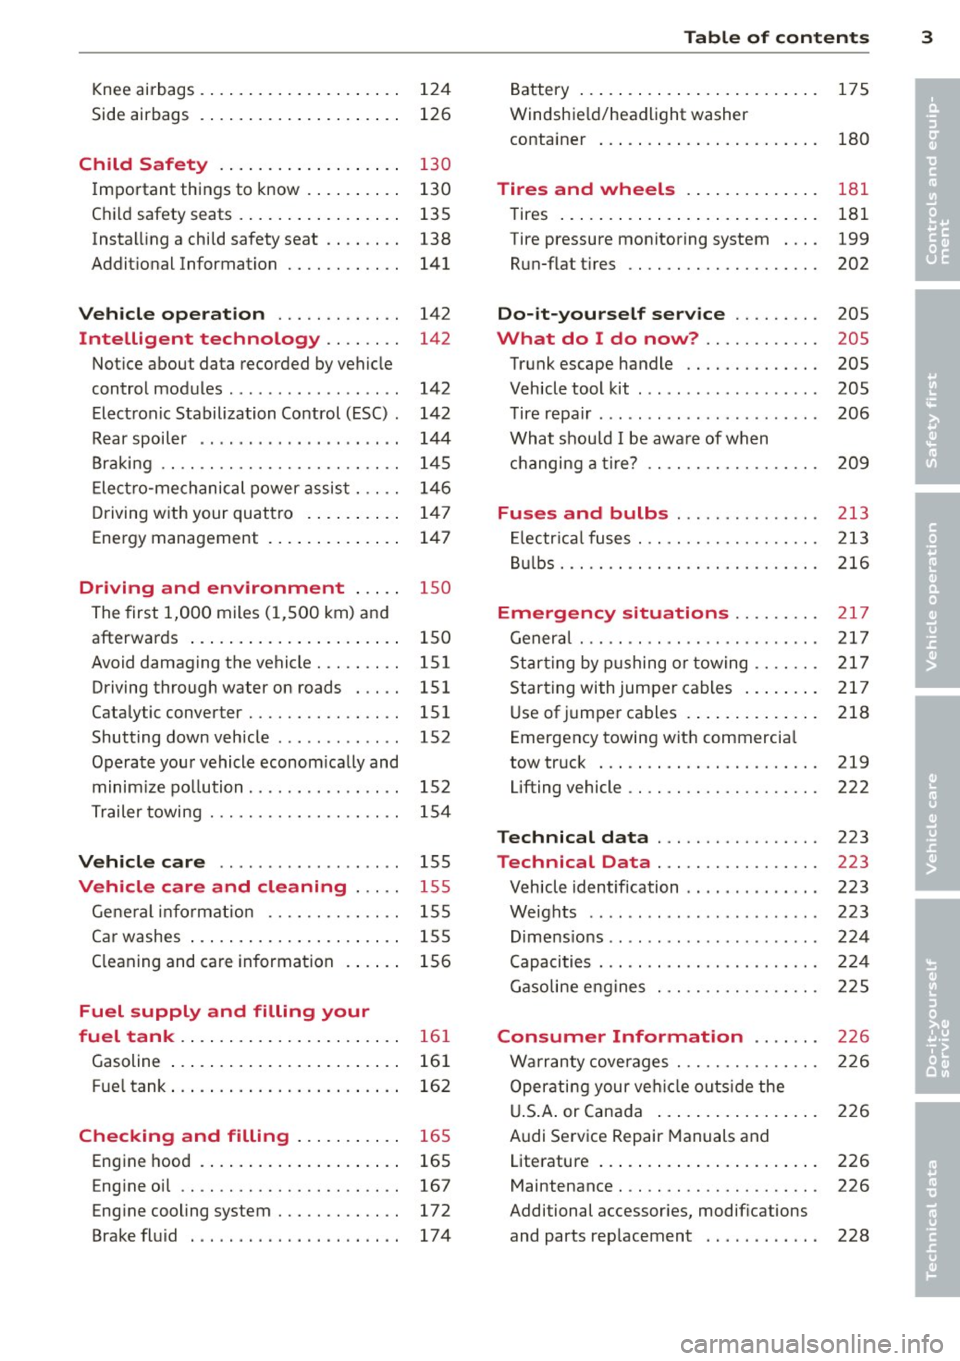
Knee airbags . . . . . . . . . . . . . . . . . . . . . 124
Side airbags . . . . . . . . . . . . . . . . . . . . . 126
Child Safety . . . . . . . . . . . . . . . . . . . 130
Important things to know ......... .
Child safety seats ................ .
Instal ling a chi ld safety seat .. .. .. . .
Additional Information ........... .
Vehicle operation ............ .
Intelligent technology .. .. .. . .
Notice about data recorded by vehicle
control modules .............. ... .
Electronic Stabilization Control (ESC) .
Rear spoiler ................ ... . .
Braking ........................ .
E lect ro-me chan ical power assis t ... . .
D riving w ith your quattro ......... .
Energy management ............. .
Driving and environment .....
The first 1,000 miles (1,500 km) and
afterwards .............. .. .. .. . .
Avoid damaging the vehicle ........ .
Driving through water on roads ... . .
Catalytic converter ............... .
Shutting down vehicle ............ .
Operate your vehicle economically and
minimize pollution ............... . 130
135
138
141
142
142
142
142
144
145
146
1 47
147
1 5 0
150
151
151 151
152
15 2
Tra iler towing . . . . . . . . . . . . . . . . . . . . 154
Vehicle care . . . . . . . . . . . . . . . . . . . 155
Vehicle care and cleaning . . . . . 155
General information . . . . . . . . . . . . . . 155
Car washes . . . . . . . . . . . . . . . . . . . . . . 155
Cleaning and care information . . . . . . 156
Fuel supply and filling your
fuel tank . . . . . . . . . . . . . . . . . . . . . . .
16 1
Gasoline . . . . . . . . . . . . . . . . . . . . . . . . 161
Fuel tank. . . . . . . . . . . . . . . . . . . . . . . . 162
Checking and filling . . . . . . . . . . . 16 5
Engine hood . . . . . . . . . . . . . . . . . . . . . 165
Eng ine oil . . . . . . . . . . . . . . . . . . . . . . . 167
Eng ine cooling system............. 172
Brake fluid ...................... 174
Table of contents 3
Battery . . . . . . . . . . . . . . . . . . . . . . . . . 175
Windshield/headlight washer
container . . . . . . . . . . . . . . . . . . . . . . . 180
Tires and wheels ........... .. .
Tires ..... .. .... .. . .. .......... .
Tire pressure monitoring system ... .
Run-flat tire s .. .. ............... .
Do-it-yourself service ........ .
What do I do now? ........... .
Trunk escape handle ............. .
Vehicle tool kit .... .............. .
T ire repai r .... ... .. ............. .
What should I be aware of when
h . t
' 7 c angmg a ire .................. .
Fuses and bulbs .. .. .. ..... ... .
El ectr ical fuses . .. .. ............. .
Bulbs .......................... .
Emergency situations ........ .
General ........................ .
Starting by pushing or towing ...... .
Starting with jumper cables ....... .
U se of jump er cables ............. .
Emergency towing with commercia l
tow truck ...................... .
Lifting vehicle .. .. ............... . 181
181
199
202
205
205
205
205
206
209
213
213
216
217
217
217
217
218
219
222
Technical data
. . . . . . . . . . . . . . . . . 223
Technical Data . . . . . . . . . . . . . . . . . 223
Vehicle identification . . . . . . . . . . . . . . 223
Weights . . . . . . . . . . . . . . . . . . . . . . . . 223
Dimensions . . . . . . . . . . . . . . . . . . . . . . 224
Capacities . . . . . . . . . . . . . . . . . . . . . . . 224
Gasoline engines . . . . . . . . . . . . . . . . . 225
Consumer Information . . . . . . . 226
Warranty coverages . . . . . . . . . . . . . . . 226
Operating your vehicle outside the
U.S. A. or Canada . . . . . . . . . . . . . . . . . 226
Audi Service Repair Manuals and
Literature . . . . . . . . . . . . . . . . . . . . . . . 226
Maintenance. . . . . . . . . . . . . . . . . . . . . 226
Additional accessories, modifications
and parts rep lacement . . . . . . . . . . . . 228
•
•
Page 18 of 244
16 Instruments and warning/indicator lights
If the I (USA models) JII (Canada models)
indicator light does not go out, or if it illumi
nates wh ile you are driv ing, or if it starts to
blink, then there is a ma lfunction somewhere
in the system . If the light does not illuminate
when you switch on the ignition, this also
means there is a malfunction .
A WARNING
If you have a malfunction in the safety sys
tems, contact your authorized Audi dealer
immediate ly. Otherwise the safety sys
tems may not wo rk properly in an acci
dent.
4 Safety belt warning light
Applies to vehicles: with safety belt warning light
The warning light is a reminder to fasten
safety belts.
The warning light . comes on for a few sec
onds after the ignit ion is switched on as a re
m inder to fasten your safety belt.
Addit ional information on safety belts
Q page 101.
0 Battery
This warning/indicator light detects a mal
function in the generator or in the vehicle's
electrical system.
The. warning/ind icator light illuminates
when you sw itch on the ignit ion a nd must go
out after the engine has started.
• Alternator fault: Battery is not being
charged
If the indicator light turns on and the mes
sage appears, there is a ma lfunction in the
generator or vehicle electr ical system.
Drive to your authorized Audi dealer or quali
fied workshop immediately . Because the vehi
cle battery is discharging, turn off all unnec
essary electrical equipment such as the radio.
Seek professional ass istance if the battery
charge level is too low.
(•) Low battery: battery will be charged
while driving
If the indicator l ight turns on and the mes
sage appears, there may be limited starting
ability.
If this message turns off after a litt le while,
the battery charged enough while driving.
If the message does not turn off, have your
authorized Aud i dealer or qualified workshop
correct the malfunction.
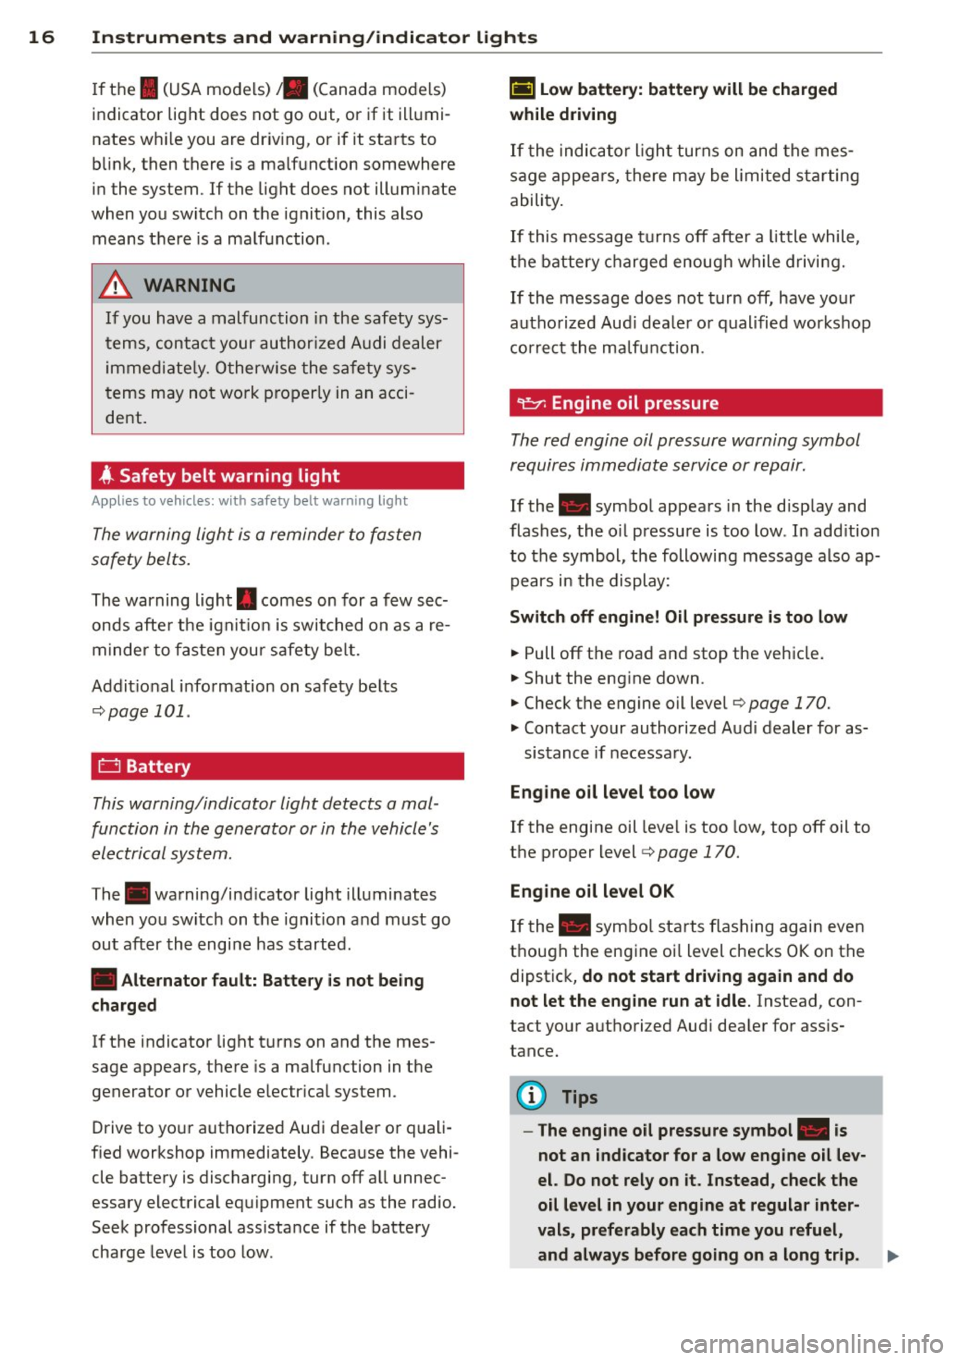
requires immediate service or repair.
If the . symbol appears in the disp lay and
flashes, the oil pressure is too low. In add ition
to the symbol, the following message also ap
pears in the display:
Switch off engine! Oil pressure is too low
.,. Pull off the road and stop the vehicle.
• Shut the eng ine down.
.,. Check the engine oil level¢ page 170.
.,. Contact your authorized Aud i dealer for as-
sistance if necessary.
Engine oil level too low
If the engine oil leve l is too low, top off oil to
the proper level¢
page 170.
Engine oil level OK
If the . symbo l starts flashing again even
though the engine oi l level checks OK on the
dipstick,
do not start driving again and do
not let the engine run at idle.
Instead, con
tact your authori zed Aud i dealer for ass is
tance.
(D Tips
- The engine oil pressure symbol. is
not an indicator for a low engine oil lev
el. Do not rely on it. Instead, check the
oil level in your engine at regular inter
vals, preferably each time you refuel,
and always before going on a long trip.
Page 29 of 244
Boost pressure indicator (boost )
A bar graph that begins on the left and fills in
towa rd the right indicates the engine's cu r
rent load (meaning the c urrent boost pres
sure) .
Engine oil t emperature indicator
If the engine oil temperat ure is be low 140 °F
(60 °C), the
't:::7-symbo l followed by th ree hy
phens" -- -'' and the °C unit is shown .
The engine has reached its opera ting temper
ature when the e ngine o il temperat ure is be
tween
176 °F (80 °() and 248 °F (1 20 °() un
der normal driving conditions. The engine oil
temperature may be higher if there is heavy
engine load and high temperatures outside.
This is not a cause for concern as long as the
• ¢ page 16 or 1\1 ¢ page 20 warning light
i n the display does not flash .
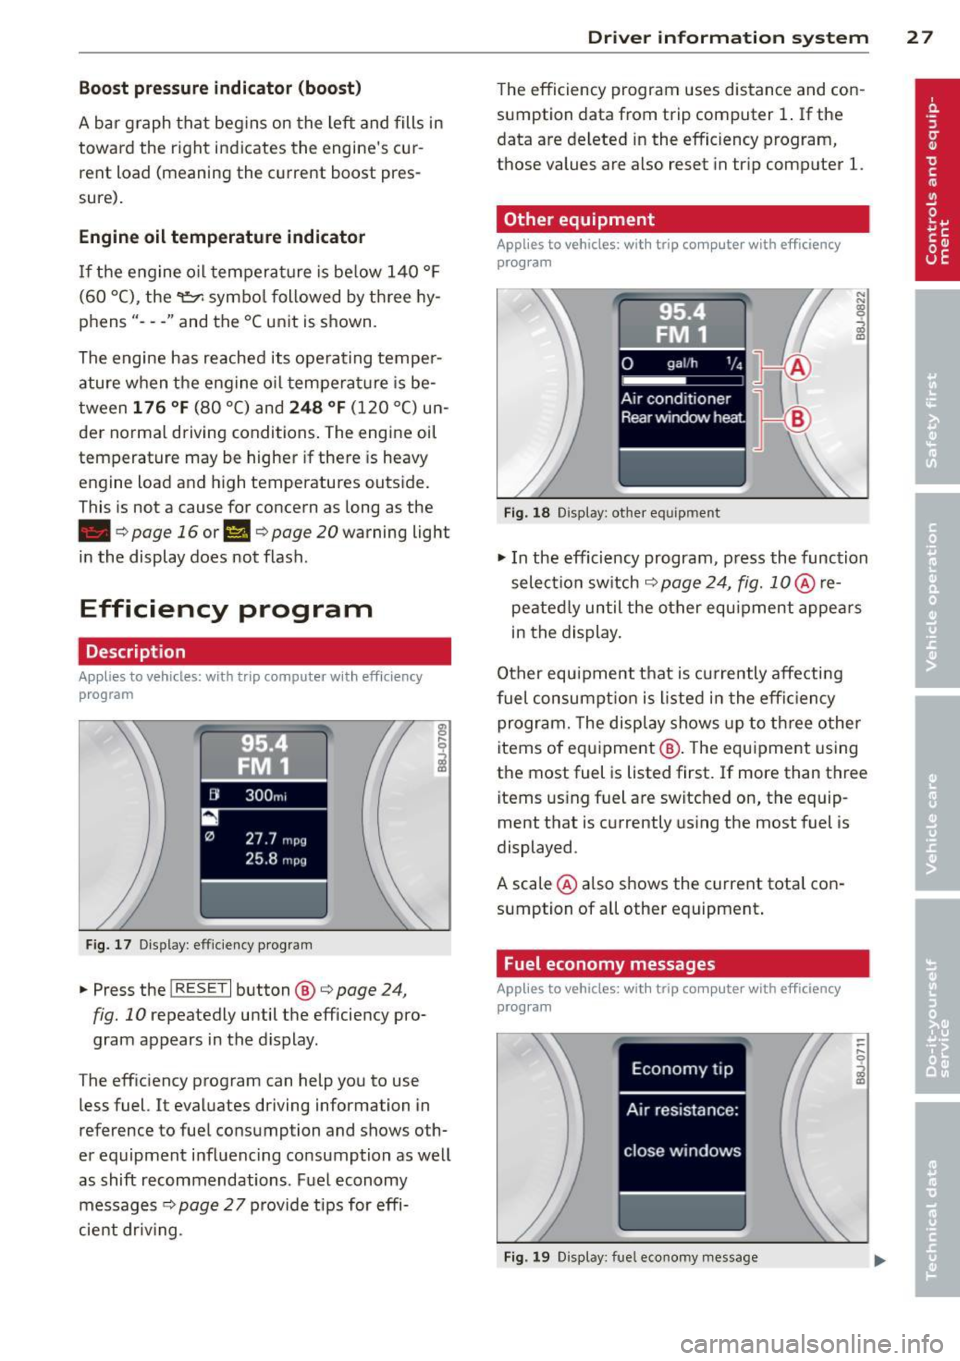
Efficiency program
Description
Applies to vehicles: with trip computer with efficiency
program
F ig. 17 Display : effic iency program
• Press the I RESE T I button @¢ page 24,
fig. 10 repeatedly until the efficiency pro
gram appears in the display.
The eff iciency program can help you to use
less fuel. It evaluates driving information in
reference to fuel consumption and shows oth
er equipment influenc ing co nsumption as well
as shift recommendations . Fuel economy
messages ¢
page 2 7 provide tips for effi
cient dr iv ing .
Dr iver in formation system 2 7
The efficiency program uses distance and con
sumption data from trip computer
1. If the
data are deleted in the efficiency program,
those values are also reset in tr ip computer
l.
Other equipment
Appl ies to vehicles: with trip computer with efficiency
prog ram
Fi g. 18 D isplay: other equ ipment
• In the efficiency program , press the function
selectio n switch
¢ page 24, fig. 1 0 @ re
peated ly until the other equipment appea rs
in the display.
Other equipment that is currently affecti ng
fuel consump tion is listed in the effi cien cy
program. The display shows up to th ree other
items of equ ipment @. The equ ipment using
the most fuel is listed first. If more than three items using fuel are switched on, the equip
ment that is currently us ing the most fuel is
displayed .
A scale @also shows the current tota l con
sumption of all other equipment .
Fuel economy messages
Applies to vehicles: with trip computer with efficiency
program
Fig . 1 9 D isplay: fue l economy message
Page 58 of 244
56 Clear vis ion
The washer jets extend forward out o f the
front bumper driven by water pressure to
spray the front headlights with water.
You shou ld inspect the headlights regularly
(for example when refueling) and clean
off
any solid dirt or insects from the lenses .
To ensure the system wo rks properly in wi nter,
keep the washer jets free of snow and remove
any ice using a de-icing spray.
Service position
It is only possible to change wiper blades if
you move the wiper arms to the service posi
tion .
In o rder to use the windsh ield wipers, t he
front lid mus t be comp lete ly closed.
Moving w iper blades to the service
position
• When there is a risk of frost, make s ure that
the wiper b lades a re not frozen to the wind
shield.
.. Switch the ignition on.
.. Move the wiper lever to position
0
c> page 54, fig. 63 .
.. Press the I Reset I button until the Displa y
typ e
menu appears in the Driver Informa
t ion System display .
.. Us ing the rocker switch and the
! Reset ! but
ton, select the
S et > W iper s > Front > Serv
ice positi on on
function. The winds hield
wiper arms move to the service position.
Moving wiper blades to park position
.. Make certain that the wiper arms are lying
against the windshie ld .
.. Switch the ign ition on and move t he wiper
l ever from posi tion
O to 4 c> page 54,
fig . 63 .
The wiper arms will move back to
the park position.
«I) Note
Never drive yo ur vehicle when the w ind
shie ld w iper arms are in the service pos i
tion and pulled away from the windshie ld .
When you dr ive faste r than 4 mp h (6 km/ h), the wiper a
rms automatically return to
the park position and cou ld cause paint
damage to the front lid!
(D Tips
- Yo u can also turn on the se rvice posit ion,
for example, if yo u want to protect the
w indshield from icing by using a cover .
- The service posit ion moves to
off a uto
matically when you operate the w ind
shield wiper lever, or speed exceeds
4 mph (6 km/h).
Cleaning windshield wiper blades
Clean the windshie ld w iper blades when they
begin to leave streaks.
.. Place the windshie ld w iper arms in the serv
ice pos it ion. Refer to
c> page 56.
.. Use a soft cloth and glass cleaner to clean
the windshield wiper blades .
A WARNING
Dirty windsh ield wipe r blades can impair
your view. This can lead to accidents .
Page 184 of 244
182 Tire s and wheel s
-Never mount used tires on yo ur vehicle if
yo u are not sure of their "previous histo
ry." Old used tires may have been dam
aged even though the damage cannot be
seen that can lead to sudden t ire failure
and loss of vehicle control.
- If you notice unusual vibration or if the
vehicle pulls to one side when driving, al
ways stop as soon as it is safe to do so
and check the wheels and tires for dam
age.
(D Note
Please note that summer and wi nte r tires
are designed for the cond itions that are
Glossary of tire and loading terminology
Accessory weight
means t he comb ined we ight (in excess of
those sta ndard items which may be rep laced)
of au toma tic tra nsmission, power s teer ing,
power brakes, power windows, power seats,
ra dio, and heater, to the extent that th ese
items are availab le as factory -installed equip
ment (whether installed or not) .
Aspect ratio
means t he ratio of the he ight to the w idth of
the tire in percent . Numbers of 55 or lower in
dicate a low sidewall for improve d steering re
sponse and better overall handling on dry pavement .
Bead
means the part of the ti re that is made of
steel wires, wrapped or reinforced by ply cords
and that is shaped to fit the rim.
Bead separation
means a b reakdown of the bond between
components in the bead.
Cord
means the strands forming the plies in the
tire . typ
ica l in those seasons . Aud i recommends
using winter tires during the winter
months . Low temperatures signif icant ly
decrease the e lasticity of summer tires,
which affects tract ion a nd brak ing ability.
If summer tires are used in very co ld tem
peratures, cracks ca n form on the tread
bars, res ulting in permanent tire damage
that can cause loud driving no ise and un
balan ced t ires. Audi i s not responsible for
th is type of damage .
Cold tire inflation pressure
means the tire p ress ure recommended by t he
vehicle manufacture r fo r a tire of a des igna ted
s iz e t hat has not bee n driven for more than a
coup le of miles (k ilometers) at low speeds in
t h e three hour period before the tire pressure
is measured or adjusted.
Curb weight
mea ns the we ight of a motor ve hicle with
standard equipment in clu din g the max imum
capacity of fuel, oil, and coolant, air condi
tioning and additional weight of optiona l
equipment.
Extra load tire
me ans a tire designed to ope rate a t higher
loads and at highe r inflation p ress ures than
the corresponding standard tire. Extra load
tires my be identified as "XL", "xl", "EXTRA
LOAD", or "RF" on the sidewall.
Gross Axle Weight Rating ("GAWR ")
me ans the lo ad -c a rry ing c apac ity of a s ingle
axle system , measured a t the tire-ground in
terfaces.
Gross Vehicle Weight Rating ("GVWR ")
mea ns the max imum total loaded we ight of
t h e ve hicl e. .,.
Page 201 of 244
or ridges on the road, particularly if the tire is underinflated .
I n o rder to m inim ize the occu rrence of impact
damage to the t ires of your vehicle, we recom
mend that you observe the following precau
tions :
- Always maintain recommended inflat ion
pressures. Chec k your tire pressure every
2,000 miles (3 ,000
km) and add air if neces
sary.
- Drive carefu lly on roads with potholes, deep
gullies or ridges. The impact from driving
through or over such obstacles can damage
your tires. Impact with a curb may a lso
cause damage to your tires.
- After any impact, immediately inspect your
tires or have them inspected by the nearest
authorized Aud i dealer. Replace a damaged
t ire as soon as possible .
- Inspect your t ires every 2,000 miles (3,000
km) for damage and wear . Damage is not al
ways easy to see. Damage can lead to loss of
air and underinflation, wh ich could eventu
ally cause tire failure . If you be lieve that a
t ire may have been damaged , replace the
t ire as soon as possible.
- T hese tires may wea r mo re qui ckly than ot h
ers.
- Please a lso remember that, whi le these tires
deliver respons ive handling, they may ride
l ess comfortably and make mo re noise than
othe r choices.
Reduced perf ormance in winter /cold
s eason condition s
All tires are des igned for certa in pu rposes.
The low aspect ratio, ultra high performance
tires originally installed on your veh icle are in
tended for maximum dry and wet road per
formance and handling . They are not suitable
for cold , snowy or icy weather condit ions .
If
you dr ive under those circums tances, you
should equip your vehicle with all -season or
winter tires, which offer better traction under
those cond itions . We suggest you use the rec
ommended snow or all-season tires specified
for your ve hicle, or their equ ivalent.
Tire s an d wheel s 199
Refer to q page 196 for more detailed infor
mation regarding winter tires.
Tire pressure monitoring system
General notes
Applies to veh icles: w ith t ire pressure monitoring system
Each tire, incl uding the spare (i f provided),
shou ld be checked monthly when co ld and in
flated to the inf lation pressure recommended
by the veh icle manufacturer on the veh icle
placard or tire inflation pressure label. (If your
vehicle ha s tires of a different size than the
s ize indicated on the vehicle placard or tire i n
flat ion pressu re labe l, you shou ld dete rm ine
the p roper t ire inflation p ress ure fo r those
t i r es.)
As an added safety feature , your ve hicle has
been equipped with a tire pressure mon ito ring
system ( TPMS) that illum inates a low ti re
pressure te lltale when one or more of your
tires is significant ly under -inflated . Acco rding
ly, when the low tire pressure te lltale i llumi
nates, you should stop and check your tires as
soon as possib le, and inflate them to the
proper pressure. Driving on a sign ificantly un
der- inflated t ire causes the tire to overheat
and can lead to tire fa ilure . Under -inflation al
so reduces fuel effic iency and tire tread life,
and may affect the vehicle 's hand ling and
stopp ing ability.
Please note that the TPMS is not a substitute
for proper tire ma intenance, and it is the driv
er's respons ibility to maintain co rrect tire
pressure, even if under-inflation has not
rea ched the level to tr igger illum inat ion of the
T PMS low tire pressure tellta le .
Your vehicle has also been equipped with a
T PMS ma lfunction indicator to ind icate when
the system is not operating prope rly . T he
T PMS ma lfunction indicator is combined with
the low tire pressure te lltale. When the sys
tem detects a malfunction , the telltale wi ll
flash for approximate ly one minute and then ..,_
•
•
Page 205 of 244
When it i s not po ssibl e to co ntinu e
d riv ing, even with run-fl at ti res?
-If the E lectronic Stabilization Control (ESC)
is not working or keeps coming on.
- If the Tire P ressure Monitoring System does
not work .
- If the tire has been severely damaged, in a
crash, for example. The tread can separate
from a damaged tire as the whee l turns, and
hit parts of the vehicle, such as the fuel tank
filler neck, fuel lines or brake lines.
- Do not continue dr iving if severe vibration
occurs or if the tire starts to smoke because
the tire is runn ing hot .
- Do not continue driving if damage to the
tire, such as cracks in the sidewall, appears.
A WARNING
Improper use of run-flat t ires can cause
vehicle damage that can lead to loss of ve
hicle control, a crash and serious personal
injury.
- Run-flat tires can only be used with spe
c ial rims.
- Run-flat tires must always be mon itored
with a properly programmed Tire Pre
ss ure Mon itor ing System.
- Always inspect a tire that has lost air to
make su re it is safe to drive w ith the t ire
in the run-flat mode.
- Never drive with run-flat tires that have
been damaged in a collision.
- Never drive with run-flat tires if heat
build-up causes the t ire to give off
smoke.
- Never drive with run-flat tires if the vehi
cle shakes or v ibrates severely.
- Never drive with a run-flat tire that de
velops sidewall cracks or other damage
wh ile in use .
- If you switch between standard and run
flat tires, an author ized Audi dealer or
qualified wo rkshop must reprogram the
control module.
Tire s an d wheel s 203
@ Note
Run-f lat ti res have special characteristics
and requirements, that are very different
from convent ional tires. Run-flat tires re
quire special rims for run-flat use and can
not be used on conventional whee l rims .
(D Tips
- If you are not able to cont inue driving
w ith run-flat tires, please seek professio
nal ass istance.
- Please contact your authorized Audi
dealer or Aud i of America, Inc . if you
have questions about t ires and rims.
Driving with run-flat tires
Applies to veh icles: w it h Run -flat t ires
Handling characteristics change when tire
pressure is low.
Driving on tires with low tire pressure changes
the way a veh icle handles, particularly when
corner ing and braking. The handling charac
teristics of run -flat tires do not seem to
change a lot even when driving on low pres
sure or in the run-flat mode . Nevertheless you
must still take specia l precautions whe n oper
at ing a veh icle on run-flat tires when t ire pres
s u re is low o r the tire(s) is flat:
" The Electronic Stabilization Contro l (E SC)
must be switched on.
" Never drive fas ter than 50 mph (80 km/h)
q .&_ .
"Plan ahead when driving and anticipate
what you will have to do considering traffic
and road conditions up ahead.
" Accelerate carefully.
" Avo id unnecessary and sudden steering and
braking maneuvers.
" Reduce your speed in plenty of t ime before
intersections, curves and other places where
you may have to react quickly .
Please see:
q page 203, When it is not possi
ble to continue driving, even with run-flat tires?
•
•
...
Page 216 of 244
214 Fuses and bulbs
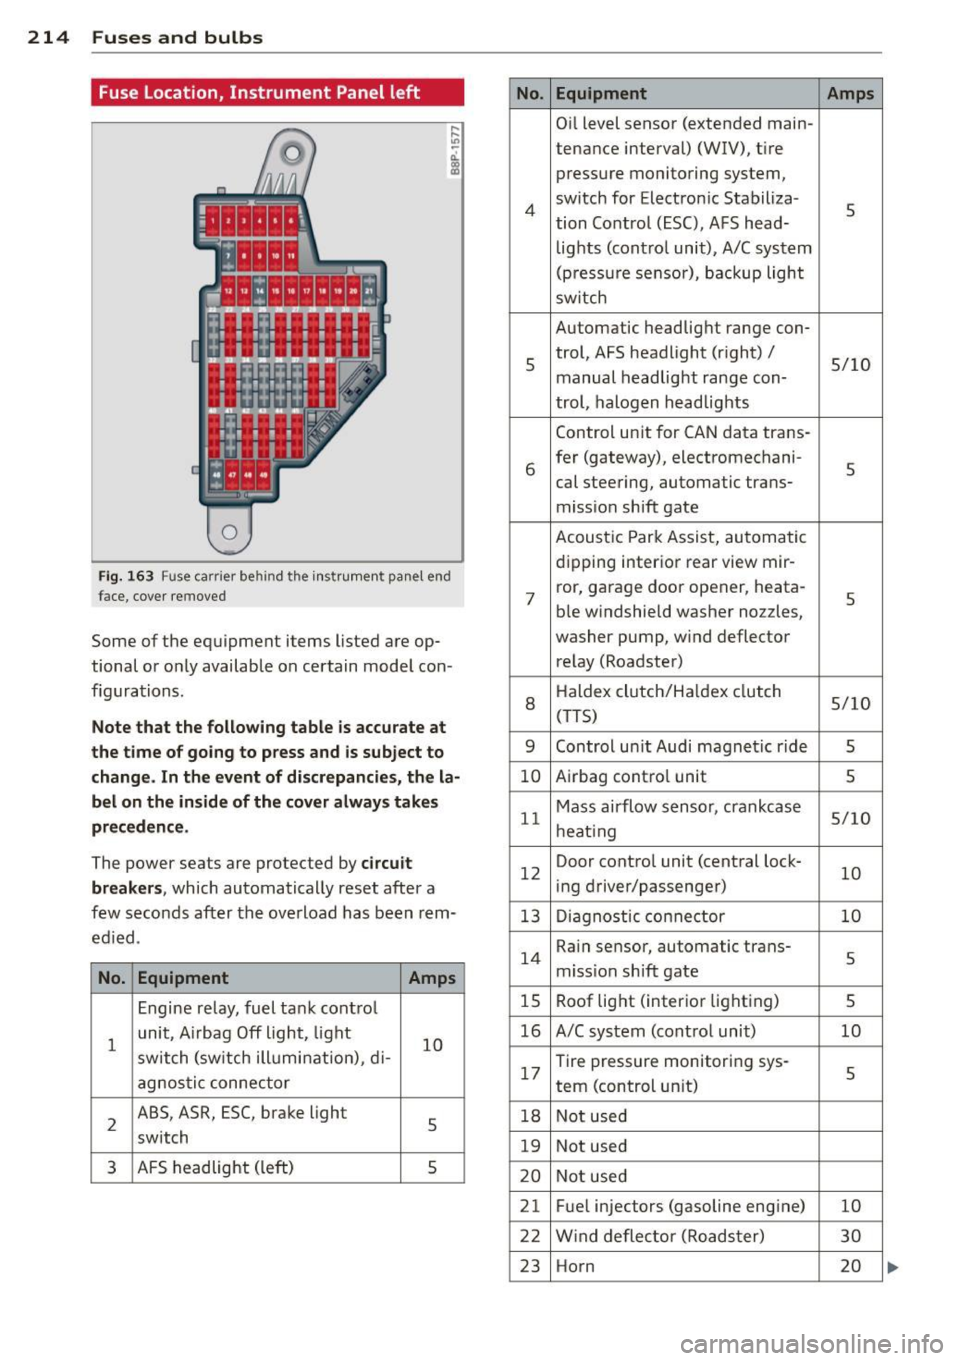
Fuse Location, Instrument Panel left
0
Fi g. 163 Fuse carrier behind the instrument panel end
face, cove r removed
Some of the equipment items listed are op
tional or only available on certain model con
figurations .
Note that the following table is accurate at
the time of going to press and is subject to
change. In the event of discrepancies, the la
bel on the inside of the cover always takes
preceden ce .
The power seats are protected by circuit
breaker s,
which automatically reset after a
few seconds after the overload has been rem
ed ied.
No . Equipment Amps
Engine relay, fuel tank control
1
unit, A irbag Off light, light
10 switch (sw itch illumination), d i-
agnos tic connector
2
ABS, ASR, ESC, brake light
5 switch
3 AFS headlight (left) s
No.
4
5
6
7
8
9
10
11
12
13
14
15
16
17
18
19
20
21
22
23
Equipment Amps
Oil level sensor (extended main-
tena nce interval) (WIV), tire
pressure monitoring system,
switch for Electronic Stabiliza-
s tion Control (ESC), AFS head-
lights (control unit), A/C system
(pressure sensor), backup light
sw itch
Automatic headlight range con-
trol, AFS headlight (right) /
5/10
manual headlight range con-
trol, halogen headlights
Control unit for CAN data trans-
fer (gateway), electromechani-
s cal steering, automatic trans-
mission shift gate
Acoustic Park Assist, automatic
dipping interior rear view mir- ror, garage door opener, heata-
s ble windshield washer nozzles,
washer pump, wind deflector
relay (Roadster)
H aldex clutch/Ha ldex clutch
5/10 (T TS)
Control un it Audi magnetic ride
s
Airbag contro l unit s
Mass airflow sensor, crankcase 5/10
heating
Door control unit (central lock-
10 ing driver/passenger)
Diagnostic connector
10
Rain sensor, automatic trans-
s miss ion shift gate
Roof light (interior lighting)
5
A/C system (control unit) 10
Tire pressure monitoring sys-
5 tern (control un it)
Not used
Not used
Not used
Fuel injectors (gasoline engine)
10
Wind deflector (Roadster) 30
Horn 20
Page 234 of 244
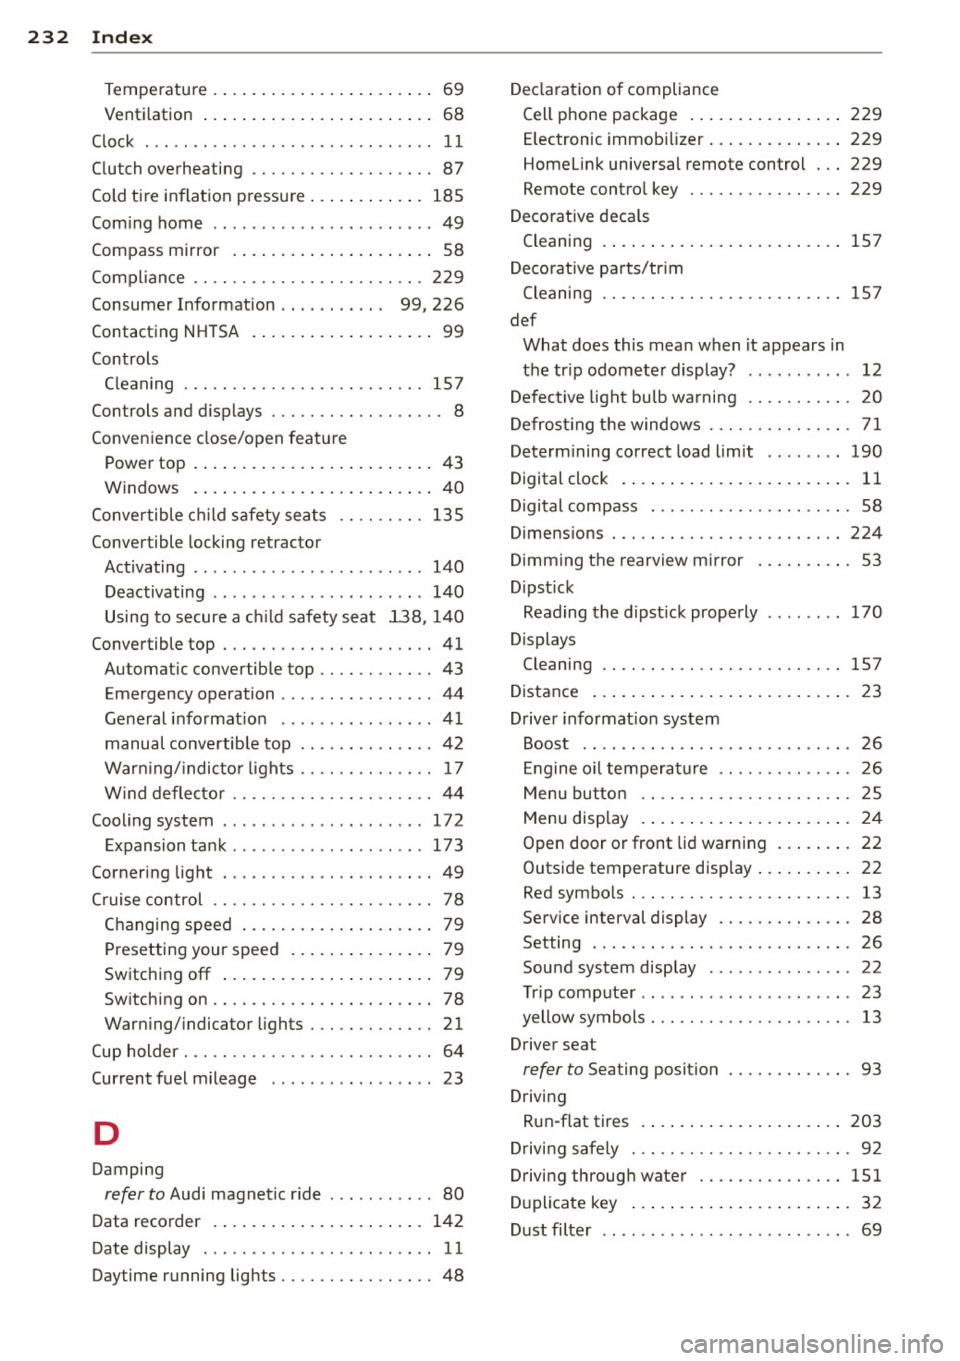
232 Index
Temperature ............ ... .. .... .. 69
Ventilation .... ........... ... .... .. 68
C lock . . . . . . . . . . . . . . . . . . . . . . . . . . . . . . 11
Clutch overheating . . . . . . . . . . . . . . . . . . . 87
Cold ti re inflation pressure ..... ... ... . 185
Com ing home .............. .... ..... 49
Compass mirror ............ ... .... .. 58
Compl iance .. ............. .. .. .. .. . 229
Consumer Information . . . . . . . . . . . 99, 226
Contacting NHTSA .......... ... .... .. 99
Controls Cleaning . .... ........... .. .. .... . 157
Controls and displays .................. 8
Convenience close/open feature Pow er top . . . . . . . . . . . . . . . . . . . . . . . . . 43
Windows . ................. ..... .. 40
Conve rtible child safety seats .. .. .... . 135
Convertible locking retractor Activating .................... ... . 140
Deactivating .................. .... 140
Using to secure a ch ild safety seat 138, 140
Convertible top .. .......... .. .. .... .. 41
Automatic convertible top ............ 43
Eme rgency operation . . . . . . . . . . . . . . . . 44
General information ........... ..... 41
manual convertible top ........ .. .. .. 42
Warn ing/ indictor lights .............. 17
W ind deflecto r ..................... 44
Cooling system . . . . . . . . . . . . . . . . . . . . . 172
Expansion tank ... ..... ..... .. .. .. . 173
Cornering light ............ .. .. .. .. .. 49
C ruise control . . . . . . . . . . . . . . . . . . . . . . . 78
Changing speed . . . . . . . . . . . . . . . . . . . . 79
Pr esetting your speed . . . . . . . . . . . . . . . 79
Switching
off .............. .. .... .. 79
Sw itching on ....................... 78
Warning/indicator lights ... .. .. .. .. . . 21
Cup holder . . . . . . . . . . . . . . . . . . . . . . . . . . 64
Current fuel mileage 23
D
Damping
refer to Audi magnetic ride . .. .. .. .. . . 80
Data recorder . . . . . . . . . . . . . . . . . . . . . . 142
Date display . . . . . . . . . . . . . . . . . . . . . . . . 11
Daytime running lights ................ 48 D
ecla ration of compliance
Cell phone package ................ 229
E lectronic immob ilizer .............. 229
Homelink universal remote control ... 229
Remote control key ............ .... 229
D ecorative decals
Cleaning . ..... .. ............. .... 157
D eco rative parts/tr im
Cleaning .. .... .. ............. .... 157
def What does this mean when it appears in
the tr ip odometer display? ........... 12
Defective light bulb warning ........... 20
Defrosting the windows .......... .. .. . 71
Determining correct load limit ........ 190
Digital clock . . . . . . . . . . . . . . . . . . . . . . . . 11
Dig ital compass . . . . . . . . . . . . . . . . . . . . . 58
Dimensions . .... .. ............. .... 224
Dimming the rearview mirror .......... 53
Dipst ick
Reading the dipst ick properly ........ 170
Displays Cleaning .. .... .. ............. .... 157
D istance ......... .. .............. .. 23
Driver information system
Boost ........ .. .. ................ 26
Engine oil temperature .............. 26
Menu button . . . . . . . . . . . . . . . . . . . . . . 25
Menu display . . . . . . . . . . . . . . . . . . . . . . 24
Open door or front lid warning ........ 22
Outside temperature display . . . . . . . . . . 22
Red symbo ls ... ... ................ . 13
Service interval display . . . . . . . . . . . . . . 28
Setting ........................... 26
Sound system display . . . . . . . . . . . . . . . 22
Tr ip computer .. .................. .. 23
yellow symbols . . . . . . . . . . . . . . . . . . . . . 13
Driver seat
refer to Seating position . . . . . . . . . . . . . 93
Driving Run-flat tires .... ............. .... 203
Driving safely . .. .. ... .......... .... . 92
Driving through water ............... 151
Duplicat e key ..... ............. ..... 32
Dust filter . . . . . . . . . . . . . . . . . . . . . . . . . . 69
Page 235 of 244
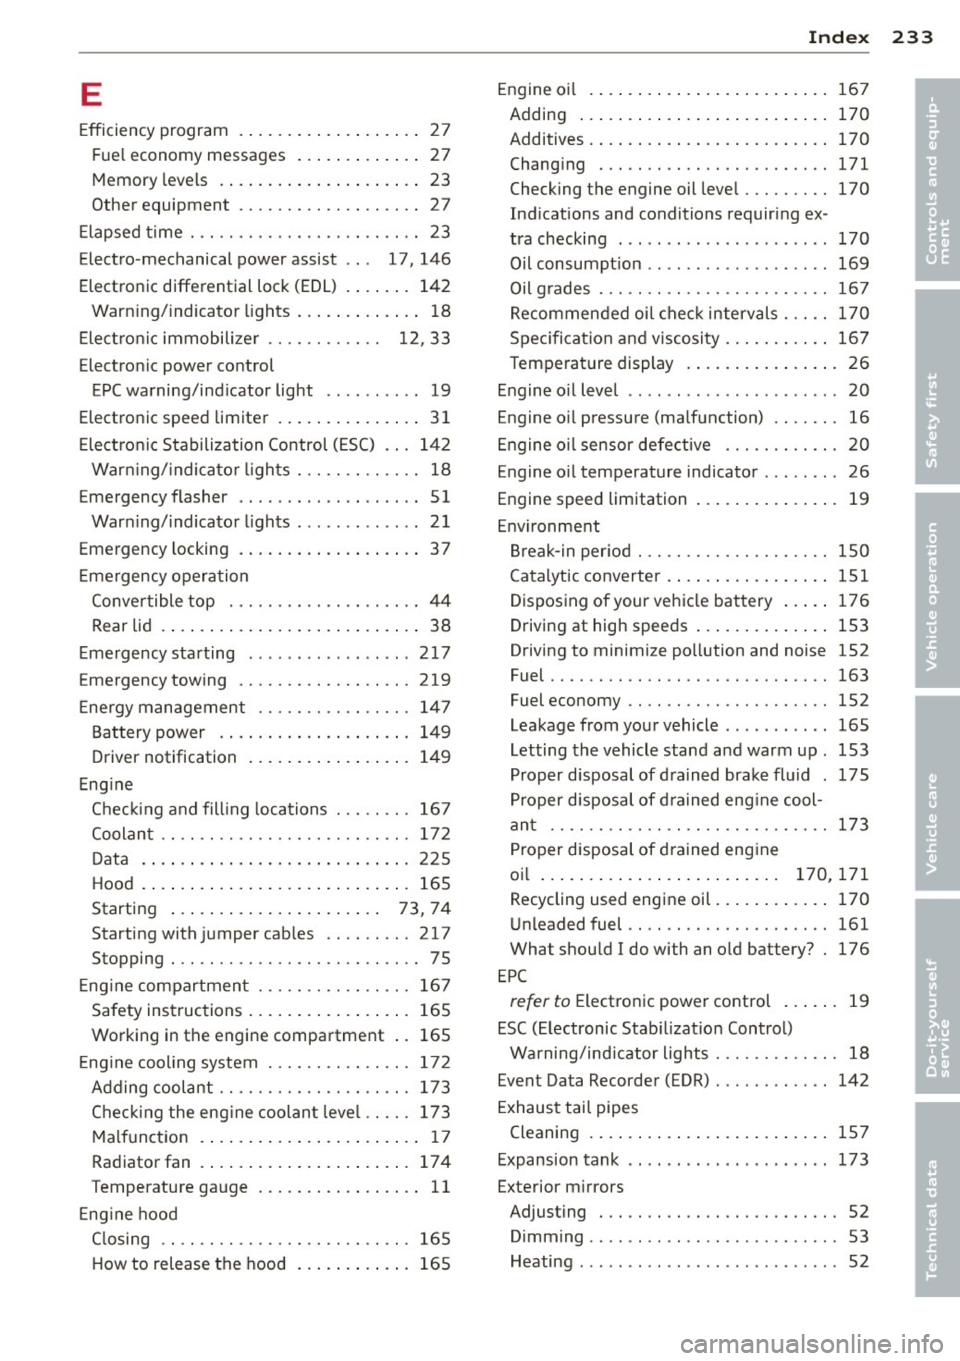
E
Efficiency program ...... ... .. .. .. .. .. 27
F ue l economy messages ... .. .. .. .. .. 27
Memory leve ls . . . . . . . . . . . . . . . . . . . . . 23
Other equ ipment .. ....... .. .. .. .. .. 2 7
E lapsed t ime . .. .... .... ... .. .. .. .. .. 23
E lectro -mechanical power assist . . . 17, 146
El ectronic differential lock (EDL) . ... ... 142
Warn ing/ indicato r lights ... .. ...... .. 18
E lect ro nic immobilize r . . . . . . . . . . . . 12, 33
Electro nic power control
EPC warning/ind icator light .. ... .... . 19
El ectro nic speed limite r .. ... .. .. .. .. .. 31
E lec tronic Stabilization Control ( ESC) .. . 142
War ning/ indicator ligh ts ... .. .. .. .. .. 18
E mergency fla sher . . . . . . . . . . . . . . . . . . . 51
War ning/ indicato r lights ............ . 21
Emergency locking . ..... ... .. .. .... .. 37
E me rgency opera tion
Conve rtible top ........ .. .. .. .. .. .. 44
Rear lid . . . . . . . . . . . . . . . . . . . . . . . . . . . 38
E mergency sta rting . ....... .. .. .. .. . 217
Emergen cy towing ..... .. .. .. .. .. .. . 219
Energy management ....... .. .. .. .. . 14 7
B attery power . . . . . . . . . . . . . . . . . . . . 1 49
D river notification ..... ... .. .. .. .. . 149
E ng ine
C hec king and fill ing locations . .. .. .. . 167
Coolan t .. .. .... .. . .... .. .... .. .. . 172
D ata . ..... .. .. .. .. .... ... .. .. .. . 225
Hood .. .. .. .. .. .. .. .... ... .. .. ... 165
Starting . . . . . . . . . . . . . . . . . . . . . . 73, 74
Startingwith jumpercab les .. .. .. .. . 21 7
Stopping . .. ............. .... .. .. .. 75
E ng ine compartmen t ..... .. .. .. .. .. . 16 7
Safety ins tructions ..... ... .. .. .. .. . 165
Wo rking in the engine compartment .. 165
E ng ine cooling system ...... .. .. .. .. . 17 2
Adding cool ant ........... .. .. .. .. . 173
Chec king the eng ine coolan t leve l .. .. . 173
M alfunct ion . . . . . . . . . . . . . . . . . . . . . . . 17
Radiator fan . . . . . . . . . . . . . . . . . . . . . . 17 4
T emperature ga uge .... ... .. .. .. .. .. 11
E ng ine hood
C losing .. .. ............. .... .. ... 165
H ow to release the hood ... .. .. .. .. . 165
Inde x 233
Engine o il . ... .... .. . .. .. ..... ... . .
167
Adding ... .. .. .... . ... ...... ... . . 170
Additives . ... .. .. .. . .. ... .... ... . . 170
Changi ng ... .. .. ........ ........ . 171
Checking the engine oil leve l ....... . . 170
Ind ications and conditions requir ing ex -
t ra checking ... .. .. . .. ... ... .. .. . . 170
Oil consumpt ion ... ............... . 169
Oil g rades . .. .. .. .. . ... .......... . 16 7
Recommende d oi l che ck intervals . .. . . 170
Spec ificat ion and viscosity .... ... .. . . 167
Temperature display . .. ..... ... .. .. . 26
Engine o il leve l .. .. .. ............... . 20
Engine o il pressure (ma lfunction) .. .. .. .
16
Engine o il sensor defective ......... .. . 20
E ngine o il temperature indicato r ...... . . 26
Engine speed limitation ... .... ... .. .. . 19
En vir onment
Br eak-in per iod . .. .... .... ..... .. .. 150
C atalytic converter . .. .. ..... ... .. .. 151
Disposing of your vehic le battery ... .. 176
Driving at high speeds .. ..... ... .. .. 153
Driving to minimi ze po llution and noise 152
Fuel ...... .. .. .. .. .. .... ....... .. 163
Fuel economy . . . . . . . . . . . . . . . . . . . . . 152
Leakage from your vehicle ........... 165
Letting the vehicle stand a nd warm up . 153
Proper disposal of dra ined brake flu id . 175
P roper disposal of d ra ined eng ine cool-
an t ...... .. .. .. ................. 173
Proper disposal of d rained eng ine
oi l .. ... .. .. .. .... . ... ...... 170,171
Recycling used engine oil ..... ... .. .. 170
Un leaded fuel .. .. .. ............... 161
Wha t shou ld I do with an o ld bat tery? . 176
E PC
refer to E lect ronic power control ... ... 19
ESC (E lectronic Stab ilizat io n Control)
Wa rning/ind icator lights ... ..... .. .. . 18
Event Da ta Recorder (EDR) .......... .. 142
E xhaus t tai l pipes
Cleaning . ... .... .. . .. .. ..... ... .. 157
Expansion tank . . . . . . . . . . . . . . . . . . . . . 173
Exterior m irrors
Adjusting . . . . . . . . . . . . . . . . . . . . . . . . . 52
Dimming .. .. .. .... .......... ...... 53
Heating ..... .. .... .......... ...... 52
•
•