hood release AUDI TT ROADSTER 2014 Owners Manual
[x] Cancel search | Manufacturer: AUDI, Model Year: 2014, Model line: TT ROADSTER, Model: AUDI TT ROADSTER 2014Pages: 244, PDF Size: 60.87 MB
Page 17 of 244
Instrument s and warnin g/indic ator ligh ts 15
system ma lfunction warning/indicator light
c> ,&. .
The ligh t 1111 (USA)/ . (Canada) illumi
nates when the ignit ion is tu rned on. I t goes
out after the engine has been started and the
parking brake is fully released. This indicates
that the brake warning lig ht is funct ion ing
properly.
If the brake warn ing light doe s not light up
w hen the engin e is cr anking o r the p arking
br ak e is applied, th ere m ay be a malfun ction
in th e electrical syste m. In thi s cas e, conta ct
y ou r A udi dealer .
If the ABS fails, the ABS warning/indicator
light
E (USA mode ls)! EIJ (Canada models)
f lashes together with the brake system warn
ing/indicator light
c> ,&. .
(USA models): If the warning light 1111 and
the warning light
EiJ illum inate together, im
mediately contact your author ized Audi dealer
or qualified workshop to have all brake pads
inspected
c> page 19.
When the light comes on, an audible warning
signa l is also given.
Parking brake set
The parking brake warning light_ /_
(Canada models) illuminates when the park
ing brake is set. In addition, a warning tone
will sound after you have driven for longer
than 3 seconds and faster than 3 mph (5 km/
h).
Park ing brak e set
The 1111 warning/indicator light illuminates
when the parking brake is set
c> &..
A WARNING
-Always observe the warnings in
c> page 165, Working in the engine
compartment, before opening the en
gine hood and check ing the bra ke fluid.
- Driv ing with low brake fluid is a safety
hazard! Stop the car and get professional
assistance. -
USA models: If both, the
1111 warning
light and the
E warn ing light come
on at the same time, the rear wheels
could lock up first under hard braking.
Lock-up of the rear wheel brakes can
cause loss of vehicle contro l and an acci
dent. Have your veh icle repa ired immedi
ately by your authorized Audi dealer or a
qualified workshop . Drive s low ly and
avoid sudden, hard brake application.
- Canada models:
If both, the b rake warn
ing light . and the ABS warning light
EiJ come on at the same time, the rear
wheels could lock up f irst under hard
brak ing. Lock-up of the rear wheel brakes
can cause loss of veh icle control and an
accident. Have your vehicle repaired im
mediately by your author ized Audi dealer
or a qualified wo rkshop. Drive slowly and
avoid sudden, hard brake application.
- If the b rake warning/ind icator light does
not go out after a few seconds and the
pa rking brake is re leased, or lights up
while you are dr iving, the flu id leve l in
the brake fl uid reservo ir is too low . If you
believe that it is safe to do so, proceed
immediate ly at low speed to the nea rest
author ized Audi dealer or qualif ied work
shop and have the brake system inspect
ed.
-Always keep in mind that after severa l
brake applications, you will need greater
pressure on the brake pedal to stop your
veh icle. Do not rely on strained brakes to
respond with maximum stopping powe r
i n critical s ituations. You must allow for
increased b raking dis tances. The extra
distance used up by fading bra kes could
lead to an accident.
tli1 !.!r Safety systems
The I ( U SA models) . (Canada mode ls) in
dicator light monitors the safety systems e.g.
(airbags, pretensioners) and i lluminates for a
few seconds each time you switch the ignitio n
o n.
Page 85 of 244
engaged, the engine should never be
speeded up unintentionally (e.g. manual ly from under the hood). Otherwise the
vehicle will immediately start to move -
sometimes even if the parking brake is
firmly applied - risk of an accident!
- Before you or other persons open the
hood and work on a running engine, the
selector lever must be moved to P and
the parking brake applied firmly - risk of
an accident! Follow the warning stickers.
@ Tips
If you have inadvertently sh ifted into N
while the veh icle is moving, you should re
move your foo t from the accelerator and
wait until the engi ne speed has dropped to
id le before shifting back to Dor S.
Selector lever lock
Applies to vehicles: with S tro nic
The selector lever lock prevents a gear from
being engaged occidentally and unintention
ally setting the vehicle in motion .
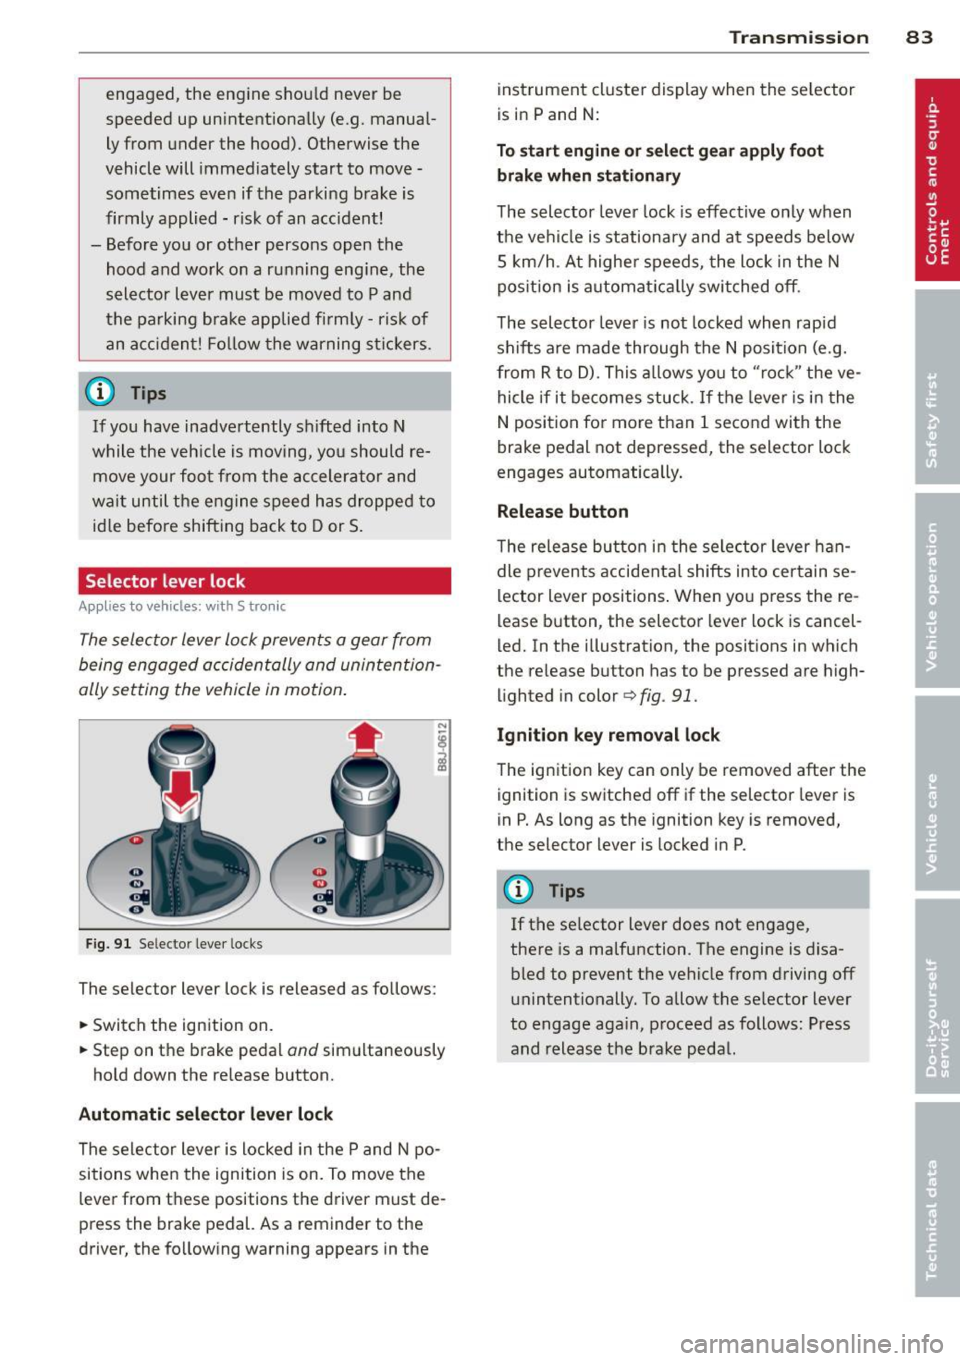
Fig. 91 Selector lever locks
The selector lever lock is released as follows:
.,. Switch the ignition on.
.,. Step on the brake pedal
and simultaneously
hold down the re lease button.
Automatic selector lever lock
The selector lever is locked in the P and N po
sitions when the ignition is on. To move the
l ever from these positions the driver must de
press the brake pedal. As a reminder to the
driver, the following warning appears in the
Transmission 83
instrument cluster display when the se lector
is in P and N:
To start engine or select gear apply foot
brake when stationary
The selector lever lock is effective only when
the vehi cle is stationary and a t speeds below
S km/h . At higher speeds, the lock in the N
pos ition is automat ically switched off.
The selector lever is not locked when rapid
shifts are made through the N position (e.g.
from R to D) . This allows you to "rock " the ve
hicle if it becomes stuck. If the lever is in the
N position for more than 1 second with the
brake pedal not depressed, the selector lock
engages automatically .
Release button
The release butto n in the selector lever han
dle prevents accidental shifts into certain se
lector lever positions . When you press the re
lease button , the selector lever lock is cancel
led. In the illustration, the positions in which
the release button has to be pressed are high
lighted in color
¢ fig . 91.
Ignition key removal lock
The ignition key can only be removed after the
ignition is switched off if the selector lever is
in P. As long as the ignition key is removed,
the selector lever is locked in P.
(y Tips
If the se lector lever does not engage,
there is a malfunction . The engine is disa
bled to prevent th e vehicle from driving off
unintentionally. To allow the selector lever
to engage again, proceed as follows: Press
and release the brake pedal.
Page 120 of 244
118 Airbag system
More important things to know about
front airbags
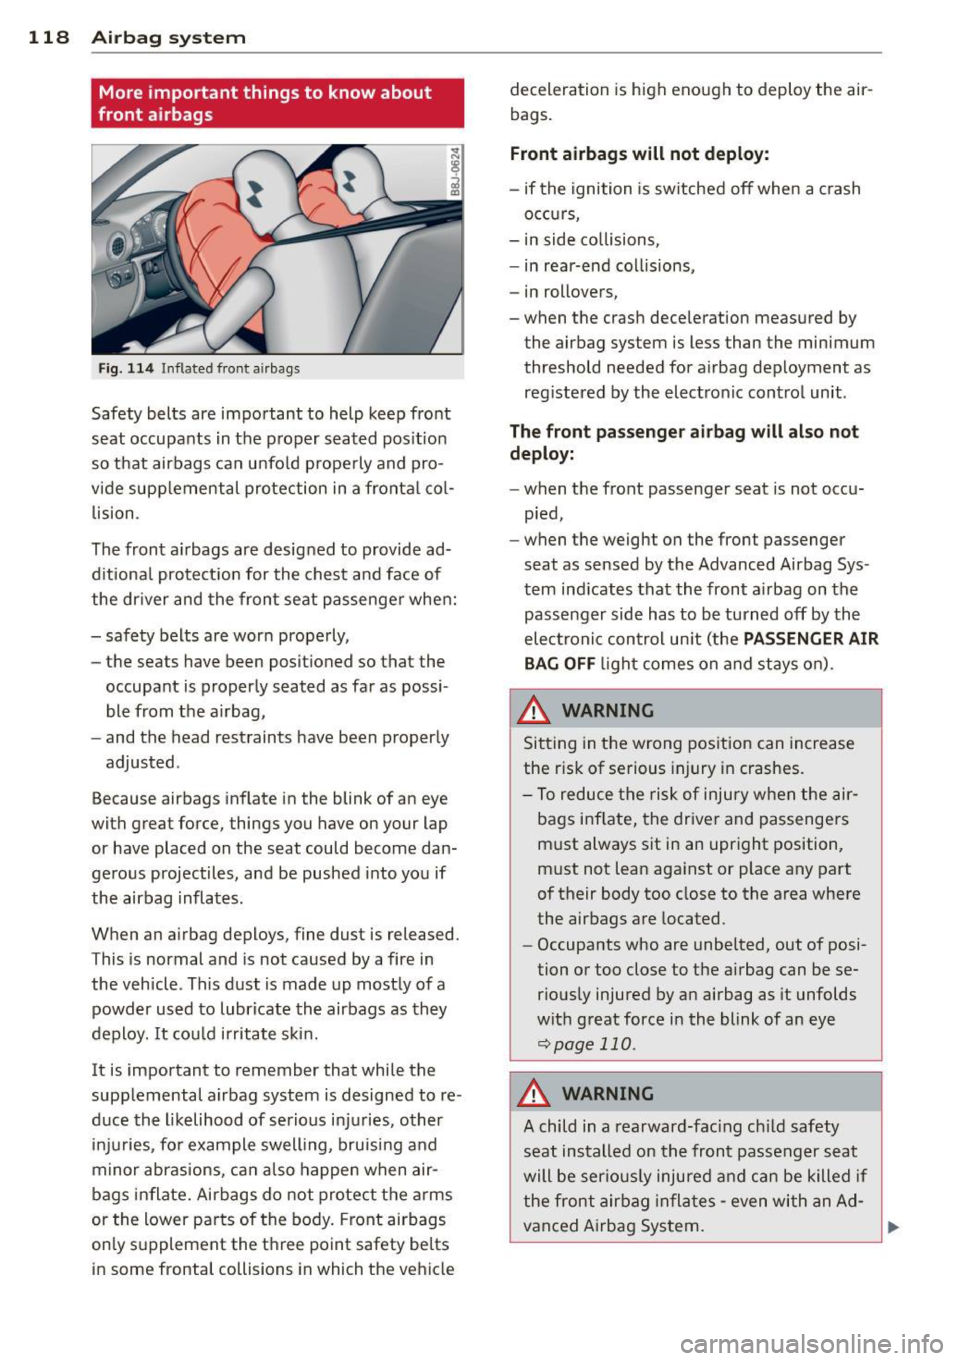
F ig. 114 Inflated fro nt airbags
Safety belts are impo rtant to help keep fro nt
seat occupants in the p roper seated pos it io n
so that airbags can unfo ld prope rly and pro
vide supplemental protection in a fronta l co l
lision .
The front a irbags are designed to provide ad
d itiona l protect ion for the chest and face of
the dr iver and the front seat passenger when:
- safety belts are worn properly,
- the seats have been positioned so that the
occupant is properly seated as far as possi
ble from the a irbag,
- and the head restraints have been properly
adjusted .
Because airbags inflate in the blink of an eye
with great force, things you have on your lap or have placed on the seat could become dan
gerous projectiles, and be pushed into you if
the airbag inflates .
When an a irbag deploys, fine dust is released.
This is normal and is not caused by a fire in
the vehicle . This dust is made up mostly of a
powder used to lubricate the airbags as they
deploy. It cou ld irritate ski n.
It is important to remember that while the
supp lemental airbag system is designed to re
duce the l ikelihood of serious inj uries, other
i n juries, fo r example swelling, bruisi ng and
m inor abrasions, ca n also happe n when air
bags in flate. Airbags do not protect the a rms
or the lower pa rts of the body. Front airbags
only supplement the t hree point safety belts
in some frontal collisions in which the vehicle deceleration
is high eno ugh to deploy the air
bags .
Front airbags will not deploy:
- if the ignition is sw itched off when a crash
occurs,
- in side co llisions,
- in rear-end co llisions,
- in rollovers,
-when the crash deceleration measured by the airbag system is less than the min imum
threshold needed for a irbag deployment as
reg istered by the electronic control unit .
The front pass enge r airbag will al so not
deploy:
- when the front passenger seat is not occu
p ied,
- when the weight on the front passenger
seat as sensed by the Advanced Airbag Sys
tem indicates that the front ai rbag on the
passenger side has to be turned off by the
elec troni c control un it (the
PASSENGER AIR
BAG OFF
li ght comes on and stays o n).
_&. WARNING ~
Si tting in the wrong position can increase
the r isk of se rious injury in crashes.
- To reduce the risk of inju ry w he n t he air
bags inflate, the drive r and passengers
must always sit in an upr ight position,
m ust not lean aga inst or place any part
of their b ody too close to the area where
the airbags a re located .
- Occupants who are unbelted, out of posi
tion or too close to the a irbag can be se
rio usly injured by a n airbag as it unfolds
wit h great force in the blink of an eye
¢page 110 .
_&. WARNING ~ -
A child in a rearward-fac ing c hild safety
seat installed on the front passenger seat
will be serio usly injured and ca n be killed if
the front airbag in fla tes -even with an Ad
vanced A irbag System.
Page 167 of 244
Checking and filling Engine hood
Releasing the engine hood
The engine hood is released from inside the
vehicle .
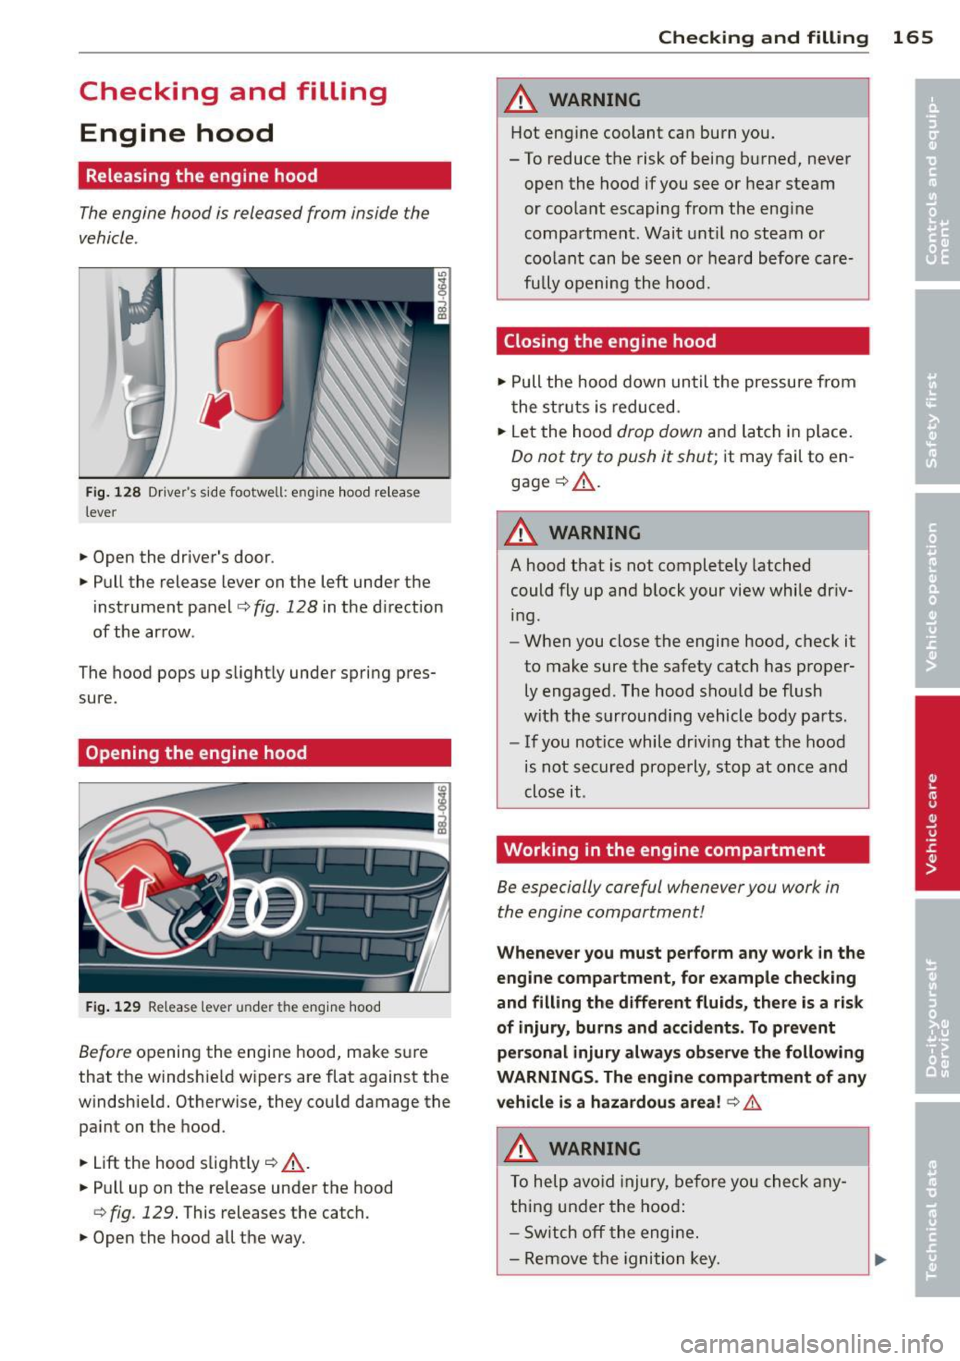
Fig. 128 Dr ive r's s ide footwe ll: e ng ine hood relea se
lever
"' Open the driver's door .
"' Pull the release lever on the left under the
instrument panel
i=> fig. 128 in the d irection
of the arrow .
The hood pops up slightly under spring pres
sure.
Opening the engine hood
F ig . 129 Release lever u nde r the engine hood
Before opening the engi ne hood, make sure
that the windshield wipers are flat against the
windshie ld. Otherwise, they could damage the
paint on the hood.
"' Lift the hood slight ly ¢
_A .
"' Pull up on the release under the hood
¢ fig . 129. This releases the catch.
"' Open the hood all the way .
Checking and fillin g 165
A WARNING
Hot engine coolant can burn you.
- To reduce the risk of being burned, never open the hood if you see or hear steam
or coolant escaping from the eng ine
compartment . Wait unt il no steam or
coolant can be seen or heard before care
fu lly opening the hood.
Closing the engine hood
"' Pull the hood down until the pressure from
the struts is reduced.
"' Let the hood
drop down and latch in p lace.
Do not try to push it shut; it may fail to en
gage ¢_& .
A WARNING
--
A hood that is not completely latched
could fly up and b lock your view while dr iv
ing.
- When you close the engine hood, check it
to make sure the safety catch has proper
ly engaged. The hood shou ld be flush
with the surround ing vehicle body parts.
- If you notice while driv ing that the hood
is not secured properly, stop at once and
close it .
Working in the engine compartment
Be especially careful whenever you work in
the engine compartment!
Whenever yo u must pe rform any wo rk in the
e n g ine compartment, for e xample ch ecki ng
and filling th e diff erent fluids, there is a risk
of injury, burn s and a ccidents. To prev ent
p ersonal injury always obse rve the foll owing
WARNINGS . The engine compa rtment of an y
vehicle i s a hazardou s area !
¢ &.
A WARNING ~
To help avoid injury, be fo re yo u check any
thing under the hood:
- Sw itch off the engi ne.
- Remove the ignition key.
Page 235 of 244
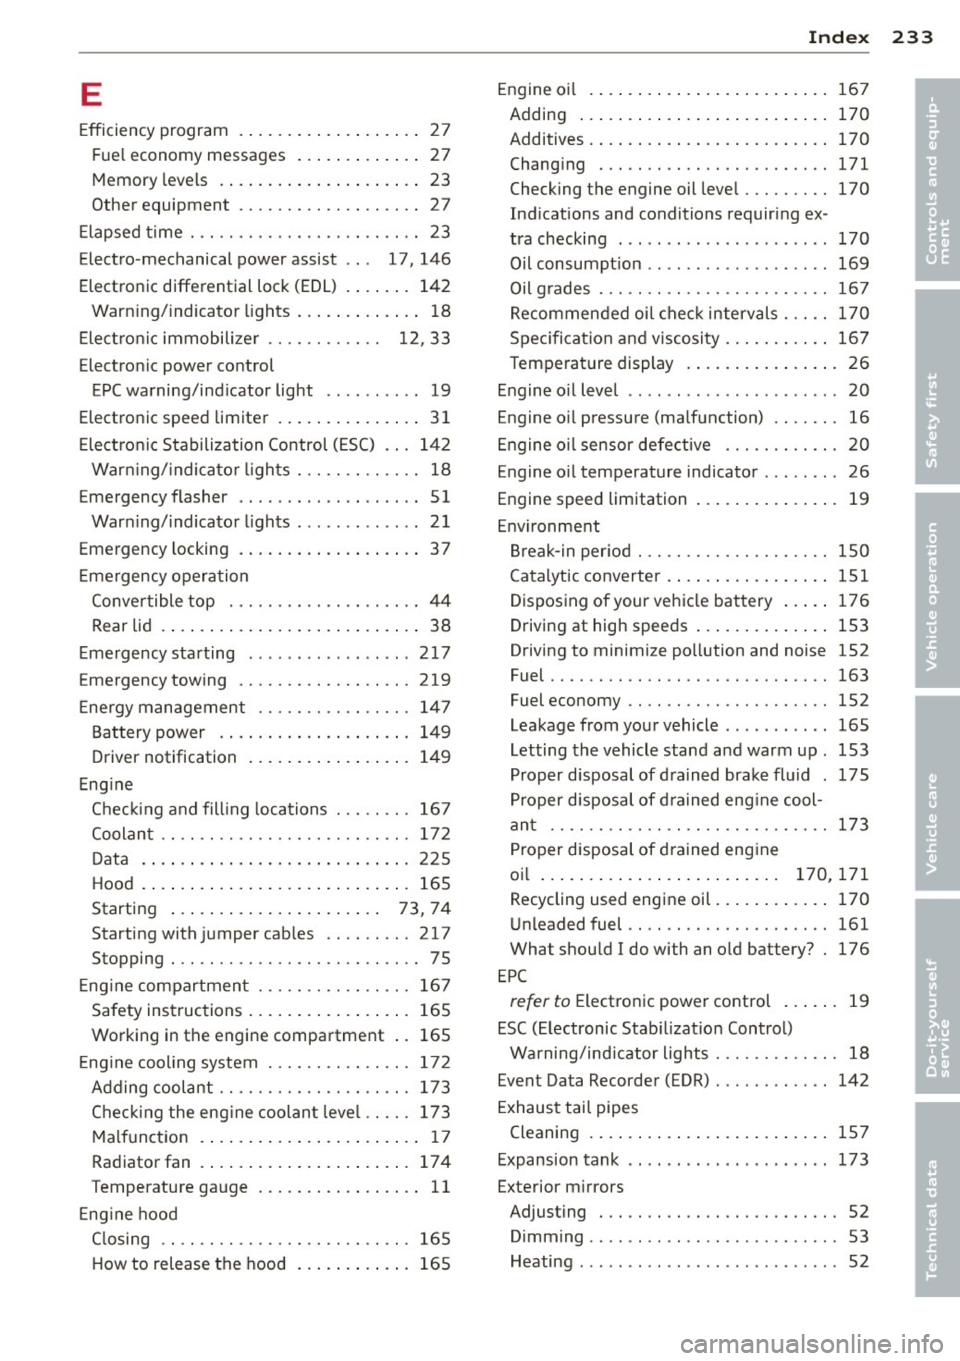
E
Efficiency program ...... ... .. .. .. .. .. 27
F ue l economy messages ... .. .. .. .. .. 27
Memory leve ls . . . . . . . . . . . . . . . . . . . . . 23
Other equ ipment .. ....... .. .. .. .. .. 2 7
E lapsed t ime . .. .... .... ... .. .. .. .. .. 23
E lectro -mechanical power assist . . . 17, 146
El ectronic differential lock (EDL) . ... ... 142
Warn ing/ indicato r lights ... .. ...... .. 18
E lect ro nic immobilize r . . . . . . . . . . . . 12, 33
Electro nic power control
EPC warning/ind icator light .. ... .... . 19
El ectro nic speed limite r .. ... .. .. .. .. .. 31
E lec tronic Stabilization Control ( ESC) .. . 142
War ning/ indicator ligh ts ... .. .. .. .. .. 18
E mergency fla sher . . . . . . . . . . . . . . . . . . . 51
War ning/ indicato r lights ............ . 21
Emergency locking . ..... ... .. .. .... .. 37
E me rgency opera tion
Conve rtible top ........ .. .. .. .. .. .. 44
Rear lid . . . . . . . . . . . . . . . . . . . . . . . . . . . 38
E mergency sta rting . ....... .. .. .. .. . 217
Emergen cy towing ..... .. .. .. .. .. .. . 219
Energy management ....... .. .. .. .. . 14 7
B attery power . . . . . . . . . . . . . . . . . . . . 1 49
D river notification ..... ... .. .. .. .. . 149
E ng ine
C hec king and fill ing locations . .. .. .. . 167
Coolan t .. .. .... .. . .... .. .... .. .. . 172
D ata . ..... .. .. .. .. .... ... .. .. .. . 225
Hood .. .. .. .. .. .. .. .... ... .. .. ... 165
Starting . . . . . . . . . . . . . . . . . . . . . . 73, 74
Startingwith jumpercab les .. .. .. .. . 21 7
Stopping . .. ............. .... .. .. .. 75
E ng ine compartmen t ..... .. .. .. .. .. . 16 7
Safety ins tructions ..... ... .. .. .. .. . 165
Wo rking in the engine compartment .. 165
E ng ine cooling system ...... .. .. .. .. . 17 2
Adding cool ant ........... .. .. .. .. . 173
Chec king the eng ine coolan t leve l .. .. . 173
M alfunct ion . . . . . . . . . . . . . . . . . . . . . . . 17
Radiator fan . . . . . . . . . . . . . . . . . . . . . . 17 4
T emperature ga uge .... ... .. .. .. .. .. 11
E ng ine hood
C losing .. .. ............. .... .. ... 165
H ow to release the hood ... .. .. .. .. . 165
Inde x 233
Engine o il . ... .... .. . .. .. ..... ... . .
167
Adding ... .. .. .... . ... ...... ... . . 170
Additives . ... .. .. .. . .. ... .... ... . . 170
Changi ng ... .. .. ........ ........ . 171
Checking the engine oil leve l ....... . . 170
Ind ications and conditions requir ing ex -
t ra checking ... .. .. . .. ... ... .. .. . . 170
Oil consumpt ion ... ............... . 169
Oil g rades . .. .. .. .. . ... .......... . 16 7
Recommende d oi l che ck intervals . .. . . 170
Spec ificat ion and viscosity .... ... .. . . 167
Temperature display . .. ..... ... .. .. . 26
Engine o il leve l .. .. .. ............... . 20
Engine o il pressure (ma lfunction) .. .. .. .
16
Engine o il sensor defective ......... .. . 20
E ngine o il temperature indicato r ...... . . 26
Engine speed limitation ... .... ... .. .. . 19
En vir onment
Br eak-in per iod . .. .... .... ..... .. .. 150
C atalytic converter . .. .. ..... ... .. .. 151
Disposing of your vehic le battery ... .. 176
Driving at high speeds .. ..... ... .. .. 153
Driving to minimi ze po llution and noise 152
Fuel ...... .. .. .. .. .. .... ....... .. 163
Fuel economy . . . . . . . . . . . . . . . . . . . . . 152
Leakage from your vehicle ........... 165
Letting the vehicle stand a nd warm up . 153
Proper disposal of dra ined brake flu id . 175
P roper disposal of d ra ined eng ine cool-
an t ...... .. .. .. ................. 173
Proper disposal of d rained eng ine
oi l .. ... .. .. .. .... . ... ...... 170,171
Recycling used engine oil ..... ... .. .. 170
Un leaded fuel .. .. .. ............... 161
Wha t shou ld I do with an o ld bat tery? . 176
E PC
refer to E lect ronic power control ... ... 19
ESC (E lectronic Stab ilizat io n Control)
Wa rning/ind icator lights ... ..... .. .. . 18
Event Da ta Recorder (EDR) .......... .. 142
E xhaus t tai l pipes
Cleaning . ... .... .. . .. .. ..... ... .. 157
Expansion tank . . . . . . . . . . . . . . . . . . . . . 173
Exterior m irrors
Adjusting . . . . . . . . . . . . . . . . . . . . . . . . . 52
Dimming .. .. .. .... .......... ...... 53
Heating ..... .. .... .......... ...... 52
•
•
Page 239 of 244
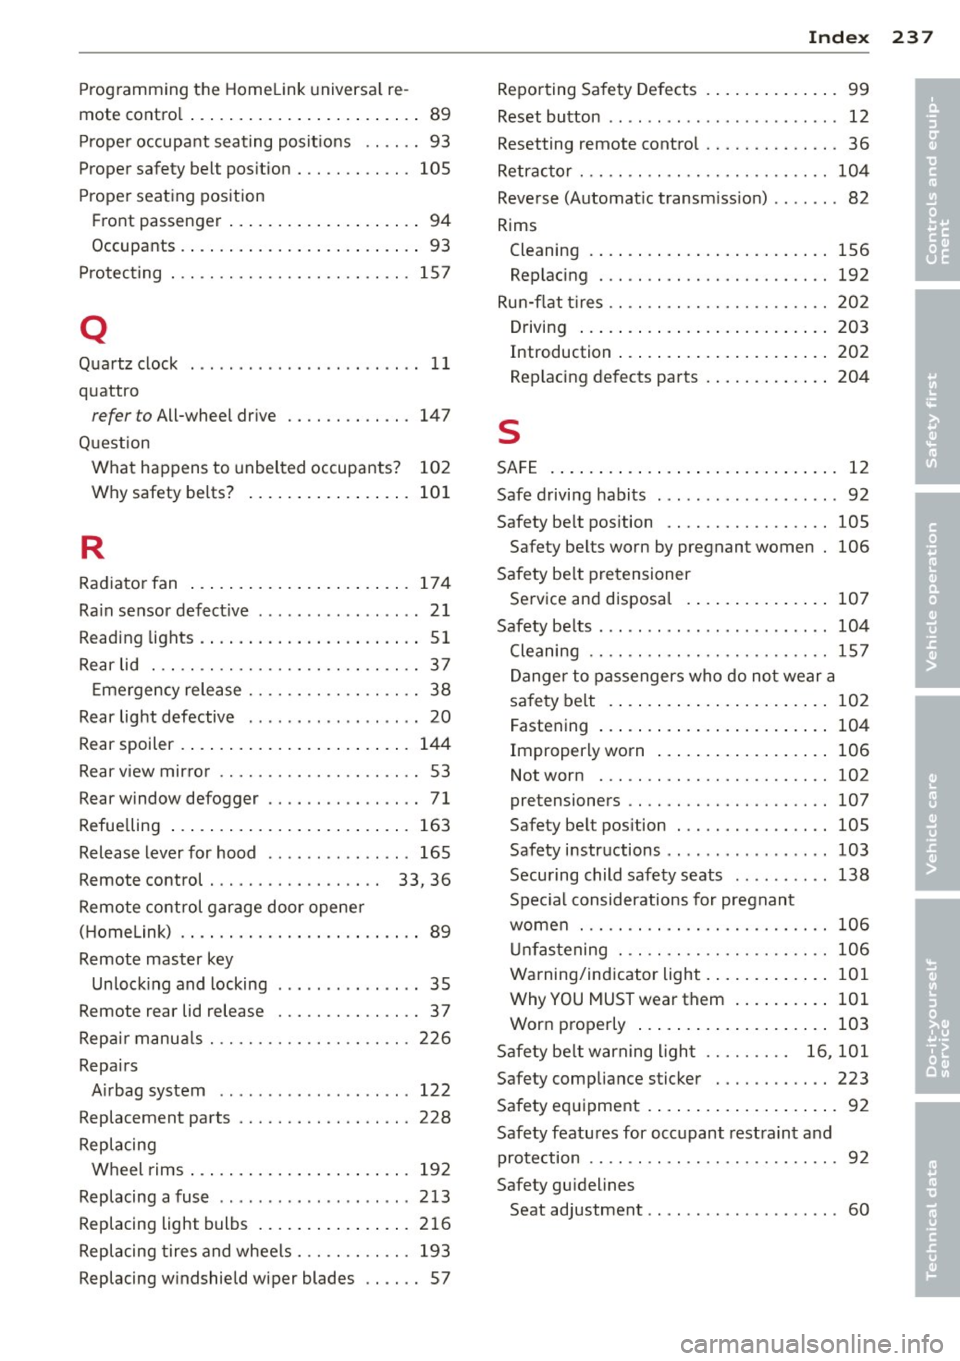
Programming the Homelink universa l re
mote contro l . . . . . . . . . . . . . . . . . . . . . . . . 89
Pr oper occupa nt seating posit ions .. .. .. 93
Proper safety belt pos ition . . . . . . . . . . . . 105
P roper seat ing position
Fr ont passenger .. ..... ... .. .. .. .... 94
Occupants .. .... .. .... ... .. .. .. .... 93
Pr otec ting . .. .. ........... .. .. .. ... 157
Q
Quartz clock . . . . . . . . . . . . . . . . . . . . . . . . 11
q uattro
refer to All-wheel dr ive .... .. .. .. .. . 147
Question What happens to unbelted occupants? 102
Why safety be lts? ..... ... .. .. .. .. . 10 1
R
Radiato r fan ... ... ..... ... .. .. .. ... 174
Ra in sensor defect ive . . . . . . . . . . . . . . . . . 21
Reading lights . ... .. .... ... .. .. .... .. 51
Rear lid ... .. .. ........... .. .. .. .... 37
Emergency release . . . . . . . . . . . . . . . . . . 38
Rear lig ht defective . . . . . . . . . . . . . . . . . . 20
Rear spoiler . ... .... .... ... .. .. .. ... 144
Rear view mir ro r . . . . . . . . . . . . . . . . . . . . . 53
Rear window defogger . . . . . . . . . . . . . . . . 71
Refue lling ... .. .... .... ... .. .. .. ... 163
Release lever for hood .. .... .. .. .. .. . 165
Remote control . . . . . . . . . . . . . . . . . . 33, 36
Remote cont rol garage door opene r
( H omelink) . . . . . . . . . . . . . . . . . . . . . . . . . 89
Remote master key Un lock ing and locking ........ .... ... 35
Remote rear lid release . . . . . . . . . . . . . . . 3 7
Rep air manua ls ............ .... .. .. . 226
Repa irs
A irbag system ... ... ..... .. .. .. .. . 122
Replacement parts ......... .. .. .. .. . 228
Replacing Wheel rims ... .. .. .... ... .. .. .... . 192
Replacing a fuse . . . . . . . . . . . . . . . . . . . . 213
Replacing light bulbs .... ... .. .. .. .. . 216
Replacing tire s and wheels . .. .. .. .. .. . 193
Replacing w indshield wiper blades .. .. .. 57
Inde x 237
Reporting Sa fety Defects . ..... ... .. .. . 99
Reset button . . . . . . . . . . . . . . . . . . . . . . . . 12
Resetting remote contro l ......... .. .. . 36
Retractor . . . . . . . . . . . . . . . . . . . . . . . . . . 10 4
Reverse (Automat ic transm iss ion) . . . . . . . 82
Rims Cleaning . ... .. .. .. . .. ... .... ... .. 1S6
Replacing . .. .. .. ................. 192
Ru n-flat tires .. .. .. ................. 202
Drivi ng ... .. .. .... . ... ...... ... .. 203
Introduction . . . . . . . . . . . . . . . . . . . . . . 202
Rep lacing de fects parts . ..... ... .. .. 204
s
SA FE . ... .. .. .. .... .. .. ...... ... .. . 12
Safe driving habits ................. .. 92
Safety be lt pos ition .... ............. 105
Safety be lts worn by pregnant women 106
Safety be lt pretensioner
Se rvice an d disposa l ... .. ..... ... .. 107
Safety be lts . .. .. .... ... .. ..... ..... 104
Cleaning .. .. .. .. .. . .............. 15 7
Danger to passengers who do not wear a
sa fe ty belt . ..... .. . .. .. ..... ... .. 10 2
Fastening ... .... .. . .. .. ..... ... .. 104
Improperly worn ... . ... ...... ... .. 106
Not worn . .. .. .. ................. 102
pretensioners .. .. ................. 107
Safe ty be lt pos ition . ... .. ..... ... .. 105
Safety i nstructions .. .............. . 103
Secu ring child safety seats .. ... ... .. 138
Spec ial considerations for pregnant
women ... .. .. .. .. . .............. 106
Unf astening . .. .. .. .. ........... .. 1 06
Warning/ind icator light . ..... ... .. .. 101
WhyYOUMUSTwearthem ... ... .. .. 101
Wor n properly ... .. . ... ...... ... .. 103
Safety be lt warning ligh t . . . . . . . . . 16, 101
Safety compliance sticker ........ .. .. 223
Safety equipment .. .. . ... ...... ... .. . 92
Safety featu res for occupant rest raint and
protection .. .. .. .. ................. . 92
Safety gu idelines
Seat adjustment . . . . . . . . . . . . . . . . . . . . 60
•
•