fuel pressure AUDI TT ROADSTER 2015 Owners Manual
[x] Cancel search | Manufacturer: AUDI, Model Year: 2015, Model line: TT ROADSTER, Model: AUDI TT ROADSTER 2015Pages: 244, PDF Size: 60.74 MB
Page 5 of 244
Knee airbags . . . . . . . . . . . . . . . . . . . . . 123
Side airbags . . . . . . . . . . . . . . . . . . . . . 125
Child Safety . . . . . . . . . . . . . . . . . . . 129
Important things to know ......... .
Child safety seats ................ .
Instal ling a chi ld safety seat .. .. .. . .
Additional Information ........... .
Vehicle operation ............ .
Intelligent technology .. .. .. . .
Notice about data recorded by vehicle
control modules .............. ... .
Electronic Stabilization Control (ESC) .
Rear spoiler ................ ... . .
Braking ........................ .
E lect ro-me chan ical power assis t ... . .
D riving w ith your quattro ......... .
Energy management ............. .
Driving and environment .....
The first 1,000 miles (1,500 km) and
afterwards .............. .. .. .. . .
Avoid damaging the vehicle ........ .
Driving through water on roads ... . .
Catalytic converter ............... .
Shutting down vehicle ............ .
Operate your vehicle economically and
minimize pollution ............... . 129
134
137
140
141
141
141
14 1
143
144
145
1 46
146
1 4 9
149
150
150 150
151
15 1
Tra iler towing . . . . . . . . . . . . . . . . . . . . 153
Vehicle care . . . . . . . . . . . . . . . . . . . 154
Vehicle care and cleaning . . . . . 154
General information . . . . . . . . . . . . . . 154
Car washes . . . . . . . . . . . . . . . . . . . . . . 154
Cleaning and care information . . . . . . 155
Fuel supply and filling your
fuel tank . . . . . . . . . . . . . . . . . . . . . . .
160
Gasoline . . . . . . . . . . . . . . . . . . . . . . . . 160
Fuel tank. . . . . . . . . . . . . . . . . . . . . . . . 161
Checking and filling . . . . . . . . . . . 164
Engine hood . . . . . . . . . . . . . . . . . . . . . 164
Eng ine oil . . . . . . . . . . . . . . . . . . . . . . . 166
Eng ine cooling system ............. 171
Brake fluid ...................... 174
Table of contents 3
Battery . . . . . . . . . . . . . . . . . . . . . . . . . 175
Windshield/headlight washer
container . . . . . . . . . . . . . . . . . . . . . . . 179
Tires and wheels ........... .. .
Tires ..... .. .... .. . .. .......... .
Tire pressure monitoring system ... .
Run-flat tire s .. .. ............... .
Do-it-yourself service ........ .
What do I do now? ........... .
Trunk escape handle ............. .
Vehicle tool kit .... .............. .
T ire repai r .... ... .. ............. .
What should I be aware of when
h . t
' 7 c angmg a ire .................. .
Fuses and bulbs .. .. .. ..... ... .
El ectr ical fuses . .. .. ............. .
Bulbs .......................... .
Emergency situations ........ .
General ........................ .
Starting by pushing or towing ...... .
Starting with jumper cables ....... .
U se of jump er cables ............. .
Emergency towing with commercia l
tow truck ...................... .
Lifting vehicle .. .. ............... . 180
180
198
201
204
204
204
204
205
208
212
212
215
2 16
216
216
216
217
218
221
Technical data . . . . . . . . . . . . . . . . . 222
Technical Data . . . . . . . . . . . . . . . . . 222
Vehicle identification . . . . . . . . . . . . . . 222
Weights . . . . . . . . . . . . . . . . . . . . . . . . 222
Dimensions . . . . . . . . . . . . . . . . . . . . . . 223
Capacities . . . . . . . . . . . . . . . . . . . . . . . 223
Gasoline engines . . . . . . . . . . . . . . . . . 224
Consumer Information . . . . . . . 225
Warranty coverages . . . . . . . . . . . . . . . 225
Operating your vehicle outside the
U.S. A. or Canada . . . . . . . . . . . . . . . . . 225
Audi Service Repair Manuals and
Literature . . . . . . . . . . . . . . . . . . . . . . . 225
Maintenance. . . . . . . . . . . . . . . . . . . . . 225
Additional accessories, modifications
and parts rep lacement . . . . . . . . . . . . 227
•
•
Page 18 of 244
16 Instruments and warning/indicator lights
4 Safety belt warning light
Applies to vehicles: with safety belt warning light
The warning light is a reminder to fasten
safety belts .
The warning light . comes o n for a few sec
onds after the ignit io n is switched on as a re
minder to fasten your safety be lt .
Addit ional information on safety be lts
¢page 100.
D Battery
This warning/indicator light detects o mal
function in the generator or in the vehicle's
electrical system.
The . warning/in dicator lig ht ill uminates
when you switch on t he ignit ion and must go
out after the engi ne has started.
• Alternator fault: Battery is not being
charged
If the indicator light turns o n an d the me s
sage a ppears, t he re is a m alfu nct ion in the
generato r or vehicle e lectr ica l system.
Dr ive to yo ur auth o riz ed Aud i dea le r or quali
fi ed workshop immedi ately . B ecau se the vehi
cle ba tte ry is dischargi ng, tur n off a ll unnec
essary elect rical e quipment such as the radio .
See k professional ass ista nce if the batte ry
charge leve l is to o low.
(•) Low battery: battery will be charged
while driving
If th e indica to r l ight tu rns o n an d th e mes
s a ge appears, there ma y be lim ited st artin g
a bili ty.
If thi s message tu rns off after a li tt le w hile,
the bat tery cha rged eno ugh wh ile d riving.
I f th e message does not turn off, have you r
author iz e d Audi d ealer or qu alified workshop
cor rect t he malfunc tion .
~ Engine oil pressure
The red engine oil pressure warning symbol
requires immediate service or repair .
If the . symbo l appears in the disp lay and
flashes, the o il pressure is too low . In add ition
to the symbol, the followi ng message also ap
pears in the display :
Switch off engine! Oil pressure is too low
.. Pull off t he roa d and stop the ve hicle .
.. Shut the eng ine down.
.. Check the engine oil level¢
page 169 .
.. Contact your authori zed Audi dealer for as -
sistance if necessa ry.
Engine oil level too low
If the engine oil leve l is too low , top off oil to
the p roper level
¢ page 169 .
Engine oil level OK
If the . sym bo l starts flas hing ag ain even
t h o ug h t he eng ine oi l level checks OK on the
dips tic k,
do not start driving again and do
not let the engine run at idle.
Instead , con
tact yo ur auth o rized Aud i dea le r fo r ass is
tance.
(D Tips
- The engine oil pressure symbol. is
not an indicator for a low engine oil lev
el. Do not rely on it. Instead, check the oil level in your engine at regular inter
vals, preferably each time you refuel, and always before going on a long trip .
- The yellow oil level warn ing indication
Ill requires oil refill or workshop serv
ice without delay. Do not wait until the
red oil pressure warning symbol.
starts to flash before you respond to
the low oil level warning
II . By then,
your engine may already have suffered
serious damage.
Page 58 of 244

56 Clear vis ion
The washer jets extend forward out o f the
front bumper driven by water pressure to
spray the front headlights with water.
You shou ld inspect the headlights regularly
(for example when refueling) and clean
off
any solid dirt or insects from the lenses .
To ensure the system wo rks properly in wi nter,
keep the washer jets free of snow and remove
any ice using a de-icing spray.
Service position
It is only possible to change wiper blades if
you move the wiper arms to the service posi
tion .
In o rder to use the windsh ield wipers, t he
front lid mus t be comp lete ly closed.
Moving w iper blades to the service
position
• When there is a risk of frost, make s ure that
the wiper b lades a re not frozen to the wind
shield .
.. Switch the ignition on.
.. Move the wiper lever to position
0
c> page 54, fig. 62.
.. Press the I Reset I button until the Displa y
typ e
menu appears in the Driver Informa
t ion System display .
.. Us ing the rocker switch and the
! Reset ! but
ton, select the
S et > W iper s > Front > Serv
ice positi on on
function. The winds hield
wiper arms move to the service position.
Moving wiper blades to park position
.. Make certain that the wiper arms are lying
against the windshie ld .
.. Switch the ign ition on and move t he wiper
l ever from posi tion
O to 4 c> page 54,
fig . 62 .
The wiper arms will move back to
the park position.
«I) Note
Never drive yo ur vehicle when the w ind
shie ld w iper arms are in the service pos i
tion and pulled away from the windshie ld .
When you dr ive faste r than 4 mp h (6 km/ h), the wiper a
rms automatically return to
the park position and cou ld cause paint
damage to the front lid!
(D Tips
- Yo u can also turn on the se rvice posit ion,
for example, if yo u want to protect the
w indshield from icing by using a cover .
- The service posit ion moves to
off a uto
matically when you operate the w ind
shield wiper lever, or speed exceeds
4 mph (6 km/h).
Cleaning windshield wiper blades
Clean the windshie ld w iper blades when they
begin to leave streaks. Use a soft cloth and
glass cleaner to clean the windshield wiper
blades.
.. Place the windshie ld w iper arms in the serv
ice pos it ion . Refer to
c::> page 56 .
"' Lift the wiper arm away from the front win
dow.
_&. WARNING
Di rty windsh ield wiper b lades can impair
your view. This can lead to accidents .
-
Page 170 of 244
168 Checking and filling
Detergent additives in the o il will make fresh
oil look dark after the engine has been run
n ing for a short time . This is norma l and is not
a reason to change the oil more often than recommended.
D am ag e o r m alfun ction s due to lack of
m ainten ance
It is essent ial that yo u change your oil at the
recommended intervals using only engine oil
that complies with Audi oi l standard
VW 502 00 . Your Lim ited New Vehicle War
ranty does not cover damage or malfunctions
due to failure to follow recommended mainte
nance and use requ irements as set forth in
the Audi Owner's Manual and Warranty
&
M aintenance book let . Your dea ler will have to
deny warranty coverage un less you p resen t to
the dea ler proof in the form of Servi ce or Re
pa ir Orde rs that all schedu led maintenance
was performed in a timely manner.
Engine oil consumption
The engine in your vehicle depends on an ade
quate amount of oil to lubricate and cool all
of its moving ports.
I n o rder to prov ide effective lubr ication and
cooling of internal engine components, a ll in
ternal comb ustion engines consume a certain
amount of oil. Oi l consumption varies from
engine to engine and may change significantly
over the life of the eng ine . Typically, eng ines
with a specif ied break-in per iod (see
c::> page 149) consume more oil during the
break-in per iod than they consume after oil
consumption has stabilized .
Under normal conditions, the rate of oil con
sumpt io n depends on the quality and viscosity
of the oil, the RPM (revolutions per m inute) at
which the engine is operated, the ambient
temperature and road cond it io ns. Furthe r fac
tors are the amo unt of o il d ilution from wate r
condensation or fuel residue and the ox ida
tion level of the oi l. As any engine is subject to
wear as mileage bui lds up, the oil consump
tion may increase over t ime until replacement
of worn components may become necessary. Wi
th a ll these variab les coming into p lay, no
standard rate of oil consumption can be es
tab lished or spec ified. There is no alte rnative
to regular and frequent check ing of the o il lev
el, see
Note .
If the yellow engine oil leve l warning symbo l
in the instr ument cluster
1\1 lights up, you
sho uld check the oil leve l as soon as possib le
with the oil dipstick c::> page 169. Top off the
o il at your earliest conven ience
c::> page 169 .
A WARNING
-Before you chec k anything in the eng ine
compartment, a lways read and heed a ll
WAR NINGS
c::> .& in Working in the engine
comportment on page 164.
CI) Note
D riving with an insufficient o il level is like
l y to cause sever e damage to the engine.
(D Tips
- The oil pressure warn ing display. is
not an indicator of the oil level. Do not
rely on it . Instead, check the oil level in
your engine at r egular intervals, pr ef
erably ea ch time you refuel, and alway s
before going on a long trip.
- If you have the impression yo ur engine
cons umes excessive amoun ts of oil, we
recommend that you consult your Aud i
dea ler to have the cause of your concern
properly diagnosed. Keep in mind that
the accurate meas urement of o il con
sumption requires great care and may
take some t ime . Your Audi dea ler has in
st ruct ions about how to measure oil con
sumption acc urately.
Page 183 of 244
-Never mount used tires on yo ur vehicle if
yo u are not sure of their "previous histo
ry." Old used tires may have been dam
aged even though the damage cannot be
seen that can lead to sudden tire failure
and loss of vehicle control.
- If you notice unusual vibration or if the
vehicle pulls to one side when d riving, al
ways stop as soon as it is safe to do so
and check the wheels and tires for dam
age .
(D Note
-Please note that summer and winter
tires are designed for the cond itions that
are typ ic al in those seasons. Aud i recom
mends using w inter t ires du ring the win-
Glossary of tire and loading terminology
Accessory weight
means the comb ined weight (in excess of
those standard items which may be replaced)
of automatic tra nsmission, power steering,
power brakes, power windows, power seats,
radio, and heater, to the extent that these
items are availab le as factory-installed equip
ment (whether installed or not) .
Aspect ratio
means the ratio of the height to the width of
the tire in percent . Numbers of 55 or lower in
d icate a low sidewall for improved steering re
sponse and better overall handling on dry
pavement .
Bead
means the pa rt of the ti re that is made of
steel wires, wrapped or reinforced by ply cords
and that is shaped to fit the rim.
Bead s eparation
means a b reakdown of the bond between
components in the bead.
Cord
means the strands forming the plies in the
tire.
Tire s an d wheel s 181
ter months . Low temperatu res signifi
cantly decrease the elastic ity of summer
t ires, which affects traction and braking
ability. If summer tires are used in very
co ld temperatures, cracks can form on
the tread bars, res ulting in permanent
ti re damage that can cause loud drivi ng
noise and unbalanced tires. Aud i is not
responsib le for this type of damage.
- Burn ished, polished or chromed rims
must not be used in winter weather. Th e
surfa ce of the rims does not have suffi
c ien t cor rosion pro te cti on for this and
c o ul d be pe rmanen tly damaged by road
salt or similar substances. This damage
is not covered by warranty.
Cold tir e inflation pressure
me ans the t ire press ure re commended by the
vehicle manufacturer fo r a tire o f a des igna ted
size that has not bee n driven for more than a
coup le of miles (k ilomete rs) at low speeds in
the three hour pe riod before the tire press ure
is measured or adjusted.
Curb weight
means the weight o f a motor vehicle with
standard equipment including the maximum
capacity of fuel, o il, and coolant, air cond i
tion ing and additional weight of optiona l
equipment.
E xtra load tire
means a tire designed to operate at higher
l oads and at higher inflation press ures than
the corresponding standard tire. Extra load
tires my be ident ified as "XL", "xl", "EXTRA
LOAD", or "RF" on the sidewall.
Gross Axle Weight Rating ("GAWR")
means the load-carrying capacity of a single
axle system, measured at the tire-ground in-
ter~ces.
~
•
•
Page 200 of 244
198 Tire s and wheel s
or ridges on the road, part icu larly if the tire is
u nderinflated .
I n o rder to m inim ize the o ccurrence of impact
damage to the t ires of your vehicle, we recom
mend that you observe the following precau
tions:
- Always maintain recommended infla tion
pressures. Chec k your tire pressure every
2,000 miles (3,000
km) and add air if neces
sary .
- Drive carefu lly on roads with potholes, deep
gullies or ridges. The impact from driving
t h rough or over such obstacles can damage
your tires. Impact with a curb may also cause damage to your tires.
- After any impact, immediately inspect your
tires or have them inspected by the nearest
authorized Aud i dealer. Replace a damaged
t ire as soon as possible .
- Inspect your t ires every 2,000 miles (3,000
km) for damage and wear . Damage is not al
ways easy to see . Damage can lead to loss of
air and underinflation, wh ich could eventu
ally cause t ire failure . If you be lieve that a
t ire may have been damaged, replace the
t ir e as soon as possible.
- T hese tires may wea r mo re quick ly than oth
ers.
- Please a lso remember that, wh ile these t ires
deliver respons ive handling, they may ride
l ess comfortably and make mo re no ise than
other choices.
Reduced performance in winter /co ld
sea son condit ion s
All ti res a re des igned for certa in pu rposes.
The low aspect ratio, ultra high performance
tires originally installed on your vehicle are in
tended for max imum dry and wet road per
formance and handling. They are not suitable
for cold, snowy or icy weather condit ions. If
you dr ive under those circumstances, you
should equip your vehicle with all -season or
winter tires, which offer better traction under
those cond it ions. We suggest you use the rec
ommended snow or all-season tires specified
fo r your vehi cle, or their eq uivalent. Refer to
q page 195
for more detailed infor
mation regarding winter tires.
Tire pressure monitoring system
General notes
Applies to veh icles: w ith tire pressure monitoring system
Each tire, incl uding the spare ( if provided),
sho uld be checked monthly when co ld and in
flated to the inflation pressure recommended by the veh icle manufacturer on the veh icle
placard or tire inflation pressure label. (If your
vehicle has tires of a different size than the
s ize indicated on the vehicle placard or tire i n
flat ion p ressure label, you should dete rmine
the p roper t ire infla tion p ress ure fo r th ose
t i res.)
As an added safety featu re, your ve hicle has
been equipped with a tire pressure mon itoring
system ( TPMS) tha t illum inates a low ti re
pressure tel ltale when one o r more of your
tires is significant ly under-inflated . Acco rding
l y, when the low tire pressure telltale i llumi
nates, you shou ld stop and check your tires as
soon as possib le, and inflate them to the
proper pressure. Driving on a sign ificantly un
der- inflated t ire causes the tire to overheat
and can lead to tire fa ilure . Under-inflat ion al
so reduces fuel effic iency and tire tread life ,
and may affect the vehicle 's hand ling and
stopp ing abili ty.
Please note that the TPMS is not a substitute
for proper tire ma intenance, and it is the d riv
er's respons ibility to maintain co rrect tire
pressure, even if under-inflation has not
reached the leve l to tr igger illum inat ion of the
T PMS low tire pressu re tellta le .
You r vehicle has also been equipped w ith a
T PMS ma lf u nction indicator to ind icate when
the sys tem is not o perating p roperly . Th e
T PMS ma lfunction indicator is combined w ith
t h e low tire pressure te lltale. When the sys
tem detects a malfunction, the telltale will
flash for approximately one min ute and then ..,_
Page 204 of 244
202 Tires and wheels
(80 km/h)
¢ page 202, Driving with run -flat
tires .
When it is not possible to continue
driving, even with run-flat tires?
- If the E lectronic Stabilization Control (ESC)
is not working or keeps coming on.
- If the Tire Pressure Monitoring System does
not work .
-If the tire has been severely damaged, in a
crash, for example. The tread can separate
from a damaged tire as the whee l turns , and
hit parts of the vehicle , such as the fuel tank
filler neck, fuel lines or brake lines.
- Do not continue driving if severe vibration
occurs or if the tire starts to smoke because
the tire is running hot.
- Do not continue driving if damage to the
tire, such as cracks in the sidewall, appears.
A WARNING
Improper use of run-flat t ires can cause
veh icle damage that can lead to loss of ve
hicle control, a crash and serious pe rsonal
injury.
- Run-flat tires can only be used with spe cial rims.
- Run-flat tires must always be mon itored
with a properly programmed Tire
P re
ssure Mon itor ing System.
- Always inspect a tire that has lost air to
make sure it is safe to drive with the tir e
in the run-flat mode.
- Never drive with run-flat tires that have
been damaged in a collision .
- Never drive with run-flat tires if heat
build-up causes the tire to give off
smoke .
- Never drive with run-flat tires if the vehi
cle shakes or v ibrates severely.
- Never drive with a run-flat tire that de
velops sidewall cracks or other damage
wh ile in use .
- If you switch between standard and run
flat tires, an authorized Audi dealer or qualified workshop must reprogram the
control module .
-
(D Note
Run-flat tires have specia l characteristics
and requirements, that are very different
from conventional tires. Run-flat tires re
quire special rims for run-flat use and can
not be used on conventional wheel rims.
(D Tips
- If you are not able to cont inue driving
with run-flat tires, please seek professio
nal assistance.
- Please contact your authorized Audi
dealer or Audi of America, Inc. if you
have questions about tires and rims .
Driving with run-flat tires
Applies to vehicles: wit h Run -flat tires
Handling characteristics change when tire
pressure is low .
Driving on tires with low tire pressure changes
the way a vehicle handles, particularly when
cornering and braking. The handling charac
teristics of run-flat tires do not seem to
change a lot even when driving on low pres
sure or in the run-flat mode . Nevertheless you
must still take specia l precautions when ope r
at ing a vehicle on run-flat tires when tire pres
sure is low o r the tire(s) is flat:
.,. The Electronic Stabilization Control (ESC)
must be switched on.
.,. Never drive faster than 50 mph (80 km/h)
¢&_ .
.,. Plan ahead when driving and anticipate
what you will have to do considering traffic
and road conditions up ahead .
.,. Accelerate carefully.
.,. Avo id unnecessary and sudden steering and
brak ing maneuvers.
.,. Reduce your speed in plenty of time before
intersections, curves and other places where
you may have to react quickly.
Please see :
¢ page 202, When it is not possi
ble to continue driving, even with run-flat
tires?
Page 215 of 244
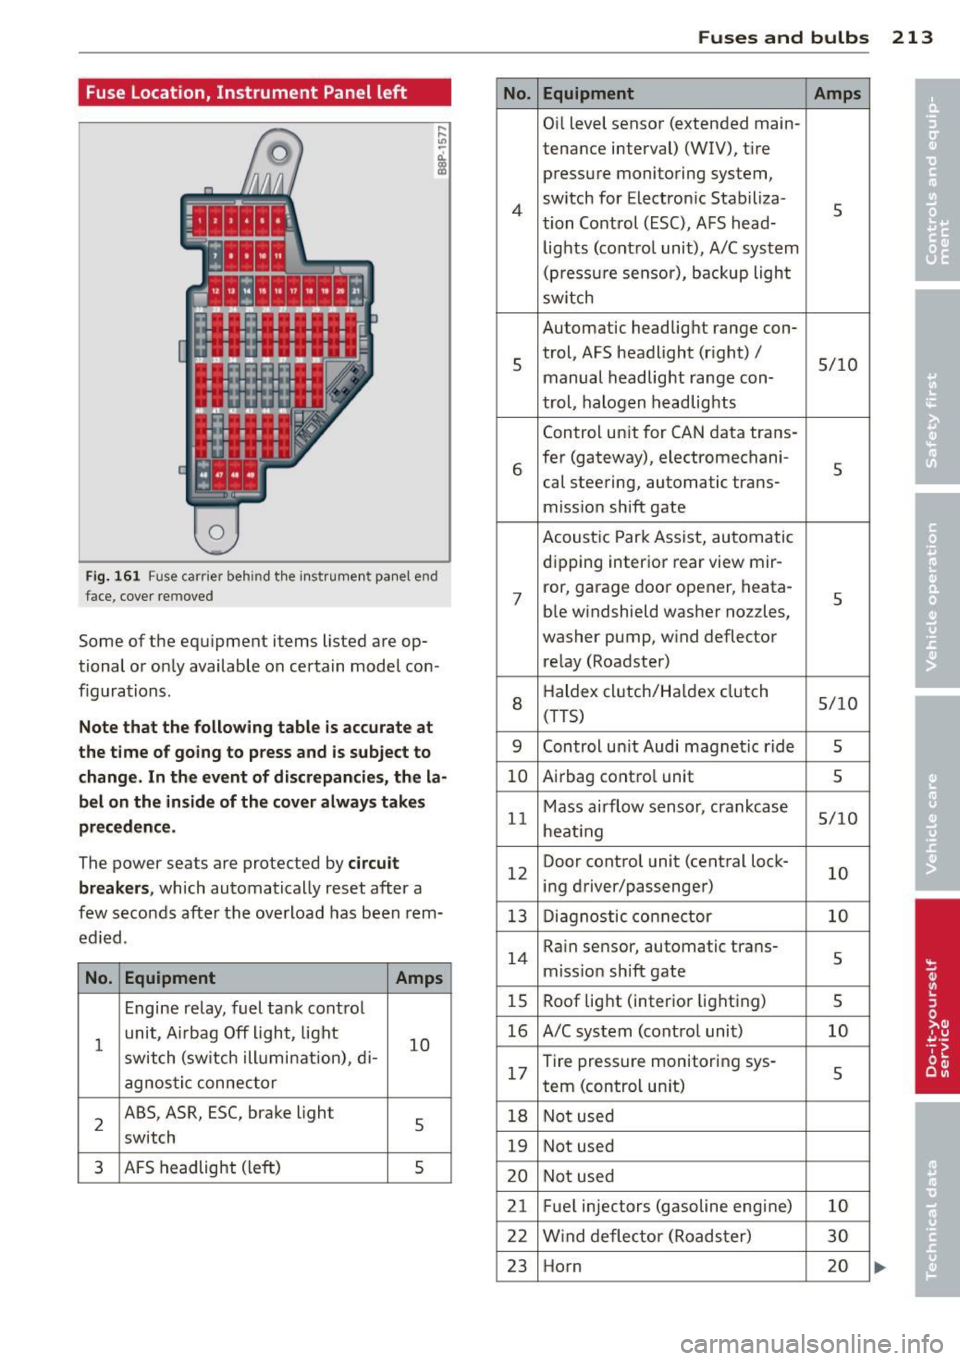
Fuse Location, Instrument Panel left
0
Fig. 161 Fuse carrier behind the instrument panel end
face, cover removed
Some of the eq u i prnent items listed a re op
tional or only available on certain model con
f igurations.
Note that the following table is accurate at
the time of going to press and is subject to
change. In the event of d iscrepancies, the la
bel on the in side of the cover always takes
precedence .
The power seats are protected by circuit
breakers ,
which automatically reset after a
few seconds after the overload has been rem
ed ied.
No. Equipment Amps
Engine relay, fuel tank cont ro l
1
unit, A irbag Off light, light
10 switch (sw itch illumi nation), di-
agnostic connector
2
ABS, ASR, ESC, brake light
5 switch
3 AFS headlight (left) 5
No.
4
5
6
7
8
9
10
11
12
13
14
15
16
17
18
19
20
21 22
23
Fuses and bulbs 213
Equipment Amps
Oil level sensor (extended main-
tenance interval)
(WIV), t ir e
press ure monitoring system,
sw itch for Electron ic Stabiliza-
5 tion Control (ESC), AFS head-
lights (control unit), A/C system
(pressure sensor), backup light
sw itch
Automatic headlight range con- trol, AFS headlight (right) /
5/10
manual headlight range con-
trol, halogen headlights
Control unit for CAN data trans-
fer (gateway), electrornechani-
5 cal steering, automatic trans-
miss ion shift gate
Acoustic Park Assist, automatic
d ip ping interior rear
view rnir-
ror, garage door opener, heata-
5 ble windshield washer nozzles,
washer pump, w ind deflector
relay (Roadster)
H aldex clutch/Ha ldex clutch
5/10 (TTS)
Control un it Audi magnetic ride
5
A irbag contro l unit 5
Mass airflow sensor, crankcase 5/10
heating
Door control unit (central lock -
10 ing driver/passenger)
Diagnostic connector
10
Rain sensor, automatic trans-
5 miss ion sh ift gate
Roof light (interior lighting)
5
A/C system (contro l unit) 10
Tire pressure monitoring sys -
5 tern (control un it)
Not used
Not used
Not used
Fuel injectors (gasoline eng ine)
10
Wind deflector (Roadster) 30
Horn 20
Page 233 of 244
_______________________________ ___:I~n ~d ~e:.::x 231
Temperature ... ... .... ... .. .. .. .... 68
Venti lation ..... .. .... ... .. .. .. .... 67
C lock ..... ................... .. ....
11
Clutch overheating . . . . . . . . . . . . . . . . . . . 86
Cold tire inflat ion pressure ... .. .. .. .. .
184
Com ing home .............. ... ... ... 49
Compass m irror . ....... ... .. .. .. .. .. 58
Comp lian ce .. ............. .. .. .. ... 228
Consumer Info rmat ion . . . . . . . . . . . 98, 225
Contact ing NH TSA . ..... ... .. .. .. .. .. 98
Controls Cleaning . .. .. ........... .. .. .. ...
156
Controls and d isp lays ....... .. .. .. .. .. . 8
Convenience close/open feat ure
Powe r top . . . . . . . . . . . . . . . . . . . . . . . . .
43
Windows . ..... ...... ... .. .. .. .... 40
Conve rtible c hild safety sea ts .. .. .. .. .
134
Convertible locking retractor
Activating . . . . . . . . . . . . . . . . . . . . . . . .
139
Deactivating ................ .... .. 139
Using to secure a ch ild safety seat 137, 139
Convertible top . ........... .. .. .. .. .. 41
Au tomatic convertible top .. .. .. .. .. .. 43
Emergency operation ........... .... . 44
Ge ne ral i nfo rmation .......... ... ...
41
manual conve rtib le top .. ... . .. ... ... 42
War ning/ indic to r l igh ts .... .. .. .. .. ..
1 7
W ind deflecto r ........... .... .. .. .. 44
Cooling system . . . . . . . . . . . . . . . . . . . . .
1 71
Expansion ta nk ... ... ... .. .. .. .. .. . 172
Cornering light ............ .... .. .. .. 49
Cruise control . . . . . . . . . . . . . . . . . . . . . . . 77
Changing spee d . . . . . . . . . . . . . . . . . . . . 7 8
Presetting your speed . . . . . . . . . . . . . . . 78
Sw itching
off .... ..... ... .. .. .. .... 78
Sw itching on . . . . . . . . . . . . . . . . . . . . . . . 77
War ning/ indicator lights ... .. .. .. .. ..
21
Cup holder . . . . . . . . . . . . . . . . . . . . . . . . . . 63
Current fuel m ileage
23
D
Damping
refer to Audi magnetic ride ... .. .. .. .. 79
D ata recorder . ..... .... ... .. .. .. ... 14 1
Date display . . . . . . . . . . . . . . . . . . . . . . . . 11
Daytime running lights .... .. .. .. .. .. .. 48
Decla rat ion of compliance
Ce ll phone package .. ... .... ... .. .. 228
E lectronic immob ilizer .. ..... ... .. .. 228
Homelink universal remote control . .. 228
Remo te contro l key ... ............. 228
Decorative deca ls
Cleaning . ... .... ... .. .. ..... ... ..
156
Decorative pa rts/tr im
Cleaning .. .. .. .. .... .............
156
def
What does this mea n when it appears in
the tr ip odometer display? ...........
12
Defective light bulb warning . ....... .. . 20
Defrost ing the w indows . .... ..... .. .. . 70
Determ ining correct load limit ........
189
Digital clock . . . . . . . . . . . . . . . . . . . . . . . . 11
D . · l 1g1ta compass . . . . . . . . . . . . . . . . . . . . . 58
Dimens ions . .. .. .. .... ............. 223
D imming the rearview m irror .. ... .. .. . 53
D ipst ick
Reading the d ipst ick properly ........
169
Displays
Cleaning
156
Distance ... .. .. .... . ... ...... ... .. . 23
Driver informat io n system
Boost ........ .. .. ... ....... ...... 26
E ngine oi l tempera ture .. ..... .. .. .. . 26
Menu but to n .. .. ... ..... ..... .. .. . 25
Menu disp lay . . . . . . . . . . . . . . . . . . . . . . 24
Open door or front lid warning ... .. .. . 22
Outsid e temperature disp lay . . . . . . . . . . 22
Serv ice inte rval display . . . . . . . . . . . . . . 28
Se tting ... .. .. .. .... ...... ....... . 25
Sound system display ... .... ... .. .. .
22
T' np compute r .. .. .. ................ 23
Dr iver seat
refer to Seating position . ..... .. .. .. . 92
Drivi ng
Run -flat t ires . ..... . .. .. ..... ... .. 20 2
Drivi ng safely ...... ........... ......
91
Driving throug h wate r .. .. .. .. ... .. .. 150
D upli cate key . .. .. .... ... .... ...... . 32
Dus t fil ter . . . . . . . . . . . . . . . . . . . . . . . . . . 68
•
•
Page 234 of 244
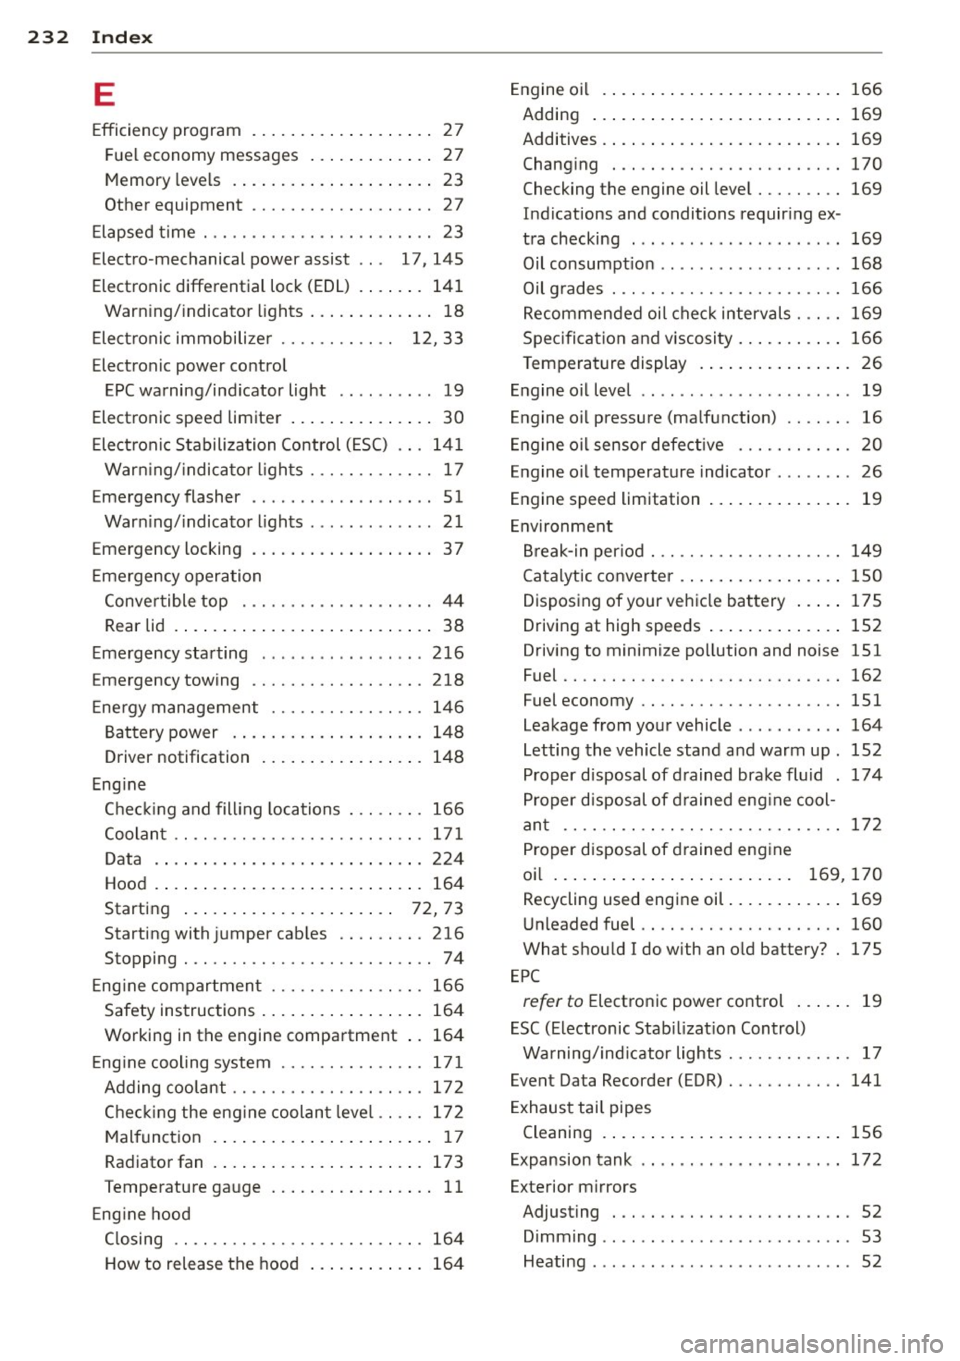
232 Index
E
Efficiency program ....... .. .. .. .... .. 27
F ue l economy messages ... .. .. .... .. 27
Memory levels . . . . . . . . . . . . . . . . . . . . . 23
Other equipment .. ......... .. .. .. .. 2 7
E lapsed time ... .... ....... .. .. .. .. .. 23
Electro -mechanical power assist . . . 17 , 145
Elect ronic differential lock (EDL) . . . . . . . 141
Warn ing/ indicato r lights ... .. .. .... .. 18
E lect roni c immobili ze r . . . . . . . . . . . . 12, 33
Electronic power co ntrol
EPC warning/ind icator light .. .. .. .... 19
Electronic speed limiter . . . . . . . . . . . . . . . 30
E lect ron ic S tabilization Control ( ESC) .. . 141
War ning/ indica tor l ights . .. .. .. .. .. .. 17
E mergency flasher . . . . . . . . . . . . . . . . . . . 51
War ning/ indicator lights . ...... .. .. .. 21
Emergency locking . . . . . . . . . . . . . . . . . . . 3 7
E mergency opera tion
Conve rtible top .......... .. .. .. .. .. 44
Rear lid . . . . . . . . . . . . . . . . . . . . . . . . . . . 38
E mergency sta rting .. ... ... .. .. .. .. . 216
Emergency towing ......... .. .. .. .. . 218
Ene rgy management ....... .. .. .. .. . 14 6
B att ery power . . . . . . . . . . . . . . . . . . . . 148
D river notification . . . . . . . . . . . . . . . . . 148
Eng ine
C he ckin g and fill ing locations . .. .. .. . 166
Coolan t .. .. ............. .... .. .. . 17 1
D ata .... .. ... ... .... ... .. .. .... . 224
Hood . ..... ... . ...... ... .. .. .... . 164
Starting . . . . . . . . . . . . . . . . . . . . . . 72, 73
Starting with jumper cab les .. .. .... . 216
Stopping . ................. ...... .. 74
E ng ine compartmen t ....... .. .. .. .. . 166
Safety instructions ... ... .. .. .. .... . 164
Working in the engine compa rtment .. 164
E ng ine cooling system ...... .. .. .. .. . 17 1
A dding coolant ........... .. ...... . 17 2
Chec king the eng ine coolan t leve l .. .. . 172
M alfunc tion . . . . . . . . . . . . . . . . . . . . . . . 17
Radiato r fan . .. .. ..... ... .. .. .... . 173
Temperature ga uge .. ... .. .. .. .... .. 11
E ng ine hood
C losing .. ............... .... .... . 164
H ow to release the hood ... .. .. .... . 164 E
ngine oi l .. .... .. ... .. ..... .... . .. 166
Adding ... .... .. .. ... ..... ... .. .. 169
Additives . ... .. .. ... .. ..... ... .. .. 169
Changi ng ..... .. ............. .... 170
Checking the engine oil level ..... .... 169
Indications and conditions requir ing ex -
tra checking ... .. ... .. .. ... ..... .. 169
Oil consumpt io n .. .......... ...... . 168
Oil g rades . .. .... ............. .. .. 166
Recommende d oi l c he ck interv als . .. .. 169
Spec ifi cat ion an d viscosity .. ... .. .. .. 166
T emperature display . .. ..... .... . .. . 26
En gine o il level .. .. ................ .. 19
Engine oi l pressure (ma lfunction) .. .. .. . 16
En gine oi l sensor defective . . . . . . . . . . . . 20
Engine oil temperature indicator ........ 26
Engine speed limitation .. ..... ... .. .. . 19
En vironment
Br eak-in per io d ... ............. .. .. 149
Catalytic converter . .. .. ..... ... .. .. 150
Disposing of your veh icle ba ttery ... .. 175
Driving at high speeds . . . . . . . . . . . . . . 152
Driving to minimi ze po llution and noise 151
Fuel ...... .... .. .. ............... 162
Fuel economy .... ................. 151
Leakage from your vehicle ..... ... ... 164
L etting the vehicle stand a nd warm up . 152
Proper disposal of d rained brak e flu id . 174
P roper d isposal of d rained eng ine cool-
an t ...... .... .. ................. 172
Proper disposal of d rained eng ine
oi l . . . . . . . . . . . . . . . . . . . . . . . . . 169, 170
Recycling used engine oil ..... ... .. .. 169
Un leaded fuel .. .. ............. .. .. 160
What shou ld I do with an o ld battery? . 175
EP C
refer to Elect ronic power co ntrol ... .. . 19
E SC (Electronic Stab ilizat io n Control)
Warning/ind icator lights ........ .. .. . 17
Event Data Recorder (EDR) ........ .... 141
E xhaust tail pipes
Cleaning . ..... .. ... .. ..... .... . .. 156
E xpansion tank . . . . . . . . . . . . . . . . . . . . . 172
Exterior m irrors
Adjust ing . .... .. ............. .... . 52
Dimming ...... .. ..... ....... ... .. . 53
Heating ....... .. ..... ....... ... .. . 52