brakes AUDI TT ROADSTER 2016 Owners Manual
[x] Cancel search | Manufacturer: AUDI, Model Year: 2016, Model line: TT ROADSTER, Model: AUDI TT ROADSTER 2016Pages: 306, PDF Size: 31.82 MB
Page 5 of 306
Downloaded from www.Manualslib.com manuals search engine 0
N
,.....
N
......
0
,.....
Vl
CX) Adjusting
graphic display and warning
beeps . . . . . . . . . . . . . . . . . . . . . . . . . . . . . 112
Fault warnings . . . . . . . . . . . . . . . . . . . . . .
112
Intelligent technology........... 113
Electronic stabilisation control (ESC) . . . . 113
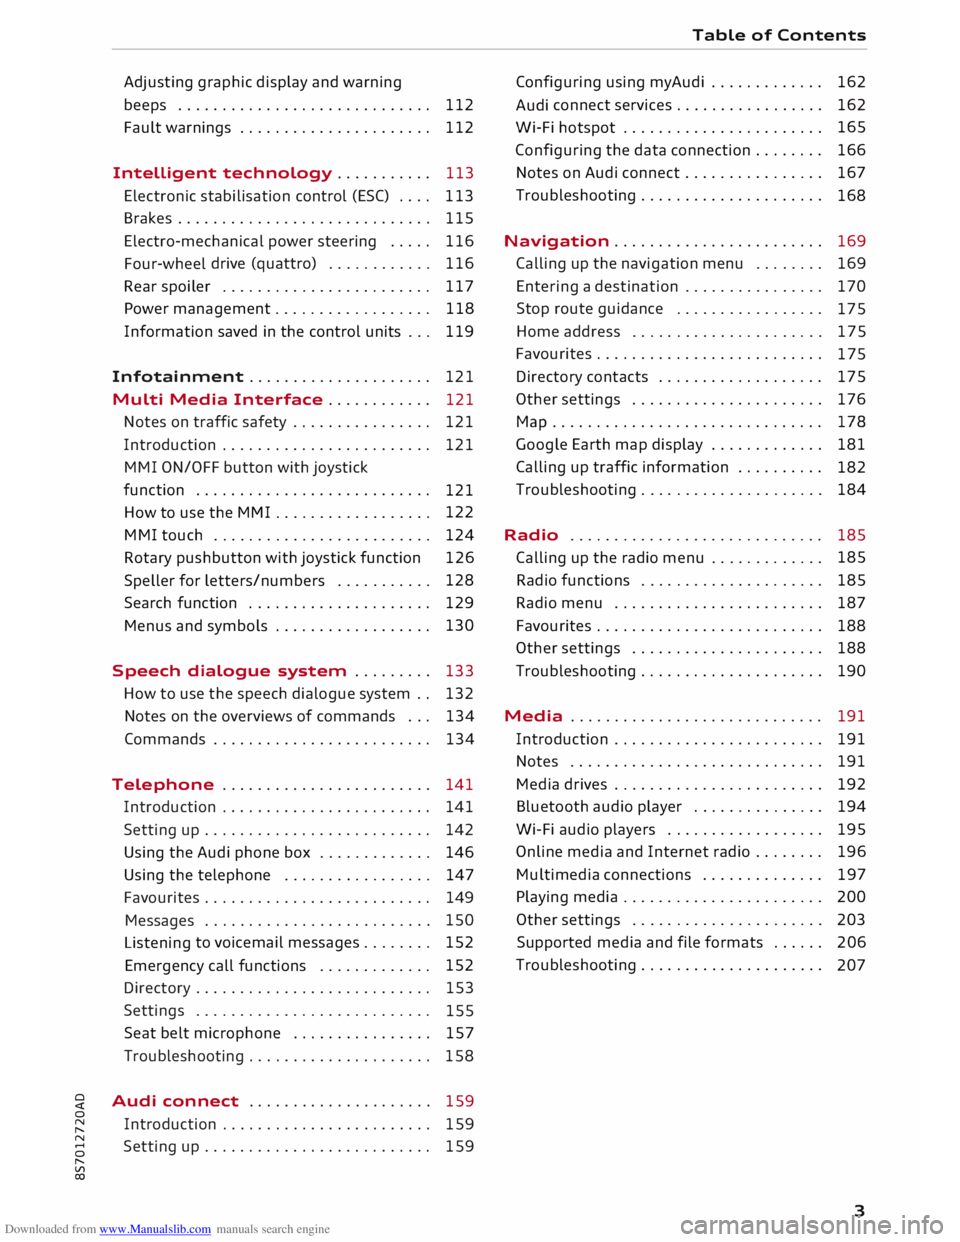
Brakes............................. 115
Electro-mechanical power steering . . . . .
116
Four-wheel drive (quattro)
. . . . . . . . . . . . 116
Rear spoiler ........................ 117
Power management.................. 118
Information saved in the control units . . . 119
Infotainment..................... 121
Multi Media Interface ............ 121
Notes on traffic safety . . . . . . . . . . . . . . . .
121
Introduction . . . . . . . . . . . . . . . . . . . . . . . .
121
M MI ON/OFF button with joystick
function . . . . . . . . . . . . . . . . . . . . . . . . . . .
121
How to use the MMI . . . . . . . . . . . . . . . . . . 122
MMI touch . . . . . . . . . . . . . . . . . . . . . . . . . 124
Rotary pushbutton with joystick function 126
Speller for letters/numbers . . . . . . . . . . . 128
Search function . . . . . . . . . . . . . . . . . . . . . 129
Menus and symbols . . . . . . . . . . . . . . . . . . 130
Speech dialogue system . . . . . . . . . 133
How to use the speech dialogue system . . 132
Notes on the overviews of commands . . .
134
Commands . . . . . . . . . . . . . . . . . . . . . . . . .
134
Telephone . . . . . . . . . . . . . . . . . . . . . . . .
141
Introduction . . . . . . . . . . . . . . . . . . . . . . . .
141
Setting up . . . . . . . . . . . . . . . . . . . . . . . . . .
142
Using the Audi phone box . . . . . . . . . . . . . 146
Using the telephone . . . . . . . . . . . . . . . . .
147
Favourites . . . . . . . . . . . . . . . . . . . . . . . . . . 149
Messages . . . . . . . . . . . . . . . . . . . . . . . . . . 150
Listening to
voicemail messages.. . . . . . . 152
Emergency call functions . . . . . . . . . . . . . 152
Directory . . . . . . . . . . . . . . . . . . . . . . . . . . .
153
Settings . . . . . . . . . . . . . . . . . . . . . . . . . . .
155
Seat belt microphone . . . . . . . . . . . . . . . .
157
Troubleshooting . . . . . . . . . . . . . . . . . . . . .
158
Audi connect . . . . . . . . . . . . . . . . . . . . .
159
Introduction . . . . . . . . . . . . . . . . . . . . . . . .
159
Setting up . . . . . . . . . . . . . . . . . . . . . . . . . .
159 Table
of Contents
Configuring using myAudi . . . . . . . . . . . . . 162
Audi connect
services . . . . . . . . . . . . . . . . . 162
Wi-Fi hotspot . . . . . . . . . . . . . . . . . . . . . . . 165
Configuring the data connection . . . . . . . . 166
Notes on Audi connect . . . . . . . . . . . . . . . . 167
Troubleshooting . . . . . . . . . . . . . . . . . . . . .
168
Navigation . . . . . . . . . . . . . . . . . . . . . . . . 169
Calling up the navigation menu . . . . . . . . 169
Entering a destination . . . . . . . . . . . . . . . . 170
Stop route guidance . . . . . . . . . . . . . . . . .
175
Home address . . . . . . . . . . . . . . . . . . . . . .
175
Favourites . . . . . . . . . . . . . . . . . . . . . . . . . .
17 5
Directory contacts ................... 175
Other settings . . . . . . . . . . . . . . . . . . . . . .
176
Ma p
............................... 178
Google Earth map display . . . . . . . . . . . . .
181
Calling up traffic information . . . . . . . . . .
182
Troubleshooting . . . . . . . . . . . . . . . . . . . . .
184
Radio ............................. 185
Calling up the radio menu . . . . . . . . . . . . . 185
Radio functions . . . . . . . . . . . . . . . . . . . . . 185
Radio menu . . . . . . . . . . . . . . . . . . . . . . . . 187
Favourites . . . . . . . . . . . . . . . . . . . . . . . . . . 188
Other settings . . . . . . . . . . . . . . . . . . . . . .
188
Troubleshooting . . . . . . . . . . . . . . . . . . . . . 190
Media ............................. 191
Introduction . . . . . . . . . . . . . . . . . . . . . . . . 191
Notes . . . . . . . . . . . . . . . . . . . . . . . . . . . . . 191
Media drives . . . . . . . . . . . . . . . . . . . . . . . .
192
Bluetooth audio player . . . . . . . . . . . . . . . 194
Wi-Fi audio players . . . . . . . . . . . . . . . . . . 195
Online media and Internet radio . . . . . . . .
196
Multimedia connections . . . . . . . . . . . . . .
197
Playing media . . . . . . . . . . . . . . . . . . . . . . .
200
Other settings . . . . . . . . . . . . . . . . . . . . . .
203
Supported media and file formats . . . . . .
206
Troubleshooting . . . . . . . . . . . . . . . . . . . . .
207
3
Page 15 of 306
Downloaded from www.Manualslib.com manuals search engine 0
N
,.....
N
......
0
,.....
Vl
CX) Instruments
and warning/indicator lamps
Camera-based traffic sign recogni
tion* ¢ page 90
Speed warning function*
¢page 86
Speed limiter*
¢page 88
Main beam assist*
¢page46
Main beam headlights
¢ page 45, ¢ page 46
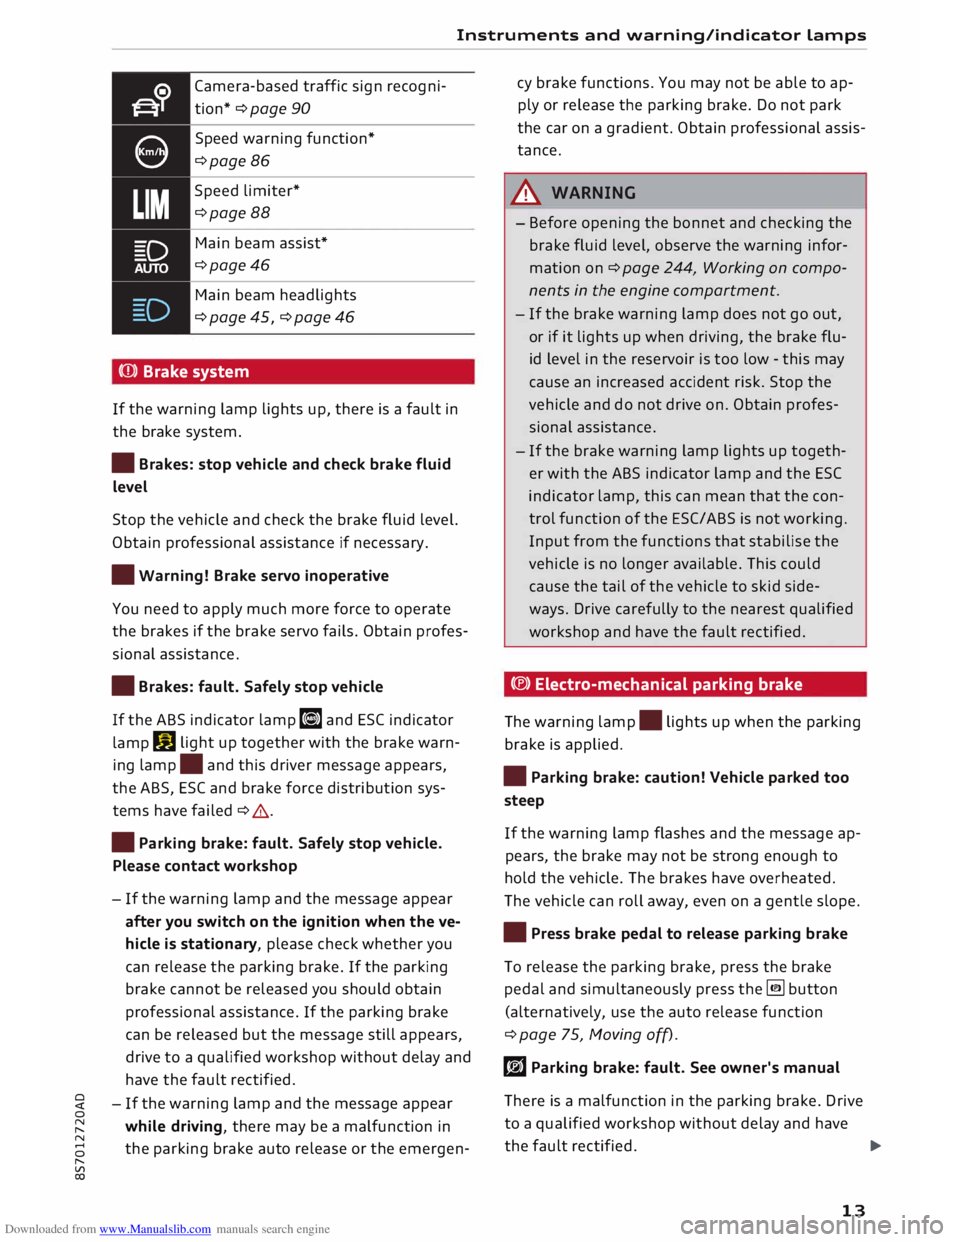
(Q)) Brake system
If the warning lamp lights up, there is a fault in
the brake system.
• Brakes: stop vehicle and check brake fluid
Level
Stop the vehicle and check the brake fluid level.
Obtain professional assistance if necessary.
• Warning! Brake servo inoperative
You need to apply much more force to operate
the brakes if the brake servo fails. Obtain profes
sional assistance .
• Brakes: fault. Safely stop vehicle
If the ABS indicator lamp liJ and ESC indicator
lamp DJ
light up together with the brake warn
ing lamp .
and this driver message appears,
the ABS, ESC and brake force distribution sys
tems have failed ¢ .&. .
• Parking brake: fault. Safely stop vehicle.
Please contact workshop
- If the warning lamp and the message appear
after you switch on the ignition when the ve
hicle is stationary, please check whether you
can release the parking brake. If the parking
brake cannot be released you should obtain
professional assistance. If the parking brake
can be released but the message still appears,
drive to a qualified workshop without delay and
have the fault rectified.
- If the warning lamp and the message appear
while driving, there may be a malfunction in
the parking brake auto release or the emergen- cy
brake functions. You may not be able to ap
ply or release the parking brake. Do not park
the car on a gradient. Obtain professional assis
tance.
A WARNING
- Before opening the bonnet and checking the
brake fluid level, observe the warning infor
mation on ¢ page 244, Working on compo
nents in the engine compartment.
- If the brake warning lamp does not go out,
or if it lights up when driving, the brake flu
id level in the reservoir is too low -this may
cause an increased accident risk. Stop the
vehicle and do not drive on. Obtain profes
sional assistance.
- If the brake warning lamp lights up togeth
er with the ABS indicator lamp and the ESC
indicator lamp, this can mean that the con
trol function of the ESC/ABS is not working.
Input from the functions that stabilise the
vehicle is no longer available. This could
cause the tail of the vehicle to skid side
ways. Drive carefully to the nearest qualified
workshop and have the fault rectified.
C®) Electro-mechanical parking brake
The warning lamp.
lights up when the parking
brake is applied.
• Parking brake: caution! Vehicle parked too
steep
If the warning lamp flashes and the message ap
pears, the brake may not be strong enough to
hold the vehicle. The brakes have overheated.
The vehicle can roll away, even on a gentle slope.
• Press brake pedal to release parking brake
To release the parking brake, press the brake
pedal and simultaneously press the� button
(alternatively, use the auto release function
¢ page 75, Moving off).
rlJ Parking brake: fault. See owner's manual
There is a malfunction in the parking brake. Drive
to a qualified workshop without delay and have
the fault rectified.
..,.
13
Page 16 of 306
Downloaded from www.Manualslib.com manuals search engine Instruments
and warning/indicator Lamps
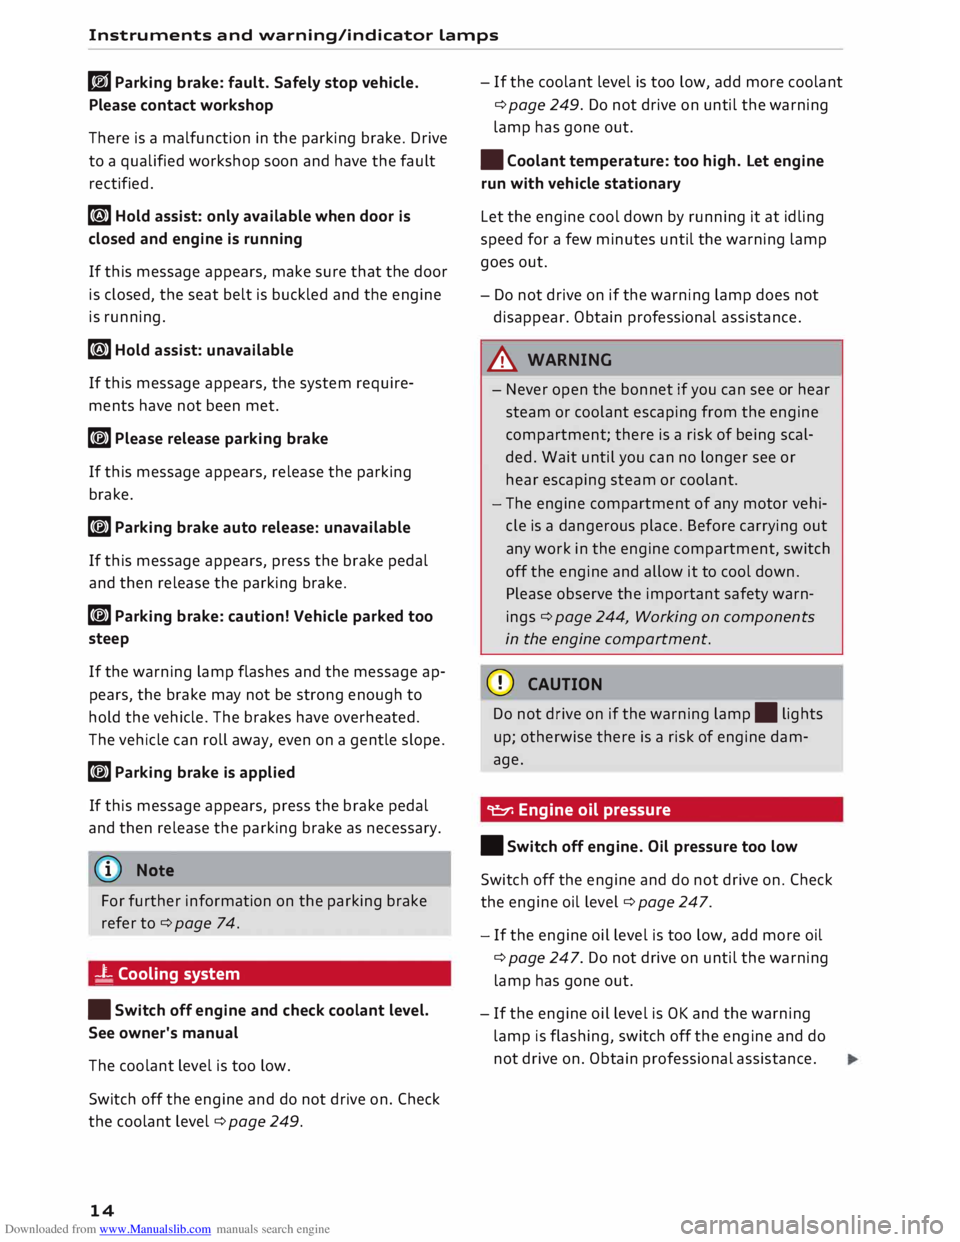
rlJ Parking brake: fault. Safely stop vehicle.
Please contact workshop
There is a malfunction in the parking brake. Drive
to a qualified workshop soon and have the fault
rectified.
[i] Hold assist: only available when door is
closed and engine is running
If this message appears, make sure that the door
is closed, the seat belt is buckled and the engine
is running.
[i] Hold assist: unavailable
If this message appears, the system require
ments have not been met.
� Please release parking brake
If this message appears, release the parking
brake.
� Parking brake auto release: unavailable
If this message appears, press the brake pedal
and then release the parking brake.
� Parking brake: caution! Vehicle parked too
steep
If the warning Lamp flashes and the message ap
pears, the brake may not be strong enough to
hold the vehicle. The brakes have overheated.
The vehicle can roll away, even on a gentle slope.
� Parking brake is applied
If this message appears, press the brake pedal
and then release the parking brake as necessary.
(D Note
For further information on the parking brake
refer to¢ page 74.
_t Cooling system
• Switch off engine and check coolant level.
See owner's manual
The coolant Level is too Low.
Switch off the engine and do not drive on. Check
the coolant Level¢ page 249.
14 -
If the coolant Level is too Low, add more coolant
¢ page 249. Do not drive on until the warning
Lamp has gone out.
• Coolant temperature: too high. Let engine
run with vehicle stationary
Let the engine cool down by running it at idling
speed for a few minutes until the warning Lamp
goes out.
- Do not drive on if the warning Lamp does not
disappear. Obtain professional assistance.
A WARNING
- Never open the bonnet if you can see or hear
steam or coolant escaping from the engine
compartment; there is a risk of being scal
ded. Wait until you can no Longer see or
hear escaping steam or coolant.
- The engine compartment of any motor vehi
cle is a dangerous place. Before carrying out
any work in the engine compartment, switch
off the engine and allow it to cool down.
Please observe the important safety warn
ings ¢ page 244, Working on components
in the engine compartment.
CD CAUTION
Do not drive on if the warning Lamp. Lights
up; otherwise there is a risk of engine dam
age.
9::::r. Engine oil pressure
• Switch off engine. Oil pressure too low
Switch off the engine and do not drive on. Check
the engine oil Level ¢ page 247.
- If the engine oil Level is too Low, add more oil
¢ page 247. Do not drive on until the warning
Lamp has gone out .
- If the engine oil Level is OK and the warning
Lamp is flashing, switch off the engine and do
not drive on. Obtain professional assistance.
Page 68 of 306
Downloaded from www.Manualslib.com manuals search engine Driving
Driving
General notes
Running in
A new vehicle should be run in over a distance of
1,500 km. For the first 1,000 km the engine
speed should not exceed 2/3 of the maximum
permissible engine speed -do not use full throt
tle. From 1,000 to 1,500 km you can gradually
increase the engine rpm and road speed.
During its first few hours of running, the internal
friction in the engine is greater than later on
when all the moving parts have bedded down.
How the vehicle is driven for the first 1,500 km
also influences the engine quality. After this peri
od you should continue driving at moderate en
gine speeds, in particular when the engine is
cold. This helps to reduce wear and tear on the
engine and increases the potential mileage which
can be covered by the engine.
You should also avoid driving with the engine
speed too low. Change down to a lower gear
when the engine no longer runs "smoothly". Ex
cessively high engine speeds are prevented by an
automatic rev limiter.
Letting the engine warm up/cool down
Applies to: Sand RS models
You can reduce the amount of wear and tear on
your vehicle during a sporty driving session sim
ply by adopting a more restrained driving style
while the engine is warming up and cooling
down.
When the engine is cold, the engine speed is limi
ted so that the full range of engine power is not
available. Once the engine has reached operating
temperature, the rev Limit moves to a higher
range of engine speeds. In addition, the tyres will
not develop their full grip potential until they
have had a chance to warm up on the road.
Even though the engine continues to be cooled
after you switch it off, it is particularly important
to give it time to cool down before parking. The
engine, brakes, exhaust system and gearbox will
66 all
reach very high temperatures when you adopt
a sporty driving style. Before you park the vehi
cle, allow it to cool down to normal temperature
by driving at moderate engine speeds for several
miles.
Avoiding damage to the car
CD CAUTION
Take care not to damage low-mounted parts
of the car (such as the spoiler or exhaust sys
tem) on steep ramps, uneven road surfaces or
roadside kerbs, etc. This applies especially to
vehicles with low ground clearance and to all
vehicles when fully laden.
Driving through water on roads
Please note the following in order to prevent
damage to the vehicle when driving through wa
ter (e.g. on flooded roads):
- The water level must not be higher than the ve
hicle's underbody.
- Do not drive faster than walking pace.
A WARNING
After driving through water, mud, sludge,
etc., the braking effect can be delayed slightly
due to moisture on the discs and brake pads.
Applying the brakes carefully several times
will remove the moisture and restore the full
braking effect.
CD CAUTION
- Parts of the vehicle (e.g. engine, gearbox,
running gear or electrical components) can
be badly damaged when driving through
water.
- Always switch off the start/stop system*
¢ page 71 before driving through water.
i Note
- It is advisable to check the depth at the
deepest point before approaching the wa
ter.
Page 69 of 306
Downloaded from www.Manualslib.com manuals search engine 0
N
,.....
N
......
0
,.....
Vl
CX) -
Do NOT stop the vehicle, drive in reverse or
switch off the engine before you are out of
the water.
- Bear in mind that waves created by oncom
ing traffic could exceed the permissible
wading depth of your vehicle.
- Avoid driving through salt water (corrosion).
How to improve economy and minimise
pollution
Fuel economy, environmental impact and wear
on the engine, brakes and tyres depend largely
on the way you drive the vehicle. By adopting an
economical driving style and anticipating the
traffic situation ahead, you can reduce fuel con
sumption by 10-15%. The following section gives
you some tips on lessening the impact on the en
vironment and reducing your operating costs at
the same time.
Anticipate well in advance
A car uses most fuel when accelerating. If you an
ticipate hazards and speed changes well in ad
vance, you will need to brake less and thus accel
erate less. Wherever possible, let the car slow
down gradually with a gear engaged, for in
stance when you can see that the next traffic
lights are red.
Change gear early to save fuel
An effective way of saving fuel is to change up
quickly through the gears. Running the engine at
high rpm in the lower gears uses an unnecessary
amount of fuel. Press the accelerator slowly and
avoid using the "kick-down" feature.
Avoid driving at high speed
Avoid travelling at top speed. Fuel consumption,
exhaust emissions and noise levels all increase
very rapidly at higher speeds. Driving at moder
ate speeds will help to save fuel.
Do not let the engine idle for longer than
necessary
Engine idling periods are automatically reduced
on vehicles with start/stop system*. On vehicles
without start/stop system*, it is worthwhile
switching off the engine at level crossings, for in- Driving
stance, or at traffic lights with a long red phase.
The fuel saved after only 30 -40 seconds is
greater than the amount of fuel needed to re
start the engine.
The engine takes a very long time to warm up
when it is running at idling speed. Mechanical
wear and pollutant emissions are also especially
high during this initial warm-up phase. It is
therefore best to drive off immediately after
starting the engine. Avoid running the engine at
high speed.
Regular servicing
Regular servicing can establish a basis for good
fuel economy before you start driving. A well
serviced engine gives you the benefit of im
proved fuel efficiency as well as maximum relia
bility and an enhanced resale value.
A poorly maintained engine can consume up to
ten percent more fuel than necessary.
Check the oil level when filling the tank. Oil con
sumption depends to a great extent on the en
gine load and engine speed. It is quite normal
that the oil consumption of a new engine only
reaches its lowest level after a certain mileage.
This means that the oil consumption can only be
properly assessed after about 5,000 km.
Avoid short trips
The engine and emission control system need to
reach their proper working temperature in order
to minimise fuel consumption and emissions.
A cold engine uses disproportionately more fuel.
The engine only reaches its working temperature
after about four kilometres, when fuel consump
tion will return to a normal level.
Check tyre pressures
Always make sure the tyres are inflated to the
correct tyre pressures to save fuel. If the tyre
pressures are just 0.5 bar too low, this can in
crease the fuel consumption by as much as 5 %.
Due to the greater rolling resistance, under-infla
tion also increases tyre wear and impairs han
dling.
67
Page 76 of 306
Downloaded from www.Manualslib.com manuals search engine Driving
Driver messages in the instrument cluster
display
Applies to: vehicles with start/stop system
Start/stop system: deactivated. Please
restart engine manually
This message appears if certain conditions have
not been met during the stop phase and the
start/stop system cannot start the engine again
automatically. The !START
ENGINE STOP!
button
must be used to start the engine.
Start/stop system: fault. Function
unavailable. Please contact workshop
There is a malfunction in the start/stop system.
Drive to a workshop soon and have the fault recti
fied.
Electro-mechanical
parking brake
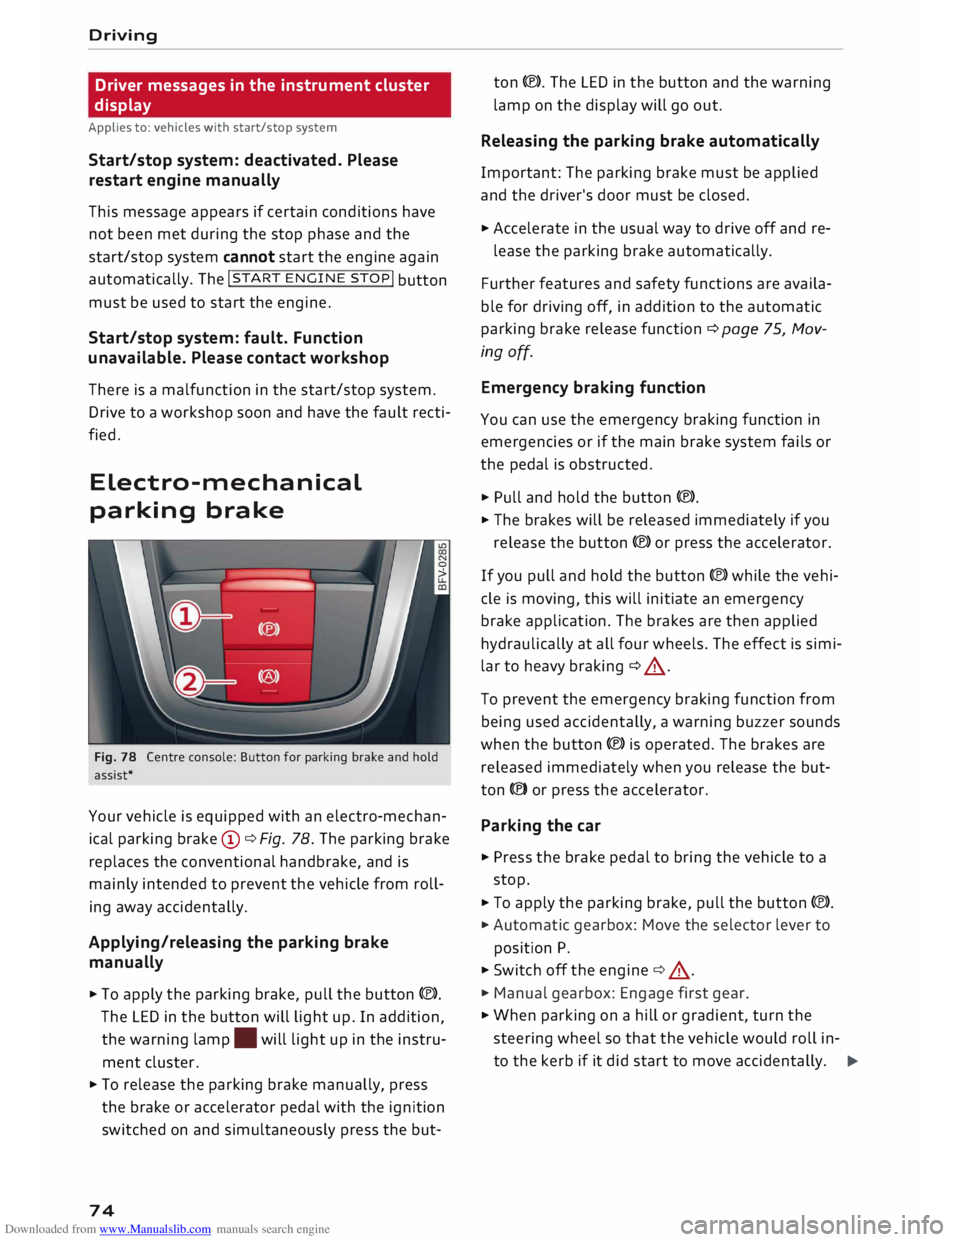
Fig. 78 Centre console: Button for parking brake and hold
assist*
Your vehicle is equipped with an electro-mechan
ical parking brake (D ¢ Fig. 78. The parking brake
replaces the conventional handbrake, and is
mainly intended to prevent the vehicle from roll
ing away accidentally.
Applying/releasing the parking brake
manually
.,. To
apply the parking brake, pull the button C®>.
The LED in the button will light up. In addition,
the warning lamp. will light up in the instru
ment cluster .
.,. To release the parking brake manually, press
the brake or accelerator pedal with the ignition
switched on and simultaneously press the but-
74 ton
(®). The LED in the button and the warning
lamp on the display will go out.
Releasing the parking brake automatically
Important: The parking brake must be applied
and the driver's door must be closed.
.,. Accelerate in the usual way to drive off and re-
lease the parking brake automatically.
Further features and safety functions are availa
ble for driving off, in addition to the automatic
parking brake release function ¢ page 75, Mov
ing off.
Emergency braking function
You can use the emergency braking function in
emergencies or if the main brake system fails or
the pedal is obstructed.
.,. Pull and hold the button (®).
.,. The brakes will be released immediately if you
release the button (®) or press the accelerator.
If you pull and hold the button C®) while the vehi
cle is moving, this will initiate an emergency
brake application. The brakes are then applied
hydraulically at all four wheels. The effect is simi
lar to heavy braking ¢ .&_.
To prevent the emergency braking function from
being used accidentally, a warning buzzer sounds
when the button (®) is operated. The brakes are
released immediately when you release the but
ton (®) or press the accelerator.
Parking the car
.,. Press the brake pedal to bring the vehicle to a
stop.
.,. To apply the parking brake, pull the button (®).
.,. Automatic gearbox: Move the selector lever to
position P.
.,. Switch off the engine ¢.&_ .
.,. Manual gearbox: Engage first gear .
.,. When parking on a hill or gradient, turn the
steering wheel so that the vehicle would roll in-
to the kerb if it did start to move accidentally. �
Page 77 of 306
Downloaded from www.Manualslib.com manuals search engine 0
N
,.....
N
......
0
,.....
Vl
CX) A
WARNING
- Never press the accelerator pedal or release
the clutch inadvertently if a gear is engaged
or if the selector lever is not in position P or
N (on automatic vehicles) while the vehicle
is stationary with the engine running. The
vehicle will otherwise start moving immedi
ately and could cause an accident.
- You should only use the emergency braking
function in a real emergency, for example if
the brake system were to fail or if the brake
pedal were to be obstructed. If you use the
emergency braking function by activating
the parking brake switch, this has the same
effect as heavy braking. Please remember
that the ESC (and the integrated ABS, EDL
and traction control functions) is still sub
ject to certain physical limits. In a corner or
in bad road or weather conditions an emer
gency stop can cause the vehicle to skid or
lose steering control.
- It is not possible to apply the parking brake
if the electrical power supply fails. In this
case, park the vehicle on a level surface and
select 1st gear (manual gearbox) or move
the selector lever to position P (automatic
gearbox) to prevent it from rolling. Obtain
professional assistance.
- Always take the key with you when leaving
your vehicle -even if you only intend to be
gone for a short time. This is especially im
portant if children are left in the car. They
might otherwise be able to start the engine,
release the parking brake or use power-op
erated equipment such as the electric win
dows -this could lead to injuries.
- Do not leave anyone (especially children) in
the vehicle when it is locked. Locked doors
could delay assistance in an emergency, po
tentially putting lives at risk.
Applies to: vehicles with automatic gearbox
You can apply the parking brake manually or
switch on the hold assist* when stopping at
traffic lights, etc. You do not then have to
hold the car with the brake pedal, as the Driving
brakes will stop it creeping forward while a
gear is engaged in the automatic transmis
sion. When you drive off in the normal way,
the parking brake will be released automati
cally and your vehicle will start moving
¢page 75.
(CD) Note
- Any slight noise which may be heard when
the parking brake is applied or released is
quite normal and no cause for concern.
- The parking brake runs an automatic test
cycle at regular intervals when the vehicle is
parked. This may cause a slight noise, which
is normal.
- If the electrical power supply fails, it is not
possible to release the parking brake (if it
was applied) or to apply the parking brake
(if it was released) ¢ &,. Obtain professional
assistance.
Moving off
Various features and safety functions are availa
ble for driving off, depending on the equipment
in your vehicle.
Hill starting with the parking brake applied
Important: The driver's door must be closed.
� To drive off more easily on a slope, apply the
parking brake and drive off just as you usually
would. The parking brake will be released auto
matically, but not until there is enough power
at the wheels to make the vehicle move in the
desired direction.
Hill starting with the hill hold assist
The hill hold assist function makes it easier to
drive away on a slope.
Important: The driver's door must be closed and
the engine must be running.
� To activate the hill hold assist, press and hold
the brake pedal for several seconds. The vehicle
must be on a slope and facing uphill.
When you release the brake pedal the braking
force will be maintained for a moment ¢.&. in
..,.
75
Page 82 of 306
Downloaded from www.Manualslib.com manuals search engine Driving
fully interrupted even when the engine is
idling.
- The accelerator pedal must on no account
be pressed inadvertently when the vehicle is
stationary. The vehicle could otherwise start
moving immediately (in some cases even if
the parking brake is engaged) and possibly
cause an accident.
- Do not press the accelerator while selecting
a gear with the vehicle stationary and the
engine running, as this could cause an acci
dent.
- Never move the selector lever to R or P
when driving at normal speeds, as this could
cause an accident.
- Before you drive down a steep gradient, re
duce the speed and use "tiptronic" to select
a low gear.
- Never allow the brake to drag when driving
downhill and do not use the brake pedal too
often or for long periods. Constant braking
will cause the brakes to overheat and will
considerably reduce the effectiveness of the
brakes. It will increase the braking distance
and could cause the brake system to fail.
- To avoid rolling back on gradients always
hold the vehicle with the footbrake or park
ing brake if you have to stop.
- Never attempt to hold the vehicle with the
clutch when stopping on a gradient. The
clutch is disengaged automatically if it is
overloaded and becomes too hot -accident
risk! If the clutch is overloaded, the indica
tor lamp 51 will light up and a message will
appear ¢page 83.
CD CAUTION
- When you have stopped on a gradient, do
not try to stop the vehicle rolling back by ac
celerating when a gear is engaged. This
could cause the automatic gearbox to over
heat and become damaged. Apply the park
ing brake or press the brake pedal in order
to prevent the vehicle from rolling back.
- If you allow the car to roll with the selector
lever in position N with the engine switched
off, the automatic gearbox will be damaged
as it will not be lubricated.
80 -
In certain driving and traffic conditions, for
instance in stop-and-go traffic, if you have
to pull away frequently or if the vehicle
creeps forwards over a long distance, the
gearbox can overheat and become dam
aged. If the indicator lamp 51 or the warn
ing lamp . lights up, stop the vehicle at
the first opportunity and let the gearbox
cool down ¢page 83.
- If you allow the car to roll with the engine
switched off, the S tronic gearbox will be
damaged as it will not be lubricated
¢ page 2 78, Tow-starting I towing away.
ijJ) Note
For safety reasons the parking brake will only
release automatically if the driver's seat belt
is engaged in its buckle.
Downhill speed control
Applies to: vehicles with automatic gearbox
The downhill speed control function helps the
driver when driving down steep gradients.
Downhill speed control is activated on a downhill
gradient when the selector lever is in D/S and the
driver presses the brake pedal. The gearbox auto
matically selects a suitable gear for the gradient.
The downhill speed control function attempts to
maintain the speed at which the vehicle was trav
elling when the foot brake was applied (subject
to the laws of physics and technical limitations of
the power train). It may be necessary to adjust
the speed again using the foot brake. The down
hill speed control can change down to 3rd gear
but no further, so it may be necessary to change
to tiptronic mode on very steep gradients. In this
case, change down manually to 2nd or 1st gear in
tiptronic mode to use the engine braking effect
and reduce the load on the brakes.
Downhill speed control is deactivated as soon as
the road levels out again or you press the acceler
ator pedal.
On vehicles with cruise control system*
¢ page 86, downhill speed control is activated
when you set a cruising speed.
�
Page 83 of 306
Downloaded from www.Manualslib.com manuals search engine I&
WARNING
The downhill speed control function cannot
defy the laws of physics and may therefore
not be able to maintain a constant speed in
certain circumstances. Always be prepared to
use the brakes!
Manual gear selection (tiptronic mode)
Applies to: vehicles with automatic gearbox
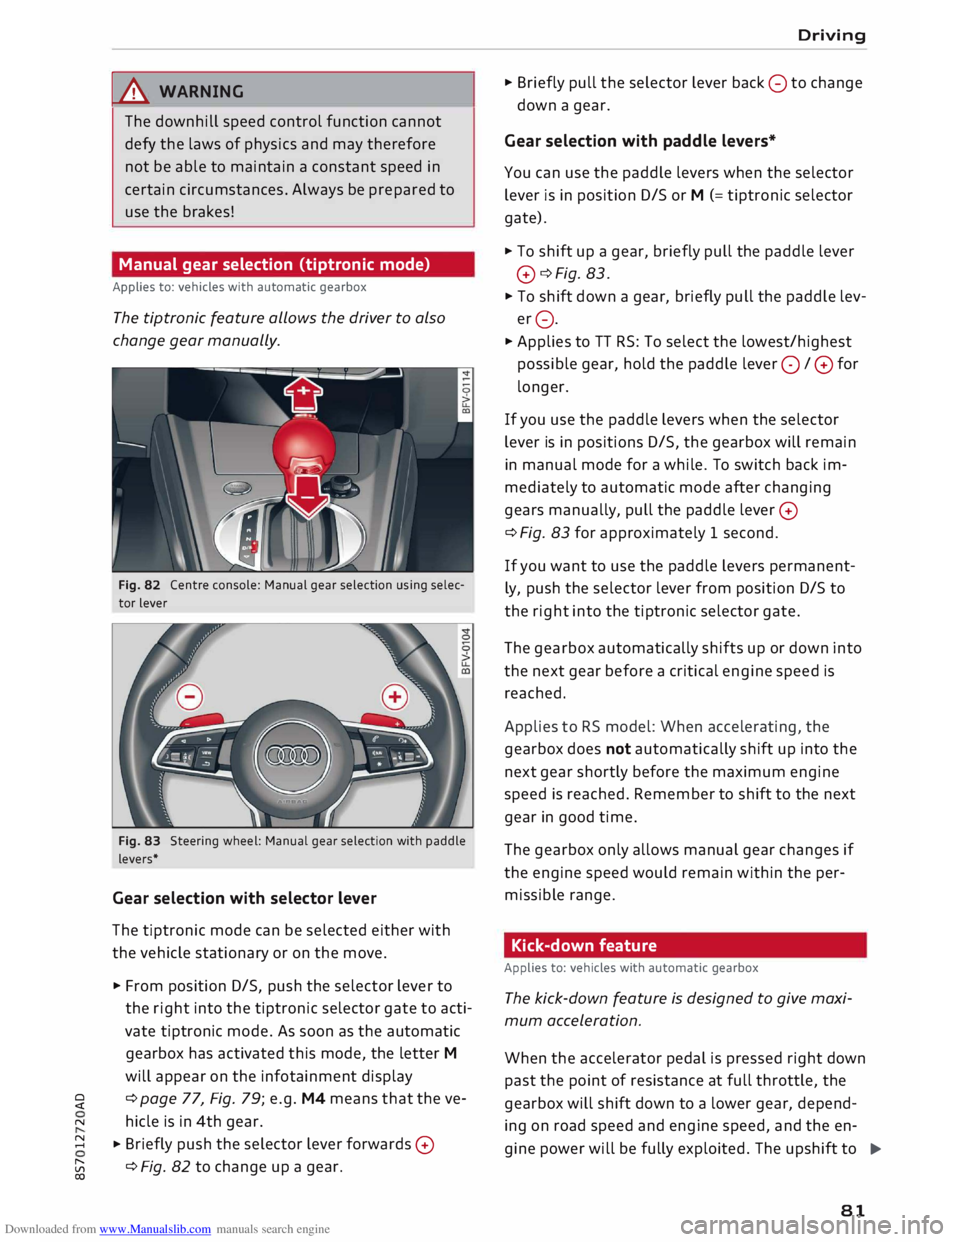
The tiptronic feature allows the driver to also
change gear manually.
Fig. 82 Centre console: Manual gear selection using selec
tor lever
Fig. 83 Steering wheel: Manual gear selection with paddle
levers*
Gear selection with selector lever
The tiptronic mode can be selected either with
the vehicle stationary or on the move.
� From position D/S, push the selector lever to
the right into the tiptronic selector gate to acti
vate tiptronic mode. As soon as the automatic
gearbox has activated this mode, the letter M
will appear on the infotainment display
� ¢
page 77, Fig. 79; e.g. M4 means that the ve-
N hicle is in 4th gear.
� � Briefly
push the selector lever forwards 0
[;:j ¢
Fig. 82 to change up a gear.
CX) Driving
� Briefly pull the selector lever back 0 to change
down a gear.
Gear selection with paddle levers*
You can use the paddle levers when the selector
lever is in position D/S or M (= tiptronic selector
gate).
� To shift up a gear, briefly pull the paddle lever
0 ¢Fig. 83.
� To shift down a gear, briefly pull the paddle lev
er 0.
� Applies to TT RS: To select the lowest/highest
possible gear, hold the paddle lever 0 / 0 for
longer.
If you use the paddle levers when the selector
lever is in positions D/S, the gearbox will remain
in manual mode for a while. To switch back im
mediately to automatic mode after changing
gears manually, pull the paddle lever 0
¢ Fig. 83 for approximately 1 second.
If you want to use the paddle levers permanent
ly, push the selector lever from position D/S to
the right into the tiptronic selector gate.
The gearbox automatically shifts up or down into
the next gear before a critical engine speed is
reached.
Applies to RS model: When accelerating, the
gearbox does not automatically shift up into the
next gear shortly before the maximum engine
speed is reached. Remember to shift to the next
gear in good time.
The gearbox only allows manual gear changes if
the engine speed would remain within the per
missible range.
Kick-down feature
Applies to: vehicles with automatic gearbox
The kick-down feature is designed to give maxi
mum acceleration.
When the accelerator pedal is pressed right down
past the point of resistance at full throttle, the
gearbox will shift down to a lower gear, depend-
ing on road speed and engine speed, and the en
gine power will be fully exploited. The upshift to
.,..
81
Page 89 of 306
Downloaded from www.Manualslib.com manuals search engine -
Make sure you do not unintentionally rest
your foot on the accelerator -this will over
ride the cruise control system which, as a re
sult, will not brake the vehicle.
- The automatic braking function may be de
activated if a system fault occurs in the
brake system (e.g. if the brakes overheat)
while the cruise control system is activated.
All the other cruise control functions remain
activated as long as the indicator lamp.
is
lit.
@ Note
- Vehicles with manual gearbox: The set
speed cannot be reached if the currently se
lected gear is too high or too low or if the
engine would overrev or fail to run smoothly
at the target speed. Make sure to change up
or down a gear in good time.
- The brake lights come on when the system
brakes the vehicle.
Adjusting the speed
Applies to: vehicles with cruise control system
... To increase or reduce the cruising speed in
steps of 1 km/h, briefly push the lever one lev
el upwards or downwards towards
GY0
¢ page 86, Fig. 88 .
.., To increase or reduce the cruising speed in
steps of 10 km/h, briefly push the lever two
levels upwards or downwards towards
GY 0
¢ page 86, Fig. 88 .
.., To increase or reduce the speed gradually, hold
the Lever towards
GYO until
you reach the de
sired cruising speed.
Overriding the set speed
Applies to: vehicles with cruise control system
You can use the accelerator pedal to increase
speed in the normal way, for example to overtake
another vehicle. Once you release the accelera
tor, the system will revert to the speed you stor
ed initially.
� However,
if the vehicle exceeds the programmed
� speed
significantly for a long time, the cruise
::2 control
system will be deactivated temporarily.
Vl
CX) Driver
assist systems
The indicator lamp.
in the instrument cluster
will go out, but the programmed speed will re
main stored.
Pre-selecting a speed
Applies to: vehicles with cruise control system
You can pre-select a desired speed while the ve
hicle is stationary.
.., Switch on the ignition .
... Pull the Lever to position
(!)¢
page 86, Fig. 88.
... Press the Lever up towards 0 or down towards
0 in order to increase or reduce the cruising
speed setting.
This function allows you to enter the desired
cruise control setting speed ahead of time, for
example before joining a motorway. Once you are
on the motorway, you can activate the cruise con
trol system by pulling the Lever to position
(!).
Switching off
Applies to: vehicles with cruise control system
Switching off temporarily
... Press the brake pedal, or
.., Push the lever towards
@ (click
stop not en
gaged) ¢ page 86, Fig. 88.
Switching off completely
.., Push the Lever to position
@ (click
stop engag-
ed), or
.., Switch off the ignition.
The speed setting will remain stored after the
system is temporarily deactivated. To resume the
programmed cruising speed, release the clutch
or brake pedal and pull the lever to position
(!).
The stored speed will be deleted once the igni
tion is switched off.
.&, WARNING
Do not resume the programmed cruising
speed if this is too high for the traffic condi
tions -this can cause accidents.
87