ignition AUDI TT ROADSTER 2017 Owners Manual
[x] Cancel search | Manufacturer: AUDI, Model Year: 2017, Model line: TT ROADSTER, Model: AUDI TT ROADSTER 2017Pages: 314, PDF Size: 76.54 MB
Page 10 of 314
Instrumen ts and ind icator ligh ts
Instruments and indicator Lights
Instruments
Audi virtual cockpit (instrument cluster)
The instrument cluster is the central information center for the driver.
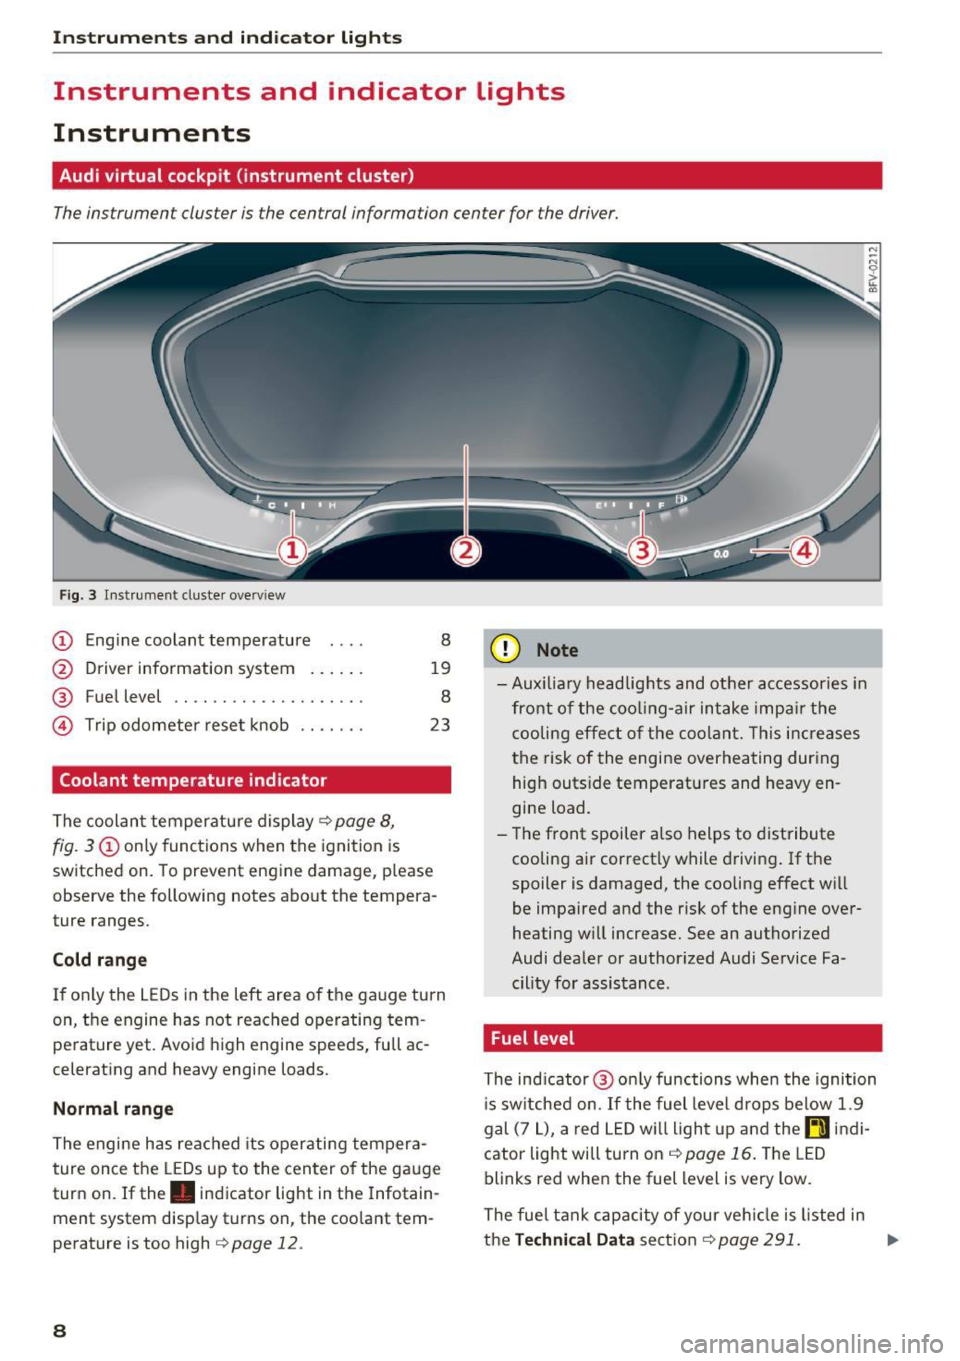
Fig. 3 Instrume nt cluster overv iew
(D Eng ine coolant temperature 8
@ Driver information system . . . . . . 19
® Fuel level . . . . . . . . . . . . . . . . . . . . 8
@ Trip odometer reset knob . . . . . . . 23
Coolant temperature indicator
The coolan t temperature display c:> page 8,
fig. 3
(D only functions when the ignition is
switched on. To prevent engine damage, p lease
observe the following notes about the tempera
ture ranges.
Cold rang e
If o nly the L EDs in the left area of the gauge turn
on, the engine has not reached operating tem
perature yet. Avoid high engine speeds, full ac
celerating and heavy engine loads .
Normal range
The engine has reached its operating tempera
ture once the LEDs up to the center of the gauge
turn on . If the . indicator light in the Infotain
ment system display turns on, the coolant tem
perature is too high
c:> page 12.
8
(D Note
-Aux iliary head lights and other accessories in
front of the coo ling-a ir intake impa ir the
cooling effect o f the coolant. This increases
the risk of the engine overheating during high outside temperatures and heavy en
gine load.
- T he front spoiler a lso helps to distribute
cooling air correctly while driving . If the
spoiler is damaged, the cooling effect will
be impaired and the risk of the eng ine over
heating w ill increase. See an authorized
Audi dealer or author ized Audi Service Fa
cility for assistance .
Fuel level
The indicator @ only func tions when the ignition
i s sw itched on. If the fuel level drops below 1.9
gal (7
L), a red LED wi ll light up and the rD indi
cator light will turn on
c:> page 16 . The LED
blinks red when the fuel level is very low.
The fuel tank capacity of your veh icle is listed in
the
Techni cal Dat a sectio n c:> page 291. ..,_
Page 13 of 314
co
co
.... N
" N .... 0
" "' c:o
If brake assist (brake booster) is not working, you
have to use much more force when braking the
vehicle. See an authorized Audi dealer or author
ized Audi Service Facility for assistance.
1111 (USA models) /. (Canada models)
Brakes: malfunction! Stop vehicle safely
If the ABS indicator light til) (USA models) /
¢cj (Canada models), the ESC indicator light J.il
and the brake system indicator light 1111 (USA
models)/ . (Canada models) turn on and this
message appears, then the ABS, ESC and braking
distribution are malfunctioning¢ ,&..
Drive to your authorized Audi dealer or author
ized Audi Service Facility immediately to have the
malfunction corrected ¢
&.
1111 (USA models) /. (Canada models) Park
ing brake: malfunction! Safely stop vehicle.
Please contact Service
- If the indicator light and the message appear
when the vehicle is stationary or after switch
ing the ignition on,
check if you can release the
parking brake . If you cannot release the park
ing brake, see your authorized Audi dealer or
authorized Audi Service Facility . If you can re
lease the parking brake and the message still
appears, see an authorized Audi dealer or au
thorized Audi Service Facility immediately to
have the malfunction corrected .
- If the indicator light and message appear
while
driving,
the hill start assist or emergency brak
ing function may be malfunctioning. It may not
be possible to set the parking brake or release
it once it has been set. Do not park your vehicle
on hills. See an authorized Audi dealer or au
thorized Audi Service Facility for assistance.
(USA models): if the
1111 and EiJ indicator
lights turn on together, have the brake system
checked immediately by an authorized Audi deal
er or authorized Audi Service Facility
¢page 14.
There is also a warning tone when the lights turn
on.
Instruments and indicator lights
A WARNING
- Read and follow the warnings in
¢ page 235, Working in the engine com
partment
before opening the hood and
checking the brake fluid level.
- If the brake system indicator light does not
turn off or it turns on while driving, the
brake fluid level in the reservoir is too low,
and this increases the risk of an accident.
Stop the vehicle and do not continue driv
ing. See an authorized Audi dealer or au
thorized Audi Service Facility for assistance.
- If the brake system indicator light turns on
together with the ABS and ESC indicator
lights, the ABS/ESC regulating function may
be malfunctioning. Functions that stabilize
the vehicle are no longer available. This
could cause the rear of the vehicle to
swerve, which increases the risk that the ve
hicle will slide . Drive carefully to the nearest
authorized Audi dealer or authorized Audi
Service Facility and have the malfunction
corrected.
PARK /(®)/¢), Electromechanical parking
brake
If the -(USA models)/ . (Canada models)
indicator light turns on, the parking brake was
set.
- (USA models) I. (Canada models) Park
ing brake: caution! Vehicle parked too steep
If the indicator light blinks and the message ap
pears, there is not enough braking power to se
cure the vehicle. The brakes have overheated. The
vehicle could roll away even on a small incline.
- (USA models) I. (Canada models)
Please press brake pedal to release parking
brake
To release the parking brake, press the brake
pedal and press the~ button at the same time,
or start driving with hill start assist¢
page 63,
Starting from a stop.
Jlj Parking brake: malfunction! See owner's
manual
11
Page 15 of 314
co
co
.... N
" N .... 0
" "' c:o
@ Tips
The oil pressure warning is not an o il level in
dicator. Always check the oil level reg ularly .
D Generator/vehicle battery
• Electric system: malfunction! Battery is not
being charged
There is a malfunction in the alternator or the ve
h icle elect rical system.
Dr ive t o an autho rized Aud i dea le r o r a uth orized
Au di Service Facility immediately. Tur n off all un
necessa ry e lectr ica l equi pment because it w ill
drain the batte ry. See your authorized A udi deal
er or authori zed Audi Service Facility if the bat
tery charge level is too low .
(•) Electrical system: low battery charge. Bat
tery w ill be charged while driving
The start ing a bili ty may be impai red.
I f t his message tu rns off aft er a lit tle while , the
ve hicl e ba ttery charged enough w hile dr iving.
If the message does not turn off, have an a uthor
iz ed A udi dealer o r au tho riz ed Aud i Serv ice Fac ili
ty repa ir th e malfunction.
~ Engine stop while driving
• Engine stopped : no power steering or brake
servo possible
There is a malfunction in the eng ine o r in the fue l
supp ly sys tem .
Mo re force is needed to steer and bra ke the mov
in g vehicle when t he engine is stopped. If the ve
hi cle is roll ing , try to b ring it to a stop off to the
side from moving traffic. See an au thoriz e d Au di
dea le r or autho riz e d Au di Serv ice Fa cility fo r as
sis tance.
A WARNING
If the eng ine stops while dr iving , yo u will
nee d to use more fo rce to bra ke the vehicle .
Th is increases the r isk o f an acci dent . There
w ill st ill be power steering if the ignit ion is
switched on w hil e the vehicle is rolling and
Instruments and ind icator lights
the re is suff ic ient battery charge. Ot herwise,
you must use greater force when stee ring.
~ Safety belt
The . indicator light stays on until the dr iver's
and fro nt passenger's* safety be lts a re fastened .
Above a certa in speed, the re will a lso be a war n
i ng tone .
(D Tips
For additional informat ion on safety belts,
se e
c:> page 189 .
@-c, Steering lock
• Steering: malfunction! Please stop veh icle
The re is a ma lfunction in the e lectron ic steering
lock . You cannot tur n the ign ition on .
Do
not tow yo ur vehicle because it cannot be
stee red. See an a uthori zed Audi dea ler or author
ized Audi Service Facility for ass istance.
f!m Steering lock: malfunction! Please contact
Service
T he re is a m alfu n cti on in the e lectron ic st eering
l ock .
Dr ive to an author ized A udi dealer or au tho riz e d
A udi Se rvice Fa cility i mmed iate ly to h ave the
ma lfunction correcte d.
D o not tow yo ur vehicle when there is a mal
f u nction in t he electron ic steer ing lock -th is
i nc reases the risk of an acc iden t.
6 Central indicator light
If the . or Pm in dicator light t urns on, check
t h e message in the i nstr ument cluster.
© -c> Engine start system
• Engine start system: malfunction! Please
contact Service
Do not switch the ignition off because you may
not be able to switch it on again.
Ill>-
13
Page 16 of 314
Instruments and indicator lights
Drive to an autho rized Aud i dea ler or a uth orized
Aud i Service Facility immediately to have t he
malfunct ion corrected .
11111 Engine start sy stem: malfunction! Plea se
contact Service
There is a malfunction in the eng ine start ing sys
tem.
Dr ive to an authorized Aud i deale r or authorized
Aud i Serv ice Facility immediately to have the
malfunct io n corrected.
f;. 11) Electronic stabilization control (ESC )
and
( 8) anti-lock braking system (ABS )
If the DJ indicato r light b links whi le driving, the
E SC or ASR (Anti-Slip Reg ulation) is actively reg u
lating.
If the
DJ indicato r light turns on, the system has
switched the ESC off . In this case, you can switch
the ignition off and then on to switch the ESC on
again. The indicator light turns off when the sys
tem is functioning fully.
Stabili zation control (E SC ): sport. Warning! Re
duced stability
I f t he II indicator light turns on, ESC sport
mode was switched on using the
I -" O FF I button
¢
page 89 . You can turn the ESC on again by
press the
I -" OFFI b utton again.
Stabilization control (E SC): off. Warning ! Re
duced stabil ity
I f t he II indicato r light tur ns on, t he ESC was re
s tricted or switched off using the
I ~ OF FI button
¢ page 89 . The message ESC OFF also appears .
You can turn the ESC on again by press the
I -" OF FI button again .
The system switches on whe n the ign ition is
sw itched on. The
II indicato r light turns off
when the system is functioning fully .
Stabilization control (ESC ): malfun ction ! Se e
owner 's manual
Stabilization control (ESC / AB S): malfun ction!
See owner' s manual
ABS: malfunction! See ow ner 's manual
14
If the DJ indicator light and the ABS indicator
li ght
rJE (USA mode ls)/ ti] (Canada models)
turn on and this message appears, there is a mal
funct ion in the ABS system or electronic differen
tia l lock. This also causes the ESC to malfunction .
The brakes still function with their normal power, but ABS is not active .
Drive to an authorized A udi dealer or authori zed
Audi Service Facility immediate ly to have the
malfunction corrected .
,&. WARNING
If the ... (USA models) JII (Canada mod
e ls) brake system indicator light turns on to
gether with the ABS and ESC ind ic a tor lights,
the ABS/ESC regulating function may have
failed. Functions that s tabilize the vehicle are
no longer avai lab le . This could cause the vehi
cle to swerve, which increases the risk that
the vehicle will slide. Drive carefully to the nearest authorized Aud i dea ler or authorized
Audi Service Fac ility and have the malfunction
corrected .
0) Tips
For additional informat ion on ESC and ABS,
see¢
page 88.
(0) Brake pads
&J Brake pads: wear limit reached . You can con
t inue driv ing . Please contact Se rvice
The brake pads are worn.
Drive to an authorized A udi dealer or authorized
Audi Se rvice Facility immediate ly to have the
brake pads checked.
App lies to : USA mode ls
The &J i ndicator lig ht turns on together with the
... indicator light
!f Safety systems
The E,I indicator lig ht monitors the safety sys
tems.
Page 17 of 314
co
co
Safety system
If them indicator light turns on or blinks, there
is a malfunction in a safety system.
Drive to an authorized Audi dealer or authorized
Audi Service Facility immediately to have the
malfunction corrected.
_& WARNING
-
Have the safety systems inspected immedi
ately. Otherwise, there is a risk that the sys
tems may not activate during a collision,
which increases the risk of serious injury or death.
c±::, Engine control
If the II indicator light turns on if there is a mal
function in the engine control.
Drive slowly to an authorized Audi dealer or au
thori zed Audi Service Facility to have the engine
checked.
C Malfunction indicator lamp (MIL)
The malfunction indicator lamp (MIL) is part of
the On Board Diagnostic system (OBD II) . The
¢..ij symbol turns on when the ignition is switched
on and turns off again once the engine is started
and running at a steady idle speed. This indicates
that the MIL is functioning correctly.
The indicator light turns on if there is a malfunc
tion in the engine electronics. See an authorized
Audi dealer or authorized Audi Service Facility to
have the malfunction corrected.
For additional information, see¢
page 17.
!?) Engine speed limitation
Appl ies to: vehicles with engine speed li m itation
(ii Maximum engine speed: XXXX rpm
The engine speed is automatically limited to the
speed displayed in the driver information system .
This protects the engine from overheating.
;:::: The engine speed limitation deactivates once the
" ~ engine is no longer in the critical temperature 0
" "' c:o
Instruments and indicator lights
range and you have released the accelerator ped
al once.
If the engine speed limitation was activated by
an engine control malfunction, the
II indicator
light also turns on. Make sure the engine speed
does not go above the speed displayed, for exam
ple when downshifting. Drive to an authorized
Audi dealer or authorized Audi Service Facility im
mediately to have the malfunction corrected.
~ Engine oil level (min.)
Ill Please check oil level
You may continue driving for the time being.
Check the engine oil level as soon as possible
<=> page 237.
-If the engine oil level is too low, add engine oil
¢page 239.
-If the engine oil level is correct and the indica
tor light still turns on, drive at low engine
speed to an authorized Audi dealer or author
ized Audi Service Facility .
"'' Engine oil sensor
• Oil level system: malfunction! Please con
tact Service
The sensor to check the engine oil level has
failed . Drive to an authorized Audi dealer or au
thorized Audi Service Facility immediately to have
the malfunction corrected .
• Oil level sensor: oil change necessary. Please
contact Service
The engine oil level is too high.
Drive to an authorized Audi dealer or authorized
Audi Service Facility immediately to have the
malfunction corrected.
(D Note
Refer to the description in the Owner's Man
ual ¢
page 239, Checking the engine oil level
and adding engine oil.
15
Page 24 of 314
Driver information system
© button l1<1<1 I l1>1>1 I
-Selecting the previous/next tr ack or station :
press the ll
- Fast forwarding /re winding audio file s: press
and ho ld the
! 1q<] I or l1>1> 1I bu tton un til t he desired
location in the fi le is reached .
@button @
- Programmable steering wheel button - open
ing a function :
press the@ bu tton.
- Programmable steering wheel button - re
questing a function :
ho ld dow n the Ill button.
- Programmable steering wheel button - chang
ing a function:
selec t the fi rst tab> Vehicle
settings
> Steering wheel button a ssignment .
@ button 1~·" 1
- Repeating the last navigat ion prompt : press
the
I Q•,.., I button when route guidance is active.
- Changing the voice guidance volume : when
route gu idance is active, turn th e right thumb
whee l upward or dow nward d uring a navigat ion
prom pt.
Multifunction steering
wheel
Operating
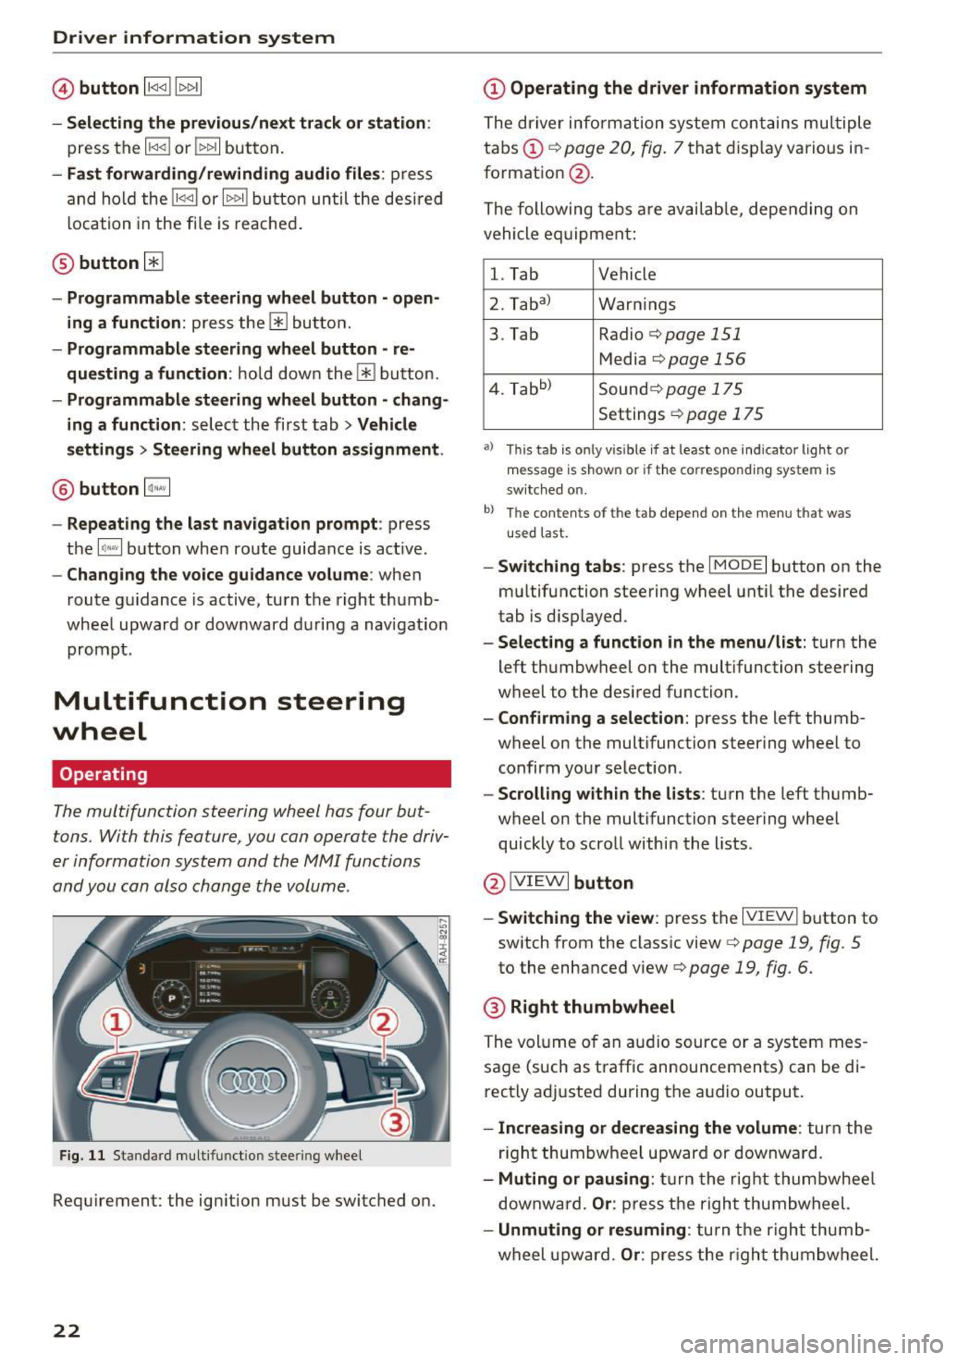
The multifunction steering wheel has four but
tons. With this feature, you can operate the driv
er information system and the MMI functions
and you can also change the volume.
Fig . 11 Standard multifunction stee ring wheel
Requirement: the ignition must be switched on.
22
(D Operating the driver information system
The driver information system contains multiple
tabs (!)¢
page 20, fig . 7 that disp lay various i n
format ion
@ .
The following tabs a re av ail ab le, depe nding on
vehicle e quipment:
l. Tab Vehicle
2. Taba )
Warnings
3. Tab Radio¢
page 151
Media ¢page 156
4. Tabb )
Sound¢ page 1 75
Settings ¢ page 175
a) Thi s tab is only v is ib le if at least one indicator lig ht or
message is shown or if t he co rrespond ing sys te m is
sw itched o n.
b ) Th e co ntents of th e tab depend on the menu t hat was
u se d l ast.
-Switch ing tabs : press th e I MODE I button on the
m ultifunction steering wheel unt il the desired
tab is disp layed .
-Selecting a function in the menu/list : turn the
left thumbwheel on the multifunction steering
wheel to the desired function .
-Confirming a selection : press the left thumb
wheel on the multifunction steering wheel to
confirm your selection.
-Scrolling with in the lists : turn the left thumb
wheel on the multifunction steering whee l
quickly to scro ll within the lists .
@!VI EWI button
- Switching the view :
press the IVIEWI button to
switch from the class ic view ¢
page 19, fig. 5
to th e enhanced view¢ page 19, fig. 6.
® Right thumbwheel
The volume o f an a udio source o r a system mes
sage (such as traffic announcements) can be di
r ectly adjusted during the a udio output.
- Increasing or decreasing the volume : turn the
r ig ht thumbwheel u pward or downwa rd.
- Muting or pausing : turn the rig ht thumbwhee l
downwa rd.
Or : press th e righ t thumbwheel.
- Unmuting or resuming : turn the righ t thumb
wheel u pw ard.
Or : press the r igh t thumbwheel.
Page 25 of 314
CD
CD
.... N
" N .... 0
" V, co
Tachometer
The tachometer displays the engine speed in rev
olutions per minute (RPM) .
The beginning of the red zone in the tachometer
indicates the maximum permissible engine speed
for all gears once the engine has been broken in
and when it is warm. Before reaching the red
zone, you should shift into the next higher gear,
choose the Dor S selector lever position, or re
move your foot from the accelerator pedal.
@ Note
The needle in the tachometer may only be in
the red area of the gauge for a short per iod of
time or there is a risk of damaging the engine .
The location where the red zone begins varies
depending on the engine.
@) For the sake of the environment
Upshifting early helps you to save fuel and re
duce operating noise.
Odometer
Fig. 12 Instrument cluste r: odomete r and reset button
Trip odometer and odometer
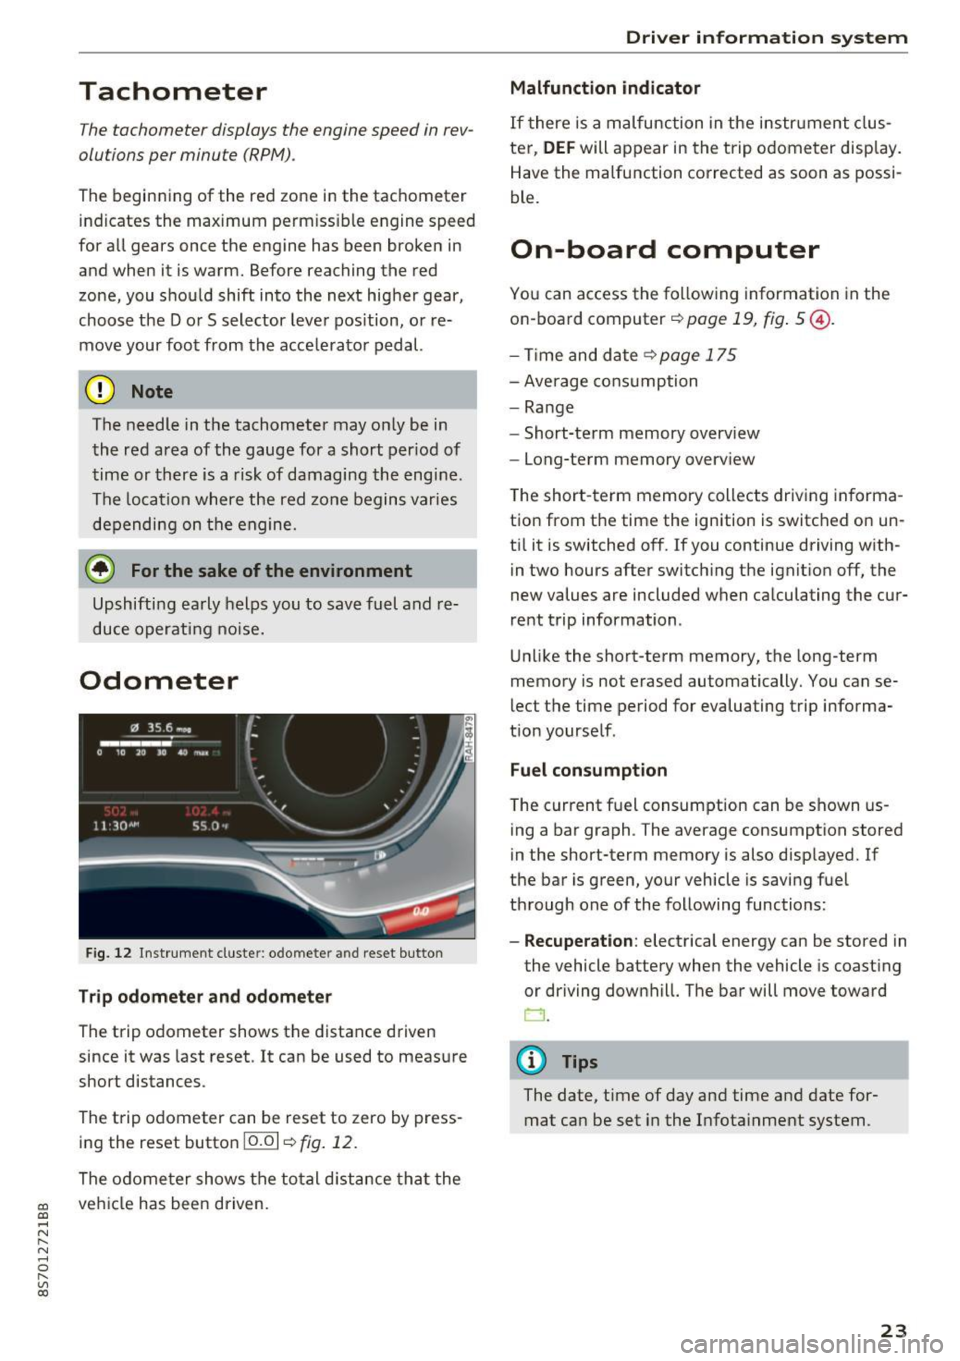
The trip odometer shows the distance driven
since it was last reset . It can be used to measure
short distances .
The trip odometer can be reset to zero by press ing the reset button 10.01
r=> fig. 12.
The odometer shows the total d istance that the
veh icle has been driven.
Driver in forma tion system
Malfunction indicator
If there is a malfunction in the instrument clus
ter,
DEF will appear in the trip odometer disp lay.
Have the malfunction corrected as soon as possi
ble.
On-board computer
You can access the following information in the
on-board computer
r=> page 19, fig . 5 @ .
-Time and date ~page 175
-Average consumption
-Range
- Short-term memory overv iew
- Long-term memory overview
The short -term memory collects driving informa
tion from the time the ignition is switched on un
til it is switched off. If you continue driving with·
in two hours after switching the ignition off, the
new values are included when calculating the cur
rent trip information .
Unlike the short-term memory, the long-term
memory is not erased automatically. You can se
lect the time period for evaluating trip informa
tion yourself .
Fuel consumption
The current fuel consumption can be shown us
ing a bar graph . The average consumption stored
in the short-term memory is also displayed. If
the bar is green, your vehicle is saving fuel
through one of the following functions:
- Recuperation : electrical energy can be stored in
the vehicle battery when the vehicle is coasting or driving downhill. The bar will move toward
CJ .
(D Tips
The date, time of day and time and date for
mat can be set in the Infotainment system.
23
Page 27 of 314
CD
CD
.... N
" N .... 0 r--. V, co
@ Key tag with PIN
Only applies to vehicles with Connectivity serv
ice*: open the key fob and rub the PIN until it is
v isib le . You can activate the Connectivity service*
on your vehicle using th is PIN code.
Replacing a key
If a key is lost, see an au thorized A udi dealer or
authorized Audi Service Facility. Have
this key de
activated.
It is important to bring all keys with
you. If a key is lost, you should report it to your
insurance company.
Number of keys
You can check the number of keys ass igned to
your veh icle in the Infotainment system . To do
this, select: the
I MENU ! button >Vehicle > left
control b utton
> Service & checks > Vehicle in
formation.
This way, you can make sure that you
have all the keys when purchasing a used vehicle .
Electronic immobilizer
The immobilizer prevents unauthorized use of
the vehicle.
Unde r certain circumstances, the vehicle may not
be ab le to start if there is a key from a different
vehicle manufacturer on the key chain .
Data in the master key
When driving, service and maintenance-relevant
data is continuously stored in your remote con
tro l key. Your Aud i service adviso r ca n read o ut
this da ta and tell you about the wo rk your veh icle
needs. This applies also to vehicles with a con
venience key*.
Personal convenience settings
I f two people use one vehicle, it is recommended
that each person always uses "t heir own" master
key. When the ignition is turned off or when the
vehicle is lock ed, persona l conven ience settings
for the following systems are stored and as
signed to the remote master key.
- Climate control system
- Parking aid*
- Active lane assist*
- Side assist*
Open ing and closing
-Drive se lect
T he sto red settings a re automa tica lly recalled
when you unlock the vehicle, open the doors or
turn on the ign ition.
& WARNING ~
A lways take the vehicle key with you when
l eav ing the vehicle, even for a short period of
time. This applies particularly when chi ldren
remain in the vehicle. Otherwise the children
could start the engine or operate e lectr ica l
equipment such as power windows.
@ Tips
-
The operation of the remote control key can
be temporarily disrupted by interference from
transmitters near the veh icle work ing in the
same frequency range (such as a cell phone or
radio equipment). A lways check if your vehicle
i s locked!
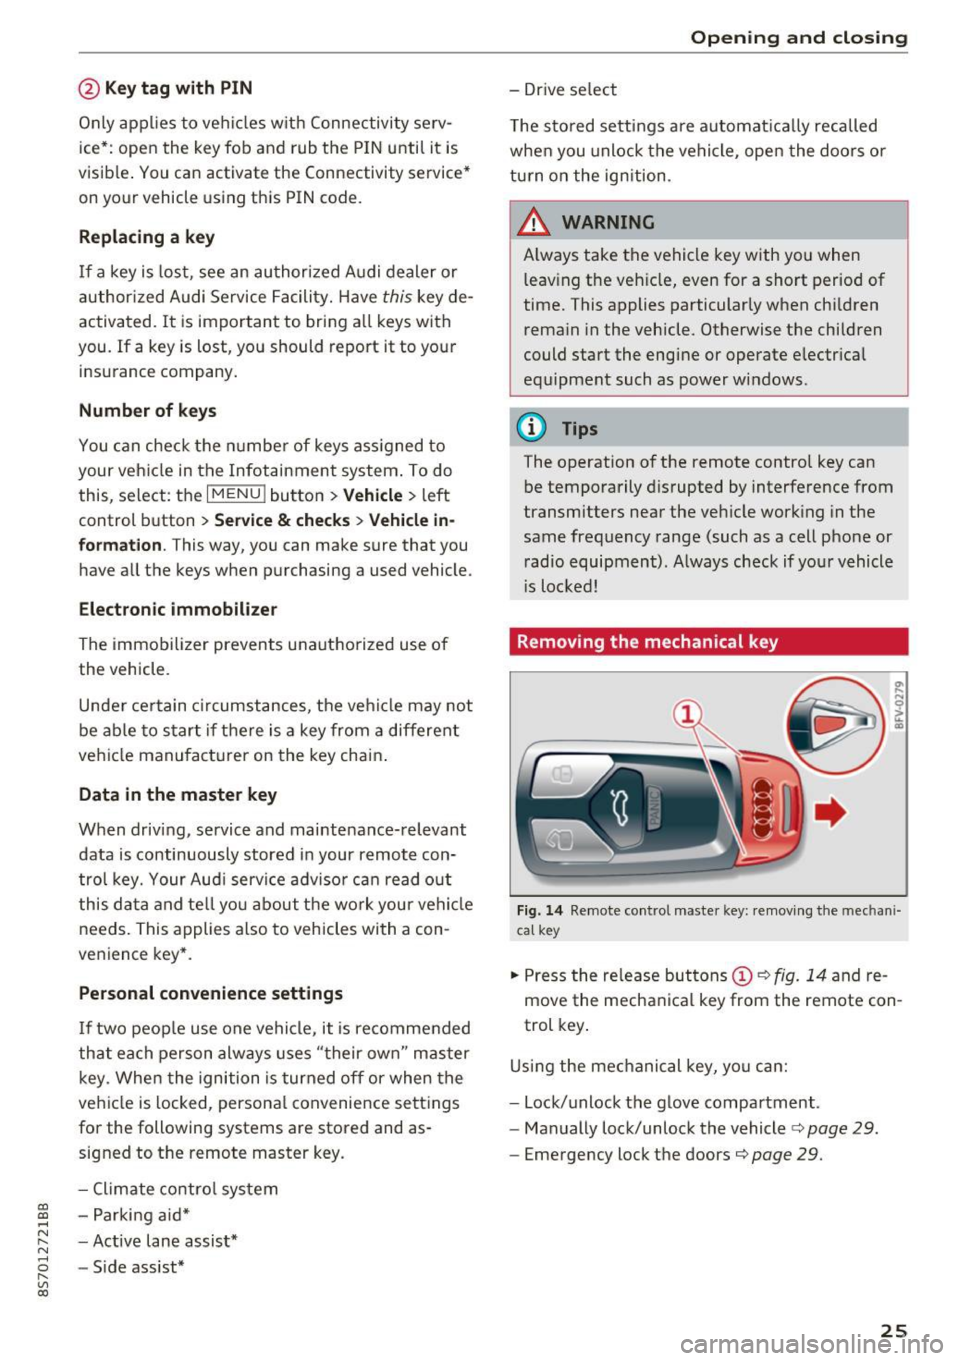
Removing the mechanical key
Fig . 14 Remote control mas ter key: remov ing the mechan i
ca l key
.,. Press the release but tons (D c::> fig. 14 and re
move the mechanical key from the remote con
trol key .
Using the mechanical key, you can:
- Lock/unlock the glove compartment.
- Manually lock/unlock the vehicle
c::> page 29.
-Eme rgency lock the doors c::> page 29.
25
Page 33 of 314
CD
CD
.... N
" N ,-I 0 r--. V, co
@ Tips
-You can still open and close the windows for
approximately 10 minutes after turn ing the
ignition off. The power windows do not
switch off until the driver's door or front passenger's door has been opened.
- When opening the doors and when open
i ng/closing the power top, the windows au
tomatically lower approximately 10 mm.
Convenience opening/closing
All windows can be opened and closed at the
same time.
Convenience opening feature
• Press the Im button on the remote control key
until all windows reach the desired position.
Convenience closing feature
• Press the {D button on the remote control key
u nti l all windows are closed¢
A or
Convenience closing with the convenience
key*
• Touch the sensor* on the door handle long
enough until all windows and the power top*
are closed . Do not place your hand in the door
hand le when doing this.
Setting convenience opening in the
Infotainment system
• Select in the Infotainment system: !MENUI but
ton
> Vehicle> left control button >Vehicle set
tings .
To enable the convenience window opening func
tion, the
Long press to open windows function
must be switched
on.
.&_ WARNING
- Never close the windows or power top* care lessly or in an uncontrolled manner, be
cause this increases the risk of injury.
- For security reasons, the windows and the
power top* can only be opened and closed
with the remote control key at a maximum
distance of approximately 6 ft (2 m) away
Open ing and closing
from the vehicle . Always pay attention when
pressing the
Im button to close the w indows
and the power top* so that no one is
pinched. The closing process w ill stop im
mediately when the
Im button is released .
Correcting power window malfunctions
You can reactivate the one-touch up/down func
tion if it malfunctions.
• Pull the power window switch up until the win
dow is completely raised.
• Release the switch and pull it up aga in for at
least one second .
Garage door opener
(Homelink)
Description
Applies to : veh icles w ith garage door o pen er (Home link)
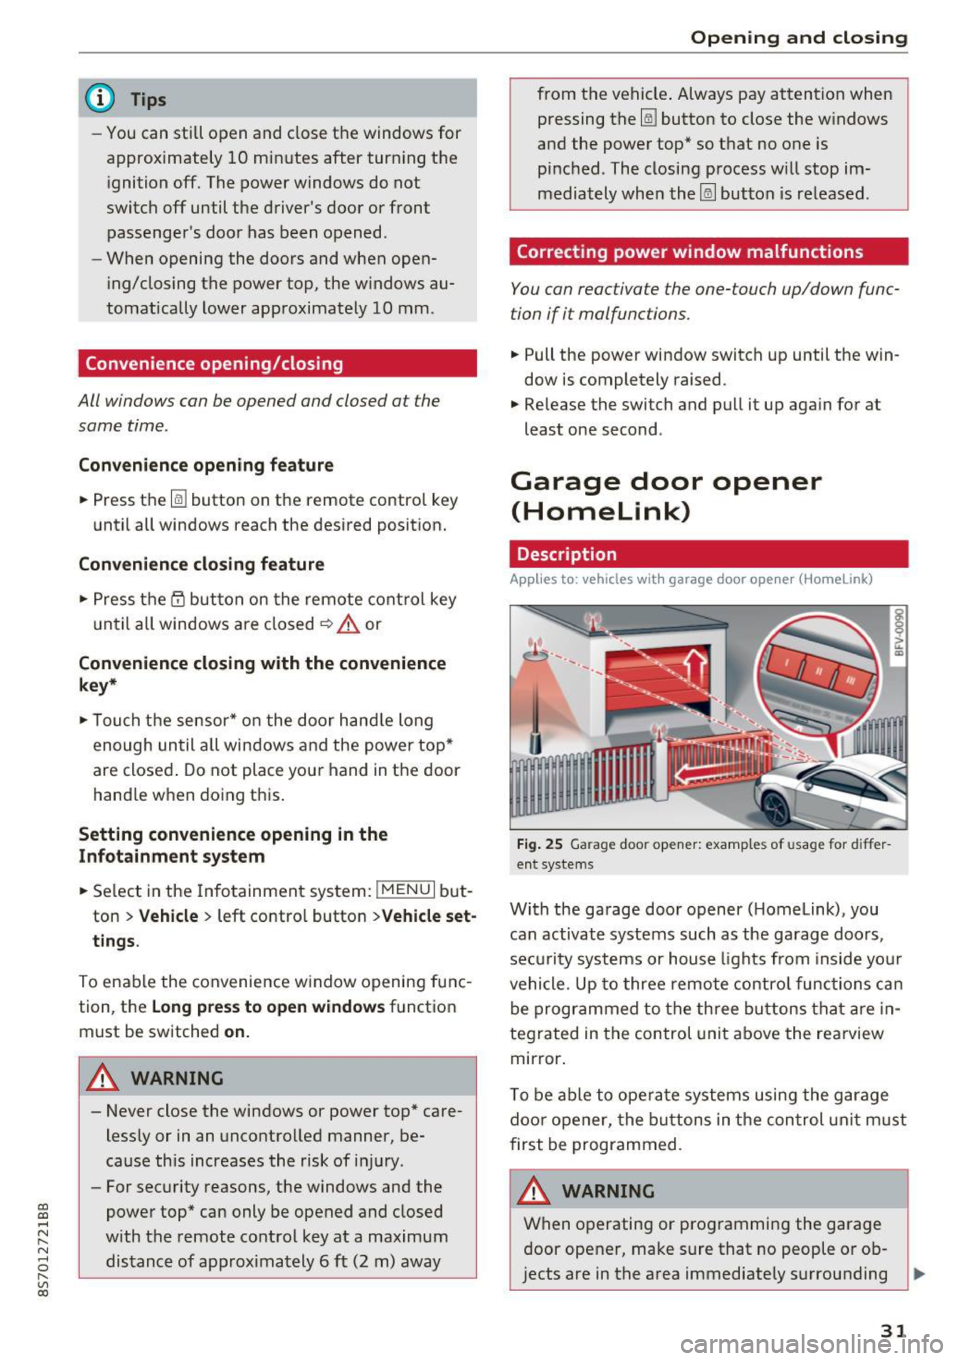
Fig. 25 Garage door opener: examples of usage for differ
ent systems
With the garage door opener ( Homelink), you
can activate systems such as the garage doors,
security systems or house lights from inside your
vehicle. Up to three remote control functions can
be programmed to the three buttons that are in
tegrated in the control unit above the rearview
mirror.
T o be able to operate systems using the garage
door opener, the buttons in the control unit must
first be programmed.
A WARNING ~
When operating or programming the garage
door opener, make sure that no people or ob
jects are in the area immediately surrounding ..,.
31
Page 34 of 314
Opening and closing
the equipment. Peop le can be injured or prop
erty can be damaged if struck when closing.
(D Tips
- For secu rity reasons, we recommend that
you clear the programmed buttons before
selling the vehicle.
- For additional information about Homelink,
v is it
www .homelink .com.
- For the Declaration of Conformity with the
provisions from the FCC in the United States
and Industry Canada, see¢
page 296 .
Operation
Applies to: ve hicles w ith garage doo r opener (Homeli nk)
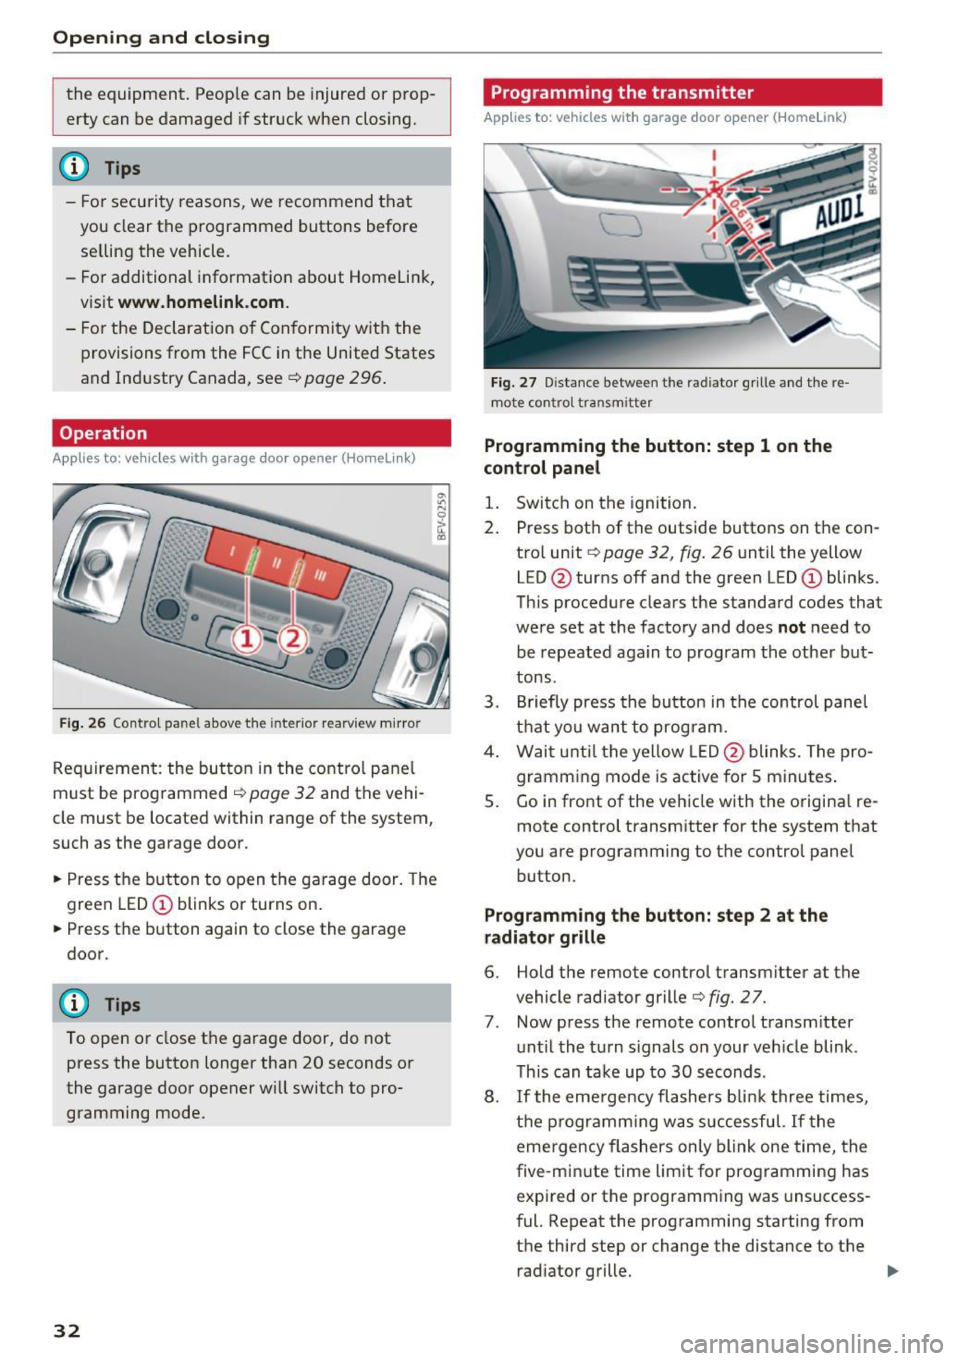
Fig. 26 Contro l pa nel above the inter io r rearview mirror
Requirement: the but ton in the control panel
m ust be programmed
i:!> page 32 and the vehi
cle must be located within range of the system,
such as the garage door .
.. Press the button to open the garage door. The
green LED
CD blinks or turns on.
.. Press the button again to close the garage
door.
(D} Tips
To open or close the garage door, do not
press the button longer than 20 seconds or
the garage door opener w ill switch to pro
gramming mode.
32
Programming the transmitter
App lies to : vehicles wit h garage door o pener (Horne link)
Fig. 27 D istance between the rad iator g rille and the re
mote contro l transm itter
Programming the button: step 1 on the
control panel
1. Switch on the ignition.
2. Press both of the outside buttons on the con
trol unit ¢
page 32, fig. 26 until the yellow
LED @turns off and the green LED
CD blinks.
This procedure clears the standard codes that
were set at the factory and does
not need to
be repeated again to program the other but
tons.
3. Briefly press the button in the control panel
that you want to program.
4. Wait until the yellow LED@blinks. The pro
gramming mode is active for S minutes.
5. Go in front of the vehicle w ith the origina l re
mote control transmitter for the system that
you are programming to the control panel button .
Programming the button: step 2 at the
radiator grille
6. Hold the remote control transmitter at the
vehicle radiator grille¢
fig. 27.
7 . Now press the remote control transm itter
until the turn signals on your veh icle blink .
This can take up to 30 seconds .
8. If the eme rgency flashers blink three times,
the programming was successful. If the
emergency flashers only blink one time, the
five -min ute time limit for programming has
expired or the programming was unsuccess
ful. Repeat the programming starting from
the third step or change the distance to the radiator grille.