Additional BMW 128I COUPE 2011 E82 Owner's Guide
[x] Cancel search | Manufacturer: BMW, Model Year: 2011, Model line: 128I COUPE, Model: BMW 128I COUPE 2011 E82Pages: 256, PDF Size: 8.41 MB
Page 118 of 256
Things to remember when driving
116 >For very heavy cargo when the rear seat is
not occupied, secure each safety belt in the
opposite buckle.
Securing cargo
>Secure smaller and lighter items using
retaining straps
*, a cargo area net* or draw
straps
*.
>Heavy-duty cargo straps
* for securing
larger and heavier objects are available at
your BMW center. To attach the cargo
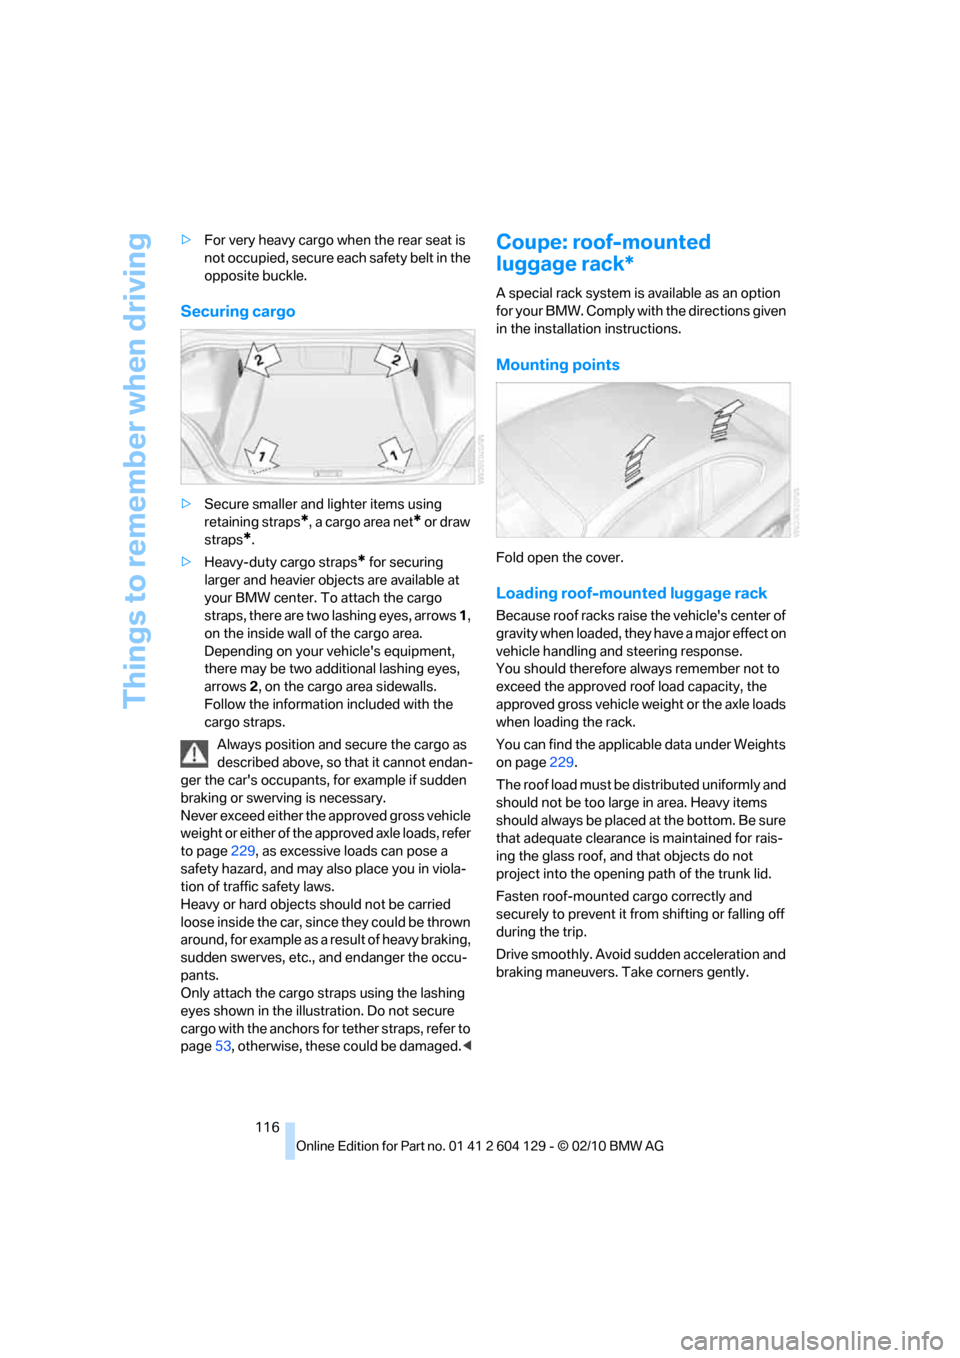
straps, there are two lashing eyes, arrows 1,
on the inside wall of the cargo area.
Depending on your vehicle's equipment,
there may be two additional lashing eyes,
arrows2, on the cargo area sidewalls.
Follow the information included with the
cargo straps.
Always position and secure the cargo as
described above, so that it cannot endan-
ger the car's occupants, for example if sudden
braking or swerving is necessary.
Never exceed either the approved gross vehicle
weight or either of the approved axle loads, refer
to page229, as excessive loads can pose a
safety hazard, and may also place you in viola-
tion of traffic safety laws.
Heavy or hard objects should not be carried
loose inside the car, since they could be thrown
around, for example as a result of heavy braking,
sudden swerves, etc., and endanger the occu-
pants.
Only attach the cargo straps using the lashing
eyes shown in the illustration. Do not secure
cargo with the anchors for tether straps, refer to
page53, otherwise, these could be damaged.<
Coupe: roof-mounted
luggage rack*
A special rack system is available as an option
f o r y o u r B M W . C o m p l y w i t h t h e d i r e c t i o n s g i v e n
in the installation instructions.
Mounting points
Fold open the cover.
Loading roof-mounted luggage rack
Because roof racks raise the vehicle's center of
gravity when loaded, they have a major effect on
vehicle handling and steering response.
You should therefore always remember not to
exceed the approved roof load capacity, the
approved gross vehicle weight or the axle loads
when loading the rack.
You can find the applicable data under Weights
on page229.
The roof load must be distributed uniformly and
should not be too large in area. Heavy items
should always be placed at the bottom. Be sure
that adequate clearance is maintained for rais-
ing the glass roof, and that objects do not
project into the opening path of the trunk lid.
Fasten roof-mounted cargo correctly and
securely to prevent it from shifting or falling off
during the trip.
Drive smoothly. Avoid sudden acceleration and
braking maneuvers. Take corners gently.
Page 127 of 256
Navigation
Driving tips
125Reference
At a glance
Controls
Communications
Entertainment
Mobility
Opening the search for special
destinations
1."Navigation"
2."Points of Interest"
The search can be narrowed by entering the
location and type of special destination.
Special destination location
Search for a special destination according to its
location relative to a locality or route.
1."Search area"
2.Select the location where the system is to
search for the special destination:
>"At current location"
>"At destination"
>"At a different destination"
>"Along route"
Special destination category
1."Category"
2.Select "All" or a specific category, e.g.
hotels or restaurants.
Category details
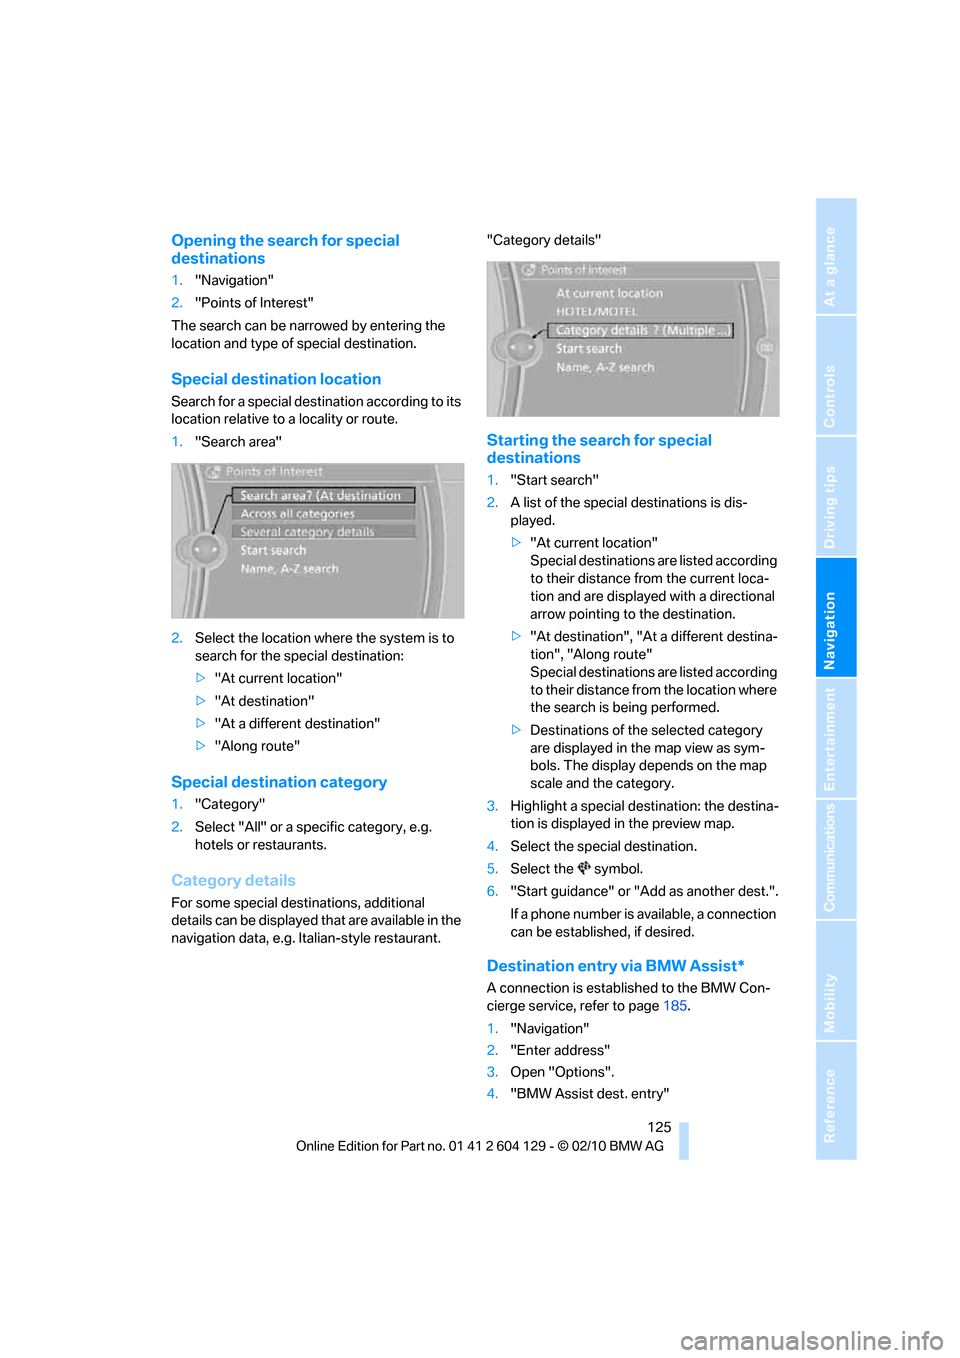
For some special destinations, additional
details can be displayed that are available in the
navigation data, e.g. Italian-style restaurant."Category details"
Starting the search for special
destinations
1."Start search"
2.A list of the special destinations is dis-
played.
>"At current location"
Special destinations are listed according
to their distance from the current loca-
tion and are displayed with a directional
arrow pointing to the destination.
>"At destination", "At a different destina-
tion", "Along route"
Special destinations are listed according
to their distance from the location where
the search is being performed.
>Destinations of the selected category
are displayed in the map view as sym-
bols. The display depends on the map
scale and the category.
3.Highlight a special destination: the destina-
tion is displayed in the preview map.
4.Select the special destination.
5.Select the symbol.
6."Start guidance" or "Add as another dest.".
If a phone number is available, a connection
can be established, if desired.
Destination entry via BMW Assist*
A connection is established to the BMW Con-
cierge service, refer to page185.
1."Navigation"
2."Enter address"
3.Open "Options".
4."BMW Assist dest. entry"
Page 128 of 256
Destination entry
126
Special destinations, entering by name
1."Navigation"
2."Points of Interest"
3."Name, A-Z search"
4.Enter the letters.
Depending on the distance, the search may
take some time. The list can contain a max-
imum of 100 entries.
5.Change to the list of special destinations.
6.Highlight a special destination: the destina-
tion is displayed in the preview map.
7.Select the special destination.
8.Select the symbol.
9."Start guidance" or "Add as another dest.".
Displaying special destinations in the
map
To display symbols of the special destinations
in the map:
1."Navigation"
2."Map"
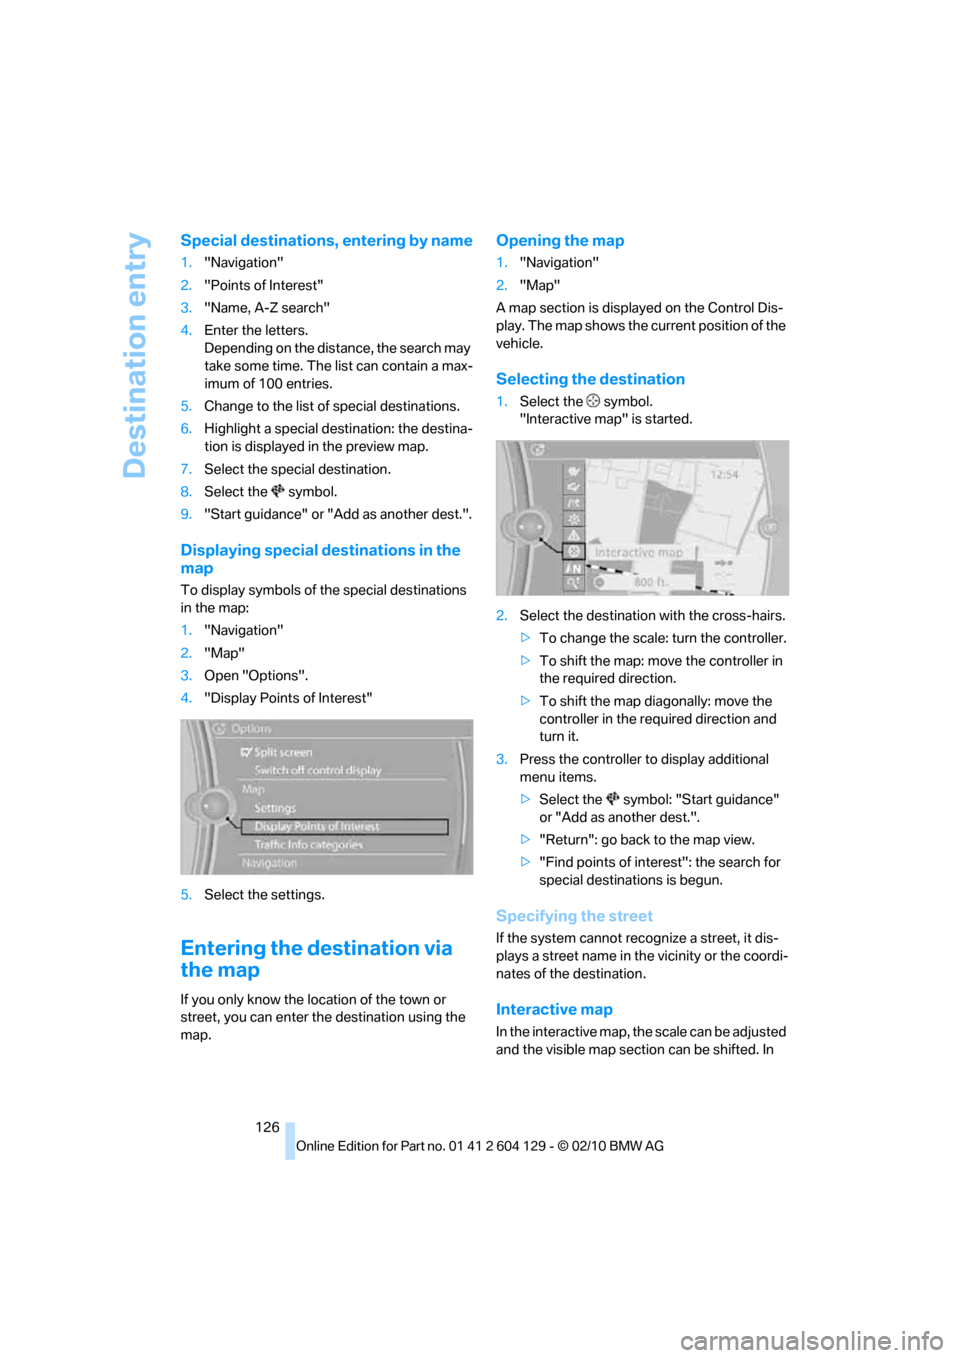
3.Open "Options".
4."Display Points of Interest"
5.Select the settings.
Entering the destination via
the map
If you only know the location of the town or
street, you can enter the destination using the
map.
Opening the map
1."Navigation"
2."Map"
A map section is displayed on the Control Dis-
play. The map shows the current position of the
vehicle.
Selecting the destination
1.Select the symbol.
"Interactive map" is started.
2.Select the destination with the cross-hairs.
>To change the scale: turn the controller.
>To shift the map: move the controller in
the required direction.
>To shift the map diagonally: move the
controller in the required direction and
turn it.
3.Press the controller to display additional
menu items.
>Select the symbol: "Start guidance"
or "Add as another dest.".
>"Return": go back to the map view.
>"Find points of interest": the search for
special destinations is begun.
Specifying the street
If the system cannot recognize a street, it dis-
plays a street name in the vicinity or the coordi-
nates of the destination.
Interactive map
In the interactive map, the scale can be adjusted
and the visible map section can be shifted. In
Page 132 of 256
Destination guidance
130
Destination guidance
Starting destination
guidance
1."Navigation"
2."Enter address"
3.Select the destination.
4."Accept destination"
5."Start guidance"
The route is displayed on the Control Display
after it is calculated.
In the map view, the distance from the destina-
tion/intermediate destination and the estimated
arrival time are displayed.
Terminating destination
guidance
1."Navigation"
2."Map"
3.Select the symbol.
4."Stop guidance"
Continuing destination
guidance
If the destination was not reached during the
last trip, destination guidance can be resumed.
"Resume guidance"
Route criteria
General information
You can influence the calculated route by
choosing certain route criteria. You can change
the route criteria as often as you like during des-
tination entry or during destination guidance.
The route is planned according to fixed rules.
The type of road is taken into account, e.g.
whether it is a highway or a winding road. As a result, the routes recommended by the naviga-
tion system may not always be the same ones
that you would choose based on personal expe-
rience.
The settings are stored for the remote control
currently in use.
Changing route criteria
1."Navigation"
2."Map"
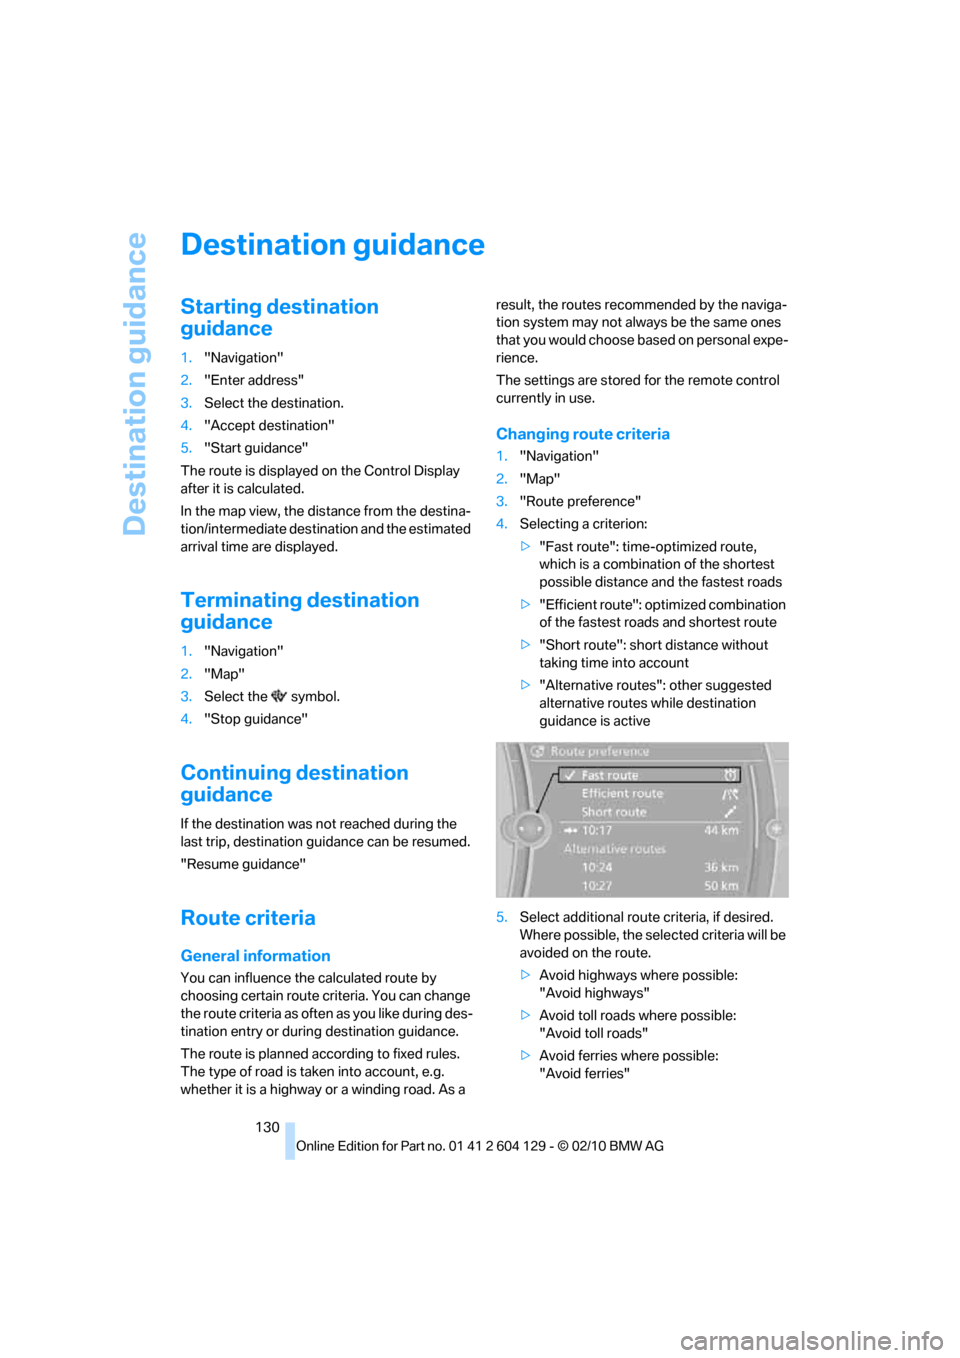
3."Route preference"
4.Selecting a criterion:
>"Fast route": time-optimized route,
which is a combination of the shortest
possible distance and the fastest roads
>"Efficient route": optimized combination
of the fastest roads and shortest route
>"Short route": short distance without
taking time into account
>"Alternative routes": other suggested
alternative routes while destination
guidance is active
5.Select additional route criteria, if desired.
Where possible, the selected criteria will be
avoided on the route.
>Avoid highways where possible:
"Avoid highways"
>Avoid toll roads where possible:
"Avoid toll roads"
>Avoid ferries where possible:
"Avoid ferries"
Page 136 of 256
Destination guidance
134
Real Time Traffic Information End-User
Provisions
Certain BMW models equipped with navigation
have the capability to display real-time traffic
information. If your system has this capability
the following additional terms and conditions
apply:
An End-User shall no longer have the right to
use the Traffic Data in the event that the End-
User is in material breach of the terms and con-
ditions contained herein.
A. Total Traffic Network, a division of Clear
Channel Broadcasting, Inc. ("Total Traffic Net-
work") holds the rights to the traffic incident
data and RDS-TMC network through which it is
delivered. You may not modify, copy, scan or
use any other method to reproduce, duplicate,
republish, transmit or distribute in any way any
portion of traffic incident data. You agree to
indemnify, defend and hold harmless BMW of
North America, LLC. ("BMW NA") and Total
Traffic Network, Inrix, Inc (and their affiliates)
against any and all claims, damages, costs or
other expenses that arise directly or indirectly
out of (a) your unauthorized use of the traffic
incident data or the RDS-TMC network, (b) your
violation of this directive and/or (c) any unautho-
rized or unlawful activities by you in connection
herewith.
B. Total Traffic Network traffic data is informa-
tional only. User assumes all risk of use. Total
Traffic Network, BMW NA, and their suppliers
make no representations about content, traffic
and road conditions, route usability, or speed.
C. The licensed material is provided to license
"as is," and "where is". Total Traffic Network,
including, but not limited to, any and all third
party providers of any of the licensed material,
expressly disclaims, to the fullest extent permit-
ted by law, all warranties or representations
with respect to the licensed material (including,
without limitation, that the licensed material will
be error-free, will operate without interruption
or that the traffic data will be accurate), express,
implied or statutory, including, without limita-
tion, the implied warranties of merchantability,
non-infringement fitness for a particular pur-pose, or those arising from a course of dealing
or usage of trade.
D. Neither Total Traffic Network, Inrix, Inc. nor
BMW NA will be liable to you for any indirect,
special, consequential, exemplary, or incidental
damages (including, without limitation, lost rev-
enues, anticipated revenues, or profits relating
to the same) arising from any claim relating
directly or indirectly to use of the traffic data,
and even if Total Traffic Network, Inrix, Inc., or
BMW NA are aware of the possibility of such
damages. These limitations apply to all claims,
including, without limitation, claims in contract
and tort (such as negligence, product liability
and strict liability). Some states do not allow the
exclusion or limitation of incidental or conse-
quential damages, so those particular limita-
tions may not apply to you.
Activating/deactivating reception
1."Navigation"
2.Open "Options".
3.Activate/deactivate "Receive Traffic Info".
Traffic bulletins in a list
A list of the traffic bulletins can be opened via
the menu or map view.
Opening traffic bulletins
1."Navigation"
2."Map"
3.Move the controller to the left, if necessary.
4.Select the symbol: "Traffic Info"
First, the traffic bulletins on the planned
route are displayed. The traffic bulletins are
sorted in the order of their distance from the
current vehicle position.
5.Select a traffic bulletin.
Additional information can be displayed for
some traffic bulletins:
1.Select the symbol.
2.Additional information is displayed.
3.To exit from the menu:
Move the controller to the left.
Page 137 of 256
Navigation
Driving tips
135Reference
At a glance
Controls
Communications
Entertainment
Mobility
Traffic bulletins in the map
When the traffic bulletin map is activated, the
Control Display changes to a grayscale display.
This enables a better view of the traffic bulle-
tins. The day/night mode is disregarded in this
setting. The symbols for the special destina-
tions are no longer displayed.
1."Navigation"
2."Map"
3.Open "Options".
4."Settings"
5."Traffic conditions/gray map"
Symbols in the map view
Depending on the scale of the map and the
location of the traffic obstruction along the
route, the symbols for the traffic obstructions
are displayed.
Additional information in the map view
Depending on the map scale, a traffic obstruc-
tion's length, direction and impact are displayed
on the map using triangles or gray bars along
the calculated route. The colors displayed
depend on the information transmitted by the
traffic information service.
>Red: traffic jam
>Orange: stop-and-go traffic
>Yellow: heavy traffic
>Green: traffic flowing freely
>Gray: general traffic information, e.g. con-
struction zone
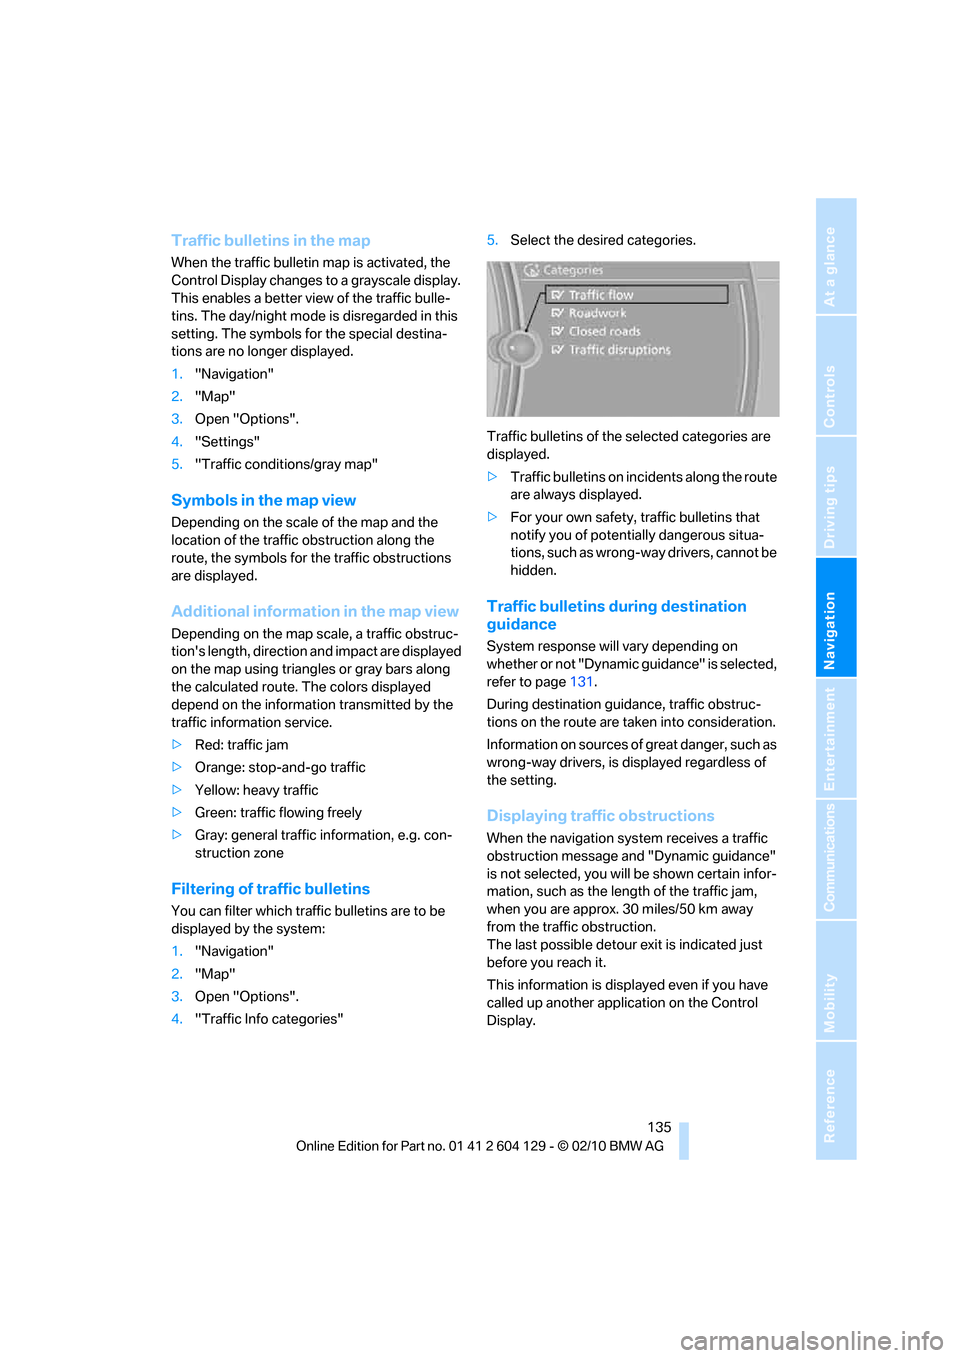
Filtering of traffic bulletins
You can filter which traffic bulletins are to be
displayed by the system:
1."Navigation"
2."Map"
3.Open "Options".
4."Traffic Info categories"5.Select the desired categories.
Traffic bulletins of the selected categories are
displayed.
>Traffic bulletins on incidents along the route
are always displayed.
>For your own safety, traffic bulletins that
notify you of potentially dangerous situa-
tions, such as wrong-way drivers, cannot be
hidden.
Traffic bulletins during destination
guidance
System response will vary depending on
whether or not "Dynamic guidance" is selected,
refer to page131.
During destination guidance, traffic obstruc-
tions on the route are taken into consideration.
Information on sources of great danger, such as
wrong-way drivers, is displayed regardless of
the setting.
Displaying traffic obstructions
When the navigation system receives a traffic
obstruction message and "Dynamic guidance"
is not selected, you will be shown certain infor-
mation, such as the length of the traffic jam,
when you are approx. 30 miles/50 km away
from the traffic obstruction.
The last possible detour exit is indicated just
before you reach it.
This information is displayed even if you have
called up another application on the Control
Display.
Page 146 of 256
Radio
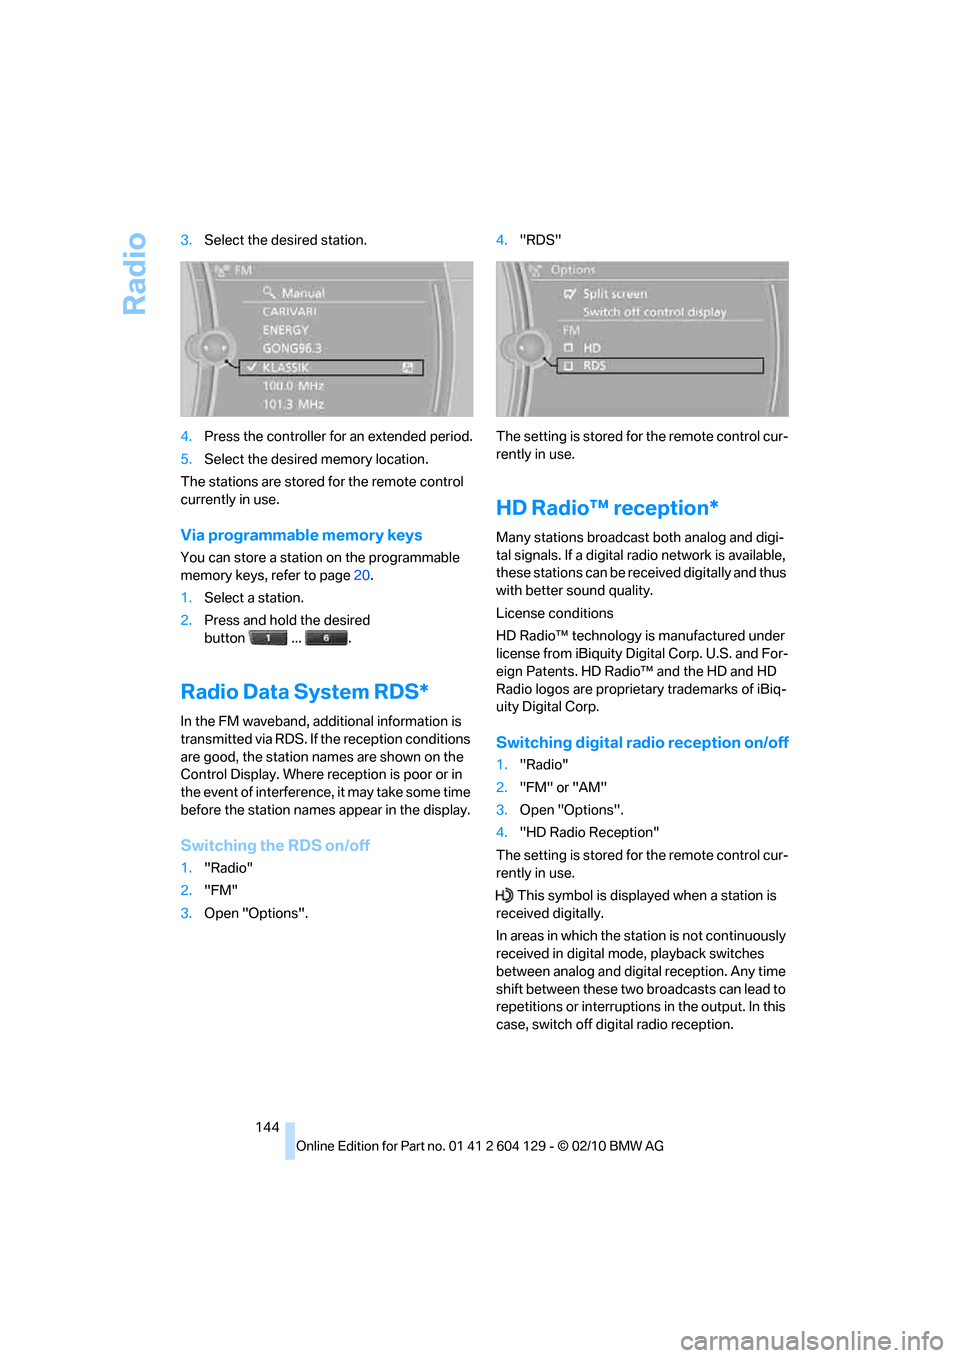
144 3.Select the desired station.
4.Press the controller for an extended period.
5.Select the desired memory location.
The stations are stored for the remote control
currently in use.
Via programmable memory keys
You can store a station on the programmable
memory keys, refer to page20.
1.Select a station.
2.Press and hold the desired
button ... .
Radio Data System RDS*
In the FM waveband, additional information is
transmitted via RDS. If the reception conditions
are good, the station names are shown on the
Control Display. Where reception is poor or in
the event of interference, it may take some time
before the station names appear in the display.
Switching the RDS on/off
1."Radio"
2."FM"
3.Open "Options".4."RDS"
The setting is stored for the remote control cur-
rently in use.
HD Radio™ reception*
Many stations broadcast both analog and digi-
tal signals. If a digital radio network is available,
these stations can be received digitally and thus
with better sound quality.
License conditions
HD Radio™ technology is manufactured under
license from iBiquity Digital Corp. U.S. and For-
eign Patents. HD Radio™ and the HD and HD
Radio logos are proprietary trademarks of iBiq-
uity Digital Corp.
Switching digital radio reception on/off
1."Radio"
2."FM" or "AM"
3.Open "Options".
4."HD Radio Reception"
The setting is stored for the remote control cur-
rently in use.
This symbol is displayed when a station is
received digitally.
In areas in which the station is not continuously
received in digital mode, playback switches
between analog and digital reception. Any time
shift between these two broadcasts can lead to
repetitions or interruptions in the output. In this
case, switch off digital radio reception.
Page 147 of 256
Navigation
Entertainment
Driving tips
145Reference
At a glance
Controls
Communications
Mobility
Displaying additional information
Some stations broadcast additional information
on the current track, such as the name of the
artist.
1.Select the desired station.
2.Open "Options".
3."Station info"
Selecting a substation
The symbol indicates that a main station
includes additional substations. The station
name of the main station ends with HD1. Sta-
tion names of substations end with HD2, HD3,
etc.
1.Select the desired station.
2.press the controller.
3.Select the substation.
In the event of poor reception, the substation is
muted for several seconds. If reception is inter-
rupted for a longer period of time, then the sys-
tem switches back to the main station.
Presets
It is possible to store up to 40 stations.
Calling up a station
1."Radio"
2."Presets"
3.Select the desired station.
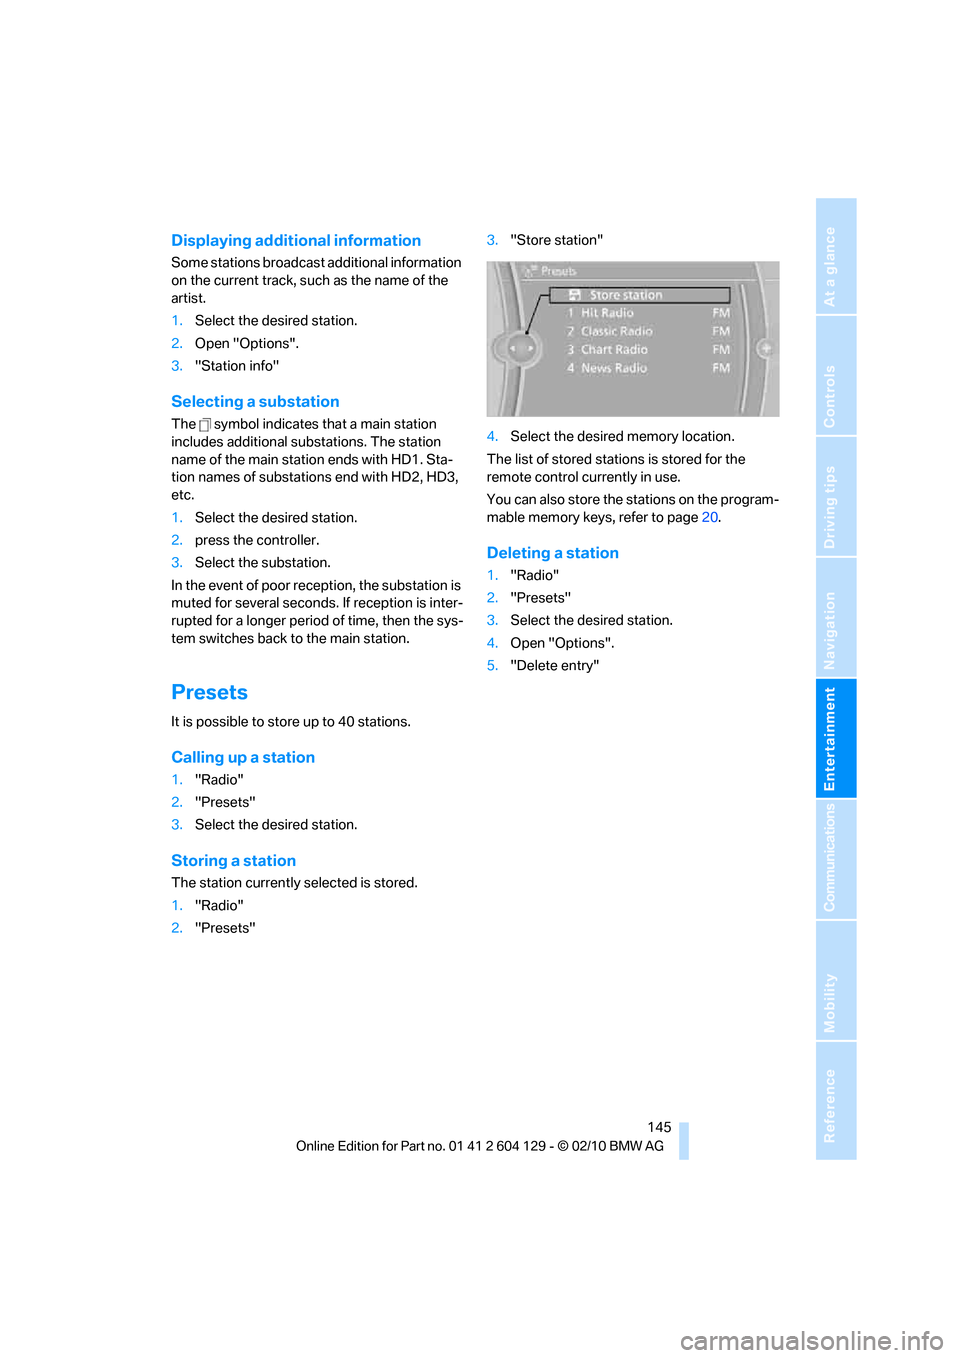
Storing a station
The station currently selected is stored.
1."Radio"
2."Presets"3."Store station"
4.Select the desired memory location.
The list of stored stations is stored for the
remote control currently in use.
You can also store the stations on the program-
mable memory keys, refer to page20.
Deleting a station
1."Radio"
2."Presets"
3.Select the desired station.
4.Open "Options".
5."Delete entry"
Page 157 of 256
Navigation
Entertainment
Driving tips
155Reference
At a glance
Controls
Communications
Mobility
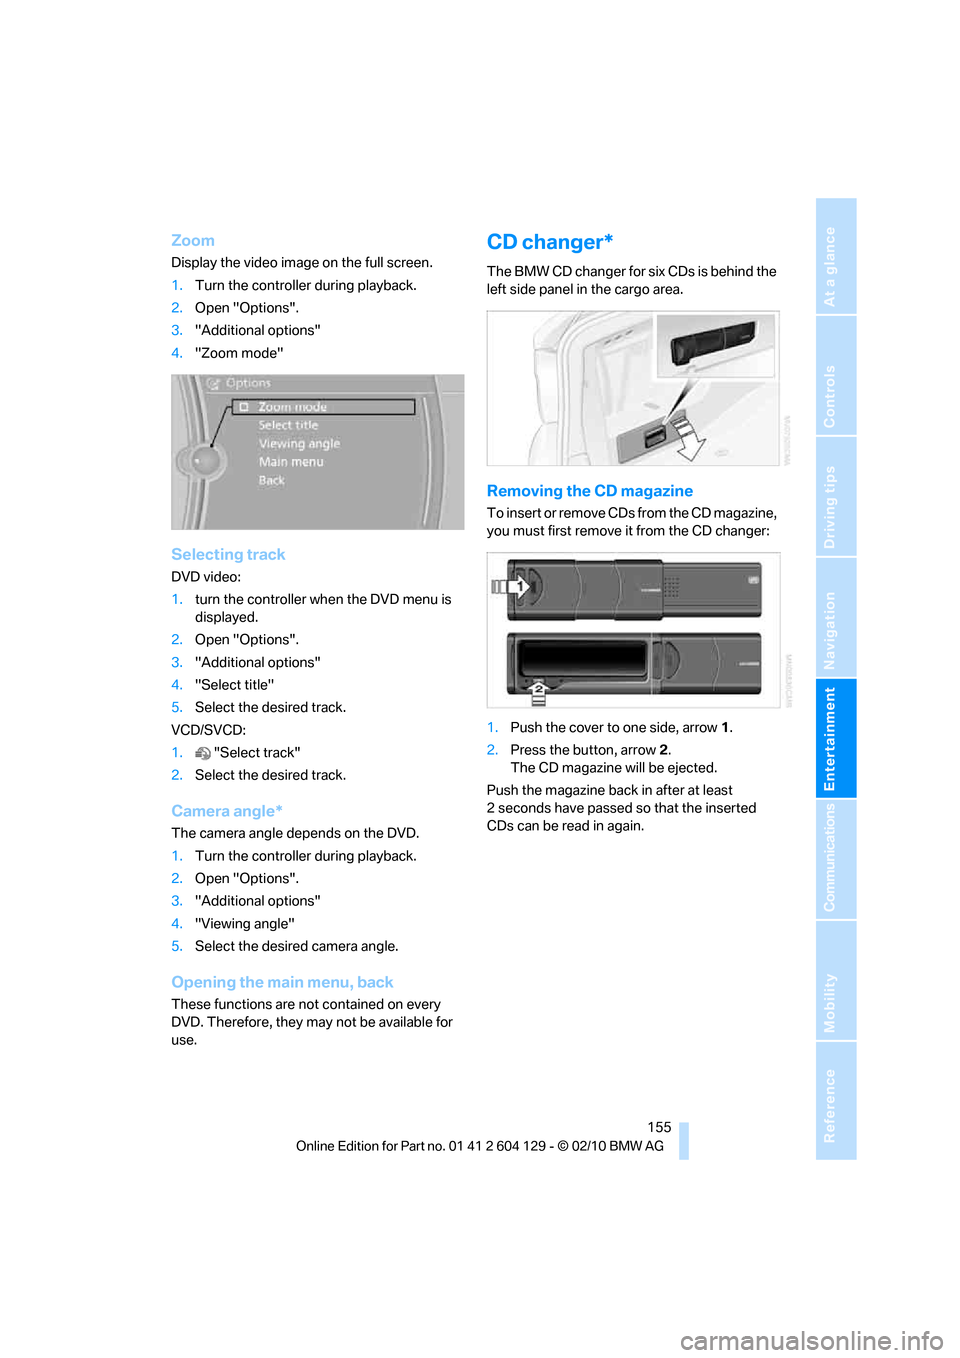
Zoom
Display the video image on the full screen.
1.Turn the controller during playback.
2.Open "Options".
3."Additional options"
4."Zoom mode"
Selecting track
DVD video:
1.turn the controller when the DVD menu is
displayed.
2.Open "Options".
3."Additional options"
4."Select title"
5.Select the desired track.
VCD/SVCD:
1."Select track"
2.Select the desired track.
Camera angle*
The camera angle depends on the DVD.
1.Turn the controller during playback.
2.Open "Options".
3."Additional options"
4."Viewing angle"
5.Select the desired camera angle.
Opening the main menu, back
These functions are not contained on every
DVD. Therefore, they may not be available for
use.
CD changer*
The BMW CD changer for six CDs is behind the
left side panel in the cargo area.
Removing the CD magazine
T o i n s e r t o r r e m o v e C D s f r o m t h e C D m a g a z i n e ,
you must first remove it from the CD changer:
1.Push the cover to one side, arrow 1.
2.Press the button, arrow2.
The CD magazine will be ejected.
Push the magazine back in after at least
2 seconds have passed so that the inserted
CDs can be read in again.
Page 161 of 256
Navigation
Entertainment
Driving tips
159Reference
At a glance
Controls
Communications
Mobility
3."Storing..."
4."Cancel storing"
The storage process is interrupted and can be
continued at any time.
Continuing the storage process
1."CD/Multimedia"
2."CD/DVD"
3. Select the symbol for the CD/DVD
player.
4."Continue storing"
Storage of the CD continues at the beginning of
the track at which storage was interrupted.
Album information
During storage, information such as the name
of the artist is stored with the track, if this infor-
mation is available in the vehicle database or on
the CD.
To update the database, contact your service
center.
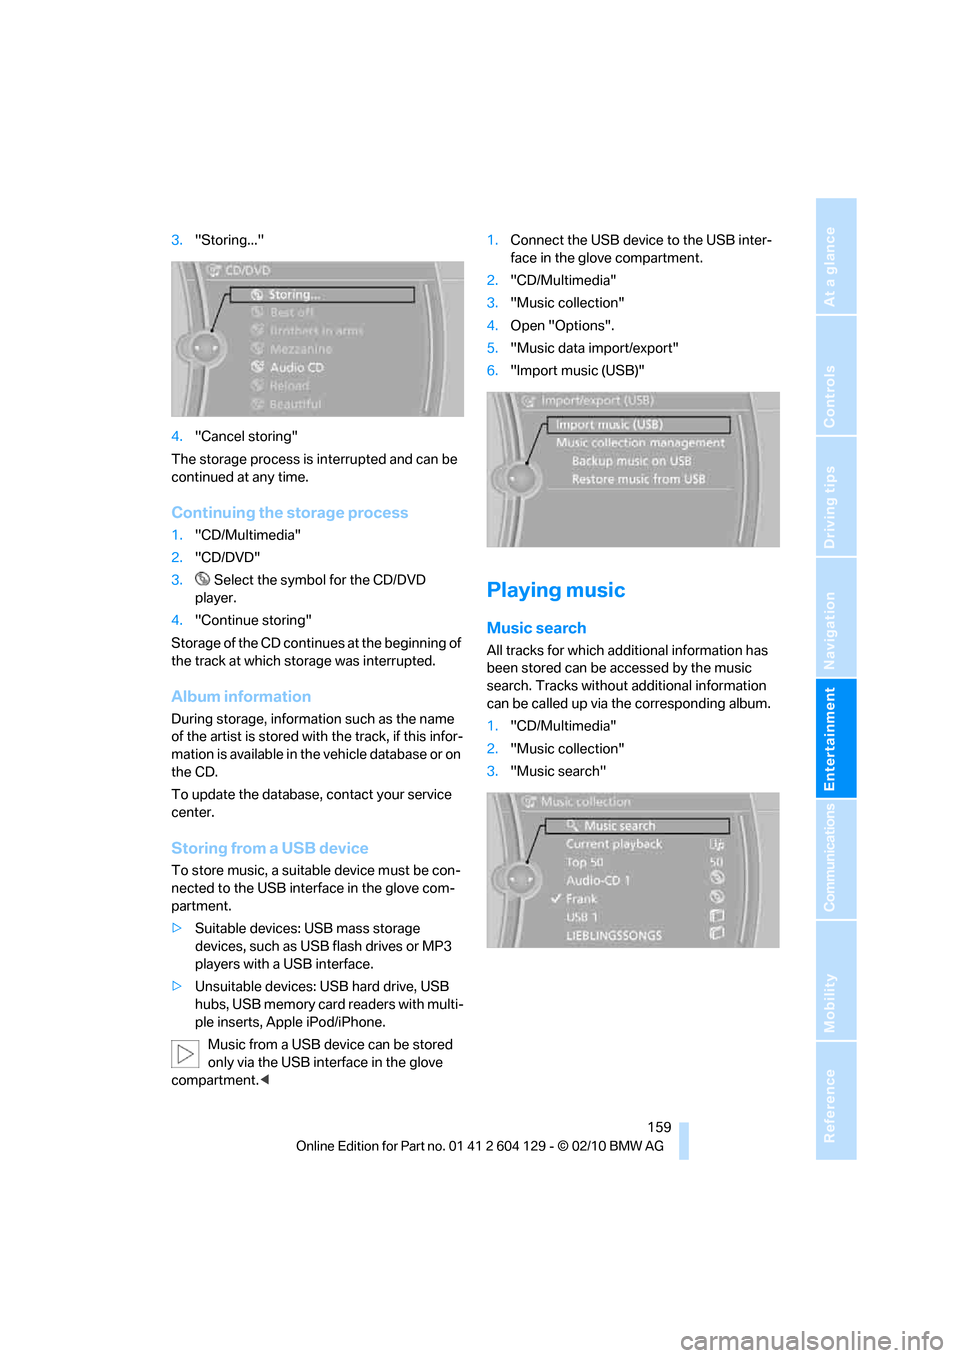
Storing from a USB device
To store music, a suitable device must be con-
nected to the USB interface in the glove com-
partment.
>Suitable devices: USB mass storage
devices, such as USB flash drives or MP3
players with a USB interface.
>Unsuitable devices: USB hard drive, USB
hubs, USB memory card readers with multi-
ple inserts, Apple iPod/iPhone.
Music from a USB device can be stored
only via the USB interface in the glove
compartment.<1.Connect the USB device to the USB inter-
face in the glove compartment.
2."CD/Multimedia"
3."Music collection"
4.Open "Options".
5."Music data import/export"
6."Import music (USB)"
Playing music
Music search
All tracks for which additional information has
been stored can be accessed by the music
search. Tracks without additional information
can be called up via the corresponding album.
1."CD/Multimedia"
2."Music collection"
3."Music search"