Additional BMW 128I COUPE 2011 E82 Owner's Manual
[x] Cancel search | Manufacturer: BMW, Model Year: 2011, Model line: 128I COUPE, Model: BMW 128I COUPE 2011 E82Pages: 256, PDF Size: 8.41 MB
Page 6 of 256
Notes
4
Notes
Using this Owner's Manual
We have tried to make all the information in this
Owner's Manual easy to find. The fastest way to
find specific topics is to refer to the detailed
index at the back of the manual. If you wish to
gain an initial overview of your vehicle, you will
find this in the first chapter.
Should you sell your BMW some day, please
remember to hand over the Owner's Manual as
well; it is an important component of your vehi-
cle.
Additional sources of information
Should you have any other questions, your
BMW center will be glad to advise you at any
time.
Information on BMW, e.g. on technical aspects,
can also be found on the Internet at
www.bmwusa.com.
Symbols used
Indicates precautions that must be fol-
lowed precisely in order to avoid the pos-
sibility of personal injury and serious damage to
the vehicle.
Indicates information that will assist you
in gaining the optimum benefit from your
vehicle and enable you to care more effectively
for your vehicle.
Refers to measures that can be taken to
help protect the environment.
*Indicates special equipment, country-spe-
cific equipment and optional accessories, as
well as equipment and functions not yet avail-
able at the time of printing.
"..." Identifies Control Display texts used to
select individual functions.
{...} Verbal instructions to use with the voice
activation system.
{{...}} Identifies the answers generated by the
voice activation system.
Symbols on vehicle components
Indicates that you should consult the rel-
evant section of this Owner's Manual for
information on a particular part or assembly.
Page 7 of 256
5Reference
At a glance
Controls
Driving tips
Communications
Navigation
Entertainment
Mobility
The individual vehicle
When you ordered your BMW, you chose vari-
ous items of equipment. This Owner's Manual
describes the entire array of options and equip-
ment available with a specific BMW model.
Please bear in mind that the manual may con-
tain information on accessories and equipment
that you have not specified for your own vehicle.
Sections describing options and special equip-
ment are marked by asterisks
* to assist you in
identifying possible differences between the
descriptions in this manual and your own vehi-
cle's equipment.
If equipment in your BMW is not described in
this Owner's Manual, please refer to the accom-
panying Supplementary Owner's Manuals.
Editorial notice
BMW pursues a policy of continuous, ongoing
development that is conceived to ensure that
our vehicles continue to embody the highest
quality and safety standards combined with
advanced, state-of-the-art technology. For this
reason, it is possible in exceptional cases that
features described in this Owner's Manual
could differ from those on your vehicle.
For your own safety
Maintenance and repair
Advanced technology, e.g. the use of
modern materials and powerful electron-
ics, requires specially adapted maintenance
and repair methods. You should therefore have
the corresponding work on your vehicle per-
formed only by your BMW center or at a work-
shop that works according to BMW repair pro-
cedures with correspondingly trained
personnel. If this work is not carried out prop-
erly, there is a danger of subsequent damage
and related safety hazards.<
Parts and accessories
For your own safety, use genuine parts
and accessories approved by BMW.
When you purchase accessories tested and
approved by BMW and Original BMW Parts, you
simultaneously acquire the assurance that they
have been thoroughly tested by BMW to ensure
optimum performance when installed on your
vehicle.
BMW warrants these parts to be free from
defects in material and workmanship.
BMW will not accept any liability for damage
resulting from installation of parts and accesso-
ries not approved by BMW.
BMW cannot test every product made by other
manufacturers to verify if it can be used on a
BMW safely and without risk to either the vehi-
cle, its operation, or its occupants.
Original BMW Parts, BMW Accessories and
other products approved by BMW, together
with professional advice on using these items,
are available from all BMW centers.
Installation and operation of accessories not
approved by BMW, such as alarms, radios,
amplifiers, radar detectors, wheels, suspension
components, brake dust shields, telephones,
including operation of any mobile phone from
within the vehicle without using an externally
mounted antenna, or transceiver equipment, for
instance, CBs, walkie-talkies, ham radio or sim-
ilar accessories, may cause extensive damage
to the vehicle, compromise its safety, interfere
with the vehicle's electrical system or affect the
validity of the BMW Limited Warranty. See your
BMW center for additional information.<
Maintenance, replacement, or repair of
the emission control devices and sys-
tems may be performed by any automotive
repair establishment or individual using any cer-
tified automotive part.<
Page 20 of 256
iDrive
18
Menu items in the Owner's Manual
In the Owner's Manual, menu items that can be
selected are given in quotation marks, e.g.
"Settings".
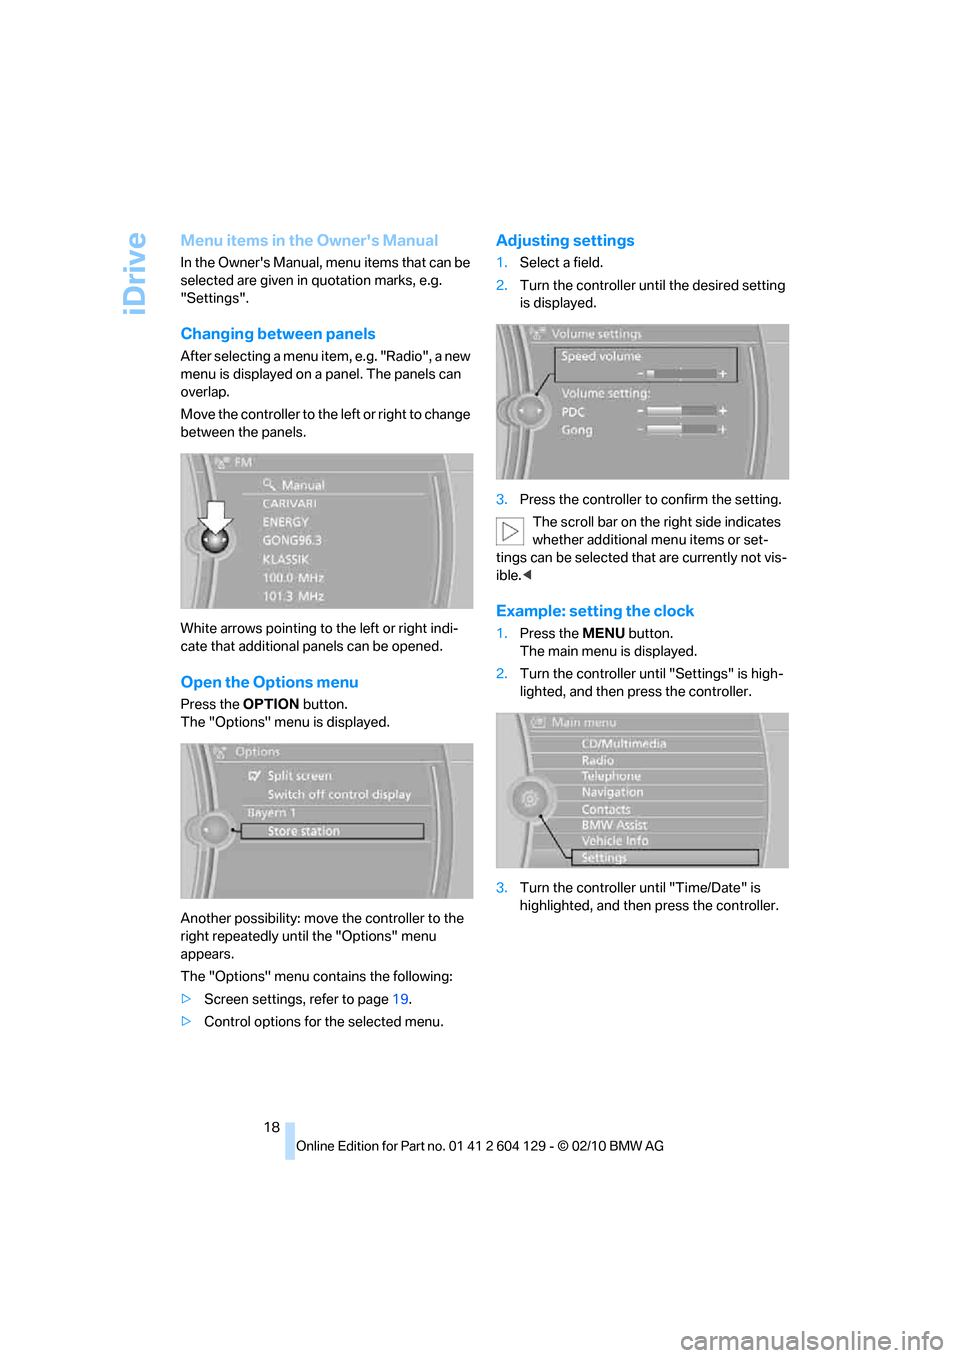
Changing between panels
After selecting a menu item, e.g. "Radio", a new
menu is displayed on a panel. The panels can
overlap.
Move the controller to the left or right to change
between the panels.
White arrows pointing to the left or right indi-
cate that additional panels can be opened.
Open the Options menu
Press the OPTION button.
The "Options" menu is displayed.
Another possibility: move the controller to the
right repeatedly until the "Options" menu
appears.
The "Options" menu contains the following:
>Screen settings, refer to page19.
>Control options for the selected menu.
Adjusting settings
1.Select a field.
2.Turn the controller until the desired setting
is displayed.
3.Press the controller to confirm the setting.
The scroll bar on the right side indicates
whether additional menu items or set-
tings can be selected that are currently not vis-
ible.<
Example: setting the clock
1.Press the MENU button.
The main menu is displayed.
2.Turn the controller until "Settings" is high-
lighted, and then press the controller.
3.Turn the controller until "Time/Date" is
highlighted, and then press the controller.
Page 21 of 256
At a glance
19Reference
Controls
Driving tips
Communications
Navigation
Entertainment
Mobility
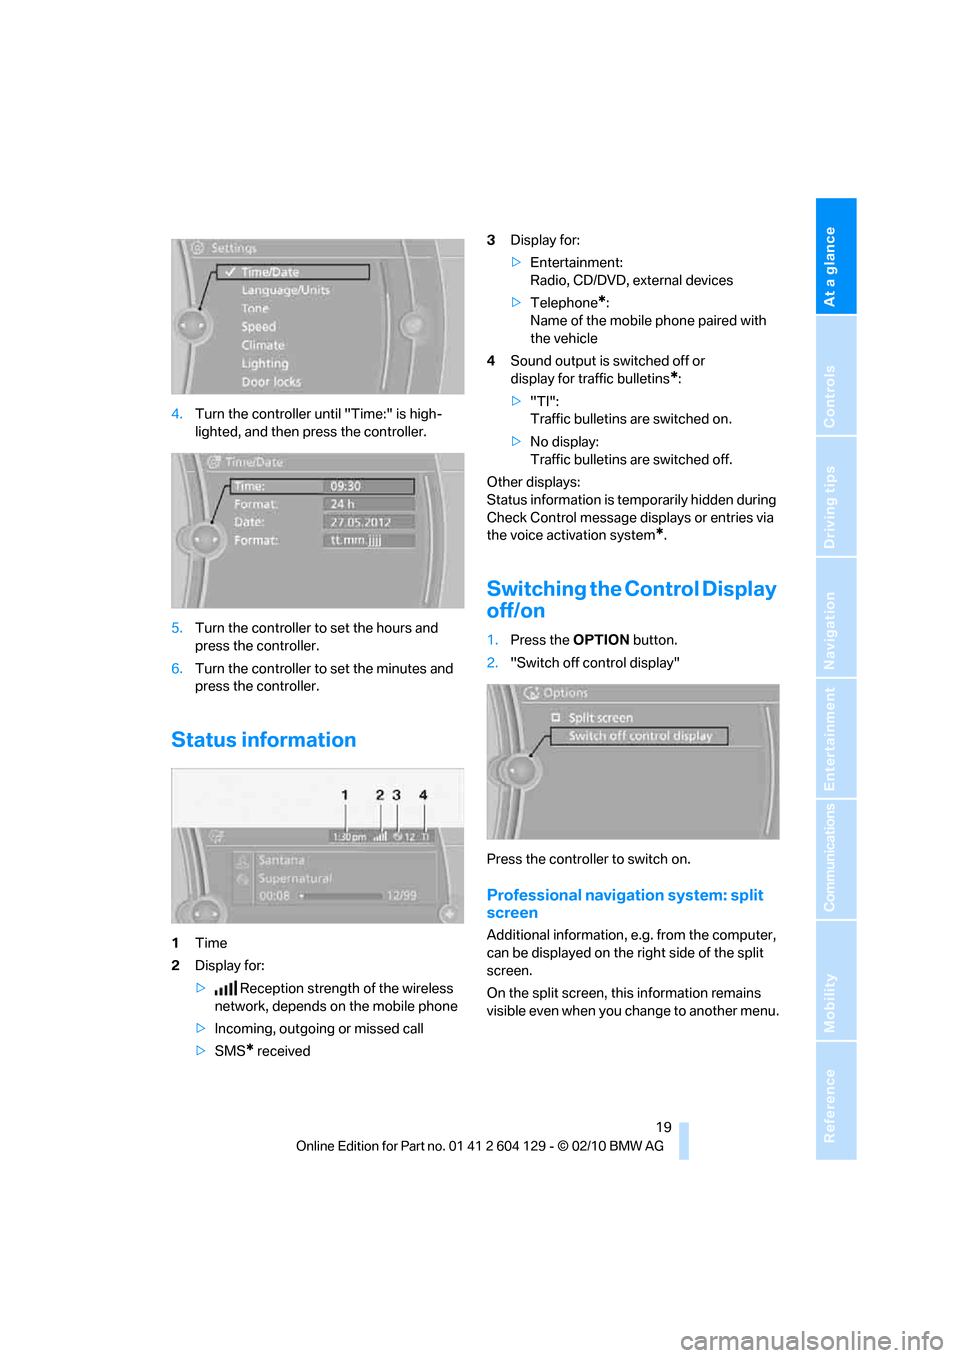
4.Turn the controller until "Time:" is high-
lighted, and then press the controller.
5.Turn the controller to set the hours and
press the controller.
6.Turn the controller to set the minutes and
press the controller.
Status information
1Time
2Display for:
>Reception strength of the wireless
network, depends on the mobile phone
>Incoming, outgoing or missed call
>SMS
* received3Display for:
>Entertainment:
Radio, CD/DVD, external devices
>Telephone
*:
Name of the mobile phone paired with
the vehicle
4Sound output is switched off or
display for traffic bulletins
*:
>"TI":
Traffic bulletins are switched on.
>No display:
Traffic bulletins are switched off.
Other displays:
Status information is temporarily hidden during
Check Control message displays or entries via
the voice activation system
*.
Switching the Control Display
off/on
1.Press the OPTION button.
2."Switch off control display"
Press the controller to switch on.
Professional navigation system: split
screen
Additional information, e.g. from the computer,
can be displayed on the right side of the split
screen.
On the split screen, this information remains
visible even when you change to another menu.
Page 23 of 256
At a glance
21Reference
Controls
Driving tips
Communications
Navigation
Entertainment
Mobility
Letters and numbers
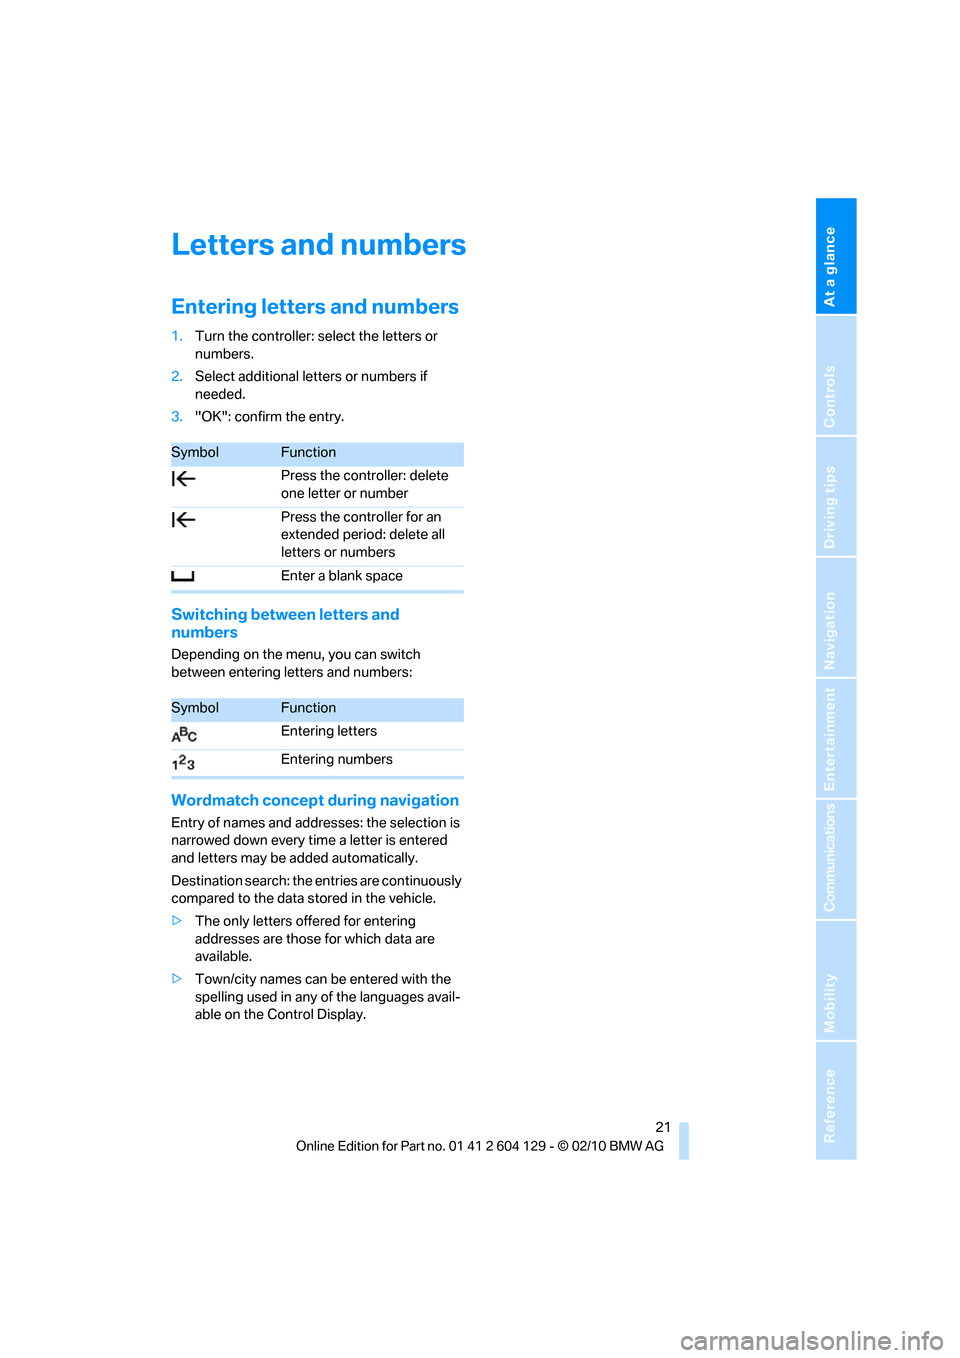
Entering letters and numbers
1.Turn the controller: select the letters or
numbers.
2.Select additional letters or numbers if
needed.
3."OK": confirm the entry.
Switching between letters and
numbers
Depending on the menu, you can switch
between entering letters and numbers:
Wordmatch concept during navigation
Entry of names and addresses: the selection is
narrowed down every time a letter is entered
and letters may be added automatically.
Destination search: the entries are continuously
compared to the data stored in the vehicle.
>The only letters offered for entering
addresses are those for which data are
available.
>Town/city names can be entered with the
spelling used in any of the languages avail-
able on the Control Display.
SymbolFunction
Press the controller: delete
one letter or number
Press the controller for an
extended period: delete all
letters or numbers
Enter a blank space
SymbolFunction
Entering letters
Entering numbers
Page 24 of 256
Voice activation system
22
Voice activation system
The concept
The voice activation system allows you to con-
trol operation of various vehicle systems with-
out removing your hands from the steering
wheel.
Most menu items on the Control Display can be
voiced as commands. It is not necessary to use
the controller.
The voice activation system transforms your
oral commands into control signals for the
selected systems and provides support in the
form of instructions or questions.
The voice activation system uses a special
microphone located in the area of the interior
rearview mirror, refer to page14.
Precondition
Via iDrive, select the language in which the
voice activation system is operating, so that the
spoken commands can be identified. Selecting
the language for iDrive, refer to page79.
Symbols in the Owner's Manual
Saying commands
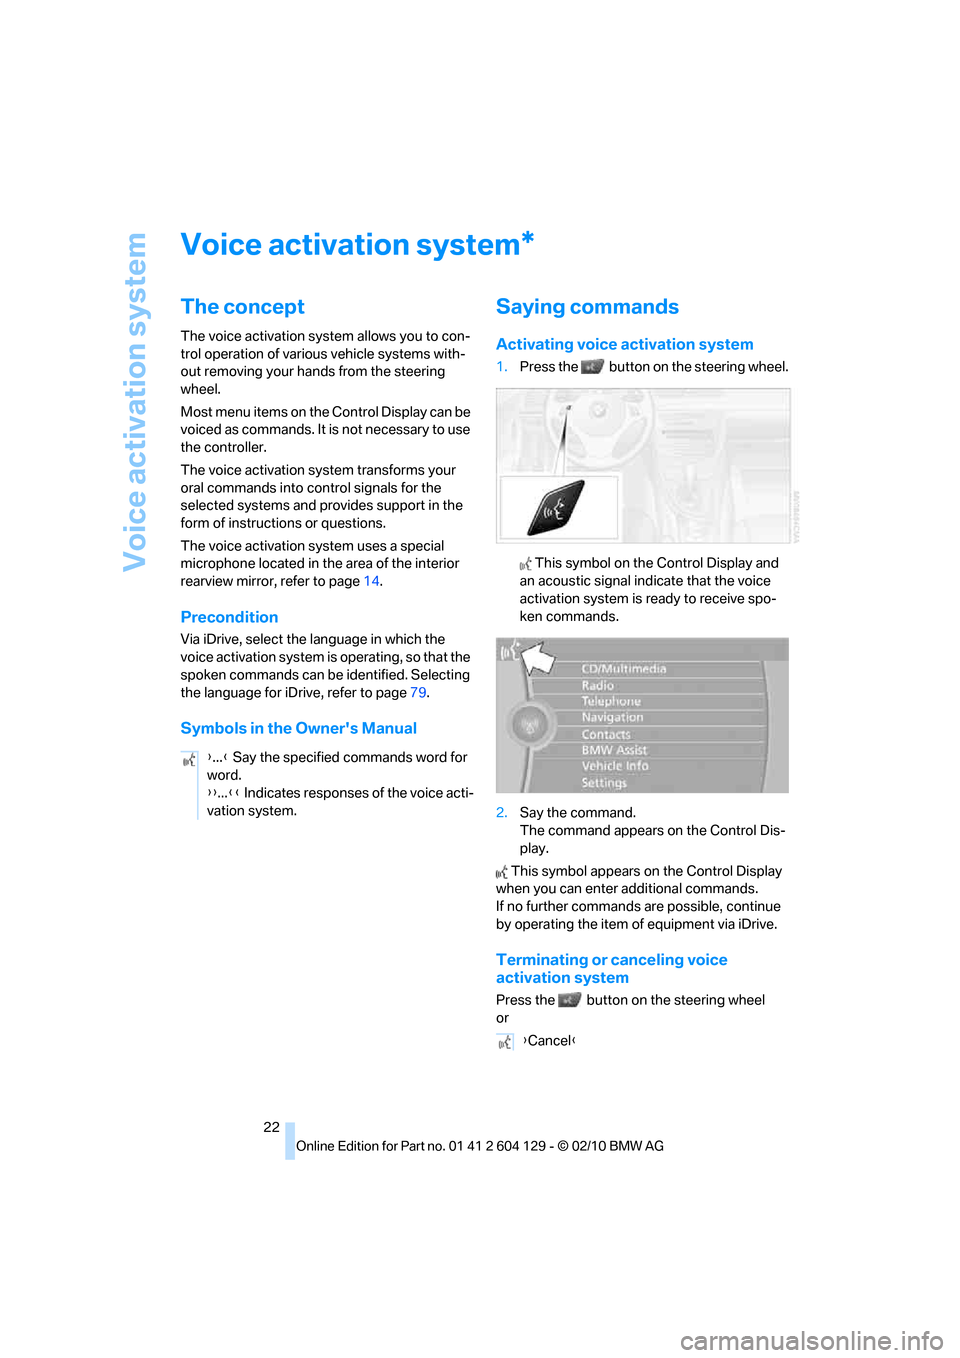
Activating voice activation system
1.Press the button on the steering wheel.
This symbol on the Control Display and
an acoustic signal indicate that the voice
activation system is ready to receive spo-
ken commands.
2.Say the command.
The command appears on the Control Dis-
play.
This symbol appears on the Control Display
when you can enter additional commands.
If no further commands are possible, continue
by operating the item of equipment via iDrive.
Terminating or canceling voice
activation system
Press the button on the steering wheel
or
*
{...} Say the specified commands word for
word.
{{...}} Indicates responses of the voice acti-
vation system.
{Cancel}
Page 28 of 256
Opening and closing
26
Opening and closing
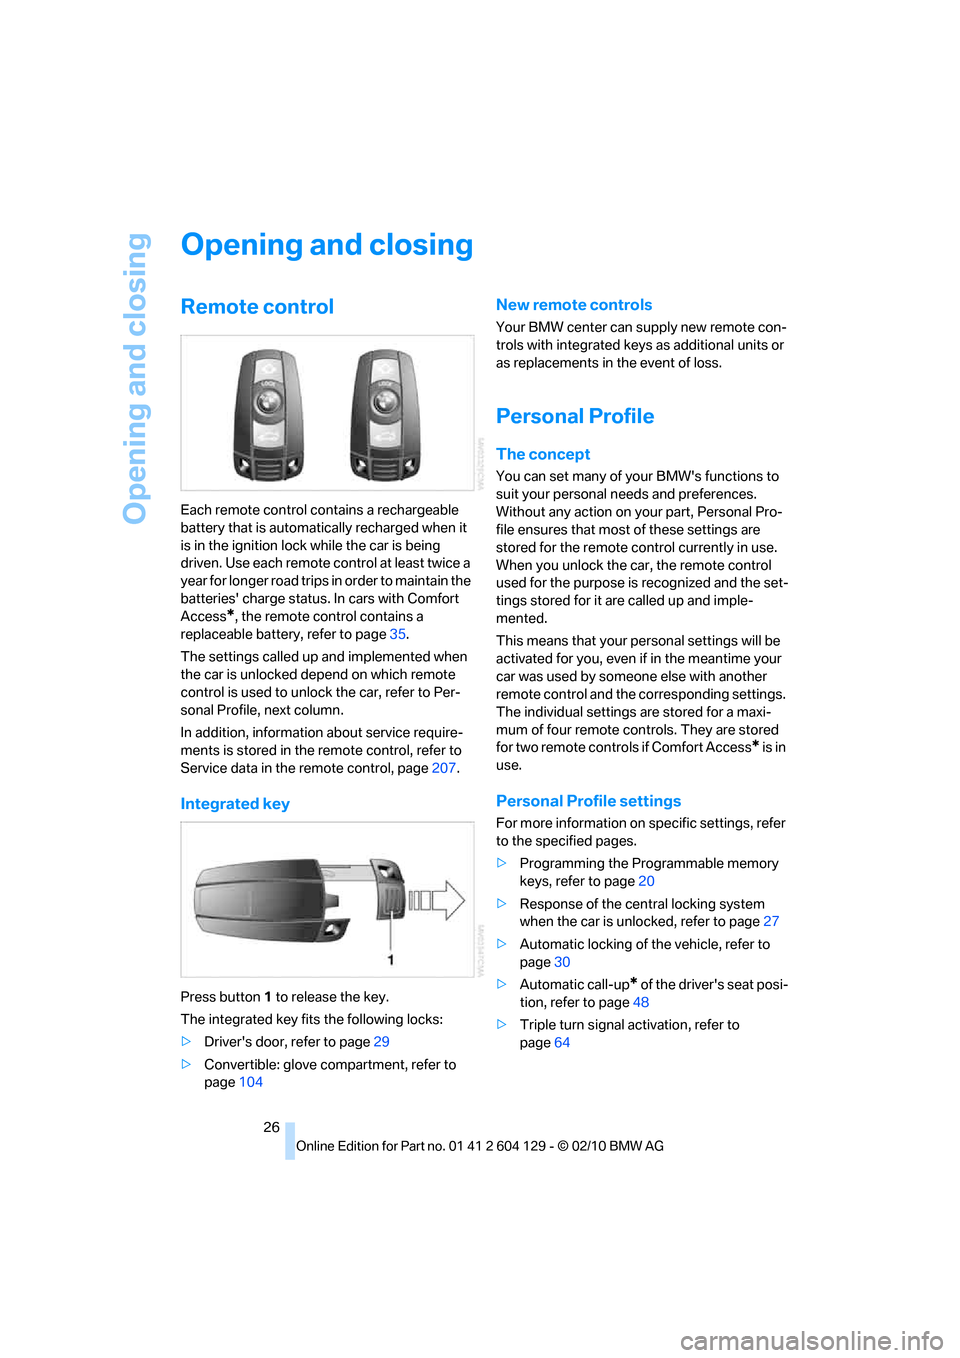
Remote control
Each remote control contains a rechargeable
battery that is automatically recharged when it
is in the ignition lock while the car is being
driven. Use each remote control at least twice a
year for longer road trips in order to maintain the
batteries' charge status. In cars with Comfort
Access
*, the remote control contains a
replaceable battery, refer to page35.
The settings called up and implemented when
the car is unlocked depend on which remote
control is used to unlock the car, refer to Per-
sonal Profile, next column.
In addition, information about service require-
ments is stored in the remote control, refer to
Service data in the remote control, page207.
Integrated key
Press button1 to release the key.
The integrated key fits the following locks:
>Driver's door, refer to page29
>Convertible: glove compartment, refer to
page104
New remote controls
Your BMW center can supply new remote con-
trols with integrated keys as additional units or
as replacements in the event of loss.
Personal Profile
The concept
You can set many of your BMW's functions to
suit your personal needs and preferences.
Without any action on your part, Personal Pro-
file ensures that most of these settings are
stored for the remote control currently in use.
When you unlock the car, the remote control
used for the purpose is recognized and the set-
tings stored for it are called up and imple-
mented.
This means that your personal settings will be
activated for you, even if in the meantime your
car was used by someone else with another
remote control and the corresponding settings.
The individual settings are stored for a maxi-
mum of four remote controls. They are stored
for two remote controls if Comfort Access
* is in
use.
Personal Profile settings
For more information on specific settings, refer
to the specified pages.
>Programming the Programmable memory
keys, refer to page20
>Response of the central locking system
when the car is unlocked, refer to page27
>Automatic locking of the vehicle, refer to
page30
>Automatic call-up
* of the driver's seat posi-
tion, refer to page48
>Triple turn signal activation, refer to
page64
Page 45 of 256
Controls
43Reference
At a glance
Driving tips
Communications
Navigation
Entertainment
Mobility
Adjustments
Sitting safely
The ideal sitting position can make a vital con-
tribution to relaxed, fatigue-free driving. In con-
junction with the safety belts, the head
restraints and the airbags, the seated position
has a major influence on your safety in the event
of an accident. To ensure that the safety sys-
tems operate with optimal efficiency, we
strongly urge you to observe the instructions
contained in the following section.
For additional information on transporting chil-
dren safely, refer to page52.
Airbags
Always maintain an adequate distance
between yourself and the airbags. Always
grip the steering wheel on the rim, with your
hands in the 3 o'clock and 9 o'clock positions,
to minimize the risk of injury to the hands or
arms in the event of the airbag being triggered
off.
No one and nothing should come between the
airbags and the seat occupant.
Do not use the cover of the front airbag on the
front passenger side as a storage area. Make
sure that the front passenger is sitting correctly,
i.e. not resting feet or legs on the dashboard;
otherwise, leg injuries can occur if the front air-
bag deploys.
Make sure that passengers keep their heads
away from the side airbag and do not lean
against the cover of the head airbag; otherwise,
serious injuries can result if the airbag
deploys.<
Even if you follow all the instructions, injuries
resulting from contact with airbags cannot be
fully excluded, depending on the circum-
stances. The ignition and inflation noise may
provoke a mild hearing loss in extremely sensi-
tive individuals. This effect is usually only tem-
porary.
For airbag locations and additional information
on airbags, refer to page88.
Head restraint
A correctly adjusted head restraint reduces the
risk of neck injury in the event of an accident.
Adjust the head restraint in such a way
that its center is at approx. ear level. Oth-
erwise, there is an increased risk of injury in the
event of an accident.<
Head restraints, refer to page46.
Safety belt
Before every drive, make sure that all occupants
wear their safety belts. Airbags complement the
safety belt as an additional safety device, but
they do not represent a substitute.
Your vehicle has four seats, each of which is
equipped with a safety belt.
Never allow more than one person to
wear a single safety belt. Never allow
infants or small children to ride in a passenger's
lap. Make sure that the belt in the lap area sits
low across the hips and does not press against
the abdomen.
The safety belt must not rest against the throat,
run across sharp edges, pass over hard or frag-
ile objects or be pinched. Fasten the safety belt
so that it sits as snugly as possible against the
lap and shoulder without being twisted. Other-
wise, the belt could slide over your hips and
injure your abdomen in the event of a frontal
collision. Avoid wearing bulky clothing and reg-
ularly pull the belt in the upper-body area taut;
otherwise, its restraining effect could be
impaired.<
Safety belts, refer to page49.
Page 47 of 256
Controls
45Reference
At a glance
Driving tips
Communications
Navigation
Entertainment
Mobility
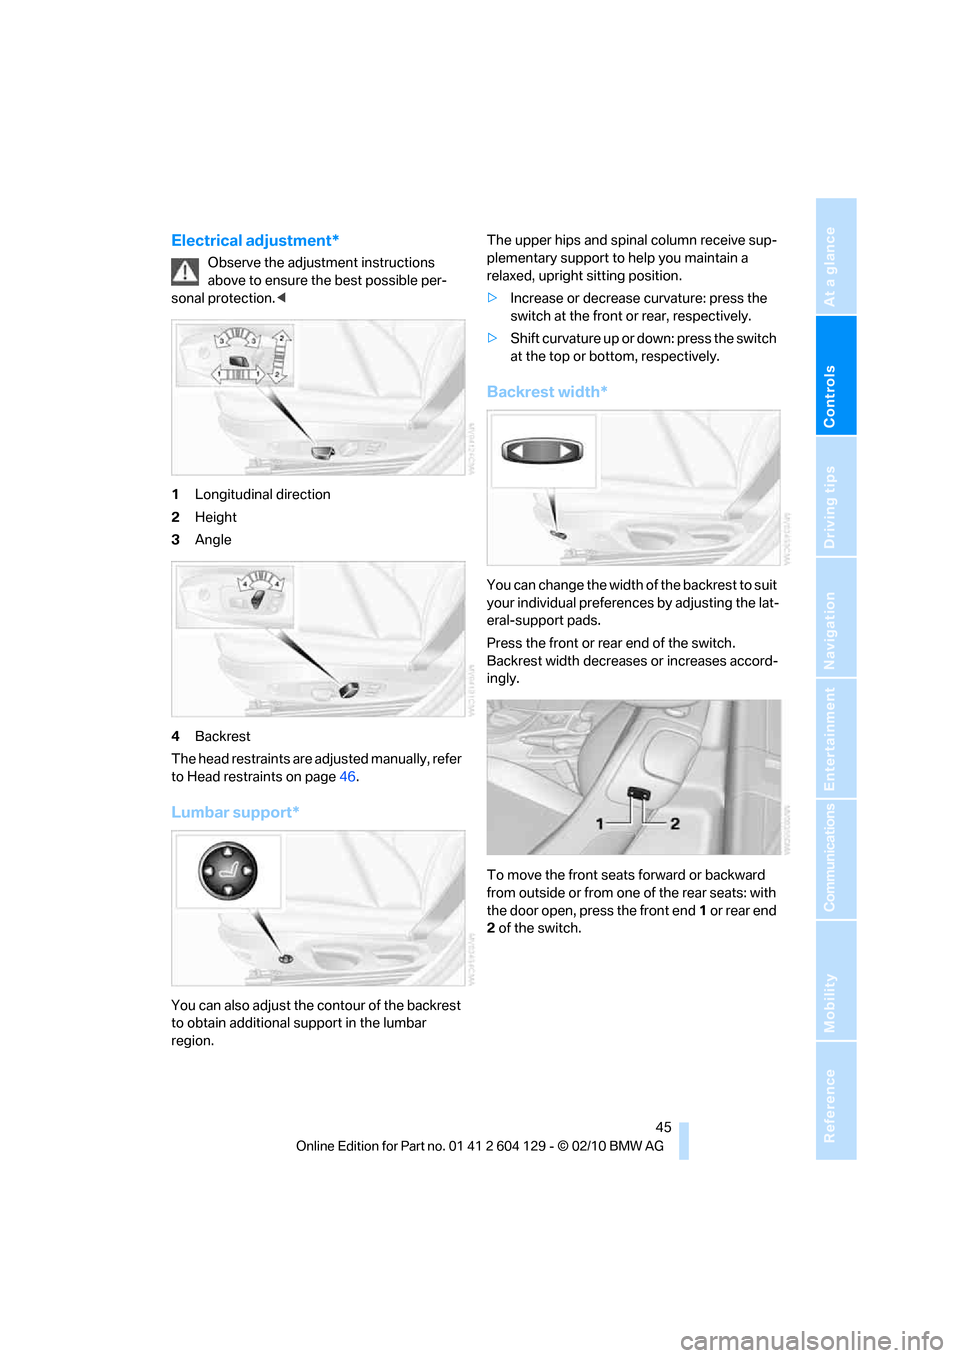
Electrical adjustment*
Observe the adjustment instructions
above to ensure the best possible per-
sonal protection.<
1Longitudinal direction
2Height
3Angle
4Backrest
The head restraints are adjusted manually, refer
to Head restraints on page46.
Lumbar support*
You can also adjust the contour of the backrest
to obtain additional support in the lumbar
region.The upper hips and spinal column receive sup-
plementary support to help you maintain a
relaxed, upright sitting position.
>Increase or decrease curvature: press the
switch at the front or rear, respectively.
>Shift curvature up or down: press the switch
at the top or bottom, respectively.
Backrest width*
You can change the width of the backrest to suit
your individual preferences by adjusting the lat-
eral-support pads.
Press the front or rear end of the switch.
Backrest width decreases or increases accord-
ingly.
To move the front seats forward or backward
from outside or from one of the rear seats: with
the door open, press the front end 1 or rear end
2 of the switch.
Page 51 of 256
Controls
49Reference
At a glance
Driving tips
Communications
Navigation
Entertainment
Mobility
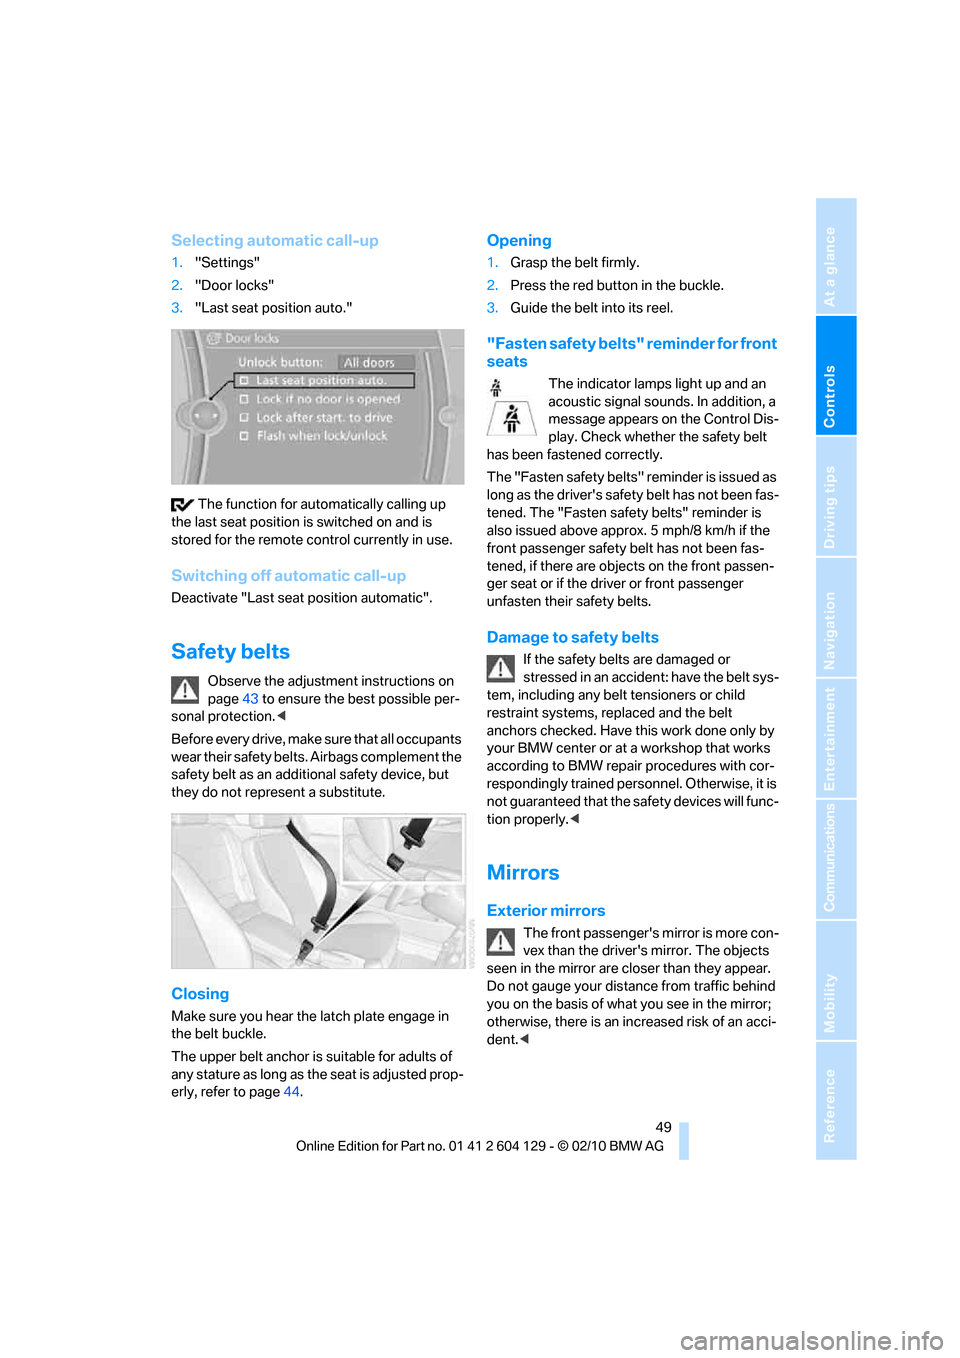
Selecting automatic call-up
1."Settings"
2."Door locks"
3."Last seat position auto."
The function for automatically calling up
the last seat position is switched on and is
stored for the remote control currently in use.
Switching off automatic call-up
Deactivate "Last seat position automatic".
Safety belts
Observe the adjustment instructions on
page43 to ensure the best possible per-
sonal protection.<
Before every drive, make sure that all occupants
wear their safety belts. Airbags complement the
safety belt as an additional safety device, but
they do not represent a substitute.
Closing
Make sure you hear the latch plate engage in
the belt buckle.
The upper belt anchor is suitable for adults of
any stature as long as the seat is adjusted prop-
erly, refer to page44.
Opening
1.Grasp the belt firmly.
2.Press the red button in the buckle.
3.Guide the belt into its reel.
"Fasten safety belts" reminder for front
seats
The indicator lamps light up and an
acoustic signal sounds. In addition, a
message appears on the Control Dis-
play. Check whether the safety belt
has been fastened correctly.
The "Fa sten safety belts " reminder is iss ued a s
long as the driver's safety belt has not been fas-
tened. The "Fasten safety belts" reminder is
also issued above approx. 5 mph/8 km/h if the
front passenger safety belt has not been fas-
tened, if there are objects on the front passen-
ger seat or if the driver or front passenger
unfasten their safety belts.
Damage to safety belts
If the safety belts are damaged or
stressed in an accident: have the belt sys-
tem, including any belt tensioners or child
restraint systems, replaced and the belt
anchors checked. Have this work done only by
your BMW center or at a workshop that works
according to BMW repair procedures with cor-
respondingly trained personnel. Otherwise, it is
not guaranteed that the safety devices will func-
tion properly.<
Mirrors
Exterior mirrors
The front passenger's mirror is more con-
vex than the driver's mirror. The objects
seen in the mirror are closer than they appear.
Do not gauge your distance from traffic behind
you on the basis of what you see in the mirror;
otherwise, there is an increased risk of an acci-
dent.<