strap BMW 2 SERIES 2014 F22 Owner's Manual
[x] Cancel search | Manufacturer: BMW, Model Year: 2014, Model line: 2 SERIES, Model: BMW 2 SERIES 2014 F22Pages: 228, PDF Size: 5.73 MB
Page 56 of 228
▷Press and hold this button until
the seat has moved to the de‐
sired position. Releasing the button
stops window/roof movement.▷Press button briefly. The seat au‐
tomatically moves to the end po‐
sition. Pressing again stops the motion.
Original position
1.Moving the seat to its original position:▷Press and hold this button until
the seat has moved to its original
position. Releasing the button stops
window/roof movement.▷Press button briefly. The seat
moves to its original position.
Pressing again stops the motion.2.Folding the backrest back.
Safety belts
Seats with safety belt
The vehicle has four seats, each of which is
equipped with a safety belt.
Number of safety belts
Your vehicle has been fitted with four safety
belts for your and your passengers' safety.
However, they can only offer protection when
adjusted correctly.
General information Always make sure that safety belts are being
worn by all occupants before driving off.
For the occupants' safety the belt locking
mechanism triggers early. Slowly guide the
belt out of the holder when applying it.
Although airbags enhance safety by providing
added protection, they are not a substitute for
safety belts.
The upper shoulder strap's anchorage point
will be correct for adult seat occupants of ev‐
ery build if the seat is correctly adjusted.
Hints One person per safety belt
Never allow more than one person to
wear a single safety belt. Never allow infants or
small children to ride on a passenger's lap.◀
Putting on the belt
Lay the belt, without twisting, snugly
across the lap and shoulders, as close to the
body as possible. Make sure that the belt lies
low around the hips in the lap area and does
not press on the abdomen. Otherwise, the belt
can slip over the hips in a frontal impact and in‐
jure the abdomen.
The safety belt must not lie across the neck, rub on sharp edges, be routed over breakable
objects, or be pinched.◀
What reduces the restraining effect
Avoid wearing bulky clothing, and pull
the shoulder belt periodically to readjust the
tension. Make sure that the belt is not jammed;
otherwise, the belt can be damaged and the
restraining effect is reduced.◀
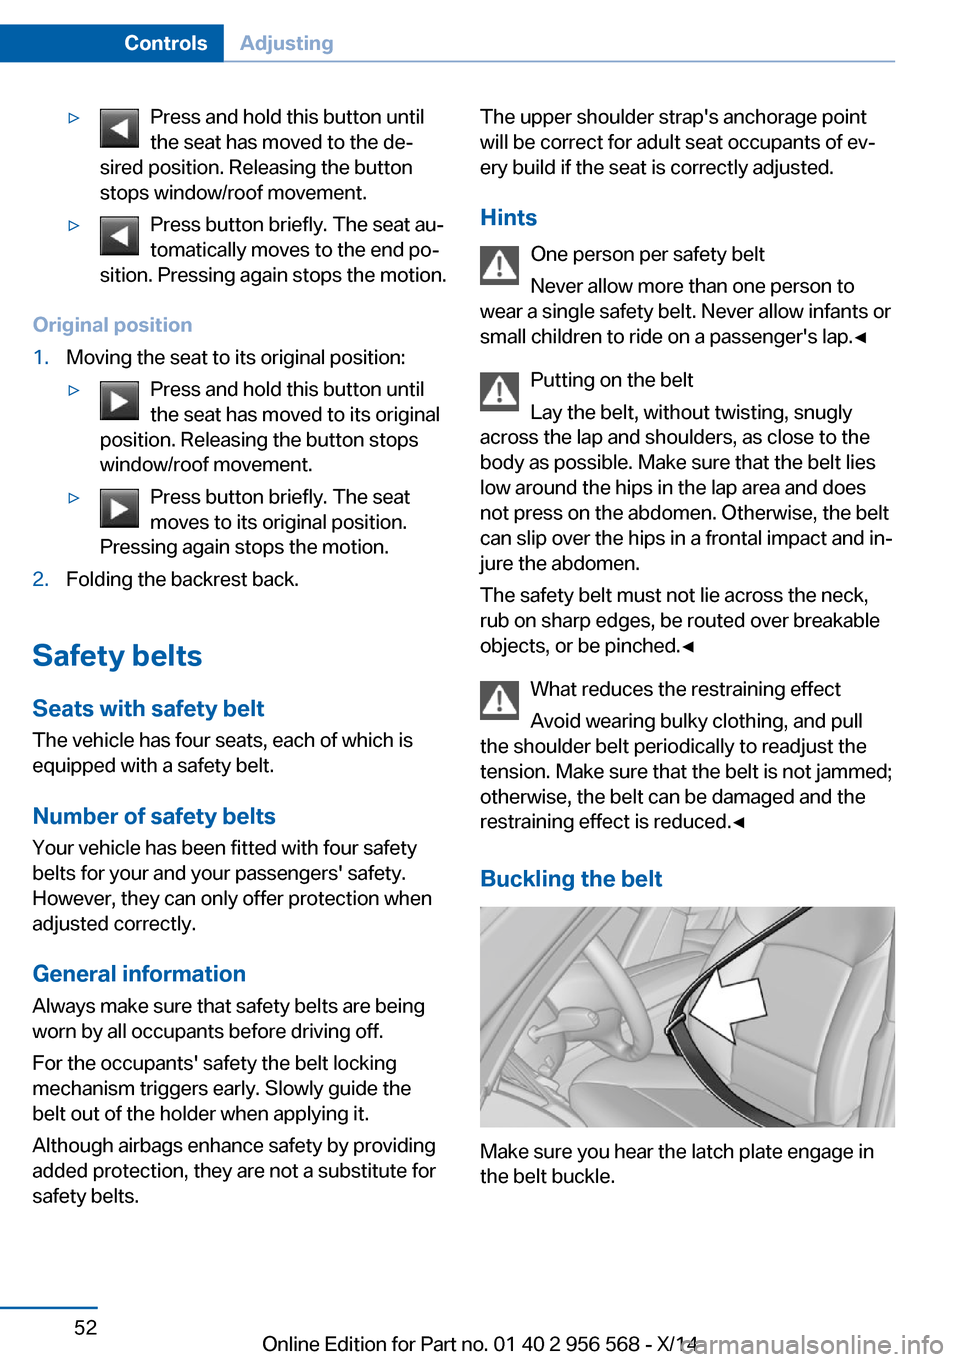
Buckling the belt
Make sure you hear the latch plate engage in
the belt buckle.
Seite 52ControlsAdjusting52
Online Edition for Part no. 01 40 2 956 568 - X/14
Page 64 of 228
of unexpected movement of the rear seat
backrest.◀
On the front passenger seat
Deactivating airbags Deactivating the front-seat passenger
airbags
If a child restraint system is used in the front
passenger seat, deactivate the front-seat pas‐
senger airbags; otherwise, there is an in‐
creased risk of injury to the child when the air‐
bags are activated, even with a child restraint
system.◀
After installing a child restraint system in the
front passenger seat, make sure that the front,
knee and side airbags on the front passenger
side are deactivated.
Deactivate the front-seat passenger airbags
automatically, refer to page 96.
Seat position and height
Before installing a child restraint system, move
the front passenger seat as far back as possi‐
ble and adjust its height to the highest and
thus best possible position for the belt and to
offer optimal protection in the event of an acci‐
dent.
If the upper anchorage of the safety belt is lo‐
cated in front of the belt guide of the child seat,
move the passenger seat carefully forward un‐
til the best possible belt guide position is
reached.
Backrest width Backrest width for the child seat
Before installing a child restraint system
in the front passenger seat, the backrest width
must be opened completely. Do not change
the adjustment after this; otherwise, the stabil‐
ity of the child seat will be reduced.◀
Adjustable backrest width: before installing a
child restraint system in the front passengerseat, open the backrest width completely. Do
not change the backrest width again and do
not call up a memory position.
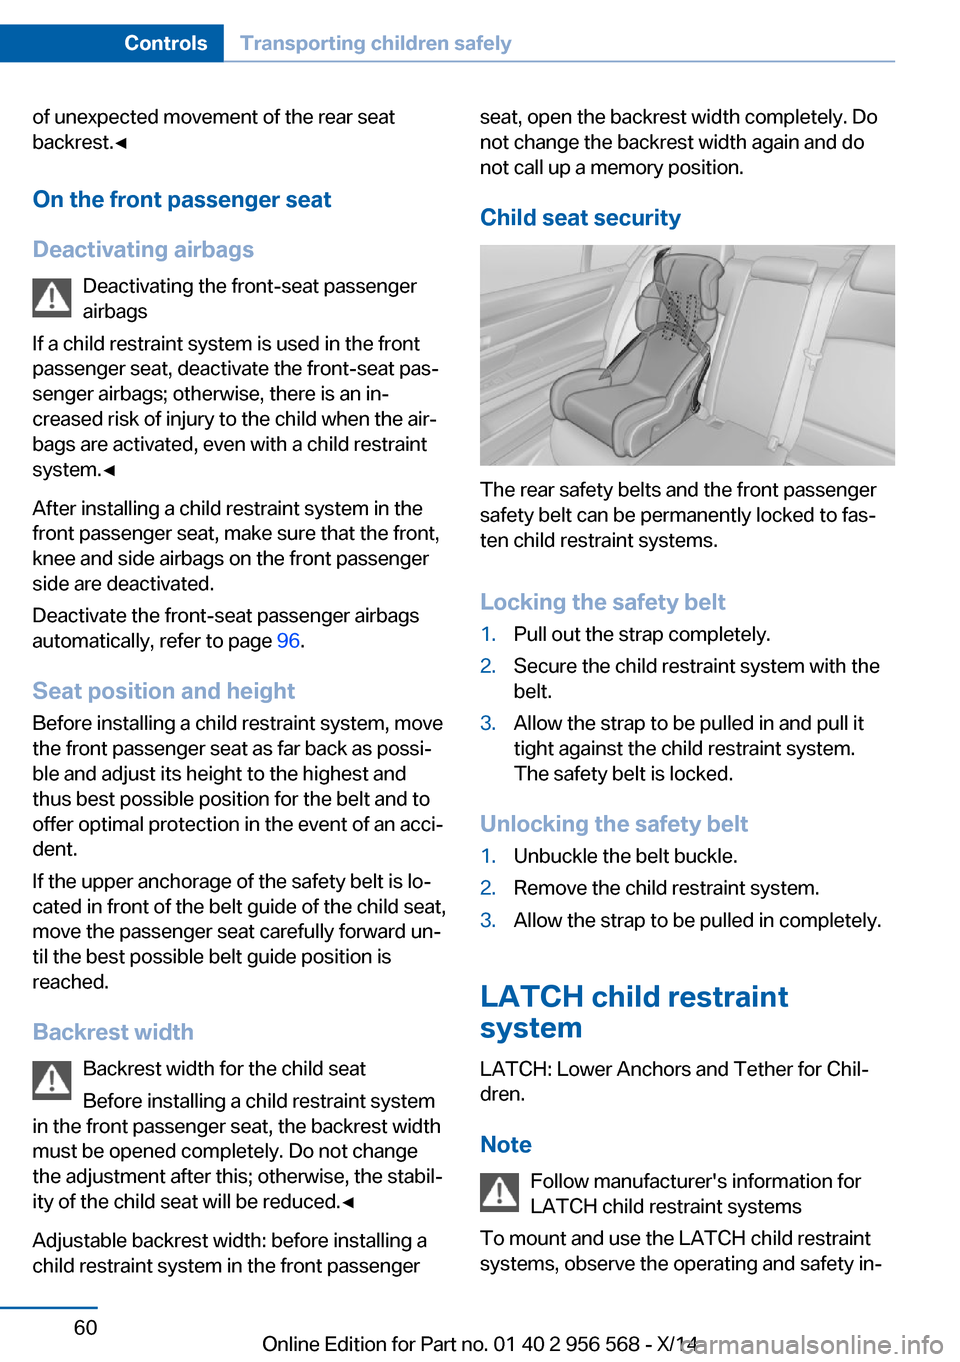
Child seat security
The rear safety belts and the front passenger
safety belt can be permanently locked to fas‐
ten child restraint systems.
Locking the safety belt
1.Pull out the strap completely.2.Secure the child restraint system with the
belt.3.Allow the strap to be pulled in and pull it
tight against the child restraint system.
The safety belt is locked.
Unlocking the safety belt
1.Unbuckle the belt buckle.2.Remove the child restraint system.3.Allow the strap to be pulled in completely.
LATCH child restraint
system
LATCH: Lower Anchors and Tether for Chil‐
dren.
Note Follow manufacturer's information for
LATCH child restraint systems
To mount and use the LATCH child restraint
systems, observe the operating and safety in‐
Seite 60ControlsTransporting children safely60
Online Edition for Part no. 01 40 2 956 568 - X/14
Page 65 of 228
formation from the system manufacturer; oth‐
erwise, the level of protection may be re‐
duced.◀
Mounts for the lower LATCH anchors The lower anchors may be used to attach the
CRS to the vehicle seat up to a combined child
and CRS weight of 65 lb/30 kg when the child
is restrained by the internal harnesses.
Properly engage the lower LATCH an‐
chors
Make sure that the lower LATCH anchors have
properly engaged and that the child restraint
system is resting snugly against the backrest;
otherwise, the degree of protection may be re‐
duced.◀
Before mounting the LATCH child restraint
system, pull the belt away from the child re‐
straint system.
The corresponding symbol shows the
mounts for the lower LATCH anchors.
Attach to the lower LATCH anchors located
behind the indicated covers.
Assembly of LATCH child restraint
systems
1.Mount the child restraint system; refer to
the user's manual of the system.2.Ensure that both LATCH anchors are prop‐
erly connected.Child restraint fixing system with a
tether strap
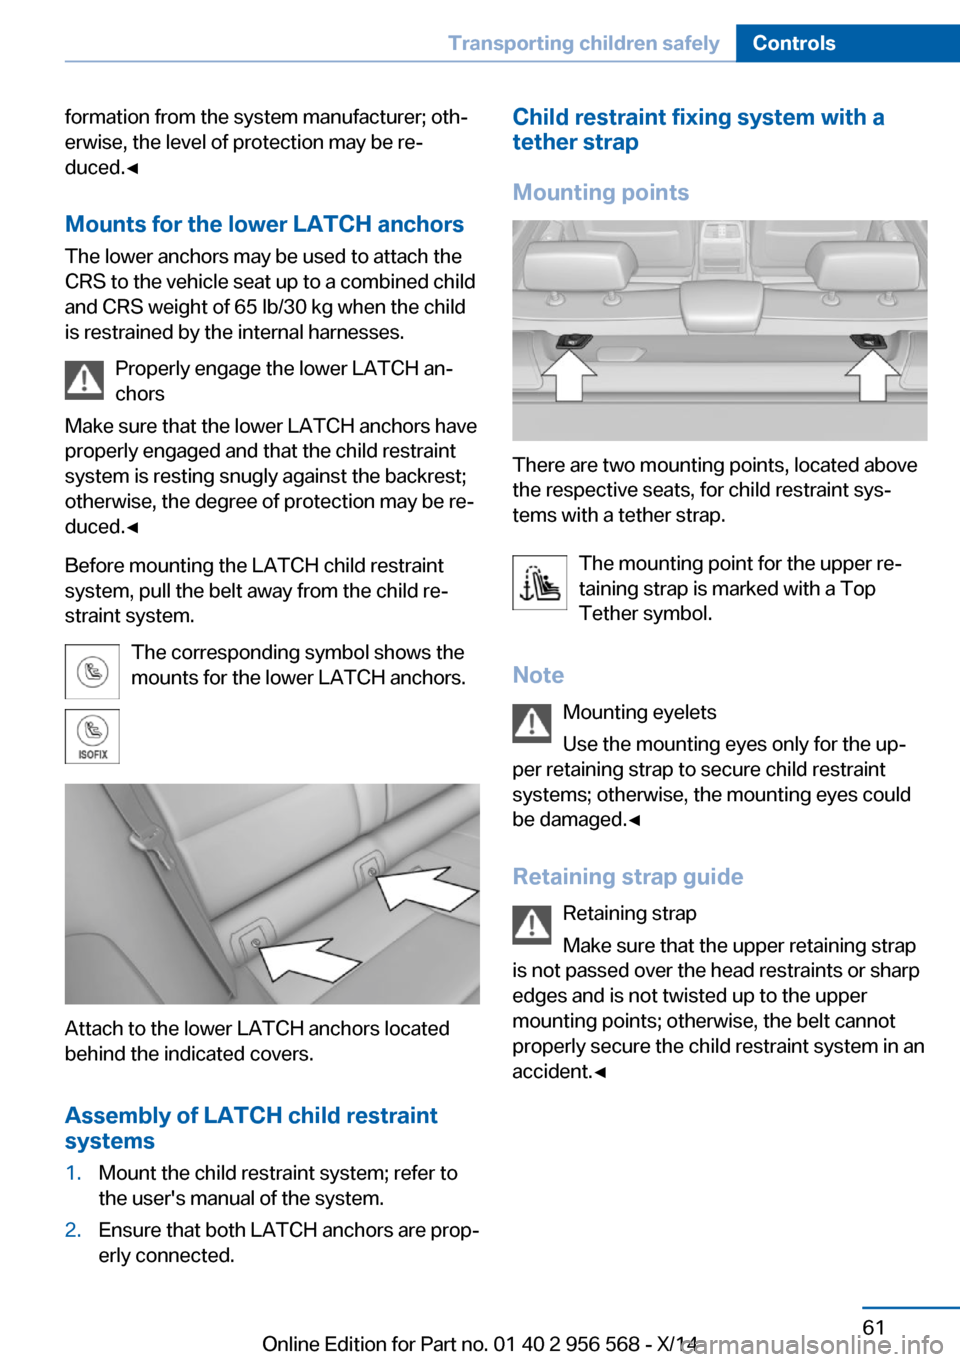
Mounting points
There are two mounting points, located above
the respective seats, for child restraint sys‐
tems with a tether strap.
The mounting point for the upper re‐
taining strap is marked with a Top
Tether symbol.
Note Mounting eyelets
Use the mounting eyes only for the up‐
per retaining strap to secure child restraint
systems; otherwise, the mounting eyes could
be damaged.◀
Retaining strap guide Retaining strap
Make sure that the upper retaining strap
is not passed over the head restraints or sharp
edges and is not twisted up to the upper
mounting points; otherwise, the belt cannot
properly secure the child restraint system in an
accident.◀
Seite 61Transporting children safelyControls61
Online Edition for Part no. 01 40 2 956 568 - X/14
Page 66 of 228
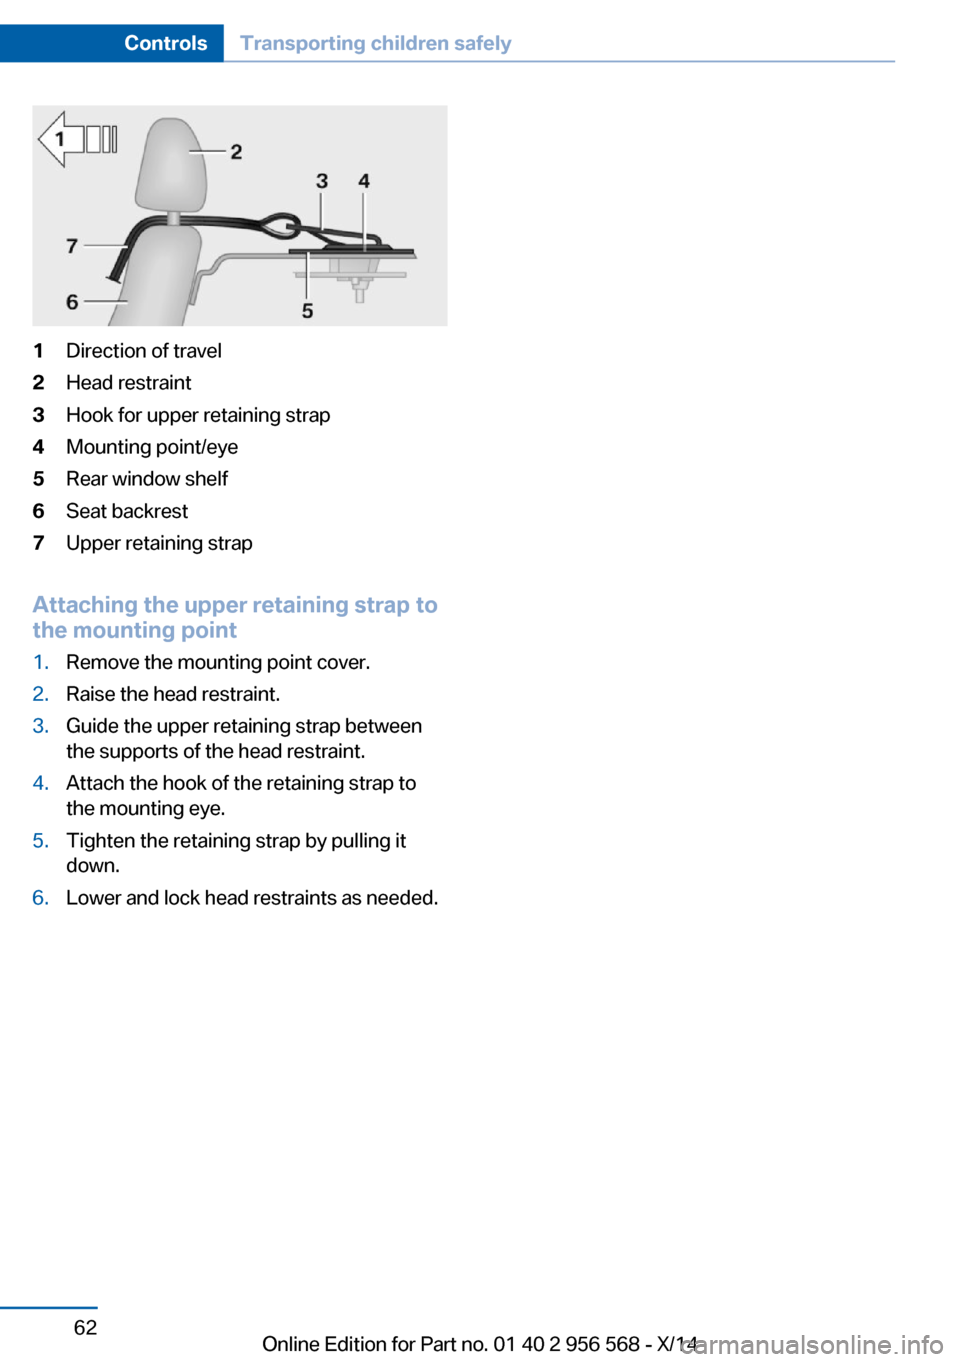
1Direction of travel2Head restraint3Hook for upper retaining strap4Mounting point/eye5Rear window shelf6Seat backrest7Upper retaining strap
Attaching the upper retaining strap to
the mounting point
1.Remove the mounting point cover.2.Raise the head restraint.3.Guide the upper retaining strap between
the supports of the head restraint.4.Attach the hook of the retaining strap to
the mounting eye.5.Tighten the retaining strap by pulling it
down.6.Lower and lock head restraints as needed.Seite 62ControlsTransporting children safely62
Online Edition for Part no. 01 40 2 956 568 - X/14
Page 146 of 228
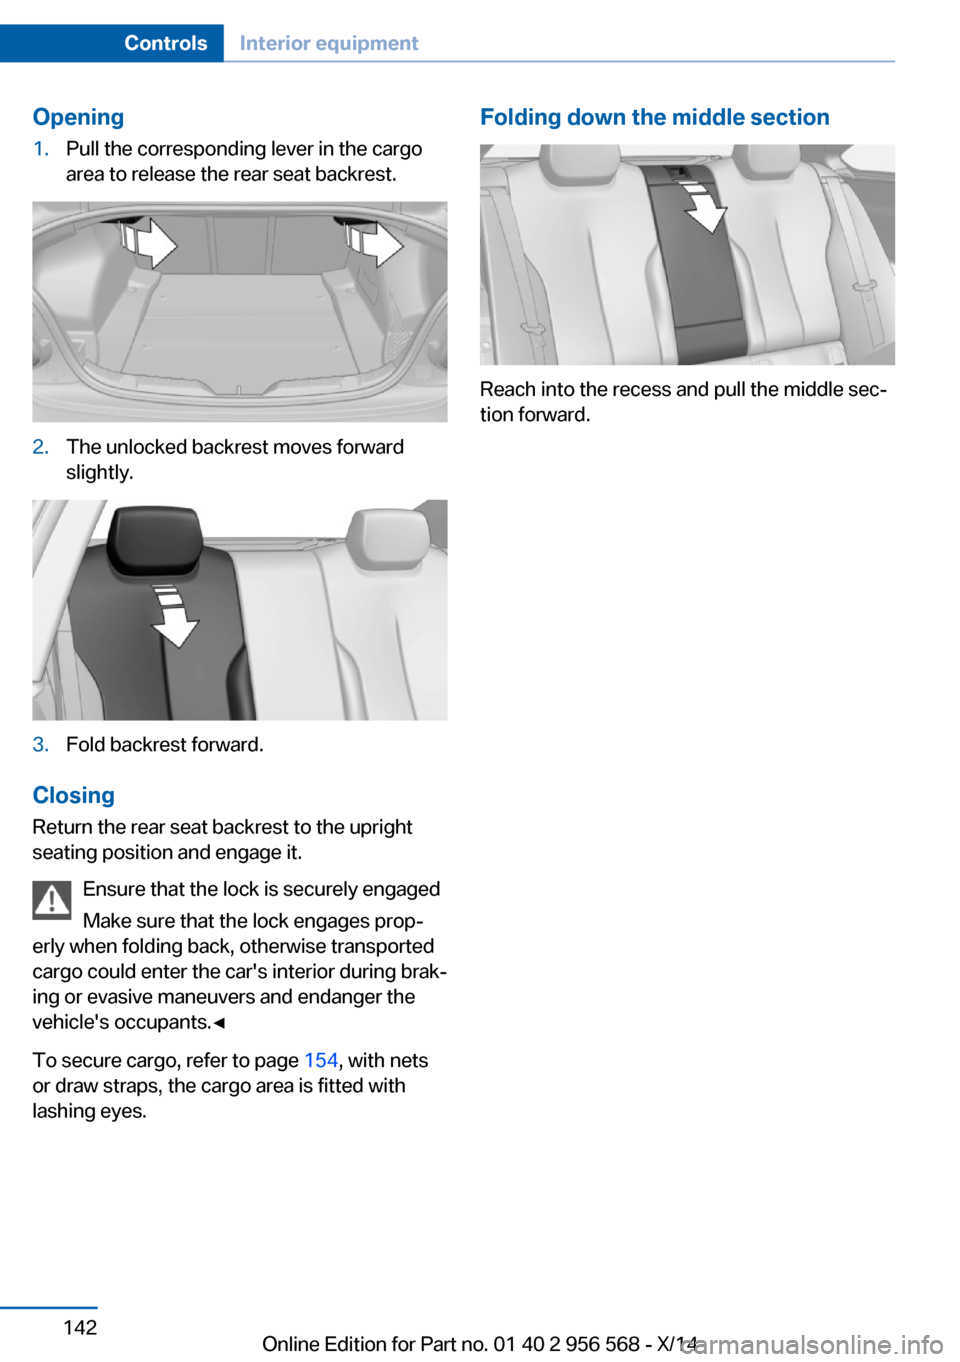
Opening1.Pull the corresponding lever in the cargo
area to release the rear seat backrest.2.The unlocked backrest moves forward
slightly.3.Fold backrest forward.
Closing
Return the rear seat backrest to the upright
seating position and engage it.
Ensure that the lock is securely engaged
Make sure that the lock engages prop‐
erly when folding back, otherwise transported
cargo could enter the car's interior during brak‐
ing or evasive maneuvers and endanger the
vehicle's occupants.◀
To secure cargo, refer to page 154, with nets
or draw straps, the cargo area is fitted with
lashing eyes.
Folding down the middle section
Reach into the recess and pull the middle sec‐
tion forward.
Seite 142ControlsInterior equipment142
Online Edition for Part no. 01 40 2 956 568 - X/14
Page 149 of 228
the USB audio interface in the center armrest.Storage compartment in the
rear
A storage compartment is located in the center
armrest.
Storage compartment
between the rear seats
There is a storage compartment between the
rear seats.
Cupholders
Hints Shatter-proof containers and no hot
drinks
Use light and shatter-proof containers and do
not transport hot drinks. Otherwise, there is
the increased danger of injury in an accident.◀
Unsuitable containers
Do not forcefully push unsuitable con‐
tainers into the cupholders. This may result in
damage.◀
Front
Rear
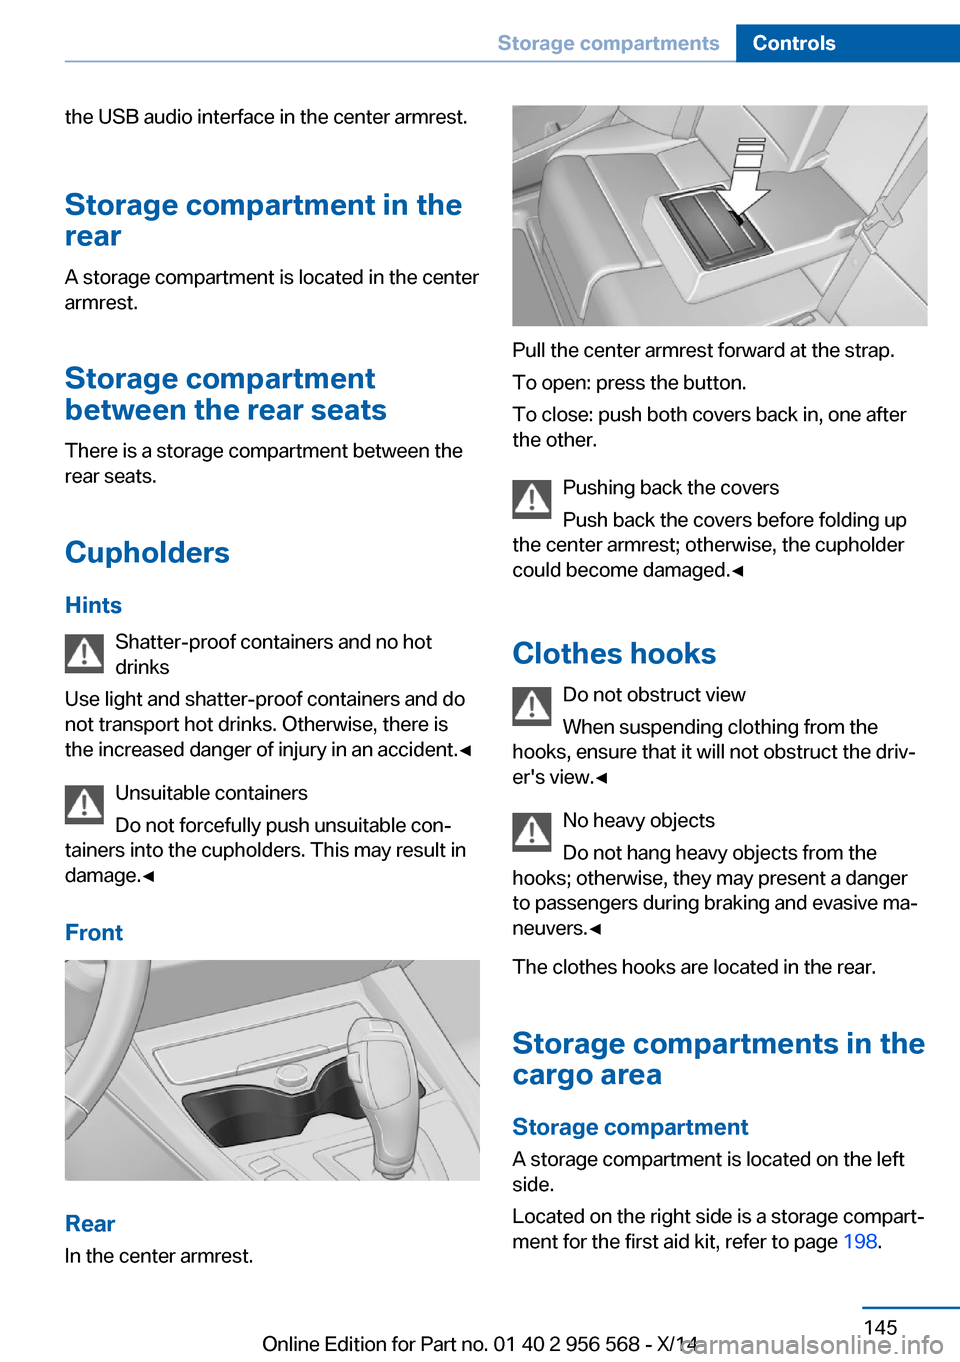
In the center armrest.
Pull the center armrest forward at the strap.
To open: press the button.
To close: push both covers back in, one after
the other.
Pushing back the covers
Push back the covers before folding up
the center armrest; otherwise, the cupholder
could become damaged.◀
Clothes hooks Do not obstruct view
When suspending clothing from the
hooks, ensure that it will not obstruct the driv‐
er's view.◀
No heavy objects
Do not hang heavy objects from the
hooks; otherwise, they may present a danger
to passengers during braking and evasive ma‐
neuvers.◀
The clothes hooks are located in the rear.
Storage compartments in the
cargo area
Storage compartment A storage compartment is located on the left
side.
Located on the right side is a storage compart‐
ment for the first aid kit, refer to page 198.
Seite 145Storage compartmentsControls145
Online Edition for Part no. 01 40 2 956 568 - X/14
Page 150 of 228
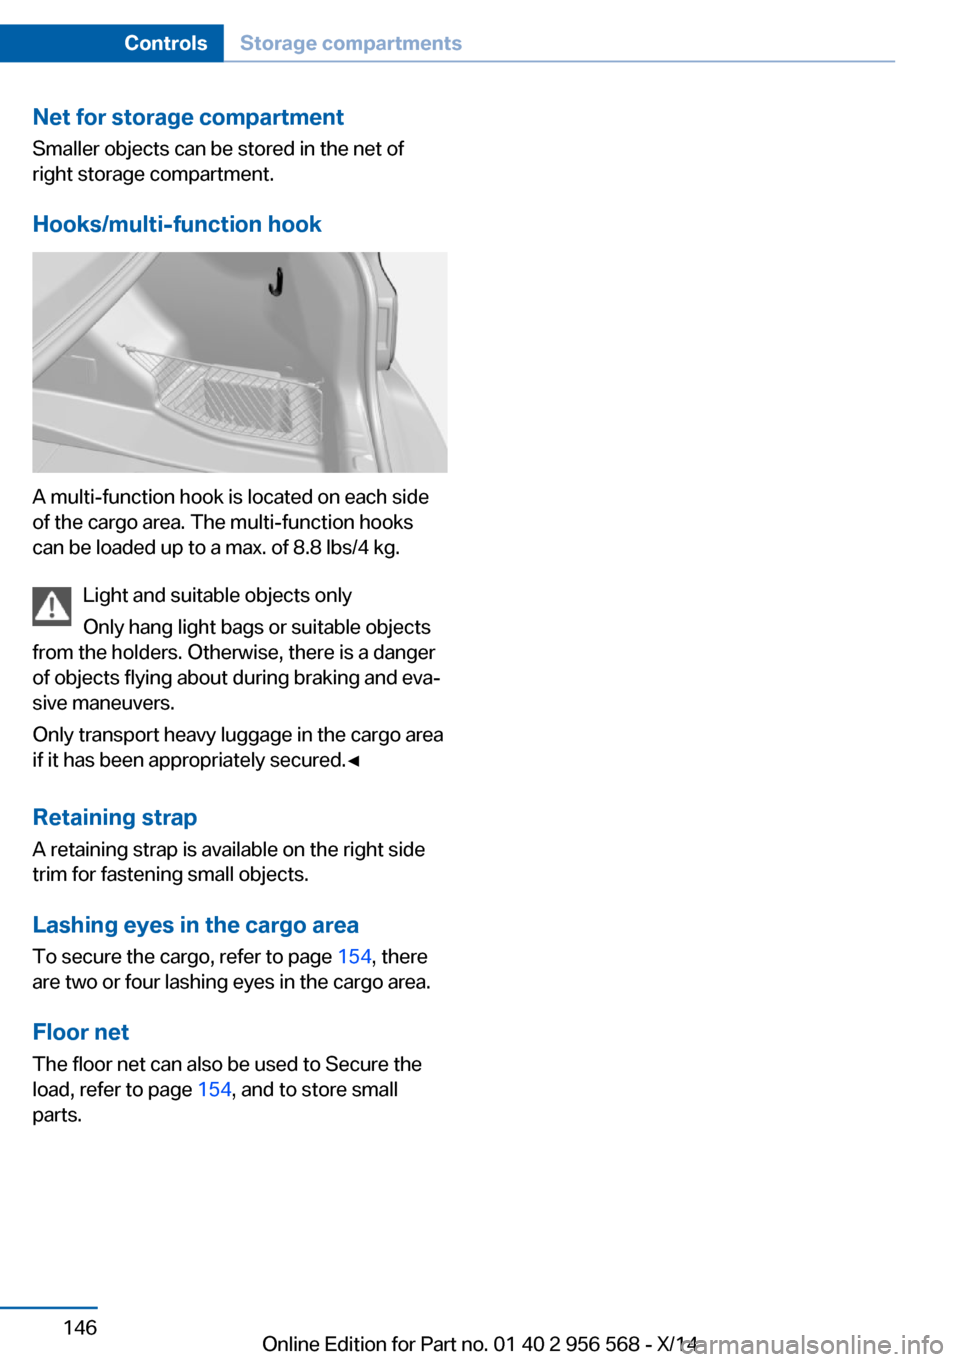
Net for storage compartment
Smaller objects can be stored in the net of
right storage compartment.
Hooks/multi-function hook
A multi-function hook is located on each side
of the cargo area. The multi-function hooks
can be loaded up to a max. of 8.8 lbs/4 kg.
Light and suitable objects only
Only hang light bags or suitable objects
from the holders. Otherwise, there is a danger
of objects flying about during braking and eva‐
sive maneuvers.
Only transport heavy luggage in the cargo area
if it has been appropriately secured.◀
Retaining strap A retaining strap is available on the right side
trim for fastening small objects.
Lashing eyes in the cargo area
To secure the cargo, refer to page 154, there
are two or four lashing eyes in the cargo area.
Floor net
The floor net can also be used to Secure the
load, refer to page 154, and to store small
parts.
Seite 146ControlsStorage compartments146
Online Edition for Part no. 01 40 2 956 568 - X/14
Page 158 of 228
Load
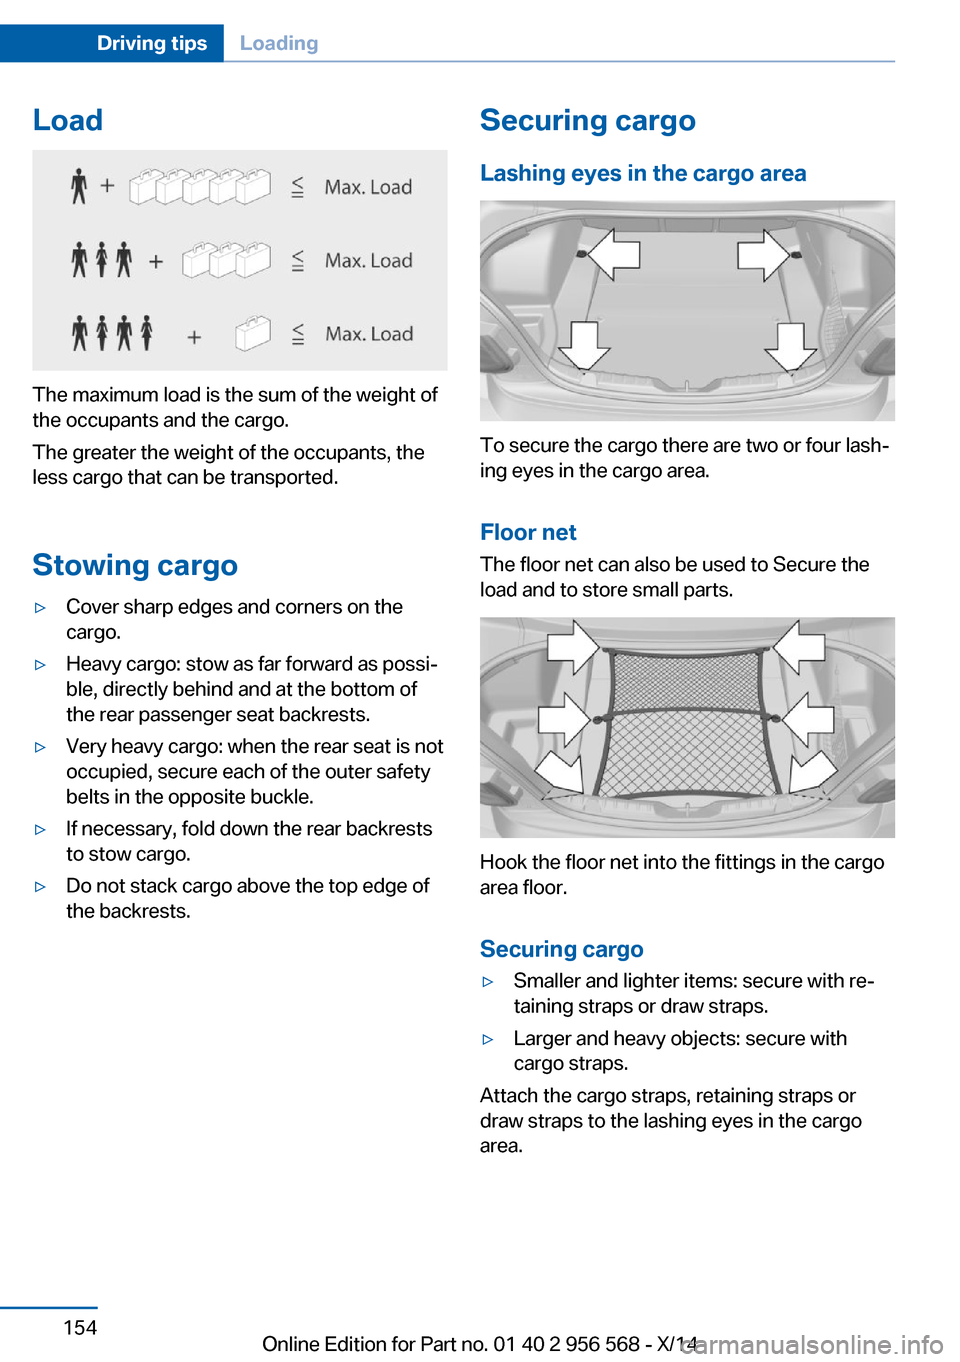
The maximum load is the sum of the weight of
the occupants and the cargo.
The greater the weight of the occupants, the
less cargo that can be transported.
Stowing cargo
▷Cover sharp edges and corners on the
cargo.▷Heavy cargo: stow as far forward as possi‐
ble, directly behind and at the bottom of
the rear passenger seat backrests.▷Very heavy cargo: when the rear seat is not
occupied, secure each of the outer safety
belts in the opposite buckle.▷If necessary, fold down the rear backrests
to stow cargo.▷Do not stack cargo above the top edge of
the backrests.Securing cargo
Lashing eyes in the cargo area
To secure the cargo there are two or four lash‐
ing eyes in the cargo area.
Floor net The floor net can also be used to Secure the
load and to store small parts.
Hook the floor net into the fittings in the cargo
area floor.
Securing cargo
▷Smaller and lighter items: secure with re‐
taining straps or draw straps.▷Larger and heavy objects: secure with
cargo straps.
Attach the cargo straps, retaining straps or
draw straps to the lashing eyes in the cargo
area.
Seite 154Driving tipsLoading154
Online Edition for Part no. 01 40 2 956 568 - X/14
Page 159 of 228
Securing cargo
Stow and secure the cargo as described
above; otherwise it may present a danger to
the occupants, e.g., during braking and evasive
maneuvers.◀
Roof-mounted luggage rack Note
Roof racks are available as special accessories.
Securing
Follow the installation instructions of the roof
rack.
Roof drip rail with flaps
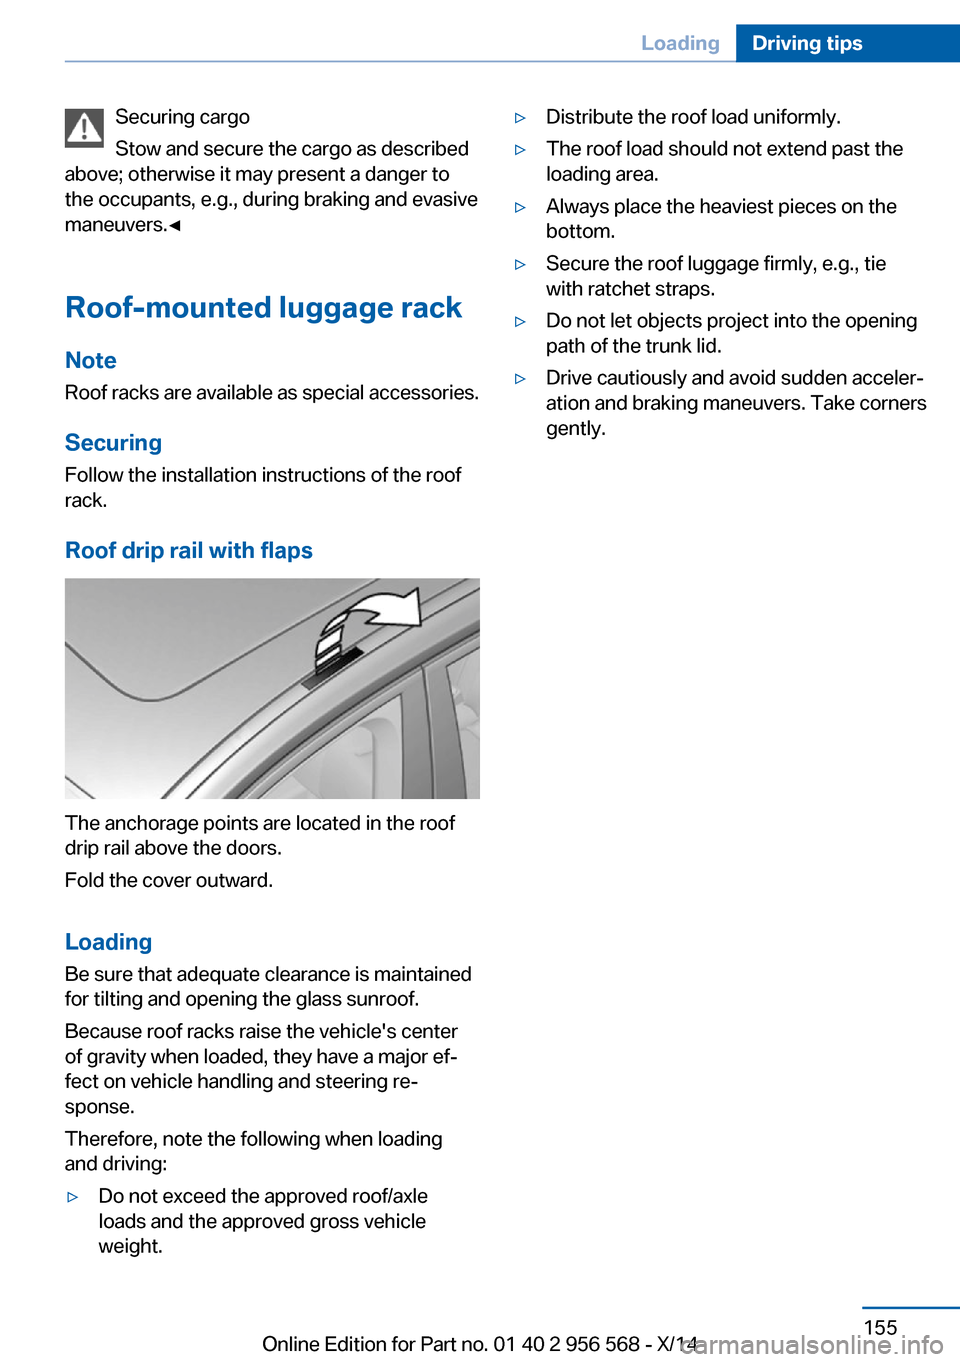
The anchorage points are located in the roof
drip rail above the doors.
Fold the cover outward.
Loading Be sure that adequate clearance is maintained
for tilting and opening the glass sunroof.
Because roof racks raise the vehicle's center
of gravity when loaded, they have a major ef‐
fect on vehicle handling and steering re‐
sponse.
Therefore, note the following when loading
and driving:
▷Do not exceed the approved roof/axle
loads and the approved gross vehicle
weight.▷Distribute the roof load uniformly.▷The roof load should not extend past the
loading area.▷Always place the heaviest pieces on the
bottom.▷Secure the roof luggage firmly, e.g., tie
with ratchet straps.▷Do not let objects project into the opening
path of the trunk lid.▷Drive cautiously and avoid sudden acceler‐
ation and braking maneuvers. Take corners
gently.Seite 155LoadingDriving tips155
Online Edition for Part no. 01 40 2 956 568 - X/14
Page 170 of 228
RefuelingVehicle features and options
This chapter describes all standard, country-
specific and optional features offered with the
series. It also describes features that are not
necessarily available in your car, e. g., due to
the selected options or country versions. This
also applies to safety-related functions and
systems.
Hints Refuel promptly
Refuel no later than at a range of
30 miles/50 km or engine operation might fail
and damage might occur.◀
Fuel lid
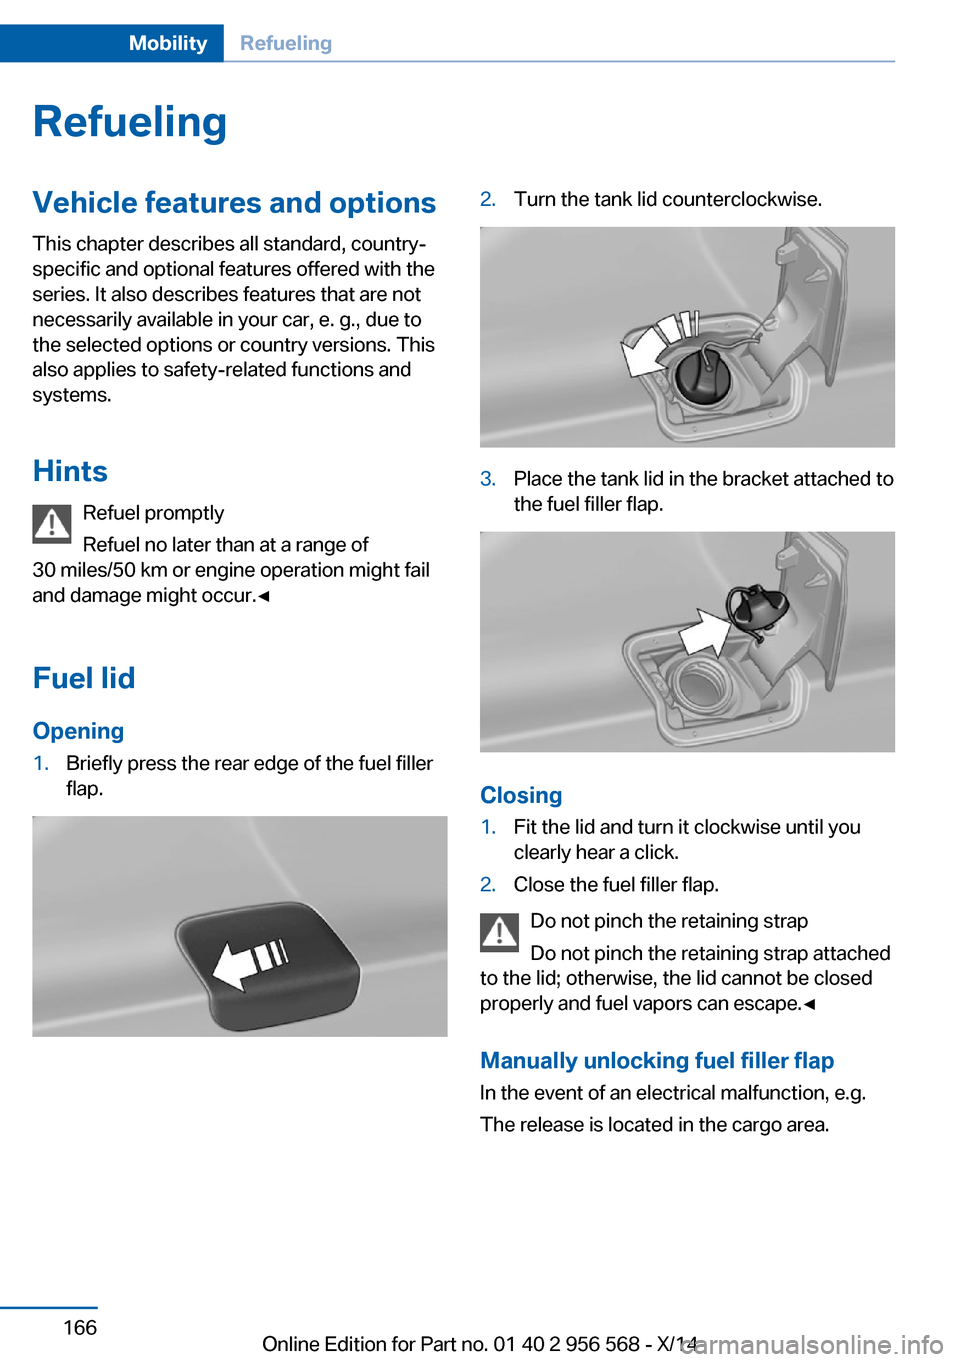
Opening1.Briefly press the rear edge of the fuel filler
flap.2.Turn the tank lid counterclockwise.3.Place the tank lid in the bracket attached to
the fuel filler flap.
Closing
1.Fit the lid and turn it clockwise until you
clearly hear a click.2.Close the fuel filler flap.
Do not pinch the retaining strap
Do not pinch the retaining strap attached
to the lid; otherwise, the lid cannot be closed
properly and fuel vapors can escape.◀
Manually unlocking fuel filler flap In the event of an electrical malfunction, e.g.
The release is located in the cargo area.
Seite 166MobilityRefueling166
Online Edition for Part no. 01 40 2 956 568 - X/14